
Do you want your images and design elements to be exactly centered in your project? Then this guide is for you.
One of the challenging tasks in Photopea can be aligning all the objects. Manually clicking and dragging objects to align their edges properly is not easy.
This guide will provide you with all the information you need to know about the various alignment options available in Photopea.
Align Elements in Photopea
Alignment is the process of arranging design elements such that they seem in balance together. We usually align two or more layers together for the following reasons:
- So their centers are all at the same point.
- To equalize the height of their upper edge.
- To provide equal distances or gaps between each element.
- To position the objects in a cohesive manner.
Apart from these functions, we also use this tool for personal productivity and to make photo editing duties simpler.
How do you Align Elements in Photopea
The top menu of the Move Tool tab contains six alignment buttons that can be used to align layers.

Here is a step-by-step tutorial on aligning elements and using the six alignment buttons.
Step 1: Select the Layers
Once the design is already opened in the Photopea app, you can proceed with the first step, selecting all the layers or elements.
Go to the Move Tool located in the top left corner of the toolbar. You can also press the shortcut key, “V,” to quickly switch to the tool.
Drag a rectangle selection around all the layers you want to align. Another way is to press the Shift or Ctrl (Cmd on Mac) key while clicking each of the layers in the layers panel. This way, the color or the layers will change, indicating that the specific layer is already selected.
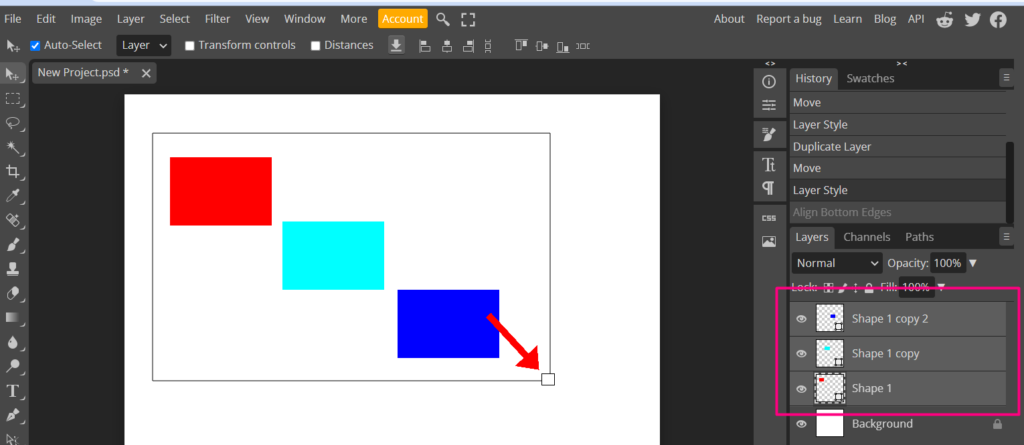
Ensure that all the layers you want to align are selected.
Step 2: Choose an Alignment Style
Use the alignment buttons at the top menu to choose the alignment style. The parameters for the Move Tool can be found along with these buttons.
Here are the properties of the six alignment buttons on the elements.
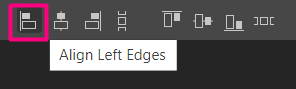
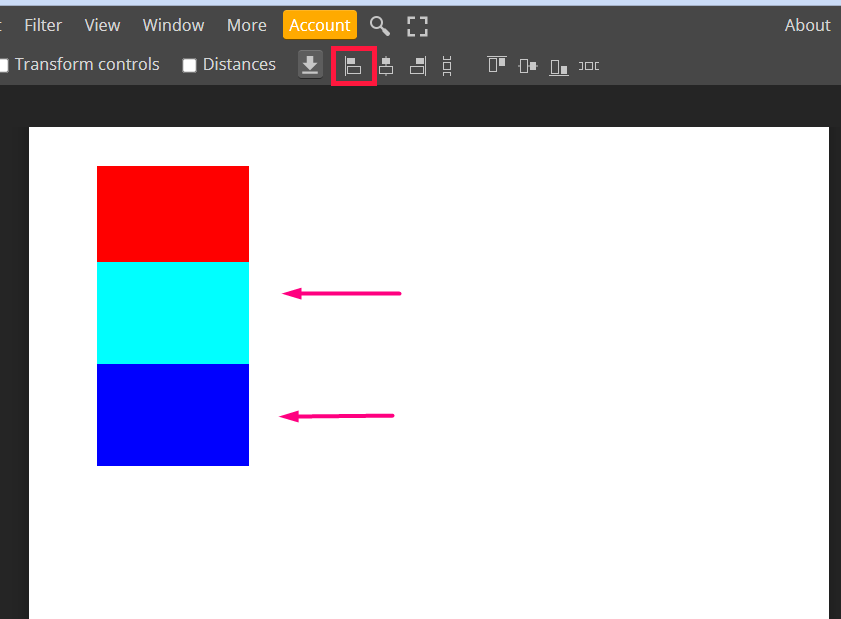
Align Left Edges
This button aligns selected objects to the left edge of the leftmost selected object on your canvas.

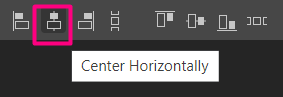
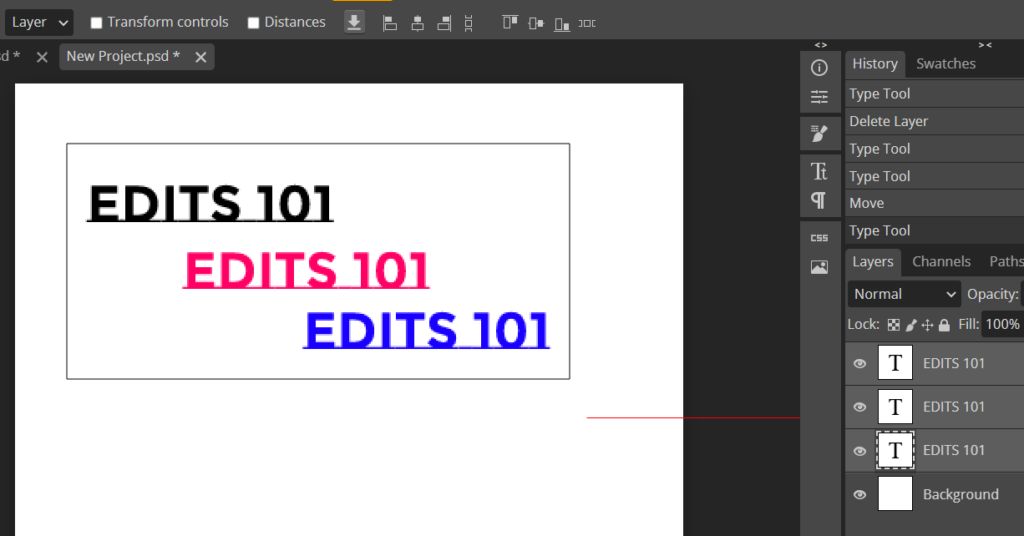
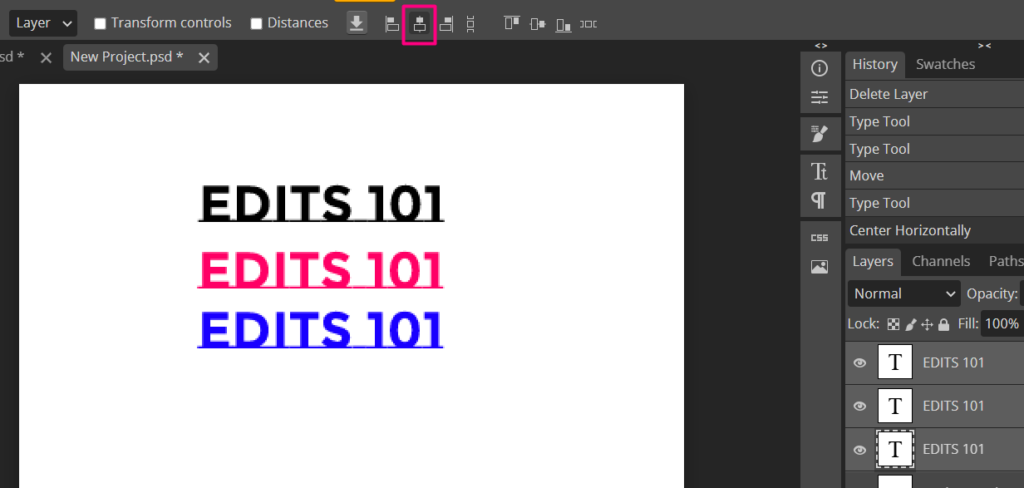
Center Horizontally
This button aligns selected objects to the horizontal center or middle of the selection border.

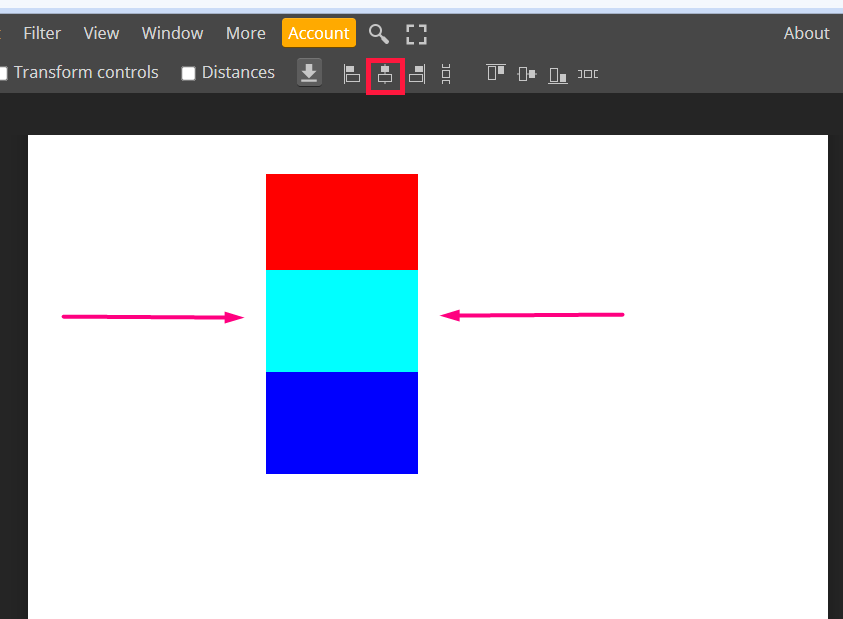
Align Right Edges
This button aligns selected objects to the right edge of the rightmost selected object on your canvas.


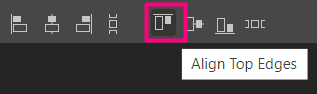
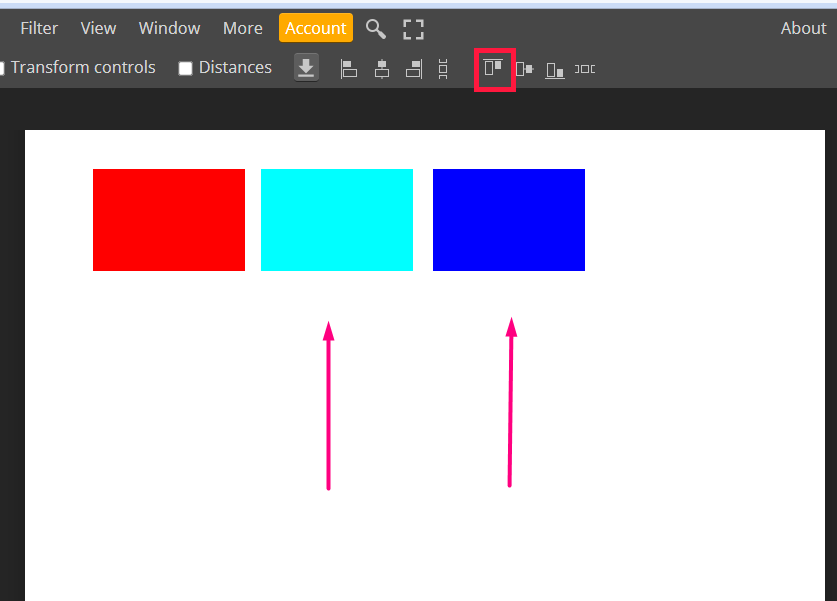
Align Top Edges
This button aligns selected objects to the top edge of the topmost selected object on your canvas.

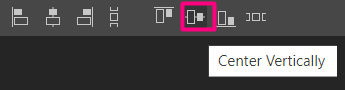
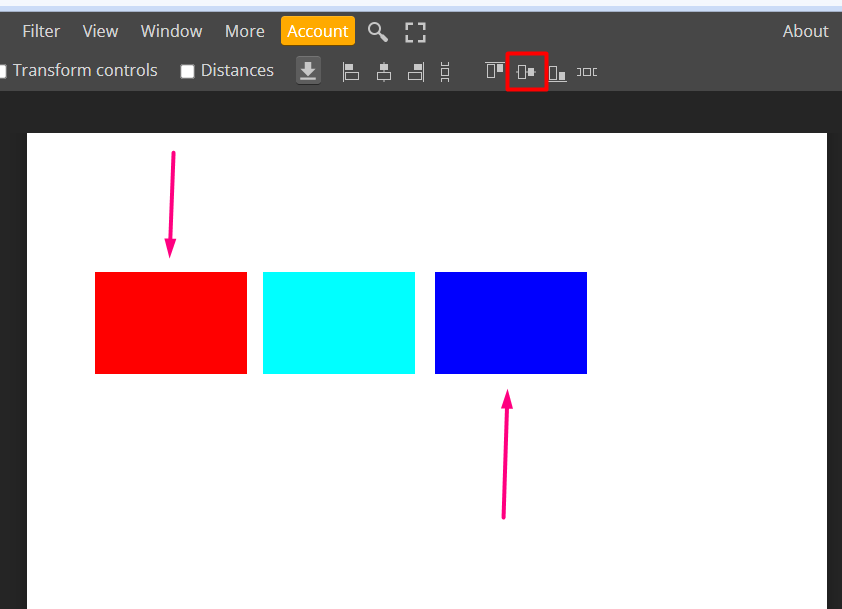
Center Vertically
This button aligns selected objects to the vertical center or middle of the selection border.

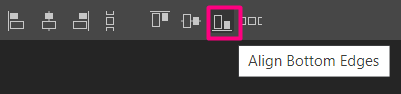
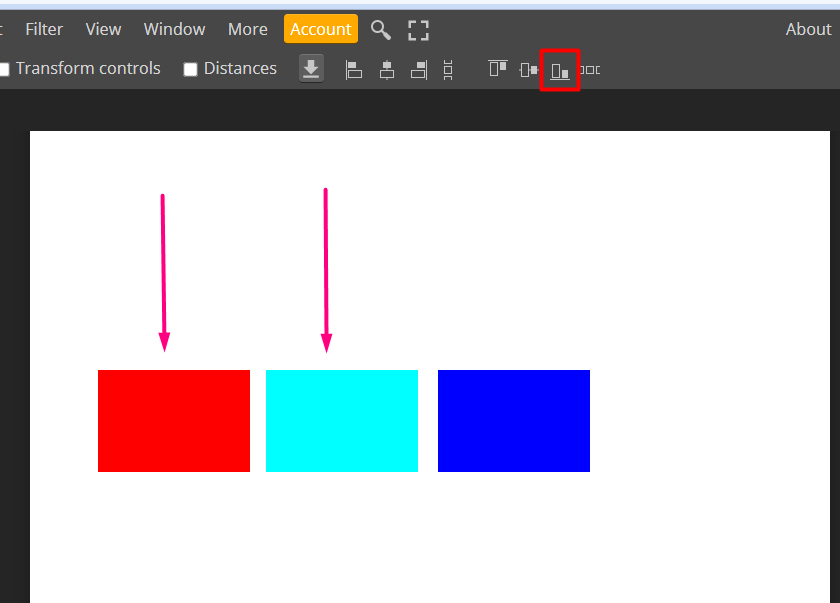
Align Bottom Edges
This button aligns selected objects to the bottom edge of the bottommost selected object on your canvas.

The first three buttons (Align Left Edges, Center Horizontally, and Align Right Edges) are mainly used to align objects or elements horizontally. On the other hand, the other three buttons (Align Top Edges, Center Vertically, and Align Bottom Edge) are used for the vertical alignment of objects.
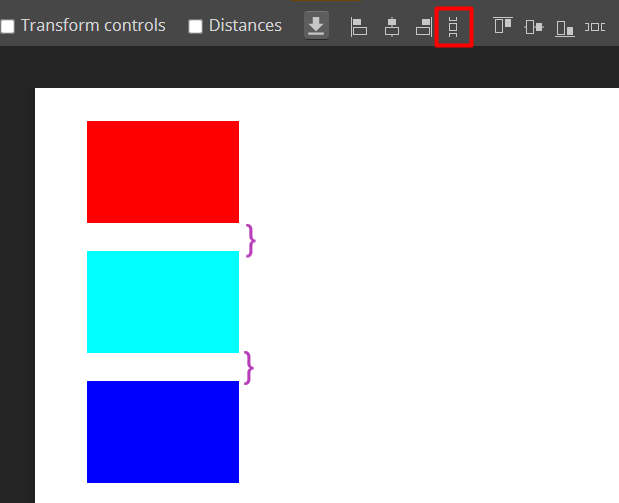
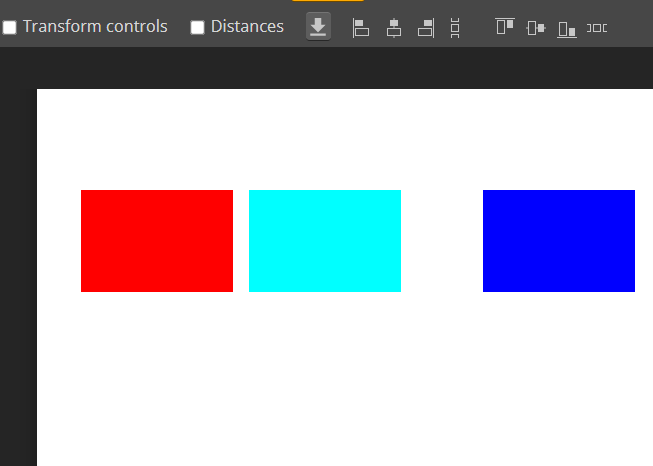
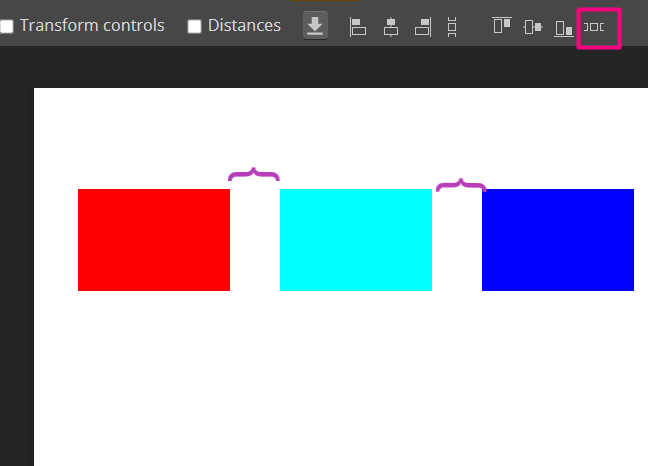
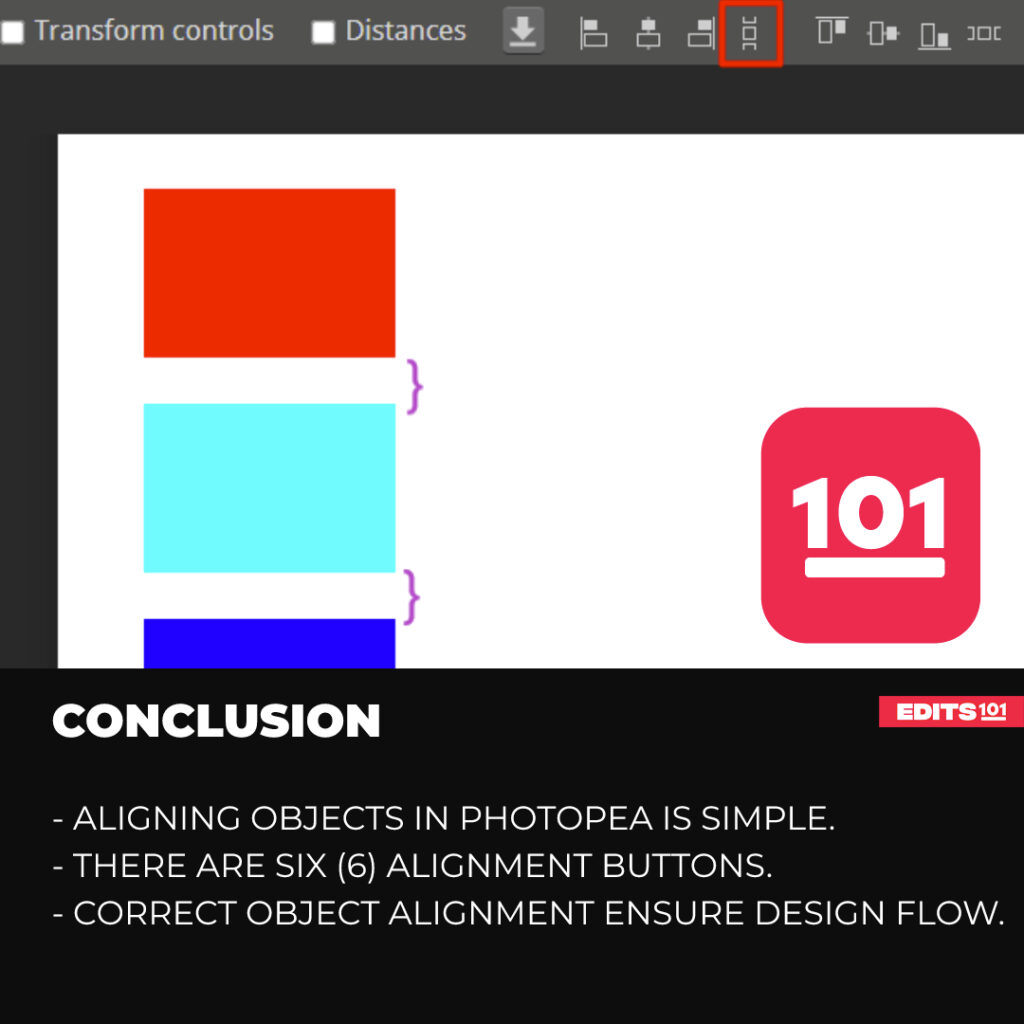
Aside from these six alignment buttons, there are also two additional buttons intended for giving equal gaps or distances between objects in the canvas.
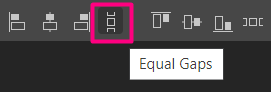
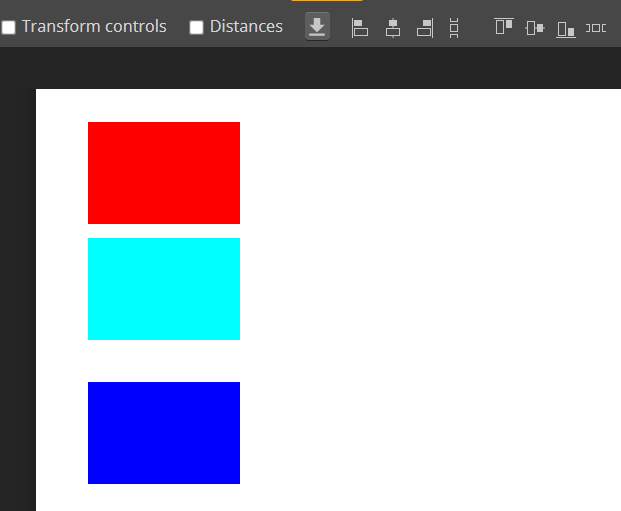
Equal Gaps (Vertical)
This button equalizes the horizontal distance between two or more objects without changing their alignment. The largest alignment gap serves as the basis for the distance.
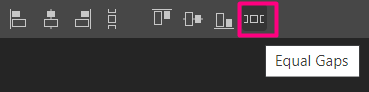
Equal Gaps (Horizontal)
This button equalizes the vertical distance between two or more objects without changing their alignment. The largest alignment gap serves as the basis for the distance.
Step 3: Save the File
Once you have applied the alignment you desire, finalize the design, and don’t forget to save it by clicking the shortcut key, Ctrl+S, or click File, then Save.
You can now download or export your file by clicking File, look for Export As, then choosing the desired format for your design.
Aligning Text in Photopea
Aside from elements or objects, you may also use the alignment tool and buttons for aligning your texts. You can align or unify the texts in a unified way by following the same procedure.
Here is a sample of how to align text in Photopea using the Center Horizontally button.
Conclusion
Correct object alignment is necessary to make sure that the overall design seems unified.
There are multiple ways to align elements and images in photopea: Align Left Edges, Center Horizontally, Align Right Edges, Align Top Edges, Center Vertically, Align Bottom Edges, Equal Gaps (Vertical), Equal Gaps (Horizontal).
You need to select the multiple elements or images with the move tool, and then you will see the alignment options appear on the top bar.
Test all of them out and use whatever is best for your project needs.
Thanks for reading, and feel free to check out more of our articles!
Expert Rating
Summary
A challenging skill to learn is object alignment, which calls for exact measurements and modifications. The process of aligning things in Photopea will become much simpler if you follow some basic rules while understanding the connections between the objects. It is very scalable and functional.


