
The Heal Tool in GIMP is an invaluable tool to have in your digital editing arsenal. Not only can it help you to remove blemishes and other unwanted elements from your photos, but it can also be used to retouch, reshape, or even alter the entire composition of an image.
If you are unfamiliar with how to use this powerful tool, this article will provide a step-by-step guide on how to use the Heal Tool in GIMP.
Does GIMP have the healing brush tool?
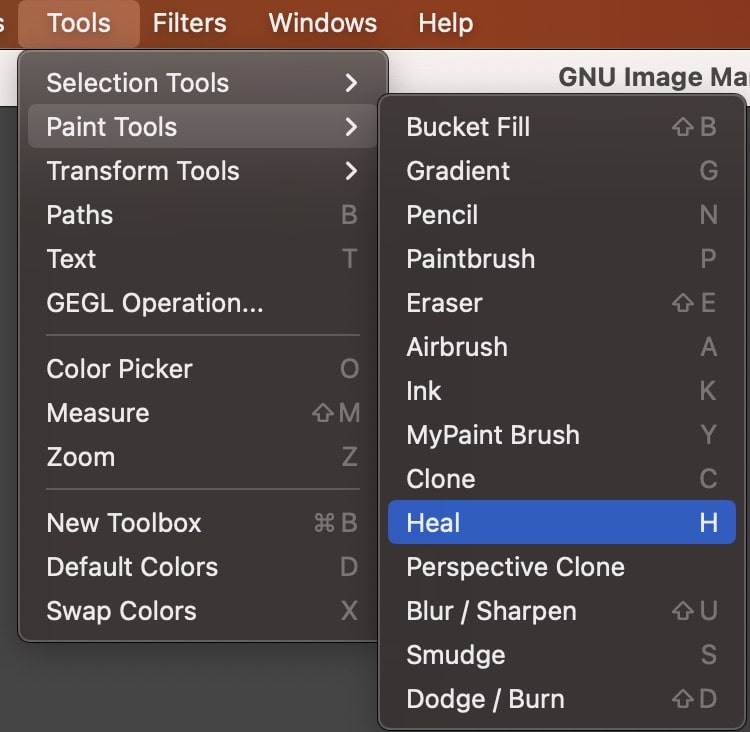
Yes, GIMP has a healing brush tool which you can find under the:
- Tools menu > Paint tools > Heal or
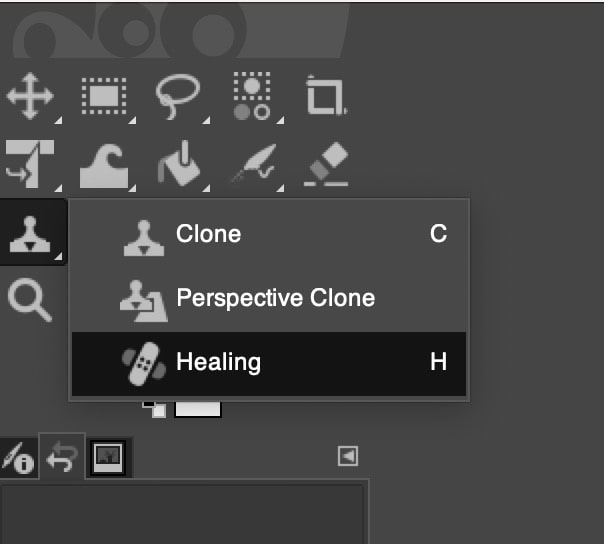
- Tools Panel (left) > Inside the Clone tool dropdown (click on the arrow)
- Shortcut “H”
Just like the name “Heal tool” signifies, it is used to heal the sections of the image which are unsightly. It is easy to use and works similarly to the Clone tool in some ways. The Heal tool turns can be extremely useful if you know its functionalities and the way to use it.
The Heal tool can be used to hide flaws, repair patches, remove unwanted objects, and much more! Moreover, the Heal tool is considered to be smarter than the Clone tool as it causes less damage to the image.
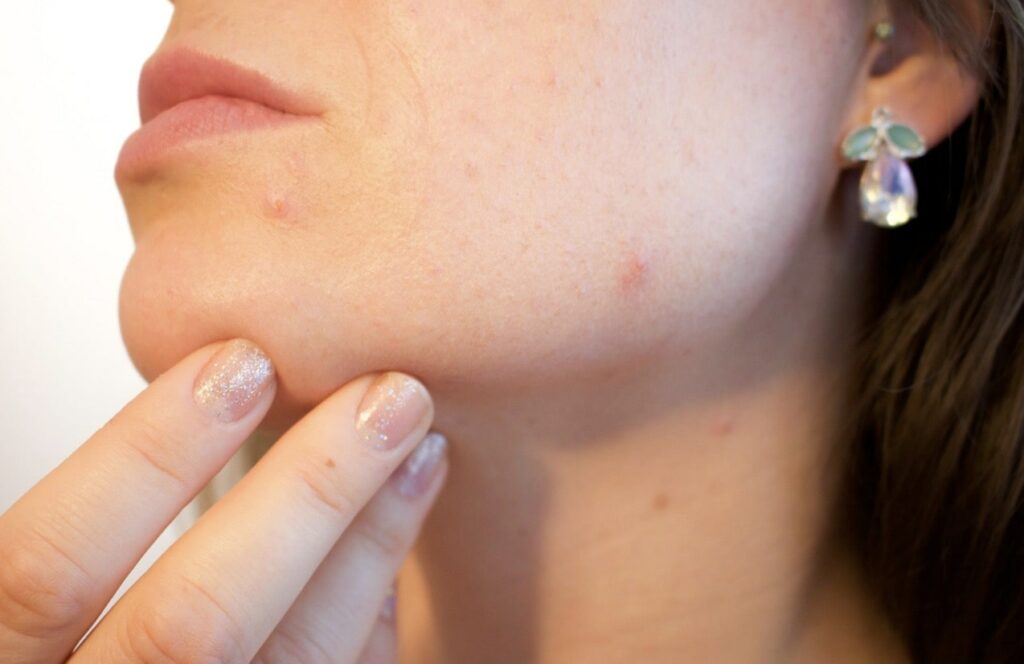
How to Remove Blemishes using Gimp?
Step 01: Open the image
First, you need to open the image in GIMP. To open the image,
- Go to the File menu.
- Click Open.
- Go to the location where you have the image saved.
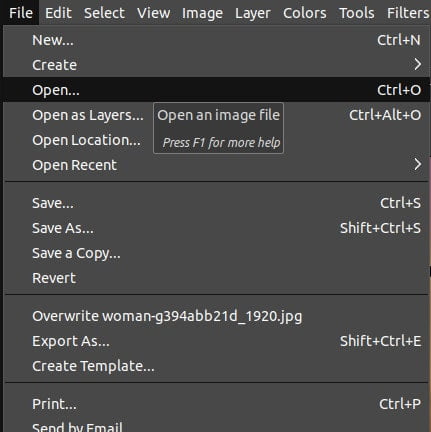
As soon as you pick the image, the image will be opened in the GIMP. Now, you can start editing your image with the Clone tool.
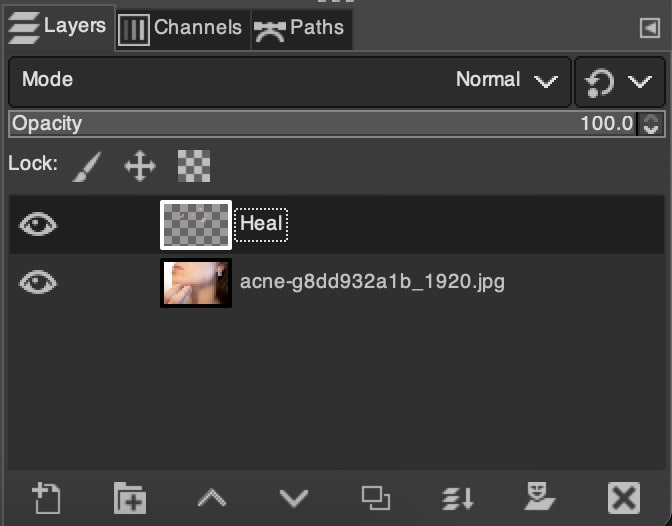
Step 02: Add a new layer
Adding a new layer is beneficial because you can maintain the healed pixels on the new layer. Furthermore, the original image will remain untouched or unedited. To add a new layer,
- In the Layers panel, click on the “page with a +” icon.
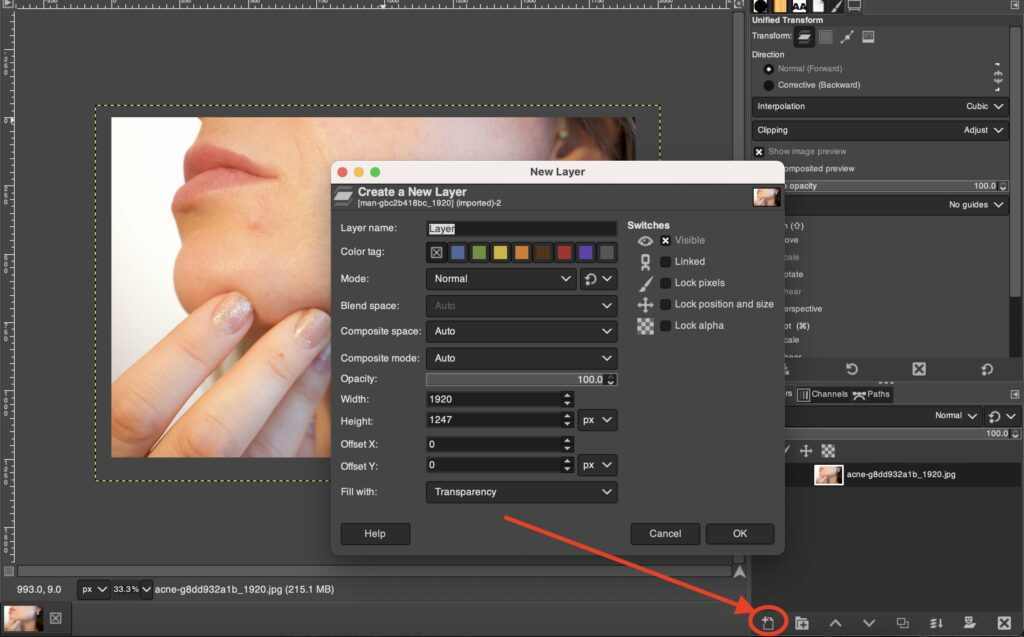
Or else:
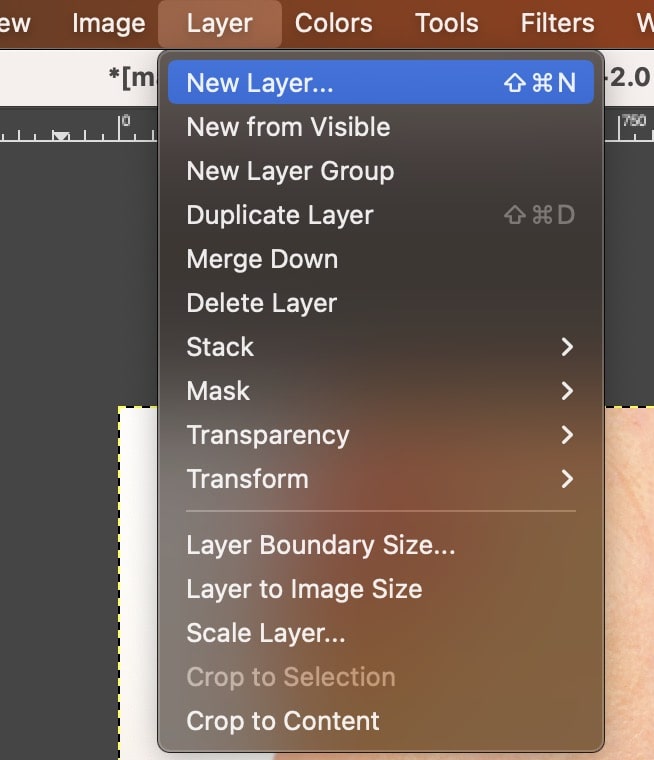
- Go to the Layer menu.
- Click on New Layer.
- As soon as you click, a new layer dialog appears. Make sure to set the Fill with option to Transparency.
- Finally, click OK in the new layer dialog.
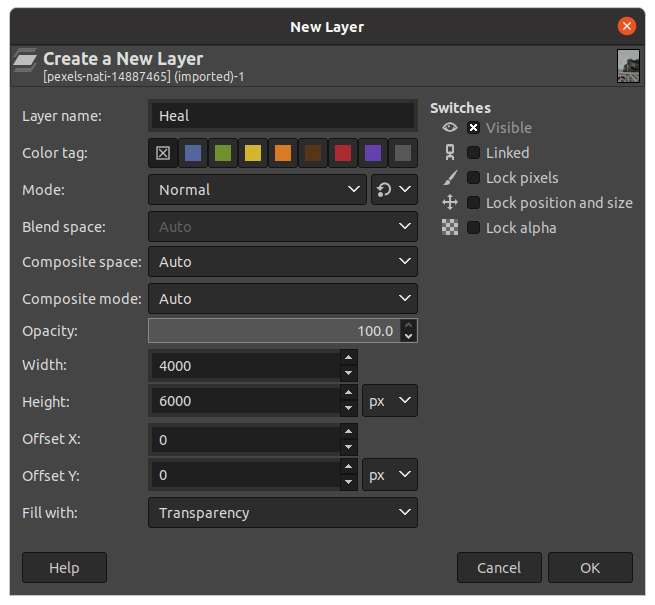
Then, the new layer would appear in the Layers dialog.
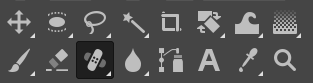
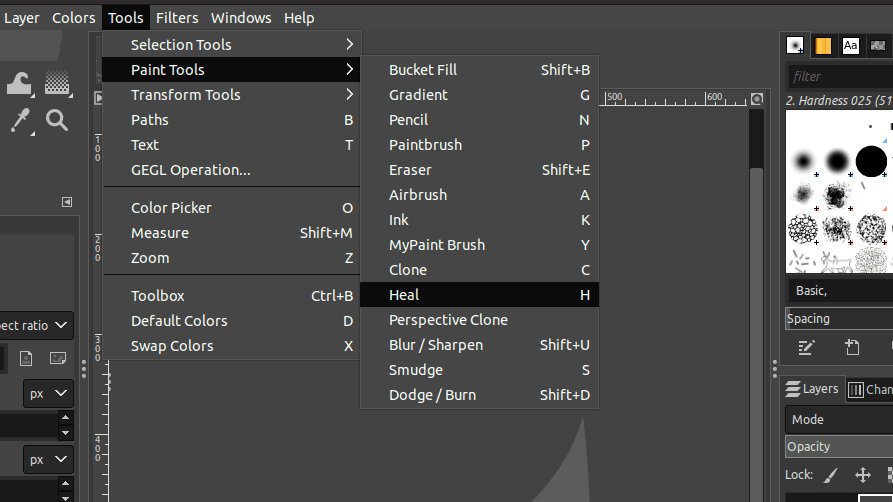
Step 03: Select the Heal tool
To select the Heal tool,
- Go to the Toolbox and click on the Heal tool icon which looks like a band-aid.
- Alternatively, use the keyboard shortcut ‘H’ to select the Heal tool.
Alternatively, follow the below steps to select the Heal tool,
- Go to the Tools menu.
- Choose Paint tools to display the drop-down list.
- Finally, select the Heal tool.
Before starting, there are a few tips you should bear in mind.
- You can easily undo any action to reverse any healing carried out: To undo, press Ctrl+Z in Windows or Linux and Cmd+Z in Mac.
- To adjust the brush size: Use the keys “[” and “]” to increase or decrease the brush size of the clone tool.
Now, you may wish to add a new layer before retouching the image using the Heal tool.
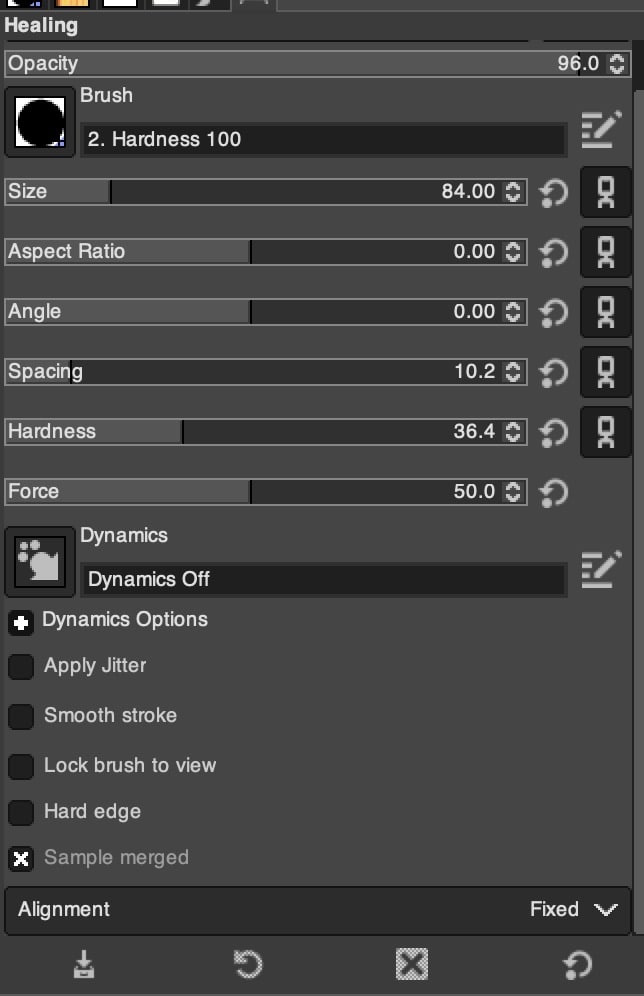
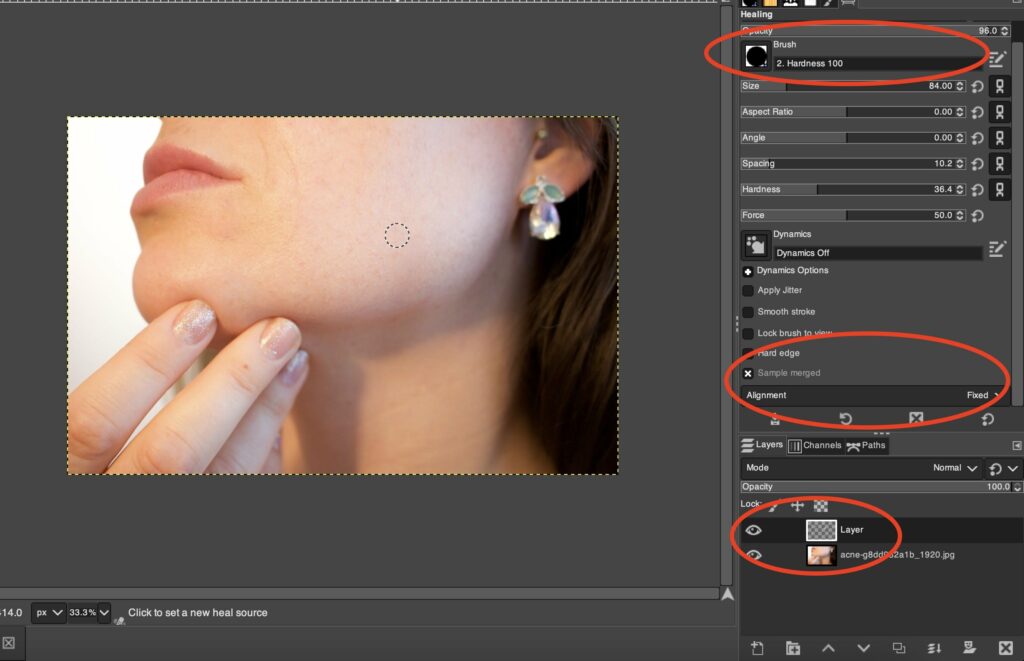
Step 04: Healing tool settings
Since we created a new layer to protect the pixels of the original image, we have to make sure that the healing is carried out on the new layer. Go to the Heal tool’s options on the left side of the canvas and adjust the settings as required.
- Adjust the Hardness to control the size of the brush hard center.
- Pick an appropriate brush size.
- The Aspect ratio allows you to set the ratio between the height and the width of the brush. In this case we will set it to 0 to make sure they are equal.
- The Angle should be 0 if you want the brush to remain circular.
- Adjust the spacing to determine the distance between the brush marks in a stroke.
- Change to Force to control the gain of the brush strokes.
- Switch the Dynamics option off or on.
- Hardness is set to Less than half to achieve a smooth transition.
To Sample Healing from all Layers & keep brush alignment fixed:
- Make sure the Sample merged option is enabled for the healing to be calculated from all the layers.
- Set the alignment to Fixed.
Once you finish adjusting the Heal tool settings, you can start healing the image.
Step 05: Select the source of the image
Make sure that have the Heal tool selected by now. Next, select the source. The source is the location you chose to replicate in the other section of the image. Make sure the source of the image does not have sharp colour transitions and it is relatively smooth. To select the source from the image,
- Hold Ctrl on Windows and Cmd on Mac and click on the area you want to use as the source.
- If you want to change the source of the image at any point in time, hold Ctrl on Windows and Cmd on Mac again and click on the area you want to use as the source.
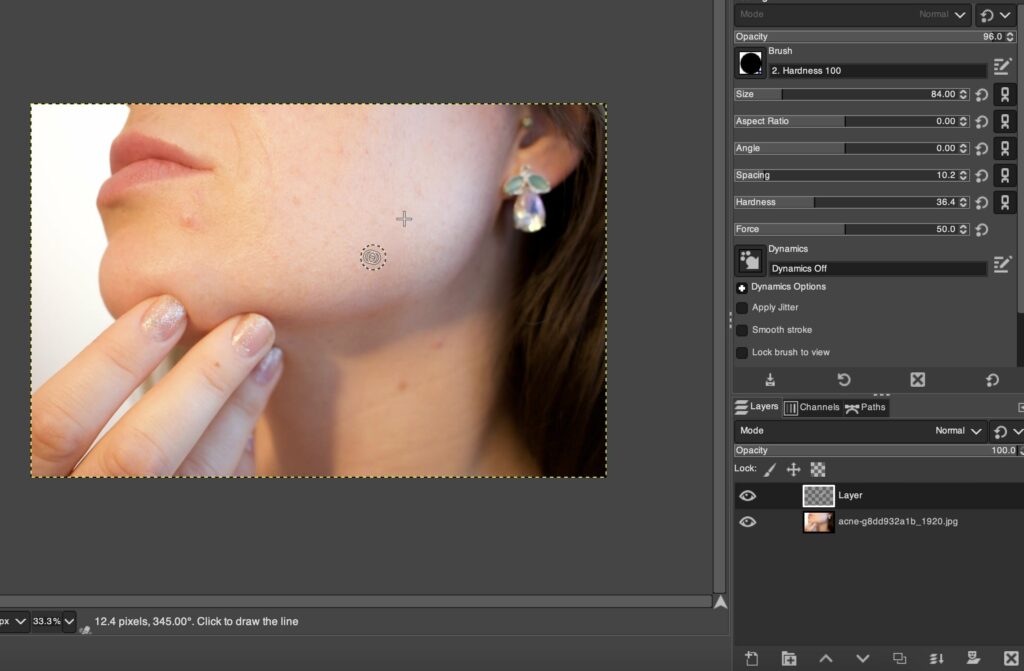
Step 06: Start healing the image
Make sure you have selected the Heal tool, adjusted the settings and selected the source. SELECT THE NEW HEAL LAYER FIRST IN THE LAYERS PANEL (this will protect the original layer). Next, simply click on the areas you wish to fix or retouch. Then, you would notice that the healing process is performed in the area you clicked on.
To be more precise, you can zoom in on the image,
- Press + to zoom in on the image.
- Press – to zoom out the image.
As you can see below, the part of the face is picked as our source and added to the image.
VIMP: To Achieve a smooth transition, make sure that Hardness is set to a low value, Sample merged option is enabled & Alignment is set to fixed (to maintain consistent colouring).
Depending on the results, you can adjust the hardness and brush size to experiment with the best outcome. There are instances when you can use the Heal tool creatively. For example, it can be used to replicate a subject of the image in a lighter shadow. To do this,
- Increase the brush size using the key “[“.
- Press Ctrl/Ctrl and click on the subject of the image to select the source.
By using these methods, you can use the Heal tool for various purposes.

Conclusion
In conclusion, GIMP’s Heal Tool is an incredibly useful and powerful tool. It can quickly and easily fix flaws in images without leaving any trace of the original imperfections.
With a few simple steps, you can use the Heal Tool to remove dust spots, blemishes, wrinkles, and other unsightly objects from your photos. Furthermore, with its ability to clone pixels from one part of the image to another, you can use the Heal Tool for larger fixes as well.
Thanks for reading & feel free to check out more of our articles!
Expert Rating
Summary
The heal tool in GIMP can be very versatile depending on what you need to use it for. It isn’t the hardest tool to learn, but can take a little bit of practise to use proficiently. This tutorial will show you how to use the Heal tool.


