
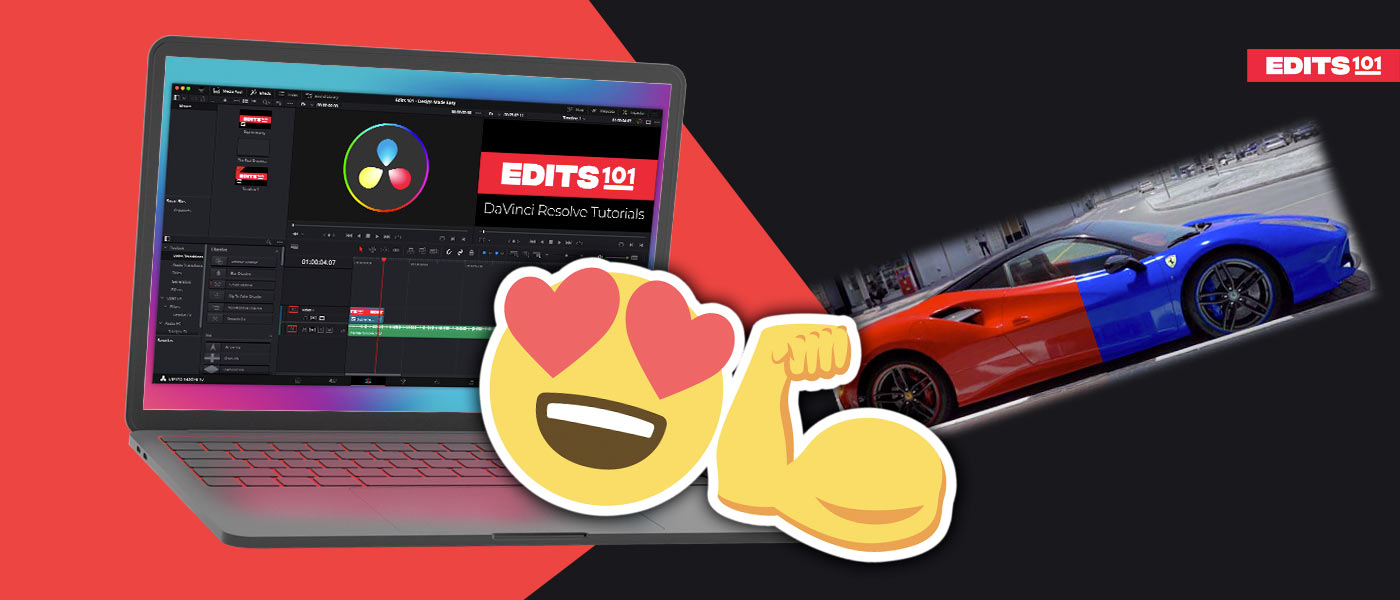
Changing the color of an object in a video seems like an impossible task, but with Davinci Resolve 18, it can be done with ease. If you know how to change the color of an object within a video, it opens up a lot of creative possibilities.
In this guide, we will dive into the process of changing the color of an object using Da Vinci Resolve 18. We will discuss the steps, techniques, and tools you need to use to achieve greater results.
So, let’s get into the process of color changing and discover how you can transform the look of objects within your videos.
How To Change Color In Davinci Resolve?
There are multiple methods available to change the color of an object in Davinci Resolve.
- Color Warper
- Curves
- Color Wheels
How To Change Color in Davinci Resolve Using Color Warper?
First of all, bring your clips into the timeline and go to the color page.
If you are a complete beginner then
Click here to check out our Davinci Resolve guide for beginners.
Davinci Resolve for Beginners
- Select the clip and then go to the color warper panel in the middle of the Davinci Resolve screen.
- Once you go to the color warper tool, now you need to move your cursor to the viewer.
- When you move the cursor in the viewer, the shape of the cursor will change into an eye dropper icon.
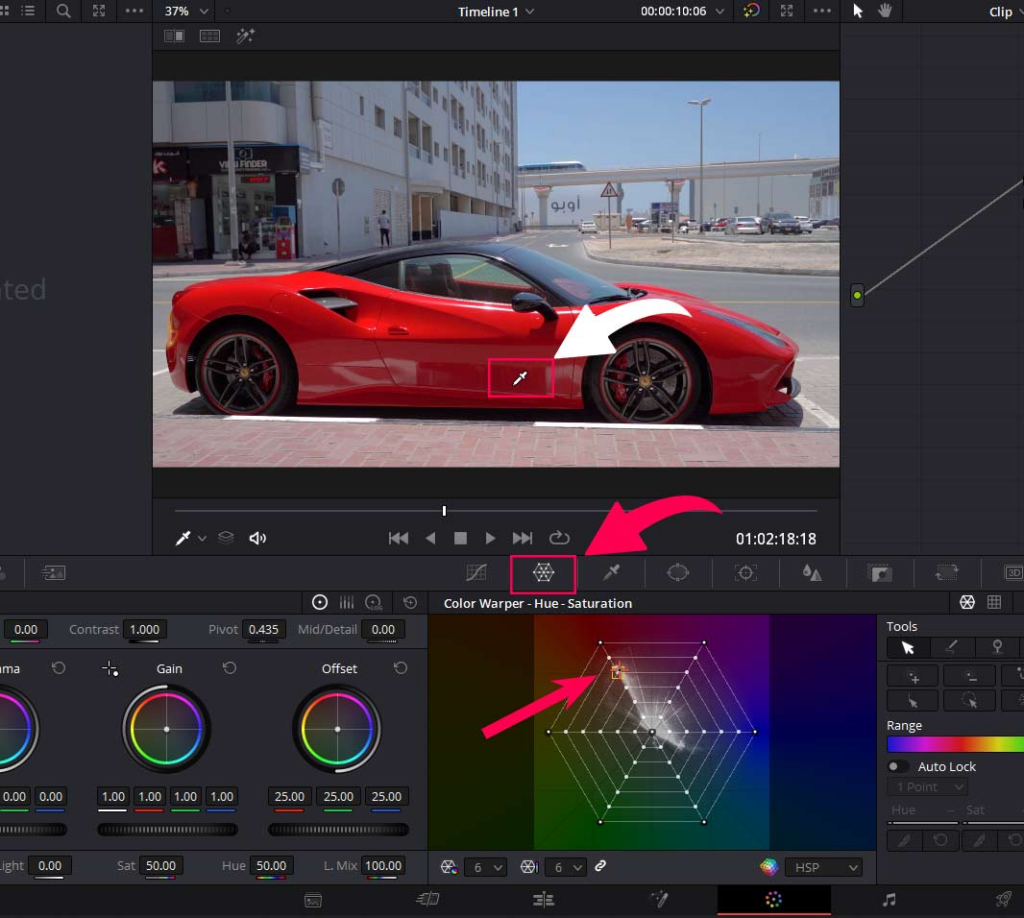
- Now click on the color you want to change, and you will see a point will be highlighted in the color warper tab.
- Grab the point which is above the selected point and move it in the direction of other colors.
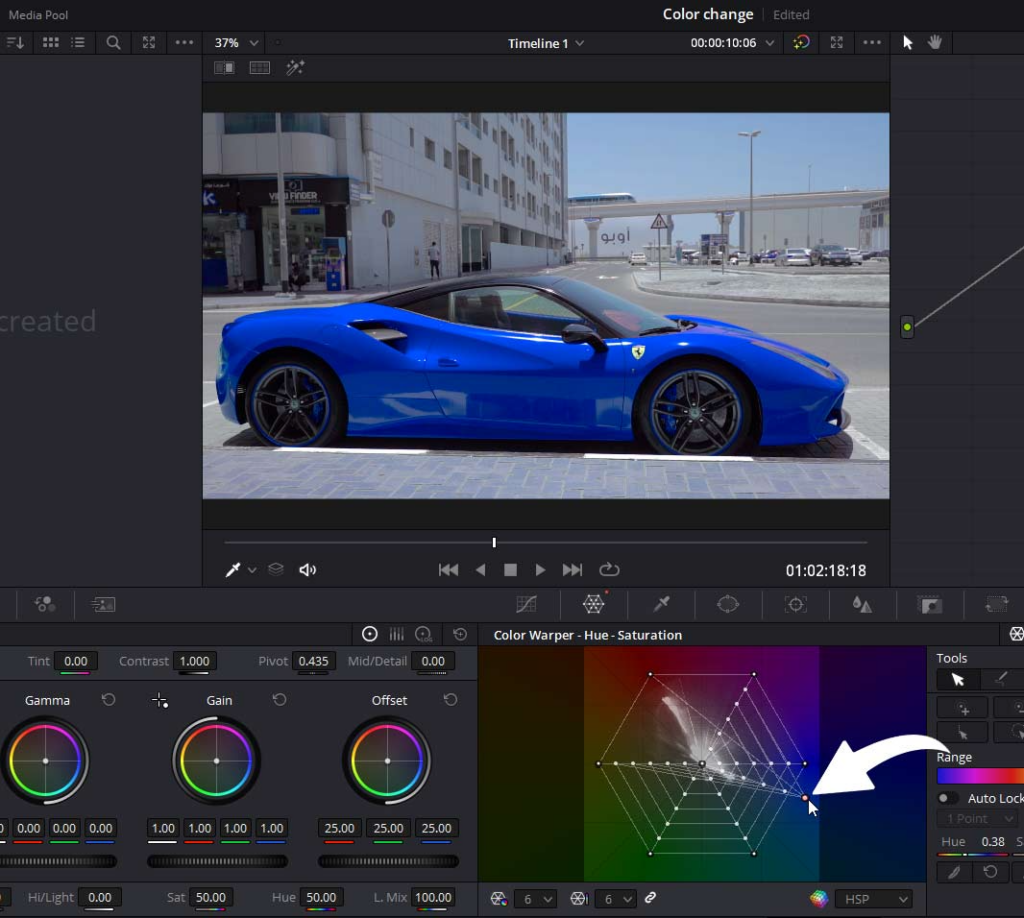
Move the point towards the blue color if you want to change the color to blue; similarly, move towards the green if you want to make the color green, and so on and so forth.
Fixing the Background
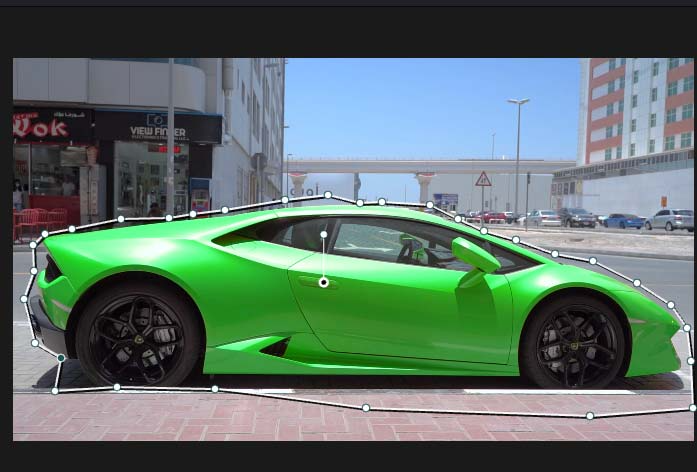
While changing the color of the object, there is a chance that you will mess up the background as well. In that case, we will need to exclude the object from the background.
To do that, we will be using power windows. The power windows will make sure that the color change will only be applied to the object, which is the car in our case.
- Now go to the power Windows Tab, which is next to the qualifiers tab.
- You can use any of the available power windows, but for the precise selection, you should use Use the curve tool to draw a precise selection.
- Click on the curve and draw a selection around the car; it doesn’t have to be perfect in our case, as the background objects are being affected by the color change or are not very close to the car.

- To close the selection, click on the point where you started the selection, and this shoot excludes the background.
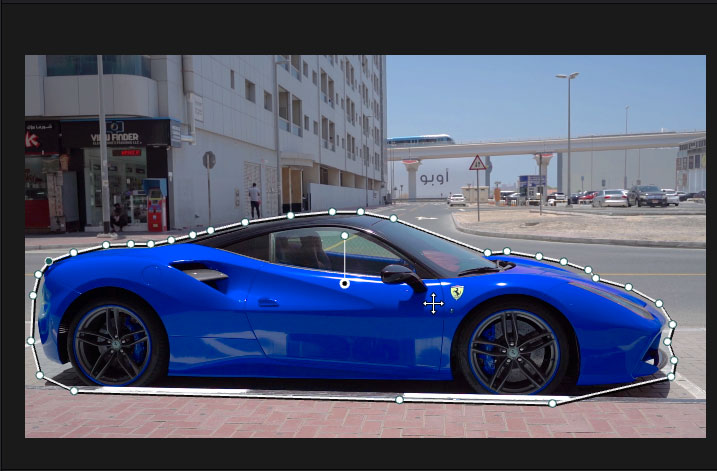
And now, the background will not be affected by the color change.
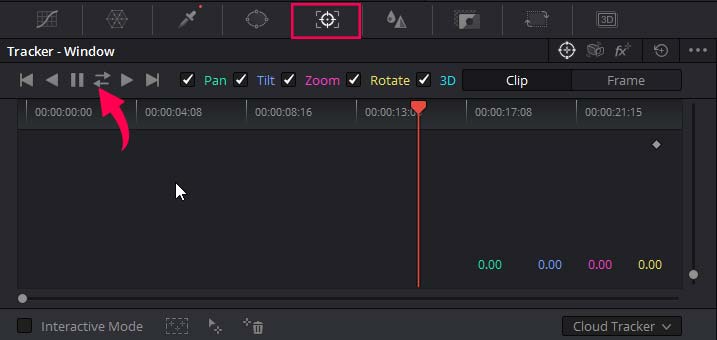
Track the Power Window
If you have a moving object, don’t forget to track the power window.
After drawing the power window, go to the tracker panel and track both forward and reverse.
Now the power window will move with the object, and the color change will only affect the object.
Note: Please keep in mind that color warper is a great tool for changing the color of an object in Davinci Resolve, but it may not work for every video, so test it and see if it works for you or not.
If not, try other methods we will discuss in the upcoming sections.
How to Change Color in Davinci Resolve Using Curves?
You can also use curves to change the color of an object in Davinci Resolve.
The Curve method will work with most of the videos as the curves target the precise colors.
The use the curves for the color change, go to the curves panel.
Then go to the Hue vs Hue curves.
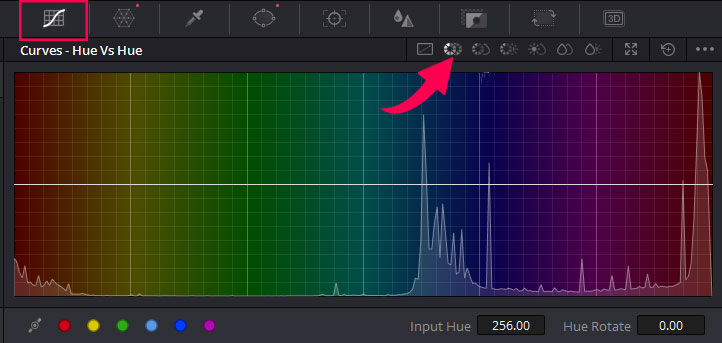
You will see the colors on the bottom of the curves panel, click on the color you want to change, and the points will automatically be created.
In our case, we have a yellow car, so we need to click on the yellow color.
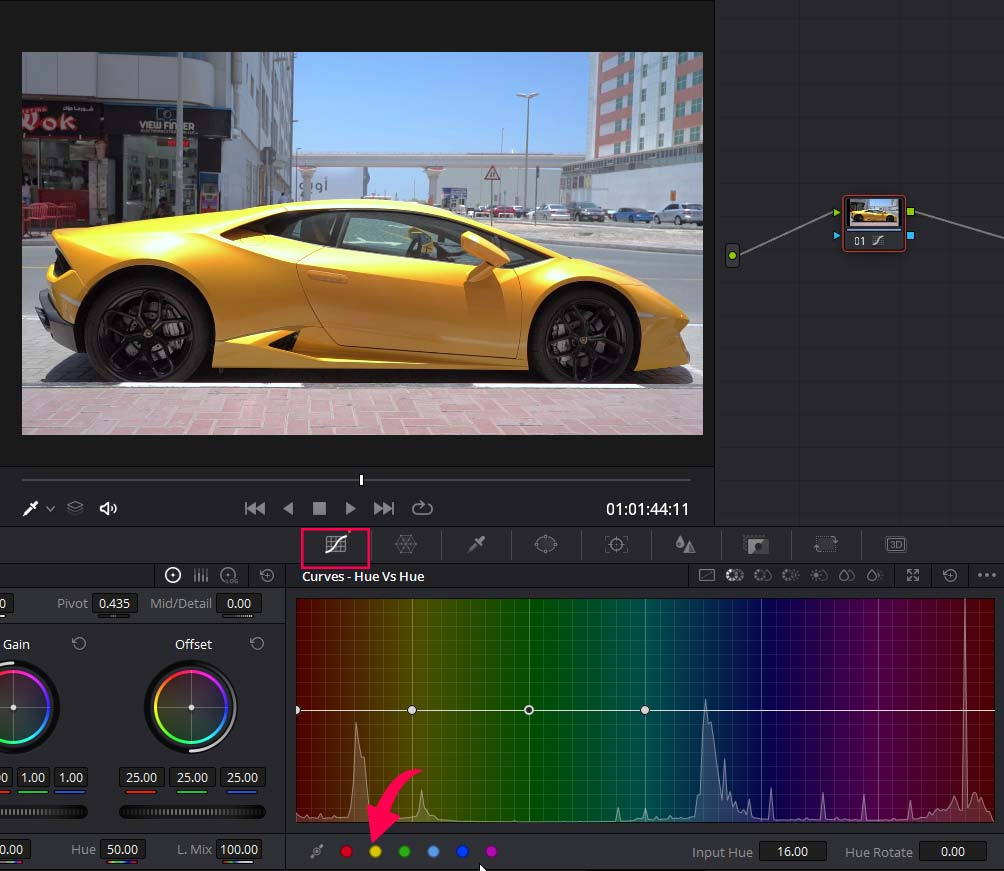
And now, the points for the yellow color are created; all we have to do now is drag the middle point on the yellow color up or down to change the color.
You can also move the point right or left to see if you can find other shades of the color that you might like.
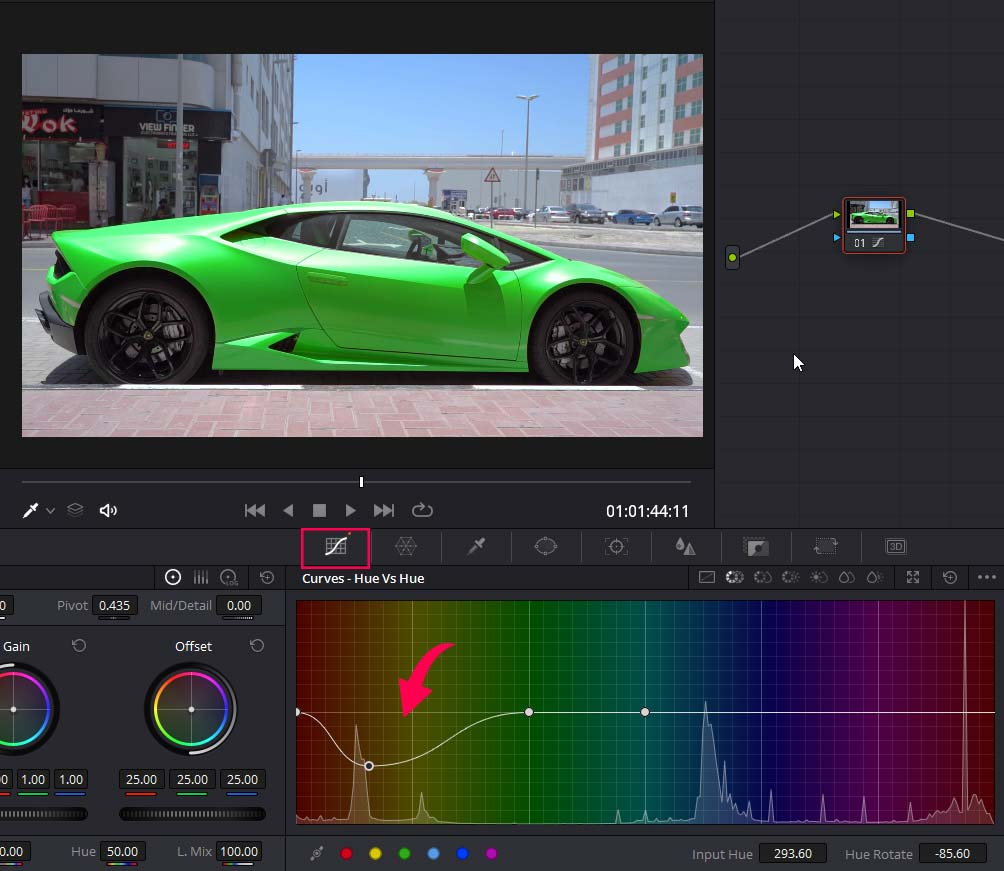
And the color of the car has been changed to green from yellow.
Fixing the Background
Now we have to fix the background like we did in the previous section. The process is exactly the same.
Go to the power windows and click on the curves panel.
Draw the selection as precisely as possible. Click on the first point again to finish the selection.
The background will be excluded from the color change as soon as you finish the selection.
Track the power window if you have a moving object, as described earlier.
Use Qualifiers and Color Wheels For Color Change in Davinci Resolve
Color wheels can also be used to change the color of an object in DaVinci Resolve, but if we use the color wheels directly, we will be affecting the colors of everything present in the video.
To change the colors of only the object, we need to use the qualifiers panel to make the selection of the object first.
Select the clip, then go to the qualifiers panel. Click on the eye dropper with a plus icon.
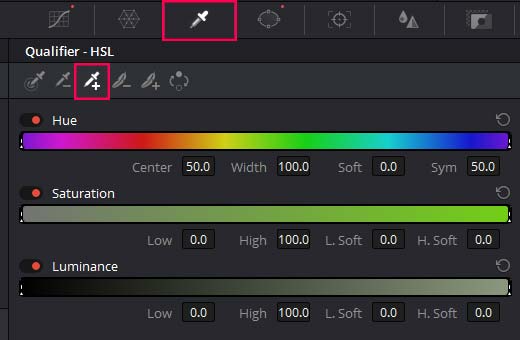
Now Click and drag over the object you want to change the color of.
Use the shortcut shift + H to see the selection. Try to make the selection as precise as possible. Once everything you want is selected, then come to the Qualifiers panel and adjust the options on the right to refine the selection.
Play with all the settings, and use the Blur radius to minimize the chances of Harsh edges.
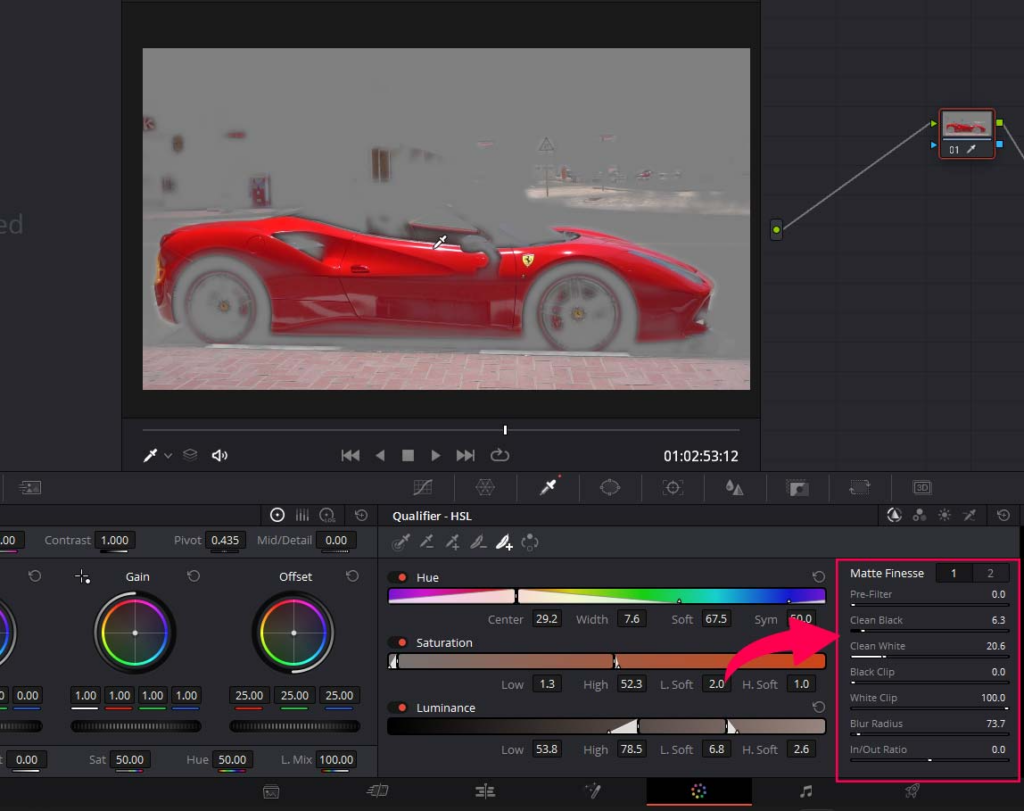
Once you think the selection is good enough, press shift + H to hide the selection.
Now either use the color wheels or the Heu control under the color wheels to change the color of the object.
Heu Control
Hover over the hue control, click, and drag toward left or right to change the object’s color, i.e., car in our case.
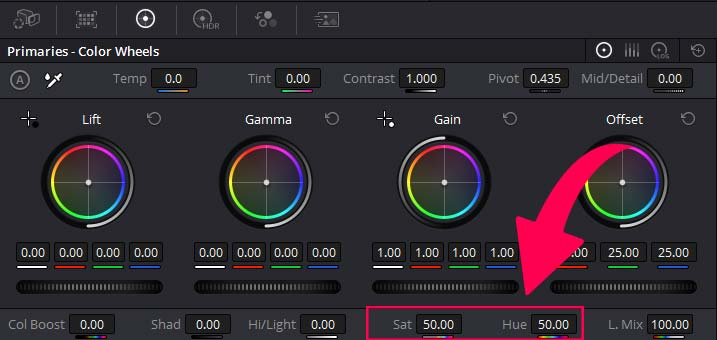
You can also use the saturation control to get more radiant colors.
Color Wheels
To change the color with the help of color wheels, make a selection of the color with the qualifiers tab and then grab the grey point in the middle of the offset wheel and move it in the direction of the color you want your object to have.
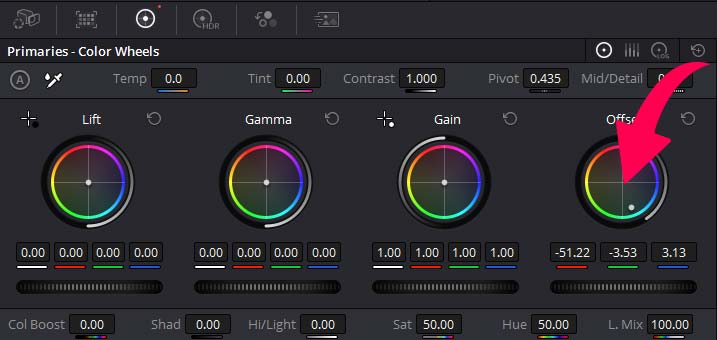
With the color wheels, you might leak the color to the background. If that is the case, then use the power window to keep the effect only on the object.
If you need to use the power window with a moving object, then you must track the power window; we have described the method earlier.
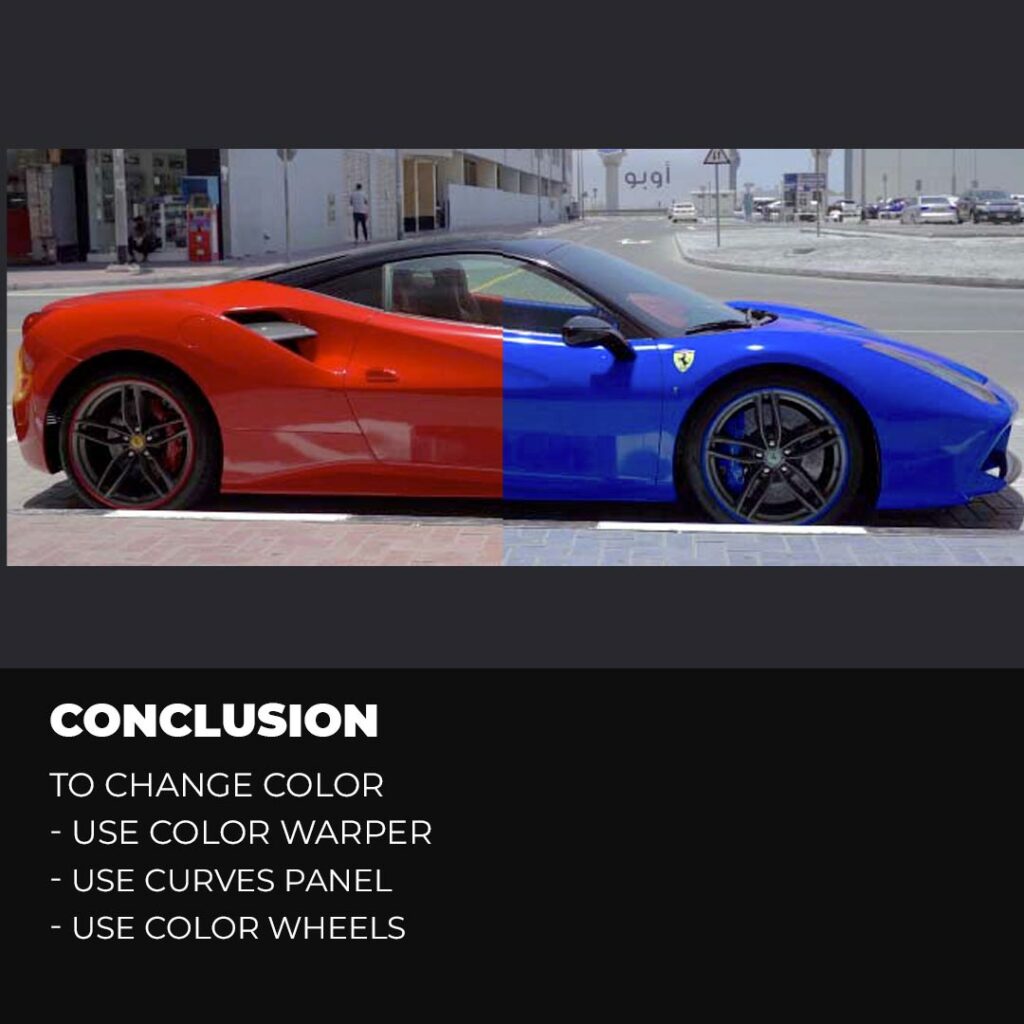
Conclusion
Go to the color warper, click on the color you want to change, and a point representing that color will be highlighted. Grab the point above the selected point and move it in other directions to change the color.
Go to the curves panel and click on the colors at the bottom to create the point, then drag the point up and down or left and right to find the color you need for the object in the video.
The 3rd method is to use color wheels and Hue and saturation controls. You need to use the qualifiers to create a selection of the object first, then use the Hue and saturation controls or use the grey dot in the center of the offset wheel to change the object color.
You might need to use the power windows or some of the above methods. Draw a path around the object with a curve option.
Don’t forget to track the power window if you have a moving object.
Expert Rating
Summary
Changing color is an easy process if you know the right tools. We have covered everythign you need to know to change the color of anything in Davinci Resolve. It takes a lot of practice to master the color change process but once you master the tools and techniques it is very functional and scalable.


