
The liquify filter in Photopea can do amazing things for you if you know how to use it the right way. This filter allows one to bend and distort the parts of an image without losing its quality to create a lot of cool and creative effects.
You can use the liquify filter in Photopea to do many things like fix the clothes or facial structure, create abstract effects, and place a logo on another object.
There are a lot of practical use cases for the liquify filter, and we will cover a few of these in the upcoming guide. By the end of this article, you’ll have a complete understanding of the Liquify filter and be able to use it to create amazing projects confidently.
So, let’s dive in!
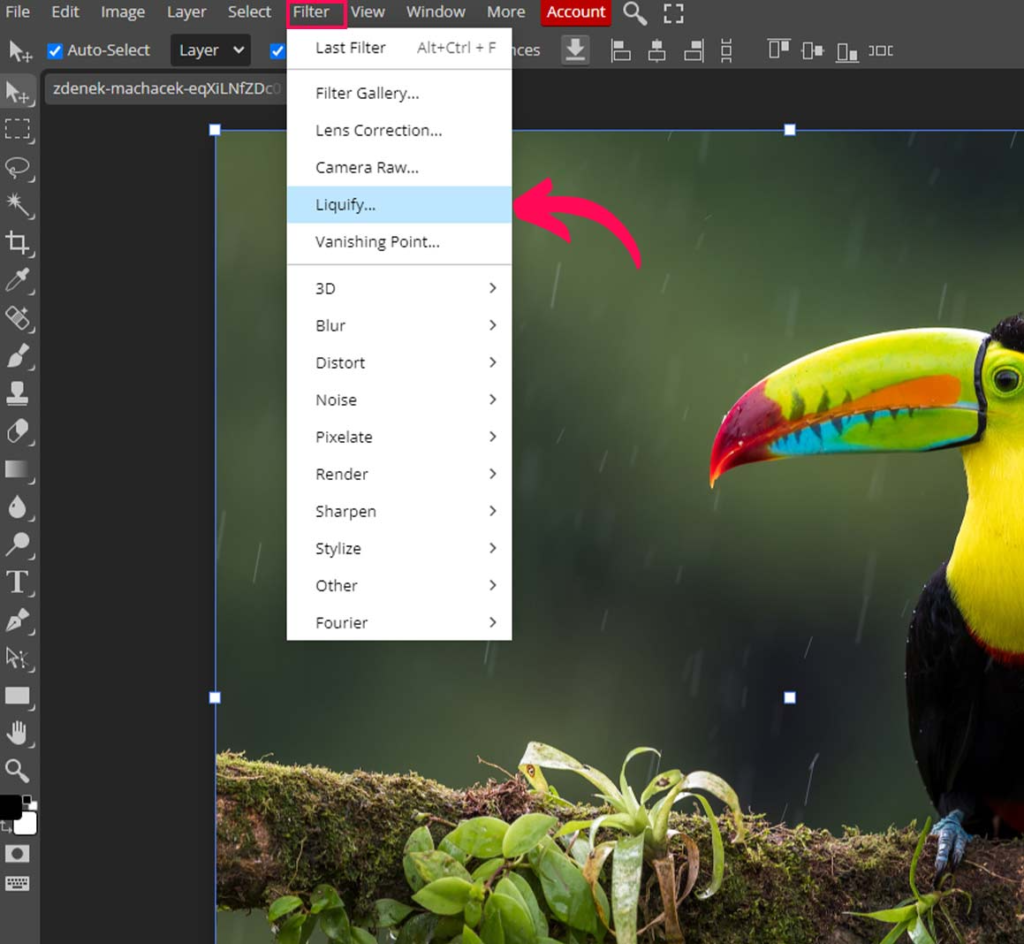
Where is Liquify Filter In Photopea?
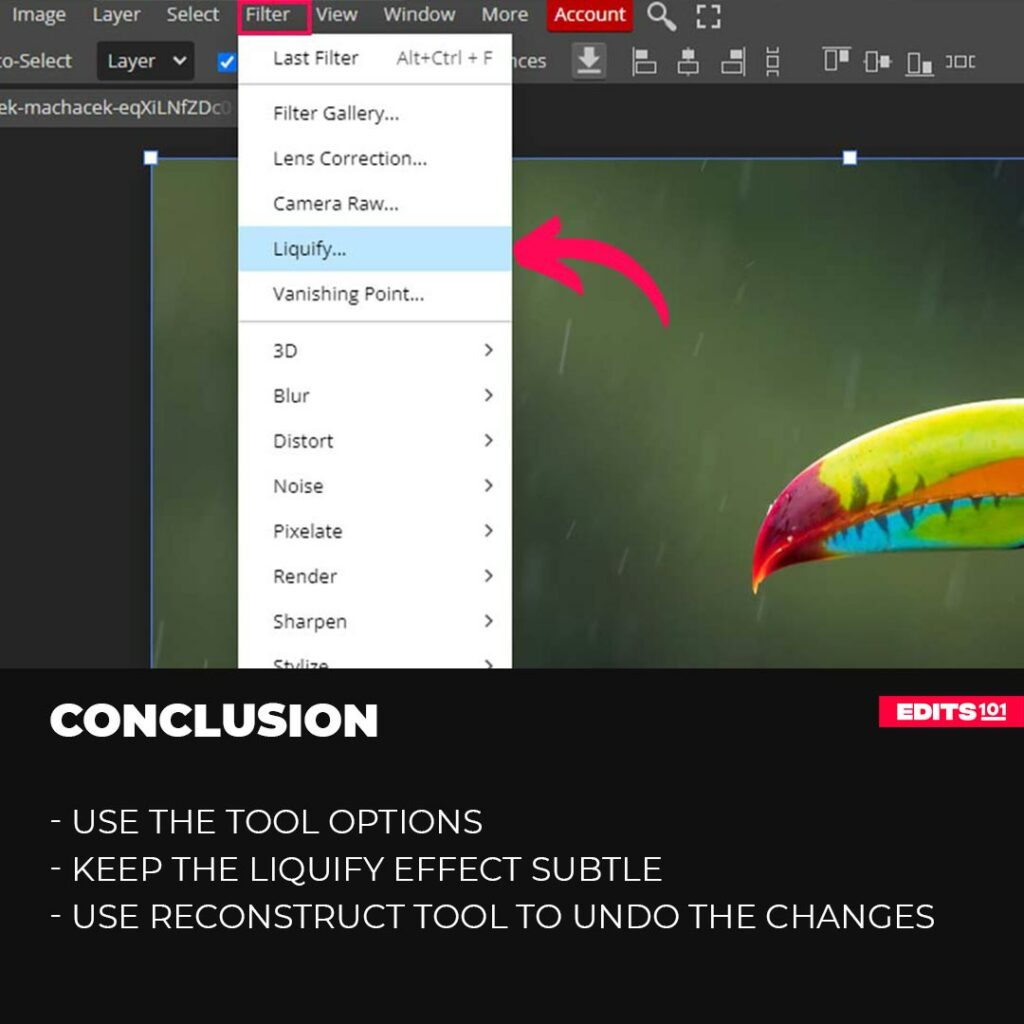
You can find the liquify filter under the Filter menu.
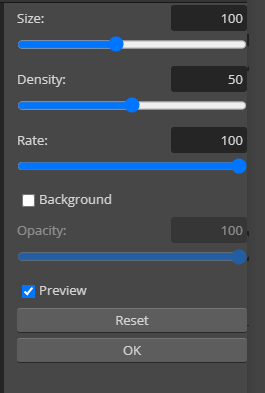
Tool Options
Now let’s discuss all the options a tool has to offer. In tool options, you can control many things depending on the effect you are trying to create.
We are discussing the tools options before tools because how tools will work and behave heavily depend upon the settings of the tool options.
Brush size
As the name suggests, this option controls the size of the brush.
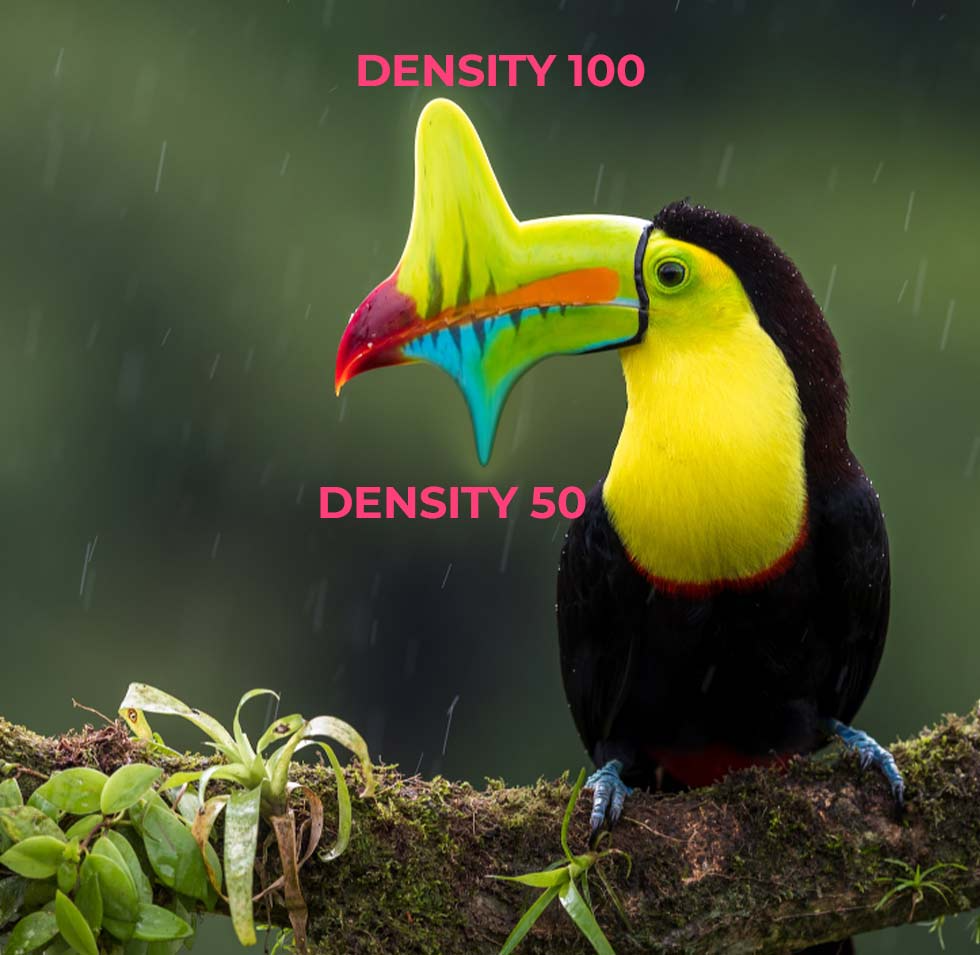
Brush Density
Brush density controls the feather of the brush.
With lower density, the effect will get smaller as you move away from the area you clicked.
With a high density, the effect will be as bigger as the size of the brush, and it won’t feather out the effect.
See the image below, and it will be easier to understand through the picture.
Brush Rate
Just think of it as a strength guide on how strong you want your liquify effect to be. The more the value, the faster it will distort the image and vice versa.
If you set a lower rate value, you will see it’s hardly moving, and this is useful if you’re doing really subtle reshapes of things, but if you need to move quickly, obviously, you will have to set a higher value.
Preview
The preview check box lets you see the before and after. If you uncheck it, you won’t be able to see the changes you have made.
Make sure to check it and turn it on and off to see the before and after.
Reset
The reset button will undo all the changes you have made inside liquify panel.
Background
If you check the background check box, it will give you an opacity slider.
With this slider, you can see the original image in the background (if you have made a duplicate), it is helpful in case you take things too far.
Liquify Filter Tools
Liquify filter has a lot of tools we can use to create certain types of effects, and every tool works differently.
So let’s have a look at all of them before diving into the practical use cases of liquify filter.
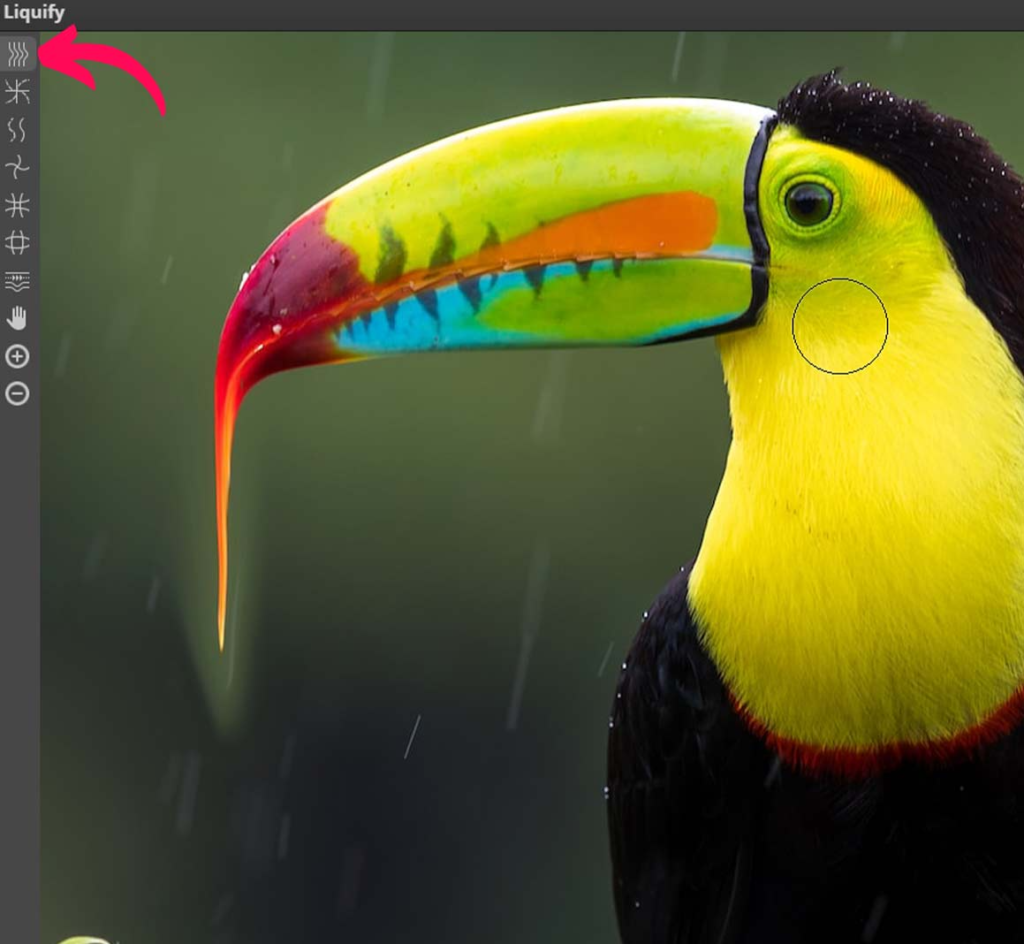
Smudge Tool
The first tool inside the liquify filter is the smudge tool. It is not wrong if we say it’s the most used tool inside this filter.
This tool drags the pixels or the image forward as you click and drag the brush.
The brush size will determine the number of pixels being distorted. Access “Brush Options” on the right toolbar to adjust the brush size.
Reconstruct Tool
The next tool you must know about is the Reconstruct tool.
In photopea, the Reconstruct tool is used to undo any distortion you have added to the image. To use this tool, click on it on the left sidebar and paint with the right brush size.
It works as an eraser to remove the changes you have made inside liquify filter.
If you want to remove a part of the distortion, use the small brush size.
Smoothen Tool
The Smoothing brush looks like it’s the same as the reconstruct tool, but it is not the same.
It doesn’t take us back to the original, but rather it averages out and evens out the contours from the previous Liquify adjustments.
This brush is useful when making an area smooth and still looks lumpy or bumpy.
It will try its best to figure out what needs to change to make that area a nice smooth curve.
Use the Smoothing brush if the area looks slightly off, which can really help.
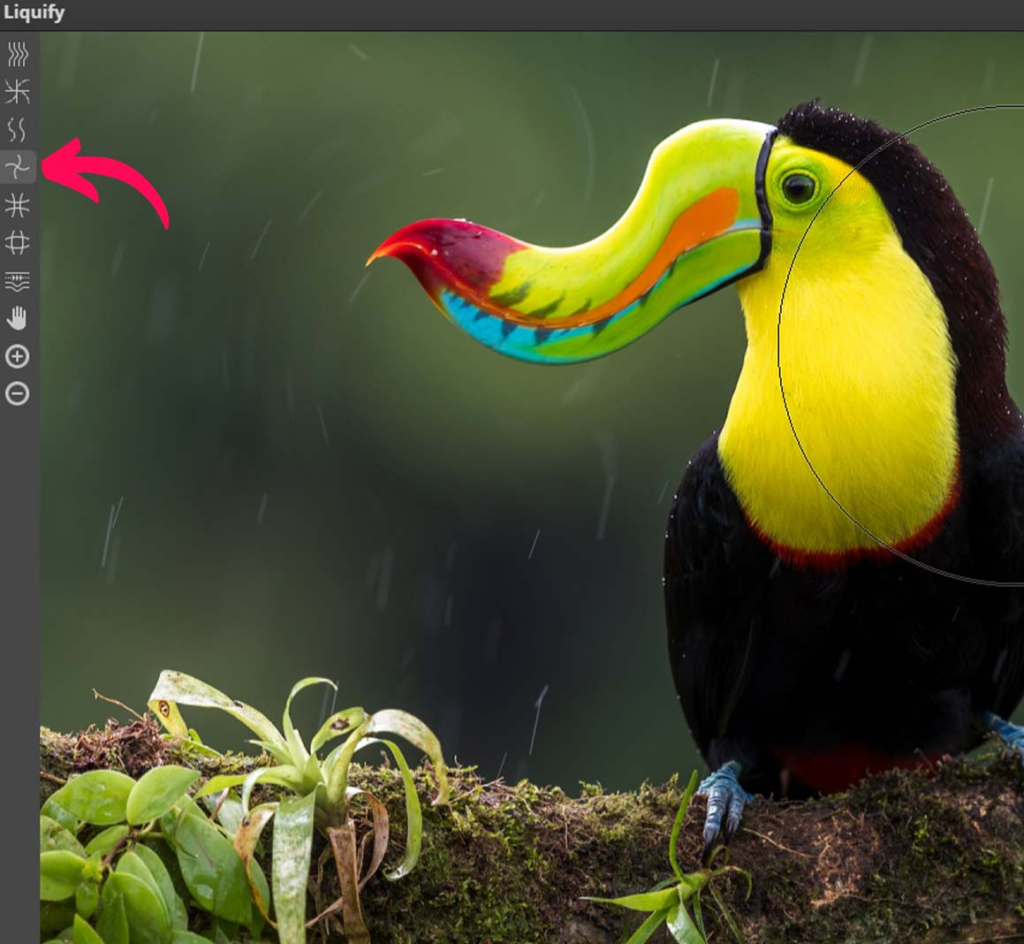
Twirl Tool
The Twirl tool rotates the pixels in a clockwise direction. But it also works anticlockwise, for that you have to press Alt of Option.
To use this, you just have to click and hold, the longer you hold the click, the more it will rotate the pixels.
While it may seem like a silly tool that is not useful, it can be used to add interesting effects to certain photos.
For example, it can be used to create a swirl in the foam on top of a cappuccino.
It’s worth playing around with, even if it’s just for fun.
Shrink Tool
Alright, moving on to the next tool on the list, we have the shrink tool.
When we click on the image with the shrink tool selected, it will pinch the pixels toward the middle of the brush.
And the larger the brush, the bigger area will be affected, so you can have some fun with this one.

Blow Tool
This is the counterpart to the shrink tool. It does exactly the opposite of the pinch tool, as it will move the pixels away from the brush’s center.
You can use this tool to make the eyes bigger for dramatic effects.
Push Left Tool
The Push Left tool in Liquify can be useful in certain circumstances. It moves pixels within the brush size to the left or right, depending on if you move the brush up or down, and flattens objects into a square shape.
It can be used for fun, but it also has practical applications.

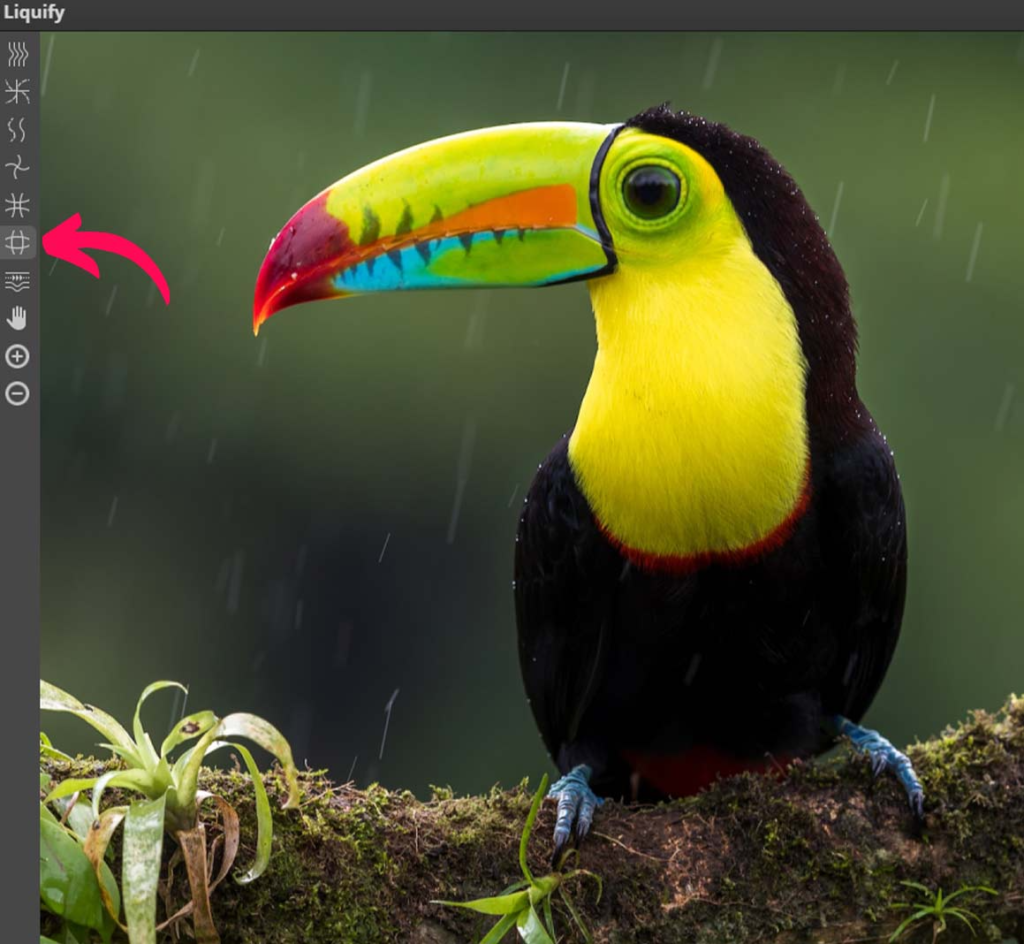
Zoom In and Zoom Out Tool
Zoom-in tool is represented by + with a circle, and the zoom out tool by – with a circle.
Choose any of the tools and click inside the canvas of liquify filter and it will zoom in or zoom out, depending upon the tool you have selected.
Hand Tool
Hand tool lets you pan around the image.

Practical Examples Of Liquify Filter In Photopea
Now that we have covered all the tools inside the liquify filter in photopea, let’s create a few amazing effects.
How To Create Line Distortion Effect In Photopea?
In this practical example, we will create a simple yet cool distorted lines effect, giving the illusion of 3d.
Create the lines with equal distance between them, as shown in the image below.

Or Download the line image here.
Make a duplicate of the lines layer so that we can always go back if things get messed up.
Select the lines layer, go to the filter menu, and click liquify.
And liquify window will open up, and you will see all the tools we have described above.
You can use multiple tools to create line distortion, like a smudge, swirl, pinch, and blow tool.
We have used smudge, shrink and blow tools to create distorted lines with 3d illusion.

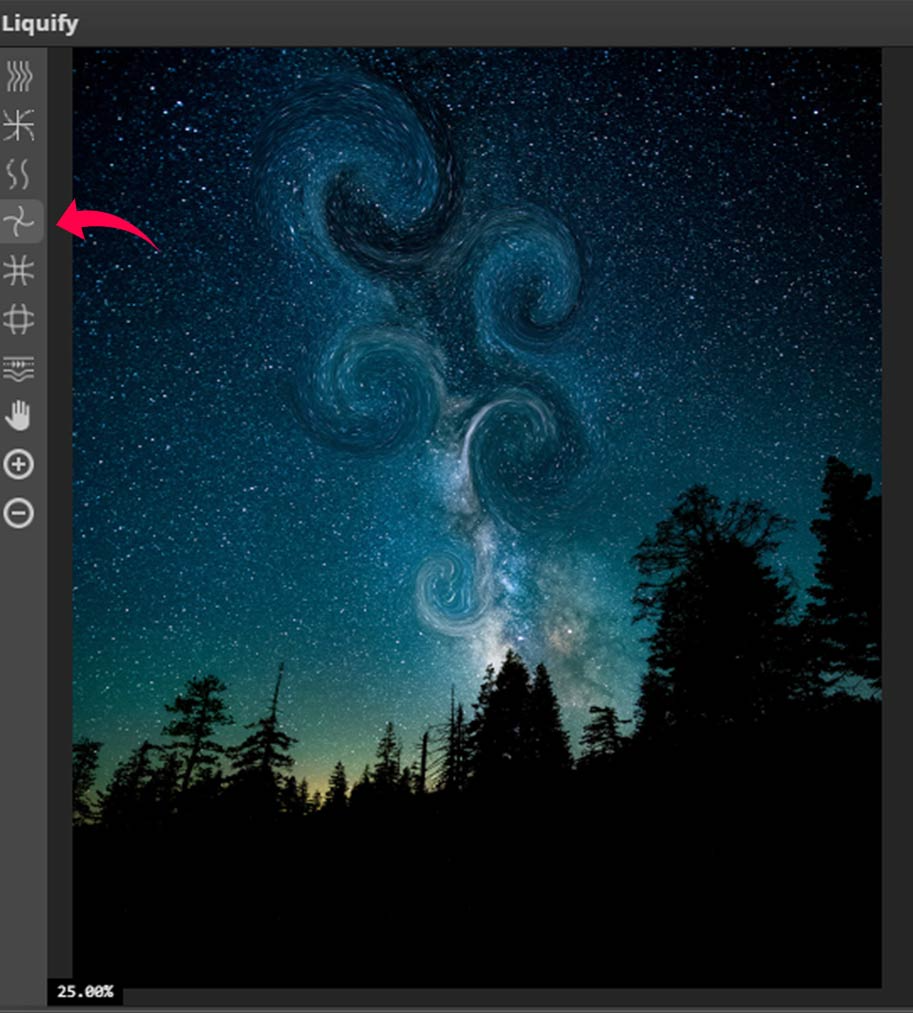
How To Create Stary Night Effect in Photopea?
We will be using the swirl tool for this effect. As you already know, the swirl tool twists the area of the image according to brush size.
Click on the area you want to swirl or twist and hold the click. The longer you hold the click, the more the area will twist.
The tool will create the effect clockwise. Use the alt or option key to go in the other direction.
If you are looking to create a subtle effect, set the brush rate in the Brush Tool Options to a lower value panel in the right-hand column.
Let’s create a starry night effect.
Choose an image of a night landscape where the sky is full of stars.
Bring it into photopea, and duplicate it.
Click on the image layer, the filter menu, and then liquify.
Choose the swirl tool and click on the areas you want to twist. There is no hard and fast rule on where to create the swirls. Just use your creativity.
Pro Tip: Click and hold, keep moving the cursor slightly to avoid hard edges.
Here’s the result.
How To Use Liquify For Portraits in Photopea?
Portrait editing is something that liquify tool is mostly used for. People make a lot of mistakes by overusing it.
Let’s take a look at a practical example of portrait editing using liquify filter in photopea.
Note: Everything discussed in the section is according to the following image, you may need to change the settings depending on the image.
Step one: Import and duplicate the image
Import your image by going to the file menu, and then choose open and place.
Or drag or drop your photo inside photopea.
Duplicate your image before applying liquify filter.
Step two: Apply liquify filter
Apply the liquify filter, go to the filter menu, and choose to liquify.
Analyze your image before starting to make changes.

Decide which areas of your image you want to adjust and how much.
Step three: Adjust Cheek and Hair with the smudge tool
Let’s Make the Changes.

As you can see, his left cheek is slightly bigger. Let’s adjust that using the smudge tool.
- Keep the brush size at around 70 to 80.
- Density at 35 to 40.
- The rate at 30 to 35.
These settings will make sure that you don’t over the effect. But if you know what you are doing, choose settings of your own choice.
Now we will adjust the area over the left ear, bringing it slightly toward the left.
Same with the hair, they look a bit squished. Bring them up from the left.
Step four: Adjust the Nose With the Shrink tool
Select the shrink tool, and click on the nose, use the above described values for the tool options.
Click and let go, do not click and hold.
Step five: Adjust the eyes with blow tool.
Take the blow tool and increase the brush size until it covers one eye. Click once on both eyes one by one.
Step six: Adjust the Smile
Take the smudge tool and decrease the brush size to 80, adust the smile slightly.
Pro Tip: In case the effect goes too far or does not look good, use the reconstruct tool and paint over the area, and it will undo the effect.
And we are done.
Here’s the final result with some subtle changes.

Conclusion
Liquify tool allows you to manipulate your photos in creative ways. You can use this filter to create a lot of cool effects.
We have covered all the tools available inside the liquify filter in photopea and also the options on which these tools depend, like brush size, density, and rate.
Then we discussed some practical use cases for the liquify filter by creating distorted lines and a starry night effect, and we also made adjustments to a portrait image.
Liquify tool is easy, but most of the time, people take it too far, and images dont look realistic. Please make sure not to overuse this filter.
We hope you have learned some useful and practical tips that you can use in your image.
Thanks for reading & feel free to check out more of our articles!
Expert Rating
Summary
Liquify is a great tool to have under your belt while editing photos and creating creative effects. But it be over used if you are beginner, so it take a lot of practice to master but have great funtionality when used the right way.


