
A thumbnail is the first thing people see when browsing through YouTube, and it can make a huge difference in whether or not they decide to click on your video.
In this step-by-step tutorial, we’ll walk you through designing a cool and effective YouTube thumbnail using Photopea that will attract more viewers.
Using Photopea to Design A YouTube Thumbnail
Now let’s dive in and create a trendy youtube thumbnail step by step.
Things You Need
Before you start, make sure you have decided on the text you want to write, the images you want to use, and any other elements you would like to use.
Document Size For the Thumbnail
You can use any size as long as its ratio is 16:9, but the most used dimensions are 1280*720 and 1920*1080.
Choose whatever dimensions you like from the above two. We will work with 1920*1080 in this guide.
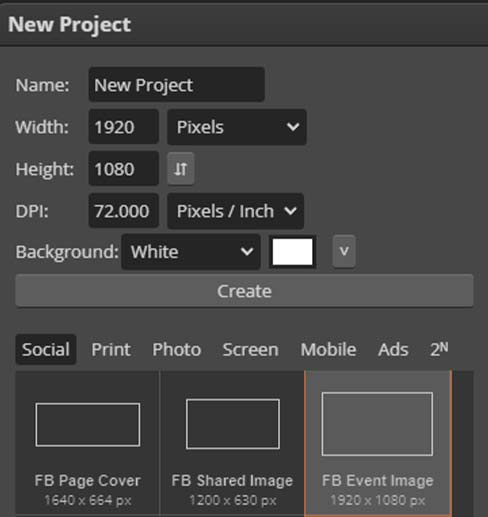
Create a New Document
Once you have Photopea open, create a new document by clicking on the New Project button, and you will see a template named FB Event Image, choose that and click Create.
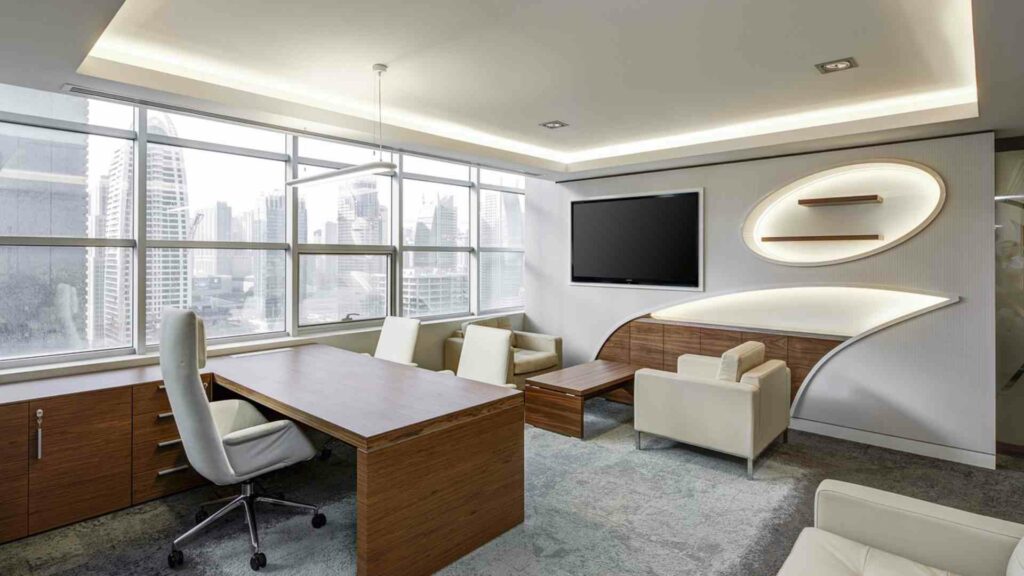
Let’s Choose the Background
Choose a background photo according to the title of the thumbnail. It’s not a must, but having a relevant image in the thumbnail is nice. As we are making a thumbnail about the business, we will choose a photo of an office.
Import that photo into Photopea, to do that, go to the File menu and choose Open & Place.
Reduce the Opacity
After importing, now let’s reduce the opacity of the background image to make the main text clearer and pop out from the thumbnail, as the text is the main component of the thumbnail.
Create a black color fill layer over the background layer by clicking on the new adjustment layer button and then choosing a black color.
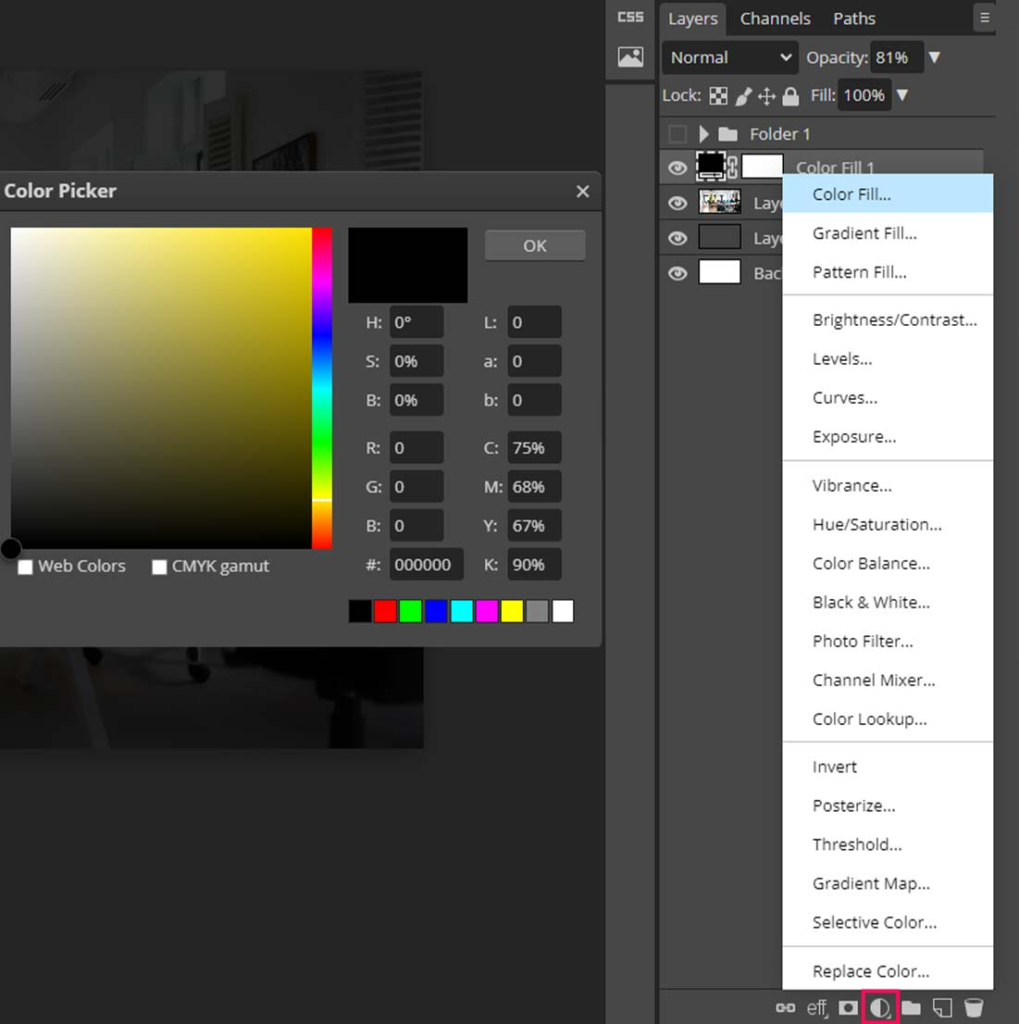
Reduce its opacity by 70 or 80%, depending on the color and lightness of the background image.
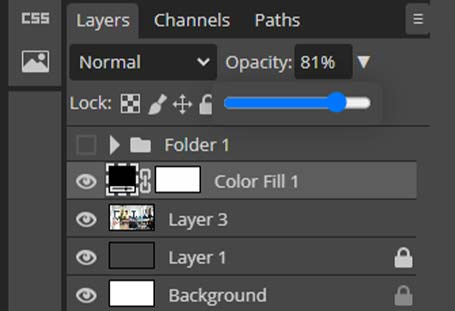
Image of The Person
Now import the person’s image or any other subject you would like to use. We will be using the image of a person in this case.
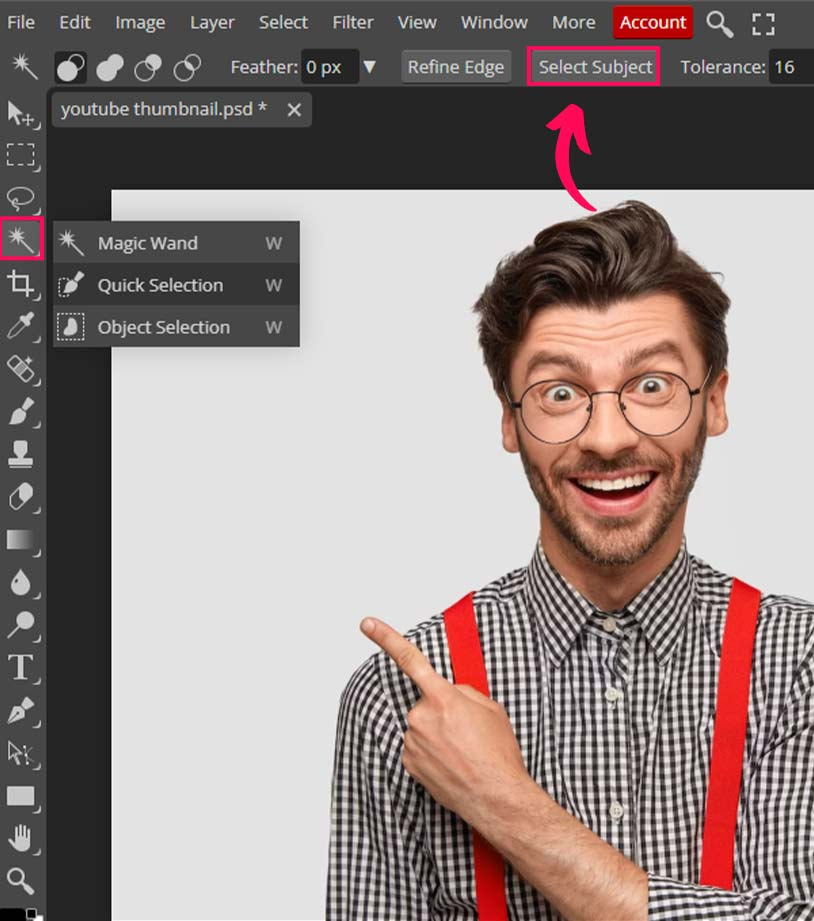
Remove Background
Select the image layer and choose the Quick Select tool; now, you will see a Select Subject button on the properties bar, click on it, and a selection will be created along the subject.
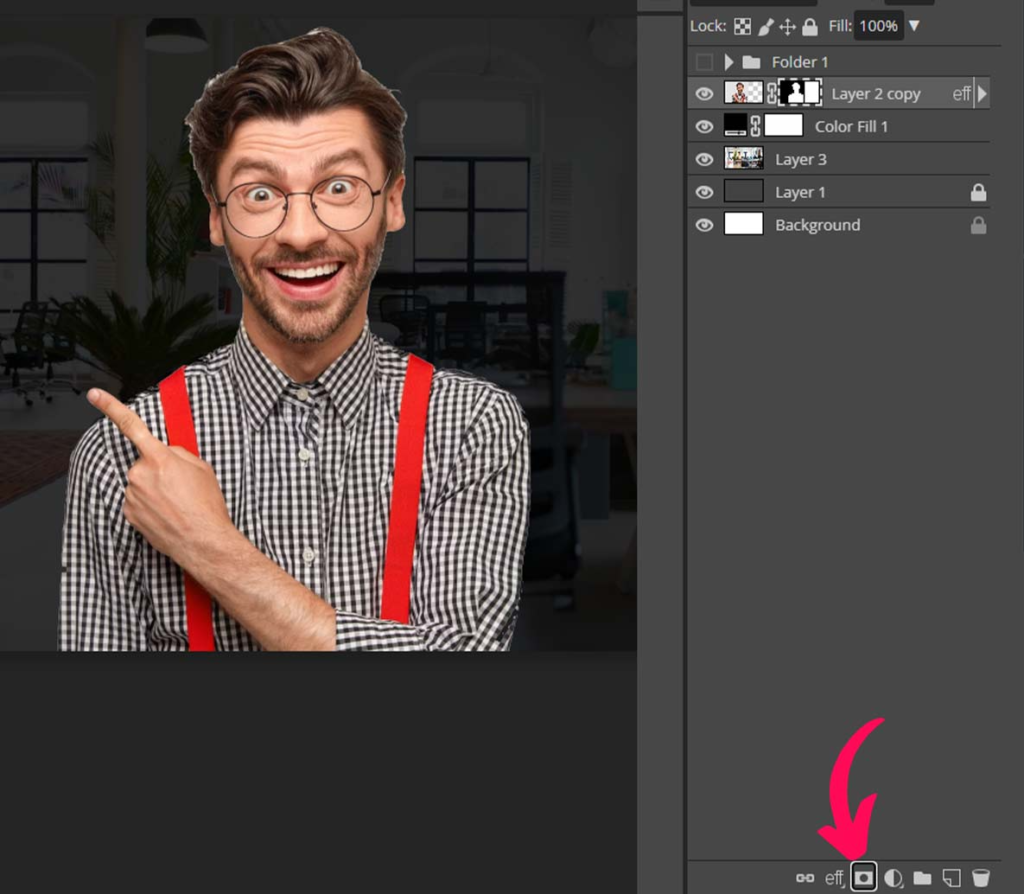
Click on the Raster Mask icon to isolate the subject from the background.
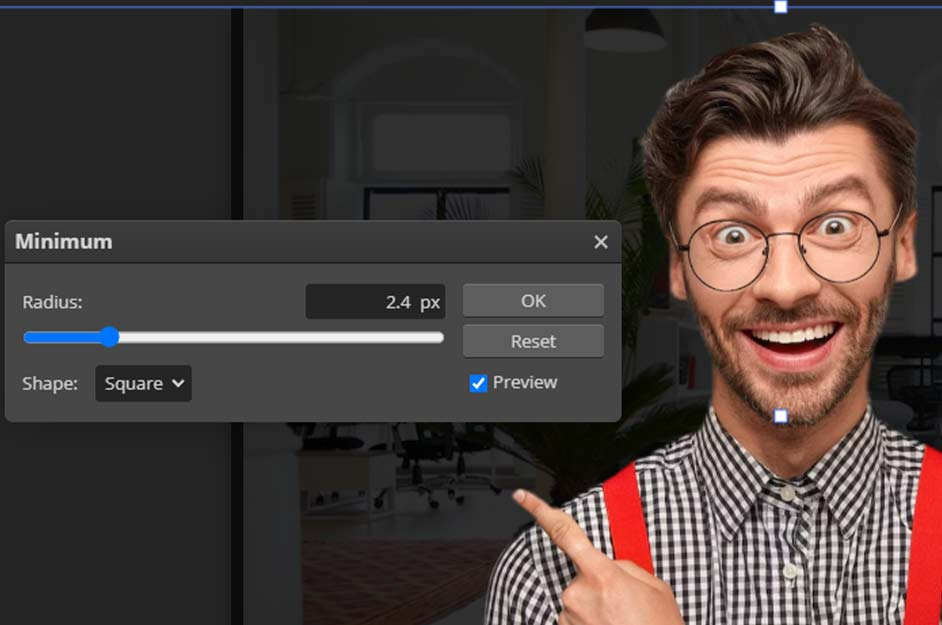
Fixing the Selection issues
As you can see in the above image, the subject has a white hallow or outline around it, which does not look very professional.
It is very easy to fix, select the image and go to Filter menu > other > minimum.
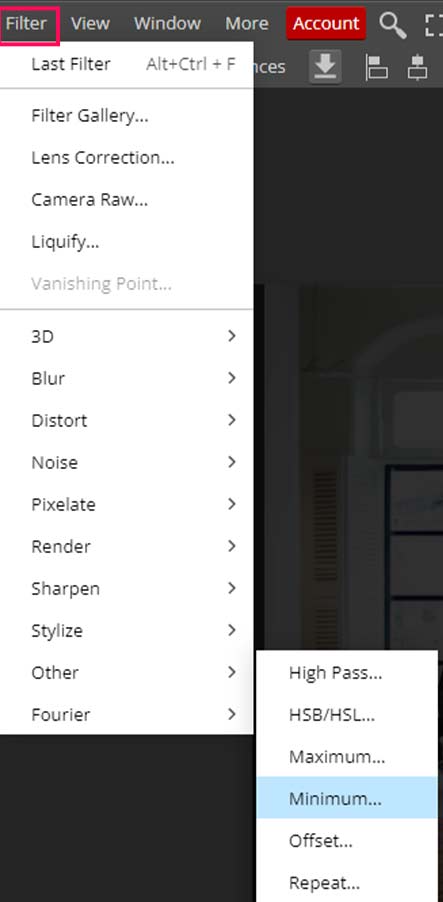
Move the slider toward the right until the white hallow disappears. Don’t take the slider too far because it will cut the important areas of the image, like ears and hair.
We have used a value of 2.4px in this case.
Resize Your Image
Resize your image to fit within the canvas by clicking on the Transform controls, and you will see a bounding box around the image, grab any point and drag your cursor to scale the image. Change the placement of the image as well.
Press Enter once you are happy with the scale and placement.
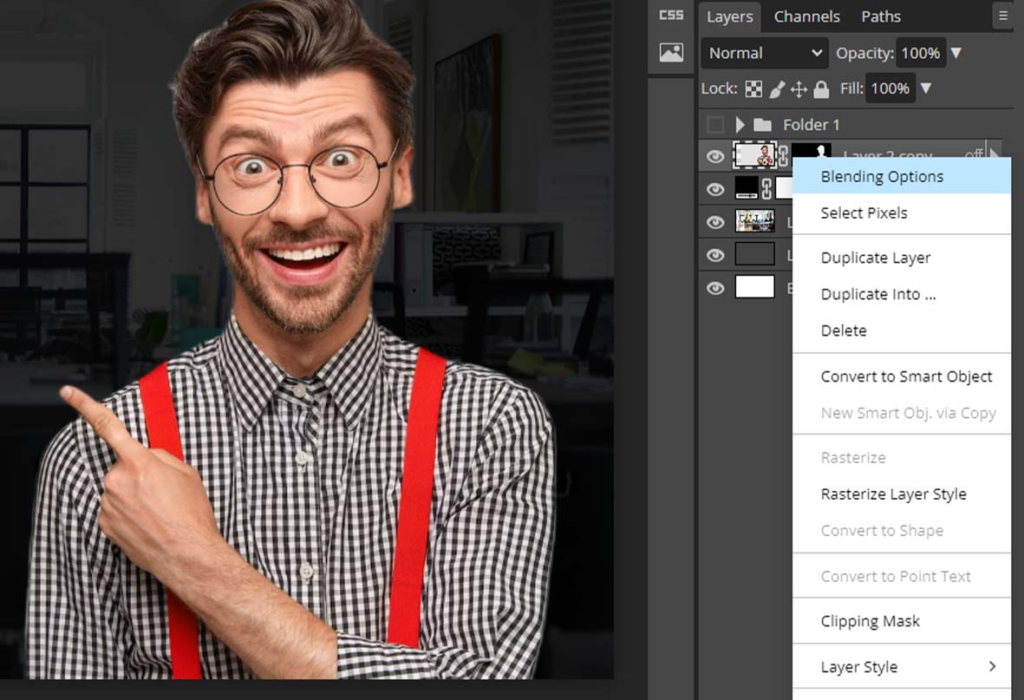
Add Glow To The Subject
Let’s take things a little further by adding glow to the subject. To add the glow, right-click on the subject layer and choose blending options.
Click on the outer glow and choose the color you like. We will go with blue color.
Keep the opacity at 100 and choose the size according to the image, we will choose 35.
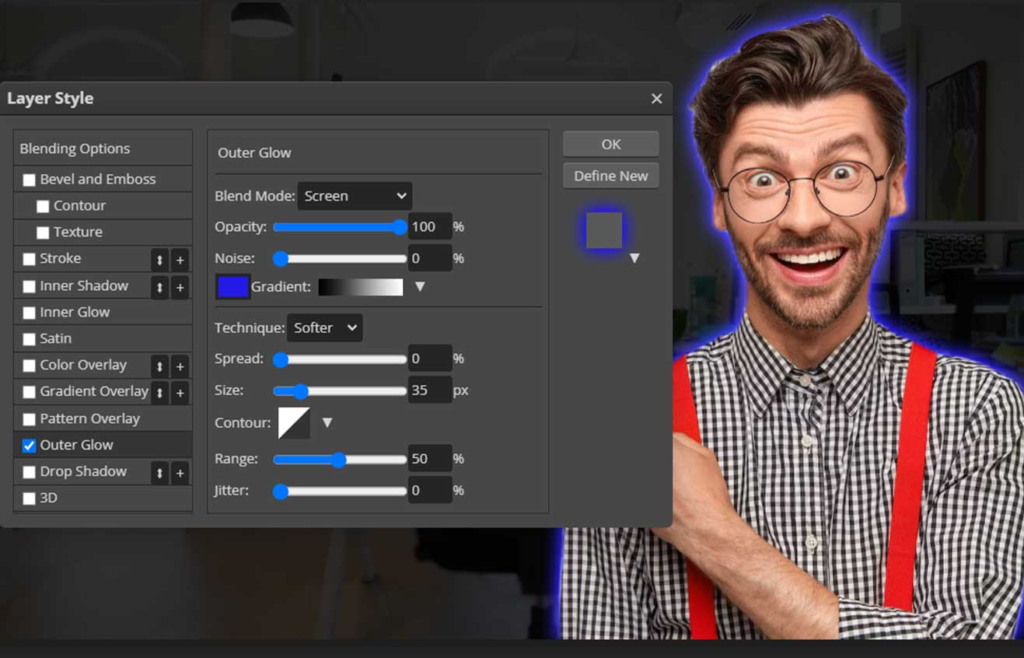
Now go to inner glow, choose the same color but decrease the opacity to 34, spread 39, and size 22.
Don’t change the blend mode if it’s on screen; if not, then change it to screen.
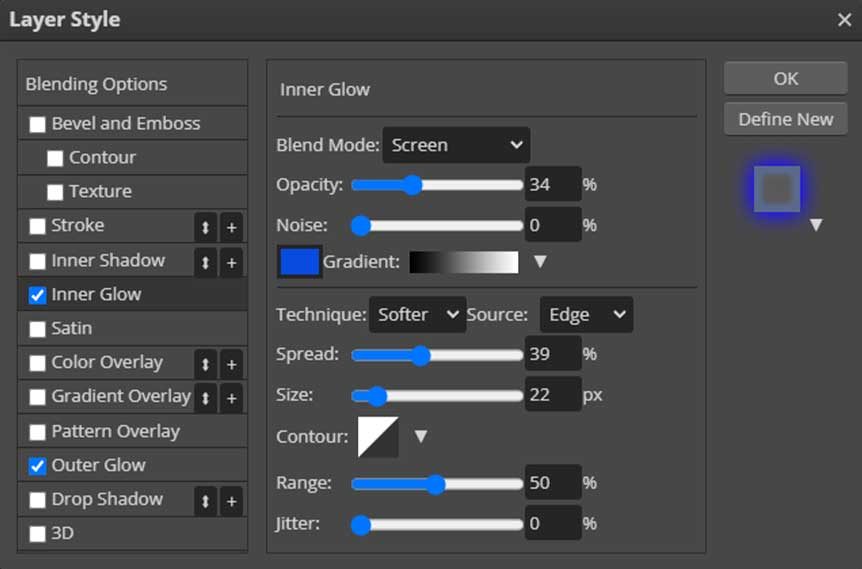
And now we have a nice glow around the subject.
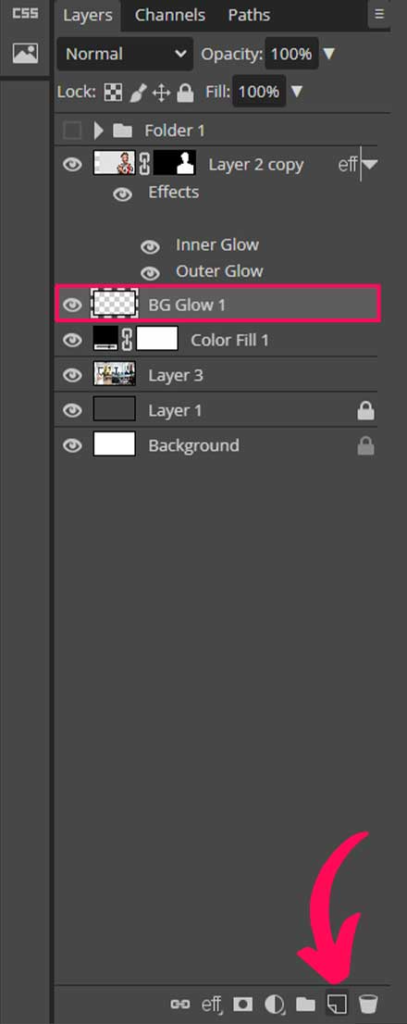
Add Effects To the Background
Now let’s stylize the background to make it look more professional.
Create a new layer by clicking on the new layer button at the bottom of the layers panel. Move the new layer below the subject layer.
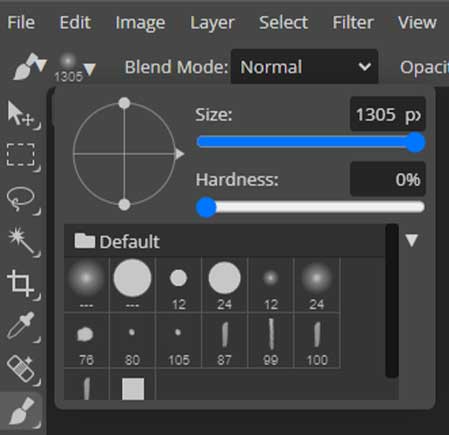
Now choose the brush tool by pressing B on the keyboard.
Make the hardness of the brush zero and size 1300.
The size of the brush may vary according to the size of the document.
Note: If you want a larger brush than 1000 px, use bracket keys [ ] to increase or decrease the brush size.
Choose the bright orange color and click on the layer once, and now there is a glow behind the subject.
To choose the color, click on the upper box and choose the color. (see the image below).

We are not done yet.
Create one more layer and place it above the first glow layer.
Now, choose a slightly brighter color, reduce the brush size, and click once. Now, there will be an even nicer glow.
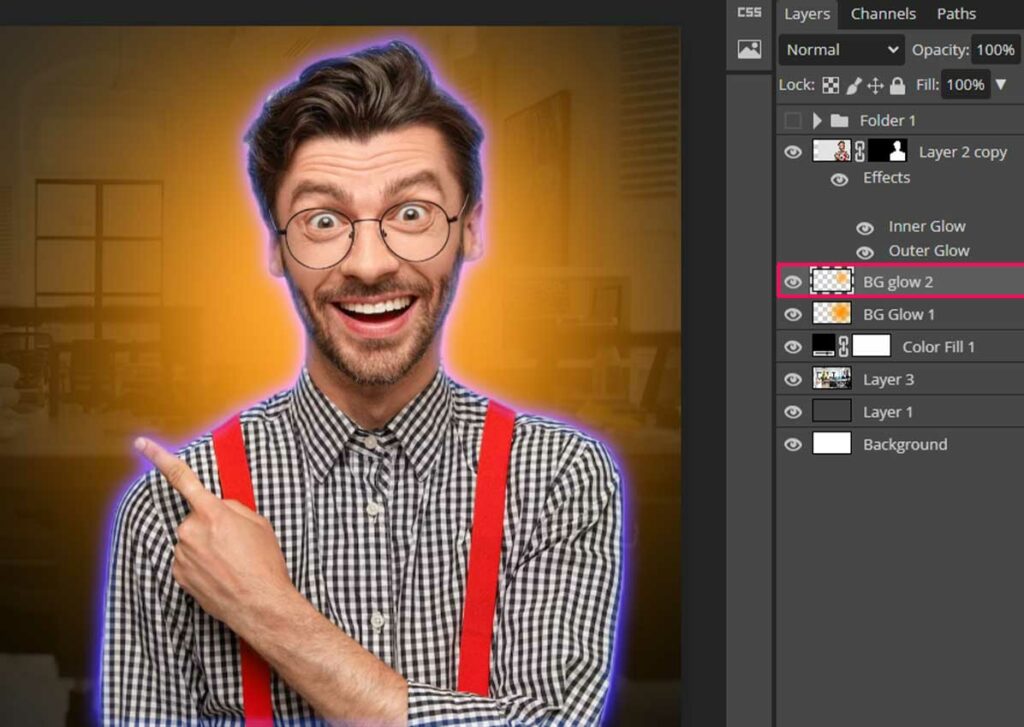
With the glow in the background and the glow on the subject, the subject is now standing out from the background.
Add the Text
Now the background and subject are ready, let’s add the text. Choose the Text tool by pressing T. Click and start writing, go back to the move tool, or click on the tick icon on the properties bar.
Write every word on a separate layer. It will be easier to edit and apply effects to the text.

Align and place the text you want.
You can move the text below the subject layer if you want to have a nice overly effect, as the finger is above the text (above image). Only do this if a large part of your text is not covered by the image.
As the text has been placed now, let’s add some effects to the text.
Tilt the text
Select all the text layers and activate the Free Transform tool by pressing Ctrl + Alt + T or Cmd + Option + T on the keyboard.
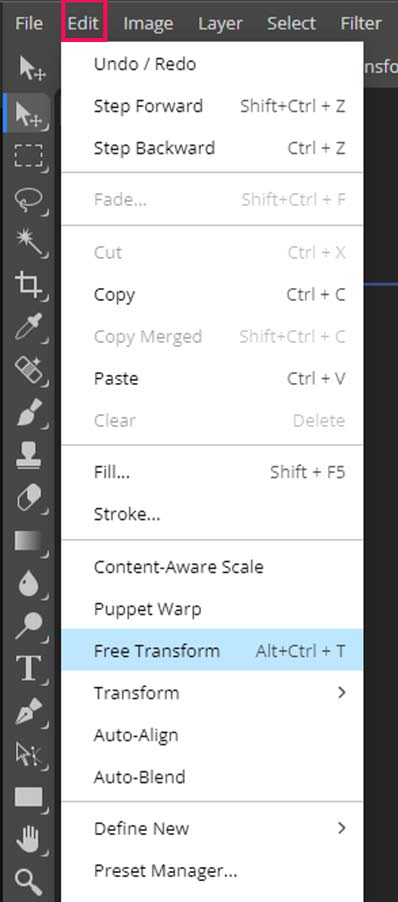
Now you will see a bounding box around the text layers.
Press Ctrl or Option Key, click on the middle point on the right side and drag upward. Drag until you have got the desired tilt effect.
Make It 3D
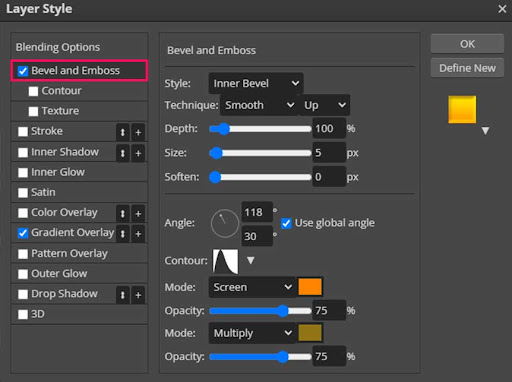
To give the text a 3d effect, right-click on any text layer (BUSINESS in this case) inside the layers panel and choose blending options.
First of all, apply the Gradient overly effect by clicking on the checkmark.

Click on the gradient box. Double-click on the two small boxes one by one and choose the colors. Click ok to apply the gradient.
Make sure to choose one darker color and one lighter color to have a nice effect, if you choose the same color on both boxes, there will be no gradient. Once the gradient is applied now, click on the bevel and emboss to apply a 3d effect.
Choose the colors and settings shown in the image below.
Now click on the drop shadow effect, and change the settings according to the image below. You can use your own settings but make sure the shadow looks good.
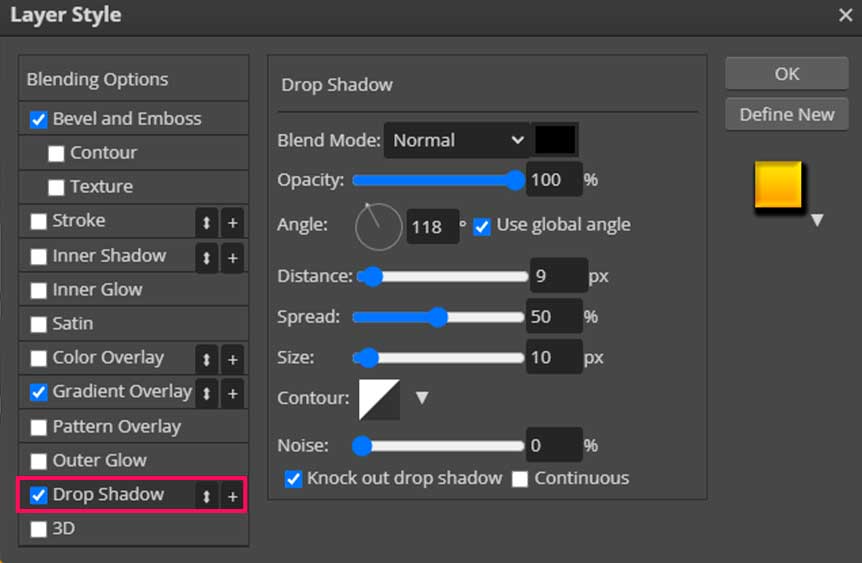
And click Ok, and you are good to go. Now we can apply the effects we have applied to the BUSINESS layer to other text layers.
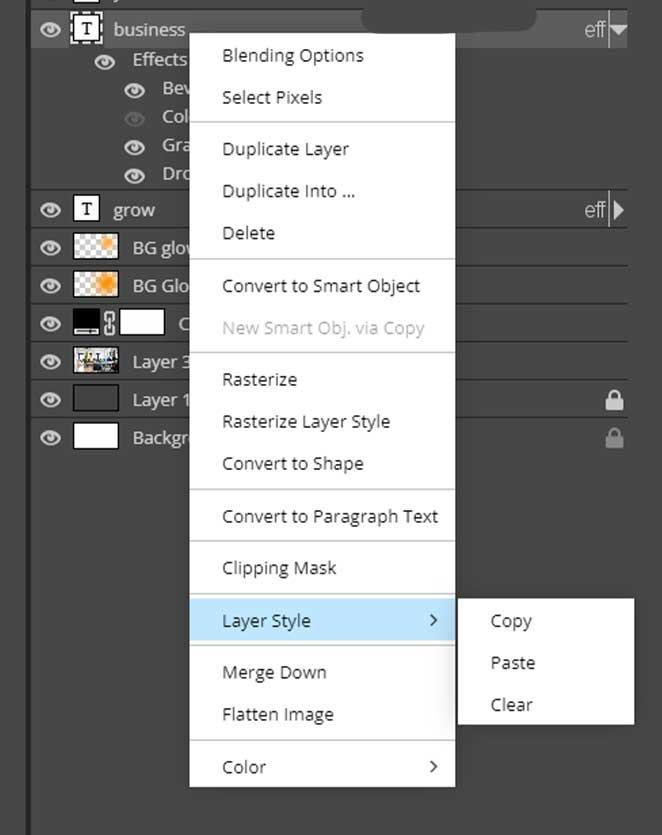
Right-click on the Business text layer > Layer Styles > Copy.
Now right-click on the layer on which you want to apply these layer styles. We will apply it to Grow, right click > layer styles > Paste.
And this is what the thumbnail looks like so far.

It looks pretty cool as it is, but we are gonna take it a little further.
Add Some more Graphics
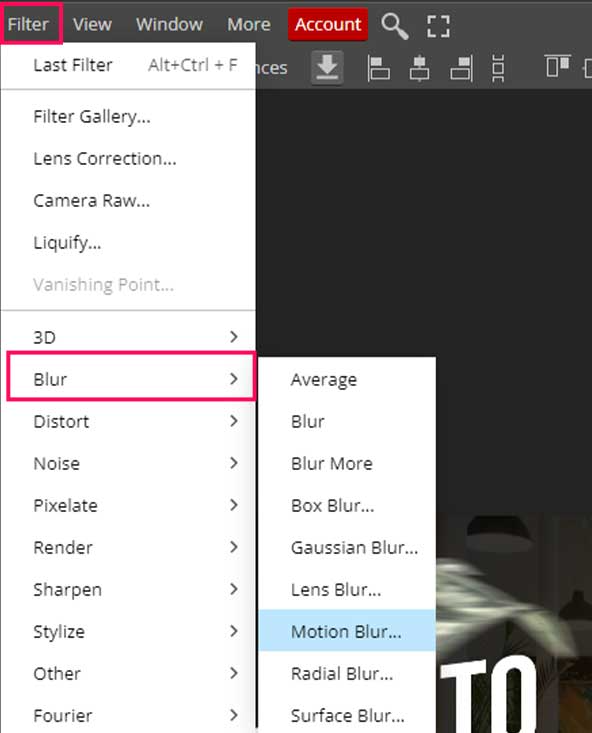
Let’s add some money and apply motion blur to give it a nice effect.
Find the image of paper currency, duplicate it a few times by pressing Ctrl + J or Cmd + J, and apply motion blur to it by going to Filter > Blur > Motion blur.
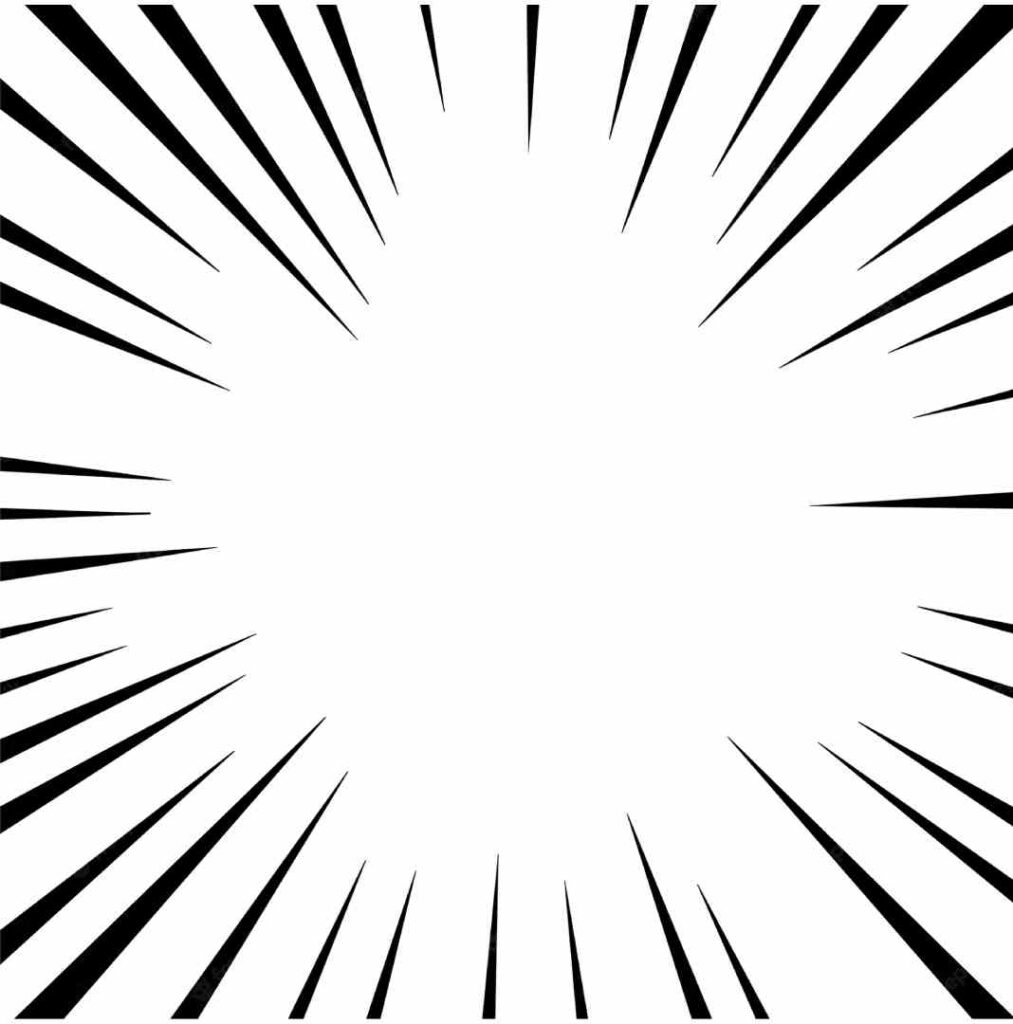
Focus Lines
Now let’s add focus lines to draw the viewer’s attention toward the text.
Keep focus lines layer behind the subject.
You can search for focus lines on websites like freepik.com.
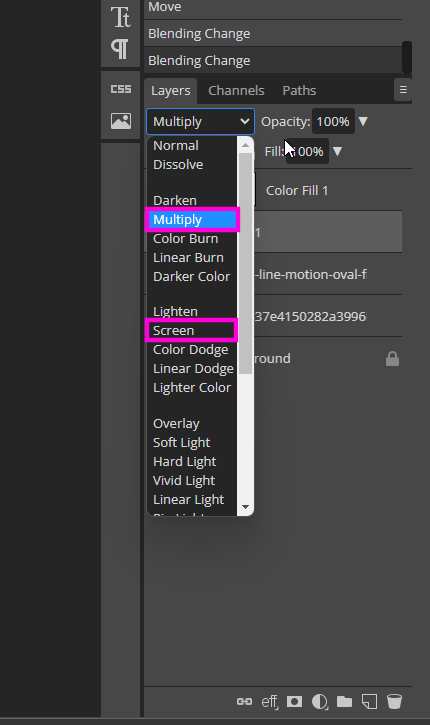
If focus lines have a white background, then change the blend mode to multiply. If the background is black, then change the blend mode to screen.
Export The Thumbnail
Go to File menu > Export As. Choose your settings and export the thumbnail.
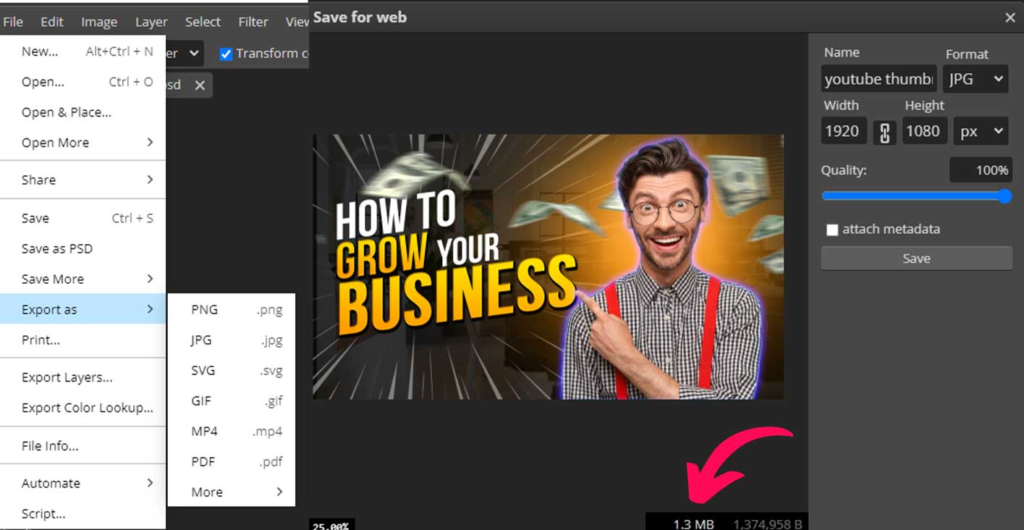
Click Save, and your thumbnail will be downloaded.
Pro Tip: Make sure the thumbnail size is less than 2 MB, otherwise, you cannot upload it to youtube.

Conclusion
Designing a YouTube thumbnail may seem a tough ask, but with the right tools and our guidance, it can be a fun and creative process.
Choose the right dimensions for the thumbnail, i.e., 1280*720 or 1920*1080. Gather the assets and images you want to use in the thumbnail; it will save you a lot of time.
Remove the background by using the Select Subject tool, and if your image has white hallow around it, use the minimum filter to get rid of it.
Apply gradient overly and choose one dark and one slightly lighter color for a professional and cool-looking effect. Also, add a bevel and emboss effect to give your text a 3d look.
Add some additional elements related to the title of the thumbnail, also use focus lines to draw attention toward the text.
By following the steps we have discussed in this guide, you’ll be able to create a professional-looking thumbnail that will attract viewers to your video.

Thanks for reading & feel free to check out more of our articles!
Expert Rating
Summary
Youtube thumbnails are a great way to attract more viewers on the videos. Creating thumbnail inside photopea take practice as you have to use multiple tools like selections, shapes, text etc. It will become easy with a little bit of practice but it has a lot of functionality and scalability.


