How to Resize an Image in Photopea
Image resizing is an essential skill you must know if you are a designer. Although there are many tools available for image resizing, in this post we will be focusing on how to resize an image in Photopea.
Although it is easy to resize an image with Photopea, it is important to use the right tools and techniques to save images from becoming blurry or pixelated. In this guide, we will be looking at the best methods you can use to resize an image on Photopea.
Difference Between Scaling, cropping, and resizing an Image
Resizing an image involves changing the dimensions of an image without applying a transformation to the original content.
What does scaling involve?
When working with raster images, it is important to note that scaling simply stretches an image to a smaller or larger size than the original. As a result, the resolution will not be adjusted according to the new size. That is why excessive scaling will cause an image to appear blurry or pixelated.
How about cropping?
Well, cropping involves the removal of unwanted outer areas from an image. The process involves the deletion of outer areas so as to improve framing and at times reduce image size. The main objective of cropping is to isolate or change the aspect ratio of an image.
What is resizing?
Resizing is all about changing the pixel information of an image. To reduce an image in size, unneeded pixels can be discarded. To increase an image in size, additional pixel information has to be added else it will appear pixelated.
How to Resize an Image in Photopea Like A Pro
Resizing an image in Photopea starts by creating the right layer.
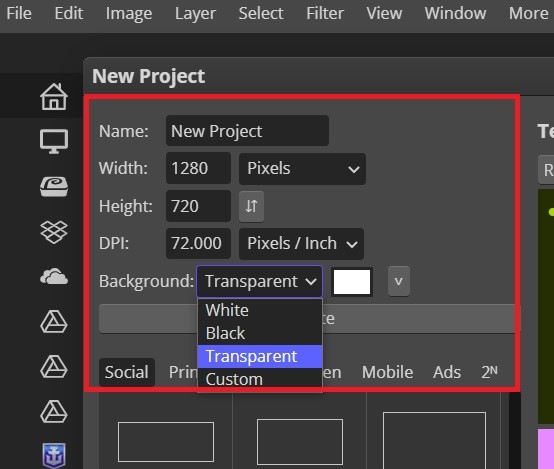
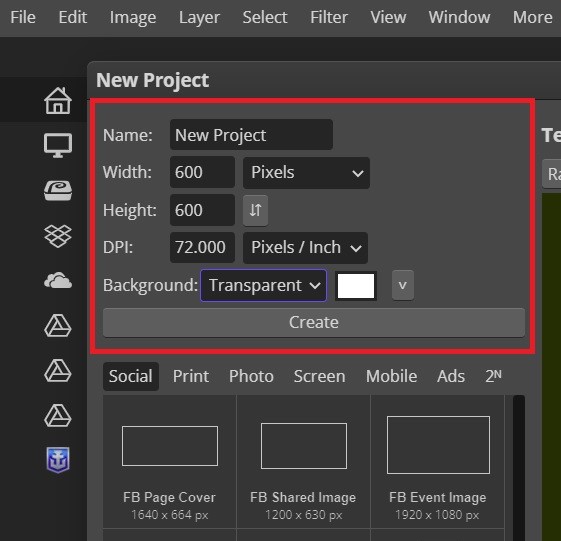
Step 1: When you open Photopea, you need to create a new project. Here are the steps you should follow:
- Press File from the top panel then select New.
- If you are using Windows, you can simply hold the ‘Alt + Ctrl + N’ to open a new project.
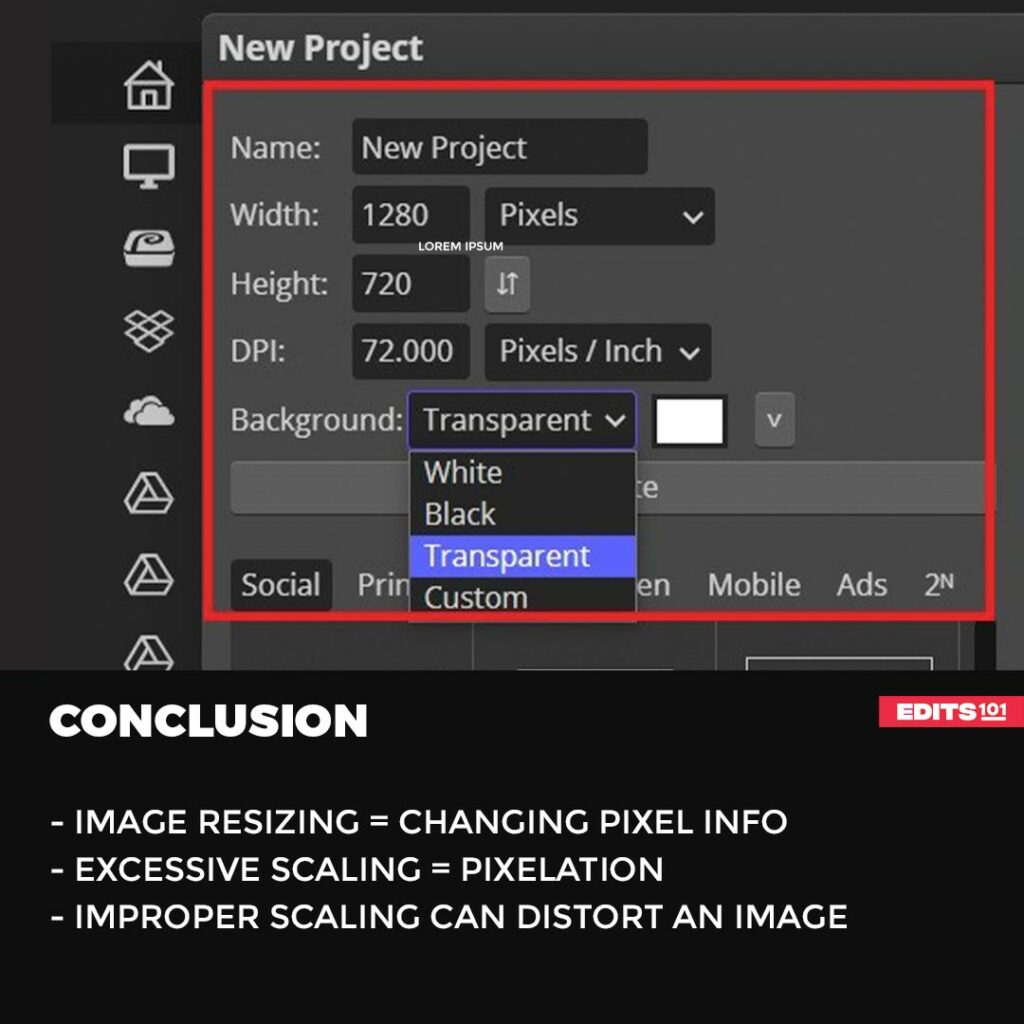
- When the new window pops up, do not click on Create just yet. You need to change the width and height parameters so that they match the size of the image you want.
- You then need to change the background to Transparent then click Create to load the layer.
Step 2: You now need to open the image you want. Follow these simple steps
- Go to File then click Open.
- Alternatively, you can simply press ‘Ctrl + O’.
- From the window that pops up, select the image you want and click Open.
- The image will load in a new tab.
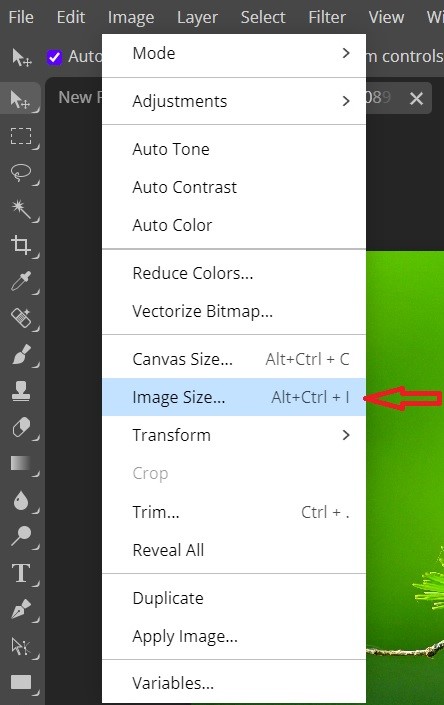
Step 3: From the tab with the image, go to Image and select Image Size.
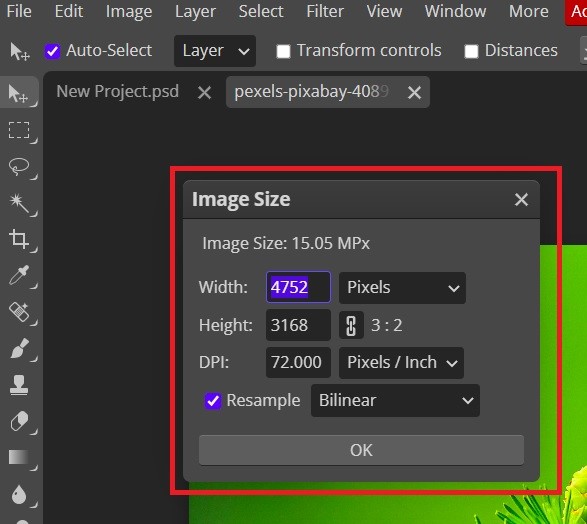
The popup window will show you the available modification options. Depending on what you want, you can either increase or decrease the width or height to achieve the desired image size then click OK.
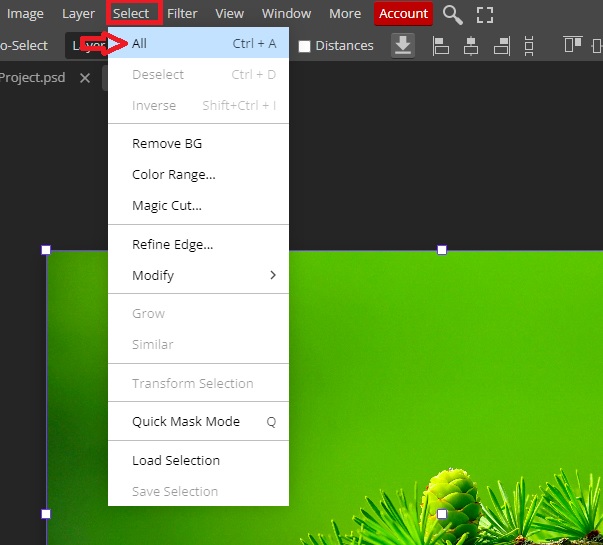
Step 4: You need to select the image so that you can move it to the tab with the transparent layer. To do so, go to the top panel and click Select then click on All.
You then need to go back to the top panel and press Edit and click Copy. Once that is done, move to the first tab, select Edit, and then click Paste.
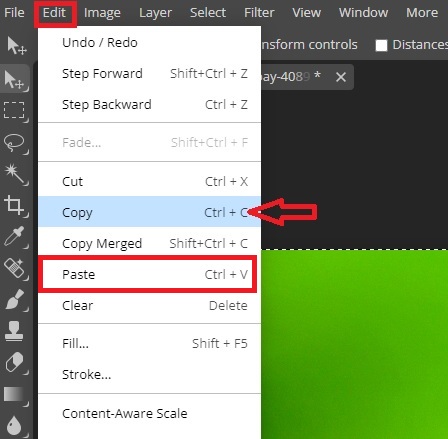
The alternative is to use the Move Tool to drag the image from the image tab to the tab with the transparent layer.
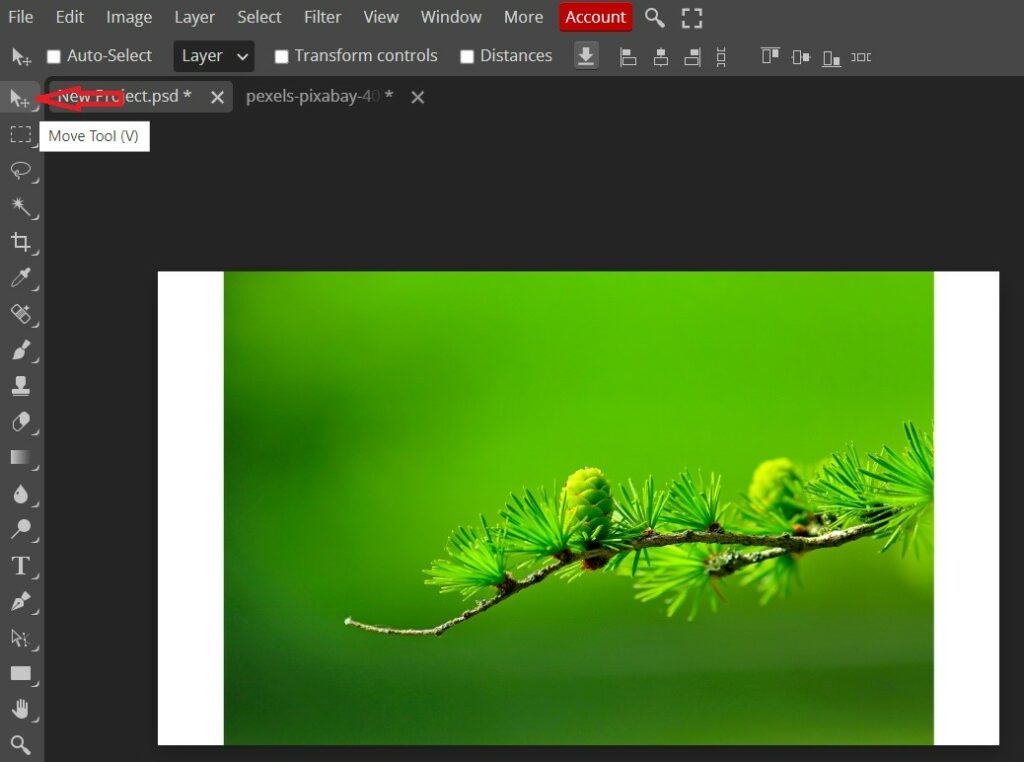
Step 5: After pasting the image on the first tab, select the Move tool and use it to align the image accordingly.
Once you are done aligning the image, the next step is to export it. Go to File then hover your mouse over Export As. Photopea offers more than a dozen export options.
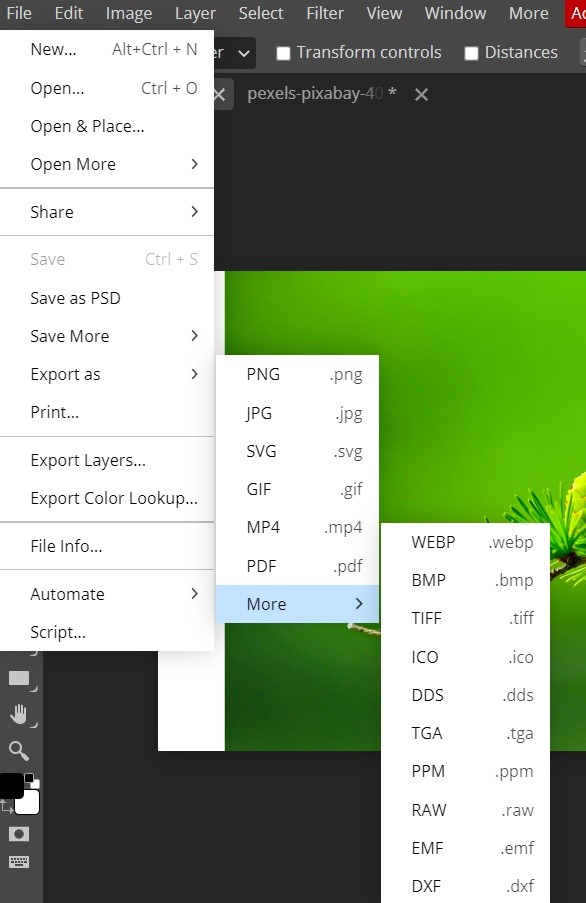
Your first instinct will probably be to export the image as JPG because JPG compresses the image further. The problem with the JPG file format is that the transparent part, the part that the image you pasted did not cover, will turn black once you export the image.
To preserve the image quality and keep it from turning black on the sides, you should go with the PNG option.
How to Resize an Image to a Specific Size in Photopea
At times all that you need is to resize an image to be of specific dimensions. For example, when uploading images to your website, you may need the images to be 600 pixels by 600 pixels.
Normal images are not a perfect square and even when they are, the images may have a height and width that is bigger or smaller than what you need.
Adjusting an image to a specific size follows the same steps as the ones we looked at earlier.
Step 1: The first step is to create a new project with the same height and width you want your image to be. You don’t need to make the background transparent because you may need white space to make the image a perfect square.
Step 2: Open up the image you wish to adjust to a specific height. To do so, go to File then click Open and select your preferred image. The image will open in a new tab.
Step 3: Once the image is loaded, go to Edit and select Copy.
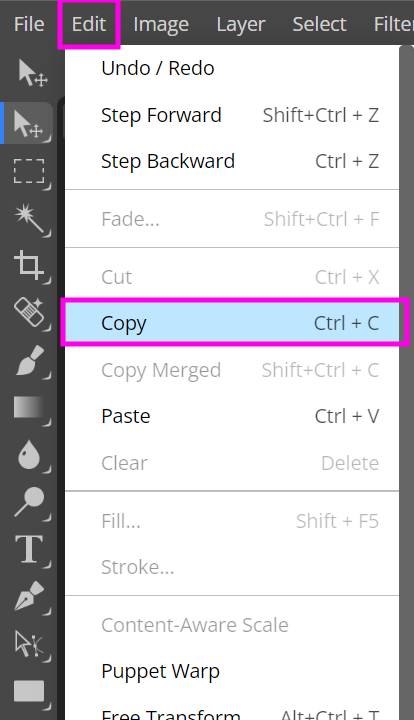
Move to the empty tab, select Edit, and click Paste.
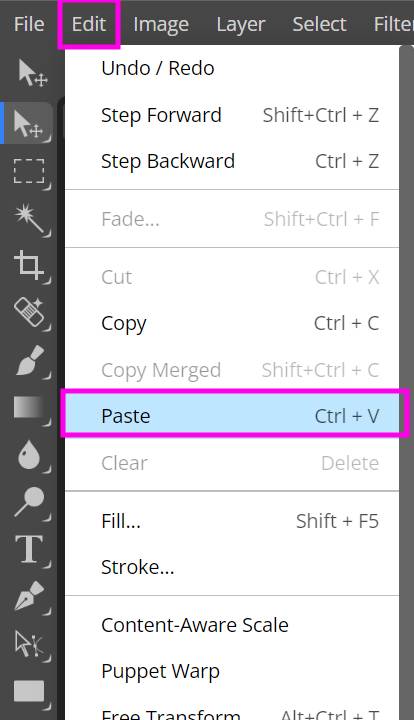
Just like before, you can use the Move Tool to drag the image to the first tab.
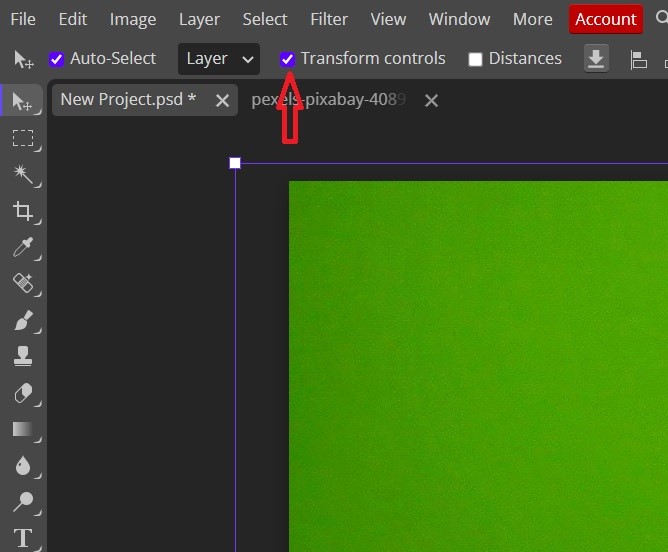
Step 4: The image will be bigger than the document you created. So, you will have to scale it down or up to fit. To do this, start by clicking on the button next to Transform Controls. That will help you see the dimensions of the image and the control points.
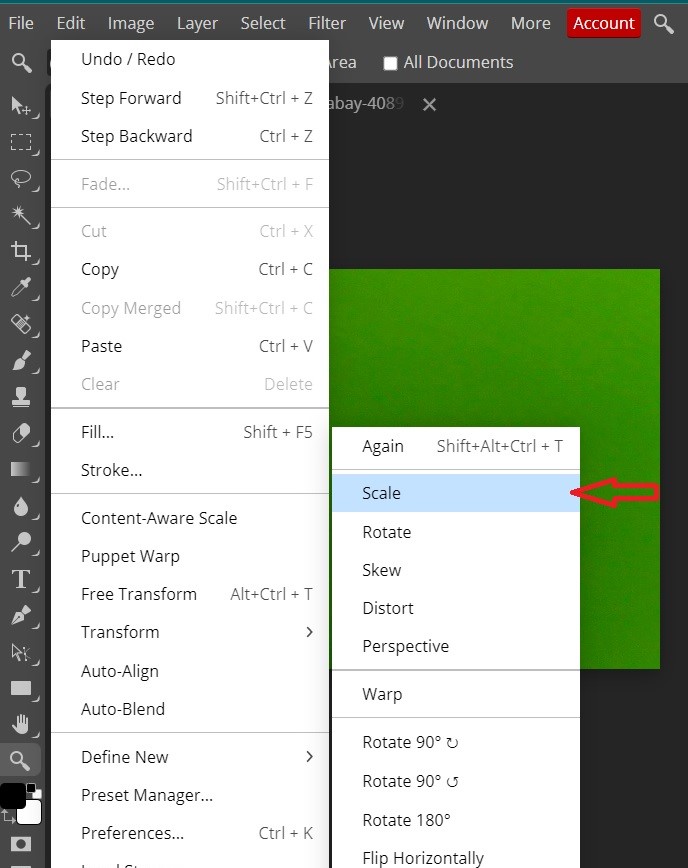
Alternatively, you can go to Edit from the top panel then move down to Transform and select Scale.
Step 5: To resize the image, you will first need to use the zoom tool to zoom the image out until you see the dimensions of the image.
You can also zoom out by holding the Ctrl or Cmd key and then hitting the Minus key on the keyboard. To zoom in, hold the Ctrl or Cmd key then hit the Plus key on your keyboard.
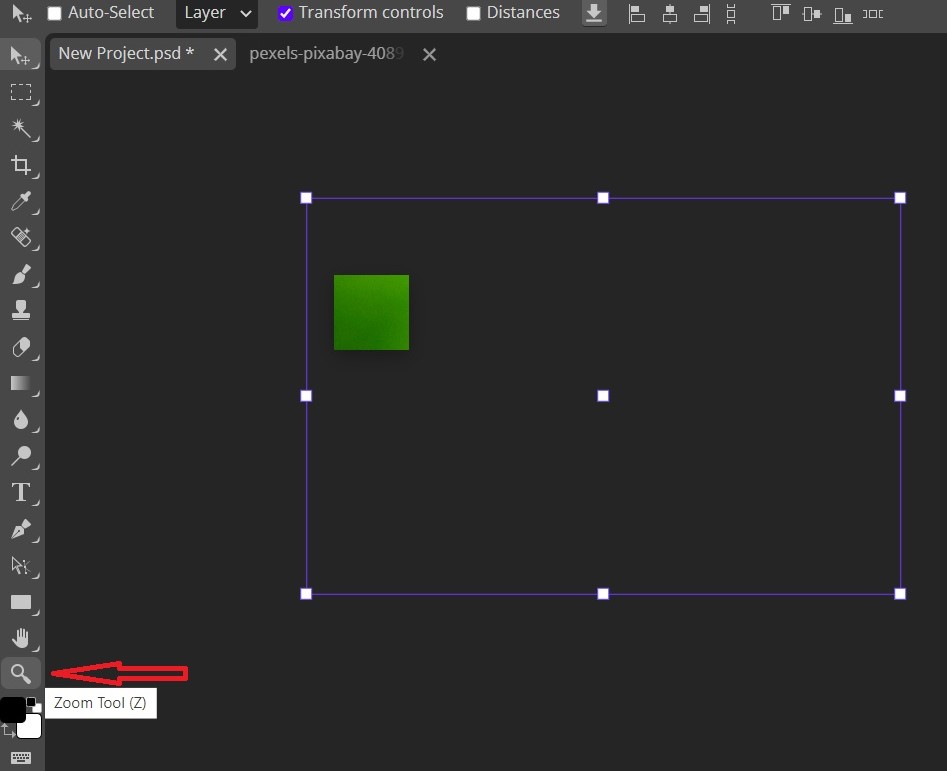
Step 6: Now that you can see all the points of the image, grab any of the corner points and move that point inwards to scale the image.
With the Transform Controls active, you will still be able to see the image even if it falls outside the layer. Use the Move Tool to position it into the layer then adjust until it fits.
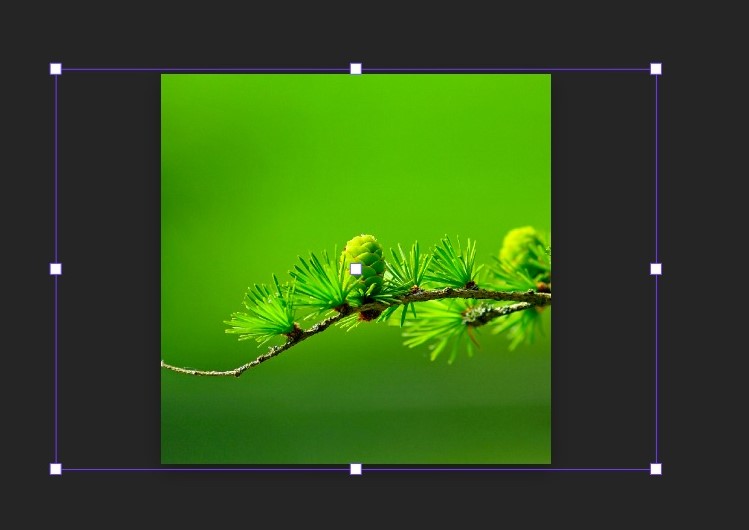
If the picture was not a square, it will not fit in the layer. If you can sacrifice some areas, you can export the image as it is.
If you want the entire picture to fit, you need to scale it until it fits in the layer then export it. For this option to work when exporting as PNG, make sure the background is not transparent and is of the most suitable color.
How to Resize an Image Without Stretching it in Photopea
Using regular scaling manipulates all the pixels in an image. This makes it hard to scale a large image to fit a specific size without messing up the main subject. Regular scaling in Photopea is done by grabbing and moving the control points while holding the shift key.

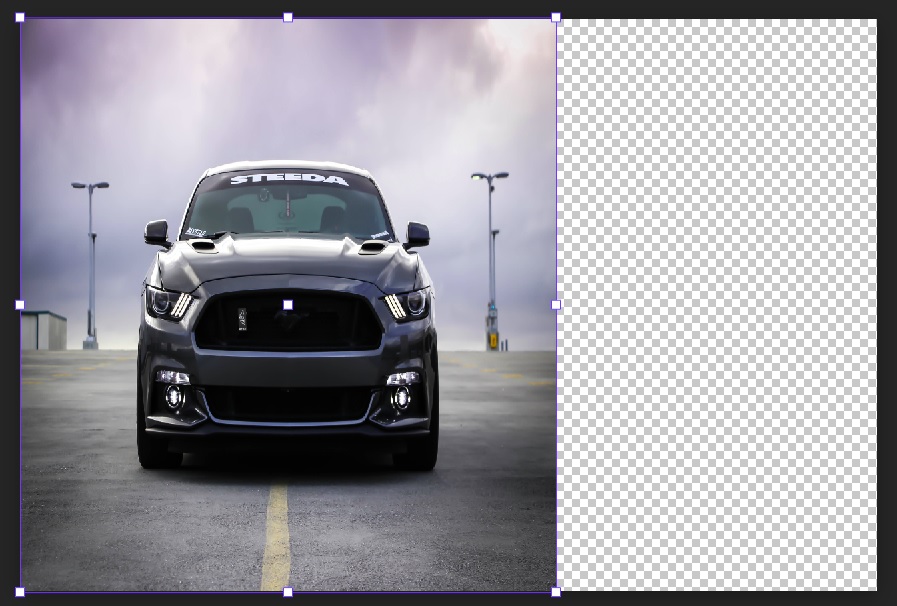
If you want a larger image to fit a specific size without distorting the subject, you will need to use the Content-Aware Scale. Here are the steps you should follow.
Step 1: Open Image in Photopea
Open the image you want to resize by going to File >> Open. Then select the image you want from your computer.
Step 2: Activate the Content-Aware Scale.
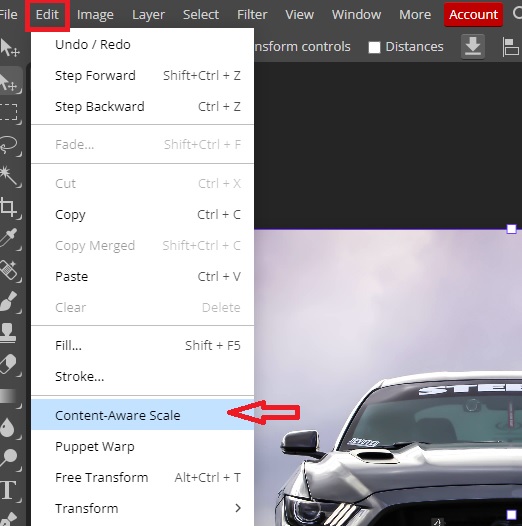
This tool helps scale an image by only affecting the areas that are not important.
Step 3: Select Subject
When you try to resize the image with the Content-Aware Scale activated, the image will still be distorted. To fix this issue, you need to select and save the selection of the subject.
Ensure the layer you are working on is selected from the Layers Panel then select any selection tool. For this, will use the Lasso Select tool.
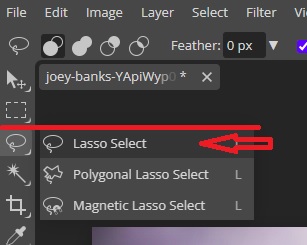
With the Lasso Select tool, make a selection around the subject. The selection doesn’t need to be perfect in this case. If your image doesn’t have a uniform background then you may need to make a perfect selection around the subject.

Step 4: Save the Selection
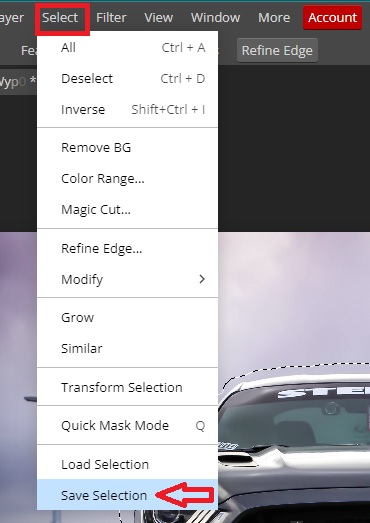
Next, we need to save the selection by going to the Select menu and clicking on Save Selection.
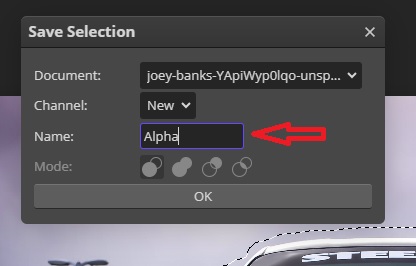
From the window that pops up, give the selection any name you want and press OK.
Once the selection is saved, press Ctrl (Command in Mac) + D to deselect.
Step 5: Select the Content-Aware Scale again
Go to Edit >> Content-Aware Scale
This time, there is a new Option Bar right below the Menu Bar. Click on the drop-down next to Protect and select your saved selection. In our case, we named our selection Alpha.

Step 6: Scale the Image
When you hold Shift and scale the image, you will be affecting all the other pixels apart for your Saved Selection.
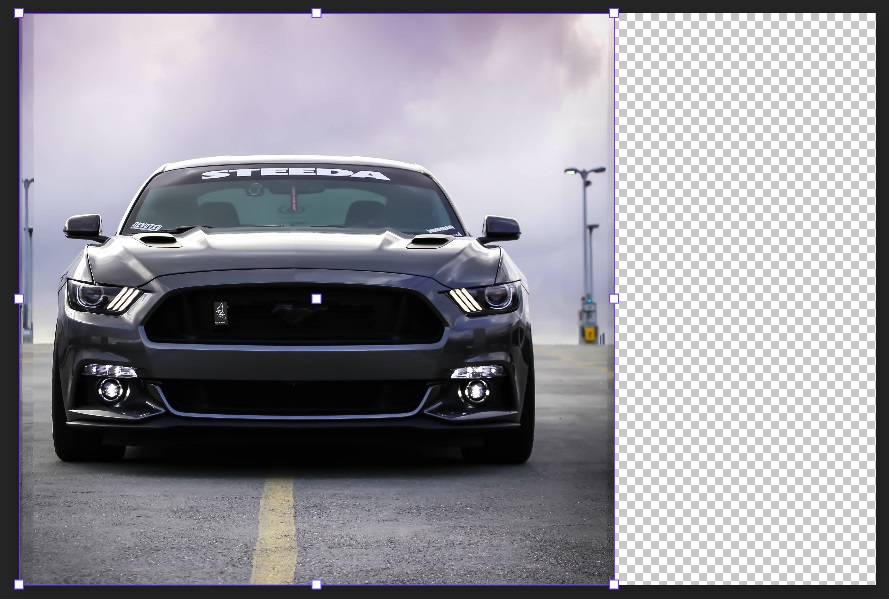
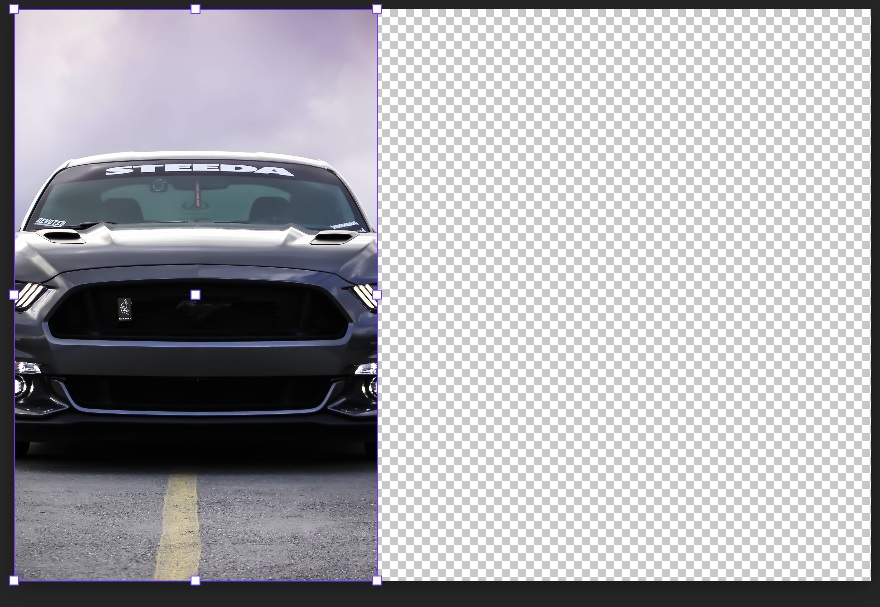
Now you can scale your image to fit anywhere without distorting it.
Conclusion
As you can see, there are different ways of resizing an image using Photopea. You can use the image size in the edit menu to resize the image, then copy and paste the resized image to the original document.
You can also resize an image by creating a document of the same size and importing the image to that document, scaling the image according to the document, and then copying and pasting the image into the original document.
Now create a selection around the main subject, save that selection, and then go to the content aware scale. Load the saved selection and then resize the image without stretching the subject.
Following the aforementioned steps will help you resize just any photo. Be careful not to distort the image especially when scaling up or down.
Thanks for reading & feel free to check out more of our articles!
Author Rating
Overall Rating
Summary
Learning to resize an image in Photopea can be helpful for various purposes, such as optimizing images for web, creating thumbnails, or fitting images into specific dimensions. It is a functional and scalable feature that offers precise control over image dimensions, aspect ratios, and resolution, making it a versatile tool.

