
Image cropping in photopea can be overwhelming sometimes because there is a mixup between image cropping and document cropping, image resizing, and image cropping.
We’ll Cover the difference between image resizing and cropping, how to crop a single layer within a document & more.
In this comprehensive guide, we will cover everything you need to know about image cropping in photopea.
What Is The Difference Between Image Resizing And Image Cropping?
Image resizing is the process of changing the size or dimensions of an existing image in order to match a certain requirement. It can be used for either scaling up or scaling down an image.
On the other hand, cropping refers to cutting out a section from the original image, thus reducing its size and leaving out any unwanted areas.
It is often used to optimize the composition of a picture by removing distracting elements that may exist on the edges.
How To Crop A Single Image Layer In Photopea?
In this section, we will talk all about how to crop a single layer. There are different ways to crop an image in photopea, we will talk about all of them. We cannot use the crop tool directly because it will crop the entire document.
Crop the Image Using Selection Tools
We will be using the rectangle select and ellipse select tools to crop a single image layer.
This process is not the easiest of all, but when you know how to use this method, you can use it in many ways to get creative.
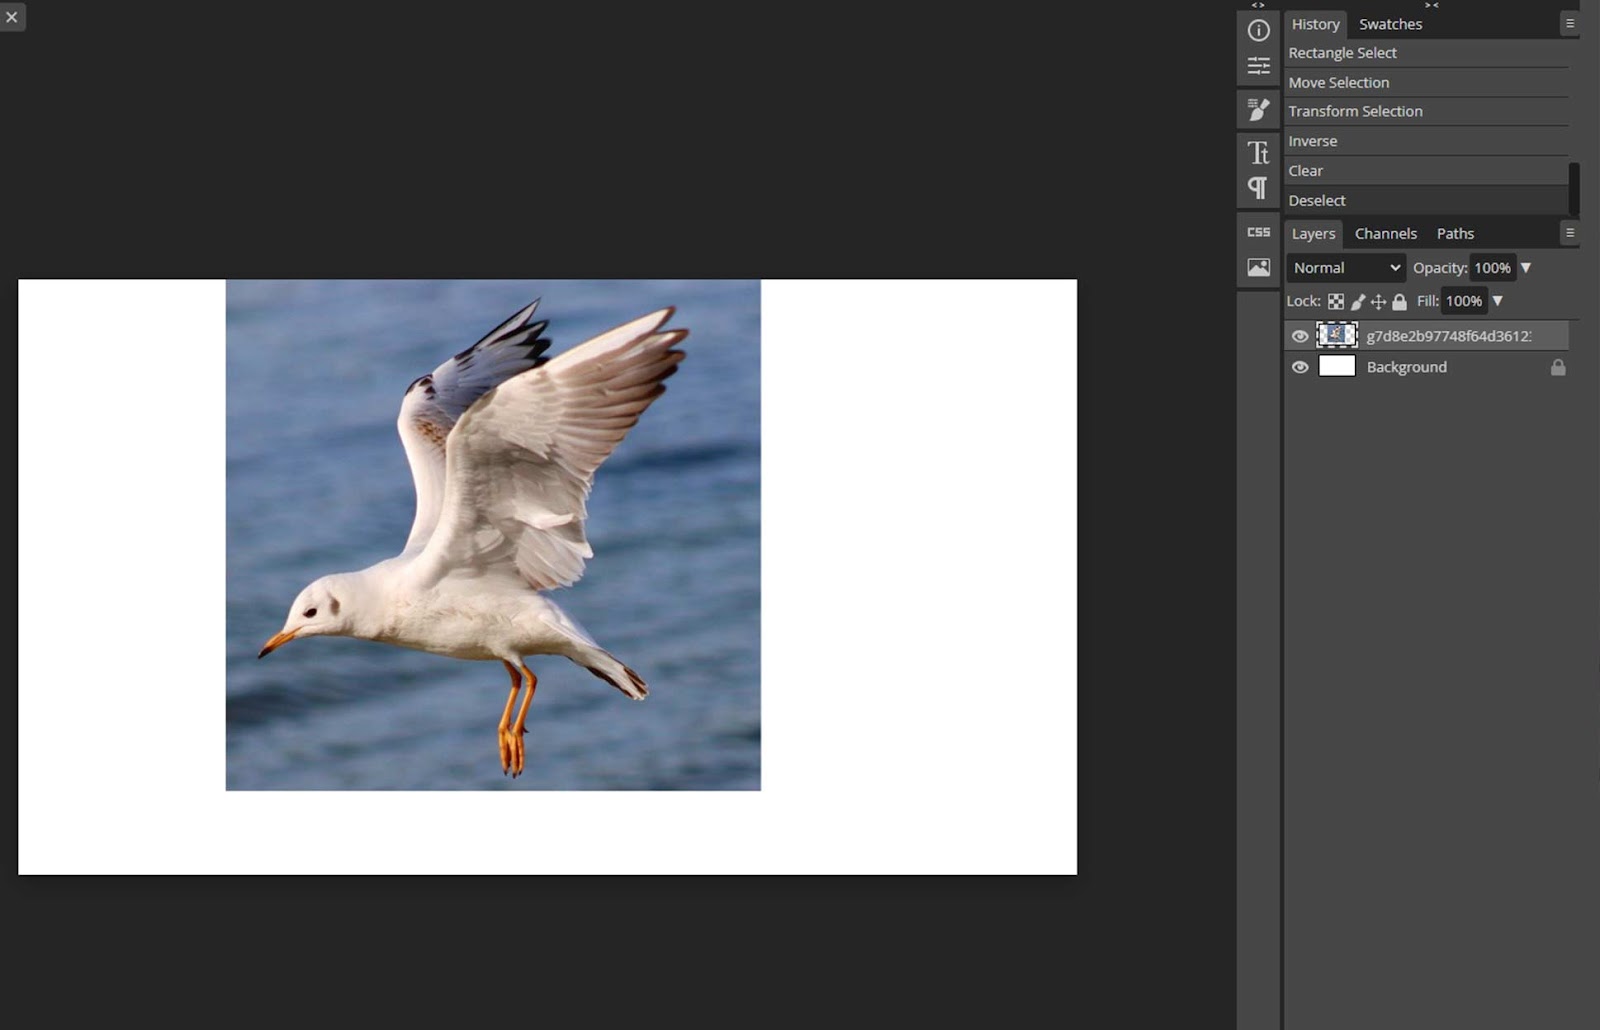
- Select the rectangular or ellipse select and draw the selection around the part of the image you want to keep.

- Press shift if you want your selection to be a perfect square or circle.

- Once the selection is created, now click on the layer mask icon to create a mask.

If the area you want to keep is cropped and vice versa then select the mask and press ctrl + I or CMD + I on the keyboard, and everything will be back to normal.

Another way to crop an image through selection tools is
- Rasterize the image first if it is a smart object, otherwise this method might not work.

- Make the selection using the method above.
- Once the selection is created, press ctrl + Shift + I or CMD + shift + I on the keyboard, or go to the selection menu and choose inverse.

- Once the selection have been inversed, the area you want to remove will be selected, don’t forget to select the layer from the layers panel. Then simply press delete and your image is cropped.
This method will only delete the pixel inside the document, not outside of the document. So scale down the image to fit the canvas and then crop it.
Cropping the Image By Clipping Mask
In this method, we will be using shapes and clipping masks to crop the image in any dimensions you want. To use this method, you only need a shape layer and an image layer you want to crop.
This a non destructive crop method (sort of), you can edit your crop but before the final step.
- Choose the shape tool, you can use any shape you want, but we recommend using a rectangle or a circle.
- Draw the shape over the area of the image you want to keep. Use the shift key to draw the perfect shape.

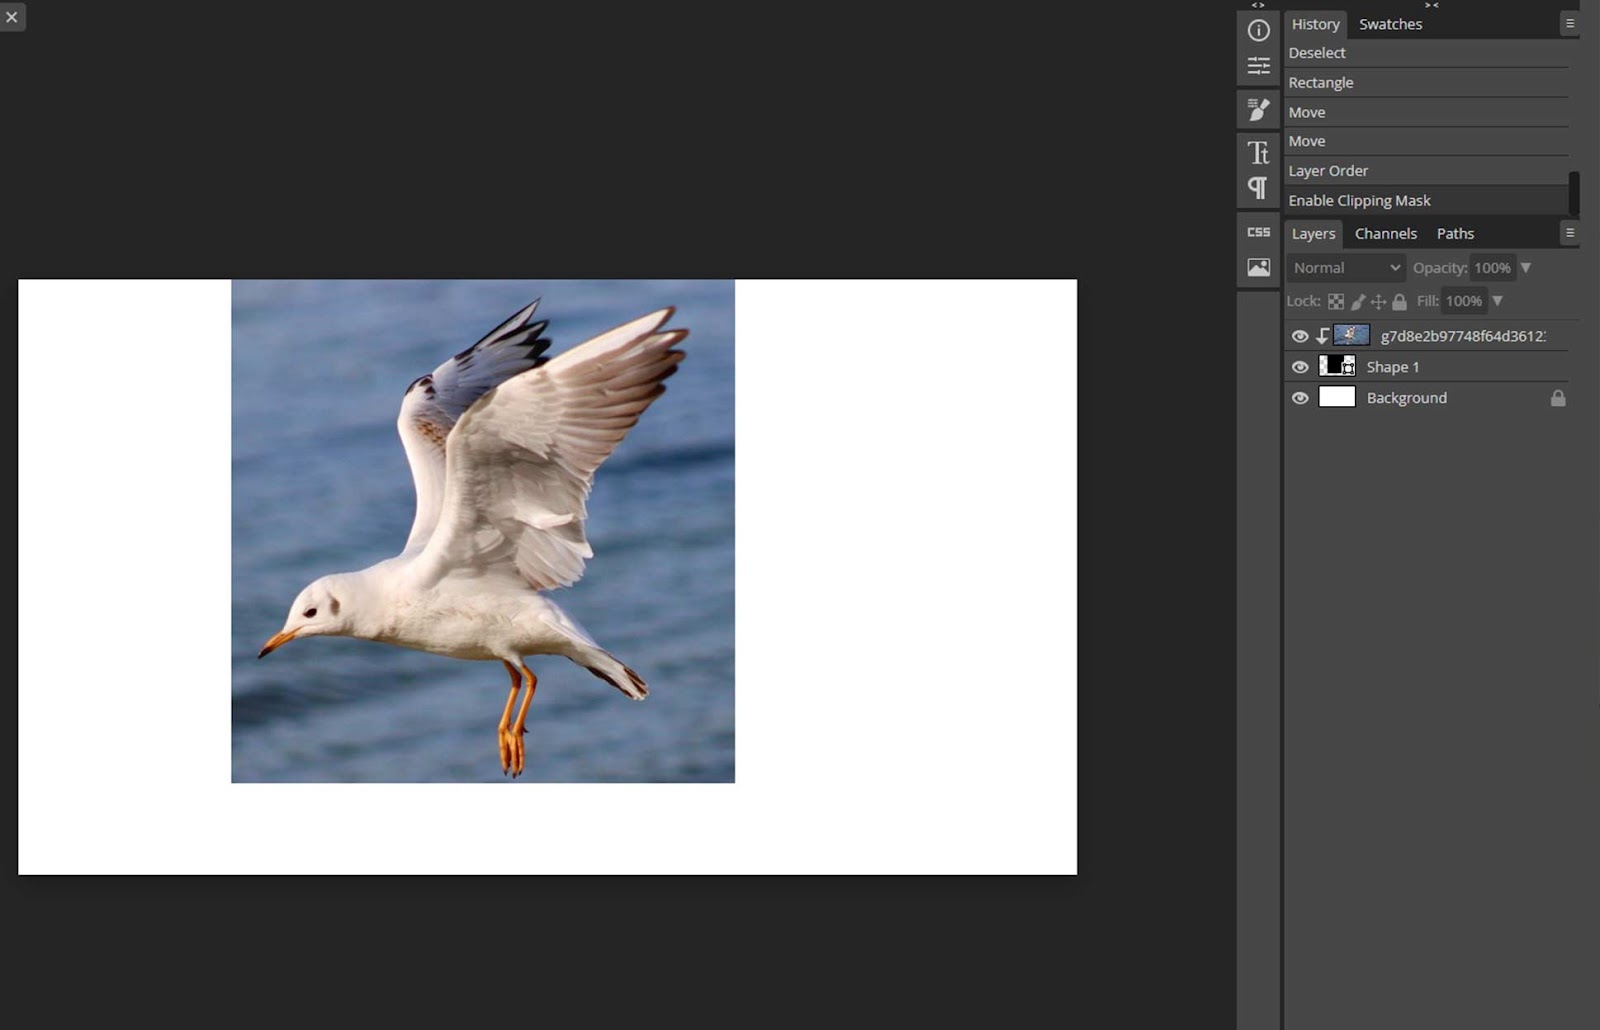
- Once you are happy with the shape, move the image layer over the shaper layer in the layers panel.

- Dont move the image inside the document or canvas.
- Now the image is over the shape layer, you might not see the shape layer, but dont worry, right-click and choose a clipping mask.

- And there you have it, your image is cropped, you can edit this crop, simply select the image layer and move it.
Now the final step, make the changes you want to make. After this step, you won’t be able to edit the crop.
- Select the image and shape layer from the layers panel. To select the images, click on the image layer, press the ctrl or Cmd key on the keyboard,d and then click on the second layer but keep pressing the ctrl or cmd key.
- Once both layers are selected, let go of the ctrl or cmd key.
- Now press ctrl + E or Cmd + E on the keyboard or right click and choose merger layers.

- Now you are left with one layer, and your image is cropped.
You can also make the group of both layers to keep them editable, but with this method, you have to be careful. Move them together otherwise, you will mess up the crop. That is why merging the layers is the better option.
Cropping the Image Through Smart Object.
This method allows you to crop your single image layer outside of your canvas.
Keep in mind that this method is a destructive crop method, you cannot undo it once you have saved the smart object, so decide what you want to do before starting the crop.
- Import the image layer you want to crop and right click on it in the layers panel, and then choose convert to smart object.

- Once the image is converted to a smart object, double click on the thumbnail of the image.

- A new window will open, and you will see only one image you double clicked on.

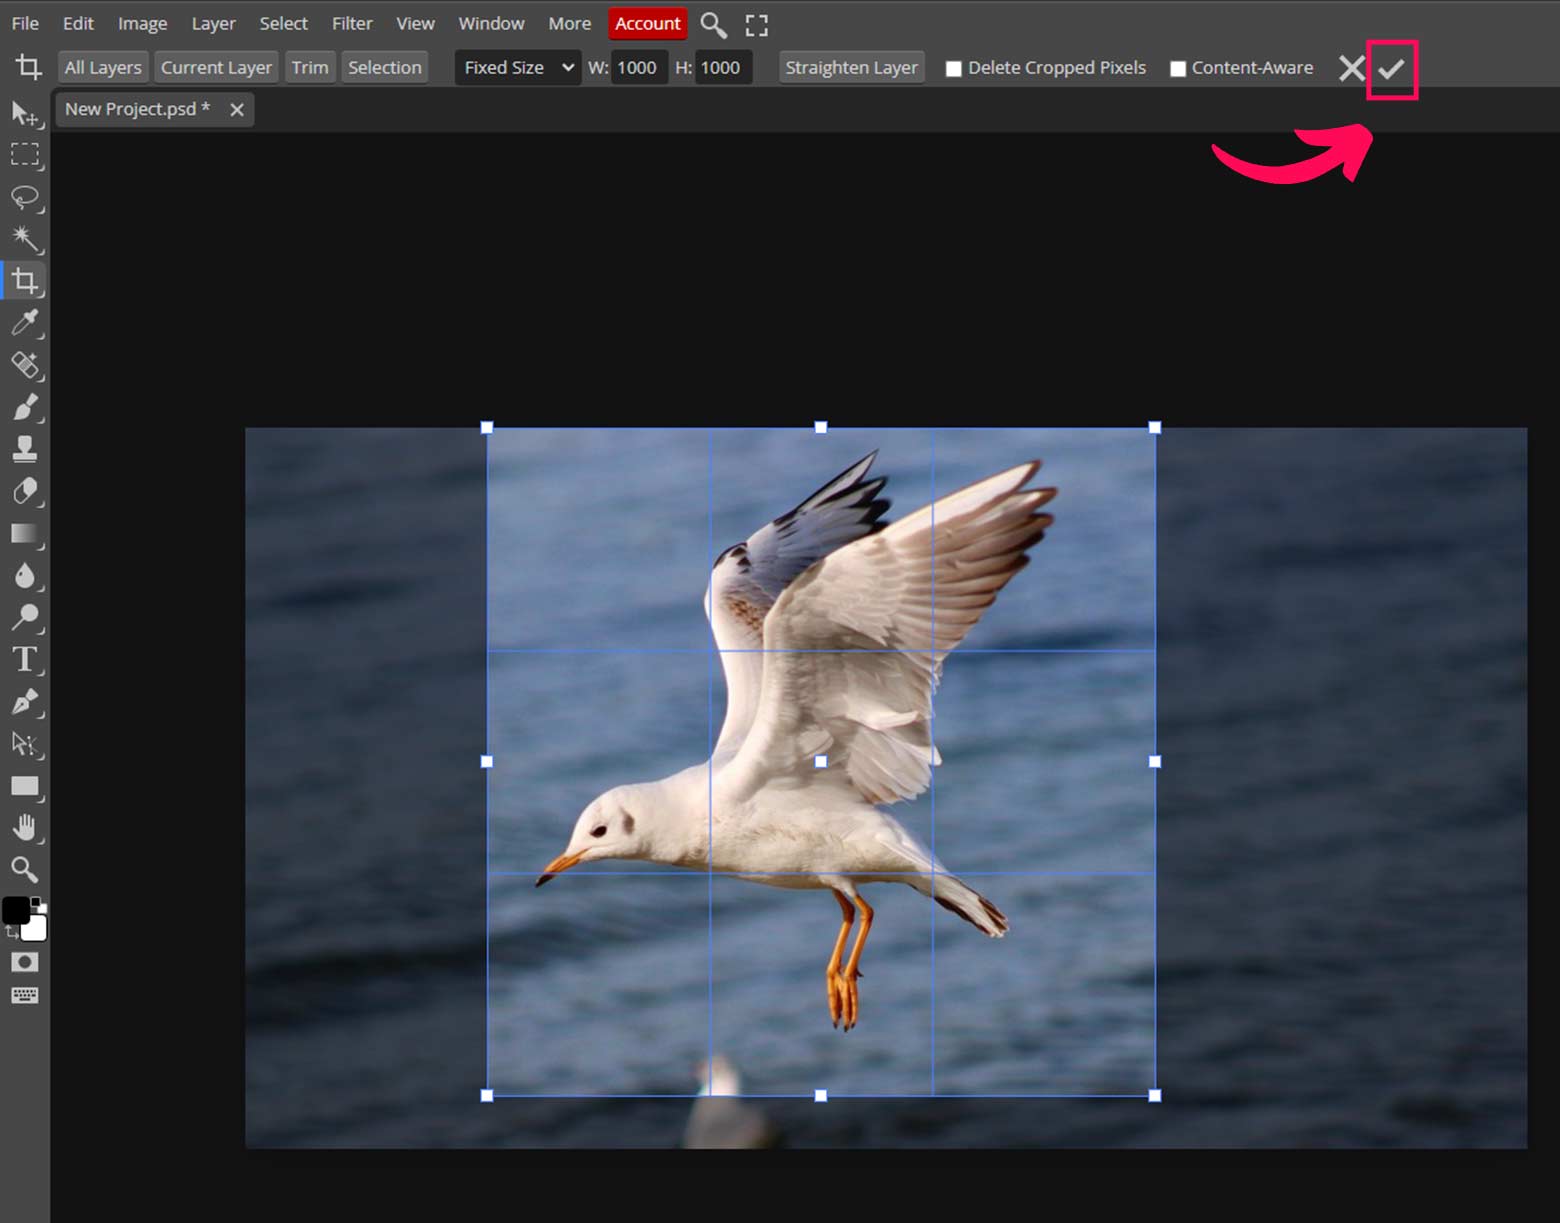
- Now choose the crop tool from tools bar or just press C key on your keyboard.
- The crop tool is now activated, and settings will appear on the settings bar below the menu bar.
You will get 3 options, Free crop, Fixed ratio, and Fixed size.
- Free crop allows you to draw the selection of your choice by clicking and dragging.
- Fixed ratios allow you to write the exact ratio you want to crop your image to. Like 1*1, 2*2 or 16*9.
- In fixed size, you can write down the size in pixels according to your requirements. For example, 300*300, 1080*1080, or 1920*1080.

Choose the method that suits you well. Draw the selection or enter the values, and once happy with the selection, click on the tick icon and press ctrl + S or Cmd + s.

- Now go back to the main document, and your image is cropped.

How To Crop The Document In Photopea?
Here’s the thing, if you crop the document, everything on the canvas will be cropped, including all the layers of image, text, or any other kind of layer.
So if you dont want to crop everything, then refer to the above methods of cropping a single layer.
- Now choose the crop tool from tools bar or just press C key on your keyboard.
- The crop tool is now activated, and settings will appear on the settings bar below the menu bar.

Options To Decide The Crop Area
You will get the following options for deciding the crop area.
All layers
This option will mark the crop area according to all the layers, it will take the dimensions of the largest layer and mark the crop area accordingly.
Current layer
If you select a layer and then choose, the option current layer, then the crop area will be marked according to the dimensions of the currently selected layer.
Trim
The trim option will mark the crop area according to the document dimensions.
Selection
If you create a selection and choose the selection option, the crop area will be marked according to the selection.
Free crop, Fixed ratio, Fixed size.
- Free crop allows you to draw the selection of your choice by clicking and dragging.
- The fixed ratio allows you to write the exact ratio you want to crop your image to. Like 1*1, 2*2 or 16*9.
- In fixed size, you can write down the size in pixels according to your requirements. For example, 300*300, 1080*1080, or 1920*1080.
Delete Cropped Pixels
Once you Click ok after choosing this option, the areas outside of the crop will be deleted.
Content Aware
If there are empty areas in the image, they will be filled with the help of content aware tool.
We dont recommend choosing this option, as it will slow down photopea quite a lot and will not give you the best results.

Crop The Document
Now you have decided on the crop area, draw the crop area of your choice and press the tick button, and voila, your whole document is cropped.
Advanced Cropping Techniques in Photopea
These are the few advanced options for cropping, these answers are linked to the part of the article above, if you don’t understand any of the questions, please refer to the same part of the tutorial above.
How to do Non-destructive cropping in photopea?
Use the layer mask method discussed above for non destructive cropping, or you can use a clipping mask, but instead of merging the layers, create the group of both layers and move them together.
How to Crop According to specific dimensions in Photopea?
Cropping in specific dimensions means cropping according to the pixel values. Choose the fixe size options after selecting the crop, too, and then you can enter the values of your choice.
How to Crop according to the aspect ratio in photopea?
You can use the option fixed ratio to crop the image if you have a certain aspect ratio in mind.
How to Crop The Image to a shape in Photopea?
Cropping a shape is easy, use the transform controls and press alt (or option) and shift while transforming.
How to Crop and straighten an image in photopea?
You can straighten the image when you select the crop tool. Choose a straight reference point in the image and draw the line after choosing the straighten option.
Common issues when cropping images in Photopea
- Unwanted content is included in the cropped section.
- Poor composition and alignment of elements within the image.
- Cropping out too much or leaving too little of the original image.
- Loss of resolution when cropping at high zoom levels.
- Image distortion due to improper cropping.
- Cropping out important parts of the image.
- Unwanted image artefacts may appear if you use the content aware tool while cropping.
Conclusion
In this detailed guide, we have covered different image cropping methods in Photopea, including selection tools, clipping masks, and smart objects.
We have also explained the difference between image resizing and cropping.
Choose the method which is right for your needs. For example, if you need a non-destructive crop, then the clipping mask method would be the best option.
If you need to crop a single layer outside of the canvas, then the smart object method would be a suitable option.

Thanks for reading & feel free to check out more of our articles!
Expert Rating
Summary
Cropping a single image layer is quite straightforward & not very hard either. It will take some practice to become good at it. It is easy to learn and have great functionality at scale.


