
GIFs are very popular these days. If you are looking to create a GIF in Photopea then look no further!
In this guide, we’ll discuss in detail how to make an animated gif in Photopea.
Getting Ready To Make An Animated GIF
If you want to create a gif in Photopea, you first have to do the following steps.
Create a new Project – Settings Required
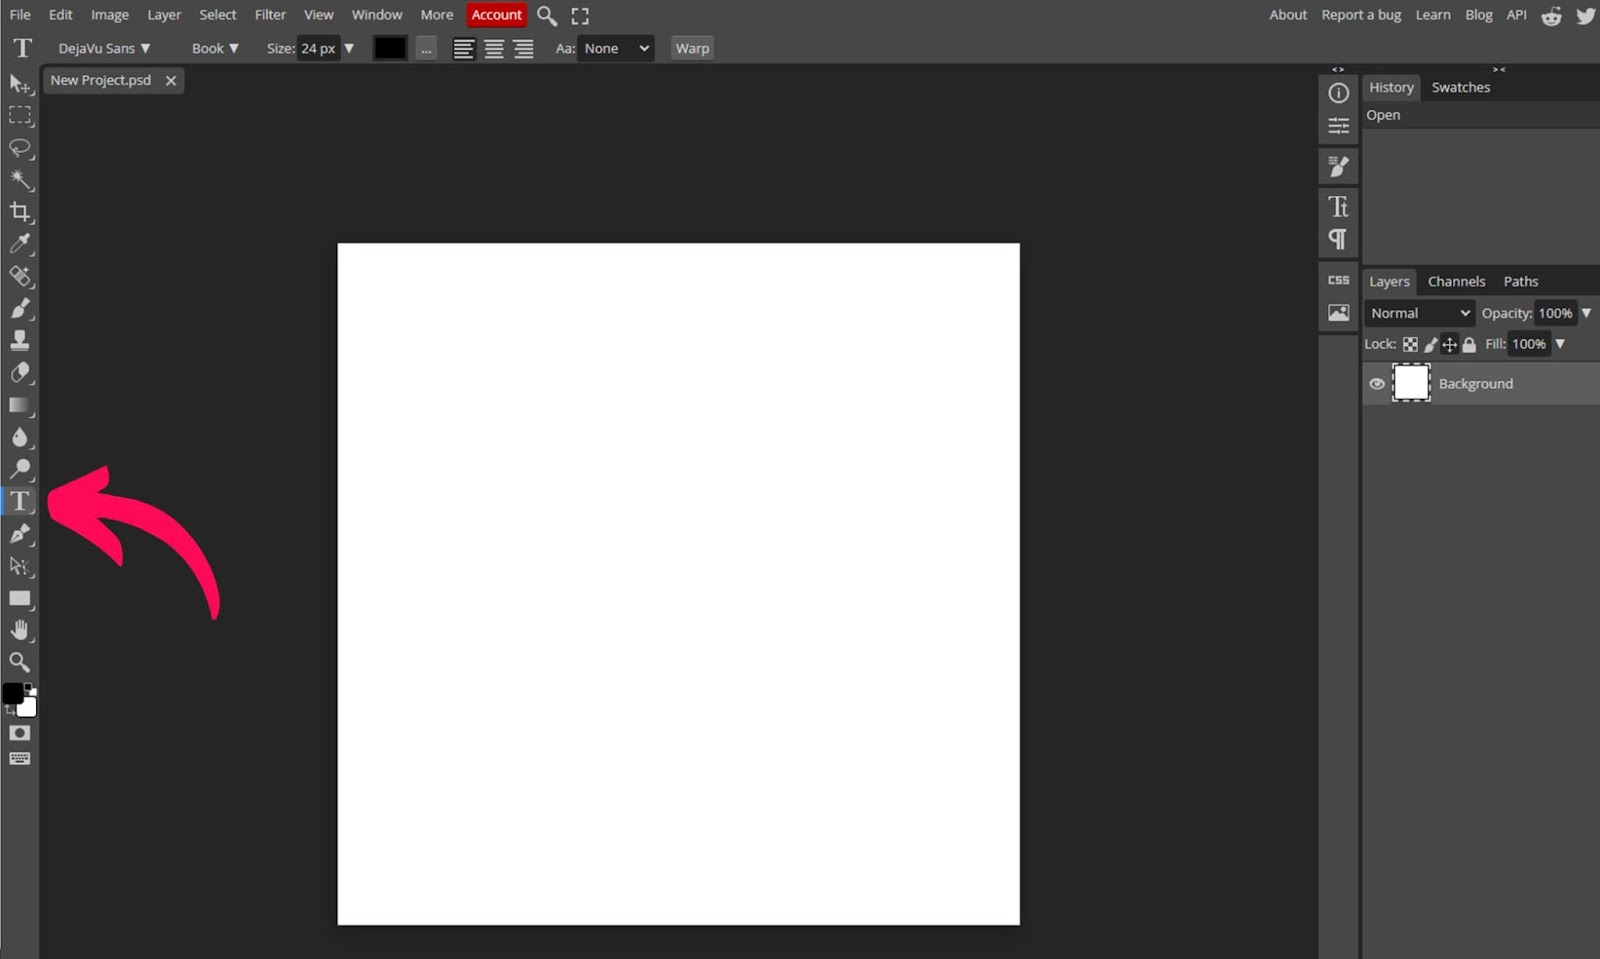
First of all, you need to create a new project in Photopea, to do that, open Photopea, click the new project button, and fill in your dimensions. Keep the document square and the DPI at 72, as this is the standard for social media.

Get Your Assets Ready
If you want to make a gif from multiple images, keep them in a folder where you can find them easily.
Creating An Animated GIF
Now begins the fun part, in this step by, step you will learn how to create a GIF with text with multiple images and with single images.
Creating An Animated GIF With Text
To create a gif with the text, you must create a separate layer for each character. For example, if you want to make a GIG with the text “PHOTO,” you have to keep every character on its separate layer like this:
- P
- H
- O
- T
- O
Now let’s talk about how to make a separate layer for each character of the word.
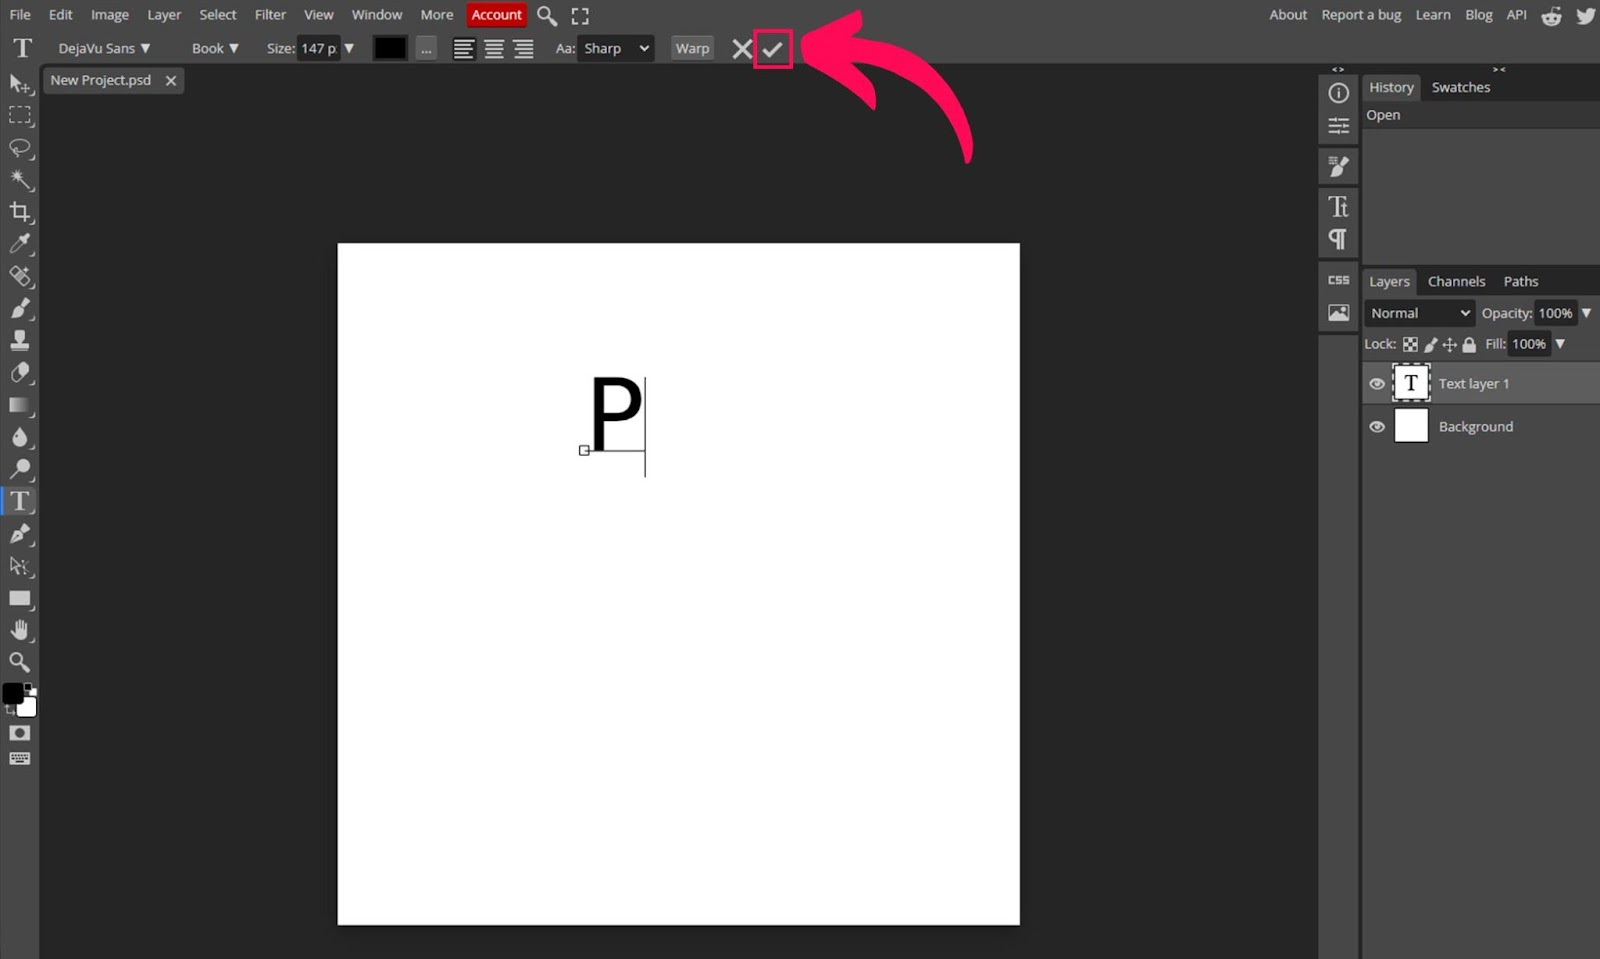
- Choose the text tool and type the letter P.
- Press the tick icon on the settings bar.
- Click again and write the Letter H.
- Again go to the settings bar and click the tick icon.
Repeat the process until all the alphabets of the word are written on separate layers.
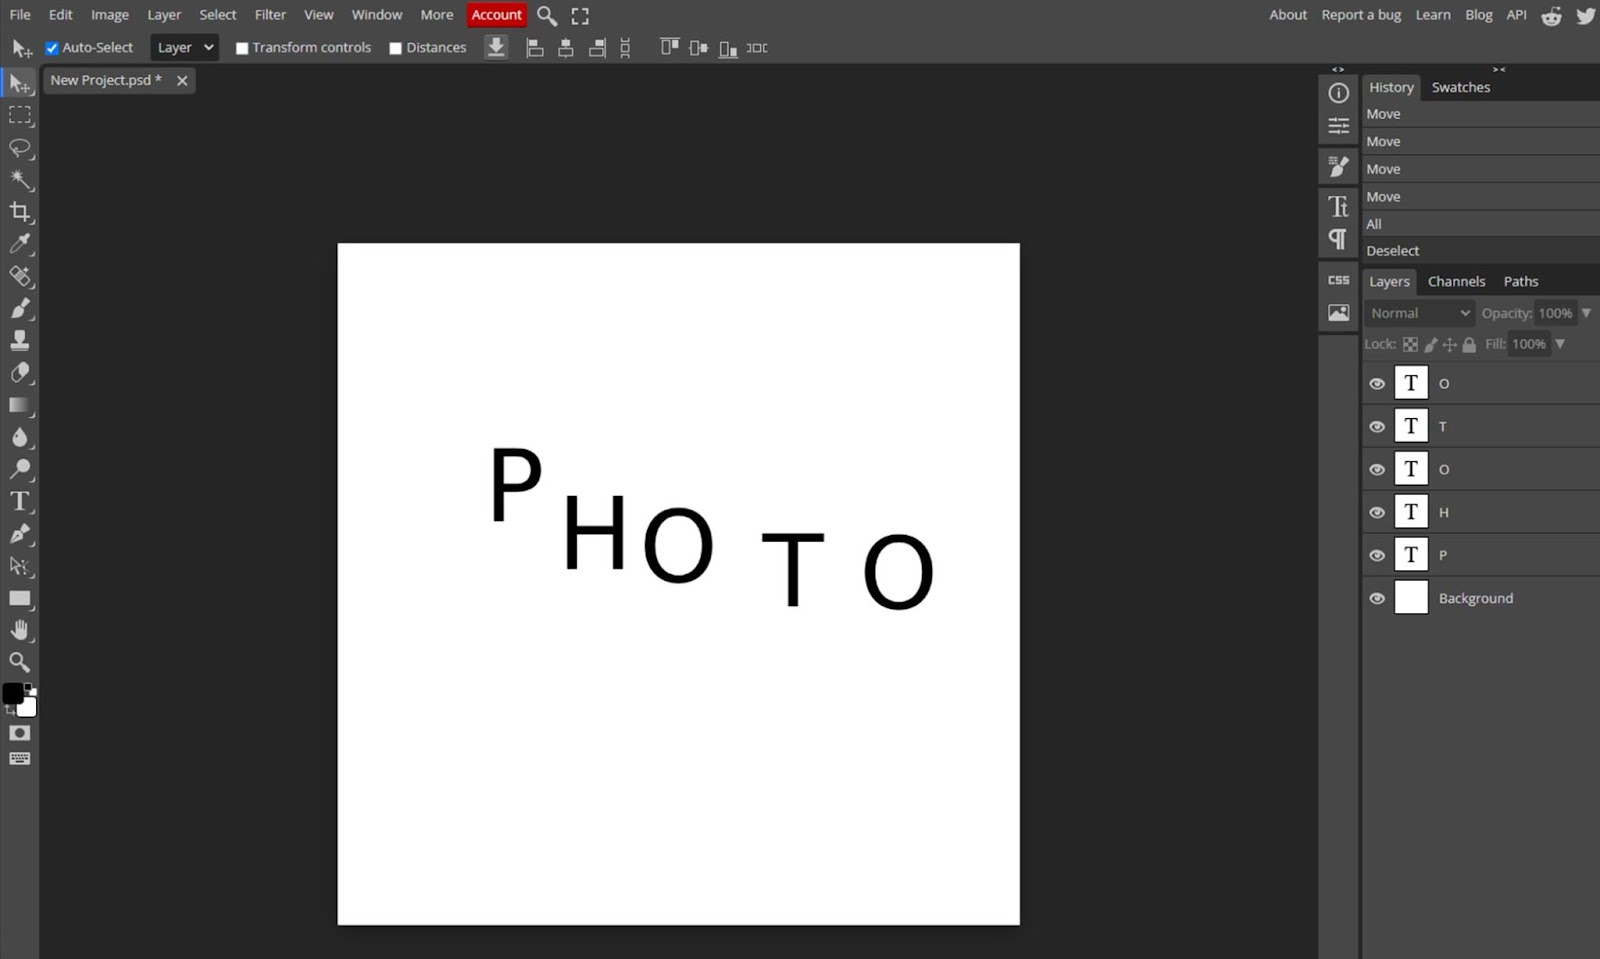
Once all the letters are written, it is time to align these letters, you can do it manually or use the align options of the settings bar.
Select all the letters by clicking and dragging a selection over them. Do it with the selection tool (V) selected. And choose the horizontal center to align option.

Another way to create text layers for each letter is:
- Write the first letter, and duplicate this text layer by choosing duplicate from the edit menu or by pressing the “ctrl+j or command+j” keyboard shortcut.
- Double-click the text layer now (click on the T icon), then double-click on the text and enter the next letter of the word.
- Repeat this process a few more times to complete the word.
- Next, select each text layer separately and adjust its position.
Write all the letters on a single layer, if you want to show the whole word all at once in your GIF. When the layers are ready, move on to the next step, renaming the layers.
- Rename all the text layers and add this ”_a_” to the start of each layer’s name.

- Keep the layer you want to appear first at the bottom, and stack the layers accordingly.
- Select All the layers besides the background, and press Ctrl+J and then Ctrl+E or Comand +E to make the whole word on a single layer. (Skip this step if you don’t want to show the whole word in your GIF).
- Make sure that the _a_ is added at the beginning of the layer name, otherwise, it will not be animated.
If you want to create a transparent GIF, then turn off the background layer or any other layer you have other than the alphabet layers. Now go to the file menu and choose export and select gif.
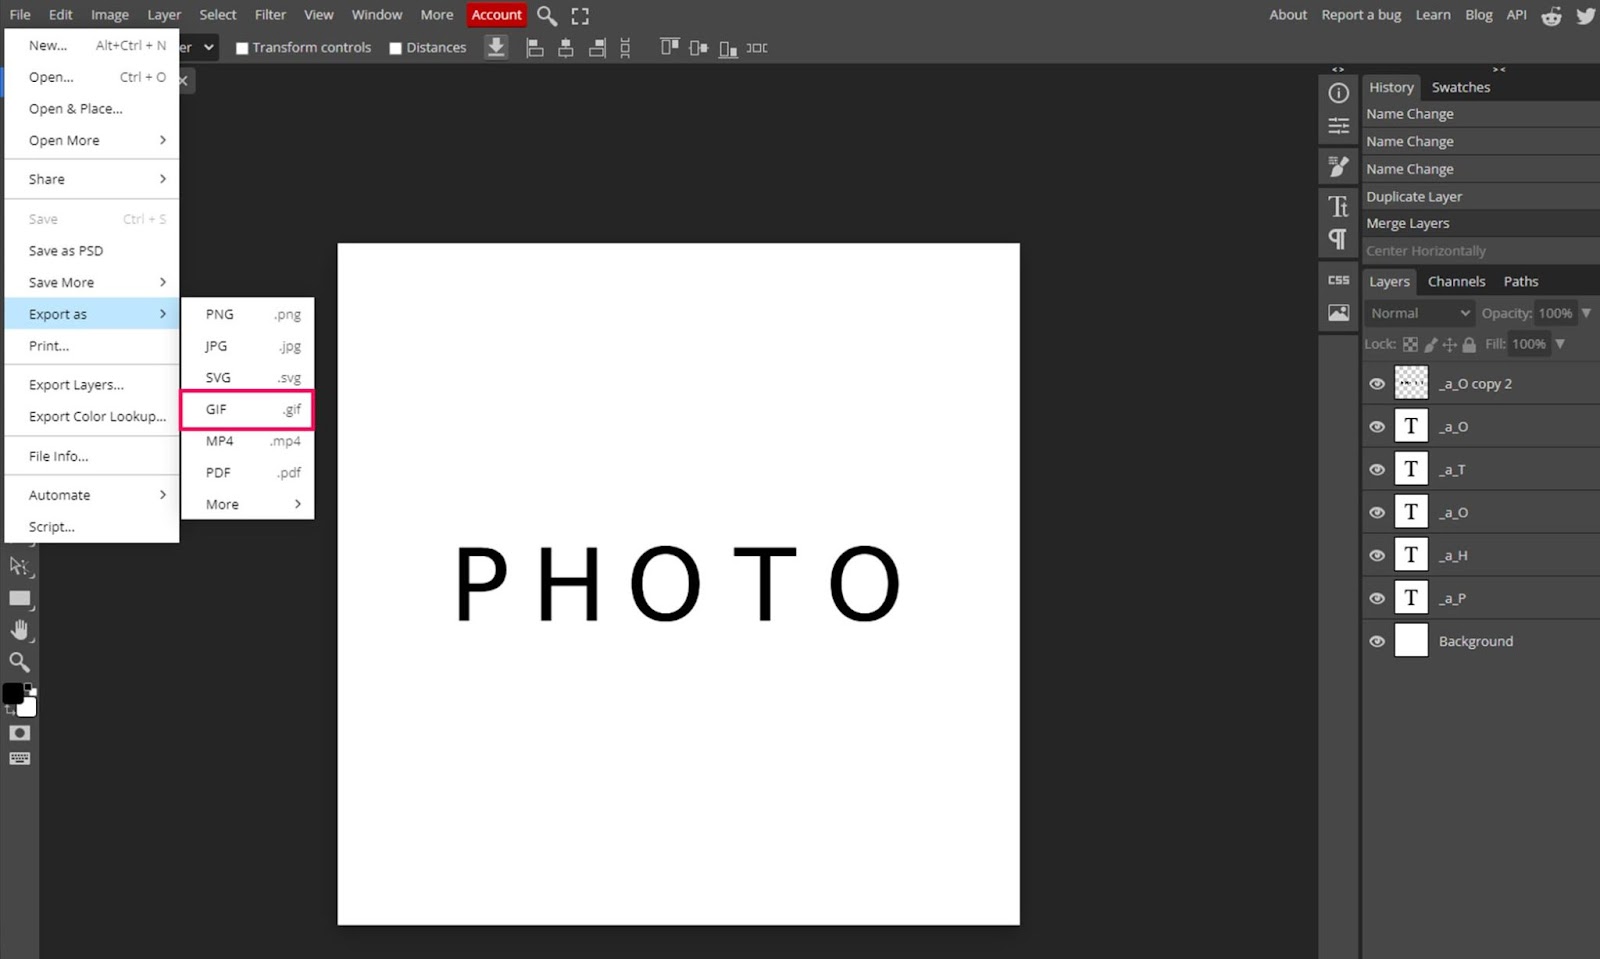
A new window will pop up with a few options.
- You can rename the GIF, change the dimensions of the GIF, change its speed and quality, reverse the movement, and change how many times you want the GIF to repeat.
- The recommended speed is 10 to have enough time between the frames to view.
- And finally, click the save button to export your final Text GIF.

This is the final result.

How to Make Animated GIF With Multiple Images
To create the animated GIF in Photopea with multiple images, the process is almost the same as of the text GIF, but we will discuss it in a short and concise way.
- Create the new project as we have described above.
- This is an important step. Go to the file menu and click on open & place.

- A new window will open. You need to go to the folder where you have saved your photos and select them. Attribution to shutterstock
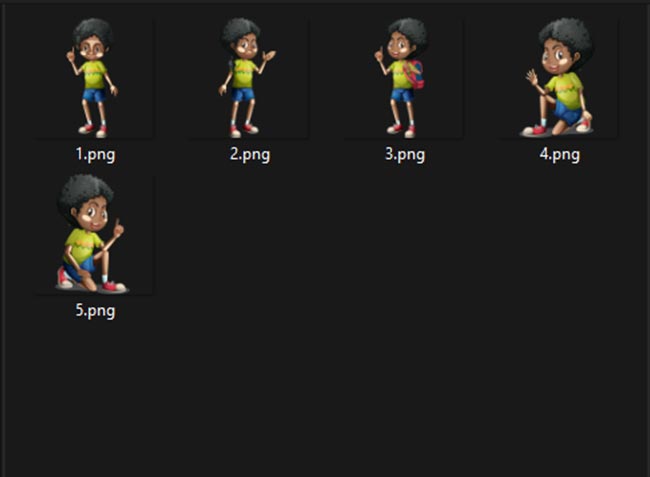
- Photopea will take a minute to open all of them, so you should wait after clicking on open and place.
Once your photos are opened and placed in the document, then arrange your photos from bottom to top. Here’s an important thing, keep the images you want to appear first at the bottom of the layer stack, and keep the layer you want to appear at the end of the GIF at the top.
- Now rename the layers and add _a_ at the start of the layer name.
Once you are okay with the stacking order, double-check everything to avoid any kind of error.

When you are happy with everything, go to the file menu and click export, change the speed and other settings to your liking, and save the final animated GIF. This is the final result of this GIF.
How to Make Animated GIF With A Single Image
We will show you something you can do if you just have one image, as most people want to play with one image, and you can manipulate an animated to stop motion animation.
- Import the photo you want to animate or make the stop motion of.
- First, we need to set up our animation. We’re going to animate this, so you need to rename the layer, double click inside of the layer, type _a_, and hit enter, so that’s the first layer, and then from here, we want to make the animation.
- Now duplicate the layer. Okay, there’s a second layer now, so turn off the previous layer, we’re working on this layer.
- You can also add some elements lifting the image, like a fire shooting out or a rocket taking the image above. We will create a shape element using the brush tool. Now we an arrow pushing upwards from underneath the image, all right, and let’s duplicate the layer.
- Now we have the next layer, hide the previous layer, and we need to make the image blast off, so we just grab the image and move it up a little bit.
- Okay, don’t forget to add the shape elements in the image, (add the shape element to the image which is visible at the moment.)
- Duplicate the layer again, and move the layer up a bit. Duplicate the layer once more and move it up a little more, we don’t want too many layers, but let’s just do a few more.
- Start the animation at the end of the document and get the image completely out of frame to have a nice effect. This is the final result.

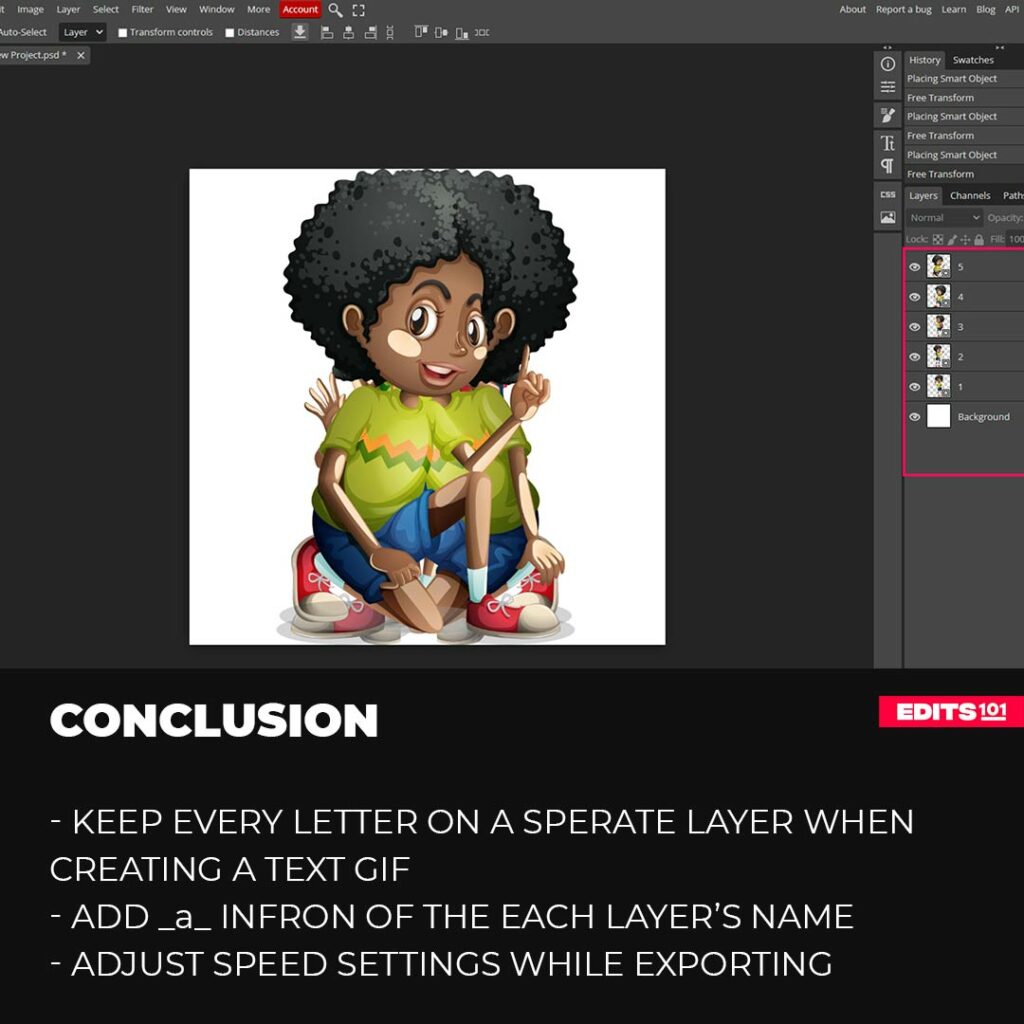
Conclusion
Making an animated GIF in photopea is easy if you understand the basics first. Before making a gif, you must understand the layers inside photopea and how to move, hide, duplicate, and rename them. You can easily create an animated gif if you can do all this.
Keep each letter on a separate layer if you want to create an animated text GIF.
All you have to do is add _a_ in front of the layer name when creating an animated GIF with multiple layers.
If you are creating a GIF with only one image, duplicate move and hide the previous layer, but before all that, make sure to add _a_ in front of the layer name.
Thanks for reading & feel free to check out more of our articles!
Expert Rating
Summary
It might take some time to understand how this technique works, however, after some practice you’ll quickly notice that animated Gifs in Photopea are not that difficult.. They are easy to make, just a little bit of practice and you are good to go.


