
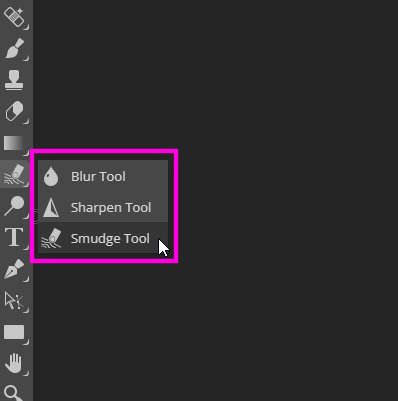
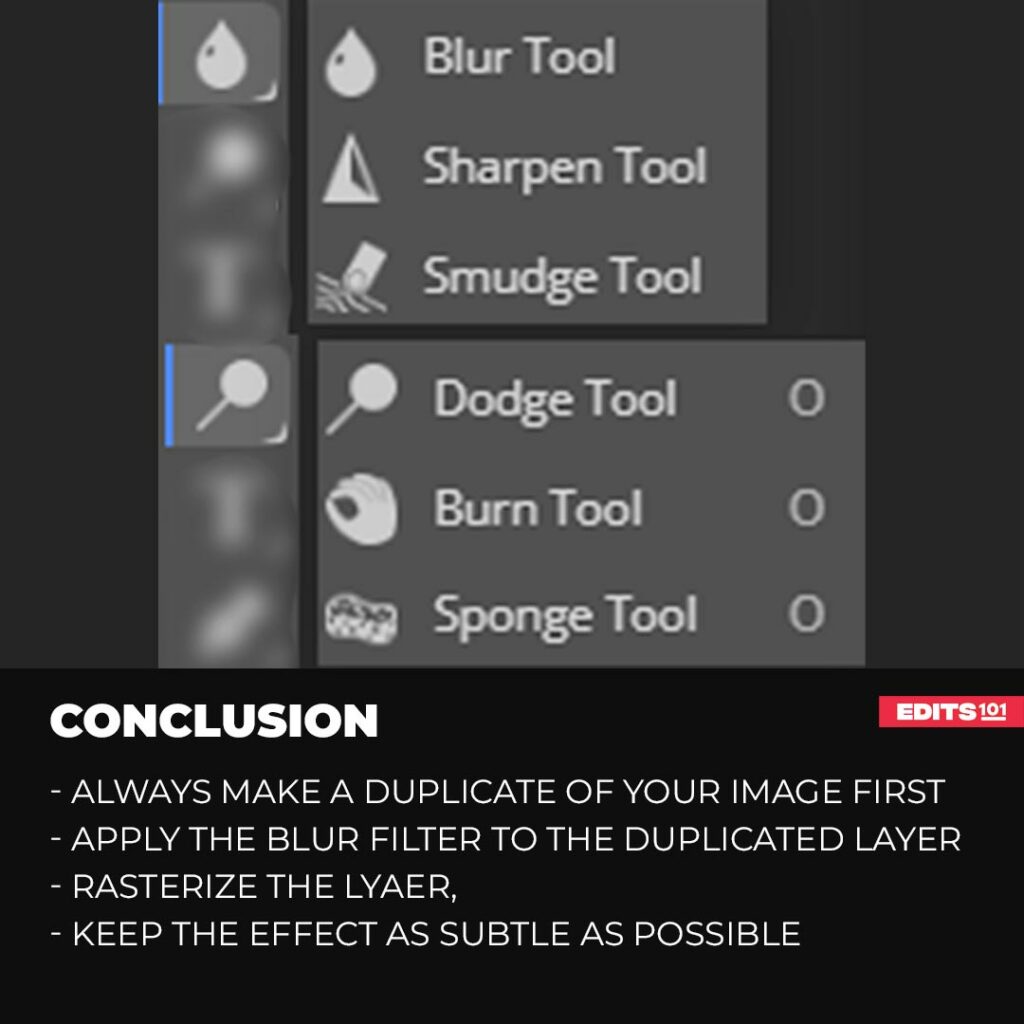
In this tutorial, we’ll cover 5 tools: the Blur Tool, the Sharpen Tool, the Smudge Tool, Dodge and Burn tools.
We will discuss what they do and how to use them in your images, where to use and how much to use, and what brush settings you should choose to get a perfect result.
Basically, everything will be covered in this guide, so get ready to master these 5 tools!
Blur Tool
The Blur tool softens the harsh pixels of an image, making it hazy by reducing the contrast between adjacent pixels. Depending on how you apply it, you can also use it to create artistic effects.
It can be used to decrease the focus of distracting elements within the photo. Blur tool can also be used to remove blemishes or pimples from a person’s face.
If you want to reduce the blur effect, you can adjust the brush’s strength. You can use the same brush options as you would with a brush or eraser tool since this tool also uses a brush tip.
Keep in mind that you should only use this tool to remove small blemishes and spots. Use other tools like spot healing for the bigger and more prominent blemishes.
How to use the Blur Tool In Photopea?
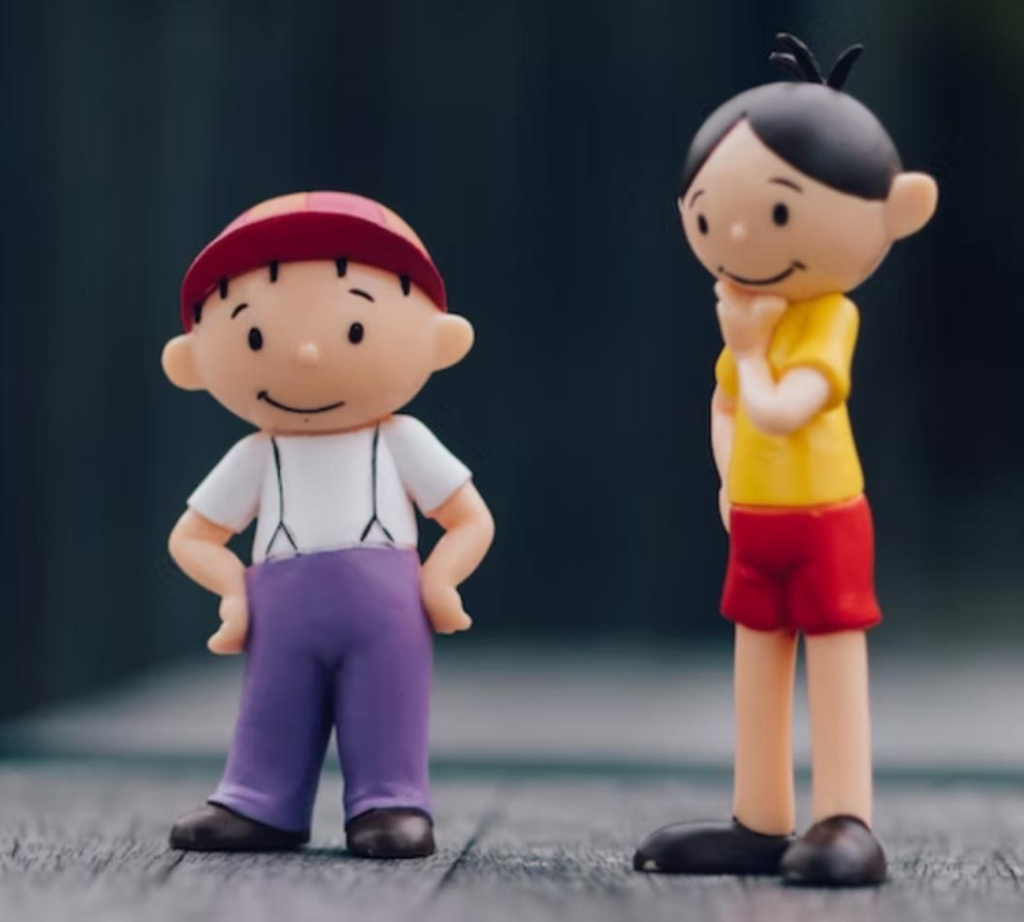
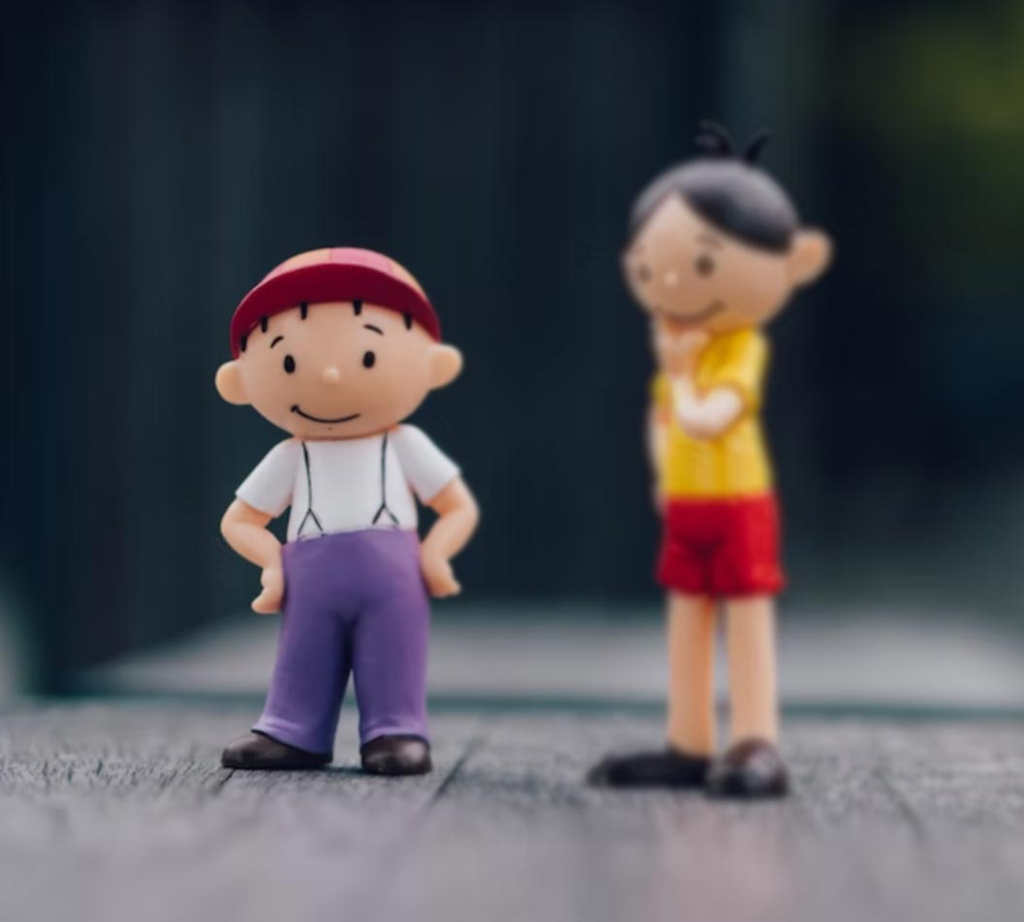
Let’s look at a practical example of the blur tool. We will use the following toy image to blur the figure on the right side.
Make the duplicate of the layer to which you want to apply the blurt to. Because the workflow involved in the blur tool is destructive, as you cannot edit the blur once applied.
To duplicate, select the layer and press ctr + J or Cmd + J.
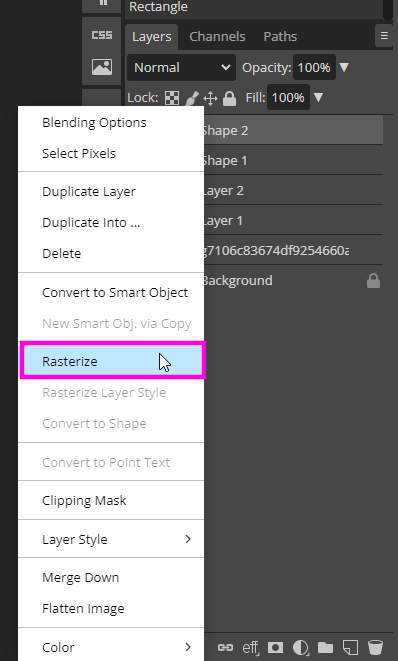
You also need to rasterize the layer first. Otherwise, the blur tool will not work. Right-click on the image inside the layers panel and choose rasterize.
Note: The bigger the dimensions of the image are, the less effect will be applied and vice versa.
If your image is bigger in dimensions, then you may have to paint multiple times.
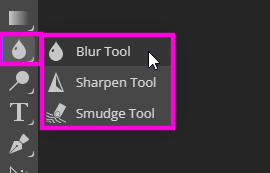
Choose the blur tool from the tools bar. Unfortunately, there is no shortcut assigned to the blur tool in photopea.
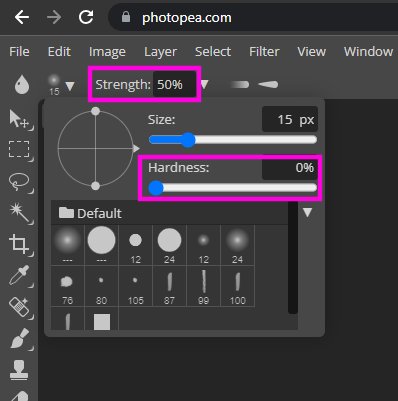
Adjust the brush settings.
- You can adjust the strength of the blur.
- The softness of the brush.
- The shape of the brush.
Keep the strength at 50 and use a softer brush. You can also use 100% strength for a stronger effect.
You can import your own brush to create certain effects with the blur tool.
Now, let’s blur the figure on the left. Select the layer and paint over the figure with the brush size of 500 px.
Paint over the figure multiple times. Click and paint, let go of the click, click again and paint. The more you paint, the effect will gradually become stronger. Keep painting until you are happy with the result.
Here’s the final result.
Sharpen Tool
The sharpen tool is a blur tool menu feature with a sharp triangle icon. It enhances the contrast and focus of the pixels in an image.
However, be careful not to overuse this tool as it can make the image look unnatural.
For instance, when editing portrait photography, the sharpen tool can be used to highlight the eyes by gently sharpening them with low intensity.
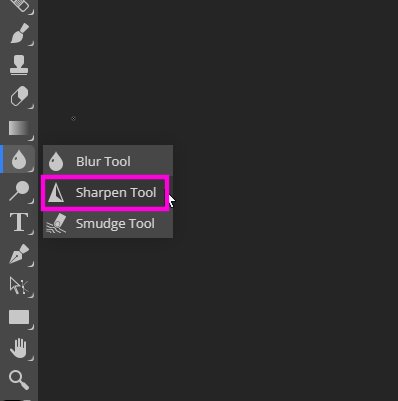
Select the sharpen tool from the toolbar and choose a brush tip from the ‘brush preset picker’ drop-down panel.
Then, apply it to the desired image area you want to sharpen. You can also select different blending options, such as darken or lighten, hue, and saturation.
The sharpen tool has a strength value that ranges from 0% to 100%. Keeping it below 25% is recommended to avoid making the effect too obvious.
If your image has multiple layers, press the keyboard shortcut key Ctrl + Alt + Shift + E to create a merged layer from all the visible layers. It will ensure that your editing affects the whole image.
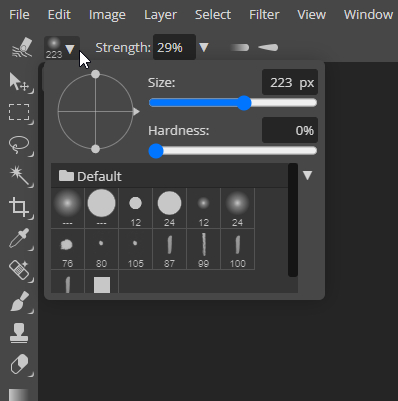
How to use the Sharpen Tool In Photopea?
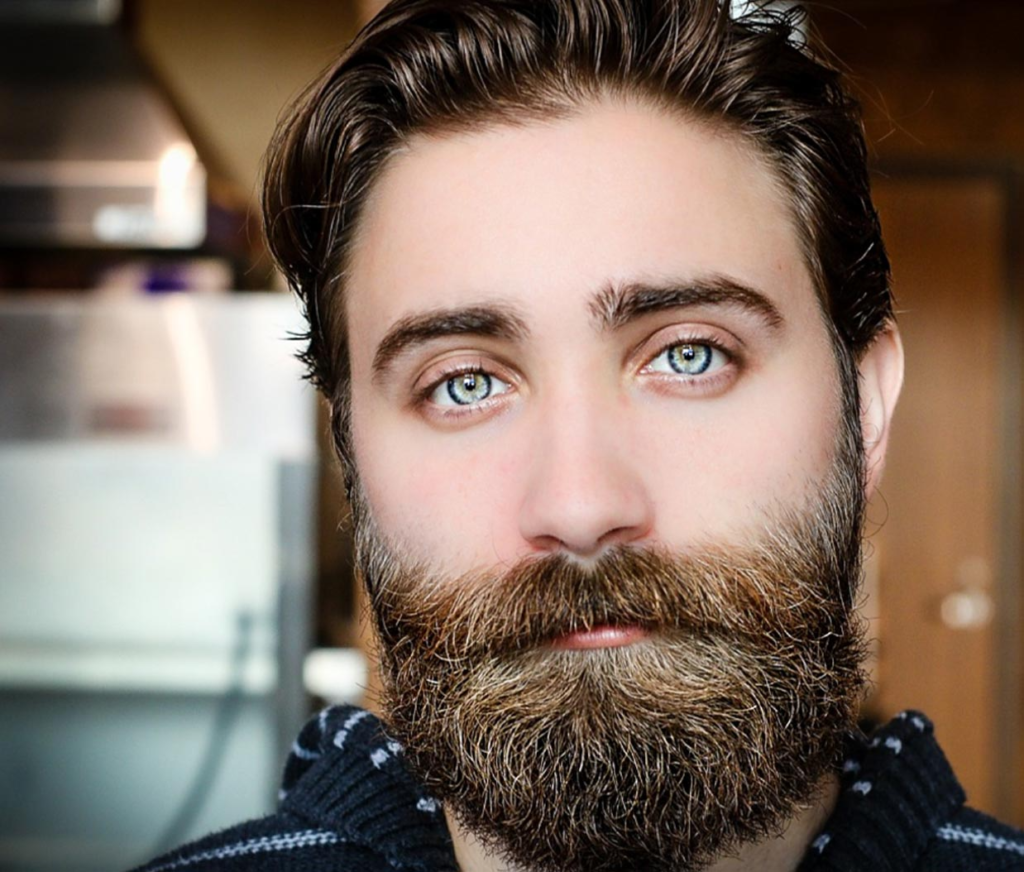
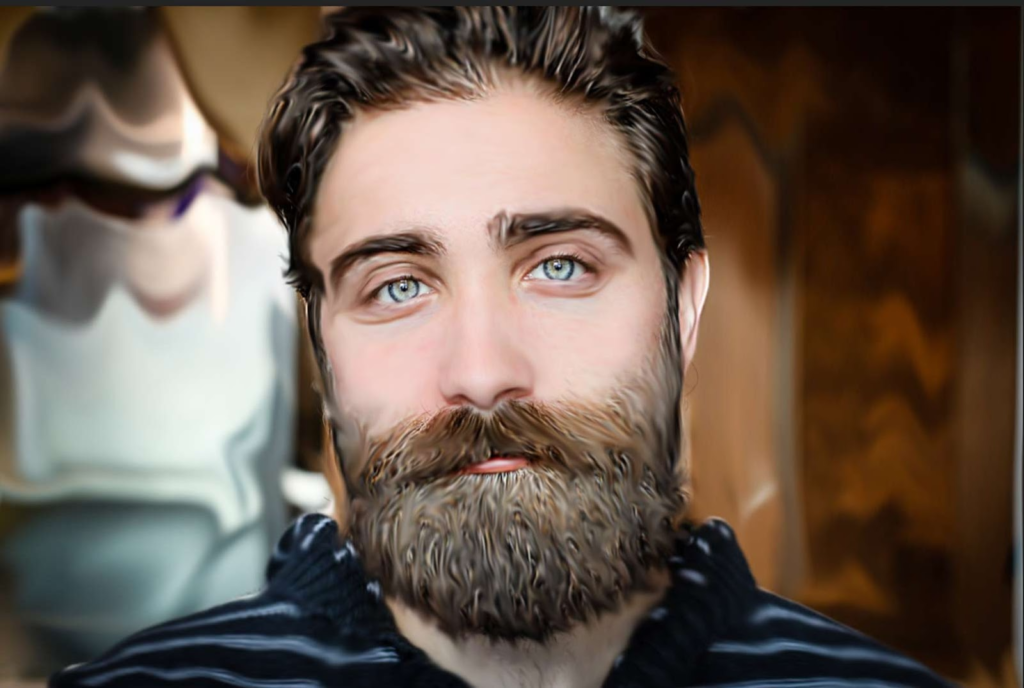
Let’s take a look at a practical example and sharpen some parts of the following image of a man.

Select the sharpen tool from the tools bar.
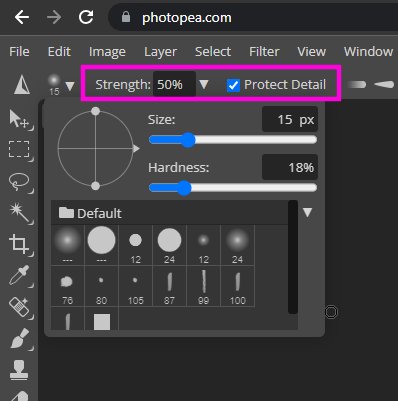
Reduce the strength setting to 25% and make the brush hardness zero.
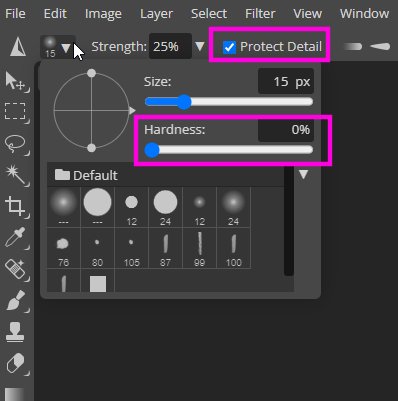
Check mark the protect detail option, it will preserve the details of the image and stop the effect from going too far.
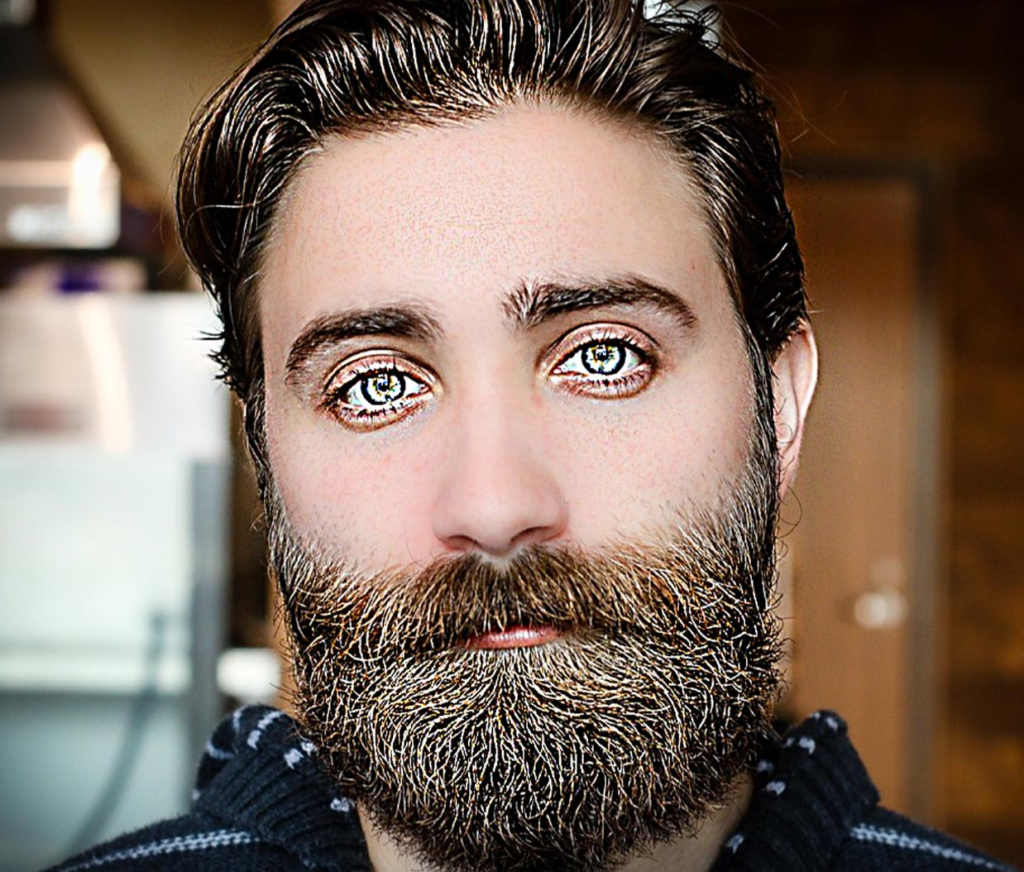
We will paint over the hairs first with a slightly larger brush and adjust the brush size with bracket keys [ ].
Then reduce the brush size and paint the eyebrows and then pupils.
Then move on to the beard and paint with a slightly larger brush.
Here’s the final result. There is not a huge change, but enough to improve the image.
Warning: Dont over use the effect; otherwise, you will get weird-looking images.
Something like this:
Smudge Tool
The Smudge Tool is like using your finger to blend and smear colors on a painting.
It’s like what artists do when they’re working with real paints and brushes.
The smudge tool is like a brush that smears and blurs parts of an image.
It’s kind of like spreading wet paint around on a canvas.
You can also use the tool to make small changes to your image.
This can make an image look like it’s been painted with brushstrokes, which is cool if you want an artistic effect.
To use the smudge tool, pick a layer to work on and start painting. The tool pushes pixels around to make them blend together.
Depending on how much you want to smudge things, you can make the effect stronger or weaker.
If you want to be careful not to mess up the original image, you can make a duplicate layer and work on that instead.
That way, you can smudge parts of the image without changing the original picture.
How to Use Smudge Tool in photopea?
We will use the same picture as an example, which we used in the sharpen tool, and convert it to a digital painting.
Choose the smudge tool from the tools bar.
Reduce the strength value to 25 – 40%.
Paint with a smaller and softer brush.
Paint in the direction of the hair to create a cool effect.
Here’s the result. It’s not perfect as it was just to show you how the tool works, but you can take your time to make it the way you want it to be.
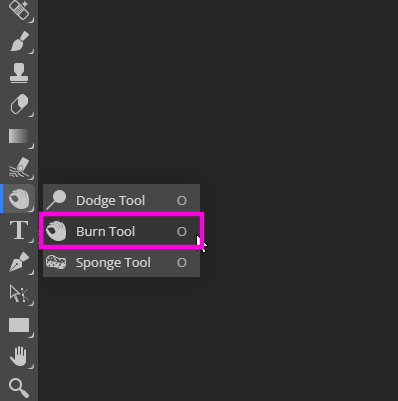
Dodge and Burn Tools
The dodge tool brightens parts of an image, while the burn tool darkens them. You can choose any brush to work on different parts of the image.
Different range options such as mid-tones, shadows, and highlights help you to dodge and burn specific areas of the image better.
Exposure options are also available, which increase or decrease the strength of the effect.
Dodge and Burn tools are a destructive way of editing images. These changes cannot be undone, so it’s best not to use them on the original layer. Instead, create a duplicate layer to work on.
This way, if you make a mistake, you can easily discard that layer and start again without affecting the original image.
These tools also work with the brush as the above discussed tools. If you paint one area multiple times, the effect will become stronger in that area.
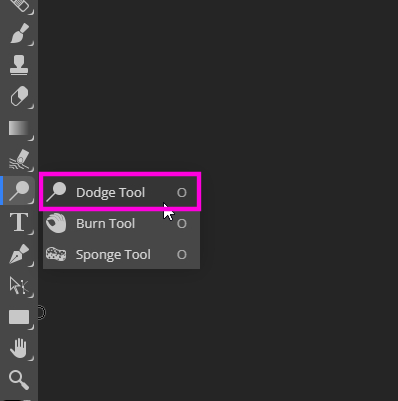
How to Use dodge and Burn Tools in photopea?
Select the layer, duplicate it, and select the Dodge tool.
we will be using the following image to balance the lighter and darker parts.
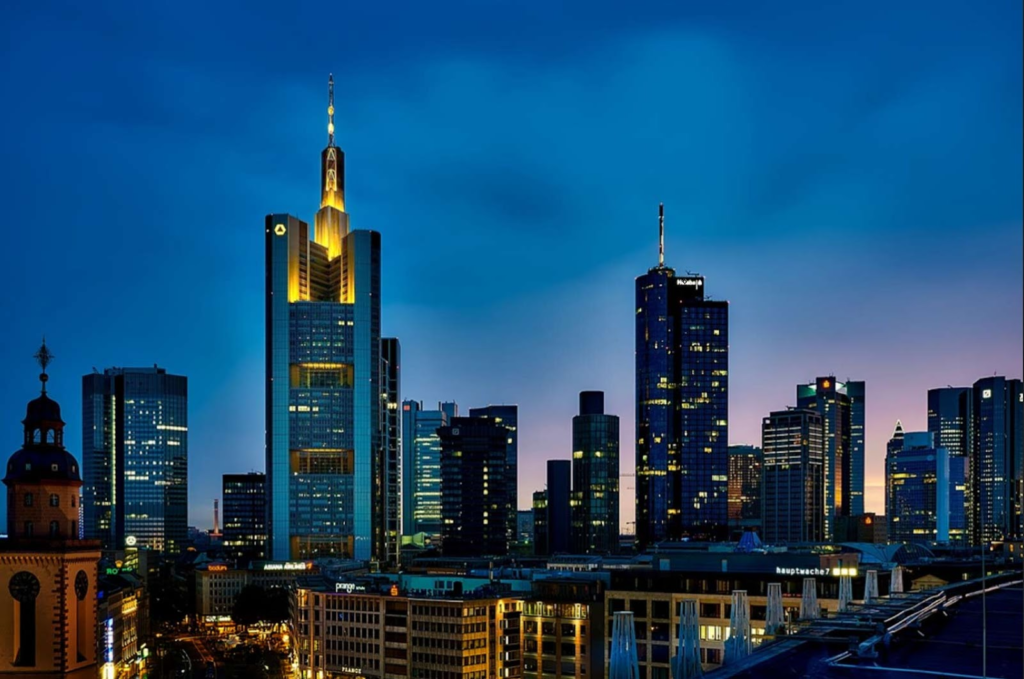
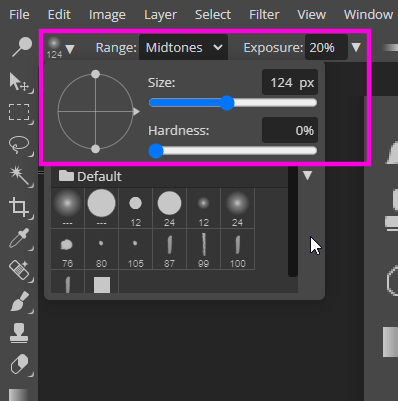
Keep the range to midtones and decrease the exposure to 20% for a subtle effect.
Now go to the brush settings tab and decrease the brush hardness to zero.
Let’s reduce the light at the bottom of the city image and increase the exposure of the building to bring the focus to it.
We will use the burn tool to reduce the light at the bottom and keep the range to midtones and exposure at 20%.
Paint with a slightly larger brush as there are no edges we need to protect.
Now switch to the dodge tool and paint on the building with a smaller brush and make sure the light doesn’t spill outside the line of the building otherwise, it will look fake.
Decrease the brush size as you go up because the size of the building is also getting smaller.
Paint until you have added enough light.
Warning: Dont over use these effects.
Conclusion
In this tutorial, the Blur, Sharpen, Smudge, Dodge, and Burn Tools are discussed in detail with their functions and how to use them in Photopea.
The Blur Tool can soften the harsh pixels in an image and reduce the contrast between adjacent pixels, while the Sharpen Tool enhances the contrast and focus of the pixels in an image.
The Smudge Tool works like a brush that smears and blurs parts of an image, giving it an artistic effect.
The Dodge and Burn Tools are used to adjust the brightness and darkness of specific areas of an image. It’s essential to adjust the brush, settings of your tool, and strength for perfect results.
Thanks for reading & feel free to check out more of our articles!
Expert Rating
Summary
Blur, Sharpen, Smudge, Dodge, and Burn Tools are destructive ways of editing images, you can do all these things without damaging the original image using more efficient methods inside photopea. These are great tools but not recommended. They need a little practice and have little functionality and scalability.


