
Adding text to your photos can be a great way to add interest, personality or to portray information through your image. There are many different ways to do this in Affinity Photo, and in this blog post we will explore some of the options available to you.
The Artist Text Tool is a great way to quickly add text to your photo, while the Frame Text Tool allows you to create more complex designs. These two tools are both easy to use, so you won’t need any prior experience. Let’s get started!
Artistic Text Tool in Affinity Photo (Shortcut ‘T’)
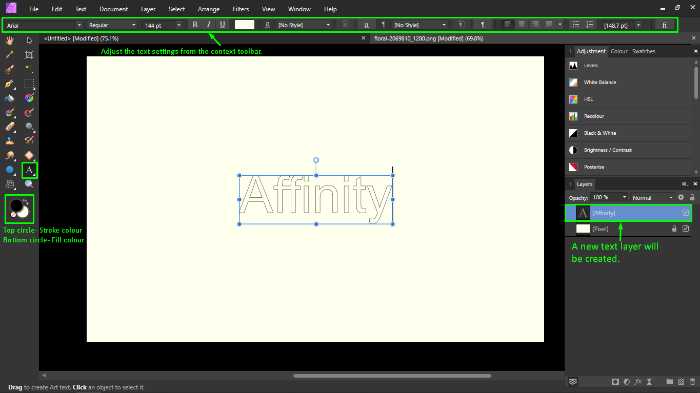
The Artistic Text Tool is a great way to add text to your photos with lots of flexibility. You can choose from a range of fonts and styles, and you can also control the size, position, and colour of your text from the context toolbar.
It is best used when you want to create a single line of text, such as a headline or caption. The Artistic Text Tool is not designed to create large blocks of text like paragraphs.
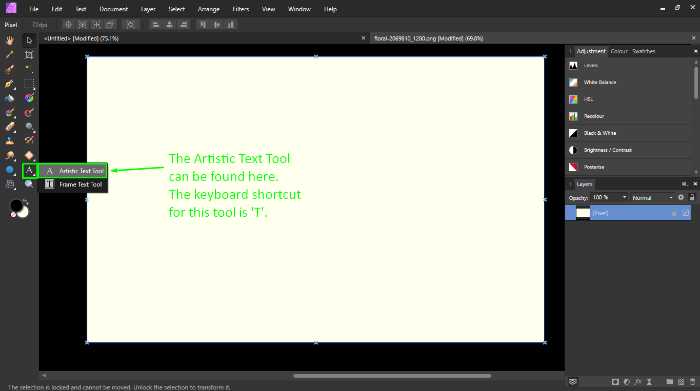
The Artistic Text Tool can be accessed from the toolbar at the left side of your screen. The icon is pretty easy to spot – it’s a capital ‘A’. The keyboard shortcut for the Artistic Text Tool is ‘T’.
Once you have selected the Text Tool, click on the canvas and start typing. You can resize, rotate and position your text however you like from the control handles around your text.
Here’s an example of how the Artistic Text Tool can be used:
Frame Text Tool in Affinity Photo
The Frame Text Tool is useful for adding text in blocks – such as paragraphs or even whole pages of text. You can use it to add text to photos, or you can use it to create designs with text and images.
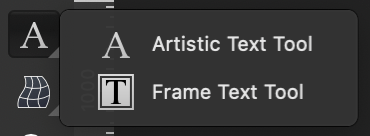
The Frame Text Tool is accessed from the Toolbar at the at the left side of your screen. It’s icon looks like a white square with a ‘T’ inside it. The keyboard shortcut for the Frame Text Tool is also a ‘T’. If you can’t see it, select the small arrow near the “A” Icon in the tool bar & a dropdown will show up & it should be residing there.
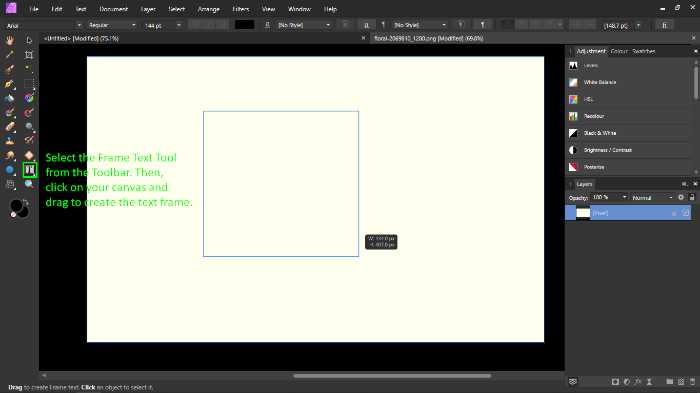
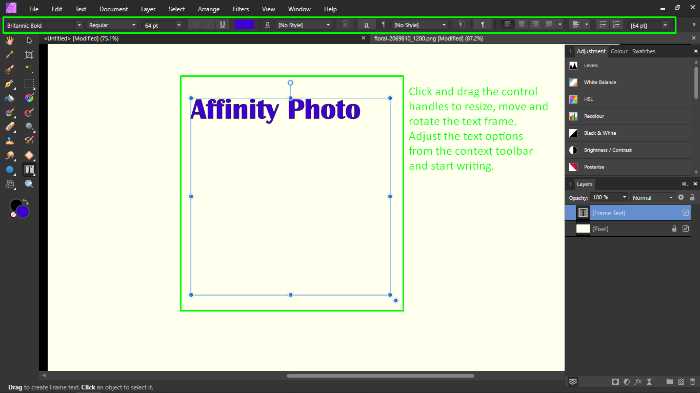
Once you have selected the Frame Text Tool, click and drag on your canvas to set the size of your text frame. You can resize and position your text however you like, and you can also change the font, style and colour from the context toolbar.
Take a look at the following images to understand how the Frame Text Tool works:
Shape Text in Affinity Photo
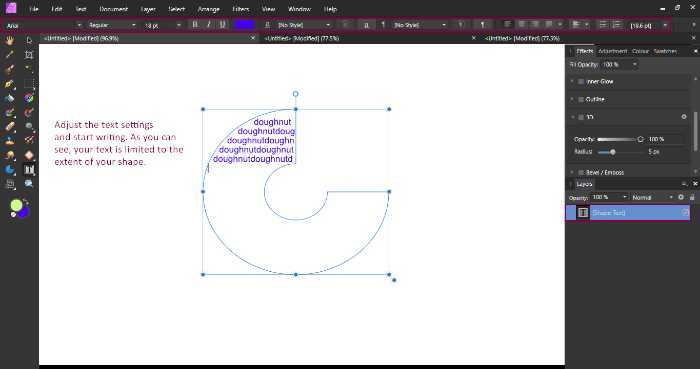
This allows you to type text into a particular shape- predefined or freehand. This is a very powerful tool as it can be used to create some really cool designs with text.
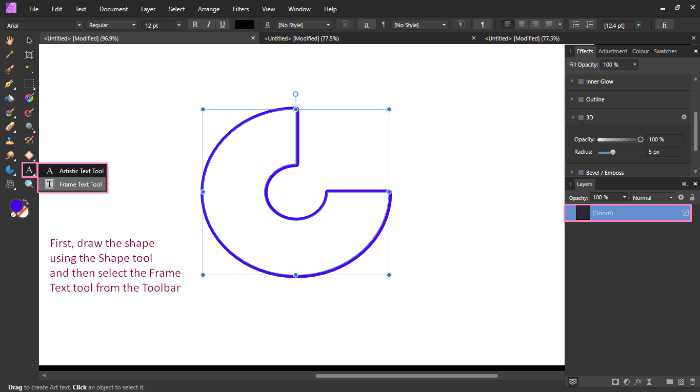
First, you have to create the shape from the ‘Shape Tool’ (Shortcut = U). When you have drawn a particular shape, select the shape layer and click on the ‘Frame Text Tool’ from the toolbar.
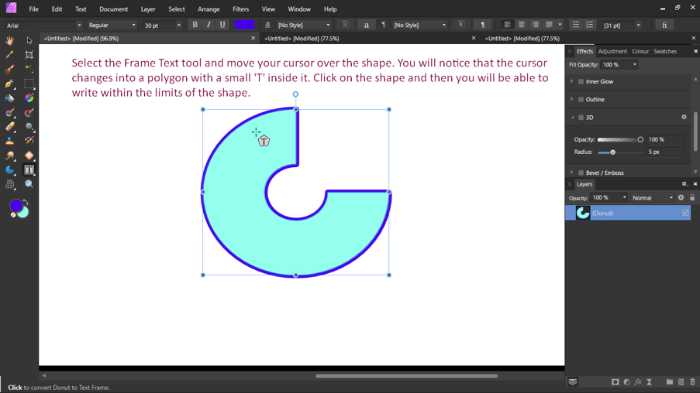
Move your cursor on the shape and you will notice that it will transform into a small pentagon with a ‘T’ inside. The shape will automatically transform into a framed text box.
Type in your text and Affinity Photo will automatically fit it within the shape. In the context toolbar you can resize the text, change the font and adjust other settings. You can resize and position your text however you like using the Move Tool.
Importing Text
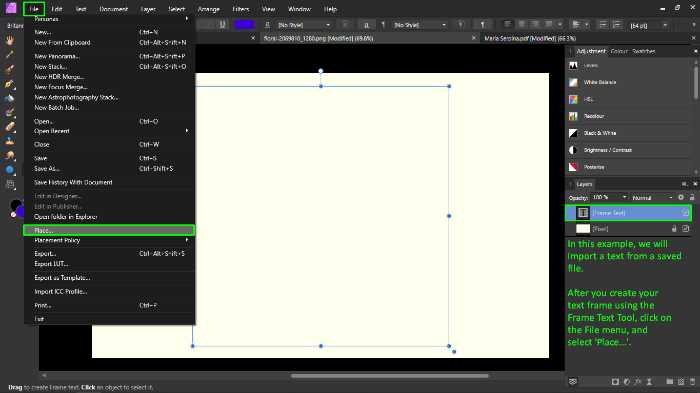
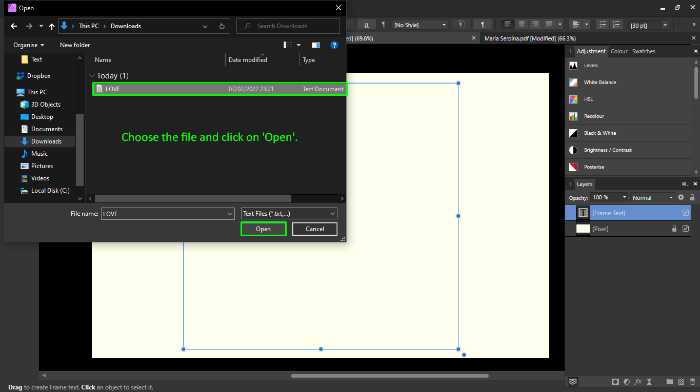
If you have already created text that you want to use in your photo, you can import it from a txt file. To do this, go to the File menu and select ‘Place’. This will open a dialog where you can choose which document you want to import. Simply select the file you wish to use and click on ‘Open’.
The following images will help you familiarise yourself with this method.
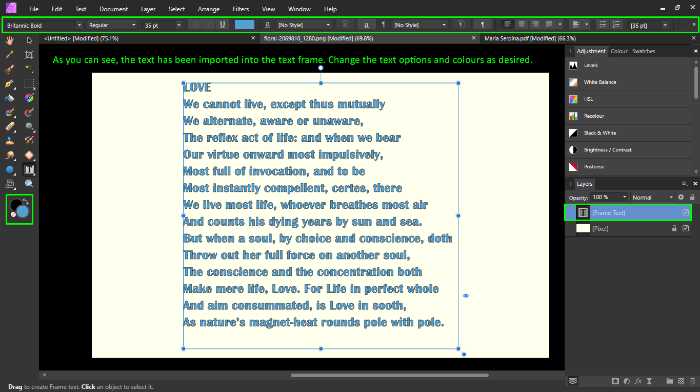
Other methods would be to drag the file you wish to add onto the text frame or to copy the text from another file and paste it within the text frame. As you can see in the images below, importing text in Affinity Photo is a very easy process.
Text on a path
Adding text to a path is a great way to create some really cool designs. You can create a path out of a line, a curve or an outline of a shape. You can use one of the preset shapes or a custom shape that you draw yourself.
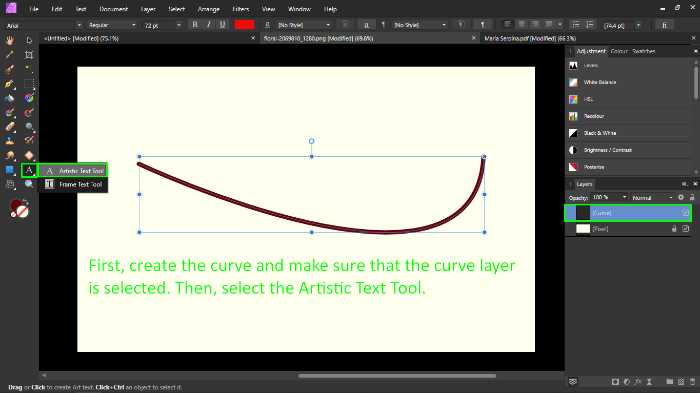
You can convert your line, curve or shape into a path using the ‘Artistic Text Tool’ from the toolbar. Simply select the layer you wish to use a path, click on the ‘Artistic Text Tool’ and then move the cursor on the path you want to add text to.
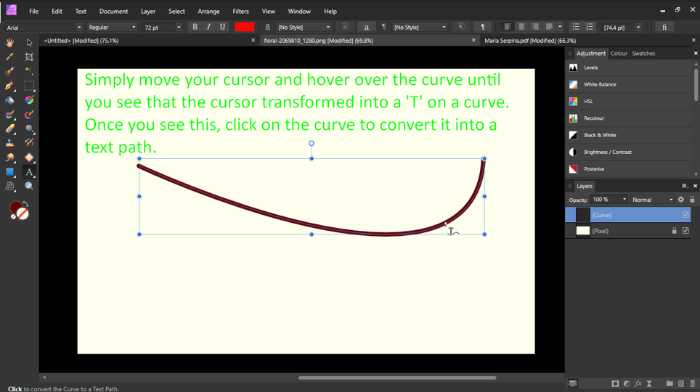
You will notice that the icon changes into a ‘T’ overlying a curved line. Once you see this icon, single-click on the path to convert it into a text path. The layer in the Layers Panel will transform into a ‘(Curve Path Text)’ layer.
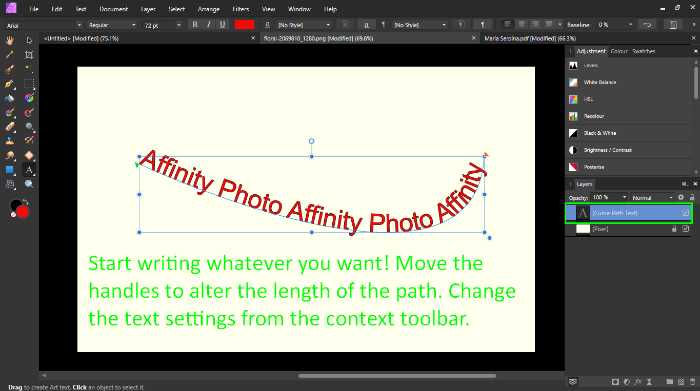
Type in your text and Affinity Photo will automatically convert your line, curve or shape into a text path. In the context toolbar you can recolour the text, change the font, choose the font size and adjust other settings. You can resize and position your text however you like using the Move Tool (keyboard shortcut ‘V’).
The handles on the path (light green and orange triangles) allow you to extend or lessen the length of the path. You can also drag the control handles to change the direction of your text. If you wish to create text on a separate path (below), simply click on ‘Enter’ (Windows) or ‘Return’ (Mac).
The baseline controls the distance between the text and the path. You can increase or decrease this value using ‘Shift + Up/Down arrow keys’.
If you’re not happy with the results, you can click on the ‘Node Tool’ and then adjust the nodes to modify or resize your text path.
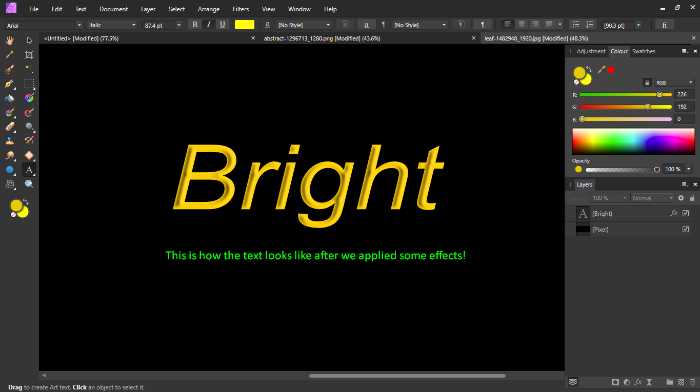
Adding effects to text
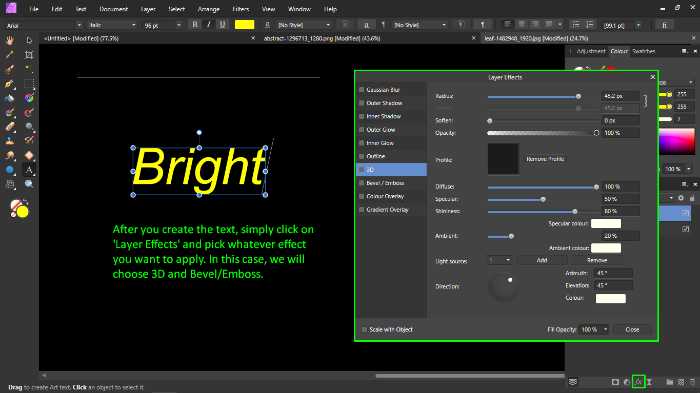
There are a range of effects that you can add to your text in Affinity Photo. The Effects panel contains a range of different effects that you can apply to your text, for example Outer Shadow, Inner Glow, 3D and Bevel/Emboss. You can apply more than one effect to your text, and you can also adjust the settings of each effect.
In the Effects panel, tick the effect/s that you want to apply to your text. Each effect has its own set of settings that you can adjust. For example, the Outer Glow effect has these settings:
– Colour: The colour of your glow;
– Opacity: The opacity of the glow;
– Radius: The size of the glow, which is measured in pixels (px);
You can resize and position your text however you like using the Move Tool (keyboard shortcut ‘V’).
Applying a colour gradient to a text
Applying a colour gradient to a text in Affinity Photo is easy. Primarily, it is important to note that the two circles of the Colour Panel represent the stroke colour and the fill colour respectively. Always highlight the text you wish change the colour of before clicking on the circles.
To change the stroke colour (the outline of your text), click on the top circle. If you also wish to change the width of the stroke, simply select the shape tool and adjust the stroke width from the context toolbar. If you click on the bottom circle, Affinity Photo will fill your text with the selected colour.
This is how you can apply a gradient colour to a text. After you have created a text using the ‘Artistic Text Tool’, simply select the ‘Gradient Tool‘ from the toolbar.
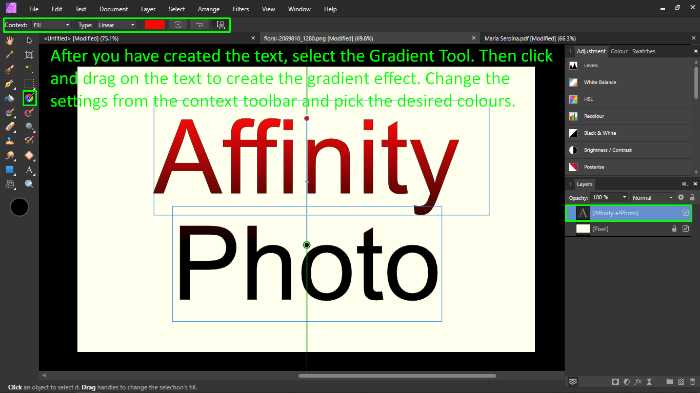
Select the type of gradient you wish to apply and then click and drag the gradient onto your text. Select the colours you wish to include in your gradient using the Colour Panel.
Once you have applied a colour gradient, you can change the angle and position of your text using the Move Tool (keyboard shortcut ‘V’).
How to clip an image to a text
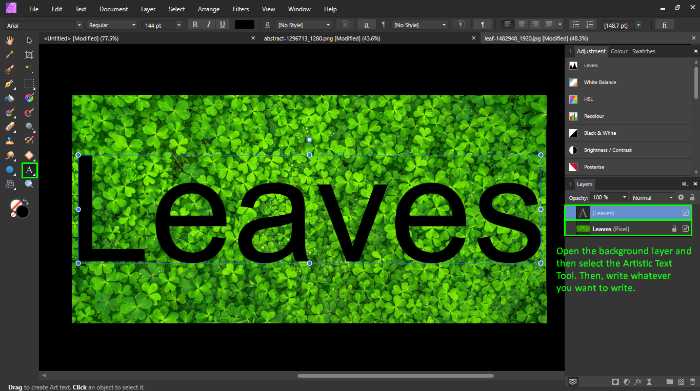
Have you ever wanted to fill a text with an image? In Affinity Photo, it’s easy!
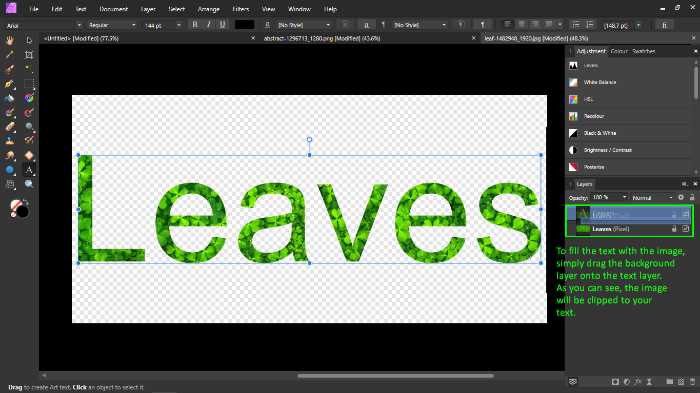
First, open the image you want to clip in Affinity Photo. Next, use the ‘Artistic Text Tool’ or the ‘Frame Text Tool’ (from the toolbar) to create your text. Adjust the text settings and then type in your desired text. If you want to clip an image to your text, drag the pixel layer onto your text layer.
You will notice that the text has been filled with your image. You can resize and position your image however you like using the Move Tool (keyboard shortcut ‘V’).
Where to find the Character & Paragraph Panel in Affinity Photo?
To edit the text you would need to open up the paragraph & character panels.
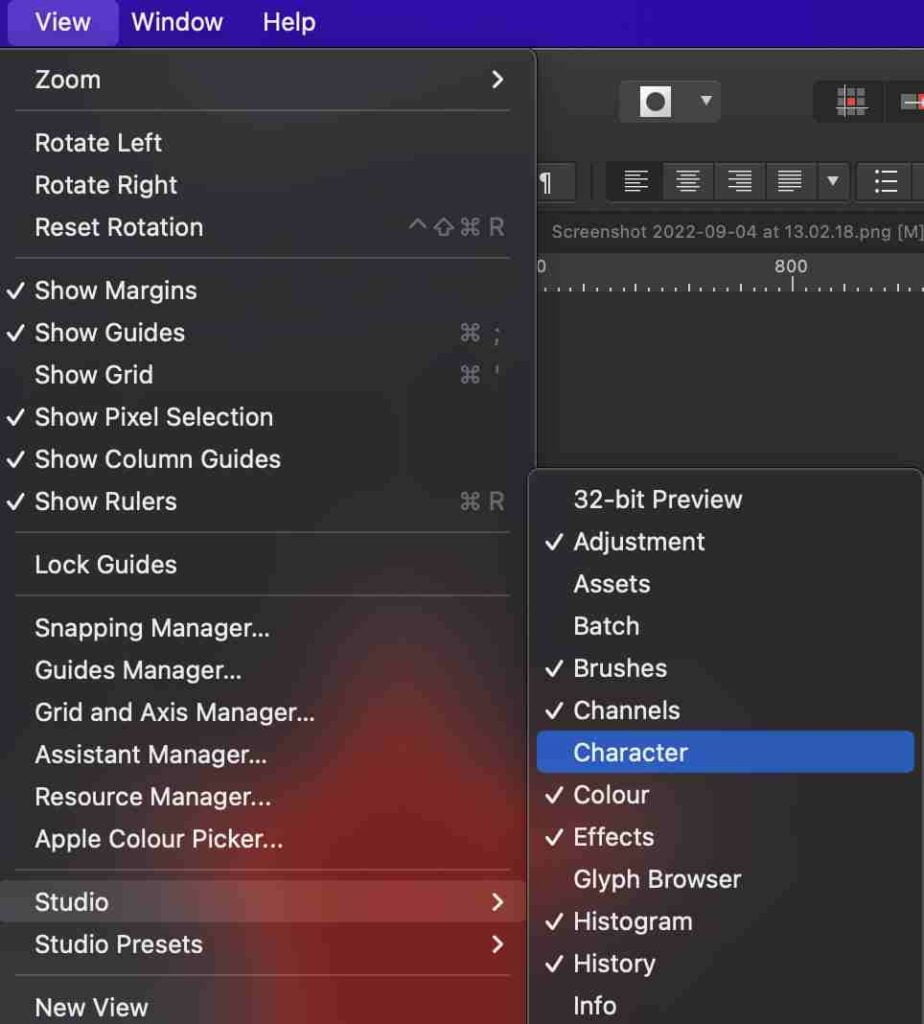
You’ll find the character panels from: View (in the top bar) > Studio > Character
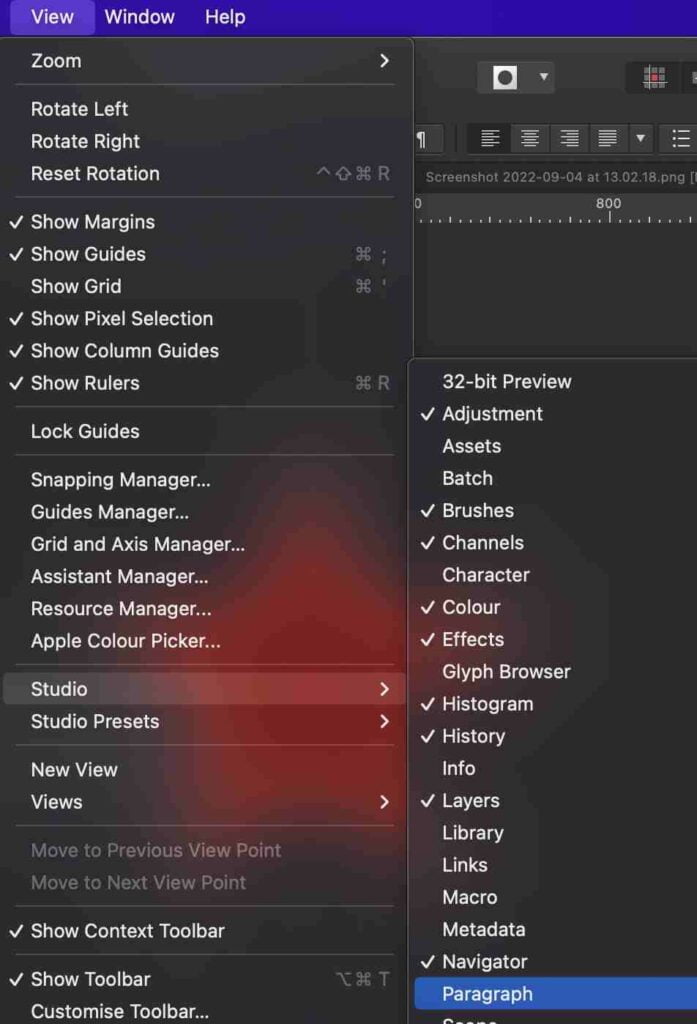
You’ll find the paragraph panel from: View (in the top bar) > Studio > Paragraph
Expert Rating
Summary
Text is one of the easiest tools to get started with, however, one of the most difficult to master. It takes time to fully understand it, though, it is extremely versatile & scalable.
Conclusion
In conclusion, there are various ways to add text in Affinity Photo, using the Artistic Text Tool and the Frame Text Tool. Affinity Photo also has a range of different effects that you can apply to your text.
You can also import text from a word processing document, PDF file or from anywhere you want. There are virtually no limitations to what you can with text in Affinity Photo.
Thanks for reading & feel free to check out more of our articles!


