
The Content Aware Fill in Photopea is a tool that enables you to remove unwanted objects from an image seamlessly. With the Content-Aware Fill, you simply highlight the object you want to remove, and Photopea will do the rest.
In this guide, you will learn the different ways you can use Content Aware Fill to make unwanted objects disappear like magic.
When to use Content-Aware Fill
While it is an amazing tool, Content Aware Fill in Photopea is best for removing unwanted objects from a scene. It works best when the textures and colors are consistent.
When working on complex images, Photopea might struggle when using Content-Aware Fill. In this case, you may have to turn to other tools, such as the Patch Tool.
Opening an Image in Photopea.
GO to photopea and then open the image you want to edit.
- You can drag and drop an image into Photopea, and it will be opened.
- Alternatively, especially when you already have other Photopea tabs open, you should go to File >> Open, select the image from your computer, and click Open.
Easy Way to Use the Content-Aware Fill in Photopea
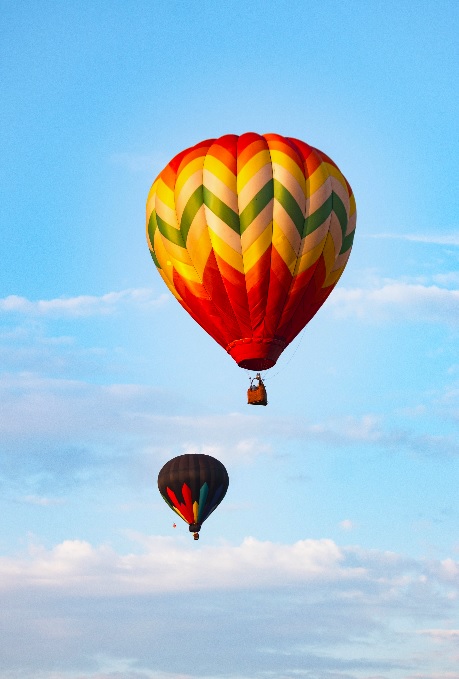
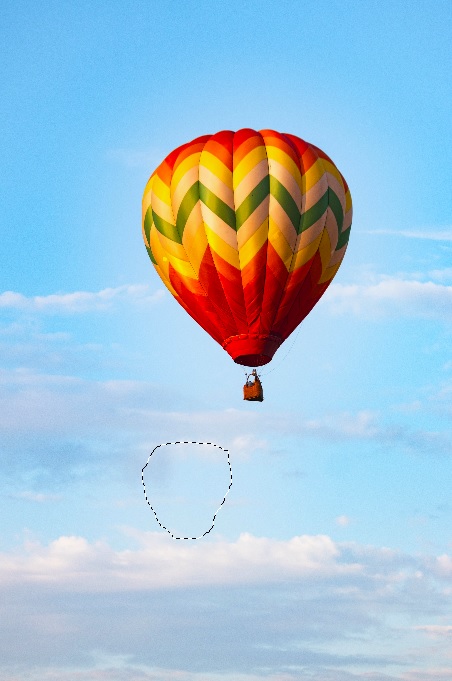
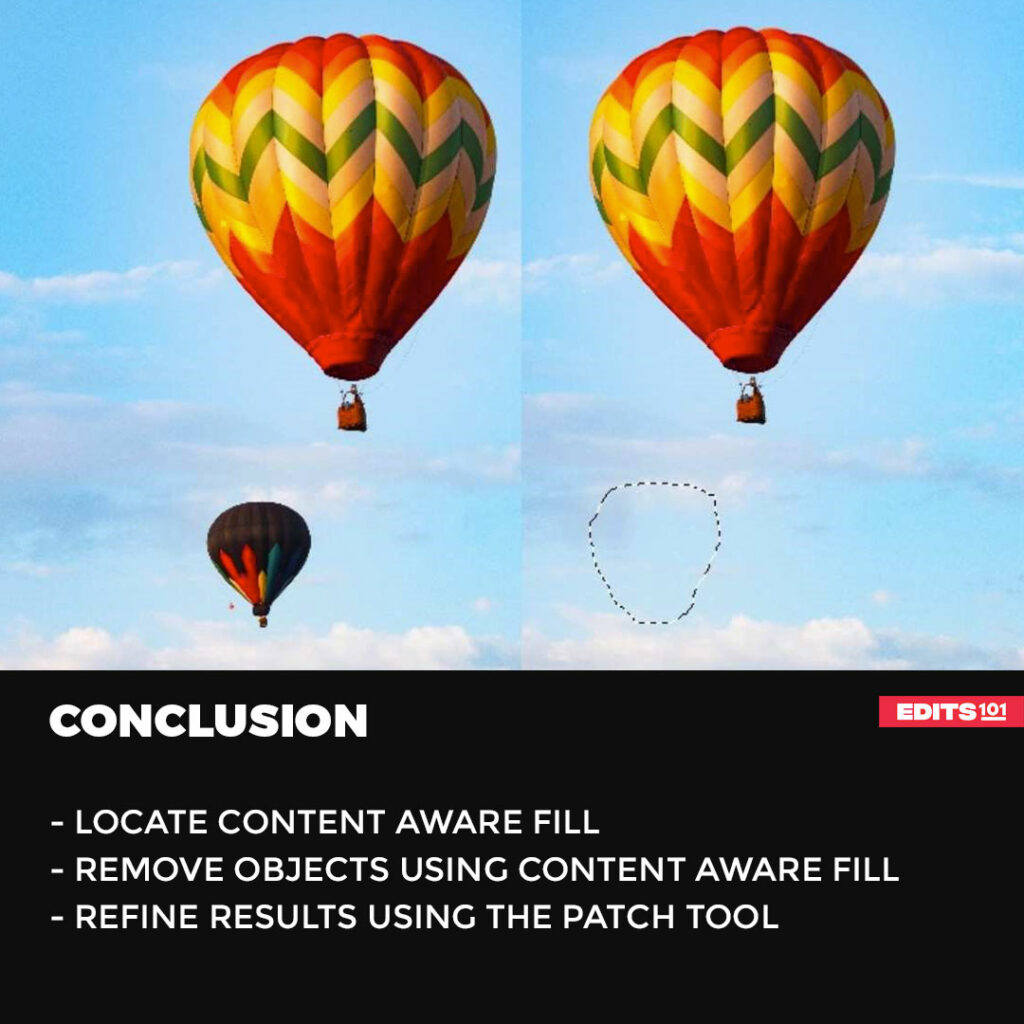
To give you a better understanding of how to use Content Aware Fill in Photopea, we will start with a simple image. In the below image, we will be making the smaller hot air balloon disappear.
Step 1: Load the Image
The first step is definitely to load up the image. You can use any of the above methods to do so.
Step 2: Select the Object You Want to Delete
To be able to use the Content-Aware Fill to delete an object, you will first need to make a selection around it. You can use any of the selection tools.
For our case, we will be using the Lasso Select tool.

With the image selected in Layers Panel, we will use the Lasso Select tool to make a selection around the smaller hot air balloon that we want to remove.
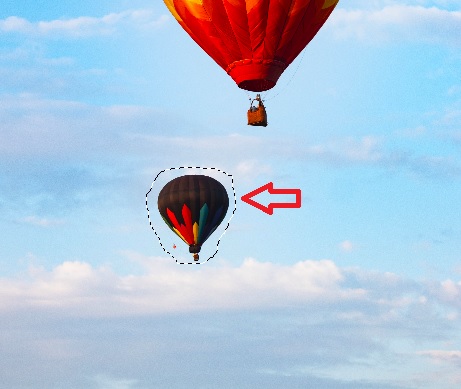
Remember that your selection does not have to be perfect. Your main goal is to make sure that the object you want to remove is included in the selection.
Step 3: Locate the Content-Aware Fill
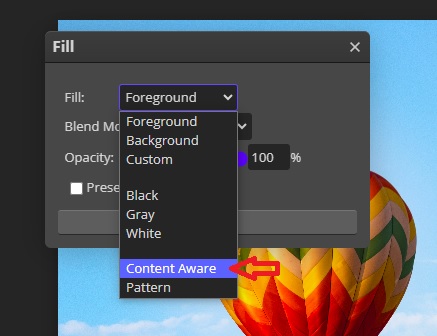
Now that the object is selected, we can now use the Content Aware Fill in Photopea. To locate it, go to Edit in the Menu Bar and click Fill.
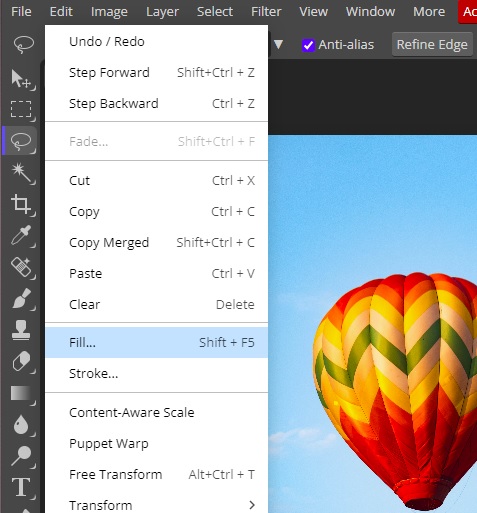
The Fill window will pop up. Click on the dropdown next to Fill and select Content Aware.
Once you are done, click OK, and Photopea will now delete the selected hot air balloon.
To remove the selection, simply hold down Ctrl (Cmd in Mac) + D on your keyboard.
You are done and It is that simple. You can go ahead and save your work.
If you wish to delete the large hot air balloon and leave the small one, you simply need to repeat the same steps.
Keep in mind that deleting large objects often cause problems, as you will see in the next example.
Using Content-Aware Fill to remove People from an Image
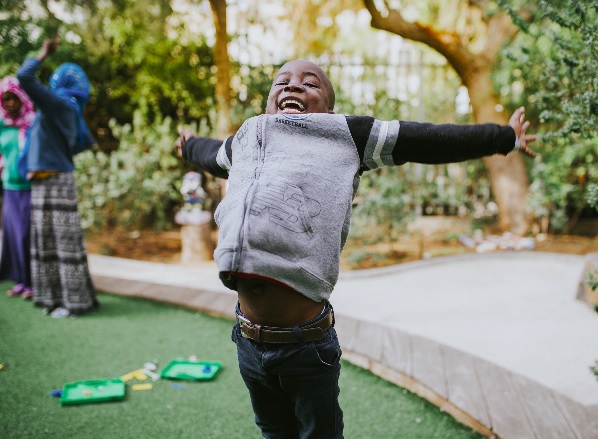
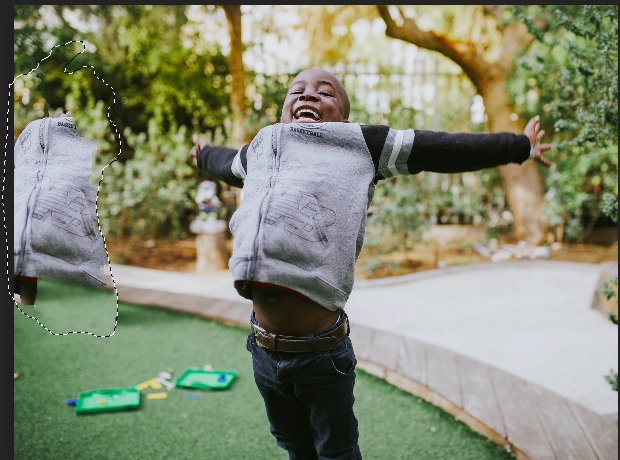
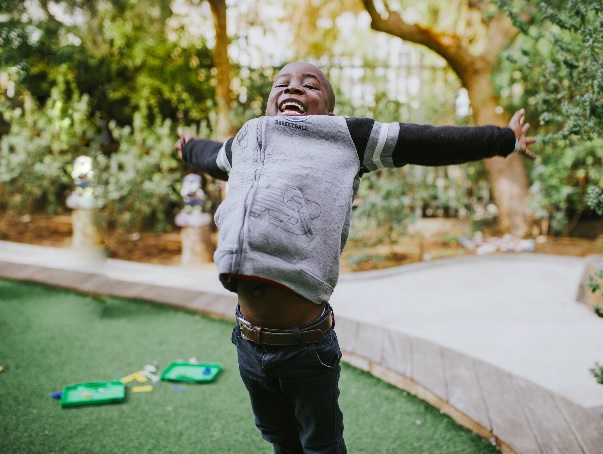
In this example, we will be removing the two blurry people in the background of the below image.
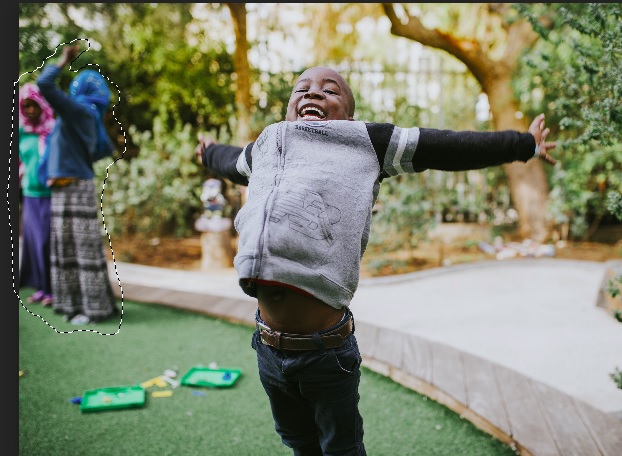
Step 1: Select the Two Blurry People
After opening the image in Photopea, we will again use the Lasso Select to select the two people we want to remove from the image.
Step 2: Open the Fill Window in Photopea
Just as we did before, we will open the Fill window in order to access Content-Aware Fill. Just like before, go to Edit from the Menu Bar and select Fill.
Once the Fill window pops up, click the dropdown window next to Fill, select Content Aware, and click OK.
Photopea will now process the image.
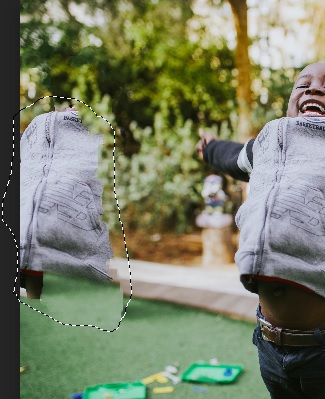
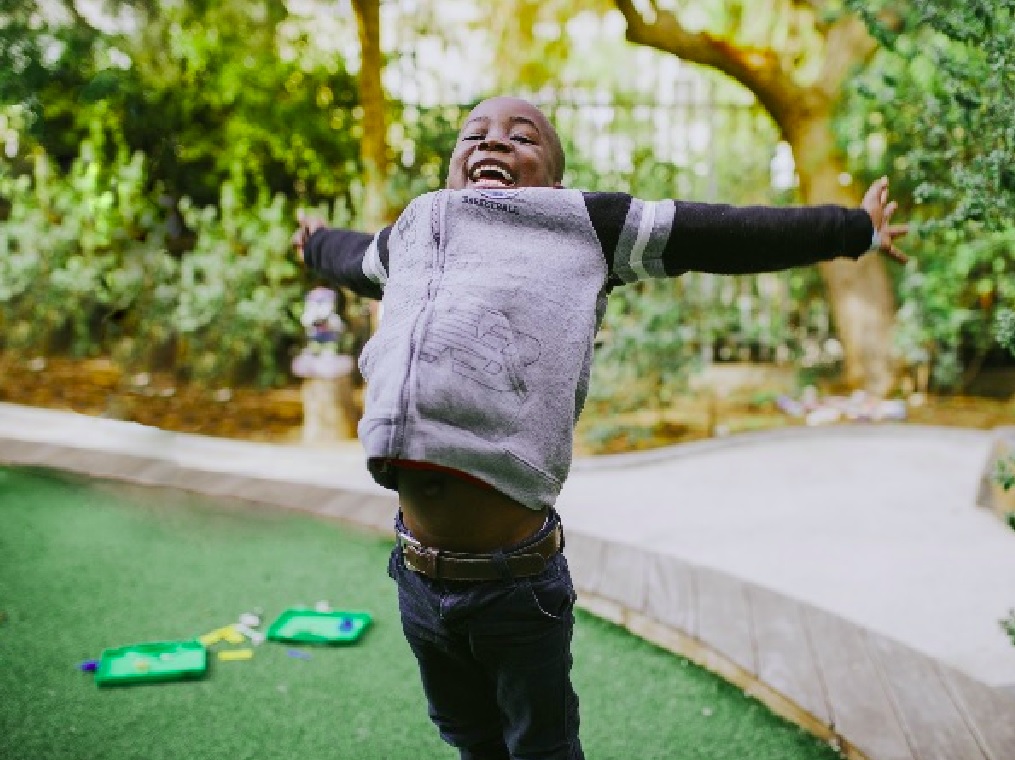
As aforementioned, Content Aware Fill only works best on simple images. Our results are not as great as seen in the below image.
To fix this issue, we will have to use the Patch Tool.
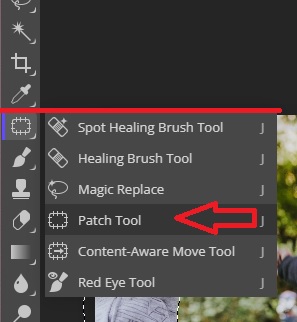
Step 3: select the Patch Tool
The Patch Tool is more like a healing brush. It is used to remove large blemishes or unwanted areas in a photo.
Before you start using the Patch Tool, start by clearing the previous selection. You can do so by pressing Ctrl (Cmd) + D on your keyboard.
Step 4: Make a Selection Around the Area You Want to refine
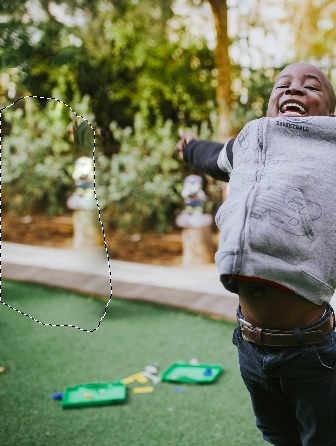
The next step now is to make a selection around the area you want to correct. First, we will try healing the entire area by selecting the entire problem area.
To heal the selected area, click inside the selection and drag the area in any direction. In our case, we will drag the selection towards the right. The Patch Tool will now fill the area with content on the right, as shown below.
As you can see, we copied the boy’s hand. We will need to use the patch tool one more time to remove the hand.
Press Ctrl (Cmd) + D to clear the selection, then use the Patch Tool to select the hand. We will again drag the selection toward the right.
Now we need to use the Patch Tool to refine the results by removing the shadows left by the people and the fake post we added when filling the space.
We are done! You can go ahead and click on File from the Menu Bar, then click on Export As and save your image in your desired file format. To work on the image later on, you need to click File and click Save As PSD.
You need to keep using the patch tool until you achieve professional-looking results.
Conclusion
In this post, we started by learning how to open an image and later learned how to remove an object from an image using a combination of the Lasso Select and the Content Aware Fill.
Later, we looked at how to remove a large object from an object using Content Aware Fill. We also discussed how to deal with problems that come with using Content Aware Fill to remove a large object. We focused on refining the results using the Patch Tool.
Thanks for reading & feel free to check out more of our articles!
Expert Rating
Summary
Content-Aware Fill in Photopea automatically fills selected areas using surrounding content, it requires some practice for seamless results. Despite its moderate challenge, it is a powerful and versatile tool for efficient removal of unwanted elements in photo editing tasks, making it valuable for photographers and graphic designers.


