

Nesting clips in Davinci Resolve is something you should consider using while editing your videos.
In this step-by-step guide, we will discuss how to create compound or nested clips, edit them and bring them back to their original shape. How you can create compound timelines and use a timeline within another timeline.
We will also cover the most common uses of compound clips that can improve your editing workflow and save a lot of your time.
Nesting Clips In Davinci Resolve
Nesting in Davinci Resolve is represented with the name compound clip.
What is Compound Clip In Davinci Resolve?
A Compound Clip in DaVinci Resolve is a feature that allows you to combine multiple video clips from a sequence into one single video clip.
How to Create a Compound Clip in Davinci Resolve?
Creating a compound clip is very easy in Davinci Resolve:
- Select all the clips you want to merge.
You can select multiple clips in two ways:
- To select multiple clips, press and hold the Ctrl or Cmd key, then click on each clip. Once you have selected all the clips you want, let go of the Ctrl or Cmd key.
- To select multiple clips, make sure you have the Selection tool selected (press A to select it). Then, simply click and drag your cursor over the clips you want to select.

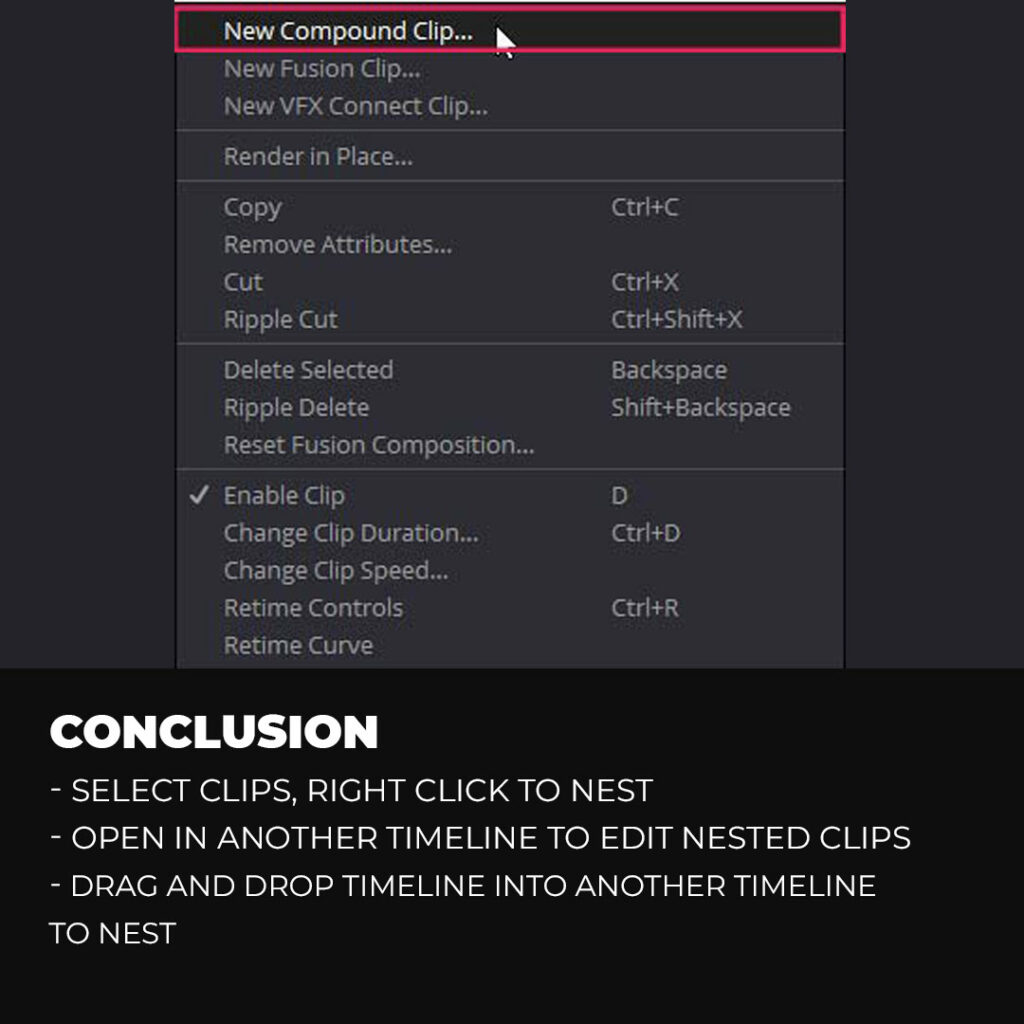
Now to nest or create the Compound clip:
- Right-click on the selected clips.
- Click on “New Compound Clip” from the menu.
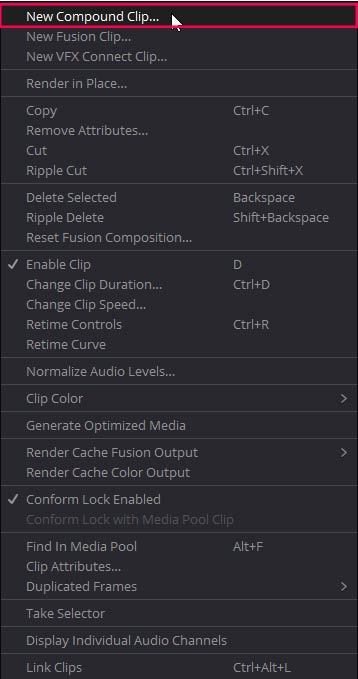
- In the window that pops up, Choose the name for the compound clip or leave it to the default.
- Now click “Create,” and the compound clip will be created.

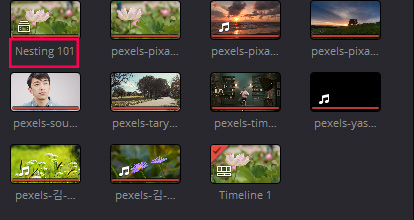
Now the compound clip has been created. You will notice that you now have a single clip on the timeline in place of all the clips you have selected.

The compound clip will also be placed in the media pool as well. You will be able to see the compound clip with other media you have imported into the media pool.
How to Identify the Compound Clip?
You can easily differentiate the compound clip from the simple clips present in the timeline.
- The first thing that will differentiate the compound clip is the name. If you have given it a name, white creating, it will appear on the clip. Otherwise, the default name compound clip with a number will be written on the clip.
- An icon at the beginning of the clip can also be used to identify the compound clip.
How to Nest A timeline In Davinci Resolve?
Now that we have discussed how to create a compound clip, it’s time to discuss how to create a nested or compound timeline in Davinci Resolve.
This is very useful if you want to import everything from one timeline to the other. If you select and drag or copy-paste everything from one timeline to the other, it can easily mess things up. It can create audio sync issues, missing clips, and many other common errors can occur.
Instead of selecting and copy-pasting everything from one timeline to the other, you can simply create a compound timeline.
You can create A nested or Compound Timeline in the following ways:
- Drag the timeline into the new timeline
- Create a compound clip of the whole timeline
Nest a Timeline By Dragiing into a New Timeline
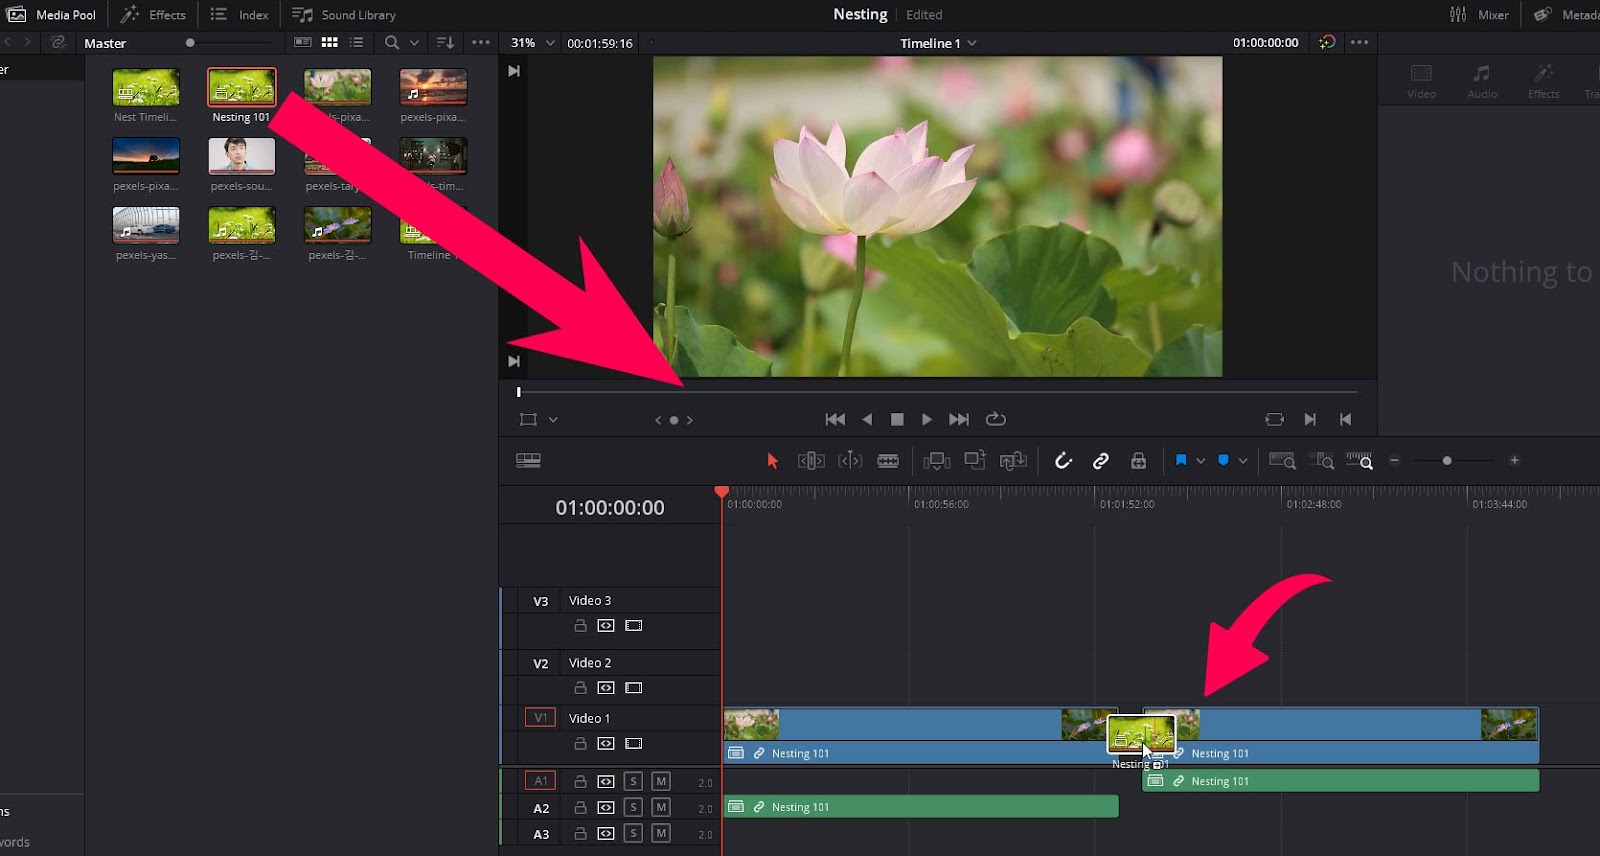
When you create a timeline, it will be present in the media pool as well as your other media, and the timeline icon inside the thumbnail represents it.
You can put one timeline from the media pool into the other timeline by just dragging and dropping.
- Drag one timeline from the media pool and put it into the active timeline.
- It will automatically become a compound clip.

Convert The Whole Timeline In A Compound clip
The other method to make a timeline a compound clip and import it to another timeline is by creating a single compound clip from the whole timeline.
- Go to the timeline and press Ctrl + A or Cmd + A to select everything in the timeline.

- Right-click on any clip and then choose “Create new compound clip” from the menu.
- Choose a name and click Create.

Now the compound clip of the whole timeline will be available inside the media pool.
- Open the other timeline where you want to import the compound timeline.
- Drag the newly created compound clip from the media pool to the desired timeline.
Edit Nested or Compound Clips In Davinci Resolve
You may need to make changes to the content inside the compound clip, to do that:
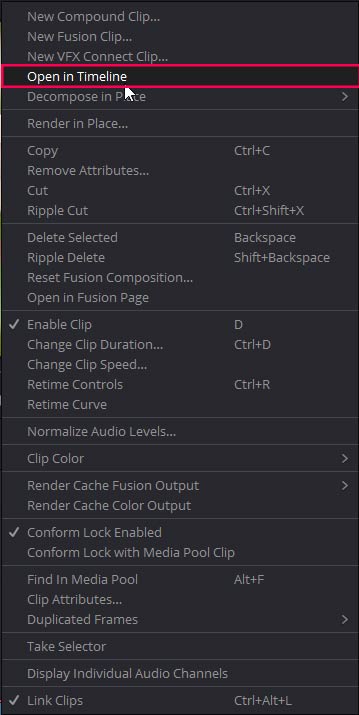
- Right-click on the compound clip inside the timeline.
- Then click on the option “open in the timeline.”
Now you have everything opened in front of you; you can make the required changes and then go back to the main timeline.
To go to the main timeline:
- Click on the timeline name in the preview monitor and choose the main timeline.

Now the compound clip will be updated.
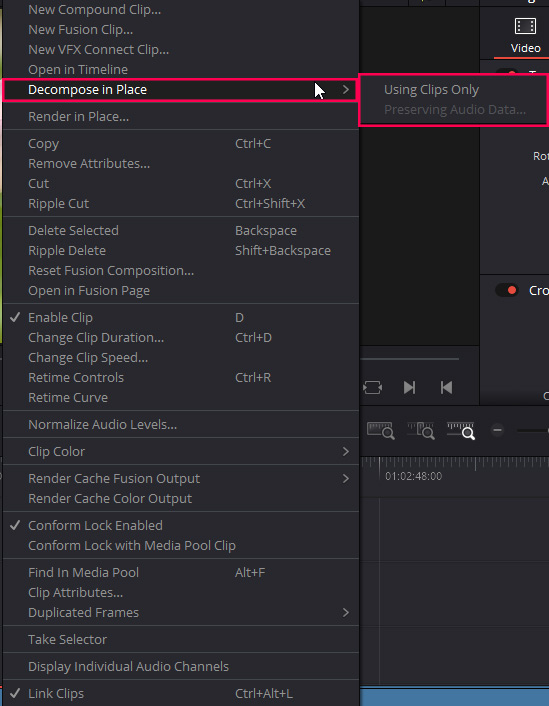
How to Decompose or Un nest Compound Clips In Davinci Resolve?
You need to decompose the Compound clip to bring the clips back to their original order.
To decompose the compound clip:
- Right-click on the compound clip.
- Click “Decompose in Place” and then click on any of the two options.
- Using clips only
- Preserving Audio Data
And now, you will have the clips back in their original form.
Uses of Nesting In Davinci Resolve
There are a lot of creative and time-saving uses of the nested or compound clips in Davinci Resolve. We will cover a few of the common ones which will improve your editing workflow and save you a lot of time.
Apply transitions to multiple clips
If you have multiple clips stacked over each other and want to transition to the next clip, then you need to apply a transition.
- You can apply the transition to every single clip present in multiple tracks. This will work, but it will take alot of time.
- Create a compound clip using the methods mentioned above to save time.
Clean up the messy timeline
Some people love having a messy timeline, but most hate it. It makes it harder to focus on the individual clips you are working on.
- So by creating a compound clip, you can clean up your timeline and focus on the clips you are working on.
Move multiple clips at once
If you have alot of clips in the Davinci Resolve timeline and you have applied effects like transitions, and you want to move them to a different place on the timeline. You can move them by selecting everything, but you will likely mess things up.
- A compound clip will make it simple to move multiple clips all at once without messing things up.
Use Multiple Clips in the Timeline
If you have multiple clips that you want to use repeatedly in your timeline, you can copy and paste them multiple times or create a compound clip.
- Most of the time, you must use lower thirds with multiple layers. Copying and pasting multiple tracks again and again is not a very efficient way to work.
- Make a compound clip of all these layers, and now you only have to move a single clip which is way easier than moving multiple clips.
Apply Effects
If you want to apply an effect to multiple clips, then the traditional way is to apply the effect to all the clips one by one.
- But with the compound clip, you can apply the effect only once, and it will be applied to everything inside the compound clip.
Conclusion
Nesting clips in Davinci Resolve are very simple. Select all the clips you want to nest and right-click. Choose the option “Create a new compound clip.”
To edit the compound clip, simply right-click and choose “open in a new timeline.” To decompose the compound clip, right-click and then select the option “decompose in Place.”
You can use compound clips in multiple ways to enhance your editing experience. Apply the effect to multiple clips, move multiple clips together, apply transitions to multiple clips, clean up the messy timeline, and much more.
Thanks for reading & feel free to check out more of our articles!
Expert Rating
Summary
In Davinci Resolve, you can nest and create compound clips by selecting multiple clips, right-clicking, and choosing “Create Compound Clip.” It may require some practice to become proficient, but it becomes relatively straightforward with regular use. Nesting and creating compound clips offer great functionality and scalability, allowing you to efficiently organize and manage complex timelines in video editing projects.


