
The Cut Page in DaVinci Resolve 18 offers a range of features and functions to help you create professional-looking videos with ease. This guide will take you through all the essential techniques, from basic trimming and cutting to advanced techniques like audio meter, multi-cam techniques, and much more!
With step-by-step instructions and clear explanations, you’ll quickly master the Cut Page and be well on your way to producing high-quality videos.
What is the Cut Page in DaVinci Resolve 18?
The Cut Page in DaVinci Resolve 18 is primarily used to quickly edit your video by viewing, trimming and joining clips together as well as modifying various audio and video settings from the Inspector. When compared with the Edit Page, the Cut Page is streamlined for fast video editing as it is equipped with the necessary tools for trimming and basic adjustments. The Cut Page is extremely user-friendly and it can be mastered by any beginner in no time!

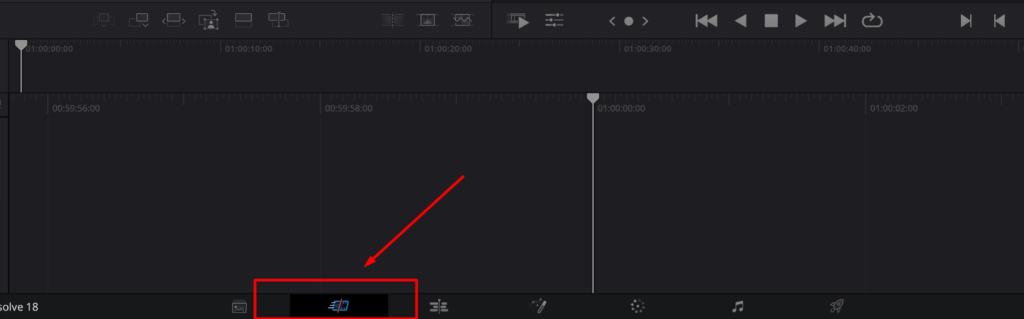
To choose the Cut Page,
- Go to the bottom of the canvas of DaVinci Resolve 18
- Choose the Cut Page icon as shown below
What are The main UI options in Cut Page?
The user interface of the Cut Page consists of three main categories as listed below:
- Media Pool: Allows you to import media clips and use them in the project.
- Viewer: Here you can preview both the clips located in the Media Pool and the video found in the timeline.
- Timeline: The timeline is the location where you place your preferred clips and apply the editing.
How does the Media Pool work on the Cut page
The Media Pool is the primary location where you assemble all the clips, graphics, images and all that you require at one destination. Then, you drag and drop them on the timeline and use it in the project. Apart from that, you can fast view, reorganize and create bins, edit in the timeline and use them in the preview window as well.
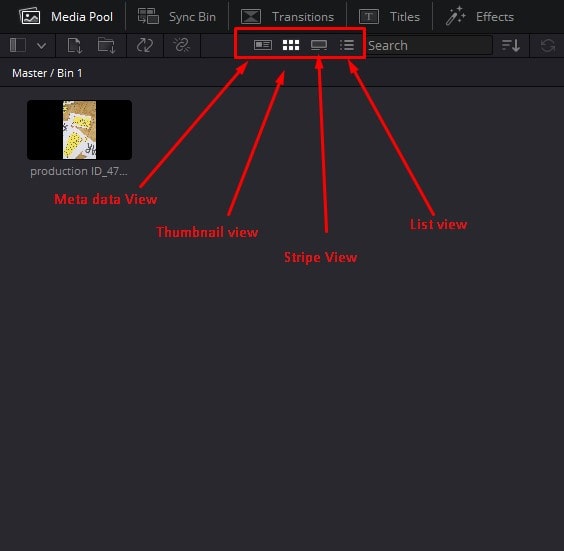
At the top of the Media Pool section, you can view the different ways to view the materials you have imported into the Media Page,
- Icon view: The icon view displays the clips as icons or thumbnails.
- Filmstrip view: The Filmstrip view displays a filmstrip in the form of frames.
- List view: The clips are shown in the list format or as a multi-column list view as well.
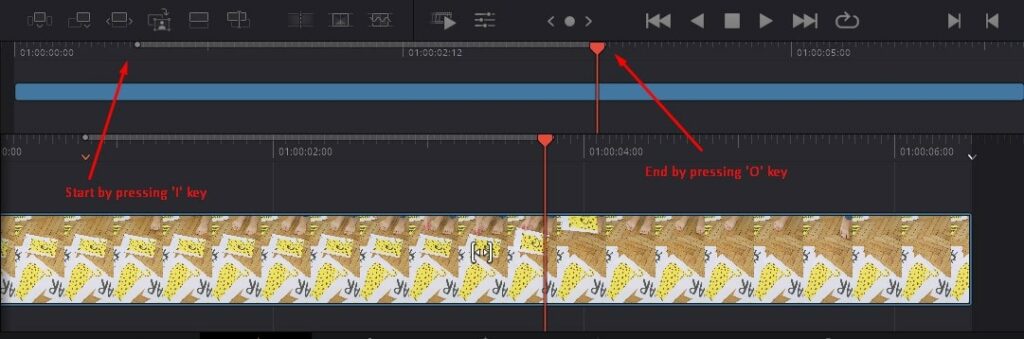
Once you place the clips on the timeline, you can use the play head to view the visual on the preview window. If you want to mark sections on the clips, use the keyboard shortcut “I” or “O” for “In” and “Out” respectively.
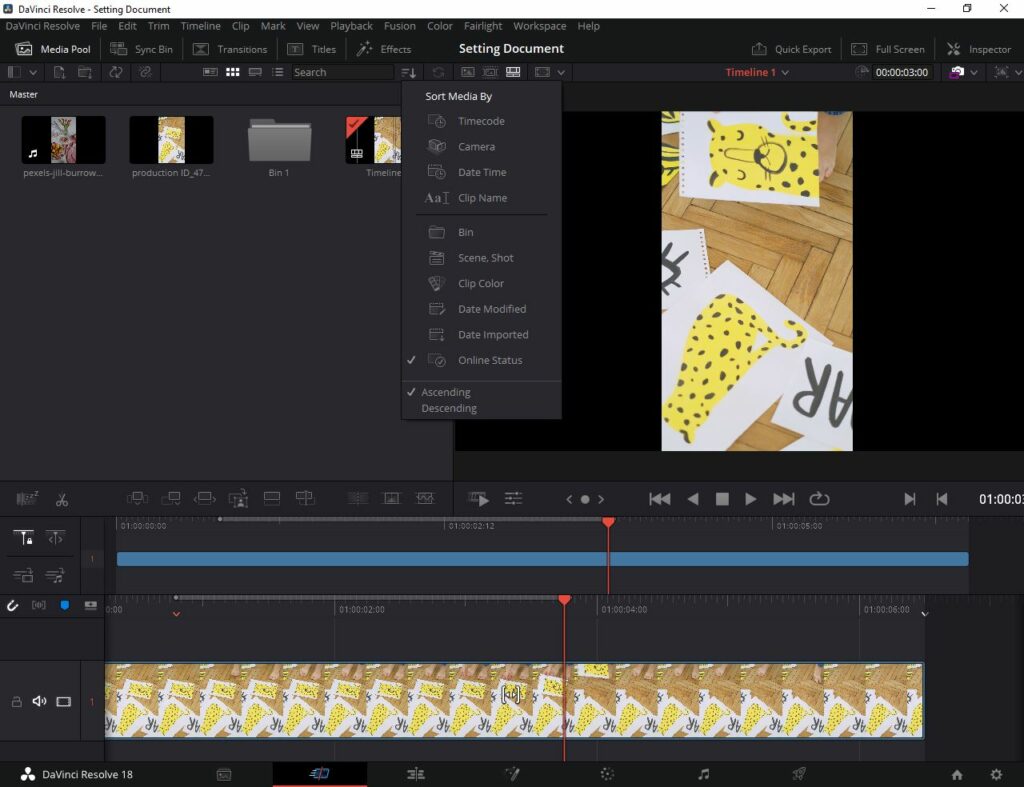
If you want to sort the media clips on the Media Pool, click on the Sort Media icon. The sorting helps to order and filter the necessary media in a dedicated manner.
The sorting can be performed in 5 ways as listed below:
- Timecode: Sorts based on the timecode
- Camera: Sorts based on the camera option
- Duration: Sorts based on the duration of the clips
- Clip Name: Sorts based on the name of the clips
- Bin: If you have added bins to the Media Pool, based on this factor it is sorted
- Screenshots: If you had added screenshots or images, media are sorted accordingly
- Clip Color: The colour of the clip is considered to sort the media contents
- Date modified: The modification date is considered when you sort the contents based on ascending or descending order
- Date imported: The date on which the clip is imported into the Media pool is considered for sorting
- Online status: The online status or the active clips are considered for the sorting process
- Ascending or Descending: Finally, once you choose one of the above options, you can decide to sort in Ascending or Descending order interconnecting the above sort method.
What is Viewer in Cut Page?
The viewer is the Cut Page is located in the upper right corner of the canvas. The main purpose of the viewer is to help to view the content.
How to View Media on the cut page?
To view the content,
- Merely double-click on any media.
- The viewer will display the content you clicked.
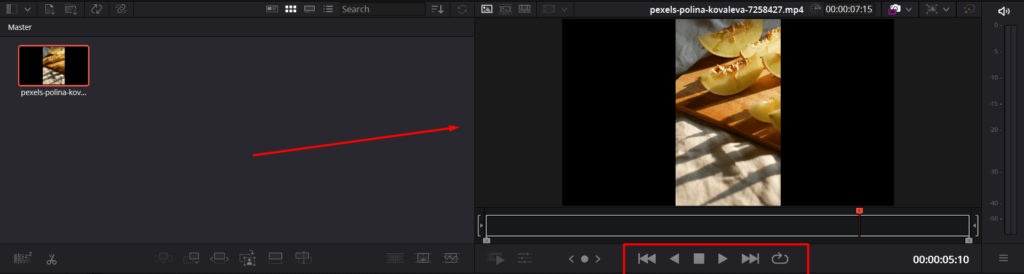
Under the viewer, you can pause, stop, forward, and backwards the specific video through the icons displayed under the Cut Page. Apart from that, you can use the navigation on the Cut Page to move across the video clip.
Apart from that, you can drag a media and drop it into the timeline. This also views the content under the viewer. Therefore, the last content you click is demonstrated in the timeline. Just like Last comes first served!
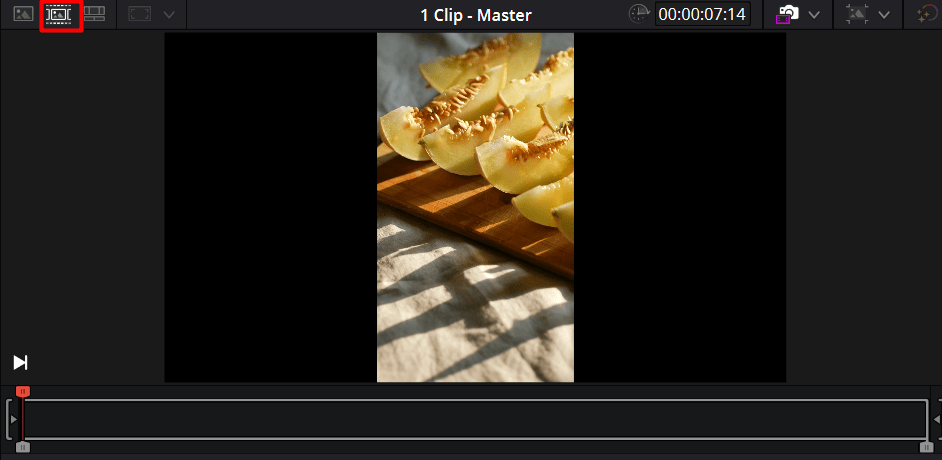
What are the Viewing Modes on the Cut page?
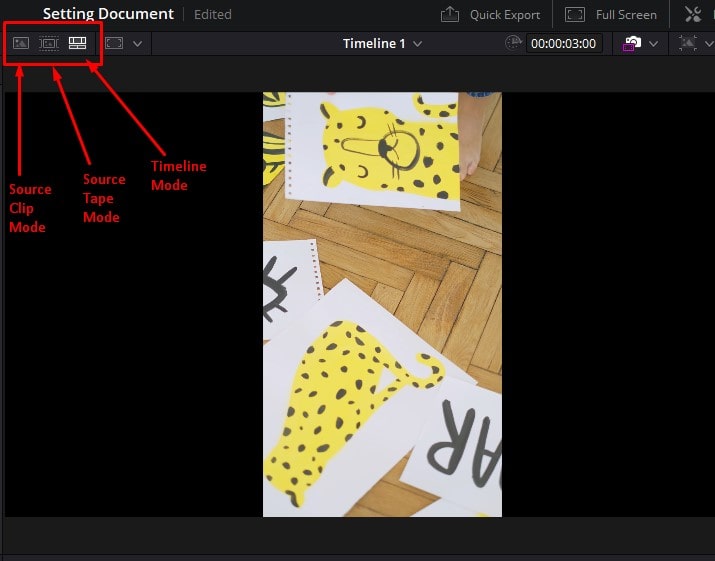
When viewing clips from the preview mode, you can use 3 main modes. These options are available at the top left corner of the Viewer window as follows:
- Source Clip mode: If you double-click on a specific clip from the Media Pool, it is opened in this mode.
- Source Tape mode: The complete bin file including the clips opened under the Source Tape mode.
- Timeline mode: If you work on the edits of your page, the timeline mode can be opened to view your edits.
What is the Timeline in DaVinci Resolve?
The timeline is the section dedicated to adjusting the timing or trimming it as per the requirement. It is important to have a proper idea about how the timeline works in order to work on the media properly.
There are two views of the timeline as displayed below:
- Upper timeline: Displays the zoom-out version of the timeline. Here, you can asses from the first to last clip of the timeline
- Lower timeline: Displays the zoom-in version of the same timeline sequence.
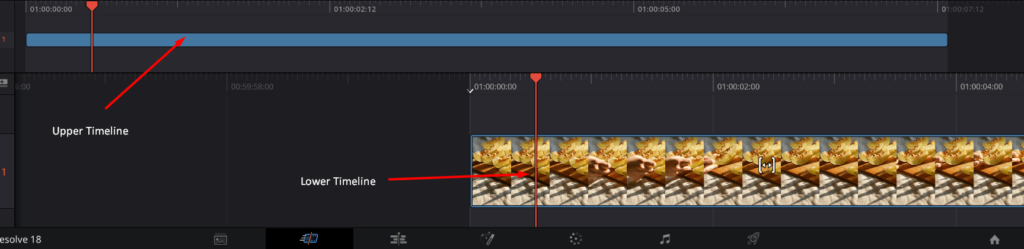
You can move the timeline by simply clicking and dragging the timelines accordingly. Using the upper timeline, you can drag the play head. Using the bottom timeline, you can move the timeline under the play head.
The upper timeline is also used to cut down some timelines as well. To do this, simply click and trim the timelines as per the requirement in the upper timeline. You will notice that the timeline is trimmed further.
How to use the Clip Inspector
If you click on a specific clip and choose the Inspector option located in the upper right corner- it opens the clip inspector for you. The clip inspector allows you to handle and change the settings with respect to each clip.
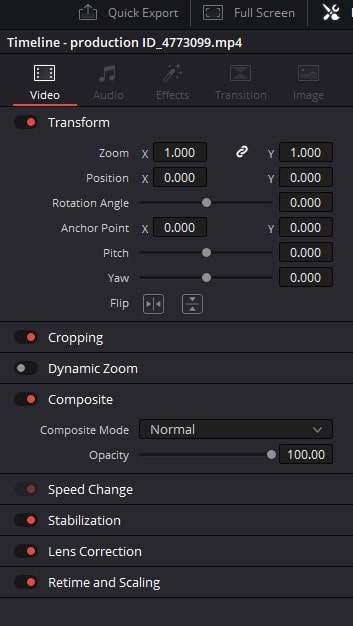
When you click the clip inspector, the following icons are displayed:
- Video: You can adjust the blend modes, stabilize shots, and correct lens distortion
- Sizing: Sizing allows to reposition, crop and scale images
- Audio: Audio adjusts sound levels, pan, pitch and EQ
- Effects: Displays the different types of effects which we can add on
- File metadata: edit and view clip metadata
- Transition controls: Displays the different types of transition controls which we can add on
What are Clip Effects on the Cut page?
The effects toolbar helps to handle effects and edit them through the preview window itself. In this case, you will not use the Inspector panel and use the options displayed in the preview window to edit the clip. You can transform, crop, add speed effects, zoom, adjust the lens and do much more tasks in the clip effects settings.
To add clip effects,
- Click on the ‘Effects’ button displayed on the preview window.
- As soon as you click, a handful of settings appear to handle the clip effects.
- Click the desired option and use it directly without the Inspector panel.
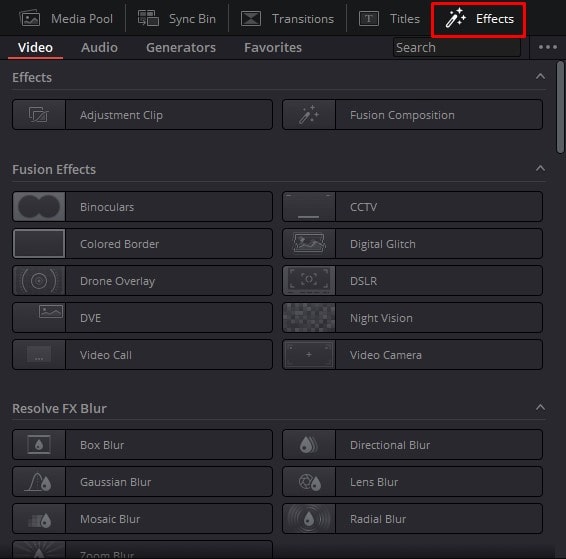
What are Transitions and Effects?
DaVinci Resolve 18 has dozens of transitions and effects you can choose from simulation lenses, effects, shape transitions, titles and much more!
You don’t need to use the transitions directly. For you can hover over each transition and it would be previewed on the preview window over your clip. Based on this, you can find the perfect transition or effect suiting your requirements.
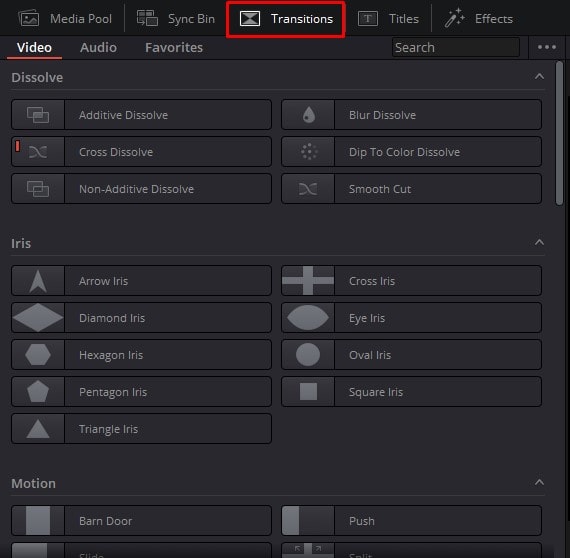
If you need to add a transition or effect,
- Go to the top left-side corner and choose the ‘Effects’ library.
- Choose a transition.
- Next, click and drag the transition and place it over the clip.
- Go to the ‘Inspector’ panel and edit the specific transition settings as per the requirement.
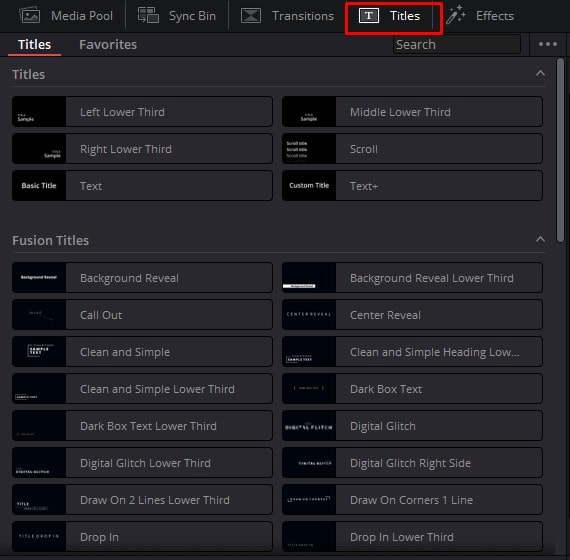
How to Add Titles on the Cut page
On the Cut Page, you can effective titles to your clip. There are plenty of animated titles, fusion titles, 2D titles, 3D titles, cinematic titles and much more that you can use directly on the clip.
To add titles or texts to your clips,
- Go to the ‘Effects’ panel.
- Choose titles from the left side of the canvas.
- All you need to do is select the right title and click and drag it to place on the timeline.
- Next, go to the ‘Inspector’ panel on the right side top and edit your title settings.
- You can change the colour, and position, and add keyframes, size, and transitions to your titles in vast varieties.
What are the Cut Page buttons?
You have several buttons located beside the viewer on the Cut Page. The main three buttons are shown below:
- Source clip
- Source Tape
- Timeline
What is the Source clip in DaVinci Resolve?
The source clip helps to display the source media you have selected.

For example, if you select ‘A media’, the source clip displays it under the option. From the source clip, you can use the red colour handle to navigate across the video clip. Apart from that, the time of the source clip is displayed in the right-hand side corner of the view.
What is the Source tape in DaVinci Resolve?
The source tape helps to put all the clips and displays at once. It means that all the content you have imported to the Media Page is indicated under one roof in source tape.
So that you don’t need to double-click or click on each clip to display it in the viewer’s tab. Suppose you want to add footage, simply click on the footage in the media. Next, drop on the upper timeline.
Different ways to use Timeline
How to build a sequence in DaVinci Resolve 18
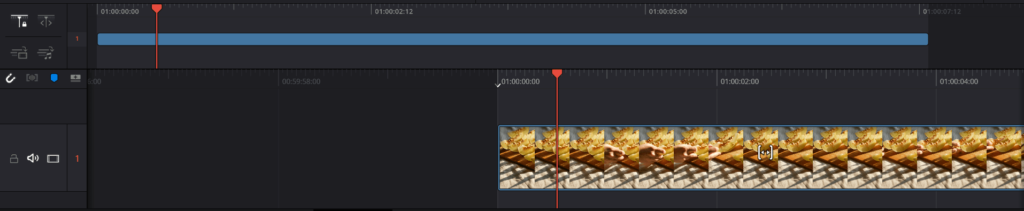
The sequence is about adding another clip over the existing time to create a sequence. So, the clip which is added works accordingly as per the sequence. You can add an existing clip and build a sequence in the upper timeline. To do this,
- Drag content in the media and drop it in the upper timeline.
- Then, adjust it accordingly in the upper timeline to build the sequence.
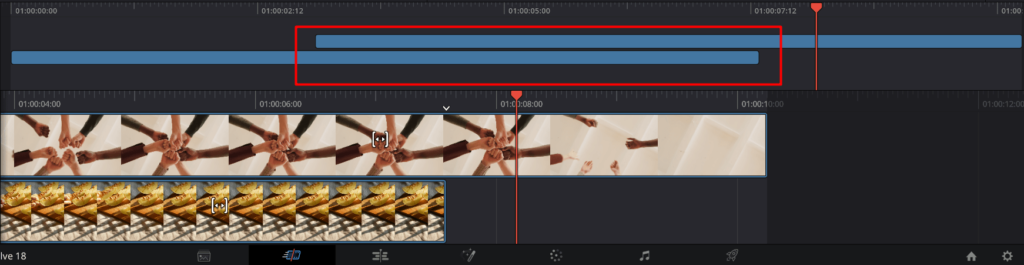
You can notice that the new sequence is overlapped in the upper timeline as shown above. Now, you can drag or move the newly added clip as per your requirement. When you view the content after editing, the sequence of the clip is maintained accordingly.
What are Smart Indicators on the cut page?
DaVinci Resolve is taught how to act intelligently. It has a feature named “Smart Indicator” to act in a dedicated manner. It helps to fasten your editing skills and work with less hassle.
The following are the key smart indicator options:
- Smart Insert: Choose a clip from the Media Pool and set the in and out points. Next, click the Smart Insert option to insert the specific clip within the defined in and out range.
- Append at End: Choose the clip/clips to attach at the end of the timeline, and click the Append at End option.
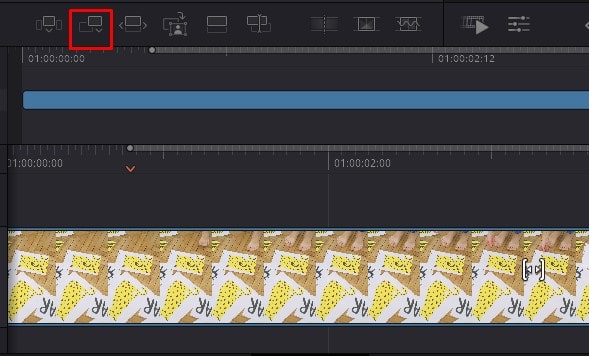
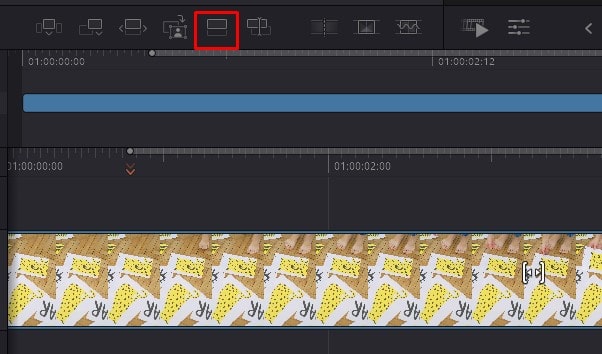
- Place On Top: Choose a specific clip and click the Place on Top option to insert the clip above the current track.
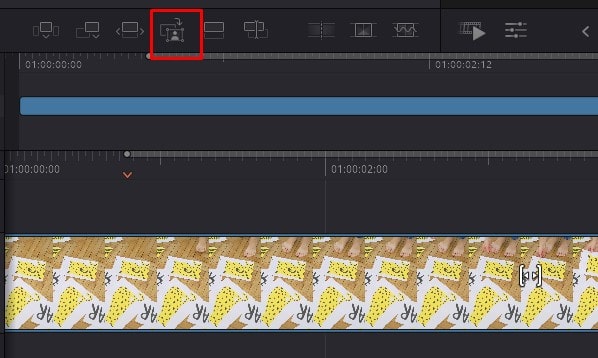
- Close-Up: This option works automatically to figure out the faces on the clips and give a close-up of those faces.
- Ripple Overwrite: This option overwrites the currently selected clip with a new clip. The old clip is replaced with a new clip on that specific location of the old clip. Works like Find and Replace functionality.

- Source Overwrite: Initially, set an in and out through the cutaway. Next, if you choose Source Overwrite, the specific clip would be placed and synchronized above the current layer.

What is Multicam in DaVinci Resolve?
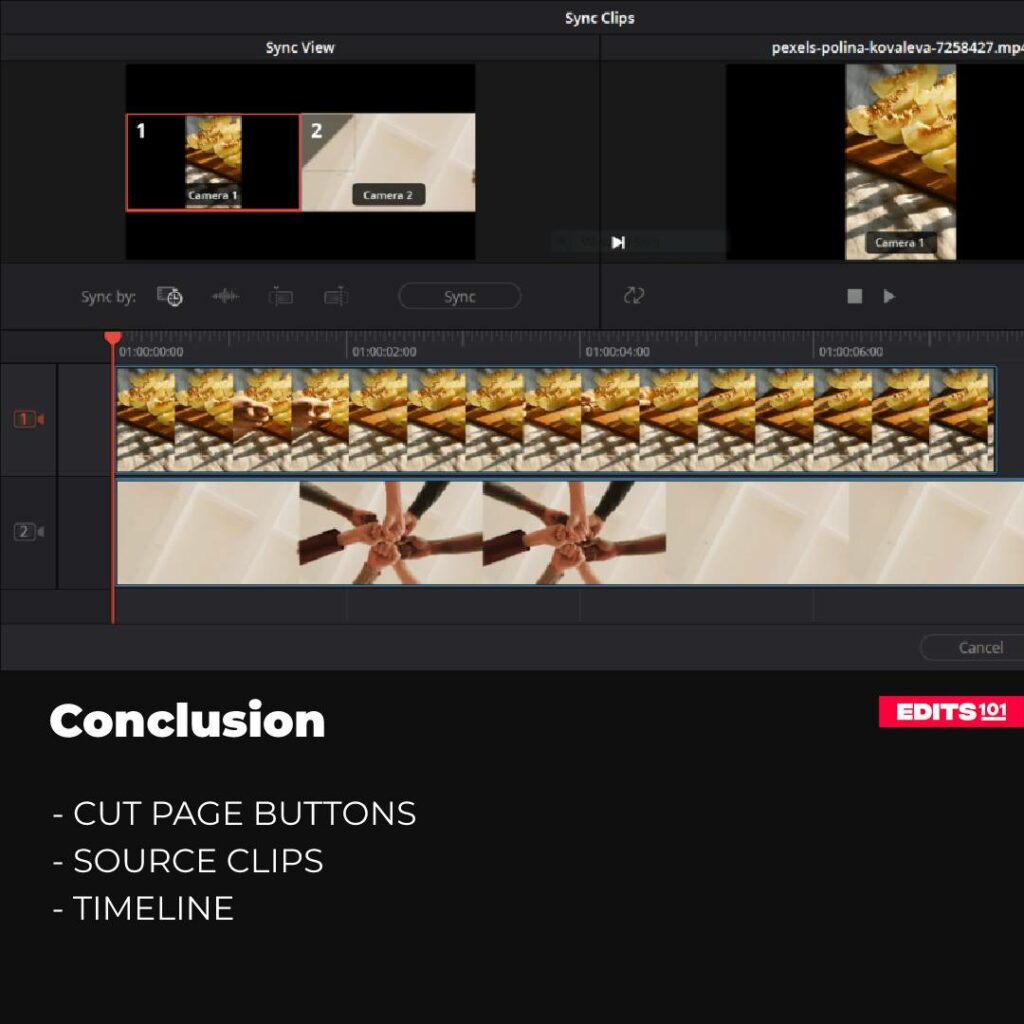
Multicam is the strategy of syncing two or more clips together and making several adjustments at once. Multicam supports syncing the clips follow the below steps to sync your clips,
- Drag all and select all the contents in the media
- Click on the ‘Sync clips’ button displayed on the Media Pool (shown below)
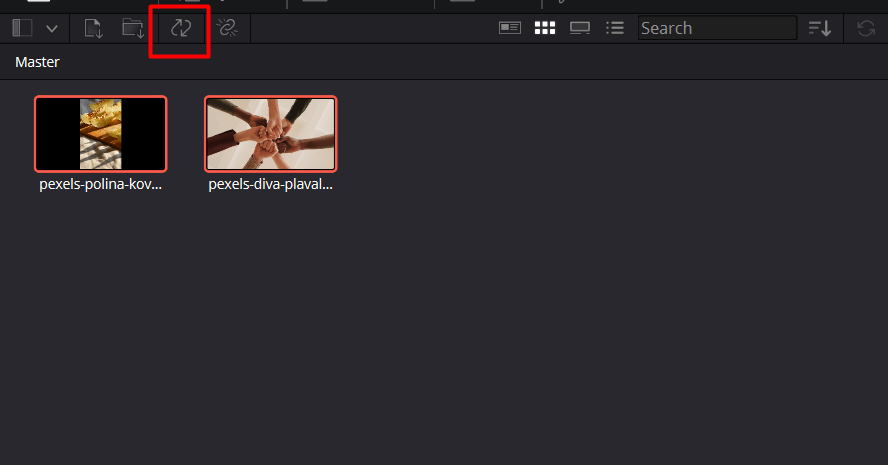
As soon as you click the sync clips, it displays the sync window to sync the clips.

If you want to sync it by the audio, click on the 2nd icon as displayed below. It would automatically sync the clips based on the audio to a Multicam sequence.

If the clips are synced, you can use any clip and trim to add it to the existing video content automatically.
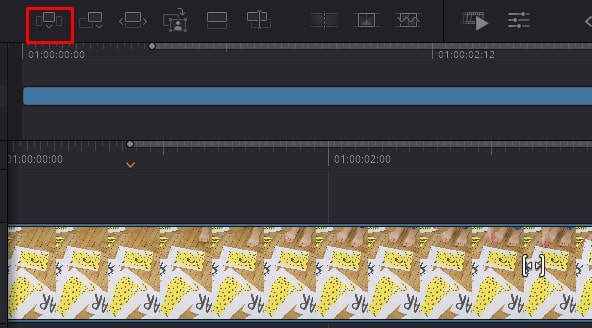
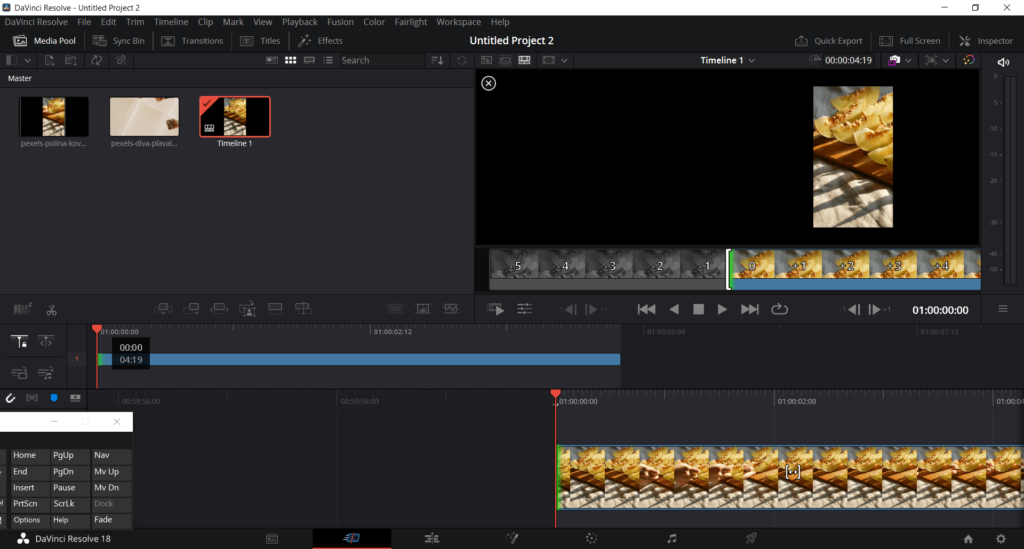
How to Source Overwrite in DaVinci Resolve?
Source Overwrite helps to add the specific clip automatically to the timeline. All you have to do is select the clip to add and click the source overwrite option. Then, it finds a suitable place to add the clip to the timeline. For example,
- Click and drag media content into the timeline. Now, trim the specific content.
- Next, click on the source overwrite button located on the Cut Page as displayed below.
- The source overwrites button automatically finds the desired location to add the specific clip onto the timeline.
- And places it on the right destination as well.

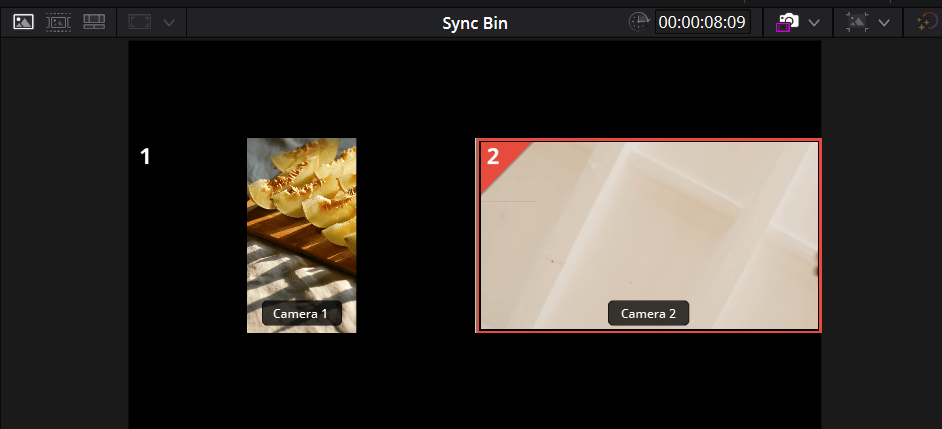
You can click on the Sync bin button located on the top left-hand side to display the Multicam clips in one window.
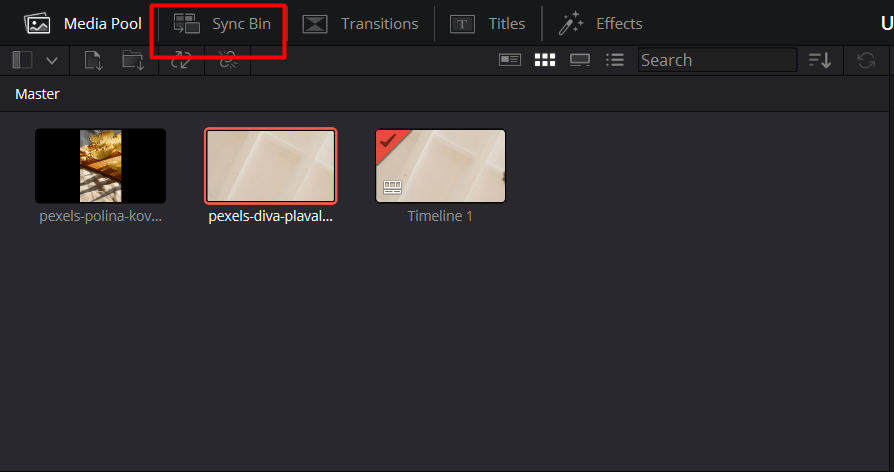
It will collage the video clips and display the clips in one window.
How to use the Trimming feature Professionally
DaVinci Resolve has a handful of handy techniques to apply trim to the video and audio clips. All you need to know is how each one of them works when you hover over each clip- that’s the point you learn to use them effectively.
- Trim: Hover over the end or beginning of the clip and drag to the left or right as per the requirement. This shortens the duration of the clip you chose to trim.
- Roll: You can shorten one side of the clip but the other side of the clip is extended. Fortunately, the number of frames on the clip is the same.
- Slip: Slip helps to move the clip up or down as per your requirement. But the duration or timeline remains the same and you can adjust it as well.
- Slide: The Slide feature works within the Slip feature. The only difference is you press the Shift key and move the clip up or down. But, the duration of the timeline is fixed in this case.
- Duration: If you need to extend or shorten a duration, hover over the edge of the specific clip and drag in or out as per your requirement. When you deal with the duration, the duration time appears in a small box at the top of the clip.
- Trimming audio: In the upper timeline and on the left side of the audio timeline, the audio trim icon is placed. Click on it to see the waveforms on the lower timeline of your audio.
How do you cut or Trim in DaVinci Resolve 18?
The Cut Page is all about how to make your activities work faster. Trimming also helps to make your speed up and fasten the media content.
Step 01: Choose the Media Content
To trim the page, initially choose media content.
Click on it and go to the Cut Page located at the bottom of the page.
Step 02: Trim the timeline
First, adjust the top timeline and choose the content to trim in the bottom timeline. Make sure to be precise in the measurements. Next, you can click on the red icon located on the right-hand side of the timeline.
Next, move your cursor closer to the start of the timeline and a bracket shape appears. Click and drag along the bracket handle to trim your timeline accordingly. That’s all! You can get the clips and drag the last clip if necessary and trim the content.
Hoes does the Audio Meter work?
If you use a clip with the audio or use the audio clip, you can get an insight into the audio meter. The audio meter is located on the right side of the Viewer window or on the timeline( appears when you play a clip).
The audio meter represents three main colours corresponding to three different perspectives as mentioned below:
- Green: Green depicts safe levels which means the audio is friendly for the user to hear and at the right level.
- Yellow: Yellow depicts that the level is not very safer and it has peak volumes at certain levels.
- Red: Red indicates the danger state of the audio as the audio peaks at high levels.
What is the Color Science Quick Menu?
The Color Science menu is located the beside the project settings cogwheel icon. If you click on it, the options related to the Color Science menu appear. Initially, when you start a project, the default settings of the colour science are placed here.
If you want to change the Color Science type, follow the below steps,
- Click on the ‘Color Science Quick’ menu beside the project settings
- Choose the desired colour science option among the DaVinci YRGB Color Management, ACEScc, or ACEScct as per the requirement.
How to Quick Export in Cut page
When you are working in a rush, you need to learn to do everything at a rapid speed. That’s why DaVinci resolve 18 has the Quick Export menu. Through the Quick Export menu, you can upload the completed video footage to online services. The online services include YouTube, Twitter, Vimeo and much more! You just need to connect the, to DaVinci Resolve and upload them on your service platform.
To access the Quick Export menu,
- Choose the ‘Quick Export’ option.
- Change the export options as per your requirement and click ‘Export’.
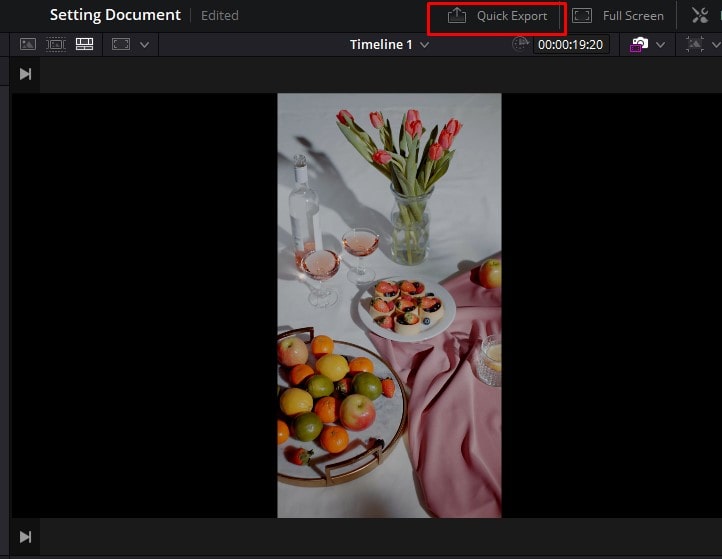
As soon as you click the Quick menu option, the Quick menu dialogue appears.

This helps to post your clips in minutes and you don’t need to use the Deliver Page!
Conclusion
In conclusion, mastering the Cut Page in DaVinci Resolve 18 is an essential step in becoming a proficient video editor. With its range of powerful tools and intuitive interface, the Cut Page makes it easy to create professional-quality videos with ease.
By following the techniques outlined in this guide, you’ll be able to elevate your video editing skills and produce videos that impress and engage your audience. Take the time to master the Cut Page in DaVinci Resolve 18 and bring your visions to life.
Thanks for reading & feel free to check out more of our articles!
Expert Rating
Summary
In summary, cut page is a has a lot of options and features to edit the clip. From the timeline, media pool, viewers are basic features. The advanced features are the smart indicators, effects, titles, audio meter, multicam, color science menu and the quick export options. Learn this tactics and master your editing skills using the cut page.


