
If you have blurry or less sharp images, Photopea can help you if you want to sharpen them.
In this step-by-step guide, we will cover different tools and techniques to sharpen your images using Photopea.
Let’s get started!
What does Sharpen Tool do in Photopea?
Sharpen Tool enhances blurry or unclear parts of an image. It focuses on increasing clarity on the soft edges, as well as increasing the contrast in your image. To do this, light pixels became brighter while dark pixels became darker.
As a result, edges are more clearly defined, which increases contrast and makes the object in the photo stand out more.
Where is the Sharpen Tool in Photopea?
Open the Photopea app, then look at the Toolbar on the left side of the canvas. Find the icon that looks like a teardrop. Click and hold or right click on the icon to reveal the tools inside.
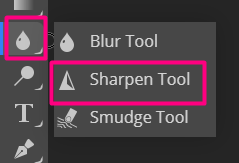
Three tools will pop-up including Sharpen Tool.
- Sharpen Tool has an icon that looks like a pyramid.
- While the teardrop is an icon for the Blur tool.
- The Smudge Tool, on the other hand, resembles a finger rubbing paint onto paper.
How to Sharpen Image in Photopea?
In Photopea, there are two options for sharpening an image. One utilizes the Sharpen tool, and the other uses the Unsharp mask inside the filters menu.
Let’s explore the differences between the two methods.
Using Sharpen Tool
This tool allows you to sharpen selective areas without unintentionally damaging or over sharpening other parts of the image.
Step 1: First, find the icon that looks like a teardrop.
Click the tool and open it by right clicking. Click the Sharpen Tool, then settings will appear at the upper left corner of the screen.

Let’s have a quick discussion on how to utilize each of the options or settings.
Adjusting the Size of Brush and Hardness
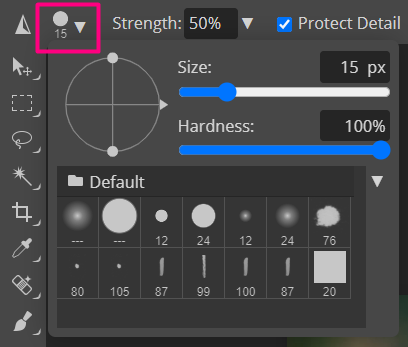
The number below the circle icon indicates the size of the brush. Here you can customize the brush size if you want to make the sharpening process faster.
Hardness, on the other hand, is used for the edges of the brush. An edge drawn with a softer brush will be blurry and less defined, while an edge drawn with a harder brush will be distinct and defined.
There are a lot of predesigned brushes available inside Photopea but we recommend you use the first brush from the default folder for natural-looking sharpening.
Strength of the Sharpen Tool
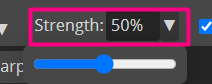
The strength setting determines how sharp you want your image to look. More sharpness will be added to the painted area if the strength value is high.
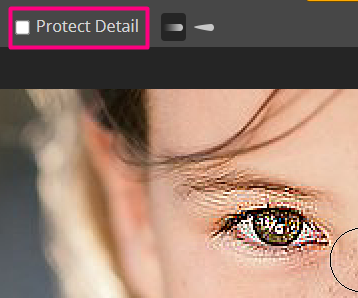
Protect Detail
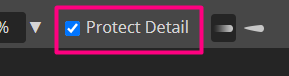
The Protect Detail option on the Options bar enables the Sharpen tool to enhance details without adding any obvious artifacts.
This is how it looks when the Protect Detail option is enabled and when not.

Step 2: Adjust the size of the brush and hardness, as well as the strength value based on your preference.
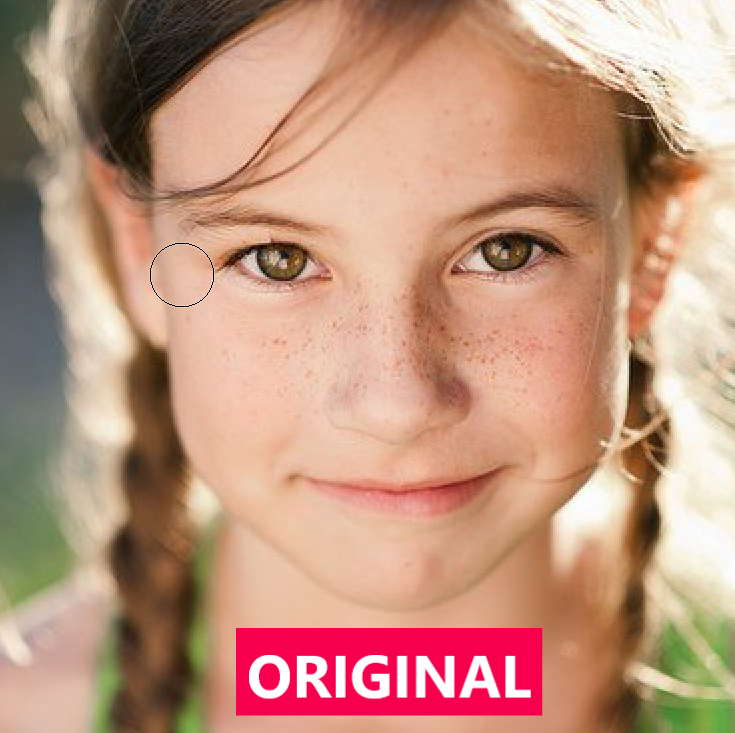
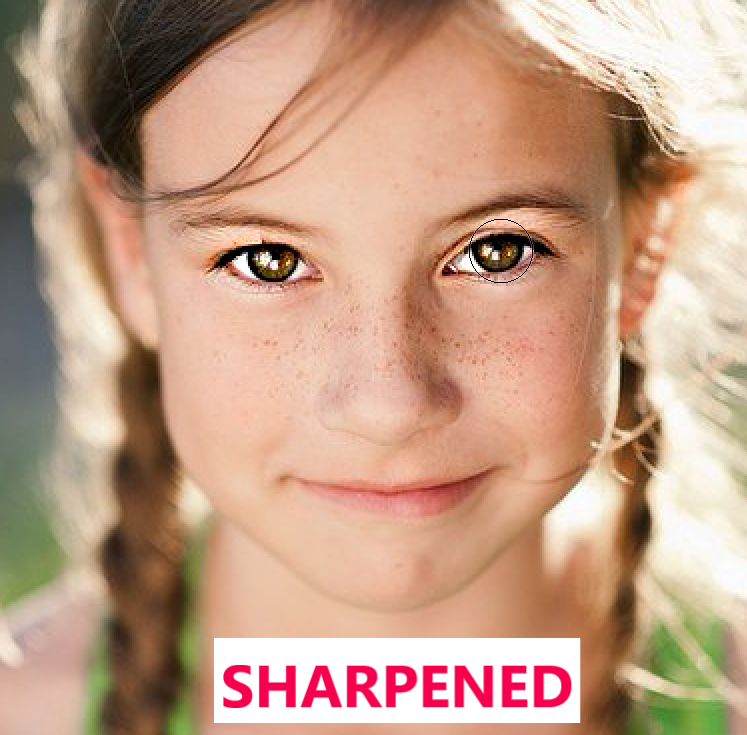
Step 3: Paint the brush across the part you want to sharpen. For instance, if you want to sharpen just the eyes in an image, click and drag (paint) the brush on the eyes.
Step 4: Save and Export the File. Click Ctrl + S then download or export your file by clicking File, look for Export As, then choose the desired format for your design.
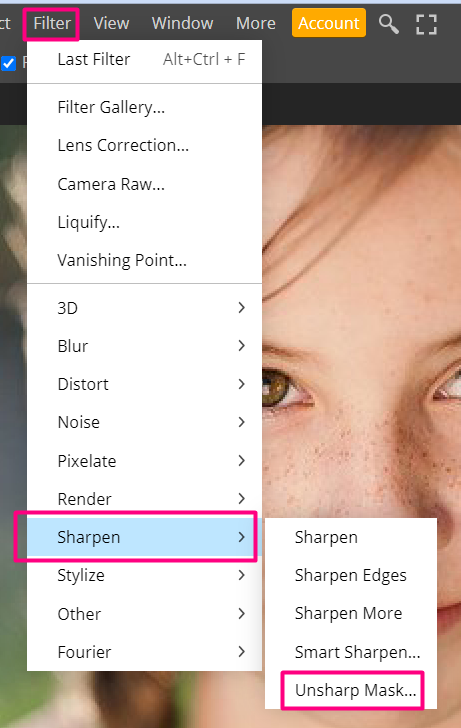
Using Advanced Tools – Unsharp Mask Filter
Unlike the Sharpen tool, the Sharpen filter found in the Filter main menu sharpens the entire image.
In Photopea, the unsharp mask filter is frequently used to sharpen images. You can change several parameters when using this filter, including:
- Amount. The amount controls how much sharpness will be applied to the image.
- Radius. Choosing a relatively low value for this parameter is recommended because the radius determines how big the sharpened details will be.
- Threshold. Image noise is often more obvious after sharpening. By setting the unsharp mask to ignore particular portions of the image, boosting the threshold can help you to reduce the noise.
Here is a step-by-step instruction manual for using the unsharp mask.
- Duplicate the layer that you want to sharpen.
- Once the new duplicated layer is selected, go to Filter > Sharpen > Unsharp Mask.
- A dialog box will appear where you can set the amount, radius, and threshold. By keeping an eye on the preview, you can experiment with the amount and radius size based on the image you are using. Moreover, it is recommended to set the Threshold to zero.
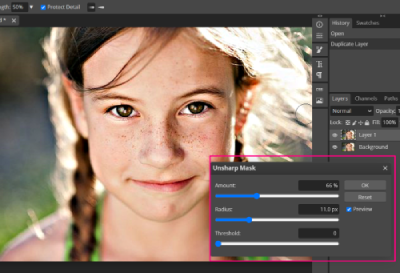
- Once you’re satisfied with the settings, click OK to save the changes. The unsharp mask will now be applied to the photo.
- Don’t forget to save and export the file on your computer.
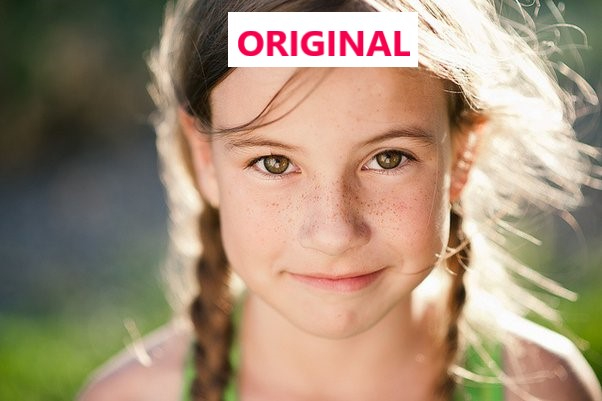
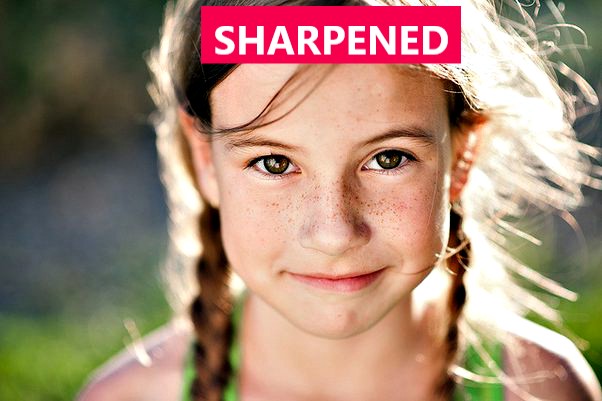
Here is an example of an image with the unsharp mask applied.
What is the best way to sharpen images in Photopea?
The best way to sharpen images in Photopea will depend on the area that needs sharpening. Tools may differ depending on whether you’re sharpening the entire image or just certain parts of it.
For instance, you might use the Sharpen tool to selectively sharpen a specific area, like a person’s eyes, if you only needed to sharpen that one area. To improve the local contrast of an image, utilize the Sharpen tool.
For optimal results, utilize the Unsharp Mask when sharpening a whole image. You can use this tool to change the overall image’s sharpening amount and threshold.
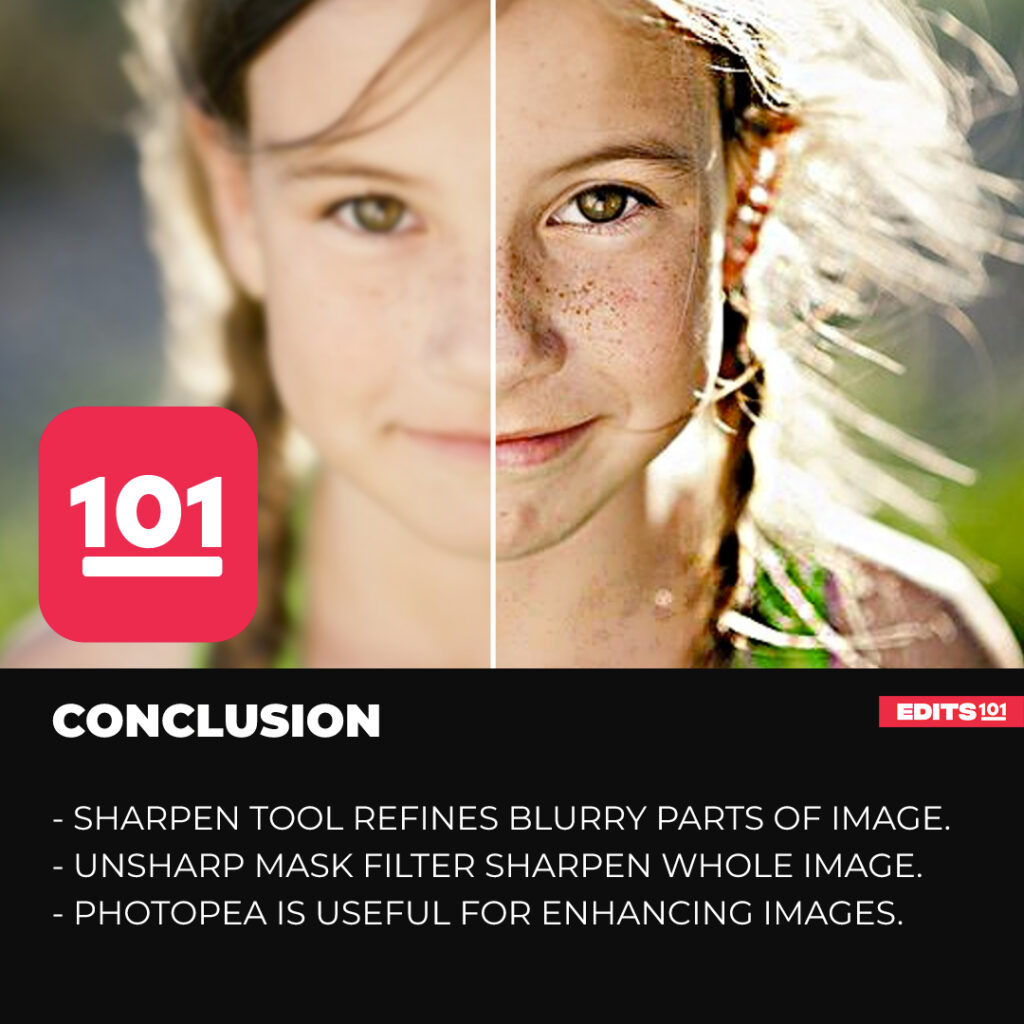
Conclusion
In Photopea, there are two options for sharpening an image. One utilizes the Sharpen tool, and the other uses the Unsharp mask under the Filters menu. Tools may differ depending on whether you’re sharpening the entire image or just certain parts of it.
While using the sharpen tool you need to adjust brush settings and paint on the areas you want to sharpen.
In unsharp mask, you need to adjust the available settings like amount, radius, and threshold. you will see a live preview and adjust the settings according to the requirements of your image.
Thanks for reading, and feel free to check out more of our articles!
Expert Rating
Summary
In general, Photopea is a useful and simple application that has lots of strong features which can help you enhance the quality of your images. Adjusting and sharpening your photographs using Photopea is a quick and easy process that may produce high-quality images.


