
One of the most amazing tools you can master on Photopea is the Blend IF setting. In this post, we will be looking at what this tool does and how you can use it to blend layers together.
We will cover how to blend two images together seamlessly and how to create amazing layer styles using a simple blend if sliders in photopea.
What is Blend IF?
Blend If is one of the most underrated tools in Photopea. It is pretty hidden in Layers Style and, as a result, is lesser known and rarely used.
The tool provides the easiest way to blend layers in Photopea. Adding it to your arsenal will make you an even better designer.
Where is Blend If in Photopea?
- Go to Photopea.com
- Click File >> Open, select an image from your computer, and press Open.
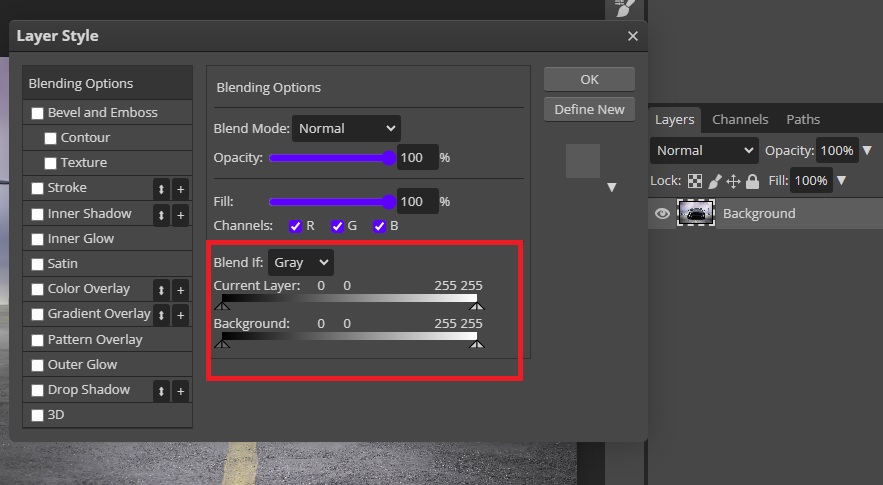
- Go to the Layers tab and double-click on the Background layer.
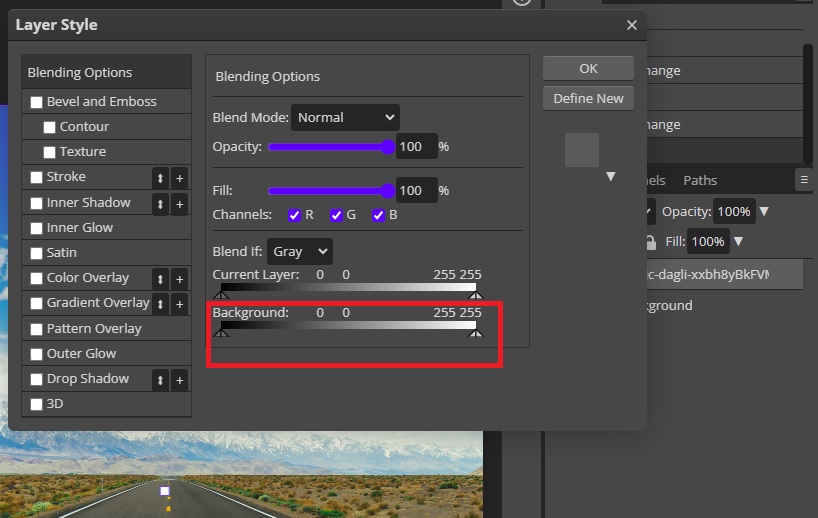
- A new window with the Blend If settings will pop up
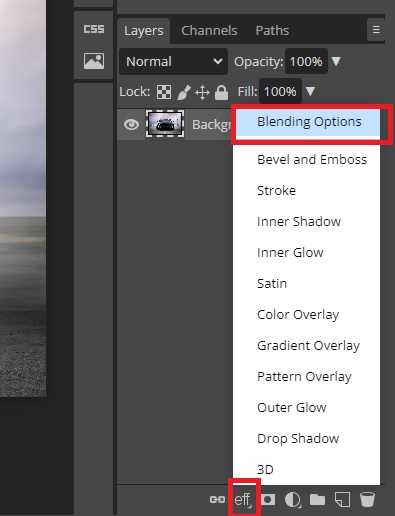
- Alternatively, once you load your image, click the Layer Style located at the very bottom of the Layers tab.
- Click on Blending Option, and the Blend If panel will open up.
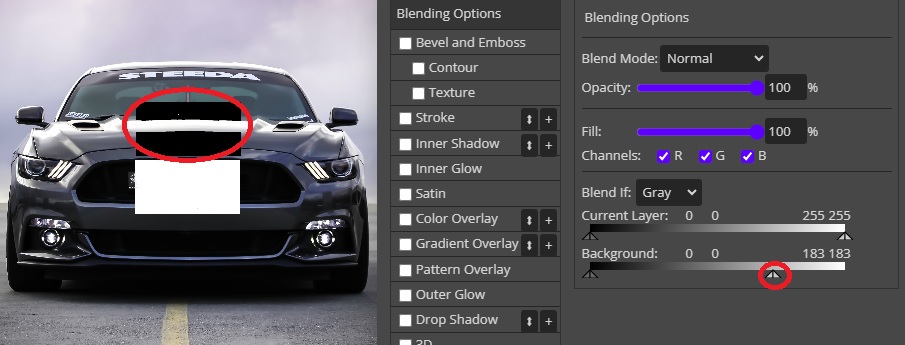
Parts of Blend If
The Blend If has three parts:
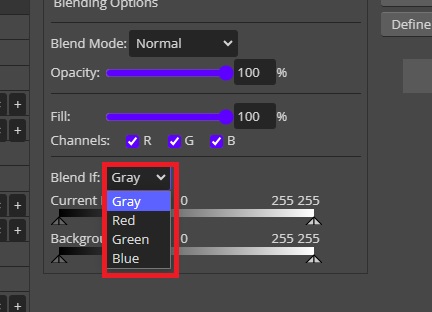
- Drop-down menu: This is the part set to gray by default. You can click on it to change to a red, green, or blue channel.
- Current Layer: Any changes you make on the Current Layer slider will only affect the layer you are working on.
- Background: The changes you make here will affect the layer that is underneath.
How Blend If Works in Photopea
Before we blend layers, you have to understand a couple of things about Blend If.
- Keeping the Drop down menu ‘Gray’ tells Photopea to blend an image based on the luminosity value of the pixels.
- To be able to separate different parts of an image accurately, the blend if works best when there is good contrast in an image.
- When an image has low contrast, you can go to the Drop Down Menu and switch channels to see if any of the other channels work better.
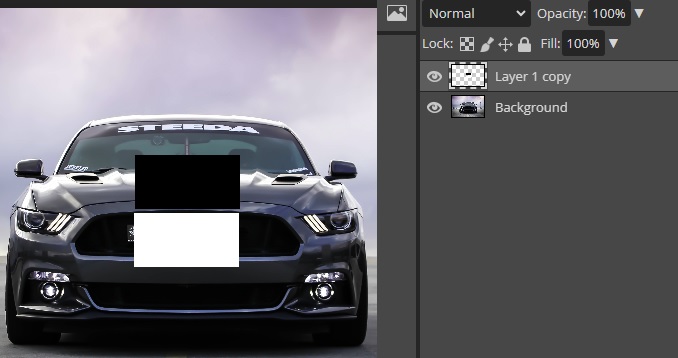
To better understand the next part, we have loaded an image and created a transparent layer with two boxes: one Black and the other White.
Current Layer
As aforementioned, changes on this slider will only affect the layer that you are working on.
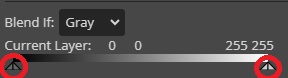
The slider has two arrows (highlighted in the image below) that you can drag along the slider. The arrow on the left is for blacks, whereas the one on the right is for whites. The values are from 0 to 255.
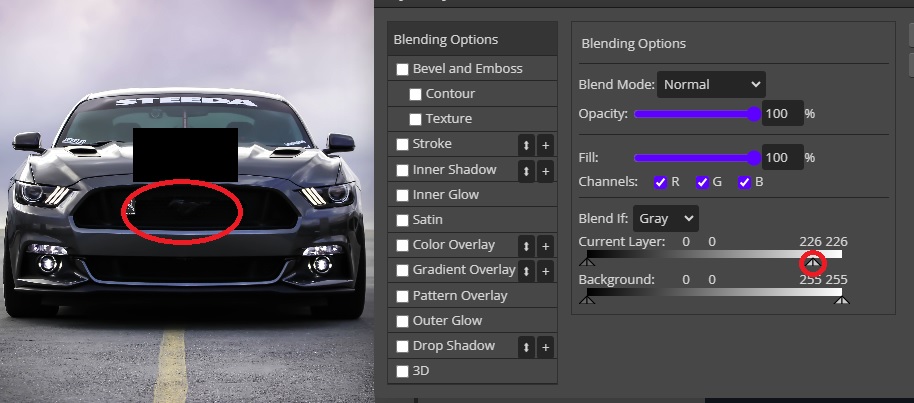
When you move the left arrow towards the right, the darkest blacks will disappear on the layer that you are working on. This means the pixels to the Left of the black arrow will become transparent while, those to the Right of the Black arrow will become visible.

Moving the arrow from Whites towards Blacks will cause the whitest white to disappear on the layer you are on. The pixels to the Right of the Whites arrow will become transparent while those on the Left of the white arrow will become visible.
If the Black and White boxes were of a gradient color or an image, the colors would disappear gradually revealing the background image.
Background
The changes you make on this slider will affect the layer that is underneath. The layer you are working on will not be affected.
The Background slider is similar to the Current Layer slider. When you move the Black arrow right, the blacks underneath will be revealed. The current layer will fade as you move the arrow.
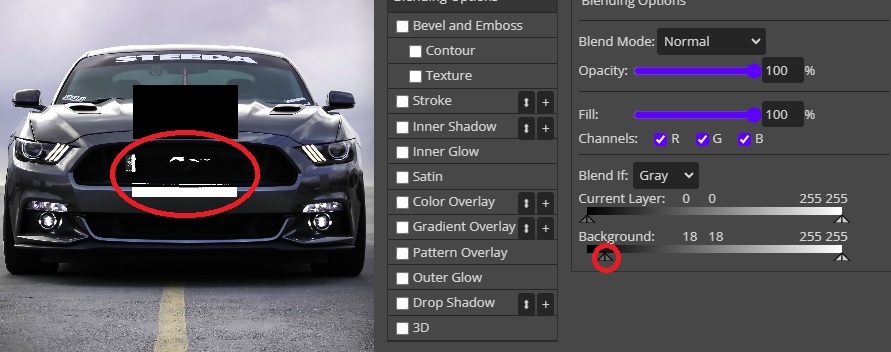
When you move the White arrow left, the whites underneath the current layer will be revealed.
Splitting the Arrows
As you may have noticed, each slider arrow has a vertical line. This means the arrow can be split into two, thus allowing you to move half of the arrow for smooth blending.
You can do so by holding down opt (in Mac)or Alt (in Windows) and then clicking on the half that you want to move. Moving the halves back together will merge them back into one arrow.
Splitting the arrow and moving half the arrow in either direction will create a smooth blend. You can move the arrow fully, then split it to fine-tune the adjustments.
How to Blend 2 Images in Photopea Using Blend IF
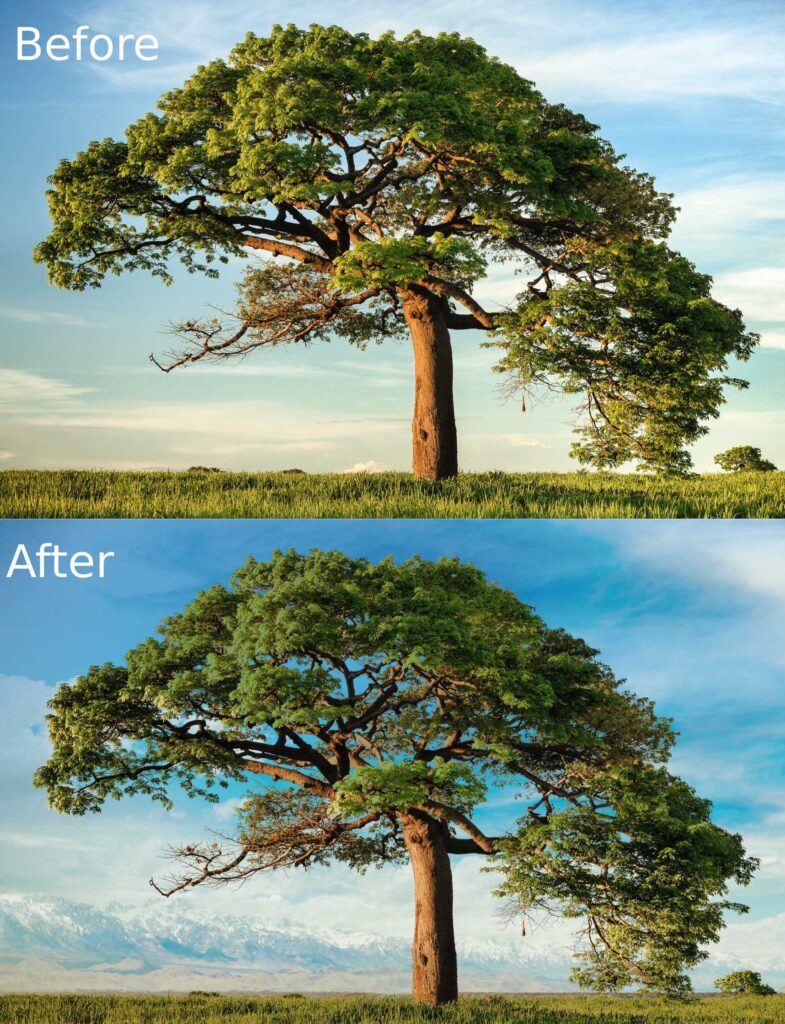
Now that you have an understanding of how Blend If in Photopea works, it’s time to look at a practical example. In this example, we will be blending two photos.
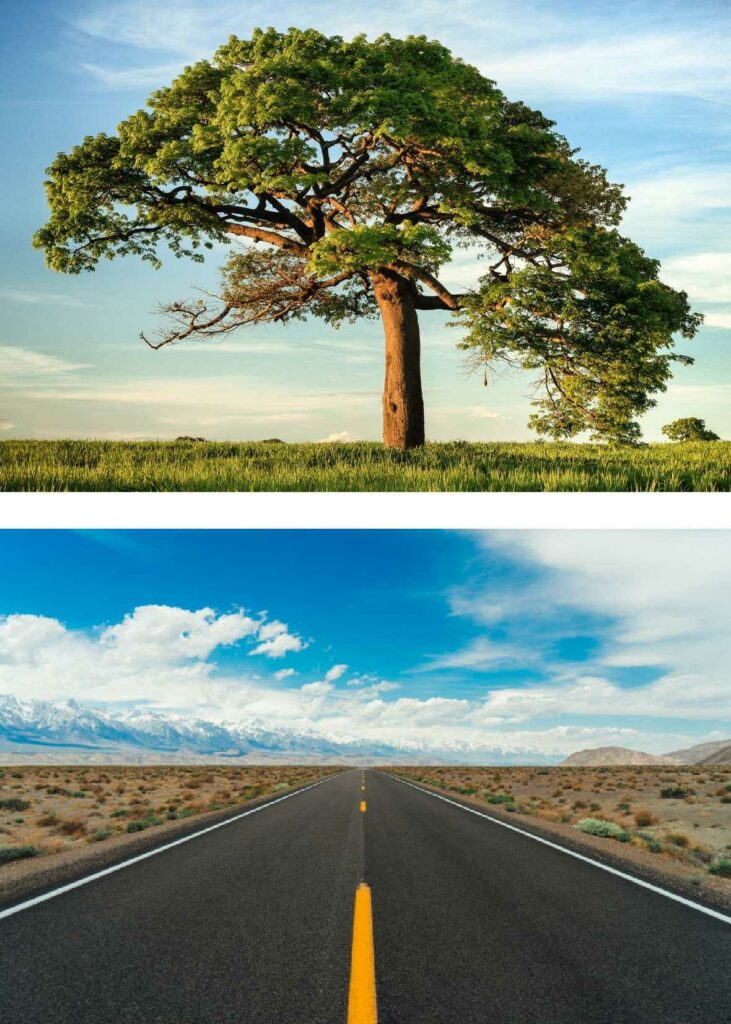
In the above photos, we will be adding the mountains and bright sky from the country road to be the background of the tree.
Step 1: Open up both photos in Photopea; in the same project. You can open the background image first, then drag and drop the other image on top of the background image.
If the images have already been loaded and you want to change the background and foreground image, simply go to the Layers tab and drag the background image so that it sits below the foreground image.
Since we want to change the background of the tree image, ensure the tree image is below the country road image in the Layers panel.

If the images are not the same size, you need to resize them by scaling them until they fit the frame. We can only see the Country Road image because it is on top of the tree image.
Step 2: Since we want the mountains to be at the horizon, we need to adjust the country road image so that its horizon aligns with the tree image.
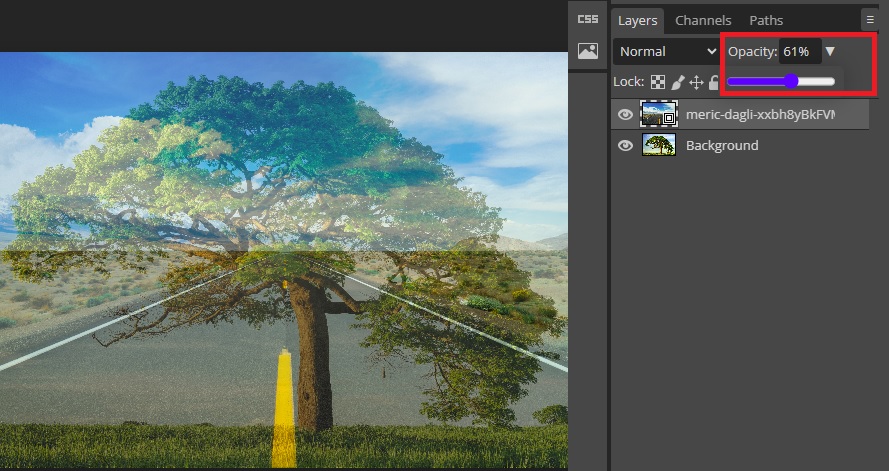
To do so, start by reducing the Opacity of the Country Road image so that you can partially see the tree image, as shown below.
Step 3: Select the Move Tool then activate the Transform Controls. Using the Move Tool, scale and move the country road image until it aligns perfectly with what you want.
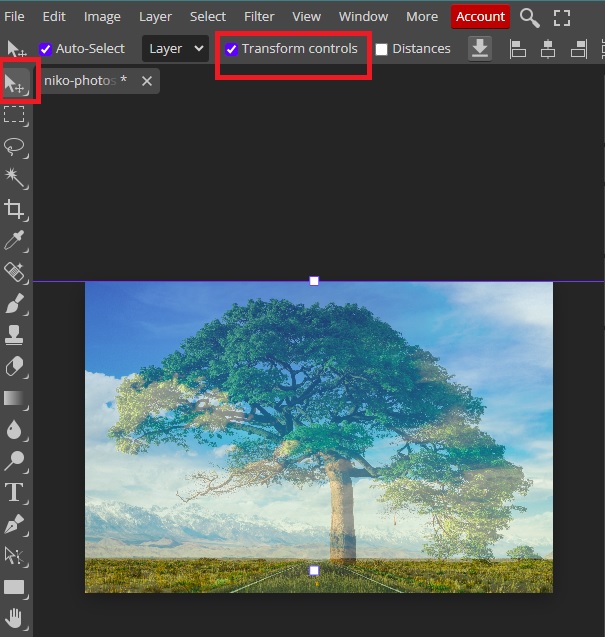
You can zoom in and out as needed by holding the Ctrl key (command key on Mac) and then using the ‘+’ key to zoom in and the ‘-‘ key to zoom out. Once done, reset the Opacity back to 100%
Step 4: Select the Country Road image and double-click to open the Layer Style panel, or right click and choose blending optons.
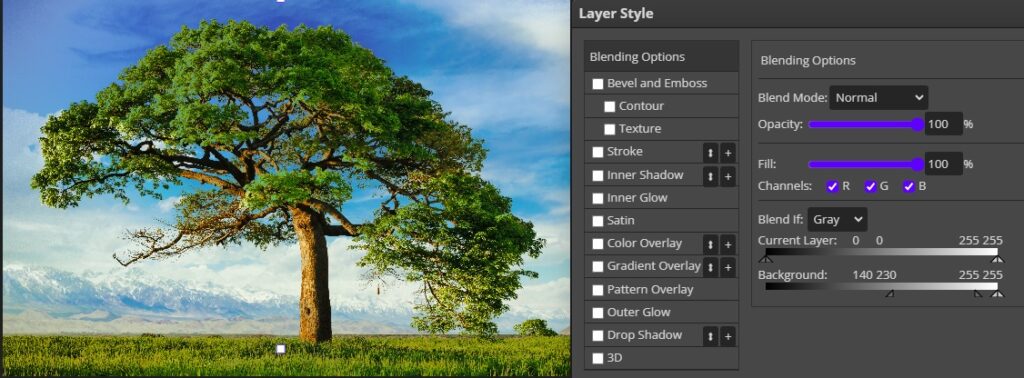
Step 5: Since we want the foreground of the tree image (background layer) to be revealed, we will use the arrows in the background slider.
Move the black arrow in the background slider towards the right to about 140 then hold down the opt (in Mac)or Alt (in Windows) to split the arrow then move the right half to about 230.
To undo the split, slide back the split arrow until it joins with the other half. You can play around with the sliders until you achieve the best results.
Step 6: Go to File >> Export As and save the image in your preferred file format.
That’s it!
Blend If In Photopea: Create Amazing Layer Styles
In this section, we will discuss step by step how to create amazing layer effects using a simple blend if sliders in photopea.
Set Up Your Canvas
Launch Photopea and open your desired image by pressing Ctrl + O or Cmd + O.
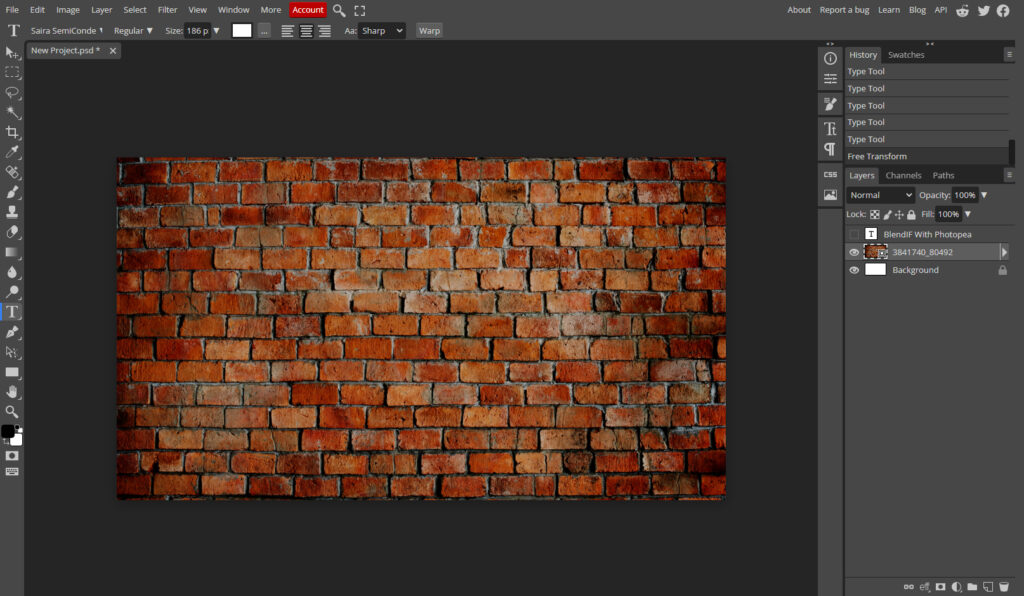
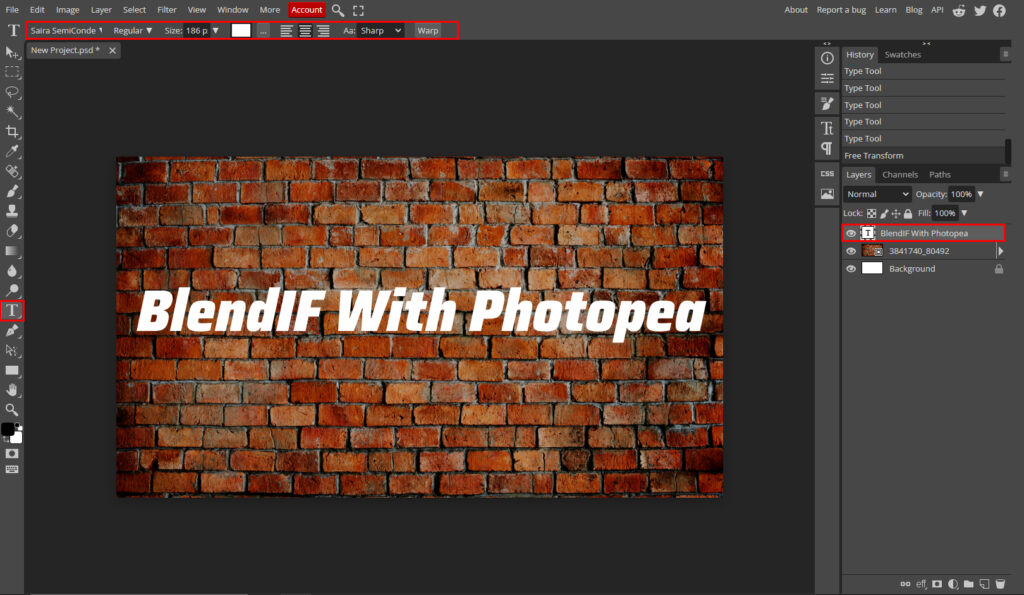
Add Text on the Image
Now, use the type tool from the left toolbar or shortcut T on your keyboard. Click anywhere on the image and type your text.
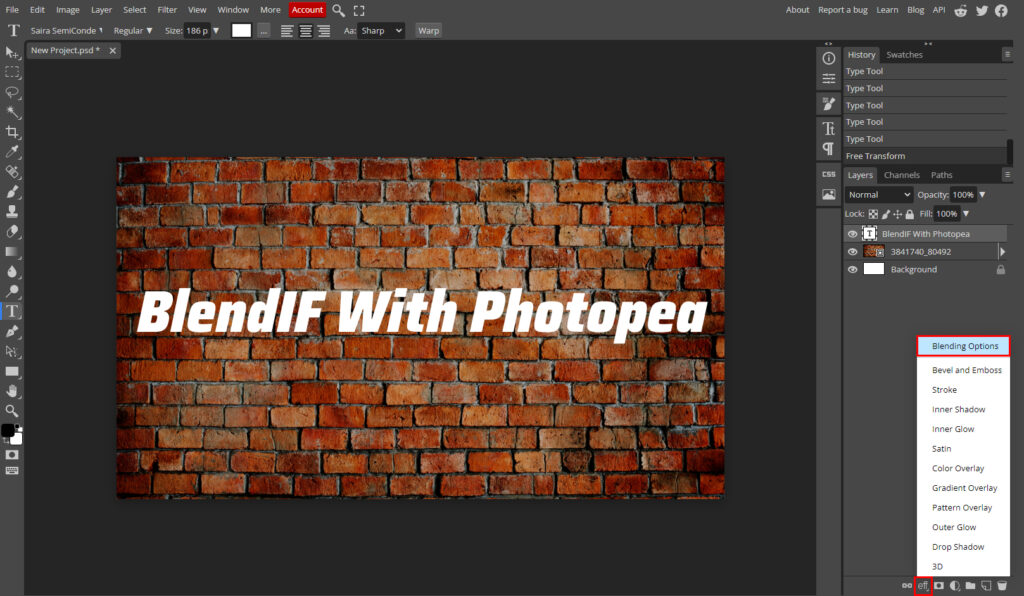
Blending options
- Now, we have to access Blending Options for the text layer. Click on the eff button at the bottom of the layers toolbar and then click on Blending Options.
Creating layer style
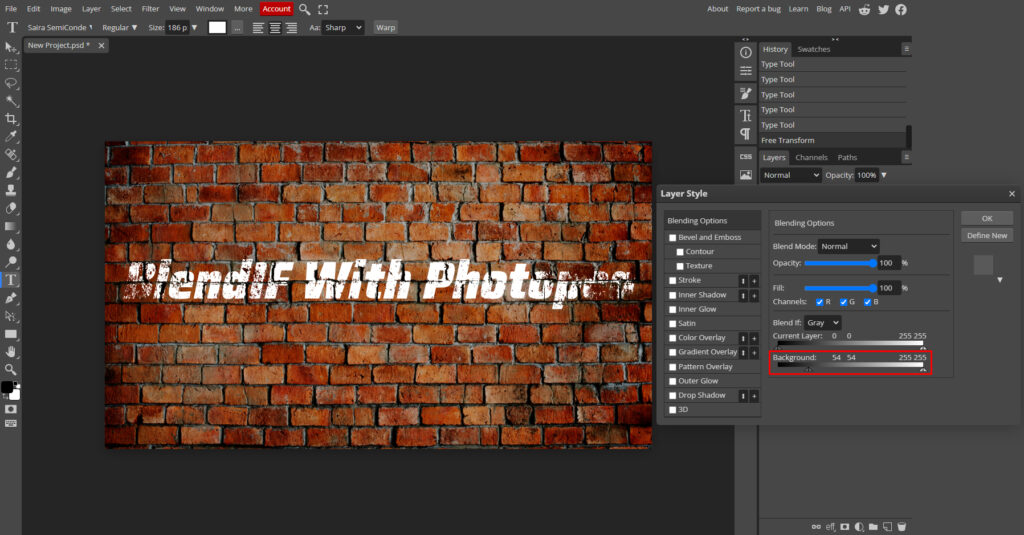
For the sake of simplicity and this tutorial, we will be working with the Background slider of the Blend If channel.
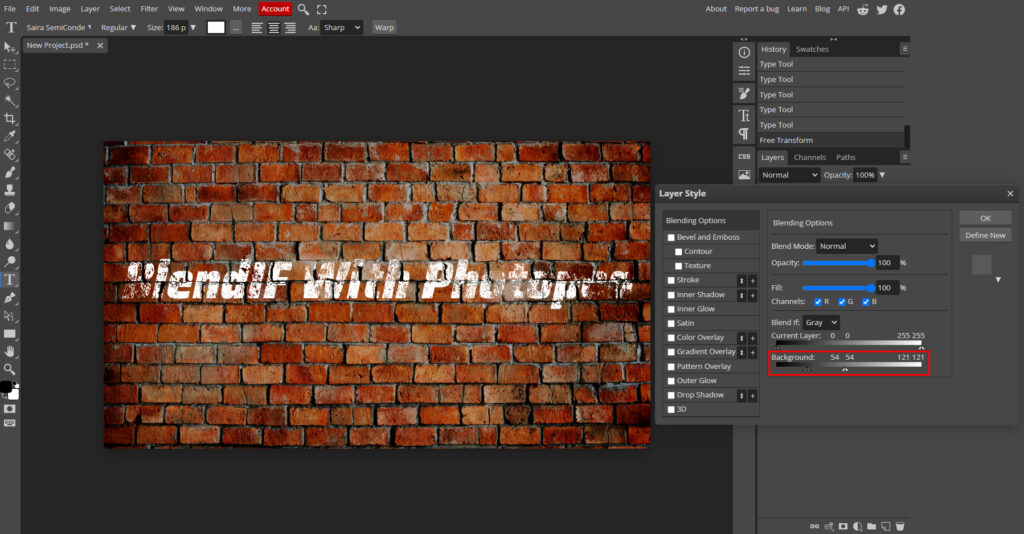
- As you can see below, if we adjust the slider towards the left on the Background channel, the text that is above the darker areas of the image fades into the background.
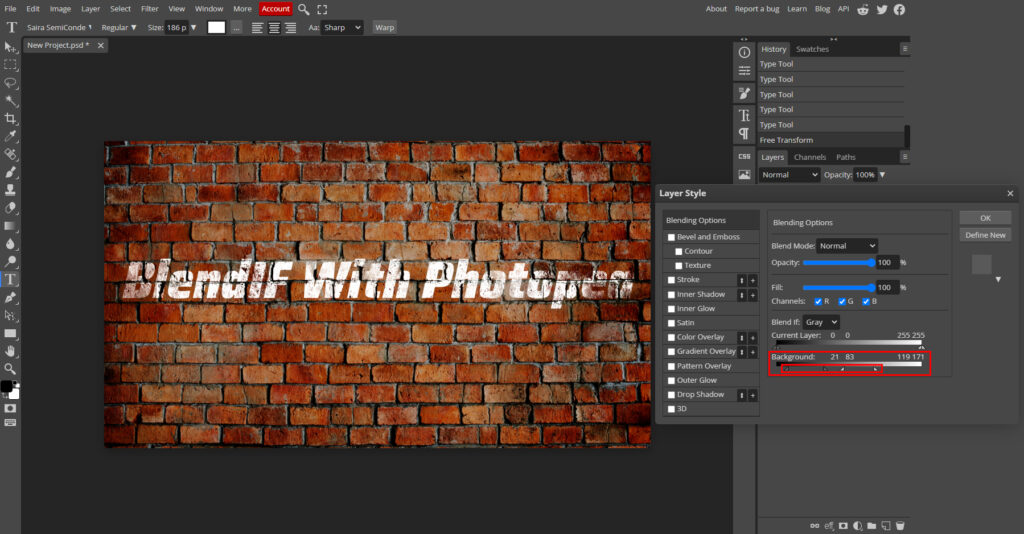
- Similarly, adjusting the slider toward the right on the Background channel will cause the text that is above the lighter parts of the background image(text in the center) to fade away.
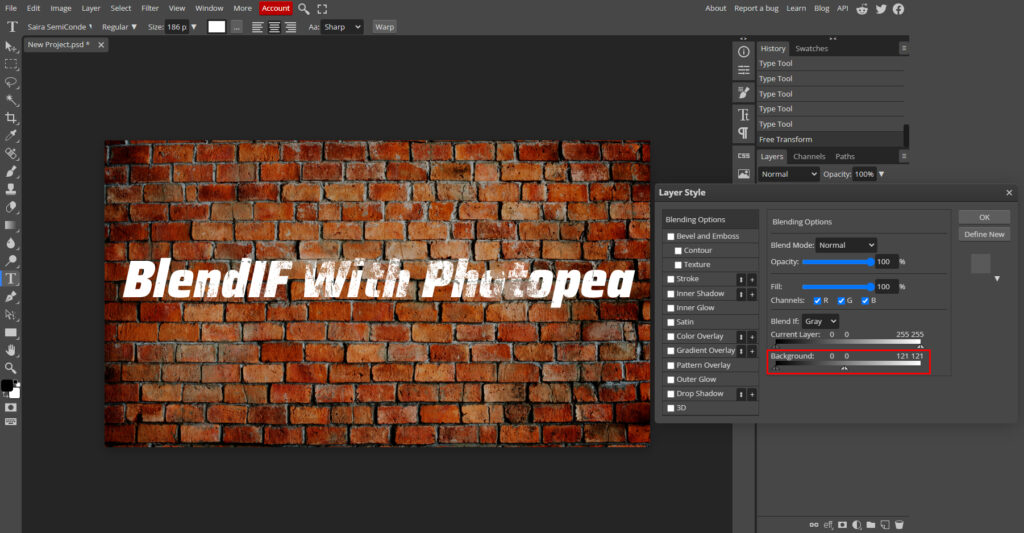
- To achieve good blending, we must move the sliders toward the left and right.
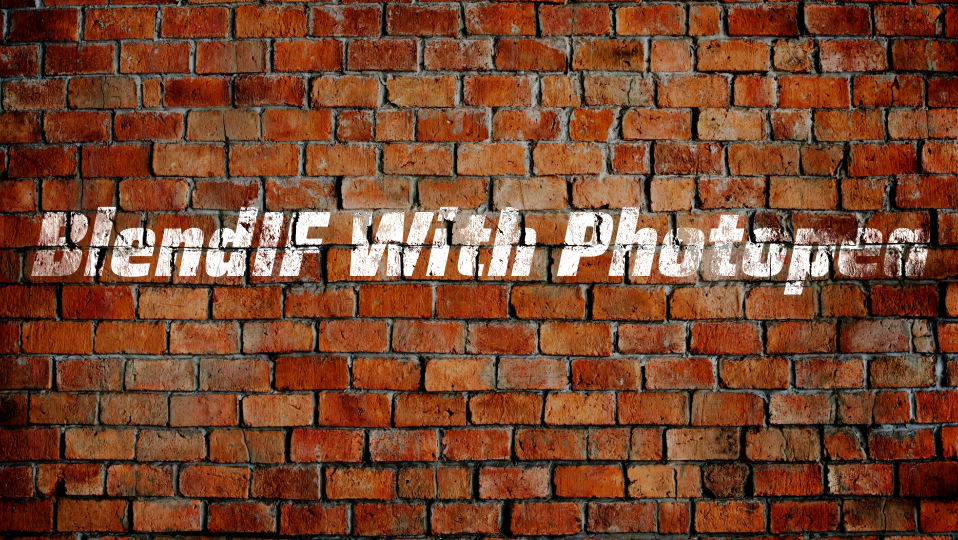
- It looks ok, but the blending is very abrupt and not really smooth. We can correct that by splitting each slider and adjusting the split to give a smoother and more natural looking blend.
- Hold the ALT or OPTION key and click on one of the sliders to seperate it. Continue adjusting the sliders till a more natural effect is achieved as you desire.
Final Result
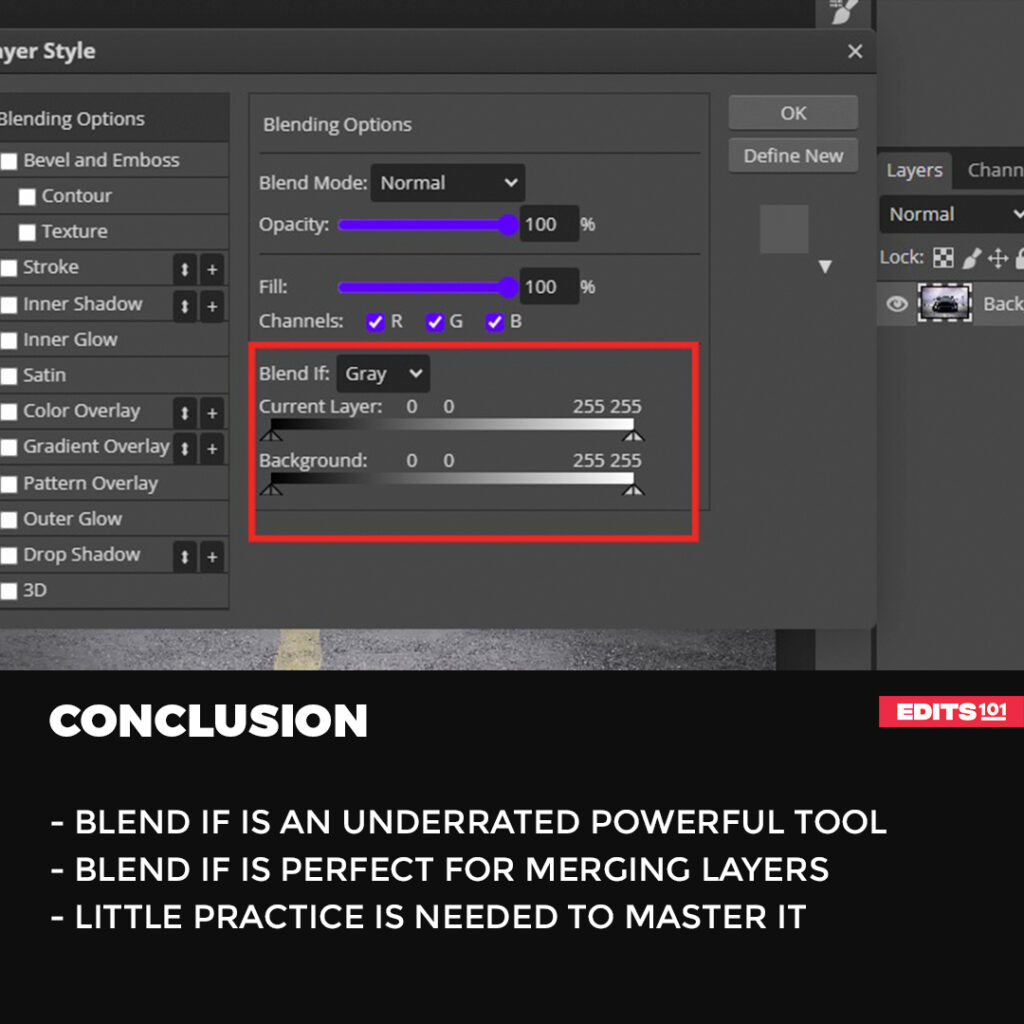
Conclusion
As you can see, the Blend If is an easy tool to use in Photopea. It can be used to blend images or to make fast adjustments without going through complicated steps.
The background Layer slider will affect the layer you are working on, while the background slider will affect the layer underneath.
We have blended the county road and tree images using the background slider, and we split the slider to achieve smooth blending.
We have also created an amazing text effect using the background slider.
Thanks for reading & feel free to check out more of our articles!
Expert Rating
Summary
Blend IF is an underrated but powerful tool in Photopea that can save you a lot of time when blending images. It only requires a little practice to master it. But once you get a good grasp on it, you will be able to create amzing effects in no time.


