
Strokes can give a stylized look to your text and make it stand out in the design. And photopea offers great tools and techniques to add strokes to your text.
In this guide, we will discuss how to add strokes of different widths, colors, and styles. We will also talk about how you can add multiple strokes to a single piece of text
Open photopea, and let’s get started!
What does it mean to outline text in Photopea?
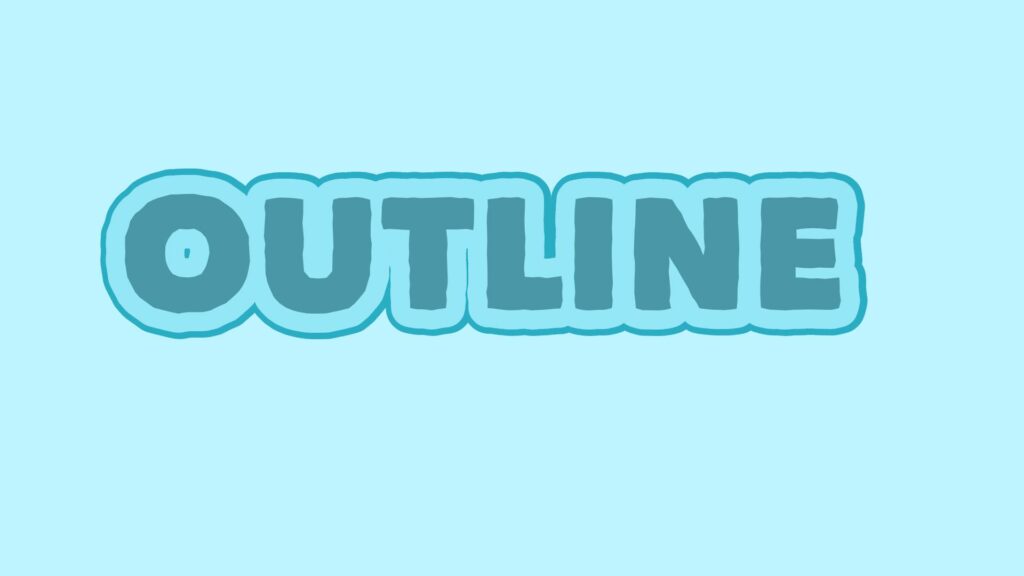
Adding a border or stroke around the text’s characters is a formatting method known as outlining. This can be done to draw attention to the text or to add a decorative element.
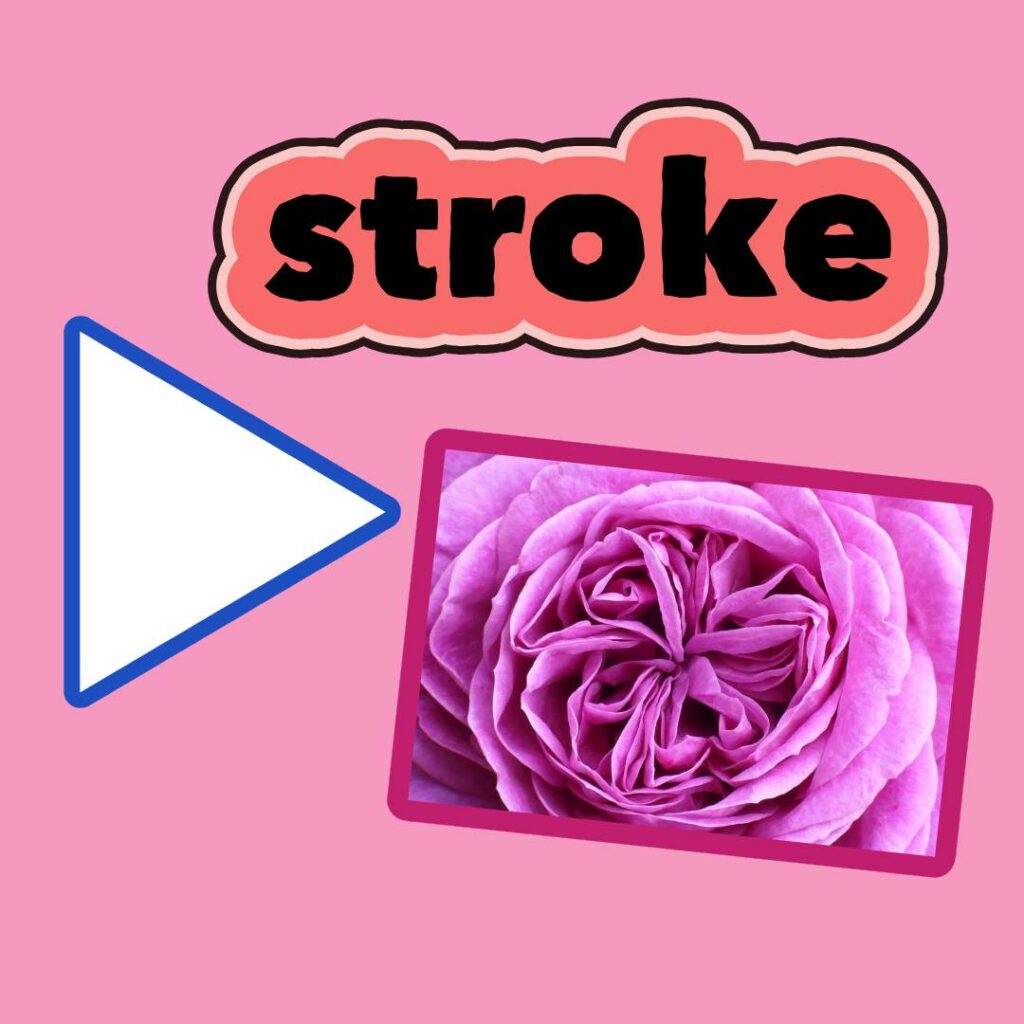
What Is a stroke?
A stroke is a line that encircles a layer, also known as a border. It is frequently used in graphic design and digital art to highlight or define an object’s edges. Various elements, including shapes, text, and images, can be given a stroke.
Why do we add stroke to Text?
Adding strokes or outlines can greatly improve your texts’ visual appeal. Here are a few reasons why you might add strokes to your texts.
- Make your text stand out.
- Create a bold and eye-catching effect.
- Add a subtle touch of elegance.
- Enhance the text’s visibility.
- Create a clear separation between the text and its background.
- Create a sense of depth or dimension in the design.
How to Outline Text in Photopea?
To open an image in Photopea, use the shortcut Ctrl+O or Cmd+O. Once you’ve added the text above the image, you can add the outline to the text. Alternatively, you can create a new black document with the shortcut Ctrl+Alt+N and apply the outline to the text there.
You can read the article on how to add text in Photopea here.
Once finished, you can change the text’s layer settings to add an outline.
Here’s a helpful technique to keep your Type Layer editable while using Layer Styles to create a stroke. You can easily add a stroke to any object on your canvas by following the simple instructions below.
Outlining Text in Photopea
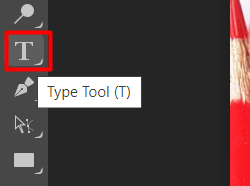
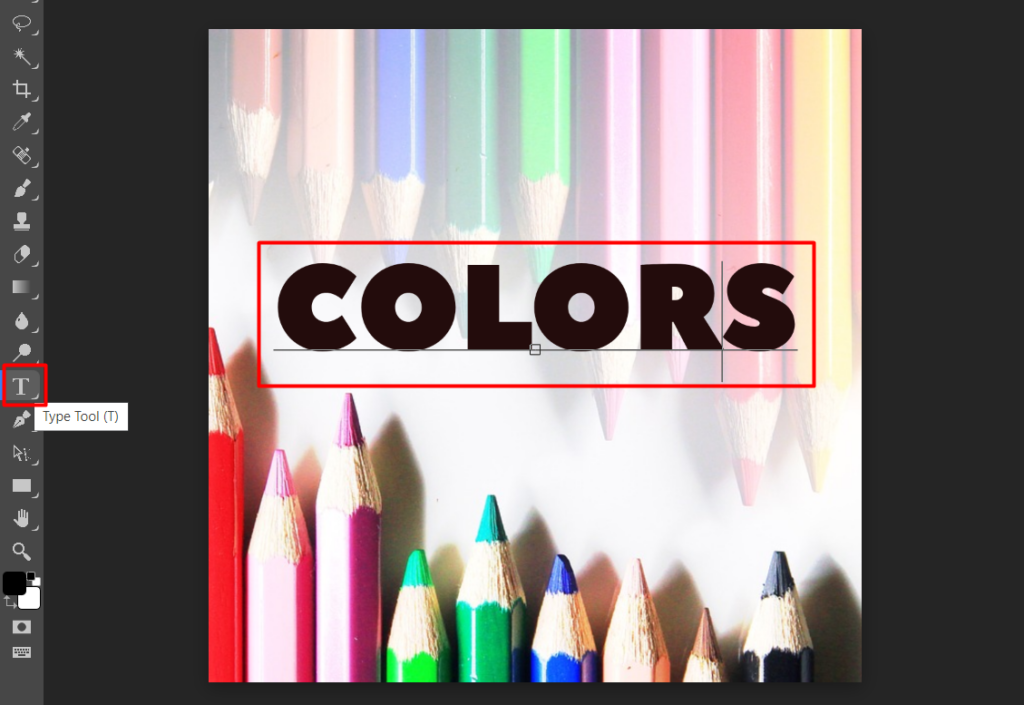
Start by selecting the Type tool and entering your text. This tool is located at the Toolbar on the left pane of the working area.
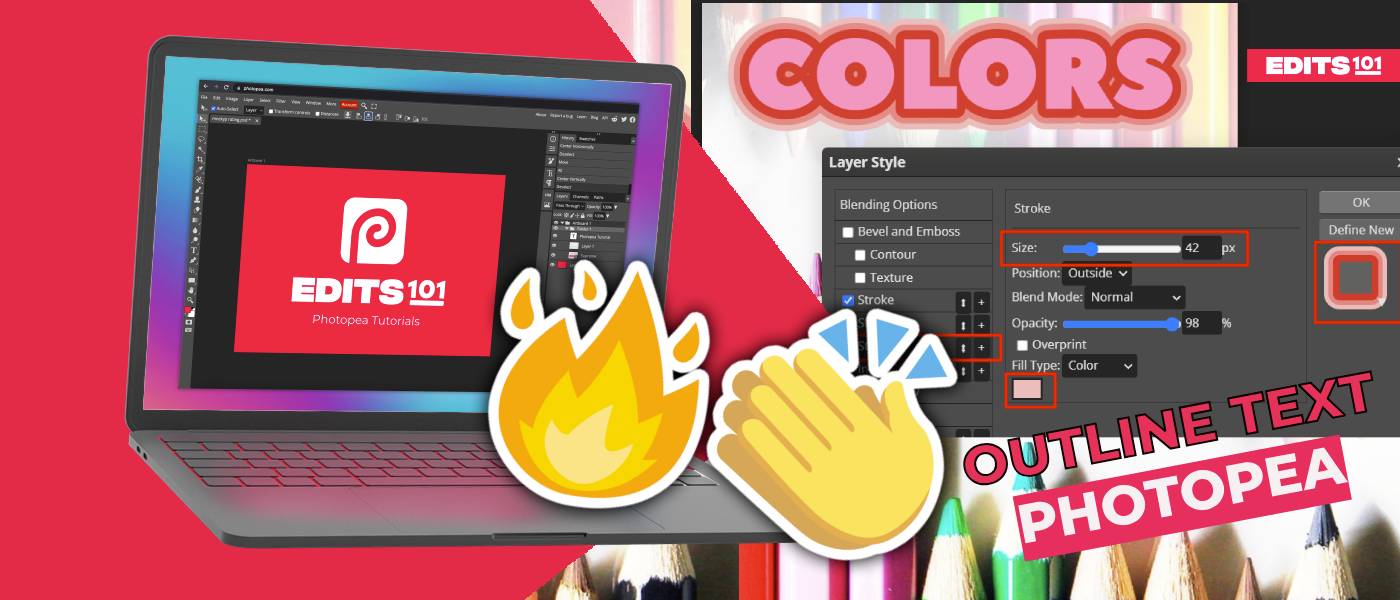
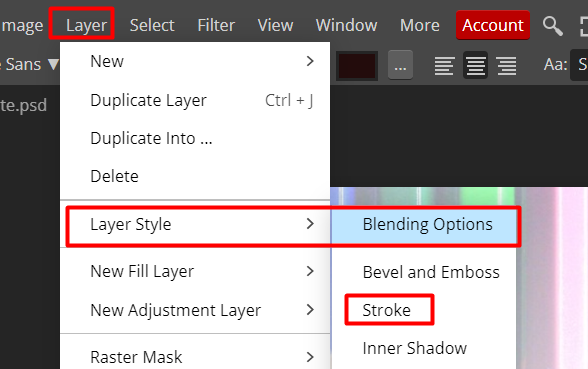
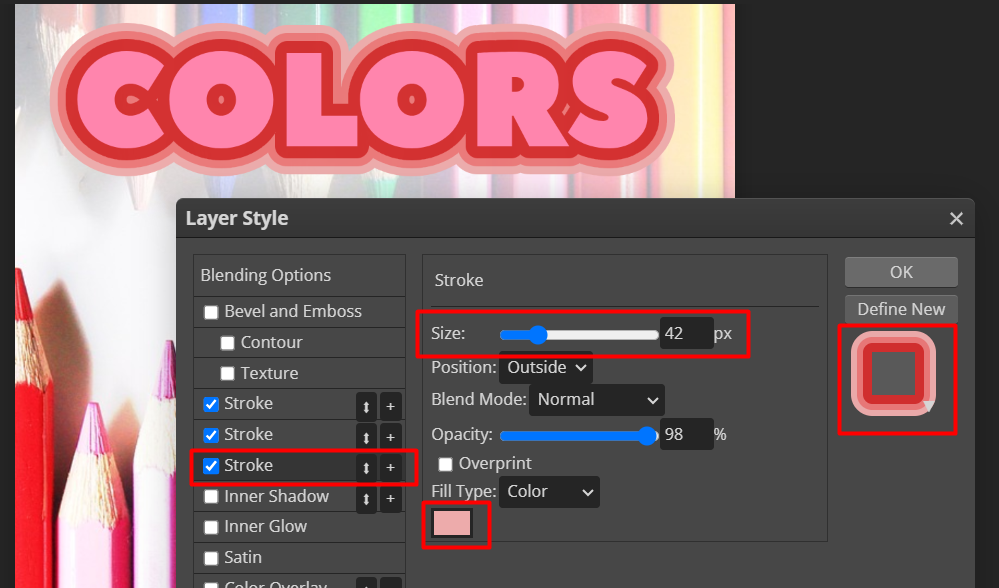
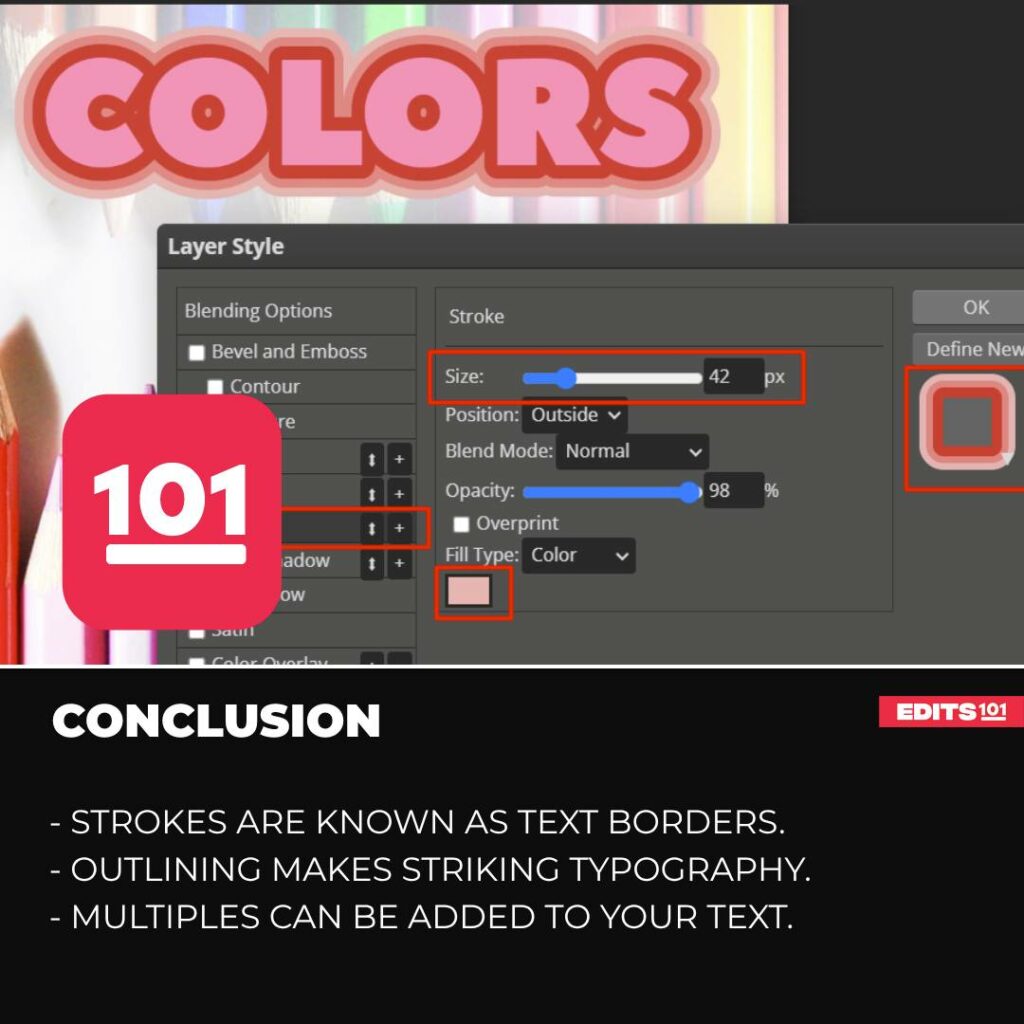
Right-click on the Type Layer and choose Blending Options from the layers panel. Or alternatively, go to Layer > Layer Style > Blending Options > Stroke.

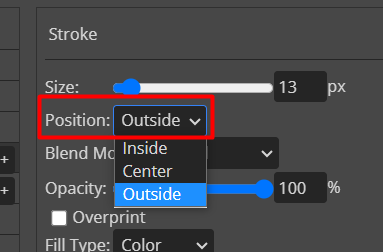
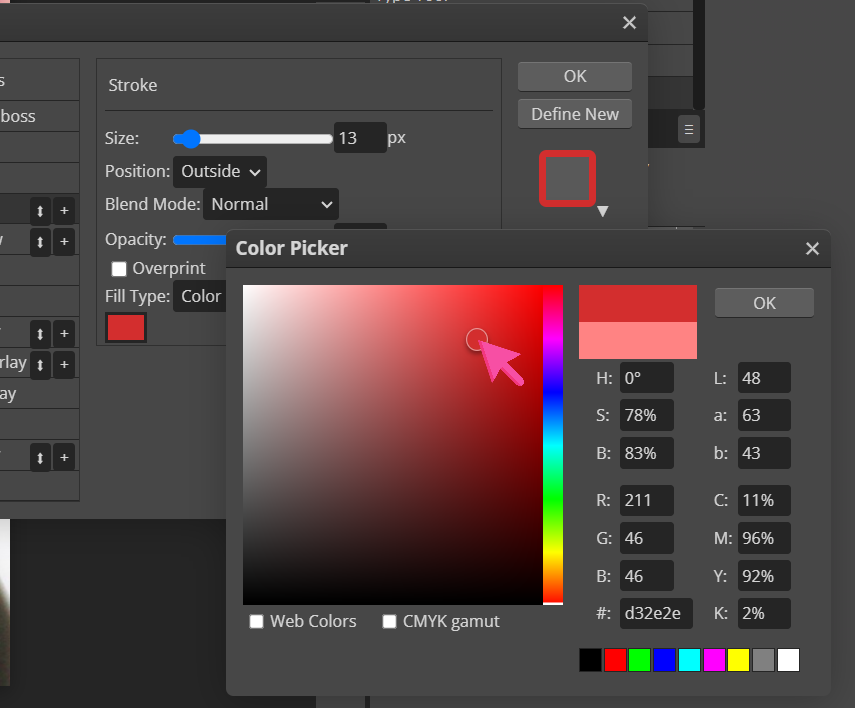
The Layer Style dialog box will appear, where the Stroke is listed on the left menu. In the Stroke options, you will have full control over the look of the text border. You can use the size slider or manually enter a value to adjust the size or width of the text outline.

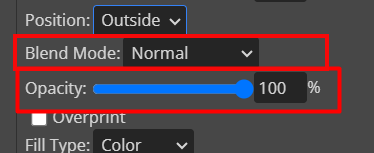
While adding a stroke, you will get 3 options for the position. These 3 positions are inside, center, and outside. Choose whatever works best for you and move on to the other available settings.
You can control how the colored stroke will interact with the layers underneath by using the blend mode. The transparency of the text border can also be adjusted using the Opacity slider.
Strokes can also be filled with patterns, solid colors, and colorful gradients. Click on the color tile to open the Color Picker if you want to use a solid color for the stroke. Click OK after selecting your preferred color.
Stroke Styles in Photopea
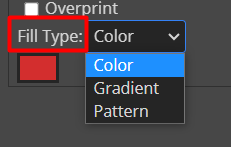
In Photopea, you have three styles of text outlines or strokes to choose from. You can use solid, gradient, and patterned strokes.
To change the stroke style, you have to click the Fill Type under the Stroke Options, and a drop-down menu will appear.
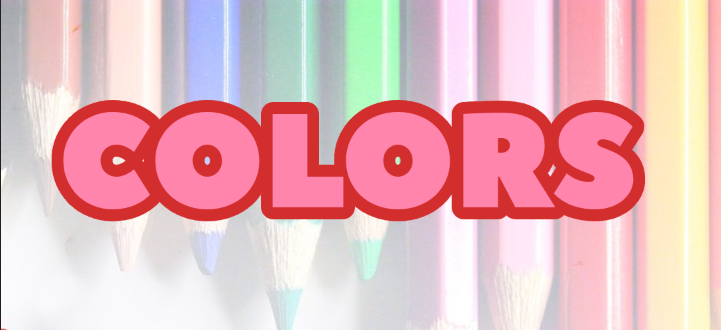
Solid Stroke
To add solid strokes to your text, use the Color option located under the Fill Type. An uninterrupted line applied evenly along an object’s border is known as a solid stroke. This technique uses one color to create a cohesive look for the text.
Gradient Stroke
The Gradient Option allows you to adjust the stroke settings in the Fill Type menu. You can select the color and gradient style from linear, radial, angle, reflected, diamond, and shape burst options.
This type of border gives the design an attractive, more elegant, and contrasted effect.
Patterned Stroke
Within the Pattern fill type option, the pattern’s angle and scale can be adjusted. The scale determines the size of the patterns displayed.
Patterned Stroke uses repetitive shapes and lines to create a stroke design.
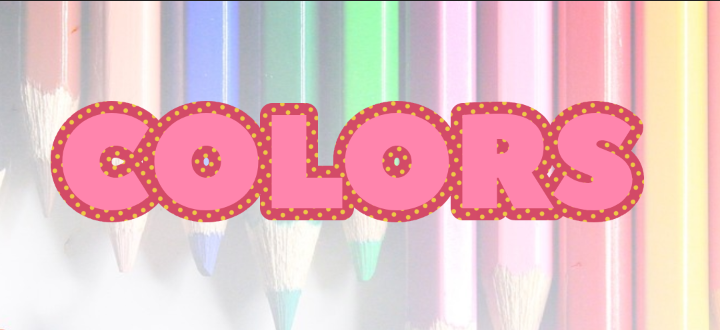
This type of stroke makes the text lively and playful and makes the text more visible and emphasized.
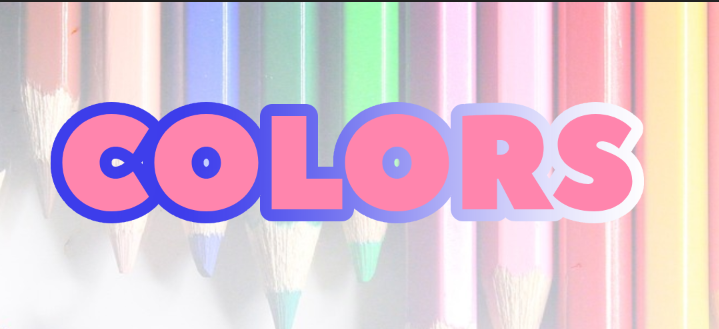
Adding Multiple Strokes in Text in Photopea
There are two ways how you can add multiple strokes in texts in Photopea. The first is using the Layer Style Options, and the second is duplicating the Layers.
Option 1: Multiple Strokes in Text using the Layer Style Options
- On the Blending Options, click Stroke.
- Click the plus (+) sign on the Stroke Options to add a new layer of border.
- Add multiple layers of stroke depending on what you want.
- Change the color and size of each stroke by clicking on each layer. We usually use lighter to darker shades of borders to create a shadowed look.
- Don’t forget to click OK to apply the effect to the text.
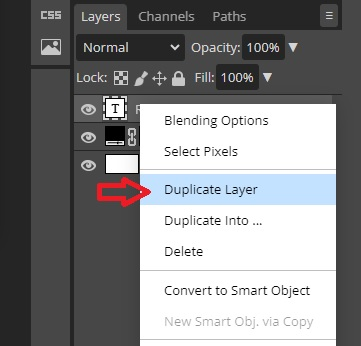
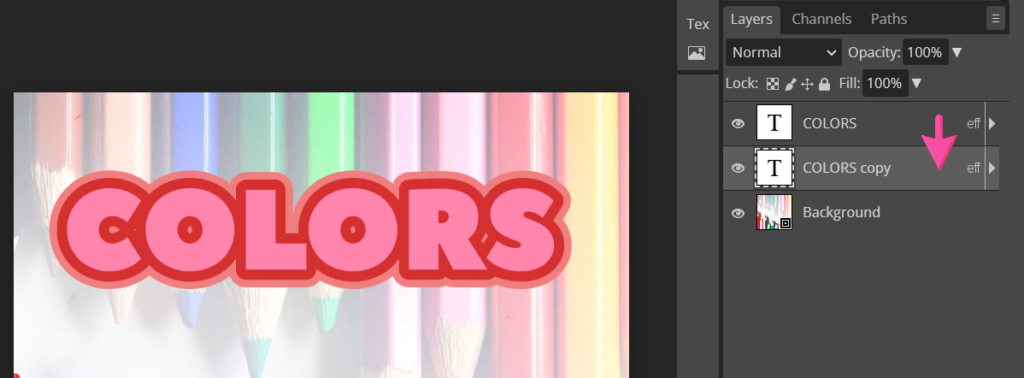
Option 2: Multiple Strokes in Text by Duplicating Layers
- Right-click on the Type Layer and choose Duplicate Layer.
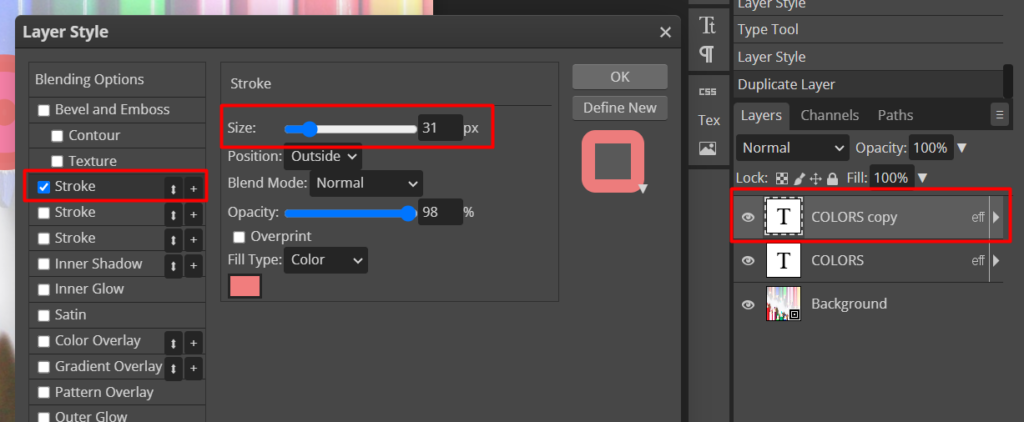
- On the duplicated layer, right-click and choose Blending Options from the options. Or alternatively, go to Layer > Layer Style > Blending Options > Stroke.
- The Layer Style dialog box will appear, where the Stroke option is listed on the left menu. Change the size of the border, which should be bigger than the stroke on the original layer.
- Drag the layer down in the Layers panel so that the text with the larger stroke will be sent backward.
- Depending on how many strokes you want to add to your text, you can add as many layers as you like. Don’t forget to click OK to apply the effect to the text.
Below is an example of multiple strokes added by duplicating layers.
Conclusion
There are different methods to create outlines for the text in Photopea. One way is to select the text and use the stroke or outline option in the blending options. You can modify the outline’s color, thickness, and style to suit your preferences.
You can apply one stroke or multiple strokes to a single text or image layer. And the best part is you can customize the look of each of the multiple strokes.
Thanks for reading, and feel free to check out more of our articles!
Expert Rating
Summary
Adding stroke or oultine to the text may require practice, it becomes manageable with regular use. Adding text outlines in Photopea offers functional and scalable results, allowing you to enhance text visibility and style in diverse graphic design projects.


