
If you’re trying to figure out how to swap out any element of an image for another quickly, you’re reading the right article!
In this tutorial, we will learn how to replace or remove an odd and inappropriate element in our image. Photopea‘s new tool enables us to quickly swap out one image for an entirely new one with just a few clicks.
Photopea Magic Replace
Photopea’s Magic Replace is a strong and practical tool that can save you lots of time. Without having to disassemble the entire design, Magic Replace allows you to quickly and easily update and change design elements like text, colors, shapes, and more.
It works by recognizing elements in your design and giving you the option to select an appropriate replacement from a large selection.
Magic Replace can be used to swap out simple shapes and patterns for more complex ones as well as to switch elements of graphics that appear in multiple images.
Where is Photopea Magic Replace in Photopea?
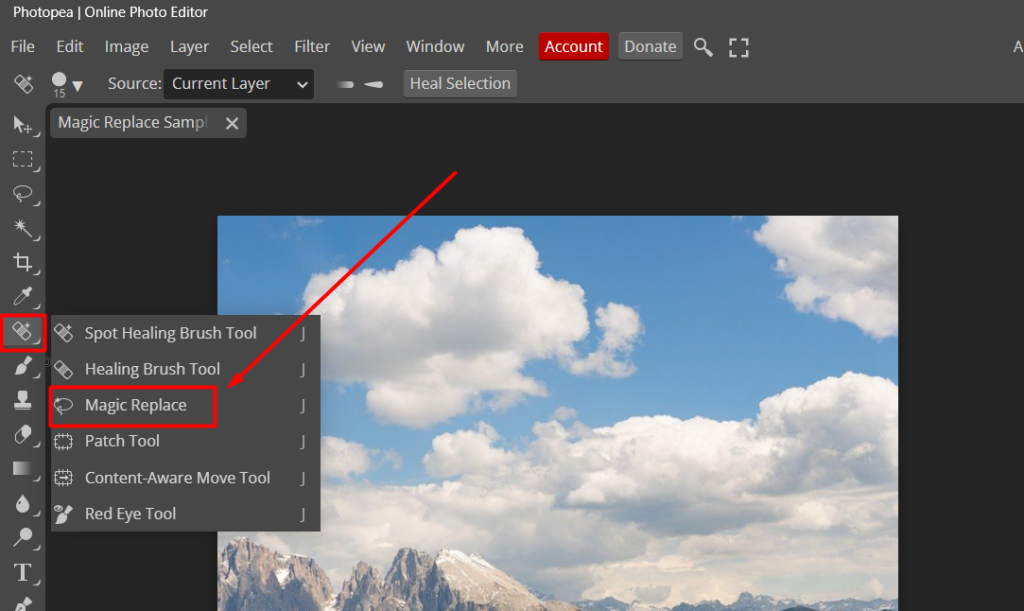
Magic replace is located in the Toolbar on the left.
Find the band-aid-like icon and right-click on it.
Six tools will appear, including the Spot Healing Brush Tool, Healing Brush Tool, Magic Replace, Patch Tool, Content-Aware Move Tool, and Red Eye Tool. You can also access these tools by simply clicking the letter “J” on your keys.
Then, click on the “Magic Replace” with the rope icon. The icon for Magic Replace is similar to Lasso Tool’s icon.
How to use Photopea Magic Replace?
The Photopea Magic Replace is very user friendly and intuitive, with minimal need of knowledge of graphic design principles or anything like that. To use Magic Replace, you can follow these 5 easy steps:
STEP 1: Open the Project
- Select Open From Computer to open an existing file directly from your computer, or alternatively, Drag and drop files from your computer to the “Drop any files here” section on the homepage.
- Once the project or image is open in the Photopea app, locate and click the Magic Replace icon on the toolbar.
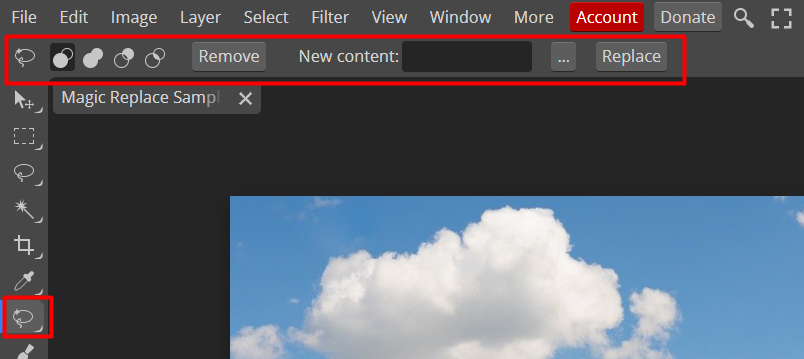
- When the Magic Replace tool is selected, the options bar will display these parameters.
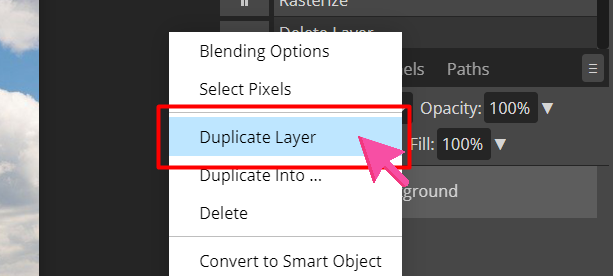
STEP 2: Duplicate Layer
Right-click on the layer, then click on the Duplicate Layer button from the drop-down menu.
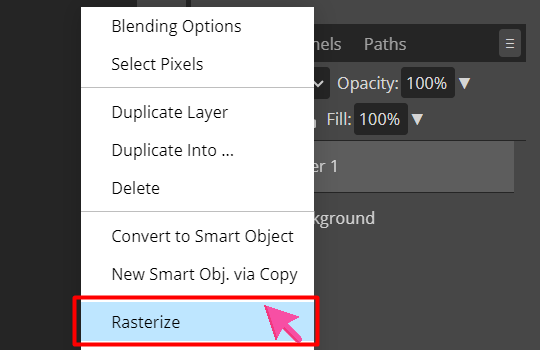
STEP 3: Rasterize the Layer
Some Photopea tools, including Magic Replace, only function on rasterized layers.
To rasterize the layers, right-click on the duplicated layer and find the “Rasterize” Option in the drop-down menu.
Click “Rasterize,” and once done, the button will be unclickable in the drop-down menu.
STEP 4: Select the Area
Draw a rough selection of the area that you want to remove or replace. Make sure that you completely select the area that you want to remove or replace.
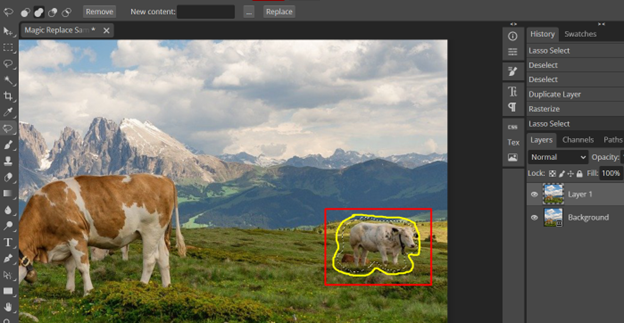
You can also use the Rectangle Select button to select the area that you want to change.
STEP 5: Remove or Replace
In just one click, you can either remove or replace the area that you selected. These are the two processes that can be done in the Magic Replace tool.
Removing an Object
To remove the object or element in the selected space, click the Remove button at the Top Main Menu. In order to remove an image completely, make sure the “Subtract” button is enabled.
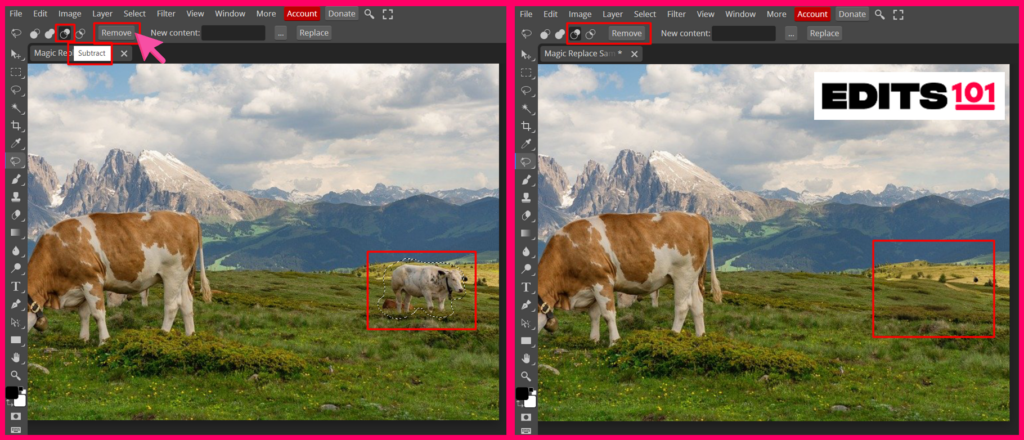
You may notice that the background behind the image that was removed is now visible, and there are no signs of any distortions or remnants from the removed image.
Replacing an Object
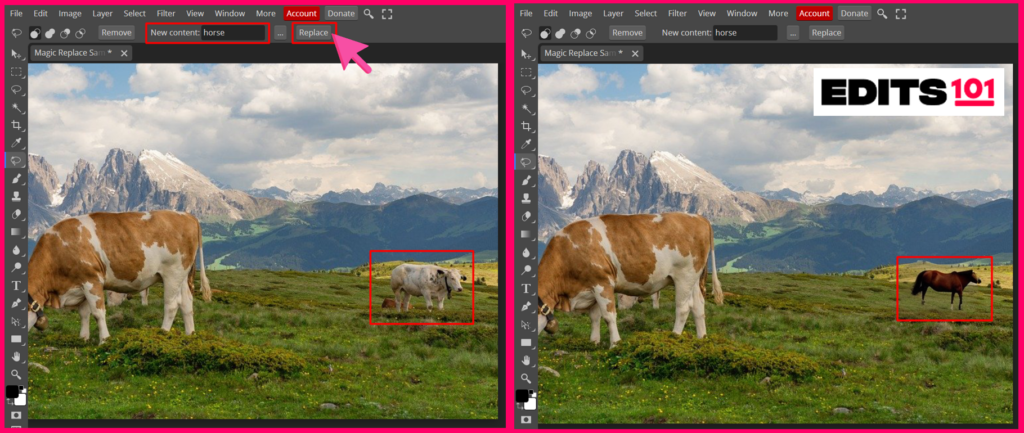
To replace the object or element with a different one, completely select the area that you want to replace.
Type the name of the object that you want to place on the selected area of the image in the New Content box.

Then, Click the Replace button at the Top Main Menu. To replace it completely, make sure the “Replace” button is enabled.
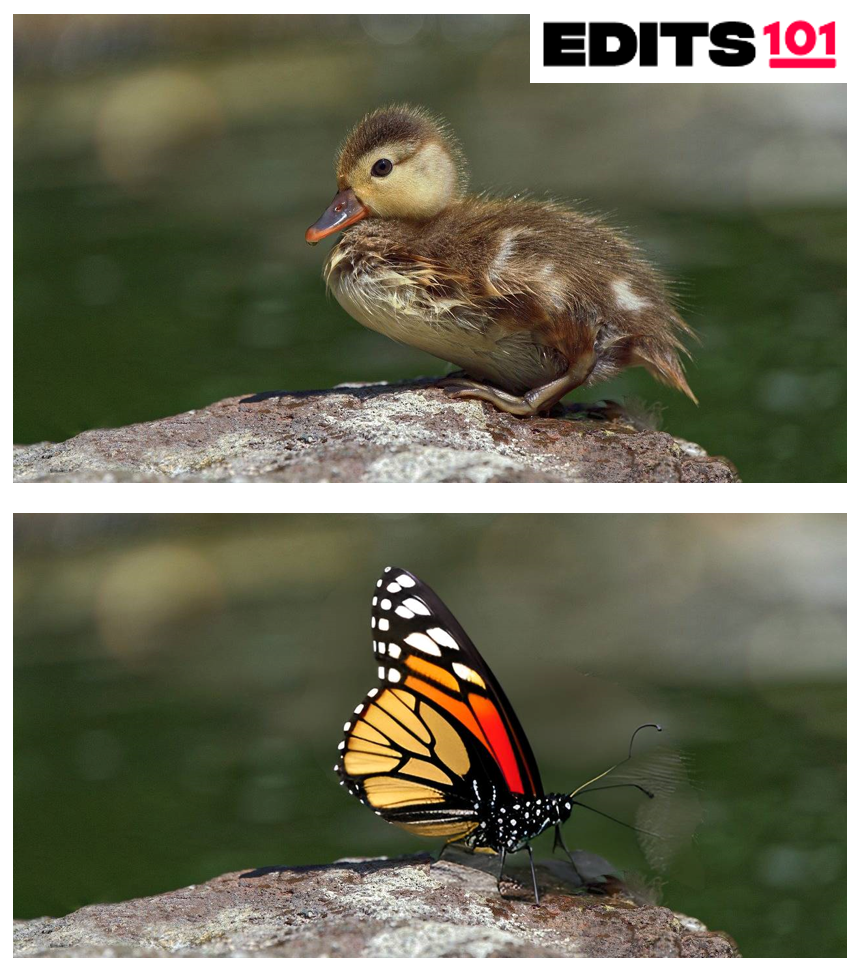
This tool is like an AI-generating image tool that perfectly blends the new image into the removed area. This could be used to change the floor in an image, replace a sky, or modify a background.
However, suppose you aren’t satisfied with the generated images. In that case, you can click the Replace button as many times as you want, and different options for you to choose from will be integrated into the image.
Once you’re done with the project, don’t forget to save the file by clicking “Ctrl+S”, and export it through the Files Menu > Export As > Choose the file format.
Conclusion
In this article, we learned how to use Magic Replace in Photopea. It is specifically covered how to use this tool in 5 simple steps.
The Magic Replace feature in Photopea is a practical and efficient tool for those working with digital designs or graphics. It’s particularly useful for removing and replacing specific areas in an image. The tool is easy to use and intuitive, requiring minimal knowledge of graphic design principles or similar expertise. It can save you a significant amount of time in your workflow.

Thanks for reading, and feel free to check out more of our articles!
Expert Rating
Summary
The Photopea Magic Replace is a versatile tool for photo editing tasks. Though moderately challenging initially, with practice, it becomes functional and scalable, enabling creative and professional image editing in diverse design projects for photographers and graphic designers.


