
With a little bit of guidance, It is easy to create a double exposure effect. In this step-by-step photopea guide, we will create a trending and viral double exposure effect from the ground up.
The 3 most important and most used tools in this guide will be raster masks and blending modes. We will learn along the way how these tools work.
Making The Double Exposure
Thing You Need
To create a double exposure effect, you need at least two photos. We have made this tutorial from a beginner’s perspective so that we will be using simple images.
Use these Photos to follow along.
Background
In this guide, the background will be the subject, the photo of a person.
Choose a photo with a simple background without distractions, like a busy background with trees or traffic.
The contrast between the edges and the background should be high, this will make cutting the subject from its background easy.
Overlay
Overlay could be anything you wish to apply to the subject layer. It could be a forest, buildings, waterfall, clouds, or mountains.
Step 1: Image Selection
Now we are going to start the double exposure creation process.
The first step is to choose the photos we need to create the double exposure.
As discussed above, you need at least two photos, a background and a foreground.
We will be using the following photos of a person and the mountain.
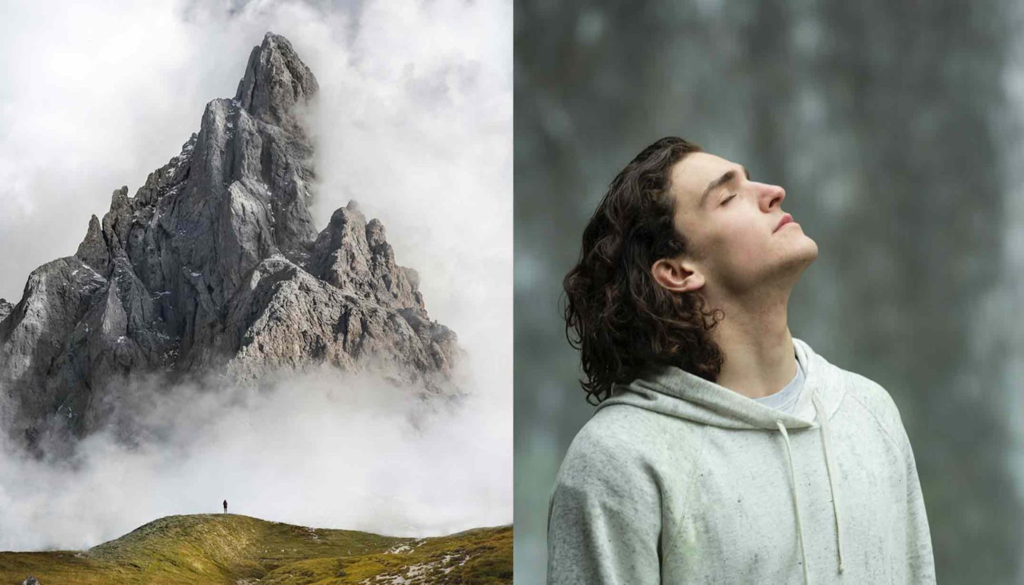
If you want to use different images, choose the photo of the person that is easy to cut out of the background and has a lot of contrast.
Step 2: Import the Subject Photo
Import the photo of the subject by going to the file menu and choosing open and place, if you have created the project.
If you haven’t created the project yet, choose the option open from the computer and choose the subject’s photo.
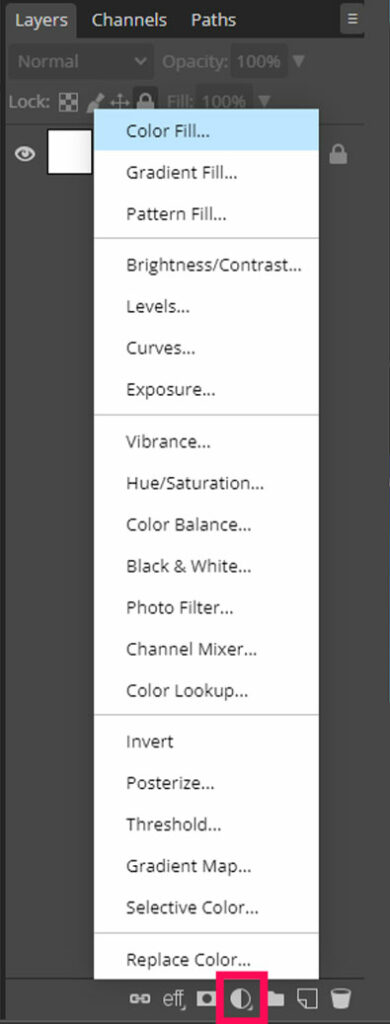
Create the background
Create a simple colored background with the help of color fill.
Step 3: Remove The Background
Now we need to remove the background of the photo with the main subject.
As you can see, the background and subject have a lot of contrast, and it will be easy to cut out, but we will need to use the refine edge tool to refine the hairs of the subject.
Let’s see how we can do that.
Select the subject layer and choose the magic wand tool, or press W on the keyboard.
Select Subject
Selecting subject option will now appear on the properties bar.
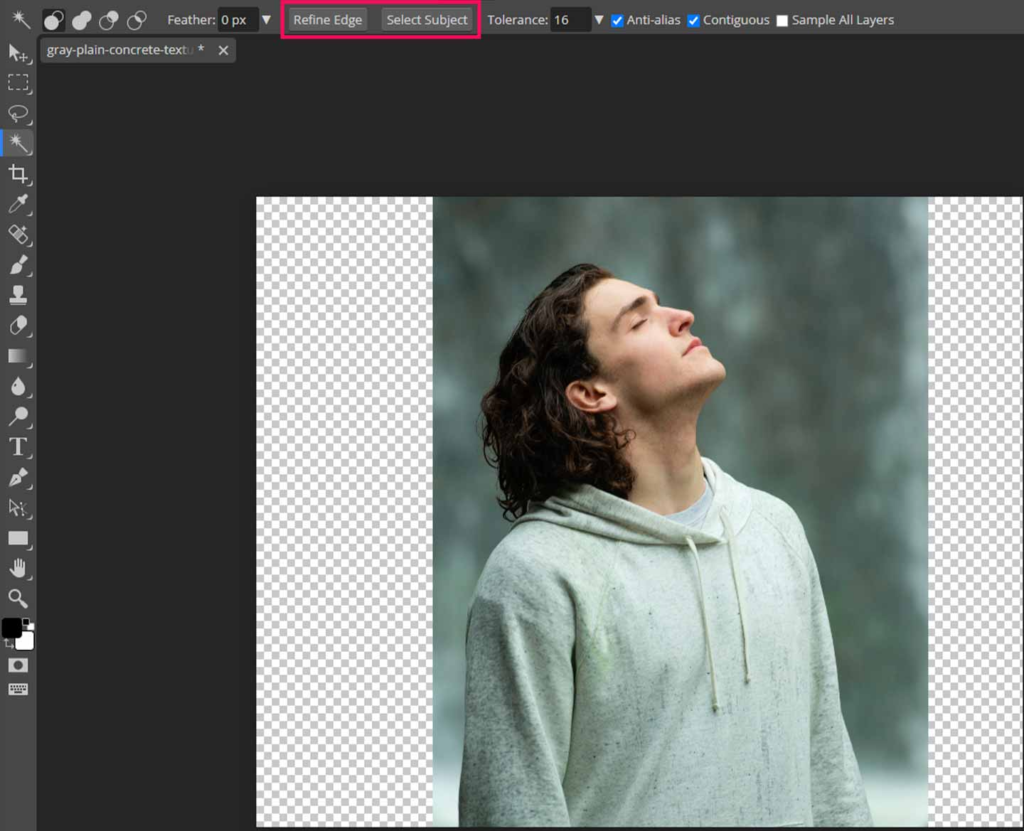
Click on select subject and wait a bit, a selection will be created around the subject.
Refine Hair
Now click on the refine edge option on the properties bar. A new window will open up, here we will fix the problems with the hair.
Choose a grey color from the top bar and reduce the size of the brush and paint on the edges of the hair, dont paint too much of the area, just a little bit.
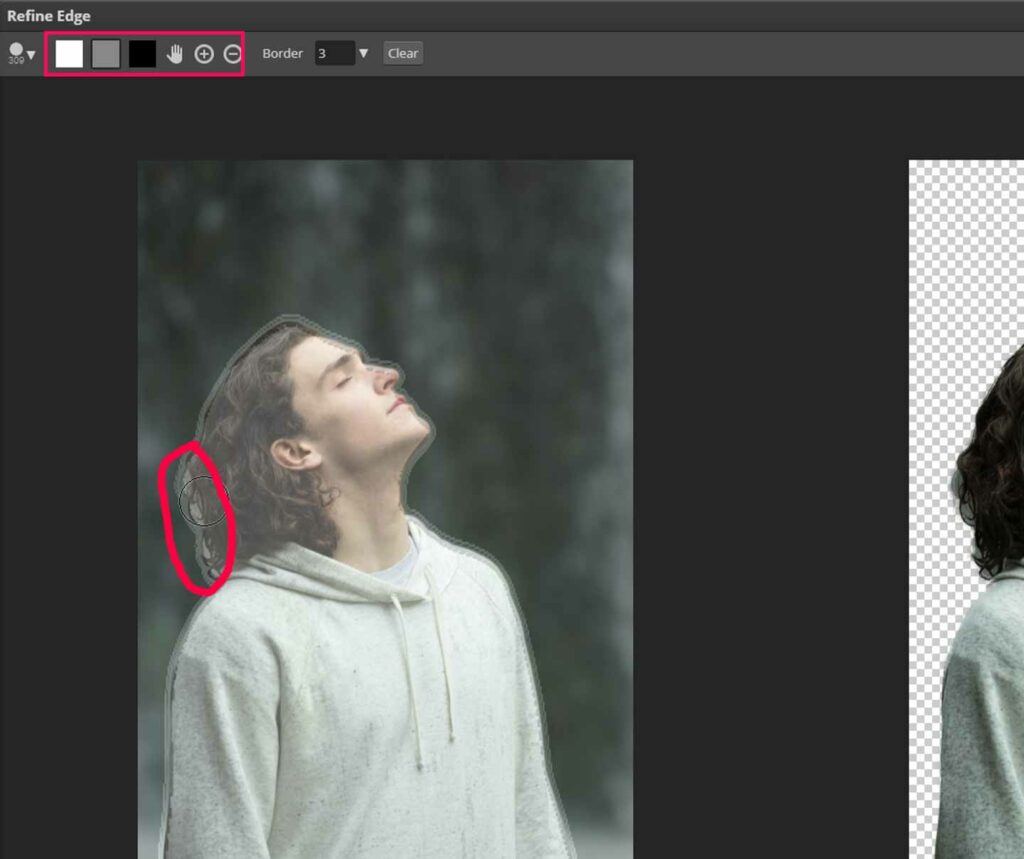
Now the problem with hair will be fixed.
Now click ok, and the background will be removed.
Step 4: Color Adjustments
Here we will make a few color and contrast adjustments to prepare our background image for the double exposure.
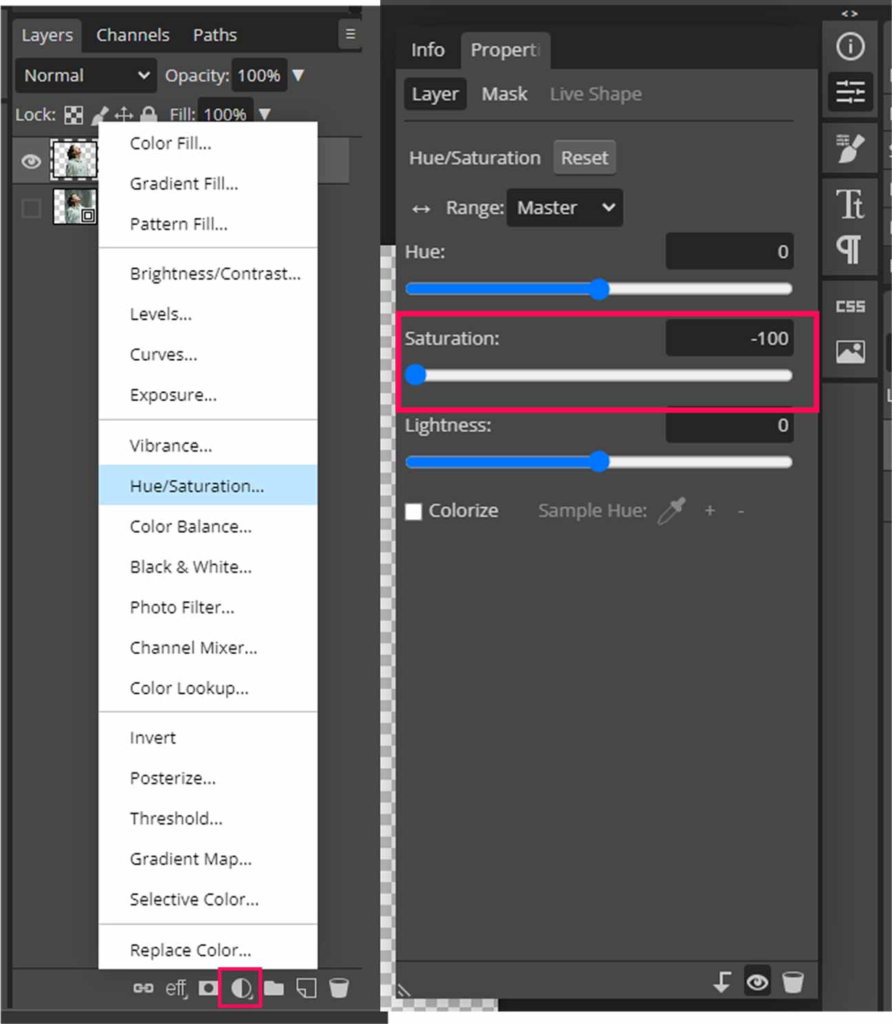
Hue/Saturation
The black and white images look more professional when creating a double exposure effect. So we will convert our subject image to black and white, it is very simple.
Create a hue saturation adjustment layer.
Drag the saturation slider all the way to zero.
Levels
Now the image is black and white, we need to give it slightly more contrast, and for that, we need to create a levels adjustment layer.
Drag both points on the left and right inward, just like shown in the image below.
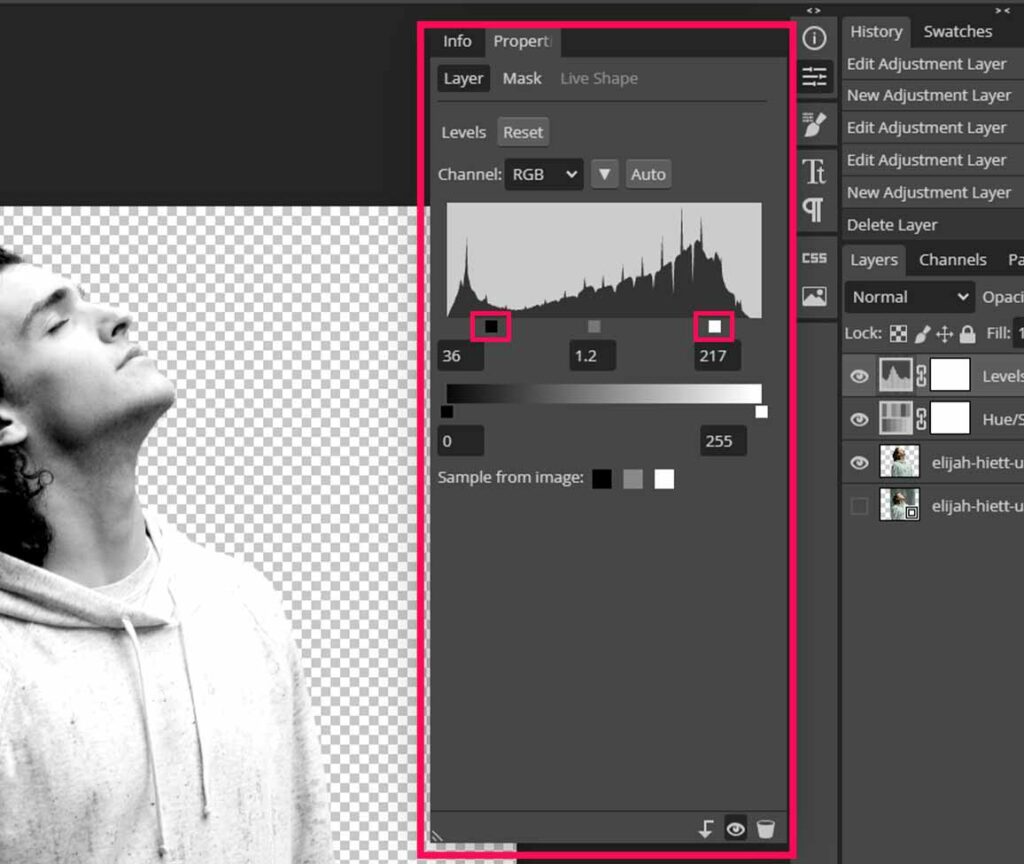
And we have a good contrast in our image.
Select the subject layer, hue saturation layer, and levels layer, press Ctrl + E or Cmd + E to merge these 3 layers.
Or right-click and choose merger layers after selecting all 3 layers.
P.S. Remember, that merging the layers is destructive – meaning you cannot undo the adjustments. Furthermore, if you’d like to maintain the edibility you could add group all of them by selecting the 3 layers & CTRL/CMD+G to create group.
Step 5: Bring In the Overlay Image
Go to the file menu and choose open and place and import the overlay image, we are using a mountain image.
Scale the image until it covers the whole subject. Place the image where you want to before moving to the next step.
Overlay Image Mask
This step is slightly complicated and important, so you must be careful.
Press Ctrl or Cmd and click on the thumbnail of the subject layer.
A selection will be created, with the selection active. Click on the mountain layer and click on the raster mask button at the bottom of the layers panel.
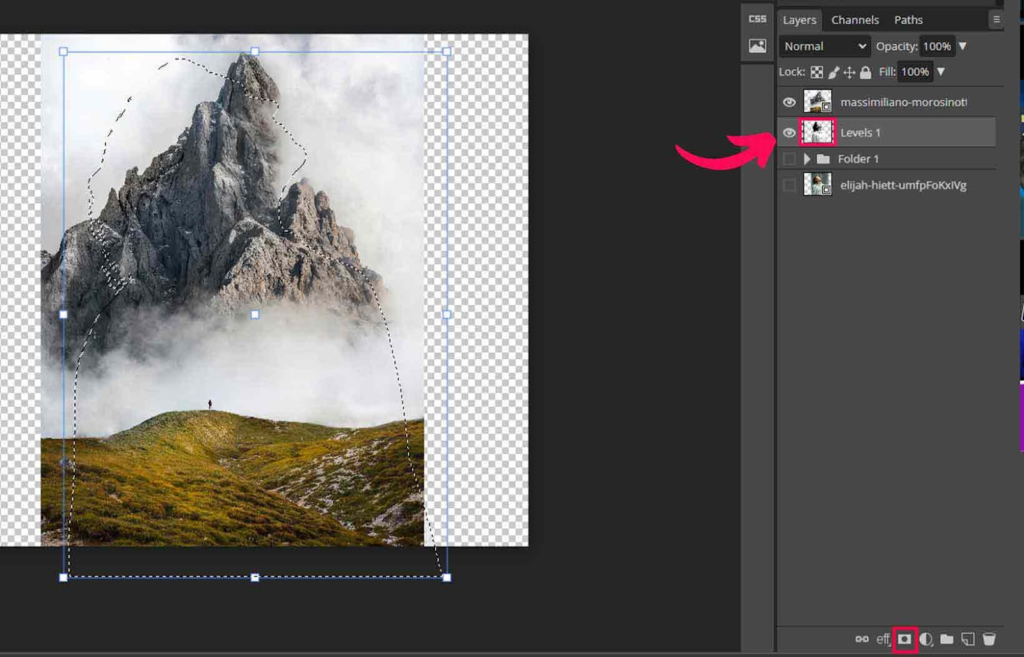
A mask will be created, and the mountain image will only be confined to the subject.
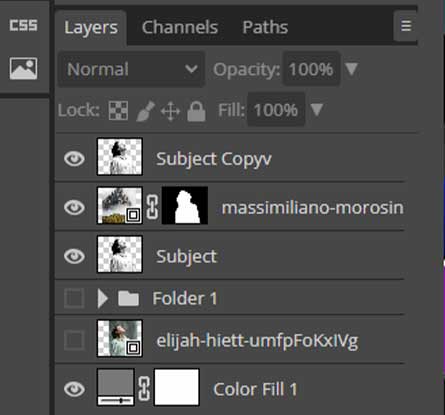
Step 6: Duplicate the Subject image
Now duplicate the subject image.
Select the subject image in the layers panel and press Ctrl + J or Cmd + J.
Move the duplicated subject image to the top by clicking and dragging inside the layers panel.
Change the blend mode
Change the blend mode of the top image to the screen.
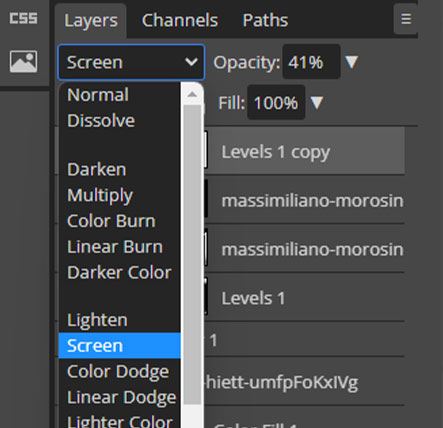
And now you will see a cool effect.
Now it’s time to refine the effect to make it more professional.
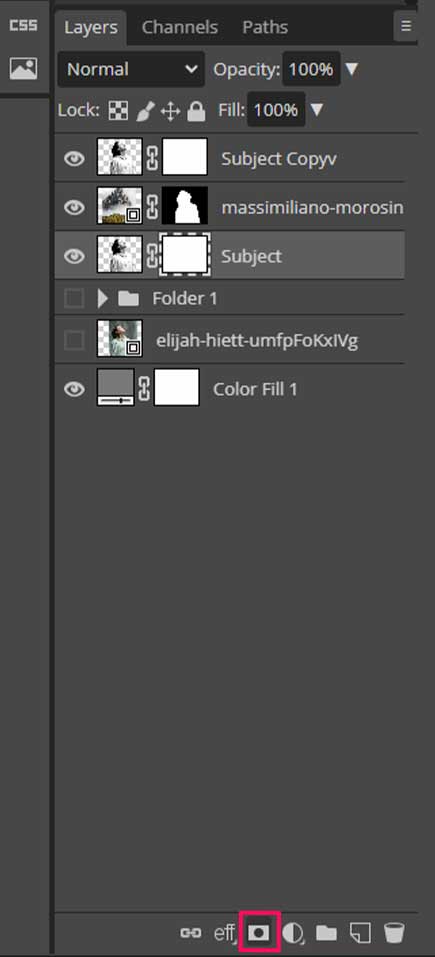
Step 7: Refine the Double Exposure
Now we will make slight changes with the help of the raster mask.
Create a raster mask on both subject layers, the mountain layer already has the raster mask we created earlier.
Refine the Mountain Layer
Select the mask of the mountain layer and choose the brush tool by pressing B on your keyboard.
Make sure the foreground and background colors are white and black, respectively.
If they are not, press D on the keyboard to set the default colors.
Press X to bring the black color to the foreground.
Make sure you use a soft brush, select the mask of the mountain layer paint the areas of the mountain you want to erase.
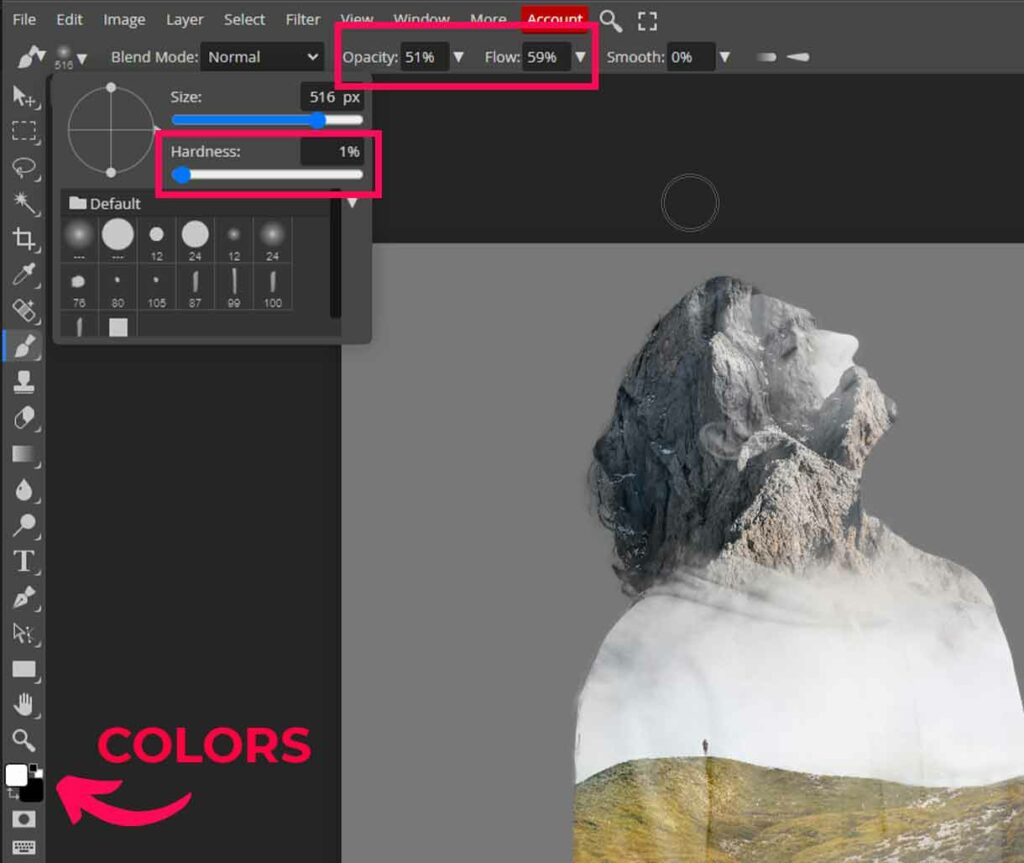
If you erase some parts you dont want to, press X, and white will become your foreground color paint with the brush to bring back erased areas.
Note: The brush works on the rule: The Black conceals and white reveals.
Be careful, dont paint with a white brush on the raster mask of the mountain layer outside the subject, otherwise, it will show the mountains even outside the edges of the subject, and that we dont want.
Note: You can go outside the edges of the subject to bring back the mountain for creative purposes, only do this if you know what you are doing.
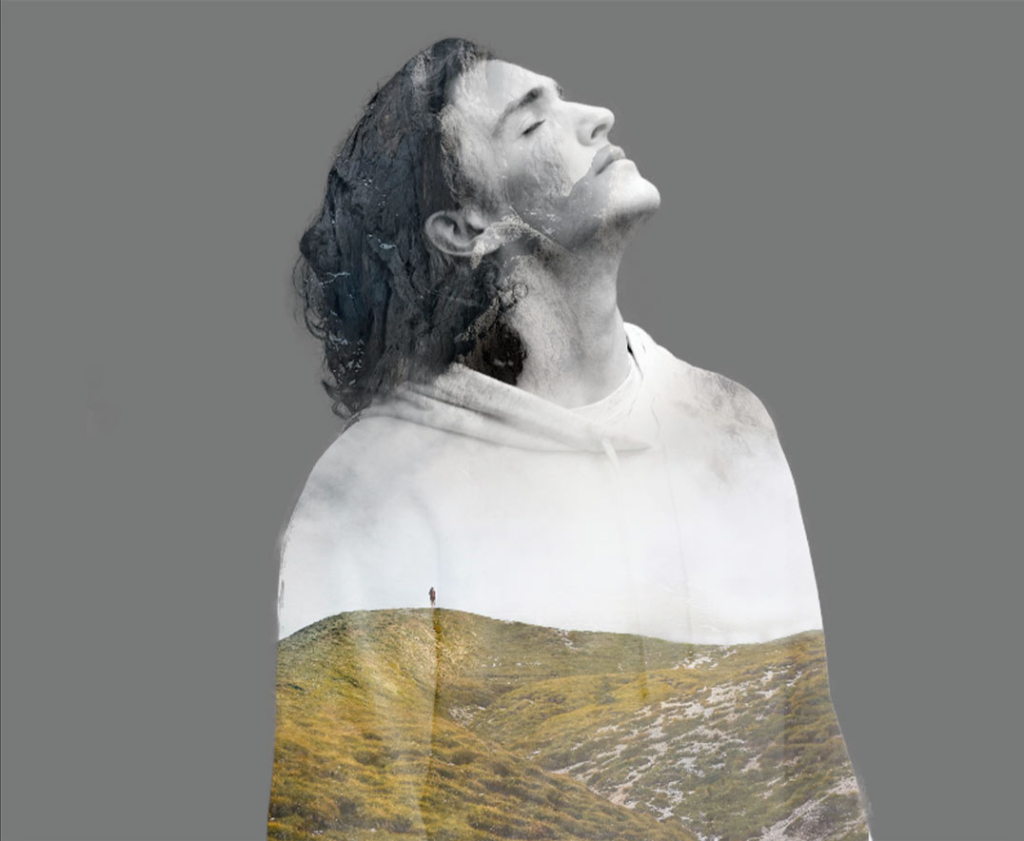
Refine the Top Subject Layer
Repeat the same process, select the mask of the upper subject layer and paint with black color to erase and white color to bring back the areas.
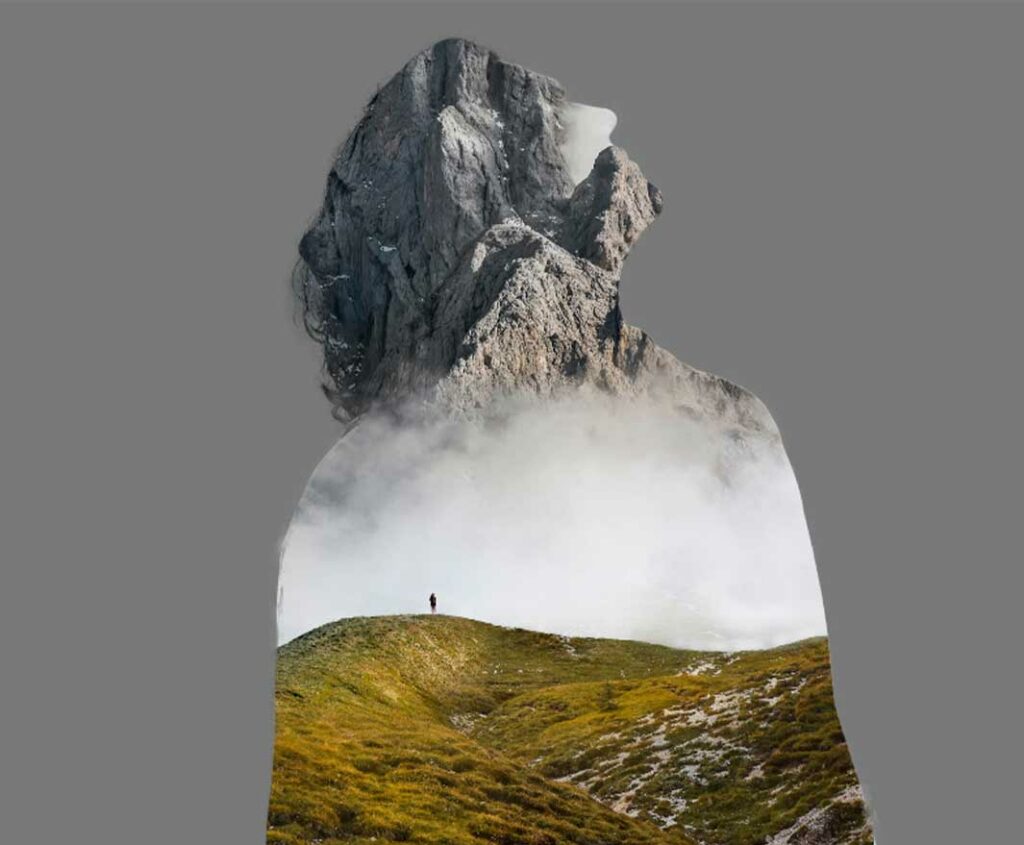
This is the result we have got after erasing some parts of the mountain from the face of the subject.
We have tried to duplicate the mountain layer and created a small part of the mountain outside the edges of the subject.
To Do that, duplicate the mountain layer and put it above everything inside layers panel.
Delete the raster mask and create a new one.
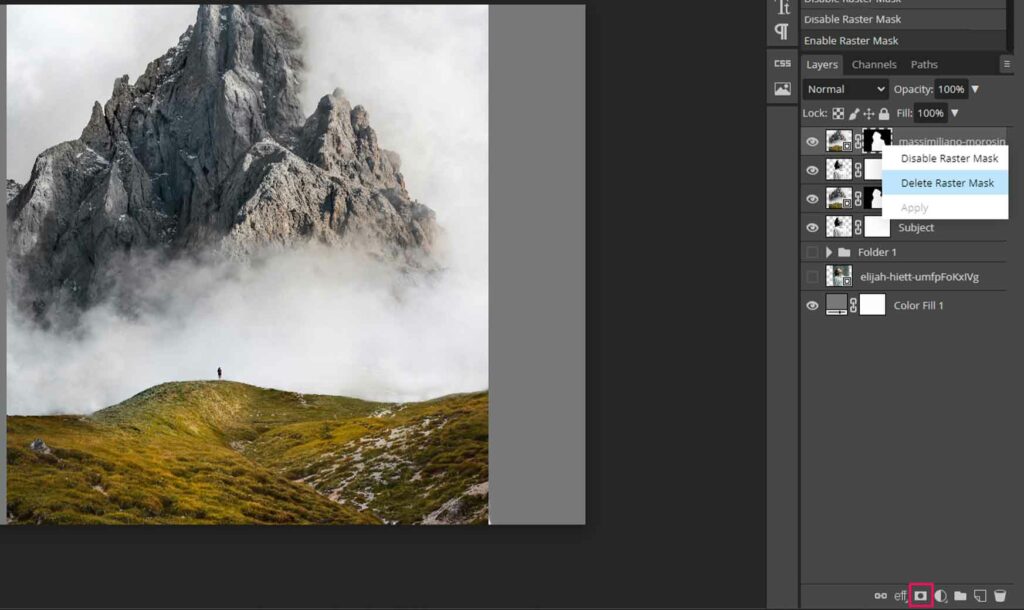
Now Select the newly created mask and paint with the black brush to erase the parts you don’t want to keep.
In this case, Erase the whole image except the part over the head.
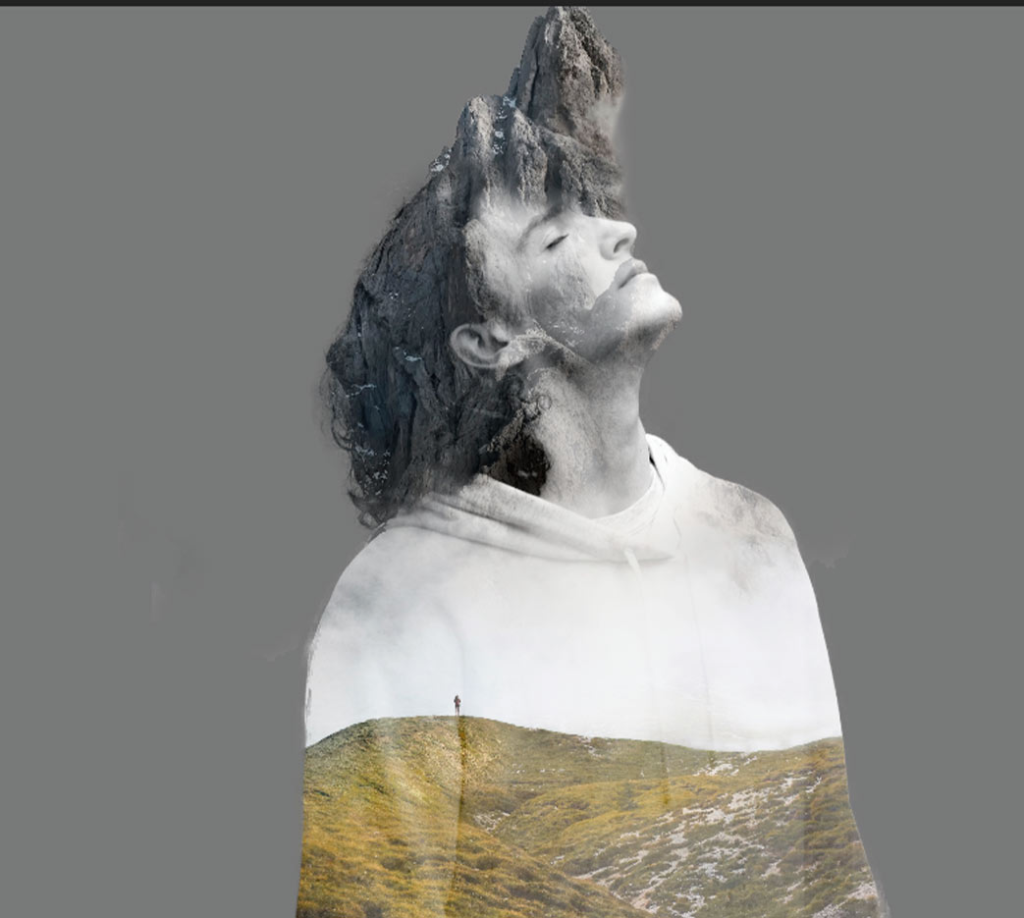
The edges may look a bit harsh or nonprofessional at the moment, but dont worry we are gonna fix them by adding additional elements.
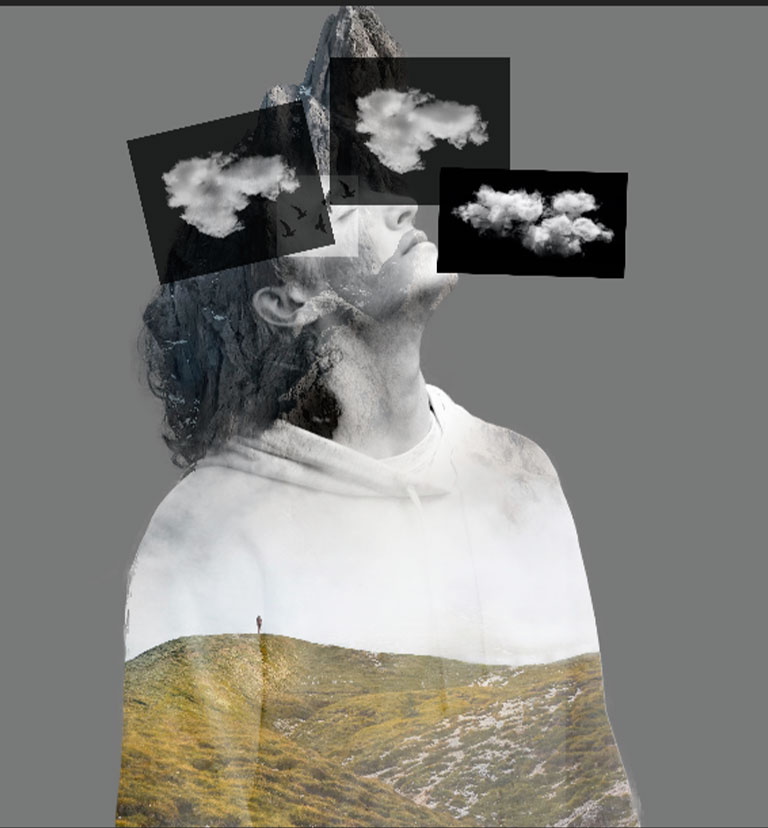
Last Step: Add Additional Elements
We will add some clouds and birds to make it cool.
You can find clouds on a black background and birds on white background from sites like freepik.com for free.
Bring in the clouds with a black background and change the blend mode to the screen.
Then bring in the birds on a white background and change the blend mode to multiply.
Note: change the blend mode to screen for the elements with the black background. And change the blend mode to multiply for the elements with the white background.
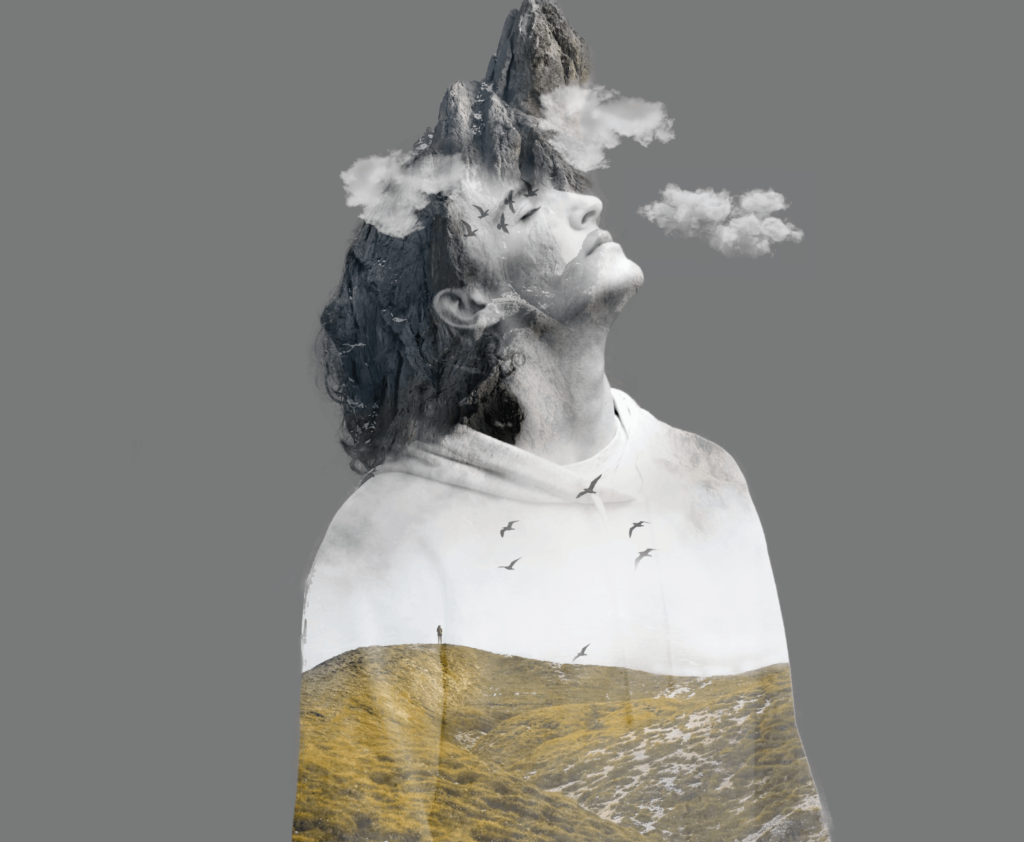
Here’s the final result after changing the blend modes of the birds and cloud layers.
Export Your Artwork
To Export the artwork you have created, go to the file menu and choose export as. You will get different file formats to choose from.
We will suggest you to go with PNG or JPG as these formats work well on the Web.
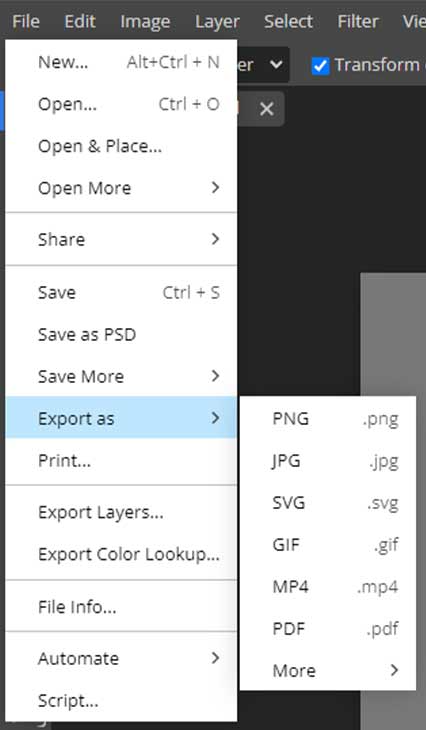
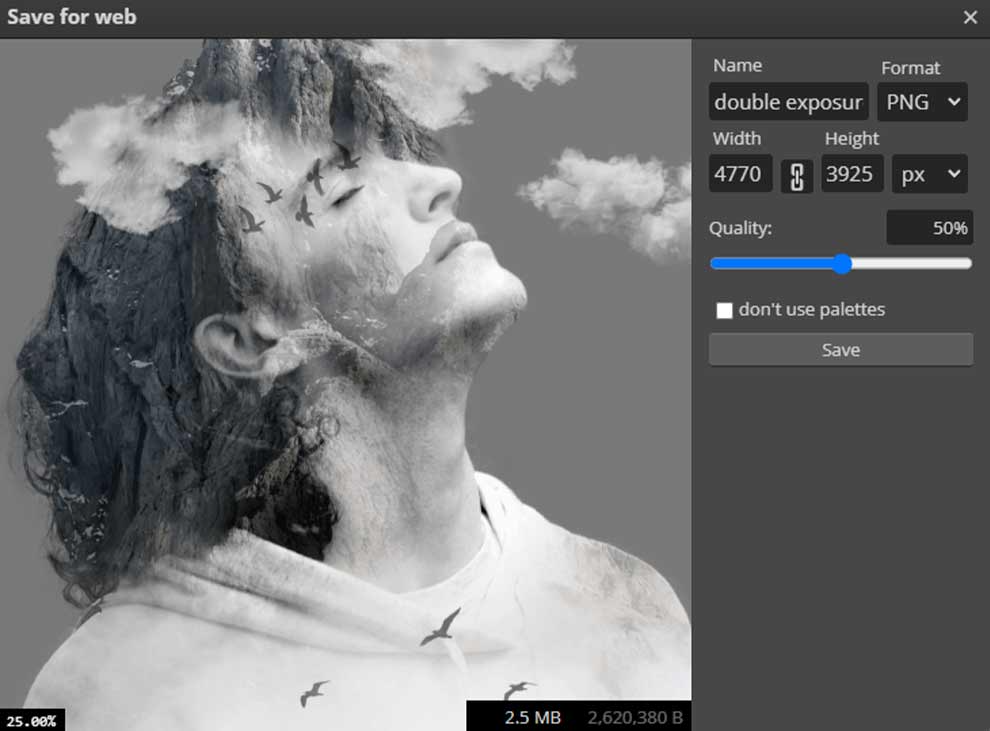
When you click on a file format, we have chosen PNG, and a new settings box will pop up.
You can dial in the dimensions and quality, and you can even change the file format.
Once you are happy with the setting, click save, and your image will be downloaded.
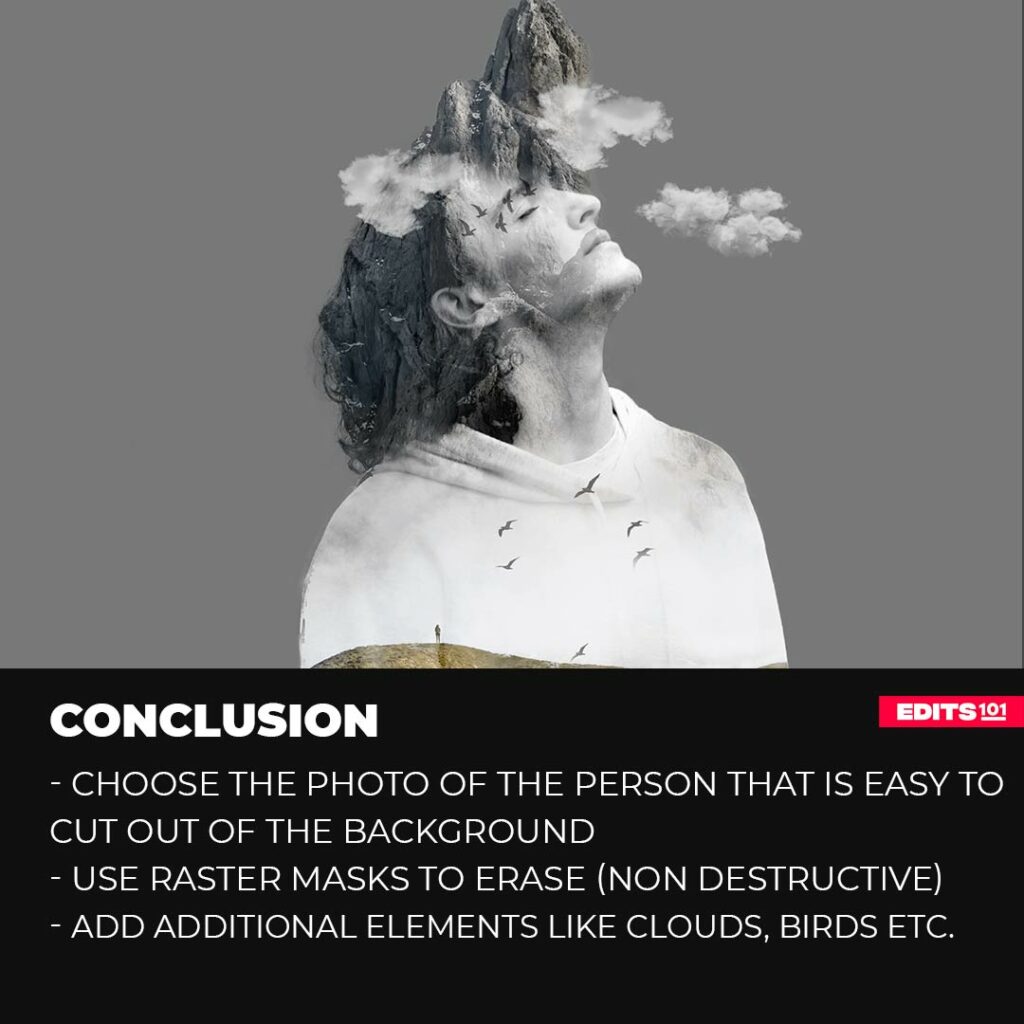
Conclusion
Finally, our double exposure is complete, and it’s looking great. We started with the selection of the images, we chose the subject with the high contrast background as it is easy to isolate the subject.
After isolating the subject, we brought in the foreground mountain image and copied the subject mask. Made some color adjustments and applied levels adjustment to increase the contrast.
Then duplicated the subject layer, put it over the mountain layer, and changed the blend mode to screen. We then used the raster mask to erase the mountain from certain parts of the face.
We Duplicated the mountain layer and made a small part of the mountain outside the edges of the image.
And finally added some additional elements to make the double exposure effect more professional and cool looking.
Thanks for reading & feel free to check out more of our articles!
Expert Rating
Summary
The double exposure effect is trending on social media in recent years. A great technique with beautiful results. It requires decent practice time to master, but once you go through the hard process the reward is worth the time.


