
DaVinci Resolve is a great and very powerful program; best of all, there’s a free version that’s pretty powerful as well.
If you are a beginner in video editing, then you Need somewhere to start, and it’s fine; we’ve all been there.
We will guide you step by step through everything you need to know to go from zero to start editing in Davinci Resolve 18.
We’re going to look at the interface, how to get nice and organized, how to import and edit clips, different tools and effects, how to export, and more.
How And Where To Download DaVinci Resolve?
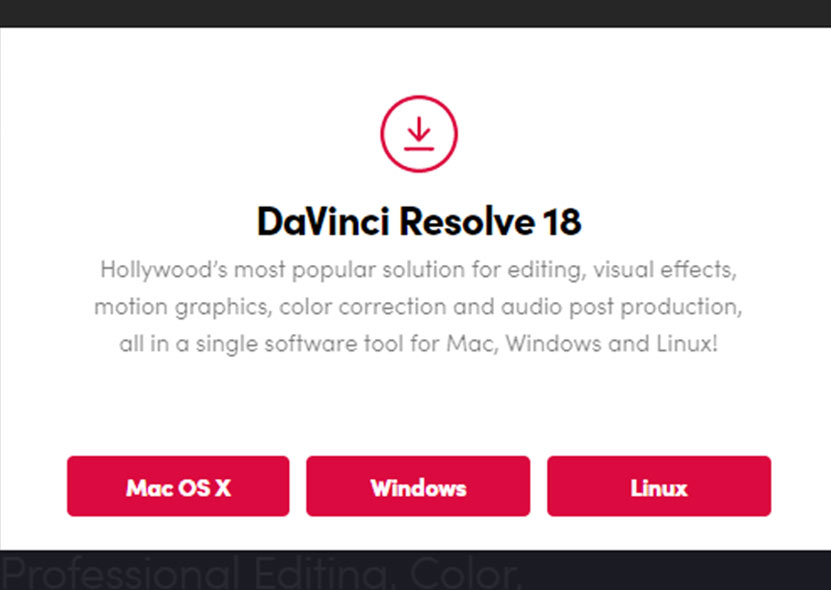
Well, the first thing we’ve got to do is obviously download DaVinci Resolve, so if you haven’t done that yet, just head to the Blackmagic Design website and go to DaVinci Resolve 18.
Click on the free download button, there’s also an option available to download the studio version, but we will go with the free one.

Click on the free download, and you will get two options, choose the one on the left and click on the platform (Windows, Mac) you are using.
And you will be asked to fill out a form.
Fill in the details and click on register & download, and the download will begin.
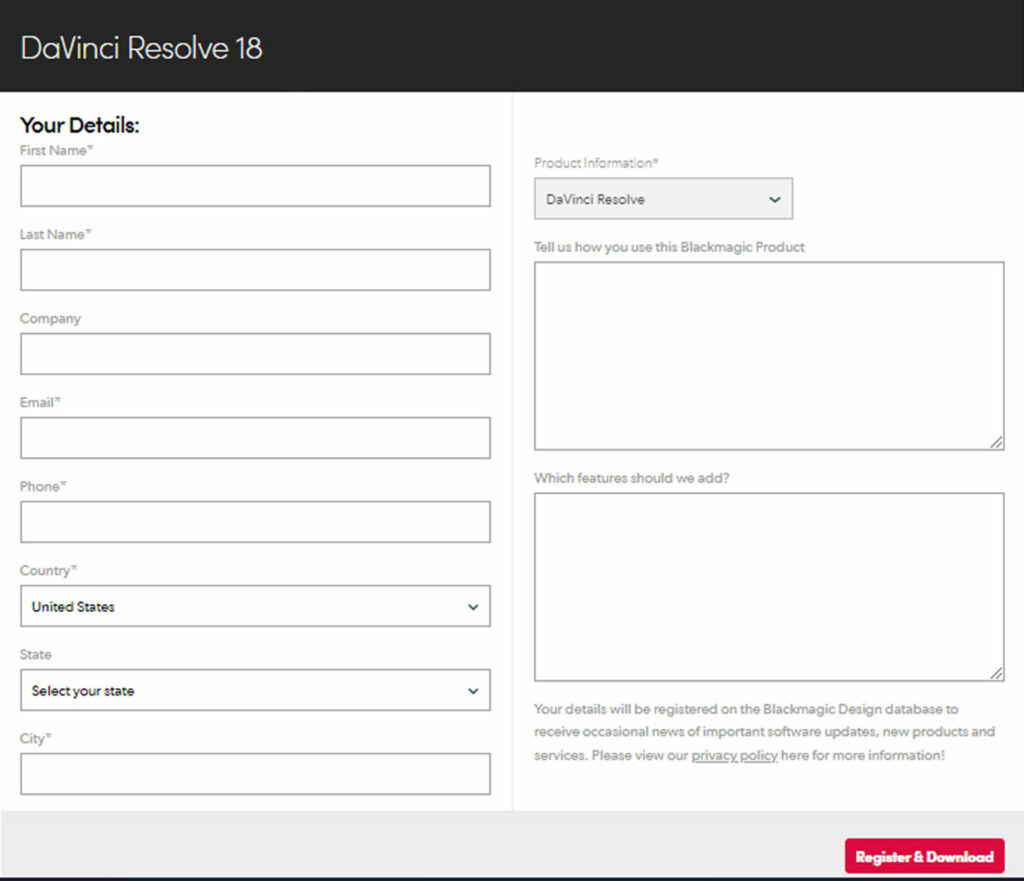
Complete the installation after the downloading is finished.
How to Create a New Project In Davinci Resolve
So when you open Resolve, the project manager window is the first window we see here.
If you have worked on any projects previously and saved them, they will show up here in the manager.
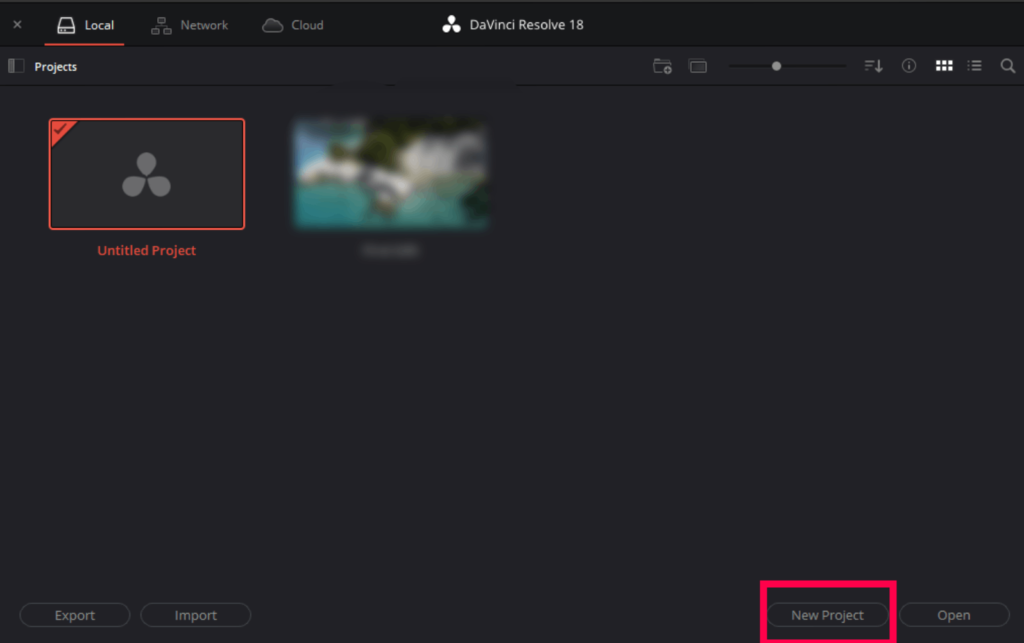
We can create a new project by either double-clicking on the untitled project. Or just click on the new project in the bottom right corner.
A slight box will pop up, asking you to name your new project. Choose a name and click Create.
Overview of The Davinici Resolve 18
When you open Resolve, you will be greeted with a screen containing 7 workspaces or pages, all created for different tasks.
- Media: This page is used for Assembly. This is where you import and organize your videos, audio, sound effects, graphics, and other assets.
- Cut: This is where you do fast and rough edits.
- Edit: On this page, you refine your edit, using effects, transitions, etc
- Fusion: This page is used to create VFX or advanced motion graphics.
- Color: Color page let you color correct and color grade your videos.
- Fairlight: This page is for all kinds of audio work. This is used for audio editing and sound design.
- Deliver: This is where you will export your final video.
To go to a specific page, just click on the buttons at the bottom of the screen.

Master Video Editing In Davinci Resolve 18
Now let’s dive in and master video editing in Resolve 18 as a beginner.
How to Turn On Auto Save In Resolve?
Before we dive straight into the editing process, we need to turn on the auto-save option.
Let’s turn on auto-save so that our work will automatically be saved as we work on this project and future projects.
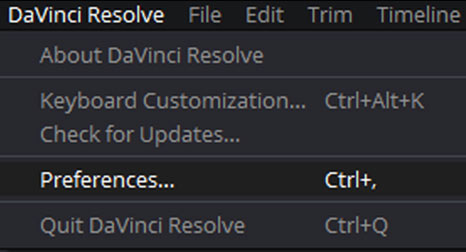
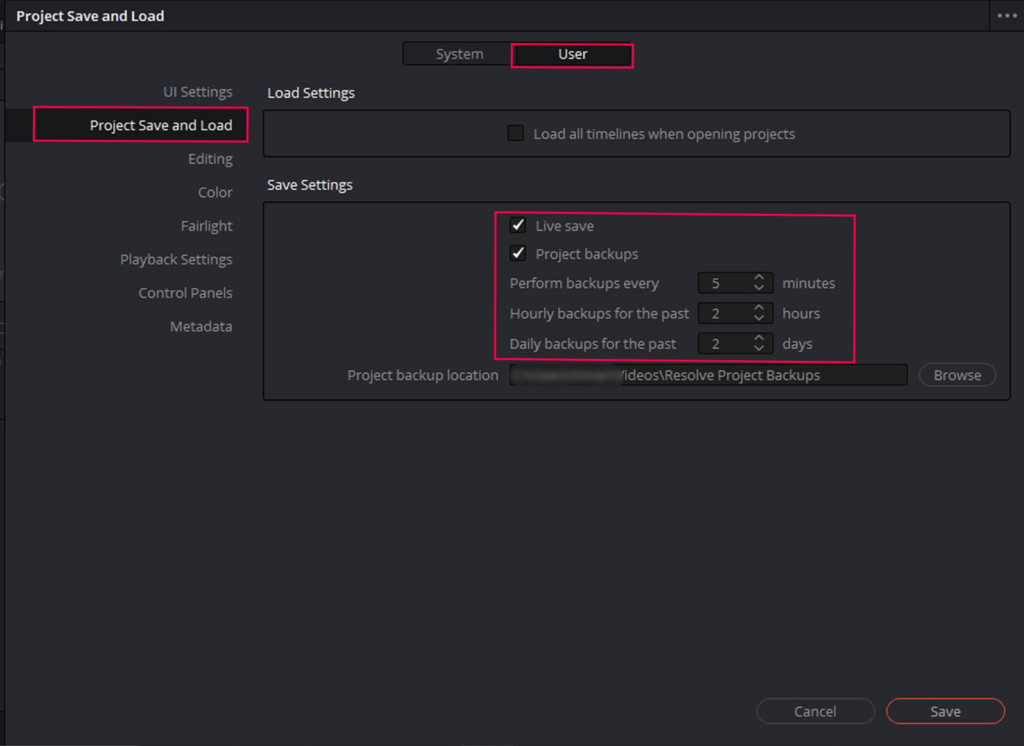
Go up to Davinci resolve menu and click on preferences, click on the user tab, choose project save, and load under save settings.
Let’s make sure that we have live save check marked.
Live Save does exactly what it says, and it will save every time you make a change in your project.
Also, check mark project backups this will auto save in increments depending on what time limit we choose.
We like Davinci to perform backups every five minutes.
We are okay with having hourly backups for the past 2 hours and daily backups for the past 2 days. You can change depending on your personal preferences.
And if you want to see where your project backup location is or you want to change the location, click browse and change or see the locations.
Click Save.
Import Media
Now, let’s import the media we want to edit by going to the media workspace.
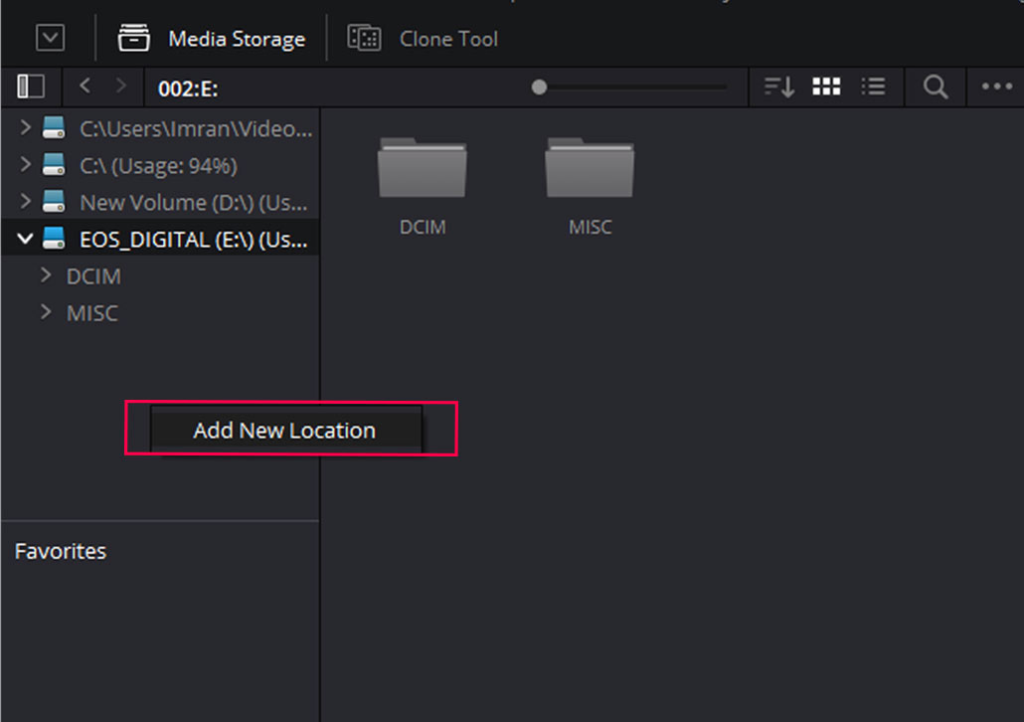
We can import footage by going over to the top left, where it says media storage, and navigating to the footage location.
You will see the list of drives and folders on your system.
Note: If you can’t see the location of the footage or the assets that you’re going to be working with.
You can right click and choose add new location, and this will bring up more locations, find the location that contains your media.
If your footage and assets were on your desktop, you could choose and open the desktop folder that your footage is in.
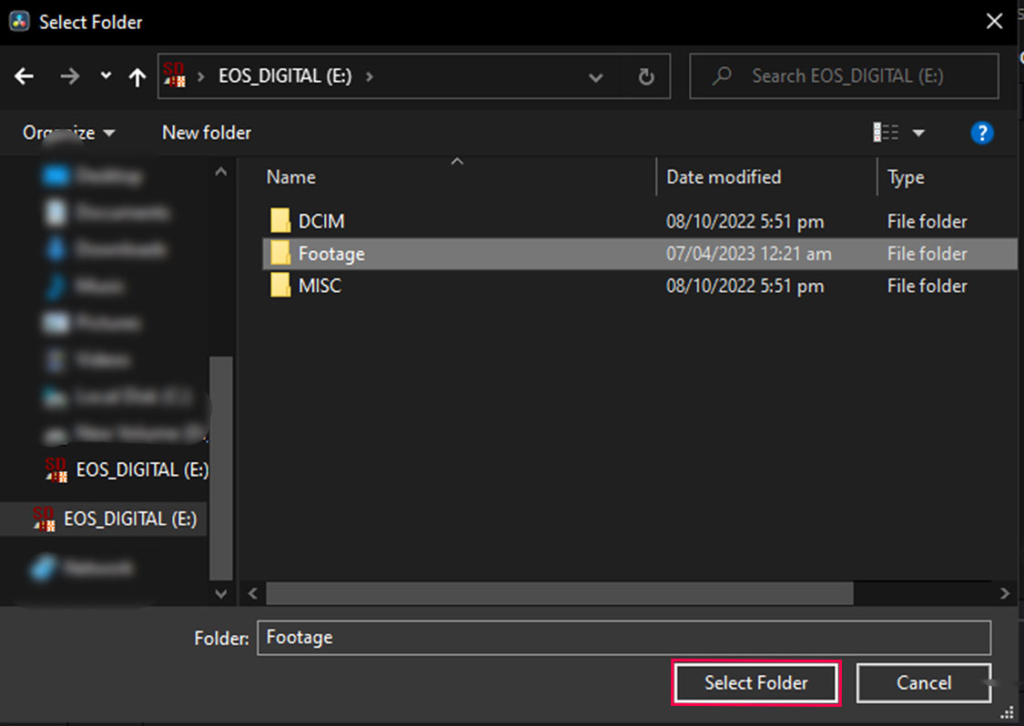
If you see the location in the panel, click on it, and all the media will appear inside the media panel.
Click and drag all the media into the pool at the bottom.
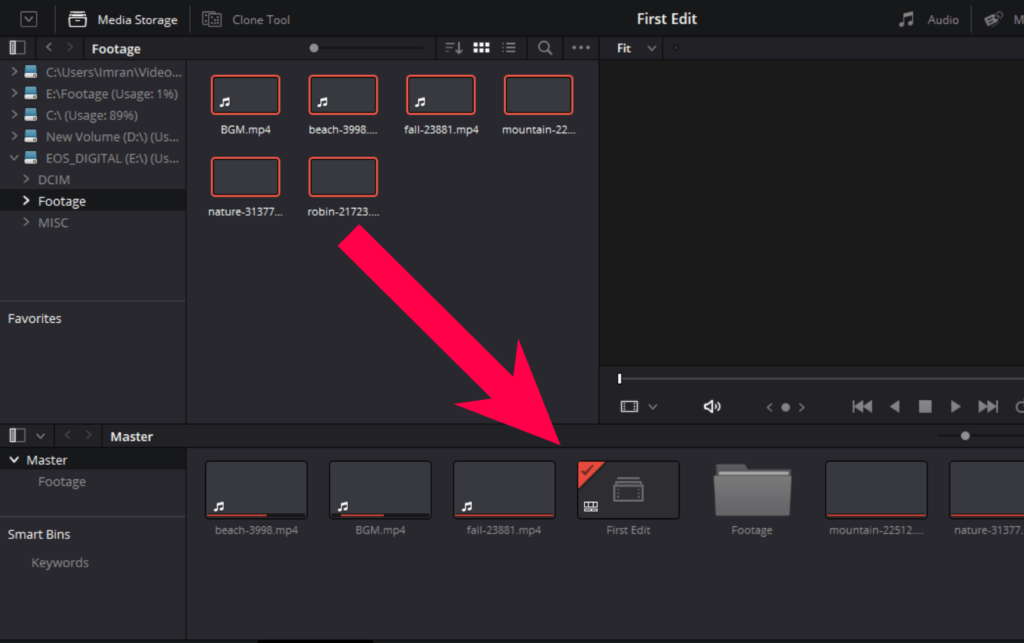
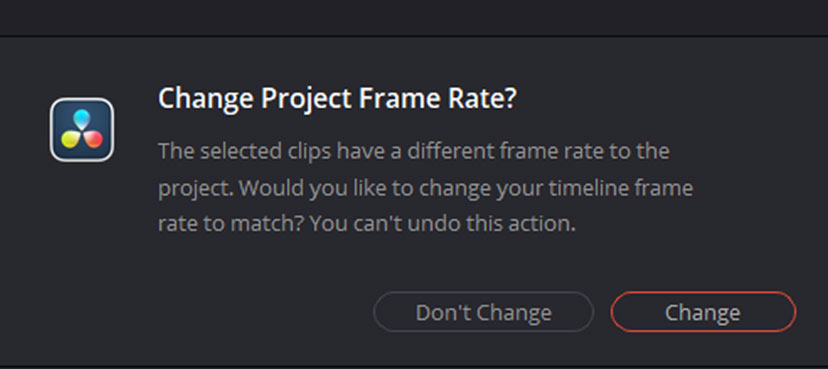
You will get a pop-up asking you to change or dont change the frame rate. Just click on Don’t change.
Now the media is imported into the project.
Create A Timeline
Select the Edit page from the bottom of the screen.
Now, let’s create a timeline.
Go to the file menu and choose new timeline.
- A new window will pop up, where you will choose the resolution, frame rate, and other settings for your project.
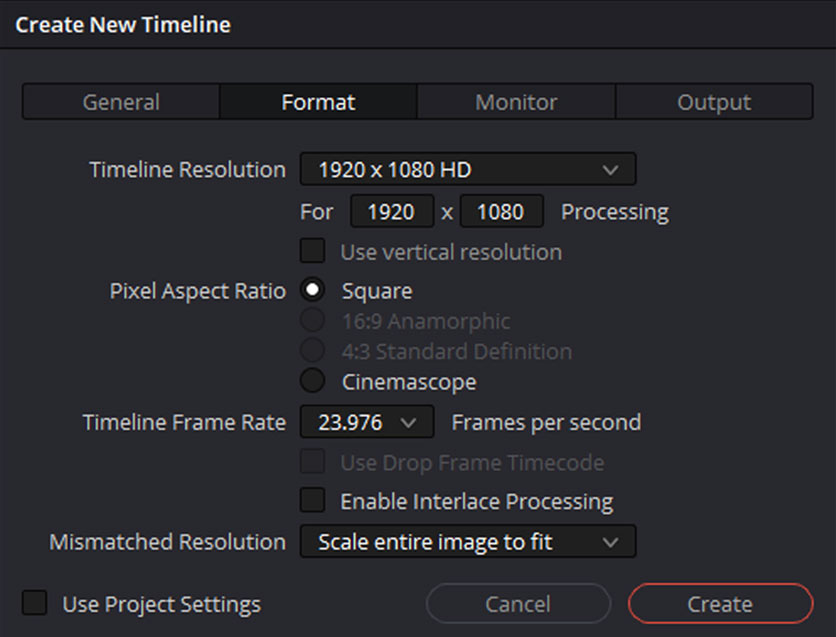
For example, if you working on a video for youtube, choose 1920*1080 (16:9), and if you are working on an Instagram reel, then choose the opposite 1080*1920 (9:16).
- Uncheck the use project settings check box.
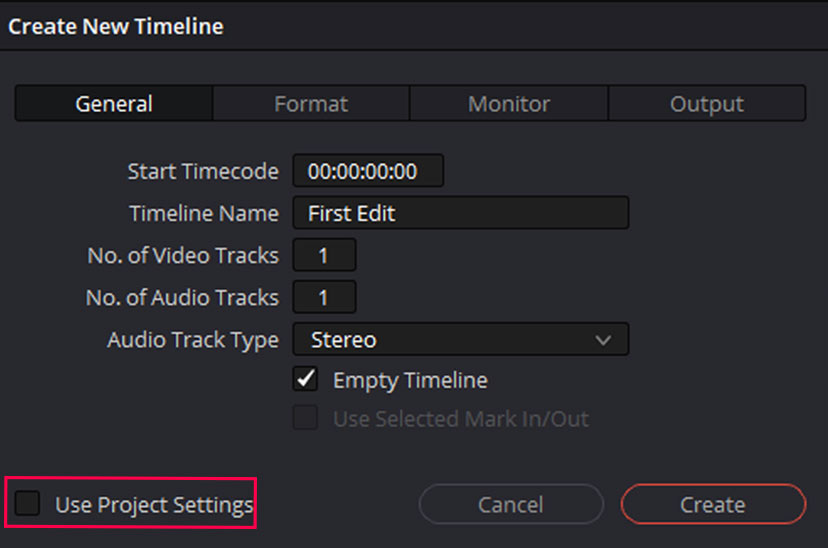
When you uncheck the use project settings, more options will appear.
- In the first tab, set the time code to 00:00:00:00.
- Rename the timeline according to the project.
On the second tab,
- Choose the resolution.
- Check the vertical option if making a video for Instagram of ticktock.
- Set the project frame rate according to the footage.
Then Click create. And the timeline will be created.
Create A Bin
Bins in resolve are folders to keep the media organized.
Right-click inside the media pool and choose the option “New BIn.”
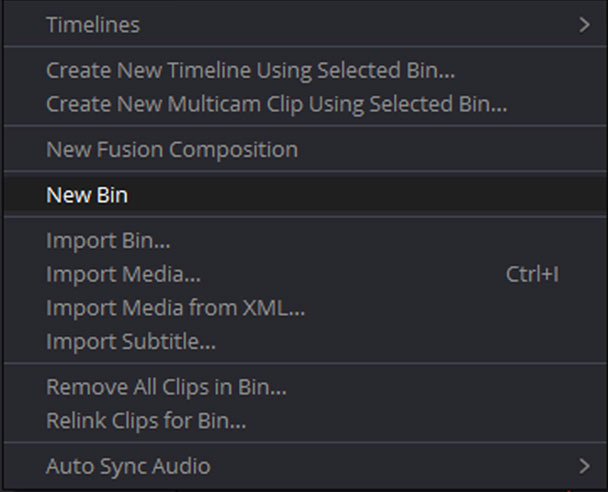
Rename the bins according to the media.
Create different bins for different media, like audio, video, graphics, etc.
Import Footage To The TImeline.
It is easy to import footage to the timeline in multiple ways, but we will discuss the easiest one.
Make sure you are on the edit page.
Click and drag all the clips or a single clip and drop it into the timeline.
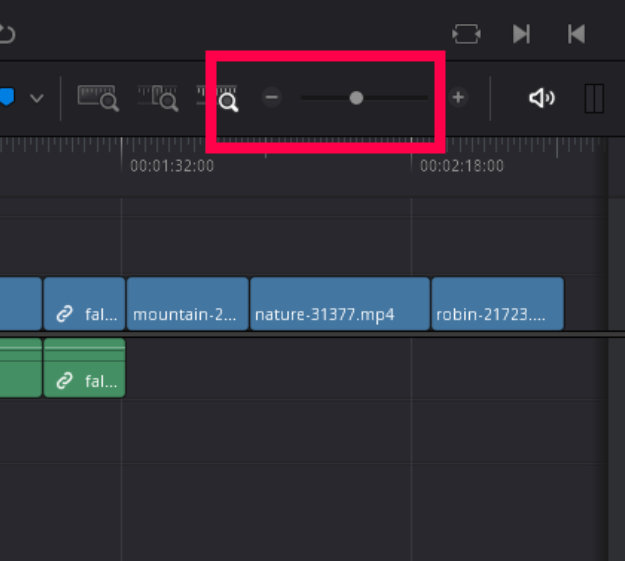
How To Zoom In and Out on the Timeline?
Use the keyboard shortcut Ctrl + or Cmd +, or you can use the slider to zoom in or out on the timeline.
Scroll left or right to see the whole timeline.
Timeline View Options
You can choose the way the timeline displays the media.
- Film strip view
- Thumbnail view
- Simple view
We will work with the default one, the film strip view, as it is easier to work with.
You can also change the height of the video and audio tracks in the timeline view panel.

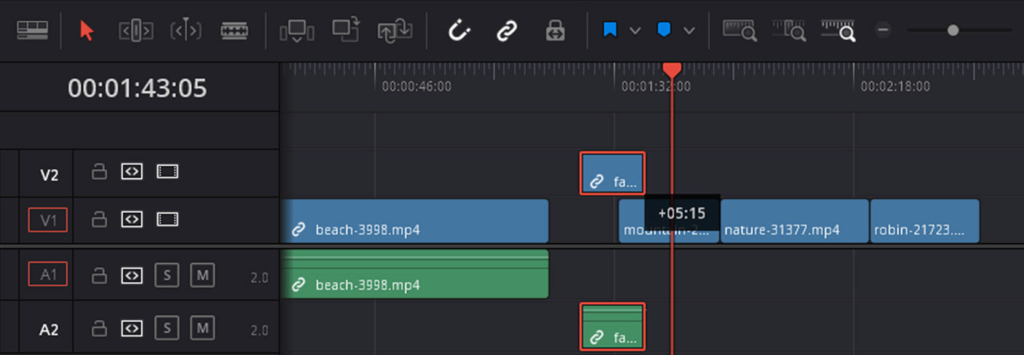
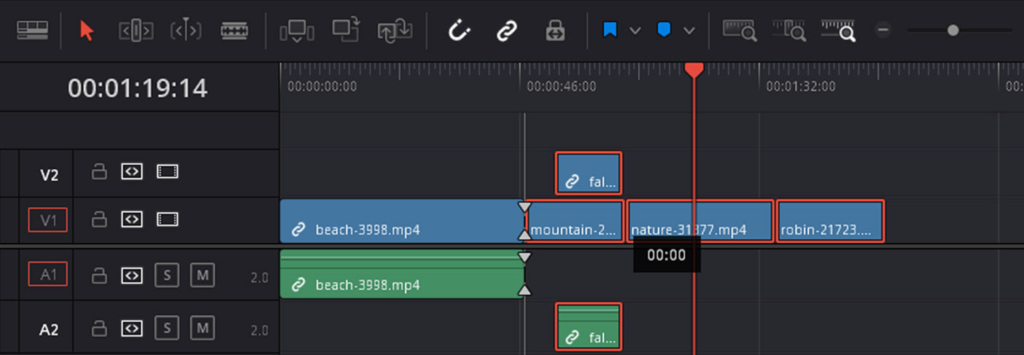
Place One Clip Over The Other
Now, whatever kind of edit you are doing, you will need to add b-roll clips, and you will be placing clips over the other clips.
It is very easy to do, just click and drag a clip to an upper track and place it wherever you want.
How to Trim The Clips
Trimming the clips means cutting a part of the clip from the beginning or from the end.
It is very easy to do. Take your cursor to the clip’s beginning or end, and the shape of the cursor will change.
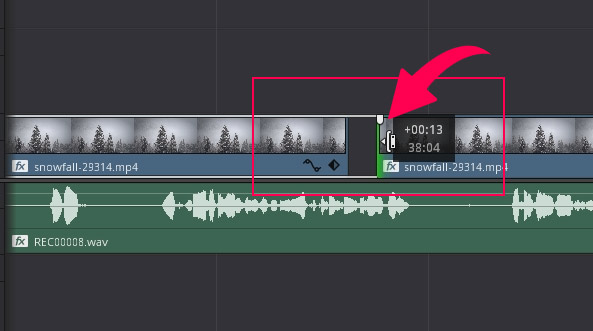
Click and drag towards the left or right to trim the clip.
Make sure the cursor is at the beginning or end of the clip, not in the middle of two clips.
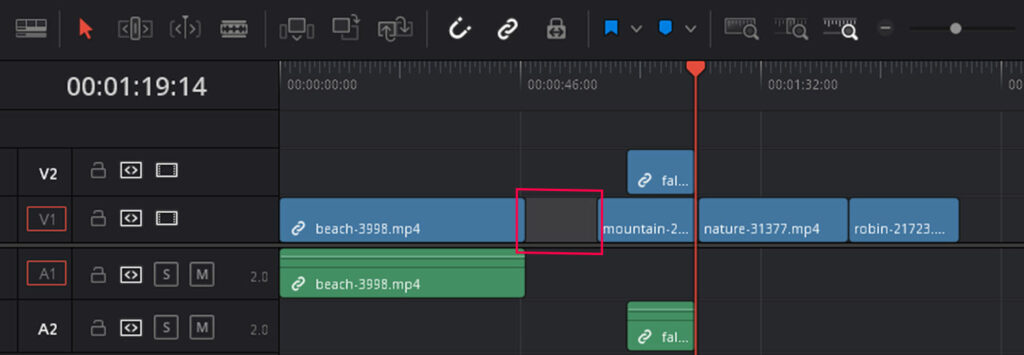
How to Delete Empty Space Between Clips
There are two ways to get rid of empty space.
- Select all the clips and move them to get rid of the space.
- Click on the empty area and press delete.
The empty space will be deleted, and clips will move and take the empty place.
How to Add Cut Clips
There are two ways to make a cut on a clip.
- Keyboard shortcut
- Balde edit mode.
Keyboard Shortcut
You can add a cut to a clip by pressing Ctrl + B or Cmd + B. Place the play head where you want to add a cut and press the shortcut.
Blade Tool
Select the blade edit mode by pressing B on the keyboard, and click where you want to make a cut.
How to Crop And Transform A Clip In Resolve
There are two ways to transform and crop your clips in DaVinci Resolve.
- On screen Controls
- Inspector Panel
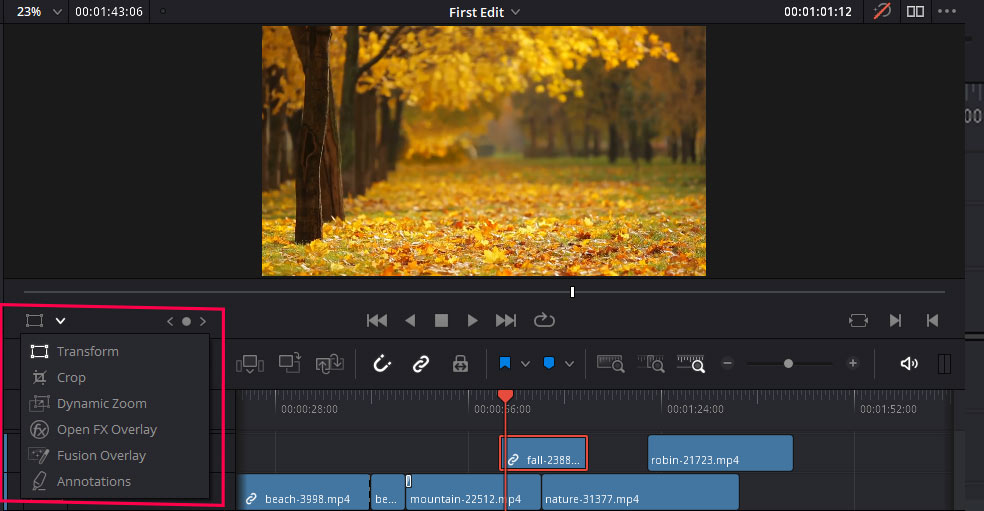
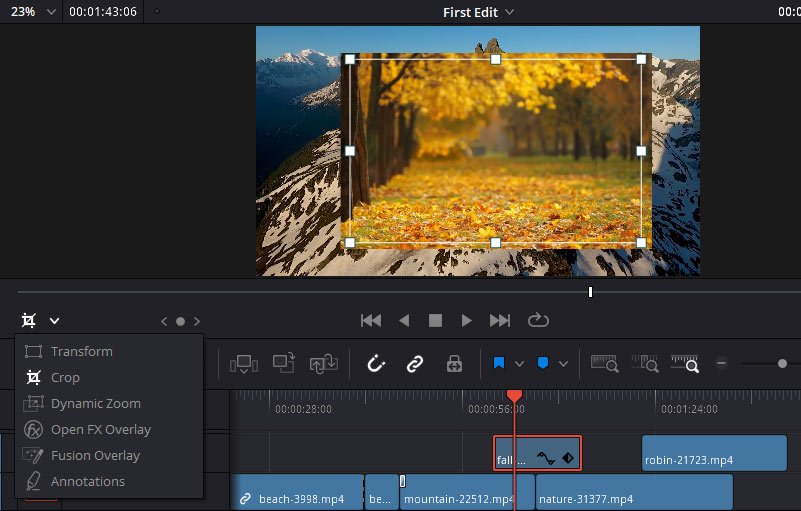
On Screen Controls
There is a panel under the program monitor where you need to select which parameter you want to change.
When you click on the panel, you will get the following options:
- Transform
- Crop
- Dynamic Zoom
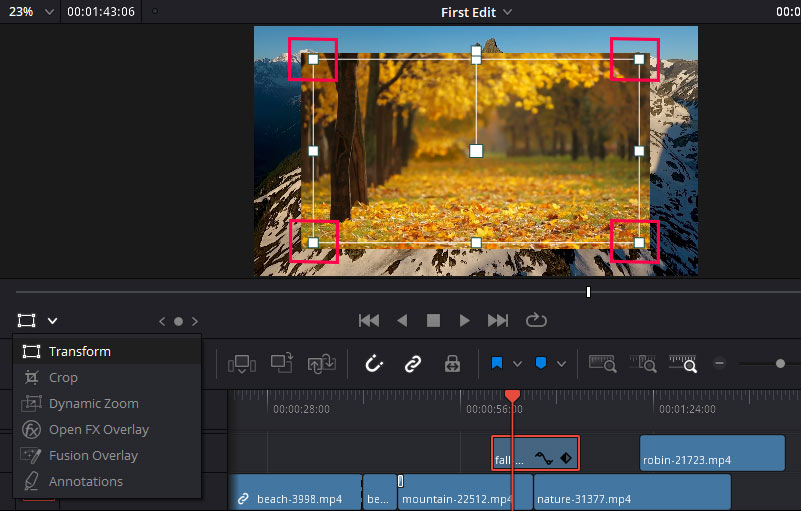
Transform
Transform lets you change the scale and position of the selected clip.
When you are transforming your clip, change the scale from the corner points.
Crop
With crop selected, you can crop your clip within the program monitor.
When you select crop, you will see a bounding box around the video, you can click and drag any point from any side to crop that particular side.
Dynamic Zoom
Dynamic zoom lets you add zoom-in or zoom-out animation to your clips.
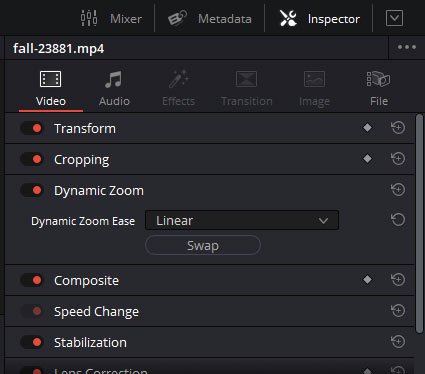
Transforming Through Inspector Panel
The inspector panel may be hidden by default, and you can turn it on by clicking on the inspector option in the top right corner.
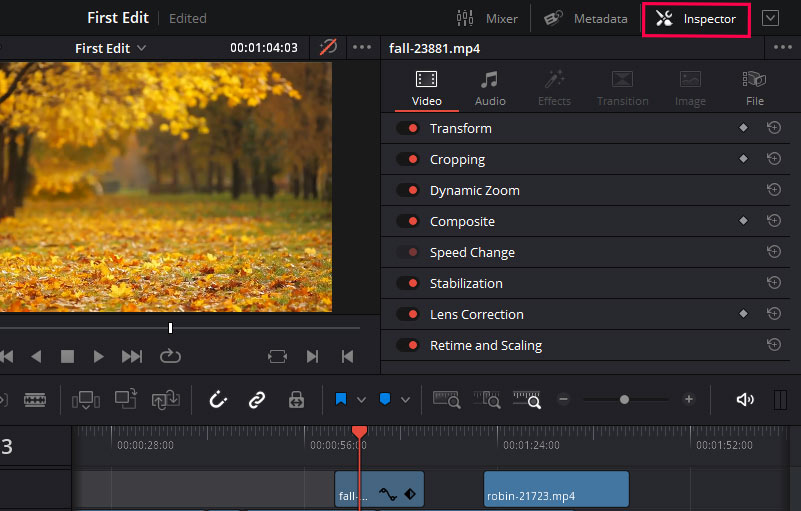
You can change a lot of settings inside the inspector panel, but we will discuss only 3 of them in this beginner’s tutorial.
- Transform
- Cropping
- Dynamic zoom
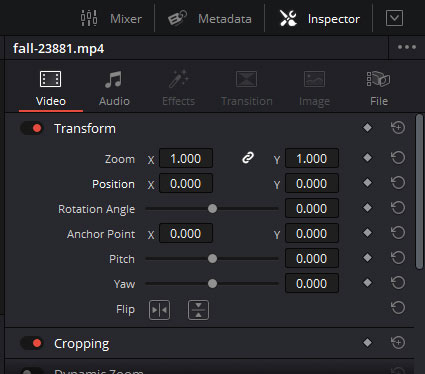
Transform
Transform options let you change the scale and position of the selected clip.
Click on the transform option, and the settings will appear.
You can change the zoom level, x and y positions, rotation angle, anchor point, and pitch and yaw settings.
Pitch and yaw give the video a fake 3d illusion.
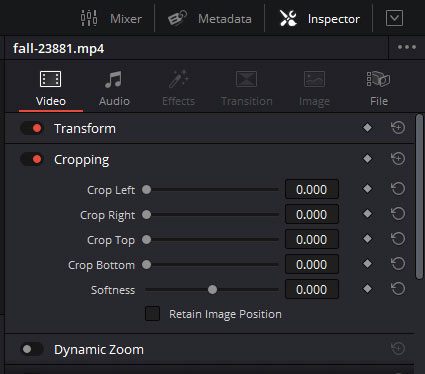
Cropping
In the cropping panel, you will get the sliders to crop all 4 sides of the video.
You will also see a softness slider if you want to fade the sides of the video.
Dynamic Zoom
As we have discussed above, the dynamic zoom will add a zoom-in or a zoom-out effect to your selected clip.
By default, when you turn on the dynamic zoom, it will add the zoom-in effect, you can convert it to zoom-out by clicking on the swap button.
How to Add Transitions Between Clips
To add transitions, you need to go to the effects panel, which may be hidden at first, so go to the top left corner and click on the effects button.
The effects panel will appear on the bottom left, click on the video transitions folder, and all the transitions will appear.
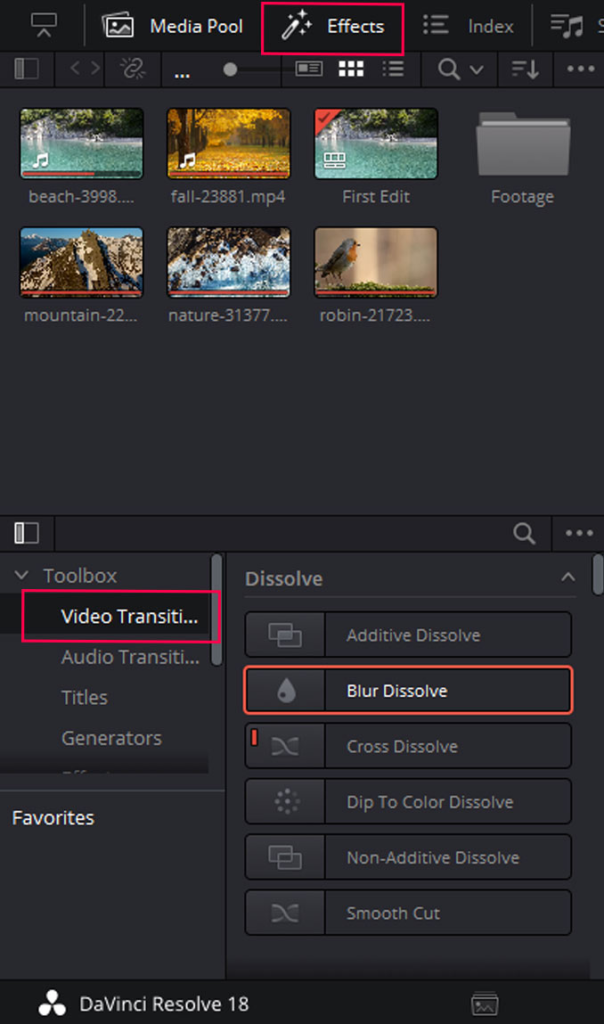
If you hover over the transition, you will see the preview inside the program monitor.
Click and drag any transition between the two clips.
And the transition will be applied.
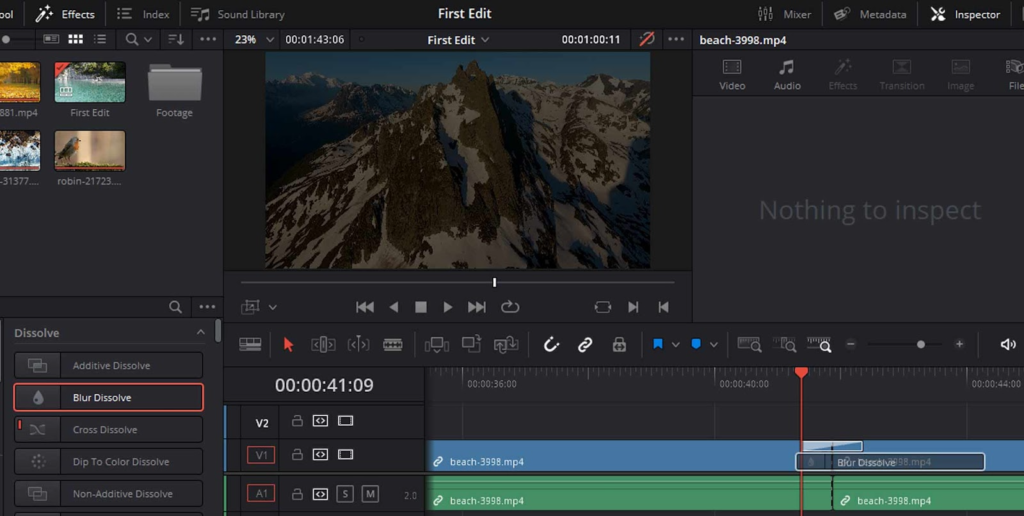
You can stretch the transition by clicking on the end and dragging. When you go to the end, the cursor will change. If the cursor is not changing, you need to zoom in on the timeline.
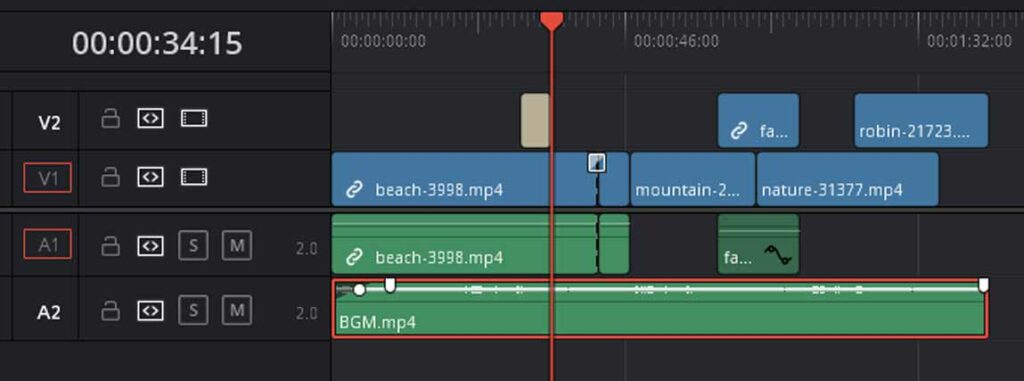
How to Duplicate Audio In Davinci Resolve?
If you have a background music track shorter than the whole video’s length. You can duplicate it easily to fit the length of the whole video.
Press Alt or Option and click and drag. You can drag down, right, or left, wherever you have space.
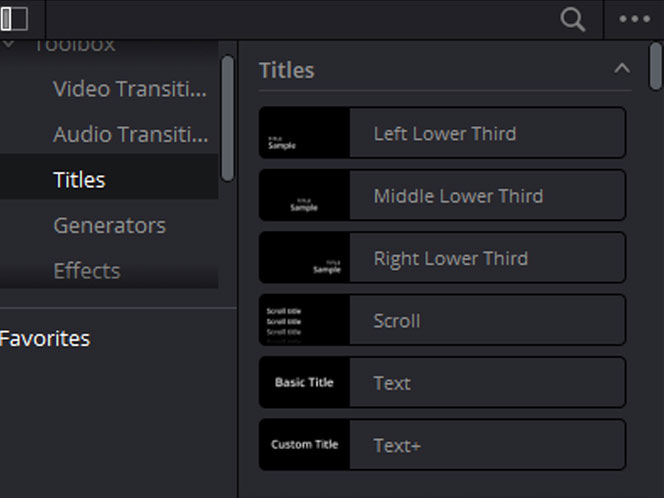
How To Add Titles In Resolve
Right below the video transitions folder in the effects panel, there is a title folder click on it, and you will see all the titles available.
Click and drag the title inside the timeline and position it on whatever clip you want.
Edit the Title
Once the title is inside the timeline, click on it and go to the inspector panel to edit the title.
You will see two tabs, one for the text and one for the general settings like position, scale, etc.
In the Title tab, you can change the text, font, color, line spacing, drop shadow, and much more.

How to Fade Audio In Resolve
When you click on the audio track, you will see two markers at the beginning and at the end.
Click and drag the marker at the beginning toward the right and the marker at the end toward the left to fade the audio.
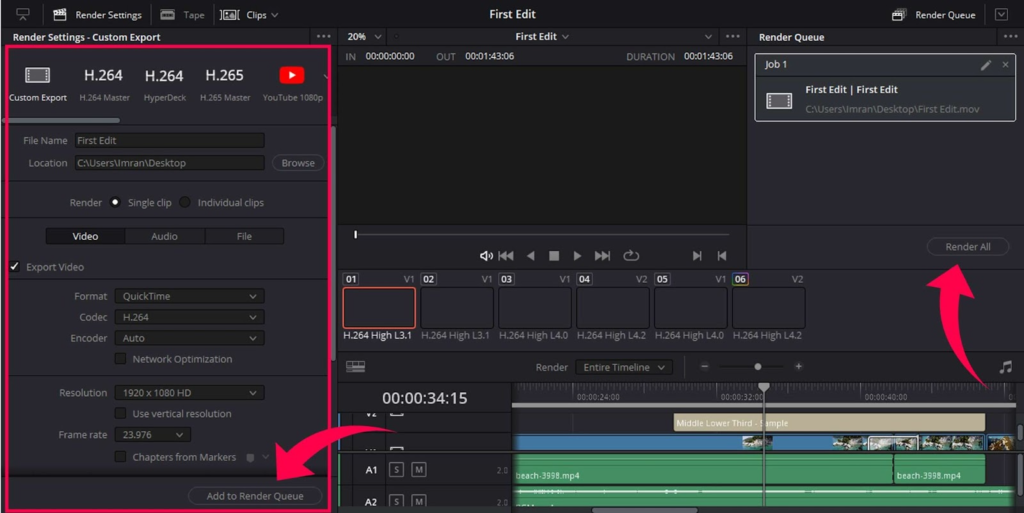
Export Your final video
To export your video, head over to the delivery page.
First of all, you will see some export presets like export for youtube, Vimeo, etc. Choose any of these presets if you are exporting for these platforms.
Or you can choose custom export and dial in the settings of your choice.
Choose the file name and location.
Don’t change any other settings like resolution and framerate.
Click on the button add to render queue.
And a new window will pop up in the upper right corner, click on render all, and your video will be exported.
Conclusion
Resolve may seem complicated at first, but if you spend some time and do the things covered in this guide, you will be up and running in no time.
We have covered almost everything a beginner need to know to start editing in Davinci Resolve 18.
From creating the project, importing footage, making cuts, and trimming clips to exporting the final video.
Make sure to be on the edit page most of the time, as it is beginner-friendly.
Use the inspector panel to change the video and audio settings. In the inspector, you can change scale, position, cropping, dynamic zoom, etc.
Feel free to experiment with the different tools we have covered, and if you have any questions, please let us know!
Happy editing!
Thanks for reading & feel free to check out more of our articles!
Expert Rating
Summary
Learning DaVinci Resolve, can be highly beneficial for beginners as offers a comprehensive range of tools and features that can help beginners create high-quality videos with ease. It is a versatile software that supports various video formats and can be used for color grading, audio editing, and visual effects.


