
Keyframes are used to add motion to the elements within a project, and they can be a video, text, or even an image layer. Keyframes are used to make a simple boring looking video more engaging.
In this guide, we will talk about what keyframes are and how they work.
Here we are assuming that you don’t know what they are and you don’t know how to use them.
We are just gonna show you some basic tips on how to get going with the keyframes, and of course, you can always get more advanced, and there’s lots of cool stuff that you can do.
What Are Keyframes?
What is a keyframe, it’s basically a point that you set on your clip that says, at this point, some parameter is going to change.
And what do we mean by parameter it could be zooming in. It could be moving a clip left to right or animating a piece of text or other objects on your screen.
So you can use keyframes here in DaVinci Resolve in many ways, but we will just stick with the basics.
For example, if you want your video to move from left to right in a specific timeframe, you need to use the keyframes to animate the position property.
Where Are Keyframes In Davinci Resolve?
To find the keyframes, you need to go to the edit page.
You want to have your clip selected to come up to the inspector, and when you look at the inspector here, you’re gonna notice all these diamonds down on the right-hand side here, those diamonds are how you add a keyframe.
Note: You can use the keyframes on the other pages, like color, fusion, and Fairlight, but we will discuss edit and color pages in this beginner-friendly guide.
How To Add Key Frames In Davinci Resolve?
Let’s have a quick overview of how to add keyframes in Davinci Resolve using the edit page.
Decide What Property You Want To Animate
You have to decide what property you want to animate, and it could be position, scale, rotation, or any other property.
Place your Playhead
Move the play head where you want the animation to begin, it is important to pay attention to the playhead.
Open Inspector Panel
Select Your Clip, and go to the inspector panel. You will see all the properties of the selected clip.
Click on the Diamond Icon Next To the Property
You will see the diamond icon, click on the diamond icon, and it will turn orange, which means that the keyframe is now active.
Move The Playhead And Change The Property
Move the playhead where you want the animation to end and then change the property without clicking on the diamond icon, Davinci Resolve will automatically create the second keyframe.
Now you will have a simple animation, and this was the basic concept of how the keyframes work inside Davinci Resolve.
How To Add Keyframes To Different Properties of A Video In Davinci Resolve?
In this section, we will dive deep into the world of keyframes and talk about how to add keyframes to the different properties of a video.
- Import your video and drag and drop it into the timeline.
- Select the video Clip and go to the inspector panel.
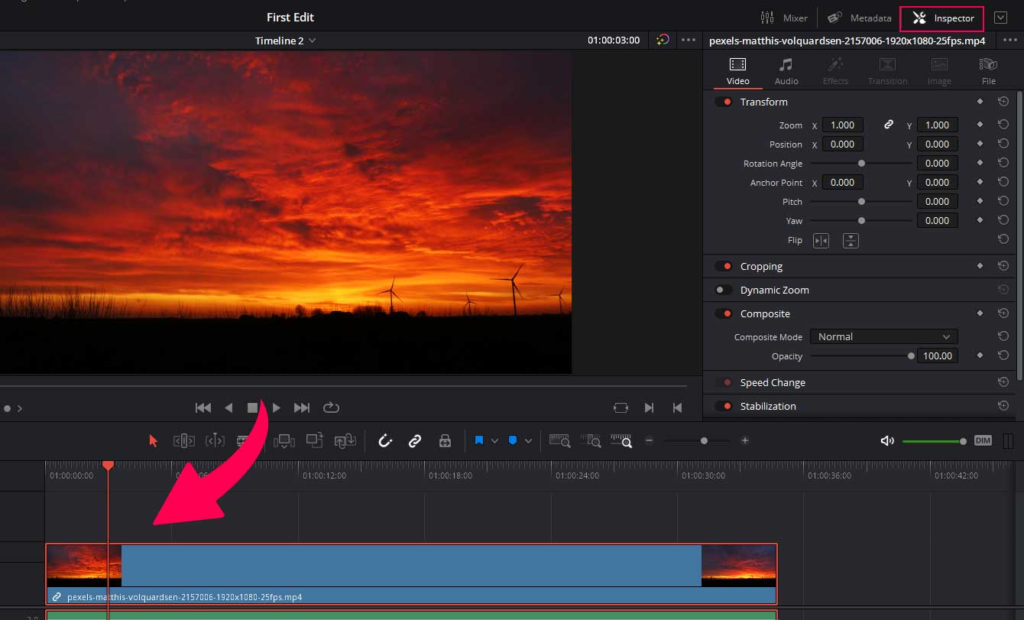
You will see all the properties in the inspector panel, and every property can be animated. We will animate the zoom property in this section. All other properties can be animated the same way.
- Move your play head where you want the animation to start.
- Click on the diamond icon right next to the zoom property. It will turn orange.
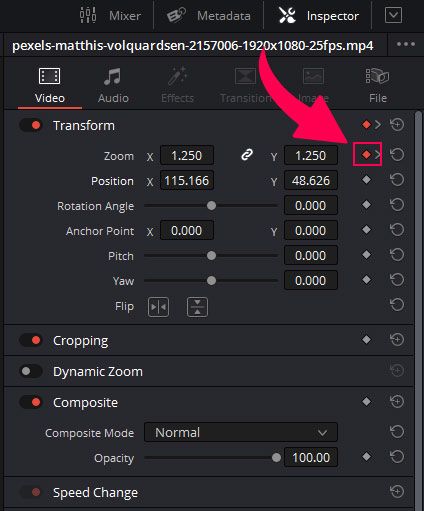
When the diamond icon turns orange, it means Davinci is now animating.
- Now move your playhead where you want your animation to end and change the zoom property.
- To change the zoom property, hover over the numbers right next to the word zoom, and the cursor will change, click and drag towards left or right to change the position.
The animation is now created, play your video, and you will be able to see it.
Where Are Keyframes On the Timeline?
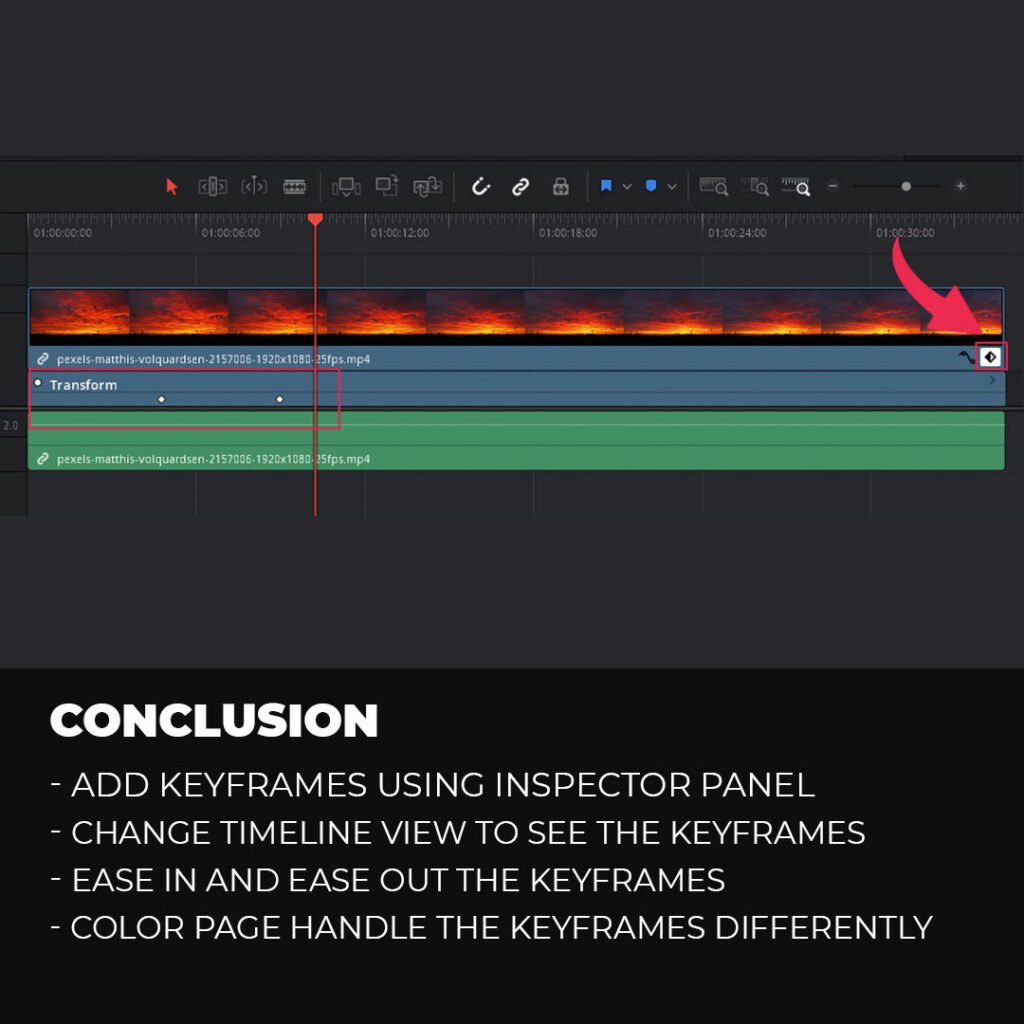
You might not see the keyframes you just created, and this is because your timeline view mode is not letting you see them. To change the timeline view mode, click on the timeline icon and choose the middle one.
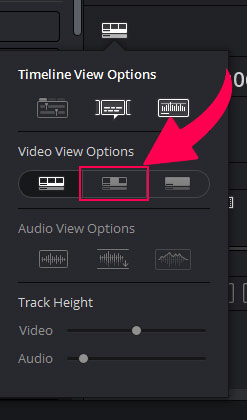
Now the keyframes will be visible on the timeline, if not then you will see a diamond icon at the bottom of your clip, click on it, and the keyframes will be revealed.
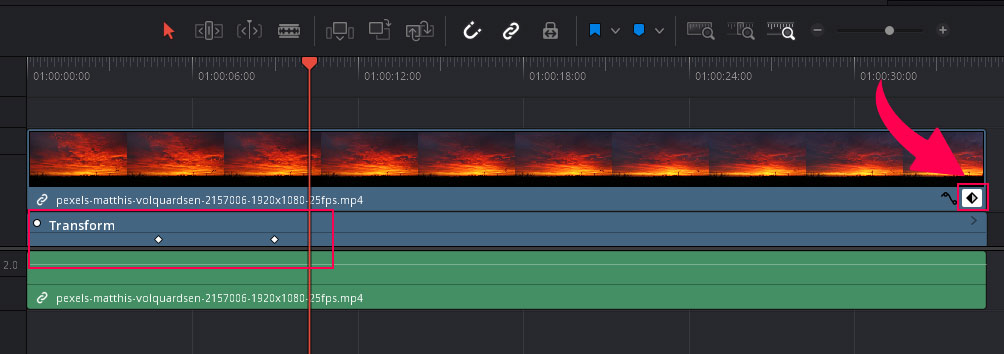
How To Move Keyframes In Davinci Resolve?
Moving Keyframes is pretty easy, after changing the timeline view and clicking on the diamond icon, you will be able to see the keyframes in the timeline. (See the above image)
- Just hover over the keyframe, and the cursor will change, click and move it left or right to make the animation slower or faster.
- If you move the keyframes closer, the animation will go faster.
- If you move them further away, the animation will go slower.
How To Ease In and Ease Out Keyframes In Davinci Resolve?
Easing the keyframes means to make the animation look more realistic. By default, the animation path is linear, and the movement is constant.
The linear path changes to a curve by easing the keyframes, and the animation looks more realistic.
Method One
In the first method, we will ease the keyframes from the inspector.
- To make the keyframes ease in and out, you must take the play head to the first keyframe.
There are two ways to take the play head to the first keyframe.
- The first one is to drag the play head, which will snap to the keyframe. (works only if keyframes are visible on the timeline)
- The second one is to go to the inspector panel and click the arrow icon next to the diamond icon.
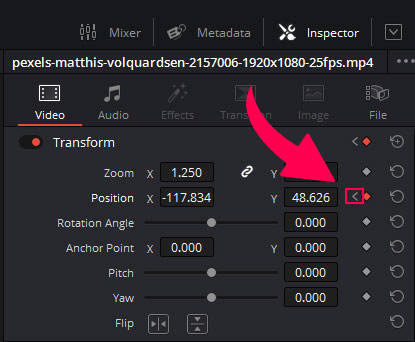
Now the play head is on the first keyframe (the diamond will turn orange if the play head is on the keyframe).
Right click and choose Ease out.
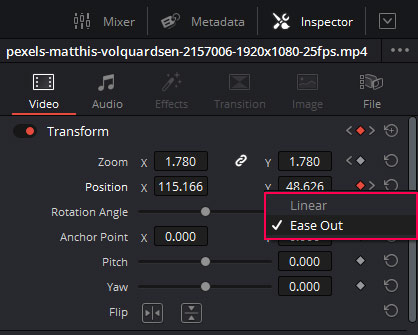
Now click on the arrow right next to the diamond icon, and it will take the play head to the second keyframe.
Right click and choose Ease in.
Method Two
In this method, we will use the timeline to ease the keyframes.
Go to the timeline and click on the curve icon.
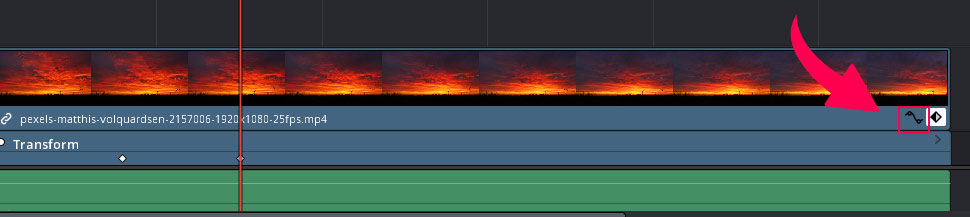
A new panel will open up below the timeline, scroll down if you dont see the keyframes.
Now click on the first keyframe, and then click on the ease out.
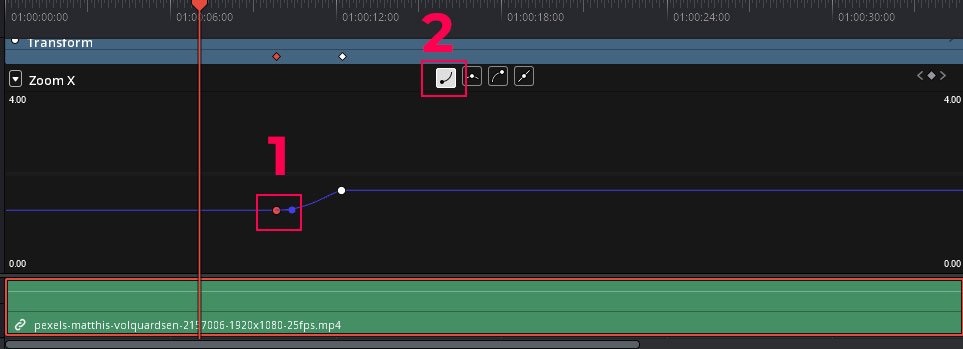
Now click on the second keyframe and click on the ease-in button.
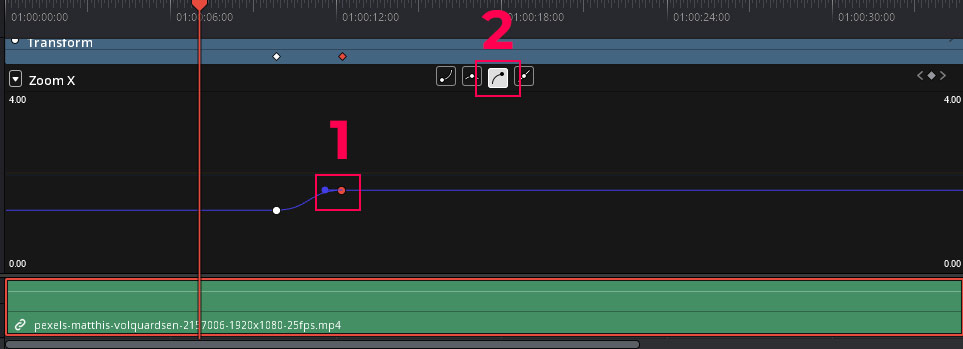
This will create an S curve and make the animation smooth and realistic.
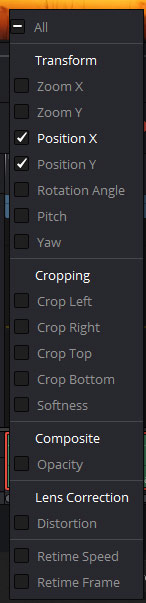
Note: If you dont see the property you are animating inside the timeline, then click on the little dropdown icon.
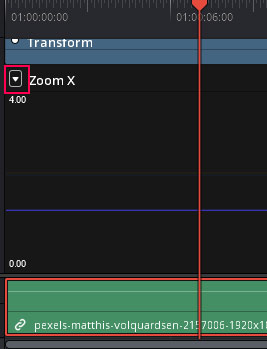
And check mark that property, and it will show up.
How To Make More Than 2 Keyframes?
Creating more than 2 keyframes is similar to our above methods.
- Move your play head where you want your animation to begin.
- Click on the diamond icon in front of the property you want to animate.
- Then move the play head to the right and change the property.
- Then move the play head to the right again and change the value of the property.
Keep repeating the process and create as many keyframes as you want.
How To Create Keyframs On Color Page In Davinci Resolve?
Keyframes on the color page work slightly differently than on the edit page.
Go to the color page and find the keyframes panel.
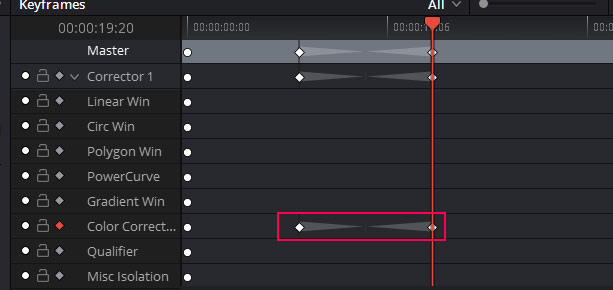
You will see a corrector 1 option in the keyframes panel, and it represents the nodes in your node panel. The more nodes you have, the more correctors will be in the keyframes panel.
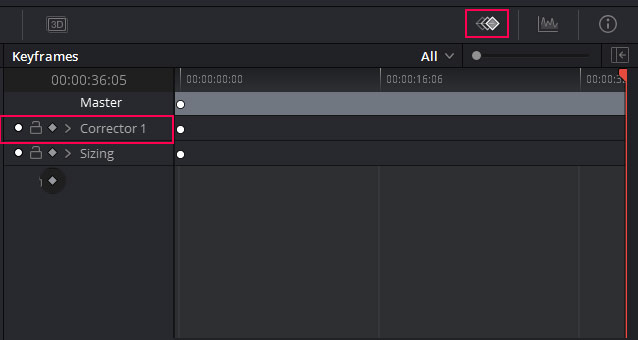
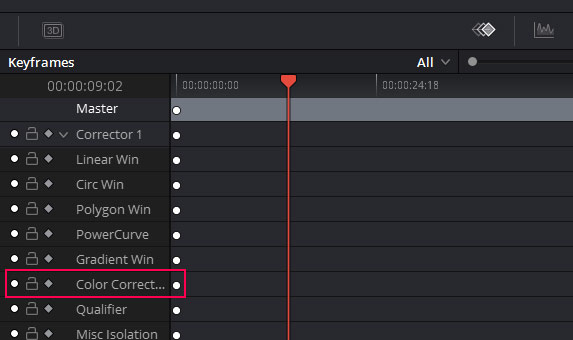
Click on the dropdown on the left of corrector 1 to reveal all the properties you can animate.
We will be animating the color correction property.
Creating Keyframes On The Color Page In Davinci Resolve
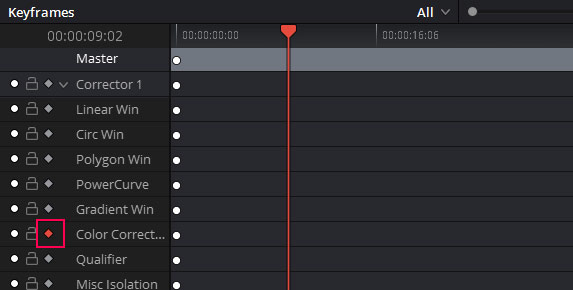
Click on the diamond icon in front of the color correction property.
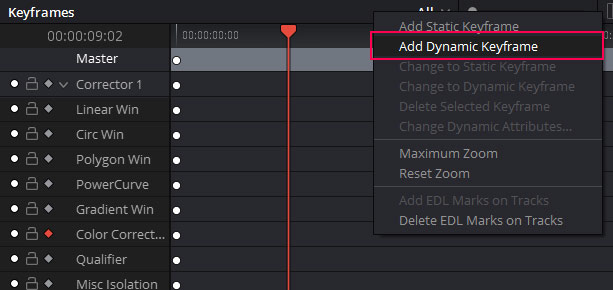
Now Move your play head where you want your animation to begin, right-click in the box in front of the color correction property, and choose “add dynamic keyframe.”
(make sure you are clicking in the box in front of the color correction property).
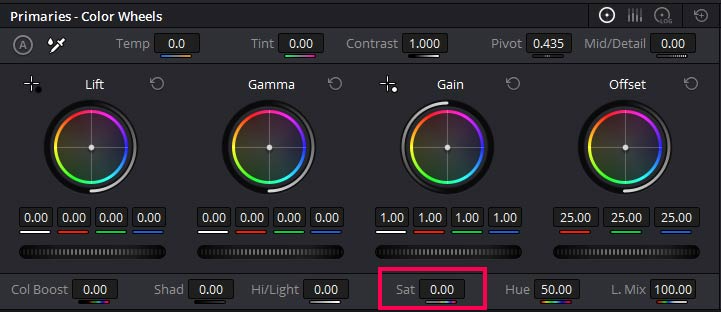
Now move your play head where you want your animation to end and make the color changes, we will make the clip black and white, so make the saturation zero.
And the keyframes have been created.
Conclusion
We have discussed basic keyframe structures, how they work, and how to create them quickly.
Then we animated the zoom property of the selected clip. Then we discussed how to ease the keyframes to make the animation more realistic. There are two ways to ease the keyframes, one from the inspector and the other from the timeline, and we covered both of them. To create more than 2 keyframes you need to move the play head and change the property value a few times.
Then we discussed how to make the keyframes on the color page, which works slightly different from the edit page, and made the clip black and white.
Thanks for reading & feel free to check out more of our articles!
Expert Rating
Summary
Adding keyframes in Da Vinci Resolve 18 allows for precise control over various parameters such as opacity, position, and effects. It can help to create dynamic animations, transitions, and visual effects that would be difficult to achieve otherwise. While it may take some time to master, it is a functional and scalable tool that can be applied to almost every video.


