
If you have used Davinci Resolve before then, you might have come around the tab called the inspector. You can call this one of the most important panels in Davinci Resolve. Most of your time while editing Videos will be spent on this panel.
This is a vast panel with many settings, and it may get complicated when starting out in Davinci Resolve.
In this guide, we will everything you need to know to familiarize yourself with the inspector panel in Davinci Resolve.
We will cover different tabs available within the inspector tab and the settings each tab has.
Where is Inspector Panel In Davinci Resolve?
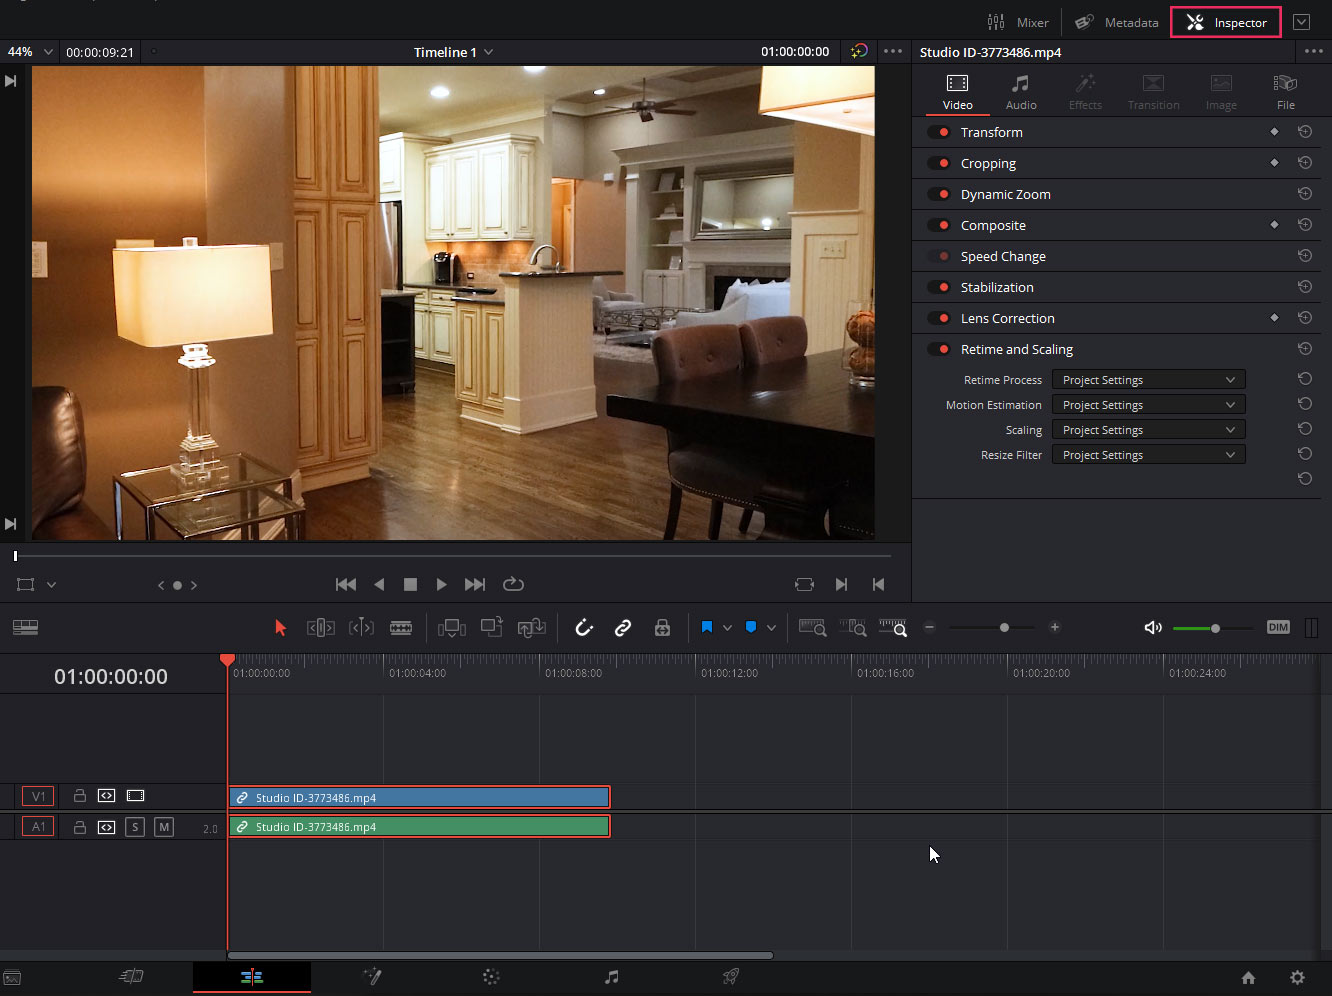
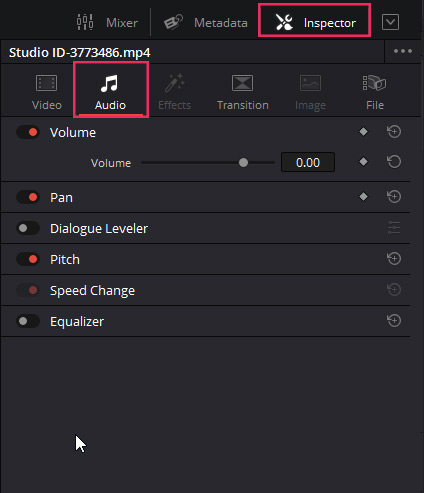
To open the inspector panel in Davinci Resolve, you need to go to the top right corner and click on the word inspector.
You can turn it on or off. Click on the word inspector, and it will show up if it is hidden, and it will be hidden if it is already visible.
Inspector Panel In Davinci Resolve
We will cover every detail you need to know about the inspector panel.
Introduction
The Inspector panel has different settings and options that let you change different parameters of the video. You can do things like zoom in or out, rotate, cut, combine, or change the speed. The panel is divided into different groups for video, audio, effects, transitions, images, and more settings.
The inspector panel is available on the following pages of Davinci Resolve:
- Media
- Cut
- Edit
- Fusion
- Fairlight
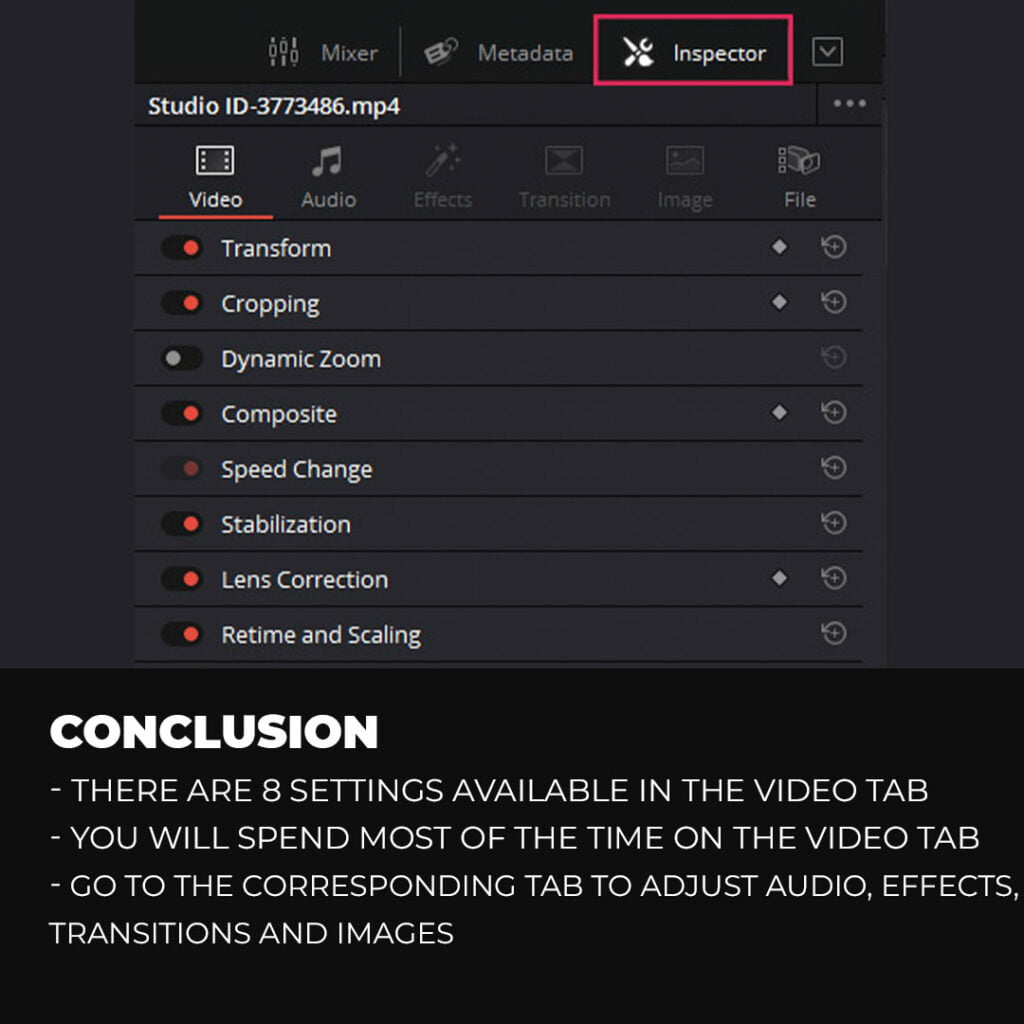
Settings Available in The Inspector Panel
The following are the most important settings available within the inspector panel.
- Transform
- Cropping
- Dynamic Zoom
- Composite
- Speed Change
- Stabilization
- Lens Correction
- Retime and Scaling
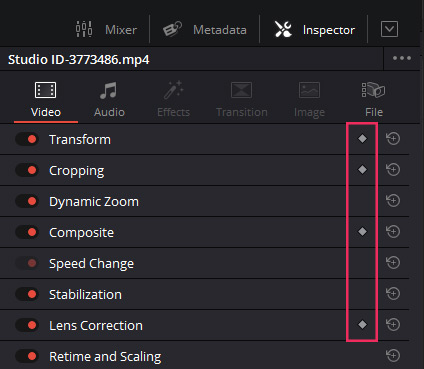
- Keyframing
There is no section available for creating keyframes in Davinci Resolve, but you will see diamond icons in front of every setting to create a keyframe for any property.

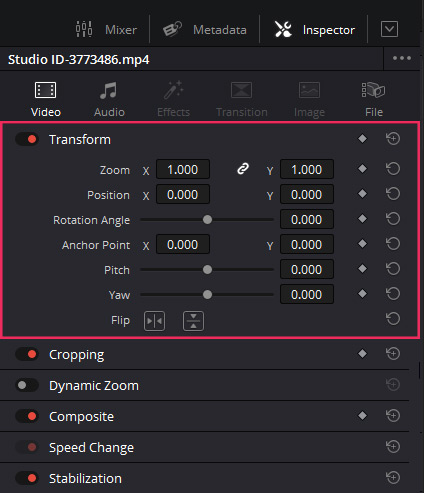
Transform Controls
Transform controls let you change the following properties:
- Zoom: Zoom in and out.
- Position: Change the position of the video on the screen (up, down, left, and right).
- Rotation angle: Rotate the video, images, and graphics.
- Anchor point: To change the point where the video scale, rotate, and zoom from.
- Pitch: change perspective vertically.
- Yaw: change perspective horizontally.
- Flip – flip your clip vertically or horizontally.
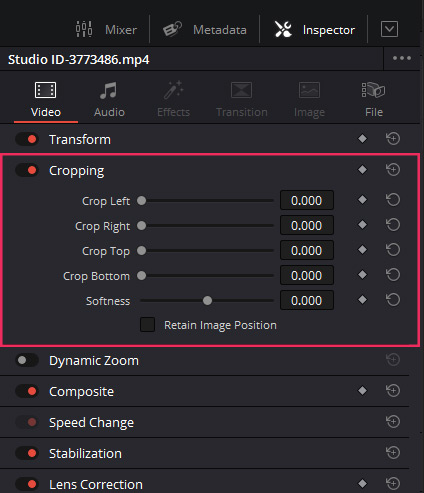
Cropping
You can crop your clip in all directions.
- Left, right, up, and down.
You also have the option to soften the corners of your cropping if you are looking for soft edges. This feature can come in handy if you want to create a picture in picture effect and soften the edges of the main video.
Dynamic Zoom
In dynamic zoom setting, you can zoom in or out from the start to the end of the clip.
The zoom will start at the beginning of the clip and continue until it ends.
- It will zoom in by default.
- If you want to zoom out, you can do that by clicking the swap button.
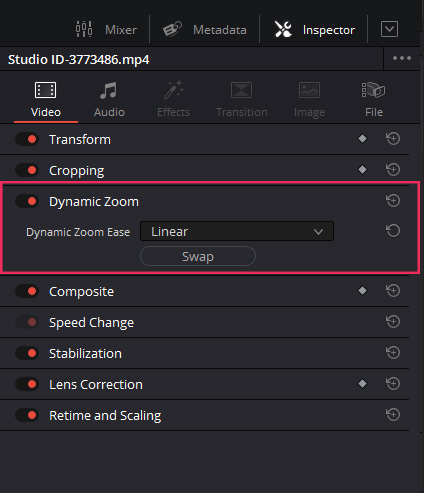
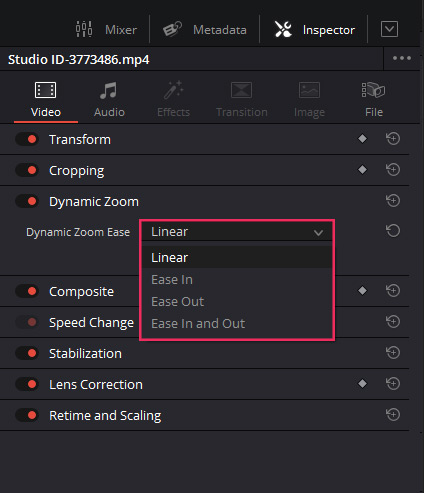
There are easing options available, which will change how zooming happens.
- Linear
- Ease in
- Ease out
- Ease in and out
If you change to ease in and out from Linear, the zoom will start slow and end up fast.
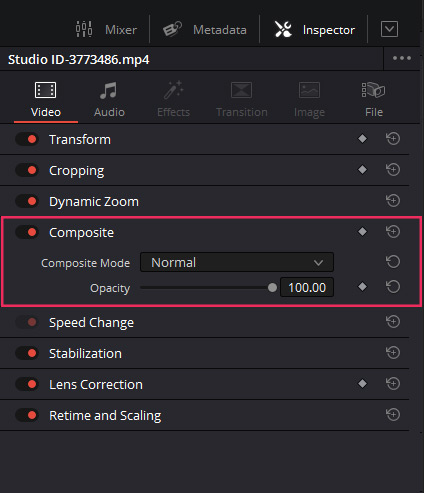
Composite
Composite modes let you blend different layers in different ways.
- When you change the blend mode of a layer to Multiply, it will remove the white parts from the video.
- Screen composite mode will make the black parts transparent.
The other composite modes will blend the layers differently. Try them out, and the possibilities are limitless.
Read our detailed guide on composite modes.
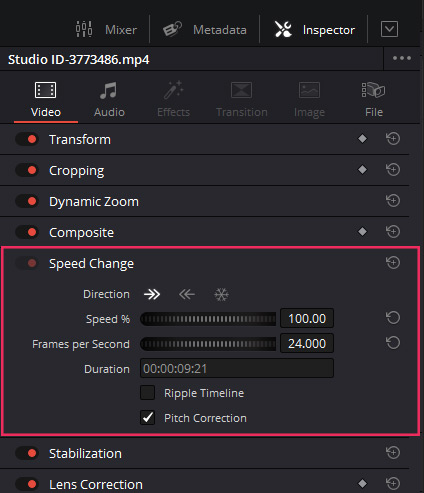
Speed change
This speed change will let you slow down or speed up the video.
- You can reverse the clip.
- Change the frame rate of the clip.
- Change the speed of the clip by changing the duration of the clip.
This is the setting used to create a lot of trending speed-ramping videos like fast forwarding, slow motion, etc.
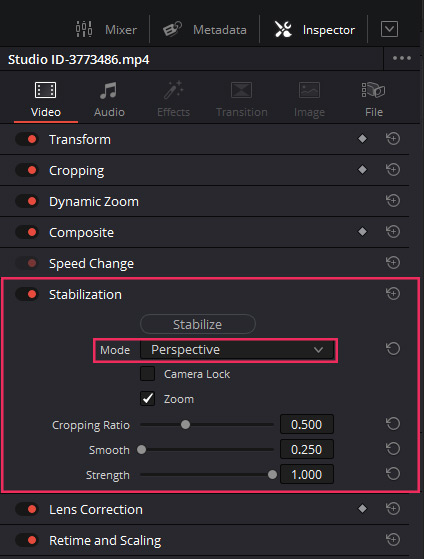
Stabilization
If you have shaky handheld footage, if that’s not the effect you are looking for, you will need to stabilize the footage.
You can choose the stabilization mode from the following:
- Perspective
- Similarity
- Translation
After choosing the mode, you can adjust the other available parameters like cropping ratio, smooth, and strength.
Every video is different, so there is no hard and fast rule for what settings to use; you will have to test and find suitable settings for your video.
Lens Correction
The lens correction tab in the inspector panel of Davinci Resolve lets you add or remove lens distortion in your videos.
If you use the analyze option, it will automatically remove the lens distortion. If you want manual control over the amount of lens distortion added or removed, you need to use the “Distortion” slider.
Note: This feature requires you to have the studio version of Davinci Resolve.

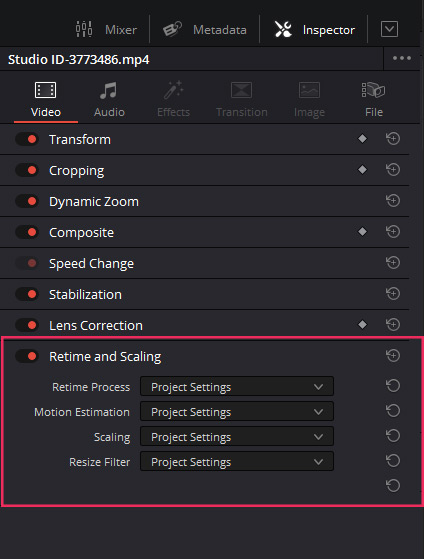
Retime and Scaling
If you have a clip with a different resolution than the project resolution, then this option can be used to scale the individual clip according to the project.
For example, suppose you have a project with 4k resolution, and you import a clip with 1080 resolution. In that case, you can scale the clip with scaling settings in the inspector panel of Davinci Resolve.
Keyframing In the Inspector Panel
This is one of the most important settings if you are looking animate different properties of the video, like zoom, position cropping, etc.
There is no direct option to create keyframes, but you can click on the Diamond icon in front of each property.
- To animate a property, take the play head where you want the animation to begin and click on the diamond icon in front of any property, then take the play head where you want the animation to end and change the value of the property. Now the property will be animated.
Detailed Guide on Adding Keyframes.
Audio Tab in The Inspector Panel
You can edit your audio in the audio tab of the Davinci Resolve inspector. Although editing your audio in the inspector panel is not recommended, you should be using the Fairlight page for audio editing. But you can use the audio tab in the inspector panel to do a slight bit of audio editing.
You can edit the following parameters in the audio tab:
- Volume
- Pan
- Dialogue Leveler
- Pitch
- Speed Change
- Equalizer
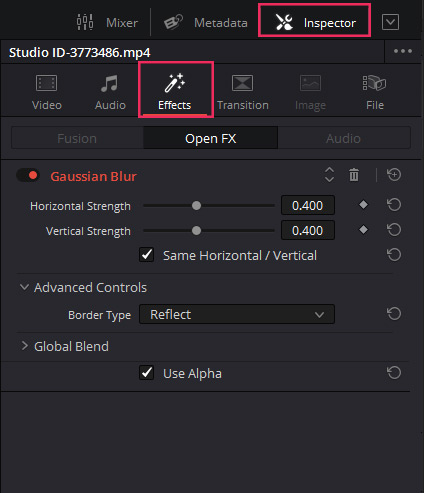
Effects Tab in The Inspector Panel
The Effects tab in the Inspector panel allows you to modify the properties of the effects you apply to your video. Each effect will have its own set of parameters and properties that will be visible in the Effects tab. You can apply multiple effects, and all of the effect settings will appear in the Effects tab.
You will find the following sub-tabs inside the effects tab:
- Fusion: for effects related to fusion
- Open Fx: For effects available inside the open Fx folder.
- Audio: For audio effects
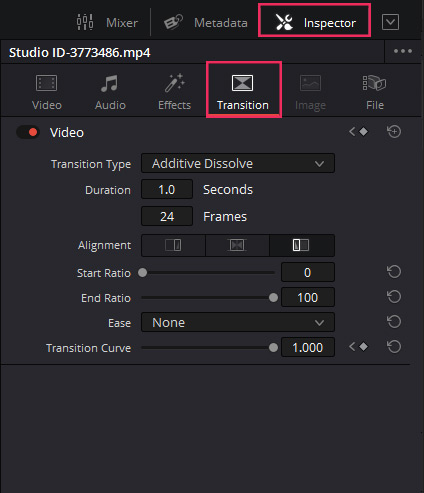
Transition Tab in The Inspector Panel
Upon applying a transition in DaVinci Resolve, you can adjust its settings in the Transition tab of the Inspector panel. Each transition has its own set of parameters, which you will see depending on the transition you apply.
The most common settings in the transition tab are the transition duration and placement, i.e., whether you want it to apply in the middle, at the beginning, or at the end.
Conclusion
The inspector panel in Davinci Resolve is vast, and if you edit a video, you have to visit the panel frequently.
Many settings are available in the inspector panel, including transform properties, Cropping, dynamic zoom, composite, speed change, stabilization, lens correction, retime and scaling, and keyframing.
All these settings make or break the quality of the video. If used correctly and creatively, then your video will look amazing. If not, it doesn’t matter how much time you spend on the video; it will not look good.
So we recommend you familiarize yourself with all the settings and use them repeatedly; the more you use them, the better you will get at them.
So play around with the settings in the inspector panel in Davinci Resolve and create something amazing.
Thanks for reading & feel free to check out more of our articles!
Expert Rating
Summary
The Inspector in Davinci Resolve is accessed through clicking the icon on the top right corner, allowing you to modify properties of clips, effects, and transitions. Although it requires some initial learning, it becomes an intuitive and powerful tool for advanced editing tasks, providing high functionality and scalability in enhancing video projects.


