

Have you ever wanted to add complex shapes and masks to your videos? If so, then the Pen tool in DaVinci Resolve 18 is the perfect tool for you.
Whether you need to trace an object or create intricate shapes, the Pen tool allows you to make precise selections with ease. So, let’s get started and unleash the power of the Pen tool in DaVinci Resolve 18!
Does DaVinci Resolve have A pen tool?
The direct answer to this question is “No, DaVinci Resolve does not have a Pen tool”. The Curve tool is the so-called Pen tool in this programme. The icon of this tool looks like a Pen and its function is very similar. That’s the reason it may be compared with the Pen Tool.
In this guide, we will use the name “Pen tool” instead of its real name: serial nodes or the curve tool.
Step 01: Setting up the Project
How to Open a Clip or Project
First, you need to open a clip or project.
To do this task,
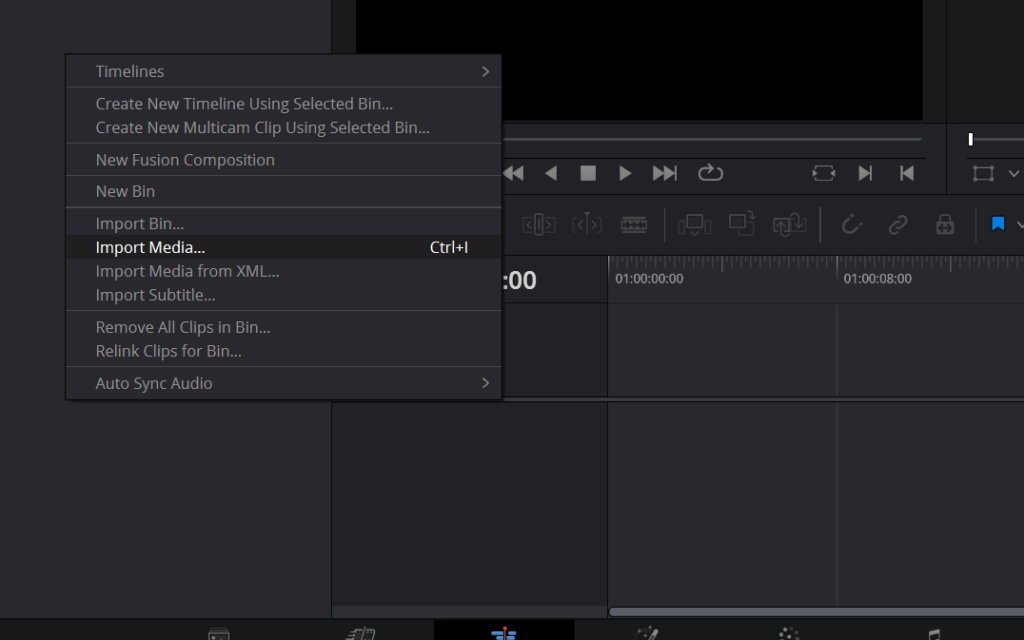
- Open the DaVinci Resolve 18 application.
- Right-click on the media pool section.
- Choose the option Import Media as displayed below.
- Alternatively, use the keyboard shortcut Ctrl/Cmd+I to open the media.
Drive to the location where the media is placed on your computer or PC. Choose the media and click Open to display it on the DaVinci Resolve 18 application. Now you are set to add the make use of the pen tool on the clip as per your requirement.
Step 02: Color page > Windows Palette
Next, to use the Pen tool, you need to go to the Color page. To go to the Color page,
- Go to the bottom of the canvas.
- Choose the Color page icon as shown below.
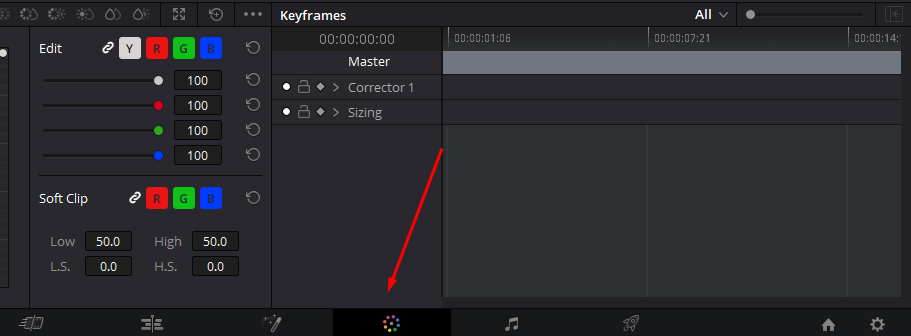
At the bottom centre of the page, in the Windows palette you will find the Pen (Curve) tool as shown below. Click on it toactivate the tool.
Out of the different tools and adjustments on the left, you will see a tool with a pen icon.
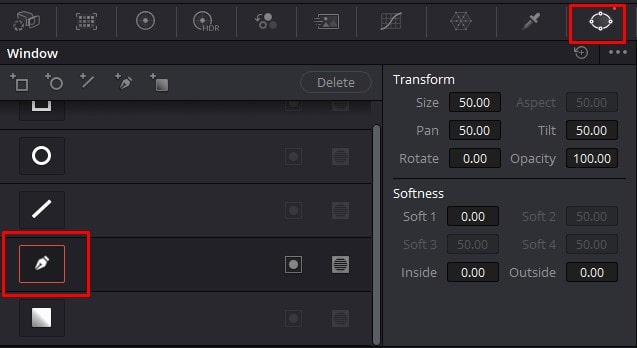
Step 03: Choose the Pen tool (aka Curve)
Now, click and choose the Pen (Curve) tool from the Windows palette.
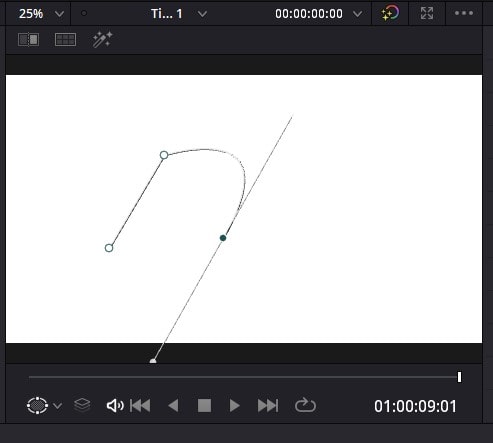
Step 04: How do you draw on DaVinci Resolve?
Go to the Viewer as a preview window will appear. Use the timeline to choose the frame where you want to draw the desired shape.
To get started,
- Click on the Viewer and place the first node.
- Next, keep adding nodes by clicking repetitively anywhere in the Viewer. You will notice that they will automatically connect to one another.
- In the below example, three lines were drawn to create the shape of the triangle.

How to draw a Curve using the Pen (Curve) tool?
If you want to create a curve,
- Click and drag on the viewer.
- Then, you will notice the control handles which allow you to adjust the curve accordingly.
How to change the location of a node?
If you want to change the location of a node,
- Hold the Shift key and drag it to create a box around the node.
- You will notice that a box with a dotted outline appears.
- Next, select and drag the desired node to relocate it.
How to delete a node?
If you want to delete a node,
- Hold the Shift key and drag it to create a box around the node.
- You will notice that a box with a dotted outline appears.
- Select the node you wantto delete and press the Delete key to delete it.
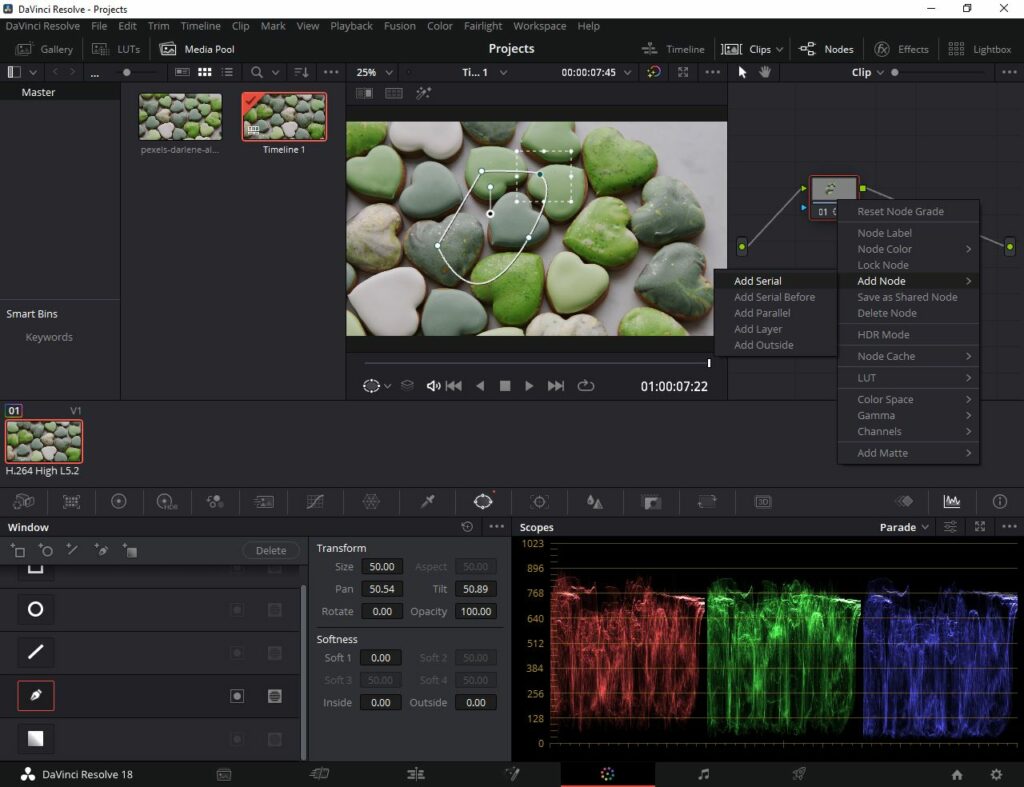
Step 05: Add a Serial Node to the Node Editor
After you draw the shape, you need to add a serial node by following these steps:
- Go to the Node Editor on the right side of the Color page.
- Right-click to display the drop-down menu.
- Next, choose the option Add Node.
- Click Add Serial.
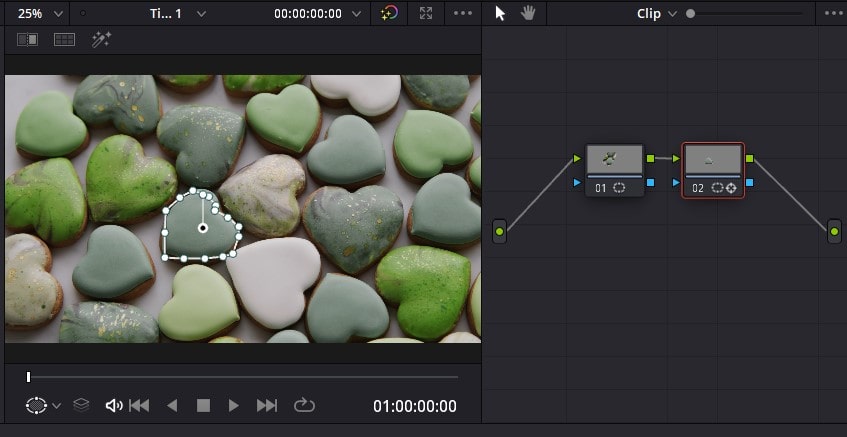
- Then, you will notice that a node is added to the destination.
Practical Tutorial for using the Pen tool and tracking Systematically
In this section, we will walk through a practical example of using the Pen tool and creating a shape. After creating the shape, we will teach you to track the shape throughout the clip.
Step 01: How to Open a Clip or Project
Initially, you need to open a clip or project to add text to the clip. To do this task,
- Open the DaVinci Resolve 18 application.
- Right-click on the media pool section.
- Choose the option Import Media as displayed below.
- Alternatively, use the keyboard shortcut Ctrl/Cmd+I to open the media.
Drive to the location where the media is placed on your computer or PC. Choose the media and click Open to display it on the DaVinci Resolve 18 application. Now you are set to use the Pen tool.
Step 02: Color page > Windows Palette
To go to the Color page,
- Go to the bottom of the canvas.
- Choose the Color page icon as shown below.
Step 03: Windows Palette> Pen tool
At the bottom of the canvas on the Color page, choose the Windows Palette. Click on the Pen (Curve) tool to select it.
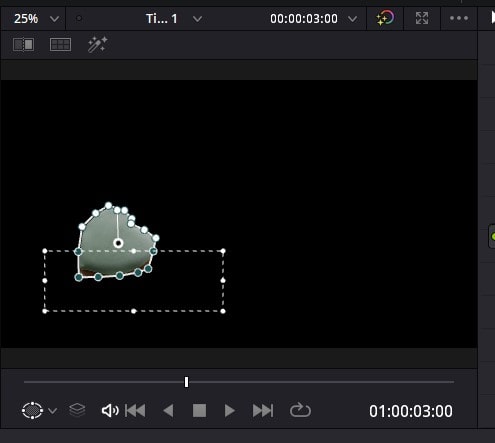
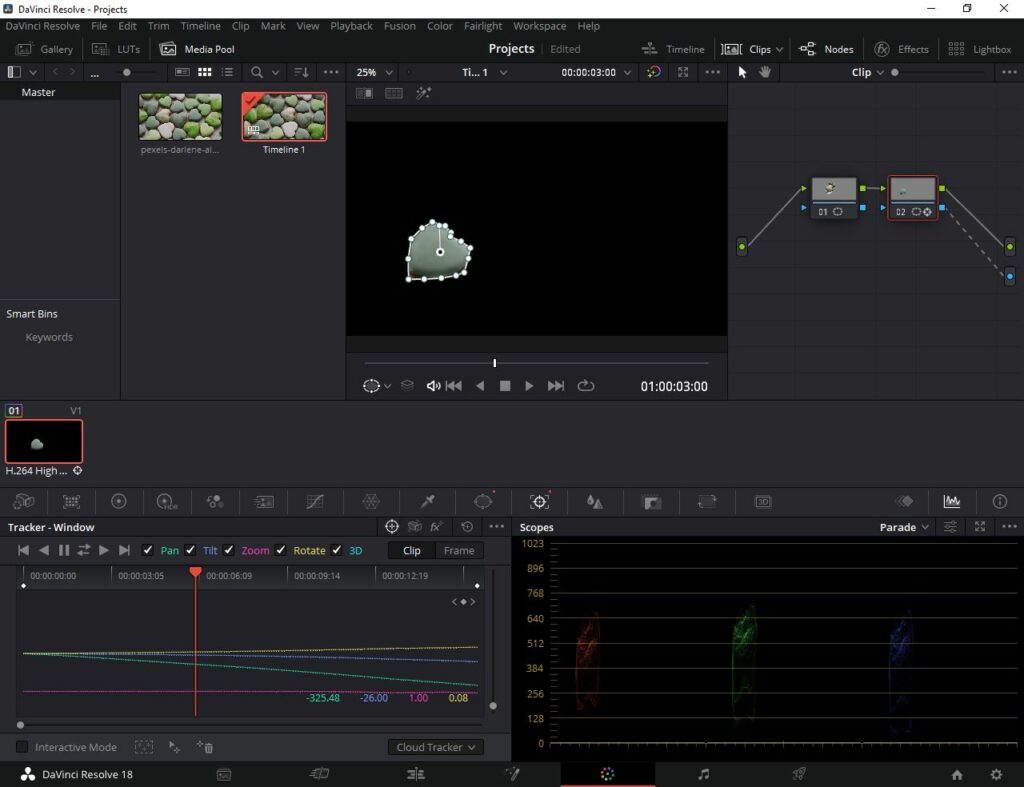
Now, it’s time to draw around the object you want to select. Click one after the other and place the nodes to create the shape in the Viewer. In the end, make sure to connect the last and the first node to finalise the shape.
Once you have joined the shape, you need to track the object when the clip is playing.
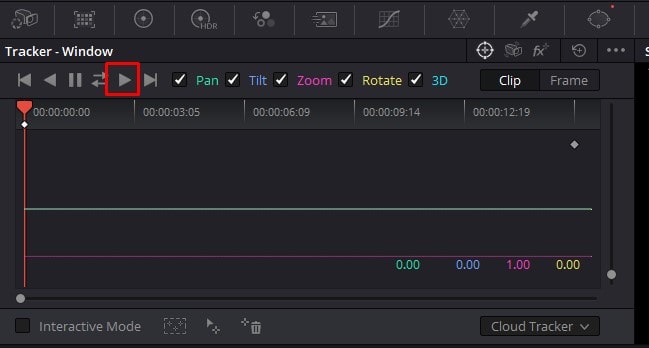
Step 04: Where is the Tracker Palette?
In the Centre Palette where we found the Windows Palette, you can find the Tracker Palette. This allows you to track the object you outlined with the nodes of while the clip is being played.
Under the Tracker Palette,
- Select the option interactive mode and enable it.
- Simply, click on the checkbox to enable it as shown below.

Once you enable it,
- Make sure to play and click the track forward button.
- Next, choose the Track backward button.
- Make sure to track the clip forward and backwards to improve the tracking as much as possible.
Now, if you play the clip, you will notice that the nodes around the shape move consistently with the clip.
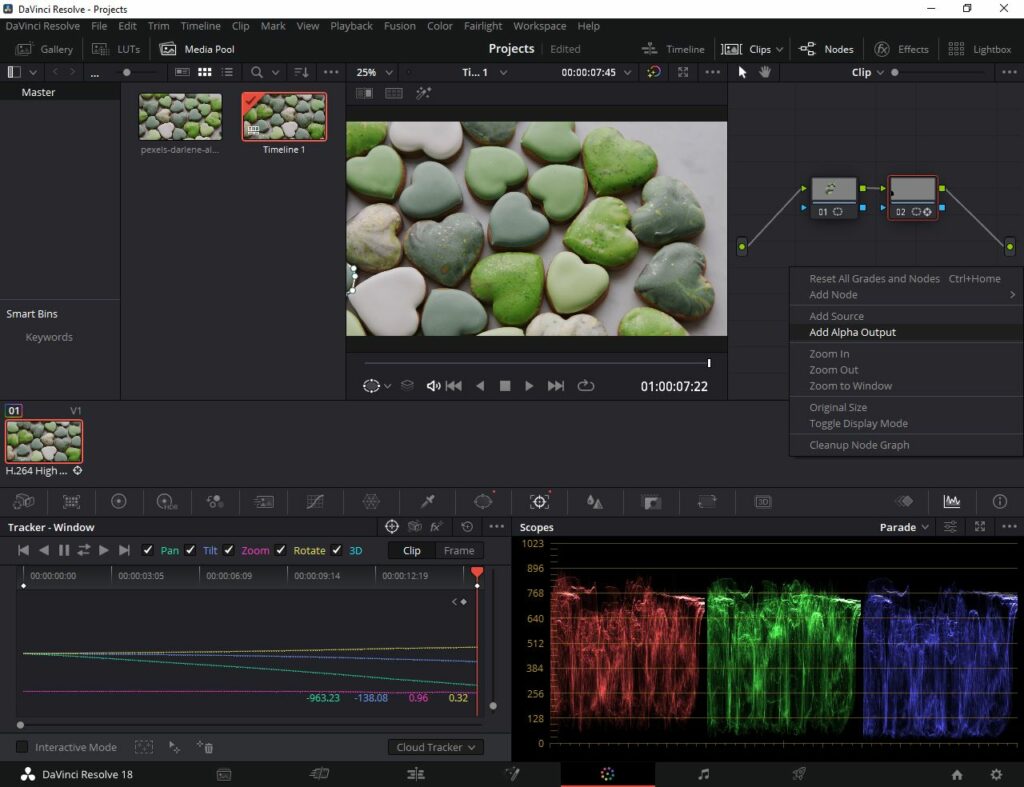
Step 05: Add Alpha Output
To add the Alpha output option,
- Go to the Node Editor.
- Right-click on it and choose the option Add Alpha Output.
How to add Annotations in DaVinci Resolve 18
n DaVinci Resolve 18, you can add annotations or markers to clips in the Viewer. All you require is the Annotation tool activated and a few basics to get to know the method. Annotation tool can not only be used freehand but also to add shapes such as rectangles, lines and arrows.
Step 01: Importing media
How to Open a Clip or Project
Initially, you need to open a clip or project.
To do this task,
- Open the DaVinci Resolve 18 application.
- Right-click on the Media Pool section.
- Choose the option Import Media as displayed below.
- Alternatively, use the keyboard shortcut Ctrl/Cmd+I to open the media.
Drive to the location where the media is placed on your computer or PC. Choose the media and click Open to display it on the DaVinci Resolve 18 application. Now you are set to add the make use of the pen tool on the clip as per your requirement.
Step 02: Choose the Annotation tool
Make sure you are on the Edit page to get started with the annotation tool.
To go to the Edit page,
- Go to the bottom of the screen.
- Click on the Edit page icon.
As you can see below, you can find a couple of options under the Viewer. Click on the leftmost icon to display the drop-down menu. Next, click on the ‘Annotations‘ option to activate it.
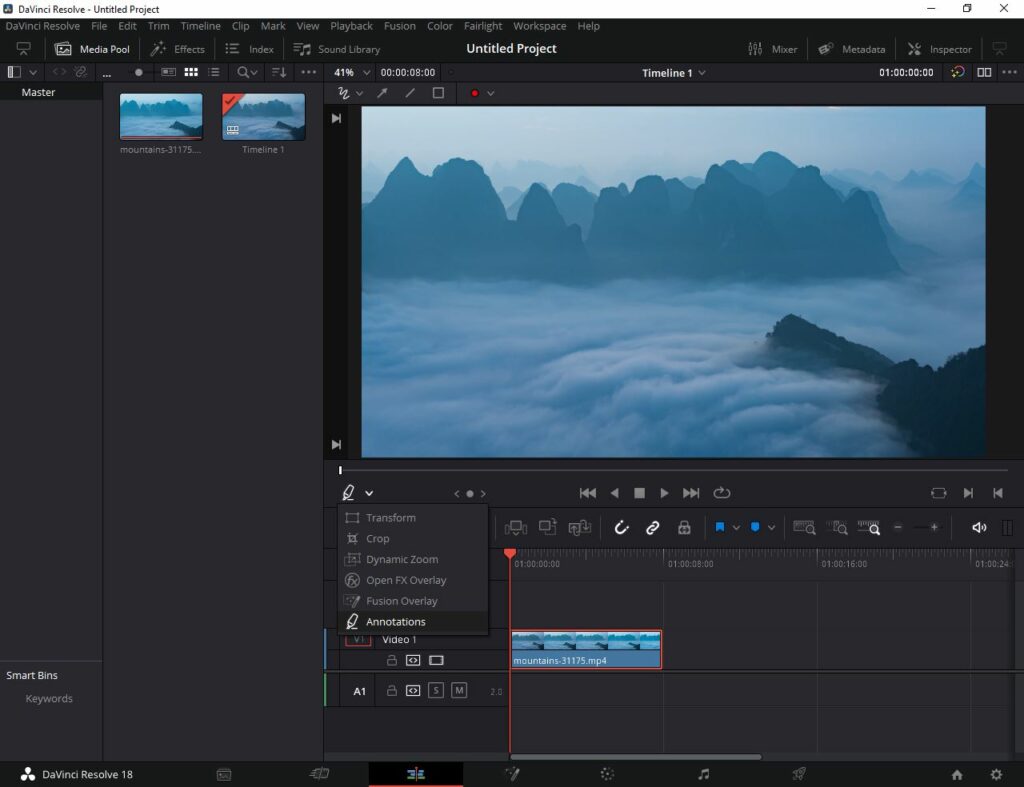
Step 03: Settings in the Annotation tool
As soon as you choose the Annotation tool, various tools will be displayed on top of the Viewer. These can be seen in the image below:
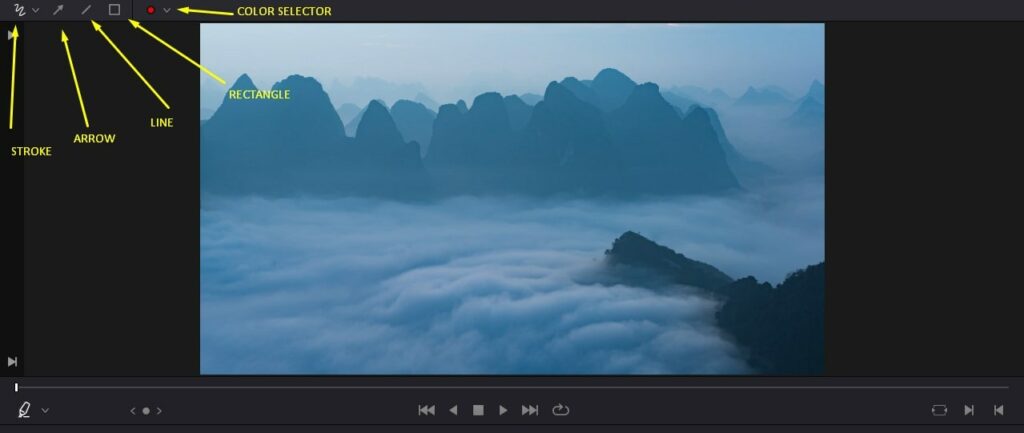
- Freehand pin stroke: Allow you to annotate in freehand mode. There are no restrictions when it comes to drawing a shape.
- Arrow tool: Used to add an arrow shape. All you need to do is click and drag to make the arrow shape appear.
- Line tool: Handy to draw straight lines across the Viewer. For example, click and drag on the Viewer to set the start and end points.
- Rectangle tool: Lets you add a rectangle shape to the Viewer. Choose the Rectangle tool and click and drag on the canvas to set the shape as per your requirement.
- Color Selector: The Color selector allows you to choose the color you want to annotate.
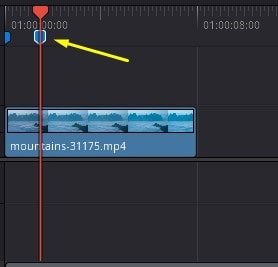
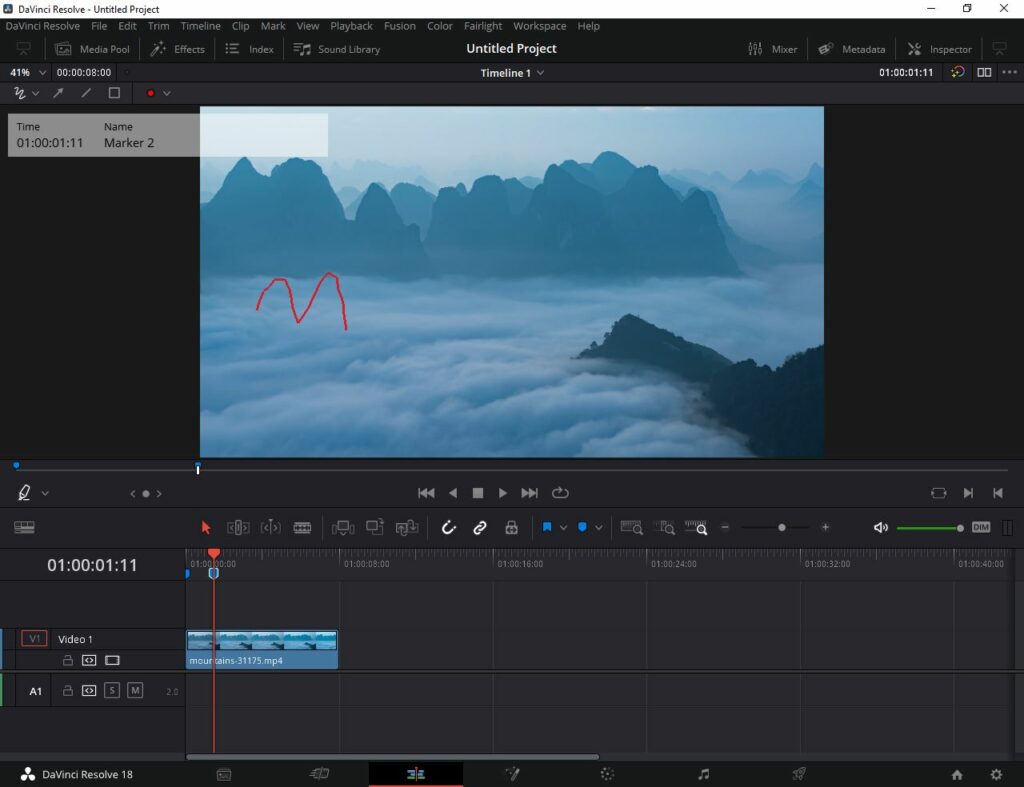
As soon as you begin to draw, a marker appears on the timeline indicating the duration of the annotation added.

If you need to create an annotation on the timeline, follow the below steps:
- Do not select the video clip from the timeline.
- Choose a specific frame to determine when you want the annotation to appear. You can use the arrow keys to navigate from one frame to another.
- Next, choose the Annotation tool and start drawing in the Viewer.
- Now, you would notice that a marker appears on the timeline.
- You can double-click on the Marker to view the complete Marker window. Under the marker’s pop-up dialog, you can add additional information, change the color of the marker, add notes for reference and more.
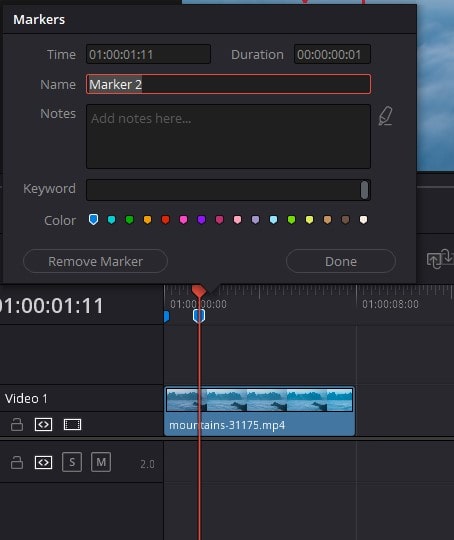
In this case, the annotations are added based on the frames of the clips.
Conclusion
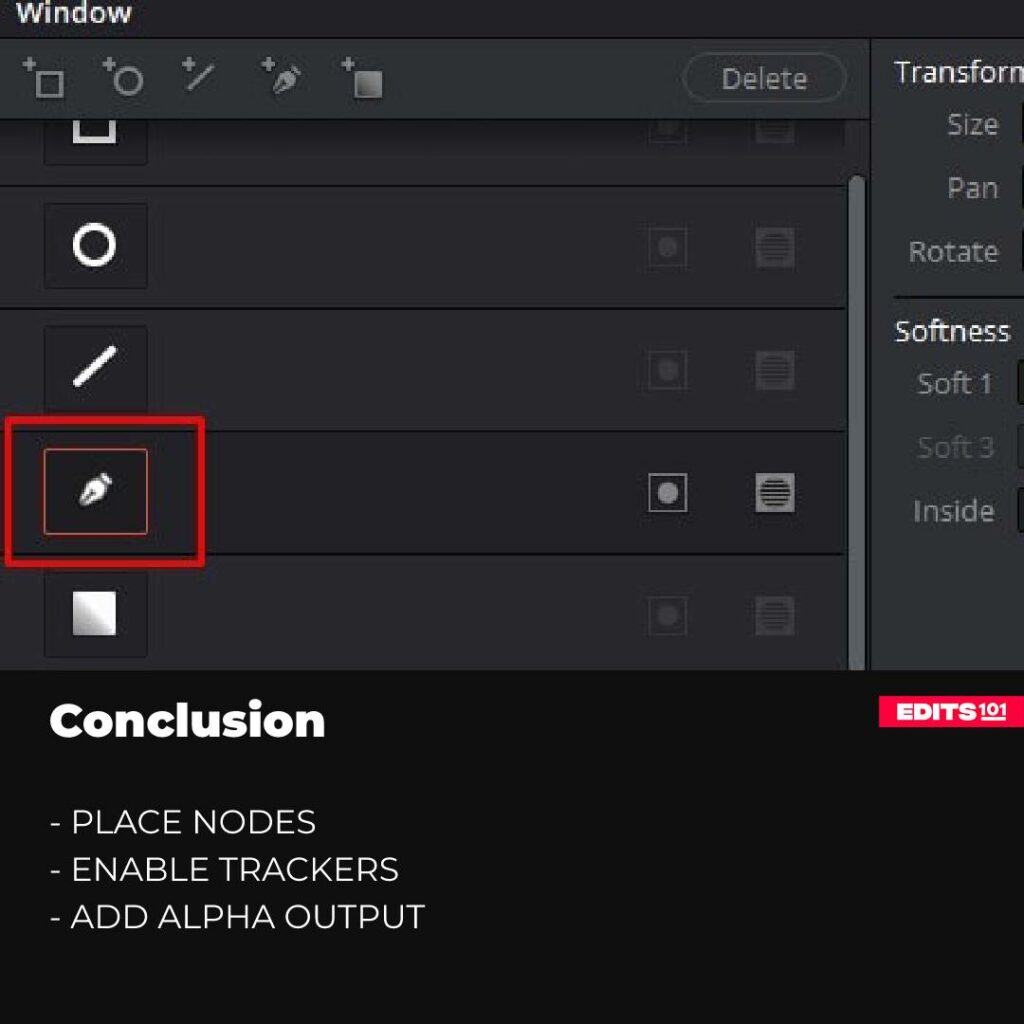
In this tutorial, we have covered the basic functionalities of the Pen tool in DaVinci Resolve 18 and demonstrated how it can be used to create complex shapes and masks with ease.
By taking advantage of the customization options, you can tailor the tool according to your specific needs, making your workflow more efficient and your video projects more polished.
So, go ahead and experiment with the Pen tool in DaVinci Resolve 18, and discover the endless possibilities that it offers!
Thanks for reading & feel free to check out more of our articles!
Expert Rating
Summary
DaVinci Resolve 18 does not have a Pen tool. The Curve option is called as the Pen tool but it’s application is identical to the Pen tool. You need to click and join the points and learn to adjust the nodes. Furthermore, the Annotation tool also acts like a Pen tool and it allows to make creative annotations.


