
DaVinci Resolve 18 is one of the most popular video editing software, and it offers a wide range of tools for working with green screen footage.
In this step-by-step guide, we will explore how to remove a green screen in DaVinci Resolve 18 in detail, from importing your green screen clips to keying out your footage and adding a new background.
What Is A Green Screen?
A Green Screen is basically a green background. Generally, a green screen is used in filmmaking. For example, if you are shooting a movie, the actors act in front of the green screen, and the background can be eventually replaced with any background imaginable, which can be filmed separately.
Do actors only act in front of green screens only? The answer is no! They can act in front of blue or yellow screens as well.

What is the Chroma key?
As per the above example, if a scene was filmed in front of a green, blue, or yellow screen, there is a digital mechanism to replace these colored screens with another background or color. The technique is known as Chroma Key. There are two synonyms for Chroma Key: Color Separation Overlay or CSO.
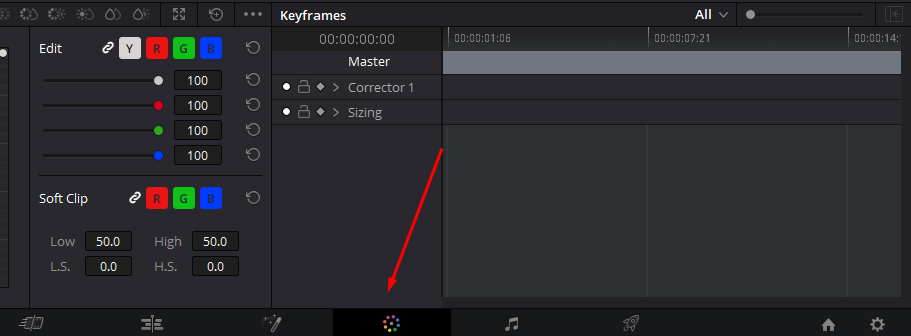
How To remove the green screen in DaVinci Resolve?
For this tutorial, we will be editing two clips in order to show you how to work with a green screen. One will be the background clip and the other will be the green screen clip.
What will you be doing? We will use the Qualifier tool to replace the green screen with the chosen background clip.
Step 01: How to open the project in Da Vinci Resolve
Initially, you need to open a clip or project.
To do this task,
- Open the DaVinci Resolve 18 application.
- Create a new project or open an already created project.
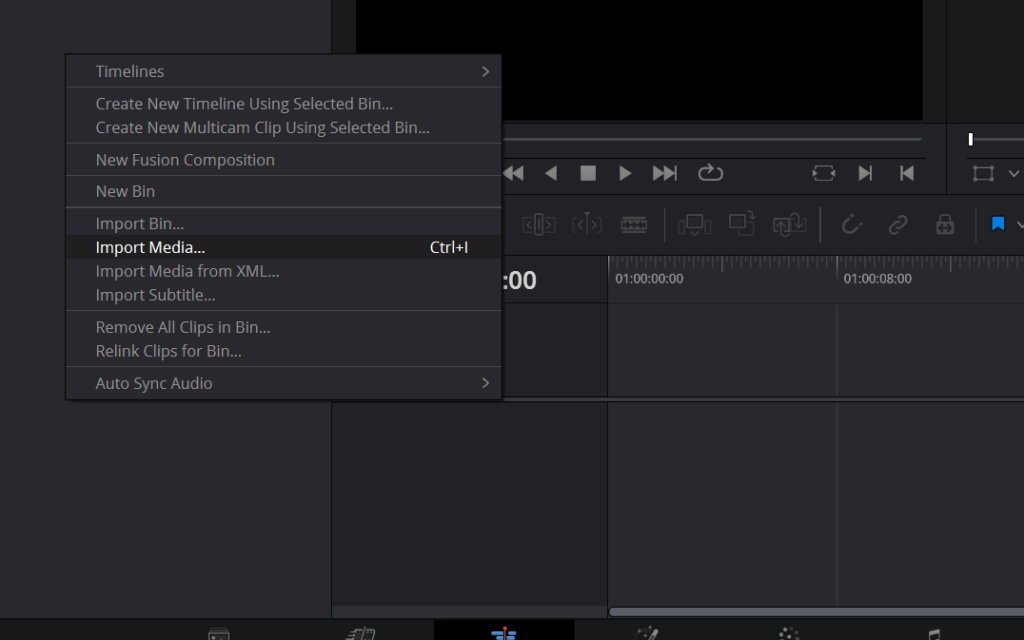
- Right-click on the Media Pool section.
- Choose the option Import Media as displayed below.
- Alternatively, use the keyboard shortcut Ctrl/Cmd+I to open the media.
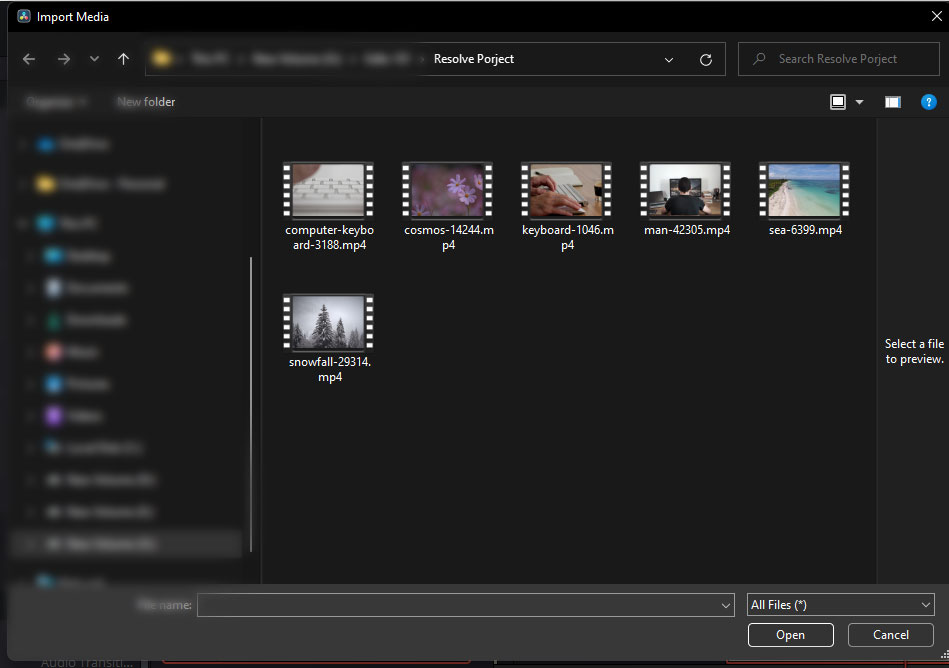
Go to the location where the media is placed on your computer or PC. Choose the media and click Open to display it on the Da Vinci Resolve 18 application.
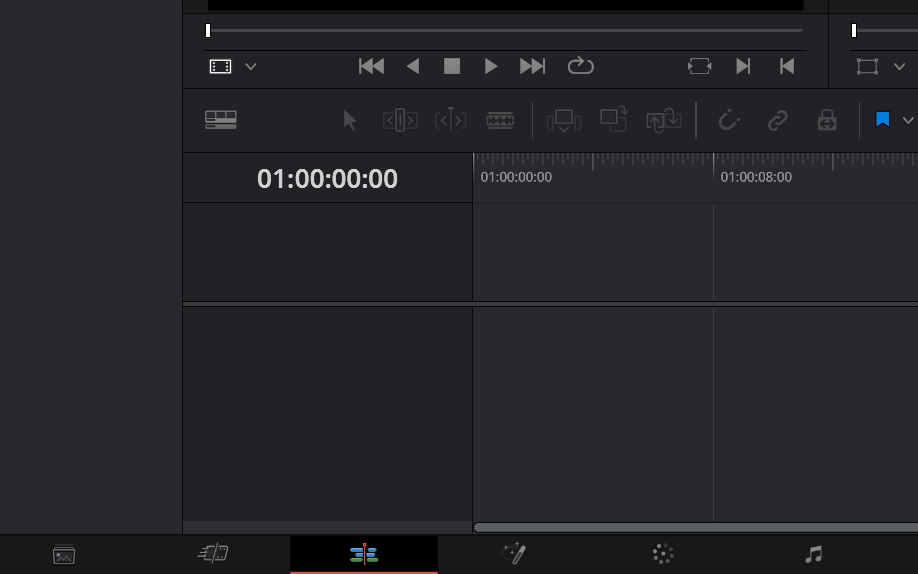
Step 02: Go to the Color page
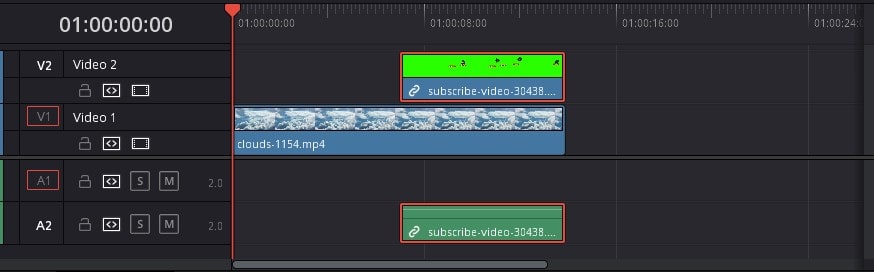
Next, drag and drop the clips from the Media Pool to the timeline.

We should place the videos in separate video tracks:
- Drag and drop the background clip on Video Track 1.
- Drag and drop the clip with the green screen on Video Track 2.
Once you have placed the clips on the timeline, select the clip with the green screen by clicking on it in the Timeline.
- Go to the bottom of the canvas.
- Choose the Color page icon as shown below.
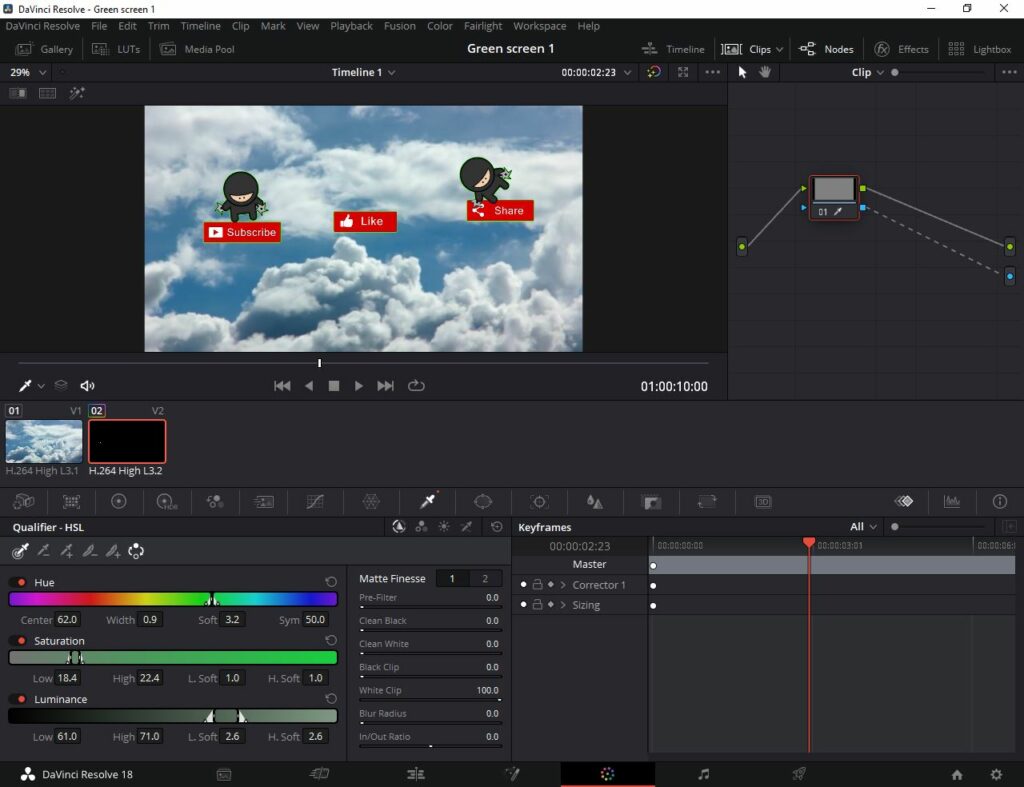
Step 03: Where is the Qualifiers Panel?
Once you are on the Color page, you will see various controls for correcting colors, noise reduction, contrasts, and so much more.
Among these options,
- Click on the Qualifier icon (it looks like a Color Picker).
- You will see a list of options available inside the panel. From these options, choose the Picker, the first icon from the left.
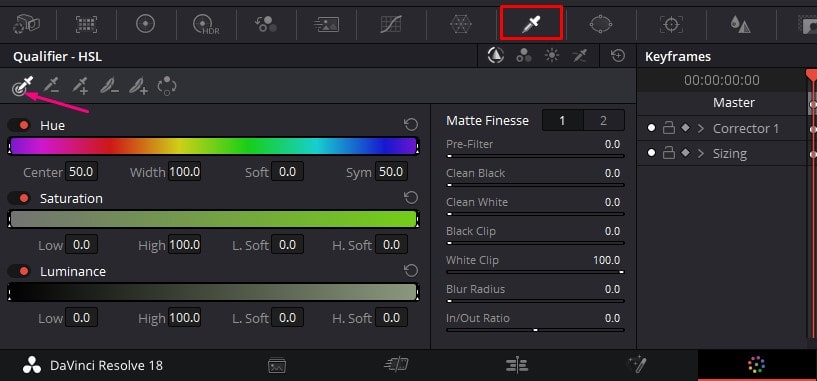
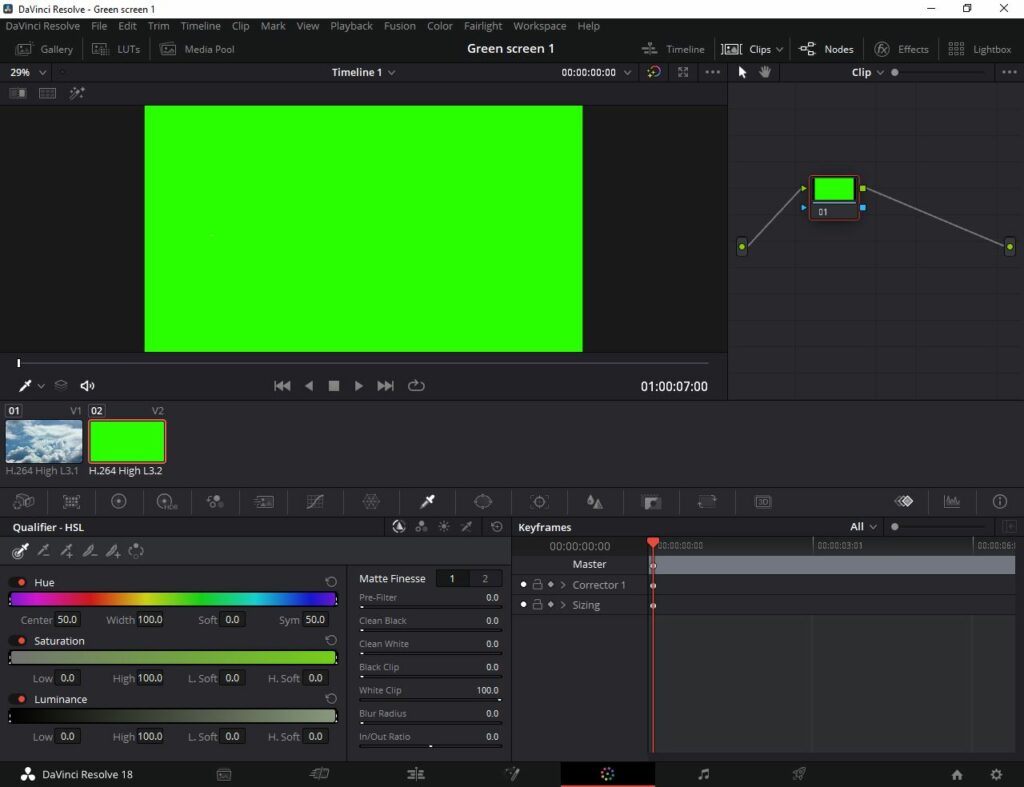
Since we selected the green screen clip, this will be shown in the Viewer. Now, click anywhere on the green screen but make sure the Picker is active. Make sure to click on the color green, as this will determine the output.
Step 04: add the Alpha Output
Next, you need to add the Alpha Output. Once you click with the picker, the green color will disappear, but you will not see the transparent background. This is because you need to add the alpha output in the nodes panel to see the transparent background.
To add the alpha output,
- Go to the Node Editor.
- Right-click anywhere in the Node Editor and select Add Alpha Output.

Connect the blue output of the node with the Alpha Output (blue dot) we just created.

Next, you must invert this selection to see the final output.
To invert,
- Go to the Qualifier HSL tab
- Click the Invert option (last icon) of the Qualifier box.
Now, you will notice that the green colored screen is removed, and the background clip (clouds in this case) has replaced the green screen.
How to Remove Green Edges?
Even though you have removed the green screen following the above steps, sometimes there can be green spots on the actor or at the edges of the clip. In this section, you will learn to remove these edges if there are any!
Step 01: Go to the Color Page
Make sure you are still on the Color page.
If you’re not on the Color page,
- Go to the bottom of the screen.
- Click on the Color page icon.
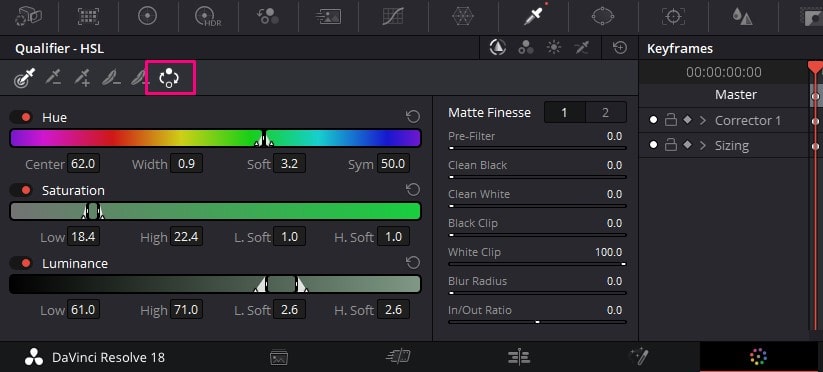
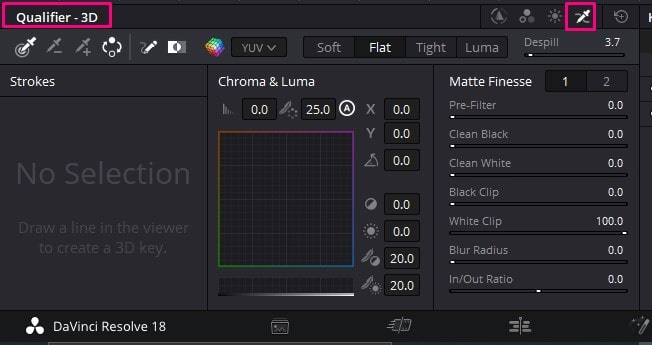
Step 02: Go to the Qualifier tool
Next, go to the Qualifier window and follow these steps,
- Make sure you are on the Qualifier window.
- Select 3D (fourth icon) from the Qualifier tab.
Then, select the Qualifier Color Picker (first icon from the left) to remove the remaining green spots. To do this,
- Paint over the green areas with your mouse.
- Next, adjust the Despill slider to completely remove the green patches.
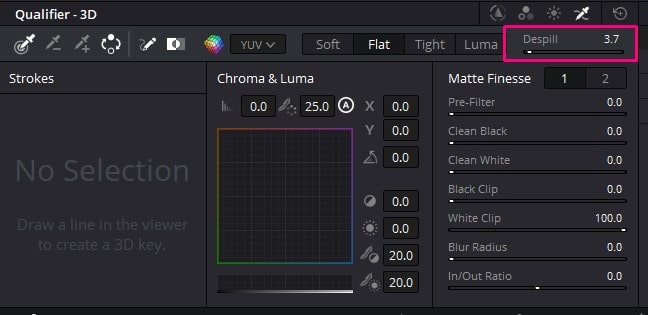
Repeat the above step as much as you need to remove the green pigments on the clip.
How to remove the green screen using Delta Layer?
The most common way to remove a green screen is by using the Fusion page. In this method, the Delta Keyer option paired with the Color Picker will allow you to get the perfect result.
Step 01: How to Import Media in DaVinci Resolve
Initially, you need to open a clip or project. To do this task,
- Open the DaVinci Resolve 18 application.
- Right-click anywhere in the Media Pool.
- Choose the option Import Media as displayed below.
Alternatively, use the keyboard shortcut Ctrl/Cmd+I to open the media. Go to the location where the media is placed on your computer or PC. Choose the media and click Open to display it on the DaVinci Resolve 18 application. Now you are set to learn to select clips as per your requirement.
Step 02: Go to the Fusion page
Next, drag and drop the clips from the Media Pool to the timeline. Once you have placed the clips on the timeline per the above guidelines, go to the Fusion page. To go to the Fusion page,
- Go to the bottom of the canvas.
- Choose the Fusion page icon as shown below.
Step 03: Add the Delta Keyer
To add the Delta keyer,
- Go to the Node Editor.
- Next, right-click anywhere in the Node Editor and choose the option Add Tool.
- Then, select Matte and choose Delta Keyer.
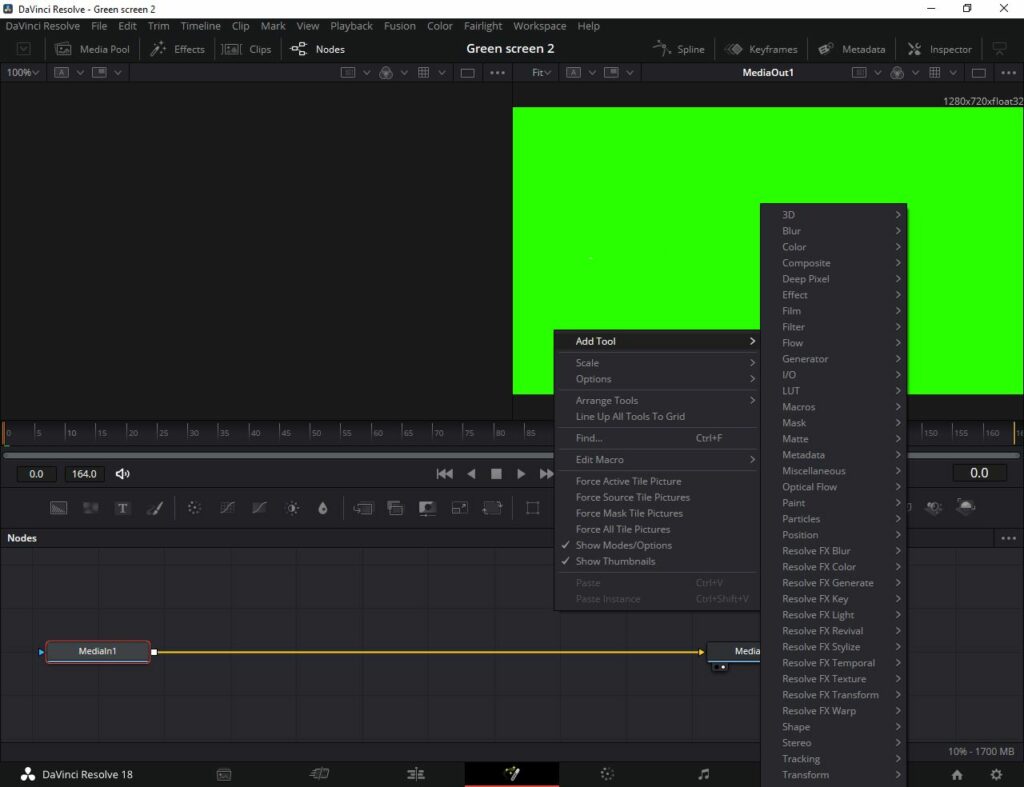
OR
- Press shift+ space and search for the delta keyer.
- Select the delta keyer and then click on the add button.

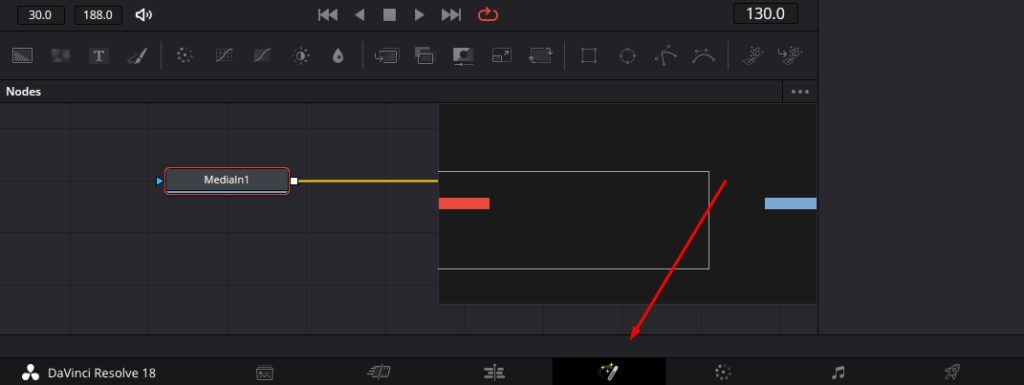
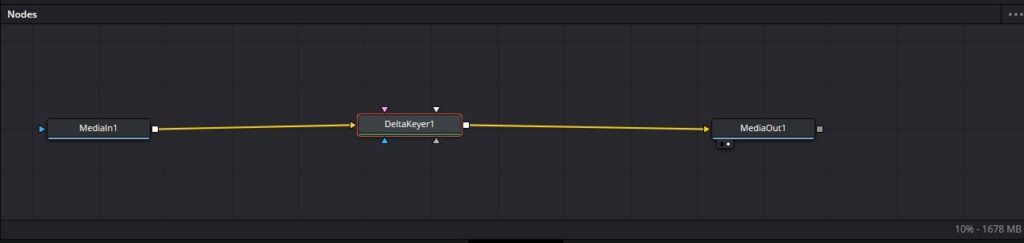
Next, join the MediaIn and the MediaOut node and place the Delta Keyer node in the middle. Press shift and drag the delta keyer node on the yellow line, let go when the line turns blue, then let go of the shift key.
A node window consisting of various Delta Keyer settings will pop up as soon as you join them.
Step 04: Remove the green color
Now select the delta keyer and go to the inspector panel on the right side. Click on the eye dropper icon next to the background color and bring the eye dropper to the green color. Dont let go of the click after clicking on the eye dropper icon; click and drag it on the green color.
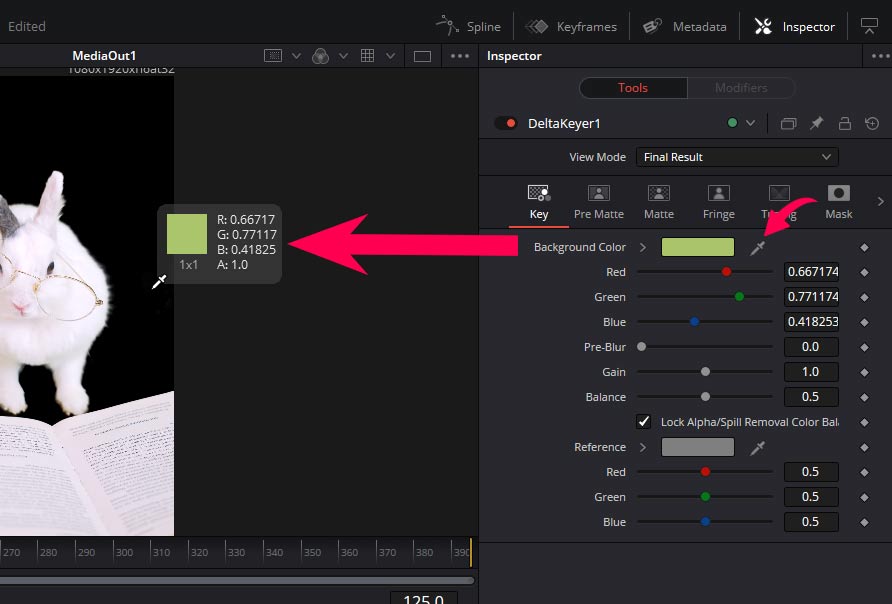
Now you can play with the other sliders for perfect green screen removal.
Easy Green Screen Removal in DaVinci Resolve 18
In this section, we will use the Edit page and apply the 3D Keyer to remove the green screen. The surprising factor is that this can be completed on the Edit Page by simply adding effects.
Step 01: Go to the Edit page
The next set of steps can be carried out on the Edit page through the Effects Library.
To go to the edit page,
- Go to the bottom of the canvas.
- Choose the Edit page icon.
Next, you need to choose the 3D Keyer effect which acts as the supporting layer to remove the green screen from the canvas.
Step 03: Choose the 3D Keyer
To choose the 3D keyer,
- Go to the Effects library.
- Next, choose Open Fx and scroll down to find the Resolve FX Key section.
- Finally, choose the 3D Keyer.
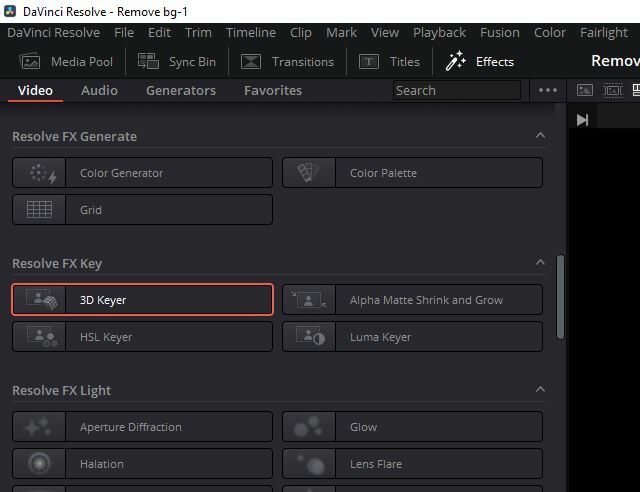
Once you click on the 3D Keyer option, drag it to the timeline and place it over the clip with the green background.
Step 04: Change settings in the Inspector
Click and select the clip with the green screen, the one you added the 3D Keyer effect to. Make sure to go to the Viewer and choose the ‘Open FX’ option from the drop-down menu.
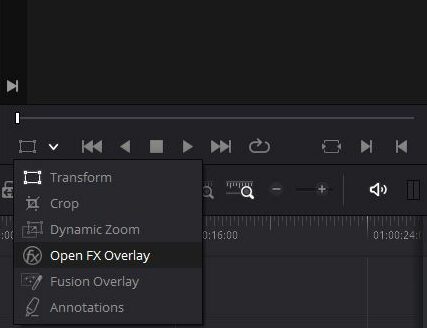
Then, go to the Inspector to change the effect settings.
In The Inspector,
- Choose the ‘Effects’ button to change the settings.
- Click on the Add Picker (color picker icon with a plus sign).

- Go to the Viewer and click and drag slightly over the green color.
- Now, you will notice that the green screen has been selected and disappeared.
Scroll down and check the Output category. Click on the Output category drop-down menu and choose the ‘Alpha Highlight B/W’ option.
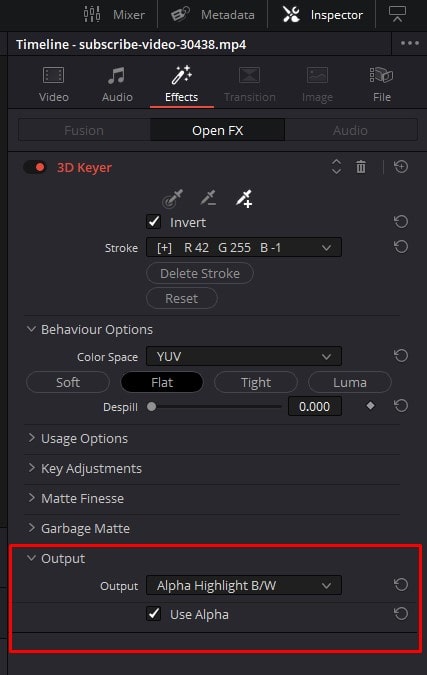
Also, tick the option ‘ Use Alpha’ to adjust the transparency of the clip. As soon as you choose Alpha, the clip appears in black and white.
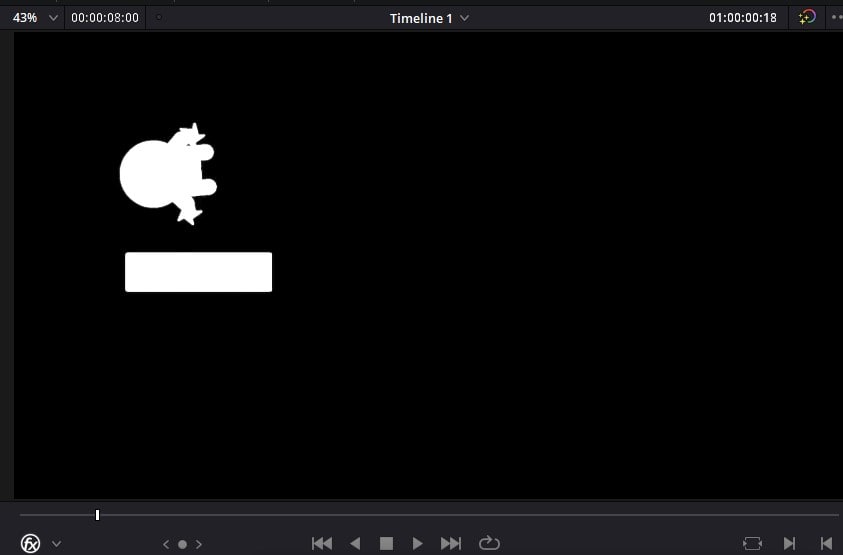
If you notice grey portions on the Viewer, follow the steps below.
If there are grey portions in the clip after switching to transparency,
- Choose the Add Picker icon from the Inspector.
- Now, click and drag over all the grey sections.
- Then, you will notice that the grey sections will become black (which means they are removed).
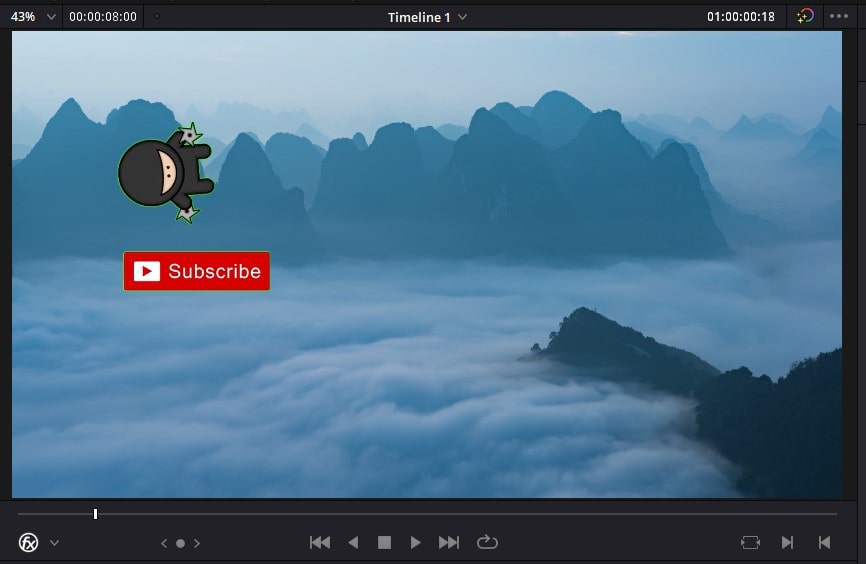
Click on the Output category drop-down menu and choose the ‘Final Composite’ option.
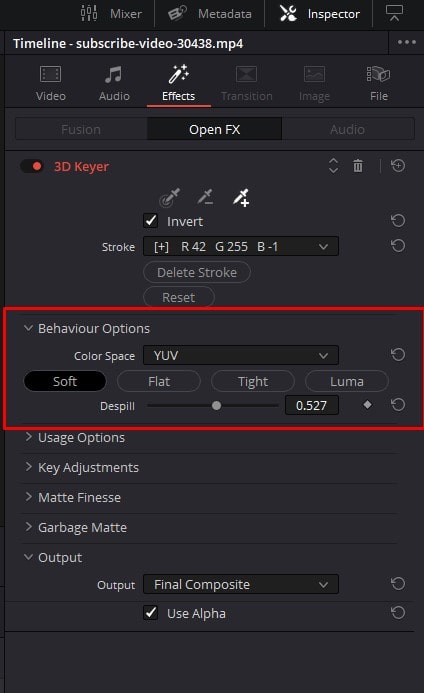
Now, you will be able to see the background clip which you have attached. The clip which had the green screen removed would look great and closer to perfect. It’s time to reach the perfection stage by making more changes. If you zoom in on the Viewer, you will notice that the subject of the clip may have a few green shades.
If there are green shades,
- Increase the ‘Despill’ slider in the Inspector.
- This will eliminate all the green shades in the clip.
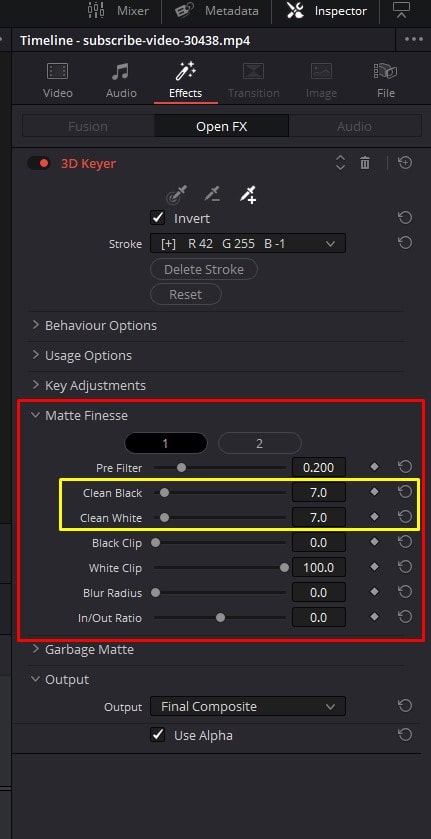
Apart from this, you can also change the Matte finesse setting by following the below steps:
- Under the Matte finesse option, you can drag the Clean Black and Clean White sliders to remove unwanted colors.
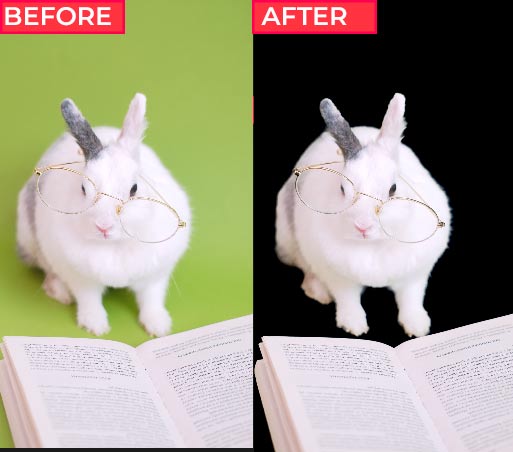
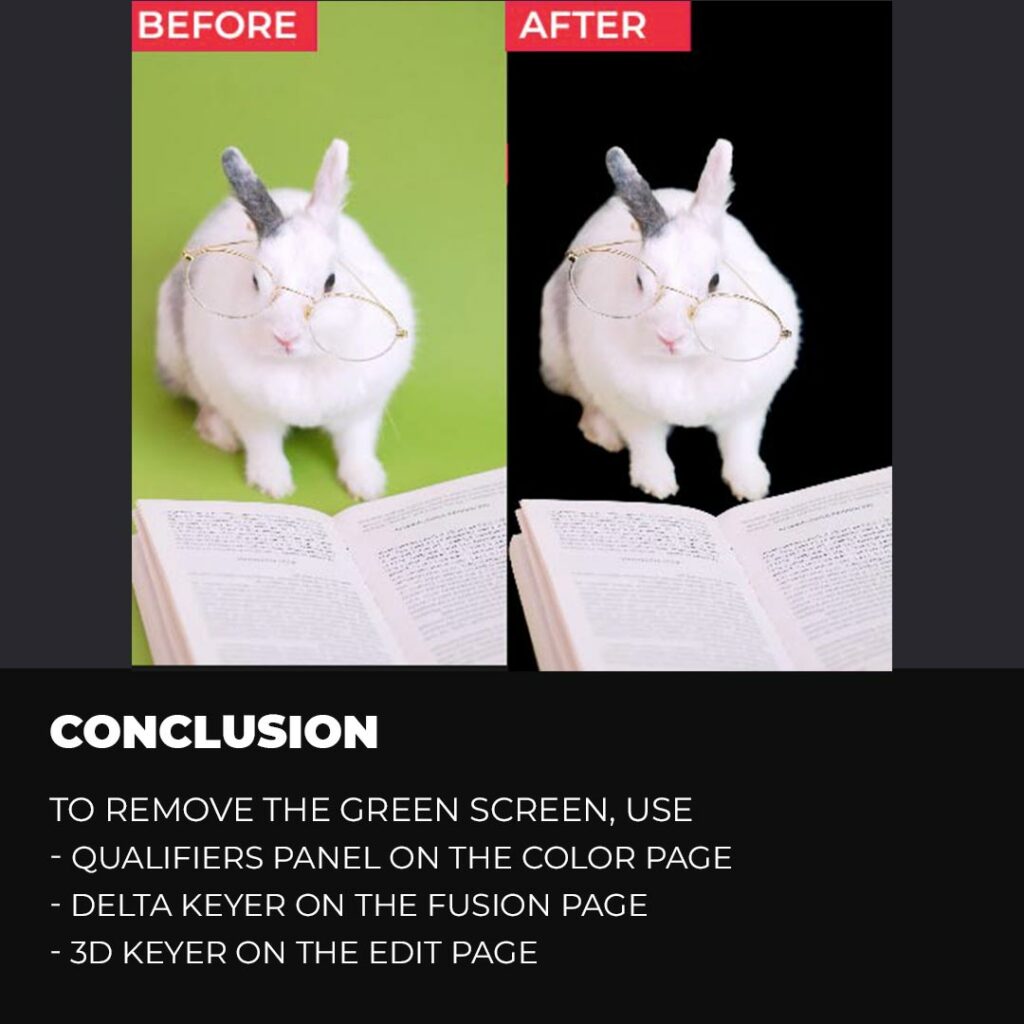
The final output will consist of the clip without the green screen and without any shades of green around the subjects, as displayed below:
Conclusion
We hope this step-by-step guide has provided you with different ways and techniques to remove a green screen in DaVinci Resolve 18.
You can use the qualifiers panel to remove the green screen. Choose the picker and click on the green color. Add the alpha output in the nodes panel, and don’t forget to invert the selection.
You can also use the Delta Keyer on the fusion page to remove the green screen. Add the delta keyer, then click and drag the picker onto the green screen, which will remove the video’s green part.
To remove the green screen on the edit page, you need to use the effect 3D Keyers. Click on the picker with a + icon and then click on the green screen. Play with other settings to get a clean green screen removal.
These are the multiple methods to remove the green screen from a video.
Thanks for reading & feel free to check out more of our articles!
Expert Rating
Summary
Learning to remove green screen in DaVinci Resolve allows you to seamlessly replace the green background with any desired image or footage. DaVinci Resolve offers a highly functional and scalable green screen removal feature, providing precise keying tools and advanced controls to achieve accurate and seamless results, even in complex scenarios.


