
Learning how to use the Match Color in Photopea can save you a lot of time. This is more so when compositing images. But how do you do it?
In this tutorial, we will cover the process of applying specific colors to an image in order to match color. And we will also cover how to match the color of the subject to the background if you are changing the color of the background.
Let’s get started!
What is the Importance of Color Matching in Photopea?
- To create a unified look.
- To make a product pop.
- To show variations of similar products.
- Manipulate color for effective storytelling.
How to Match Coloring Between Two Images in Photopea
You can match the color between two images in Photopea by using the Match Color tool. This will help you maintain consistency across your photos.
Step 1: Open Both Images in Photopea
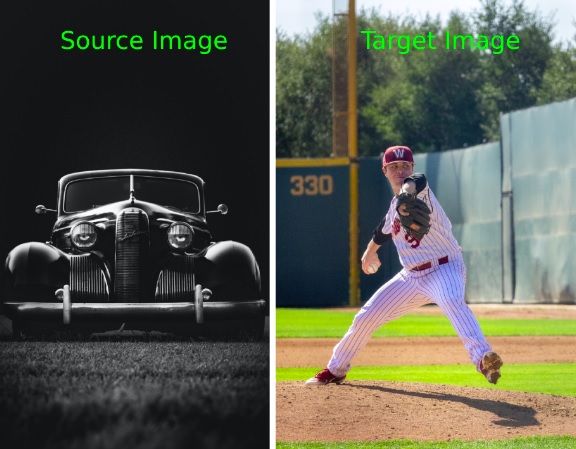
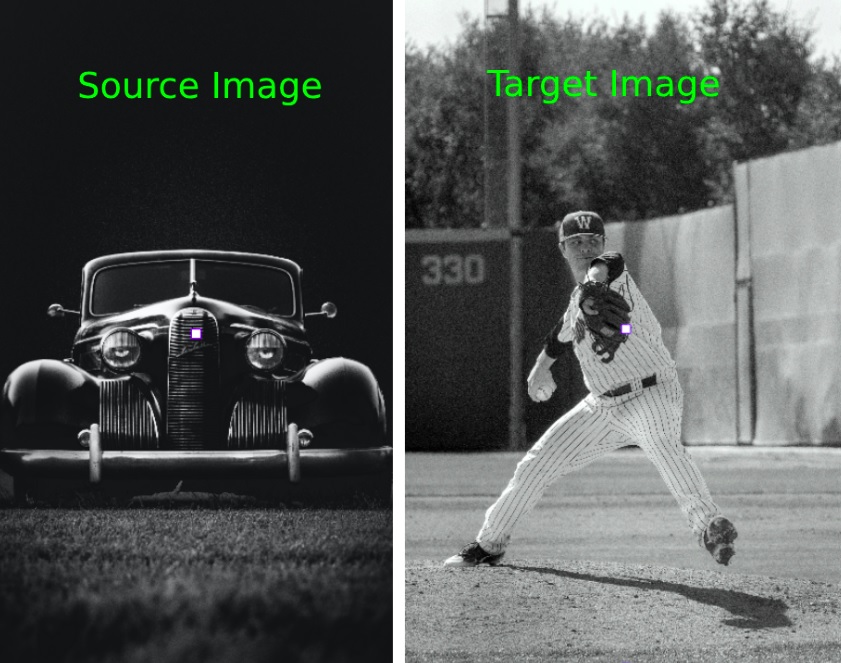
The first step is to open the source image and target image in Photopea. Go to File >> Open, select the image you want to color match, and click Open.
Go back to File >> Open, select the photo that you have already edited, and click Open. In our case, we will make the image on the right (target image) look like the one on the left (source image) by transferring filters.
To avoid confusion, it is good to have your images named properly. That way, when opened in different tabs, you will not have trouble knowing the image tab you need.
Step 2: Select Match Color
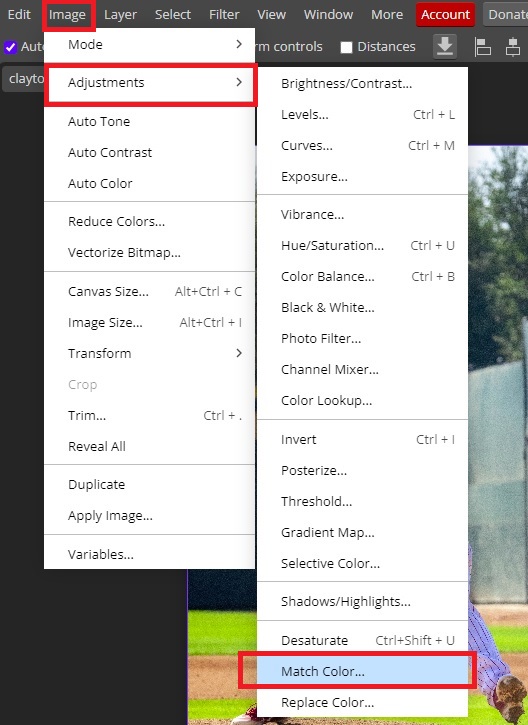
Once the two images are opened, you need to go to the tab with the image whose colors you want to alter. You then need to ensure the image layer is selected, then go to Image >> Adjustments >> Match Color.
The Match Color window will pop up. Click on the drop-down arrow next to Source and select the name of your Source Image.
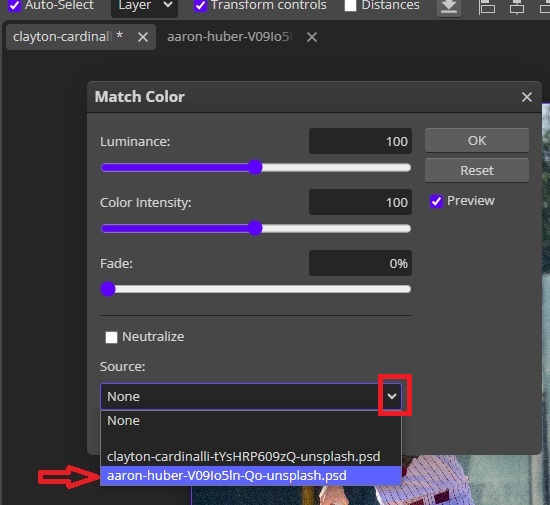
Photopea will now adjust the colors of your image to match them to the Source Image.
You will then need to refine the image further by moving the Luminance slider to adjust the brightness as well as play around with the Color Intensity slider. Here are the settings we settled for.
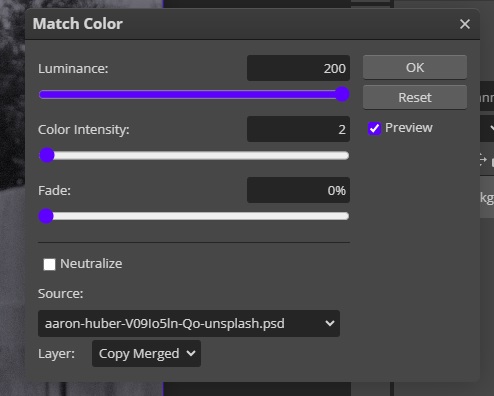
Once you are done, click Okay.
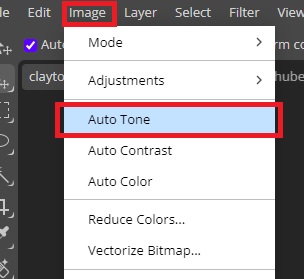
Step 3: Auto Tone
The final step is to brighten up the image. Go to Image and click on Auto Tone.
Here are our final results.
You are Done!
Match Color From a Selection in Photopea
If you would want an object to be the same color as another, you need to follow these steps. The method works best when changing the color of clothing.
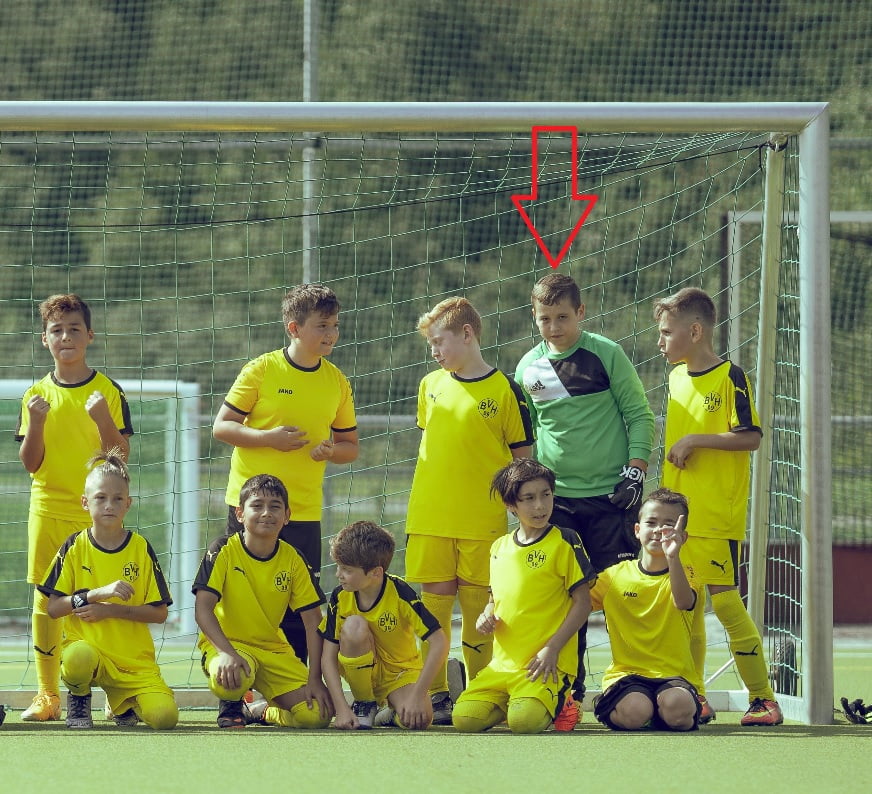
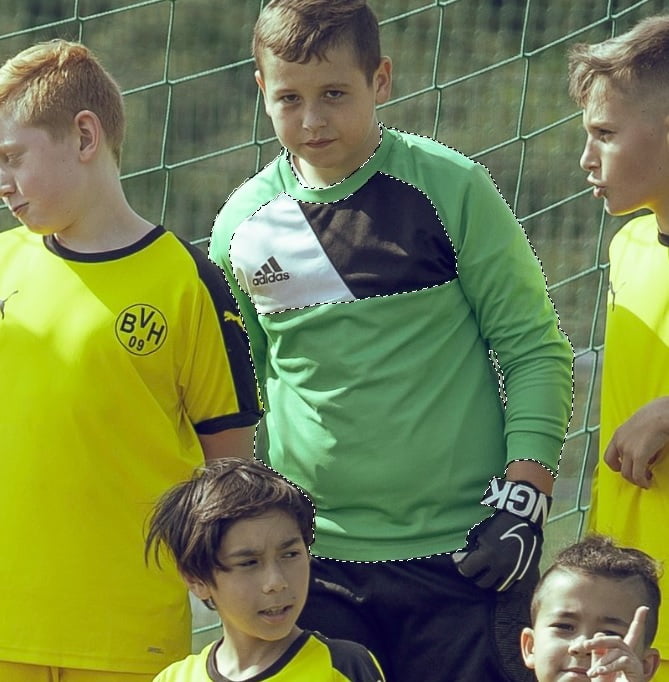
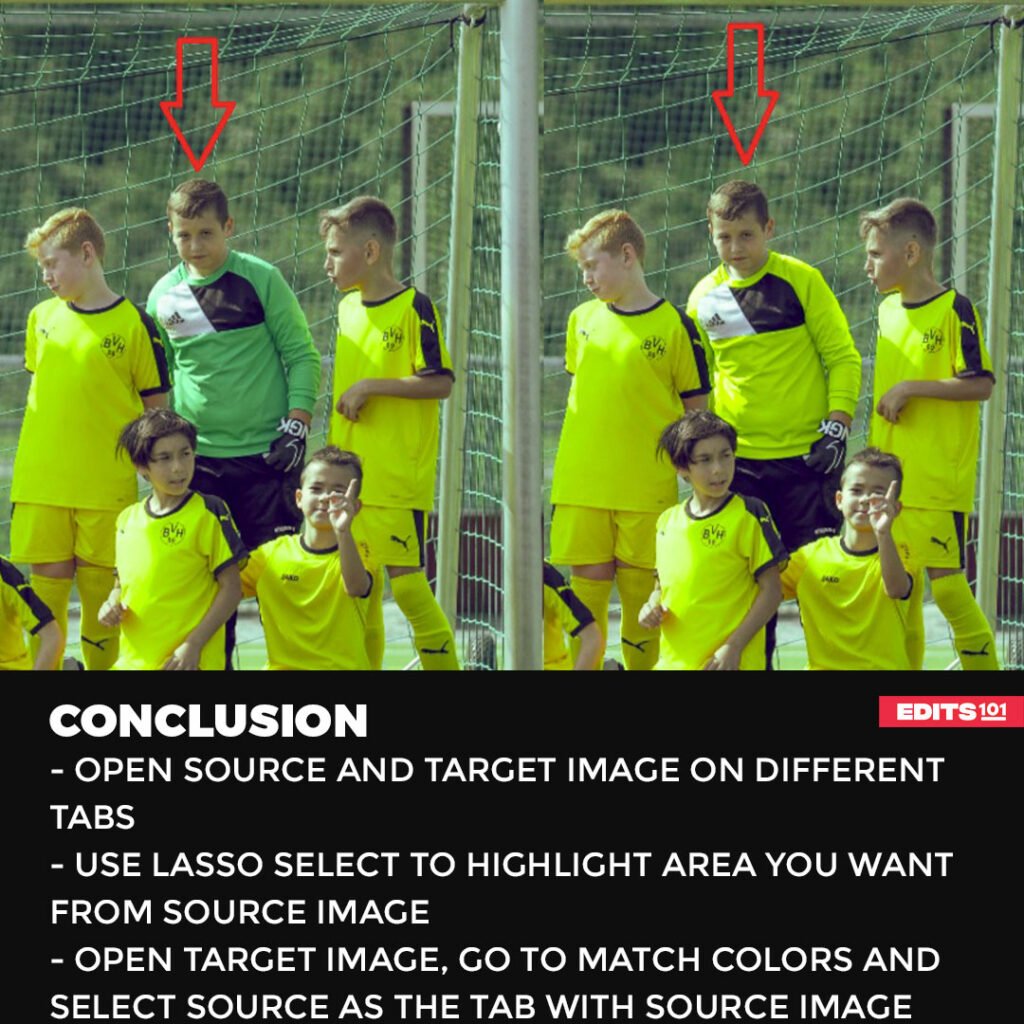
In this example, we will be changing the color of the green jersey to yellow so that it matches the uniform of other players.
Step 1: Open the Source and Target Image
First, you must load the target and source images onto Photopea. For this, we will open our image twice on different tabs. Open by going to File >> Open, select your image, and click Open.
Step 2: Make a Selection of the Sample Area
While on the tab of the Source Image, go to the Tools Bar and select Lasso Select.

With the image layer selected, use the Lasso Select to draw a circle around the area you want to use as a sample.
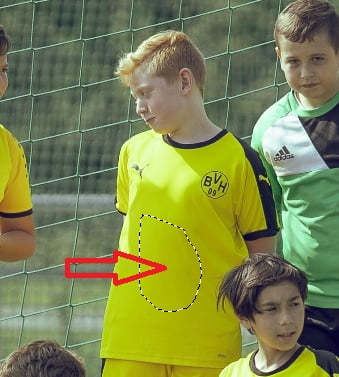
Step 3: Select the Shirt
Now we need to go to the tab with the Target Image and select the shirt. For the boy’s shirt, we can either use the Lasso tool or the Magic Wand. In our case, we will use the Magic Wand.

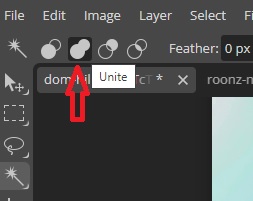
With the Magic Wand, we need to click on an area of the shirt, and a selection will be created. For the areas that are not selected, go to the Options Bar, select Unite, and continue clicking on the unselected areas.
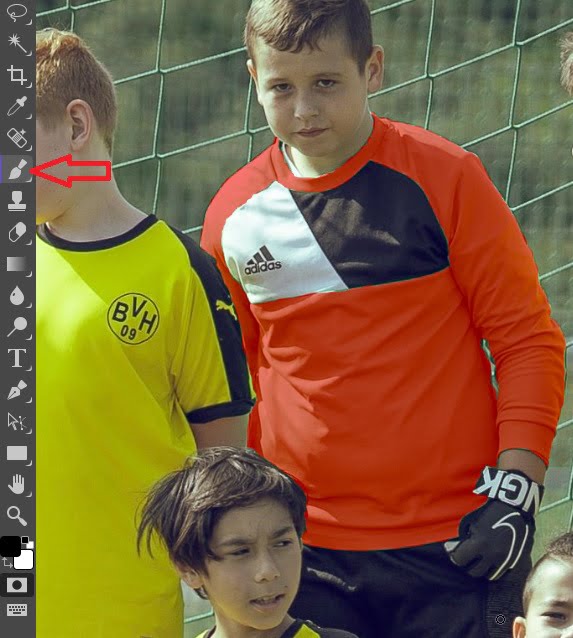
You should zoom in so as not to miss anything. Alternatively, you can press the Q on your keyboard to enter the Quick Mask Mode. From there, use the Brush Tool to paint everything you want to include in the selection.
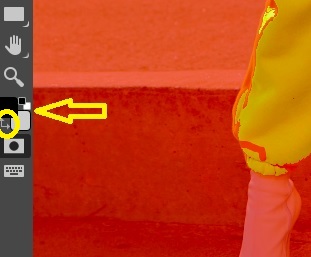
Set the brush colors to default by pressing D on the keyboard before painting with the brush. Black color will add to the selection, and the areas you paint with the withe color will be removed from the selection.
Any area that is red in color has not been selected. To unselect an area in Quick Mask Mode, simply switch to Black from White in the Color Picker and paint over the area you wish to deselect. You switch by clicking the L-shaped arrow between the white and black.
Once you are done making your selection, hit the Q on your keyboard to exit the selection mode.
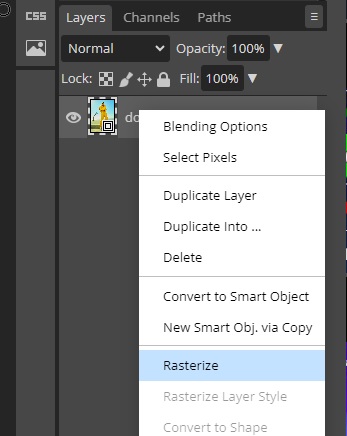
Step 4: Rasterize the Layer
Right-click on the image layer and click Rasterize.
Step 5: Go to Match Color
Click on Image >> Adjustments >> Match Color

Just like we did in the first example, go to the dropdown arrow next to Source and select the Tab with the Source Image.
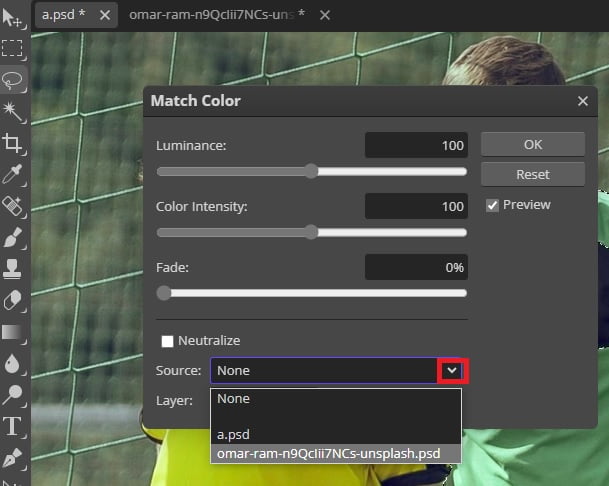
Photopea will now add the shirt’s selected color in the Source Image. You can move Luminance and Color Intensity sliders to achieve better results.
Once you are done, click OK and then Ctrl (Cmd) + D to remove the selection.
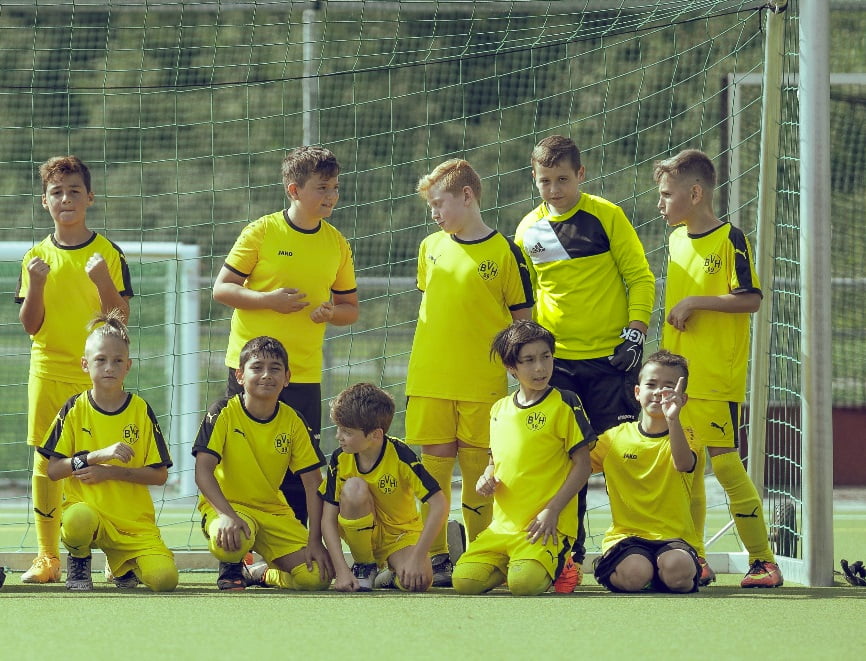
You can repeat the steps to change the color of the trouser and even the shoes.
Once you are done, go ahead and save your image by going to File >> Export As and selecting JPG or your preferred file format.
Go to File >> Save As PSD to continue working on the image later. You can load the PSD file onto Photopea and continue from where you left off.
Match color of the subject to the background
To begin, you will require two images – one of the main subject and another of the background.
Remove the Background
First of all, select the subject layer and remove its background. Press W on the keyboard and the select subject option that will appear on the top bar.
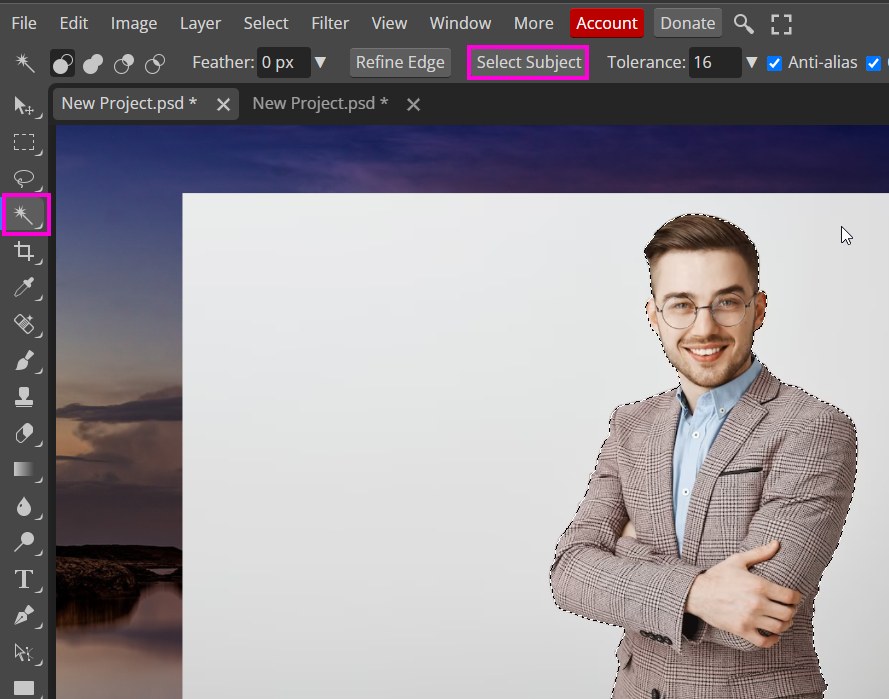
Click on it, and a selection around the subject will be created; click on the raster mask, and the background will be removed.
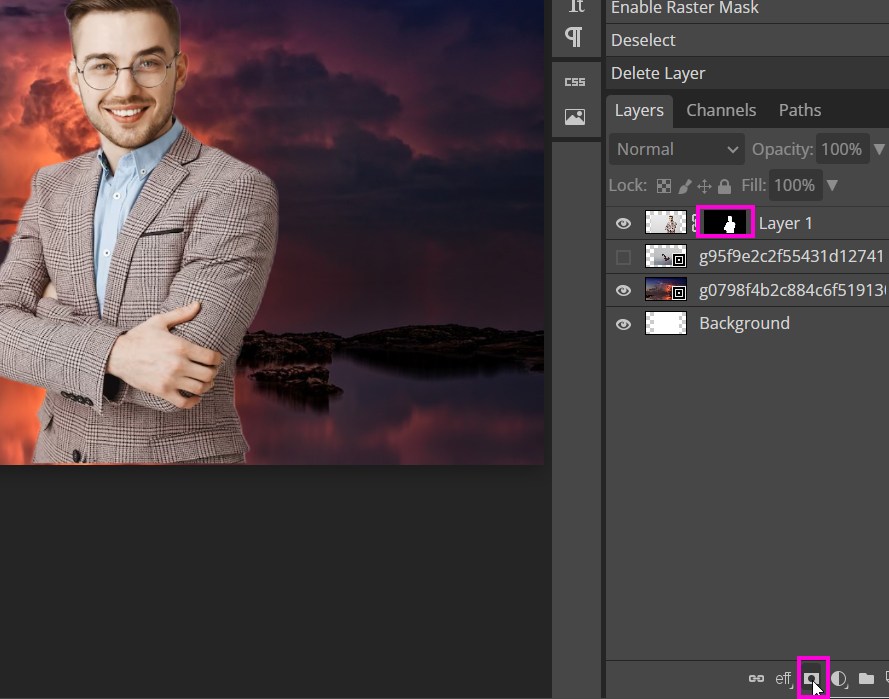
To remove the edges around the subject, first select the mask. Then, go to the filter menu and choose “Other” followed by “Minimum.”
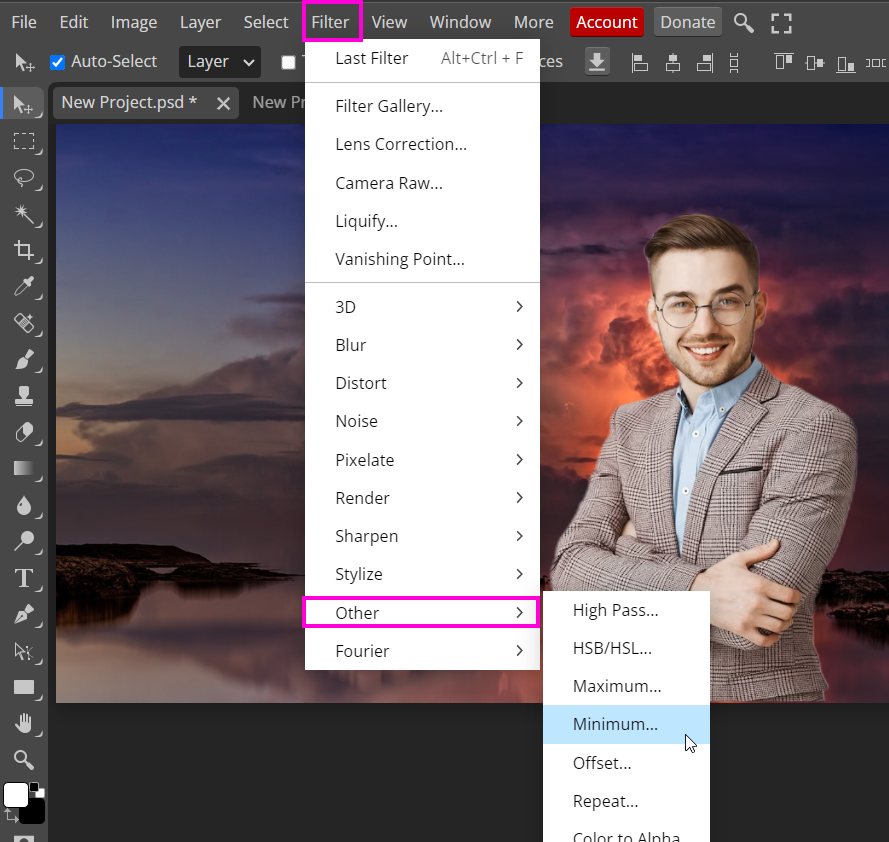
Apply the minimum filter, and make sure that you keep the value as low as possible to retain important details.
Match The Color
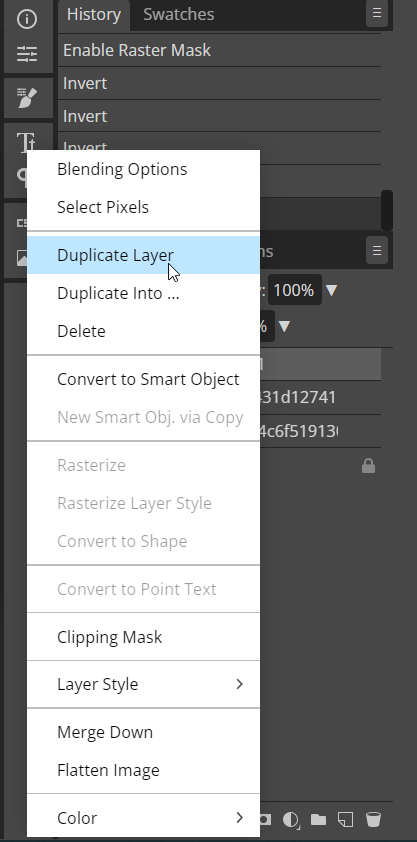
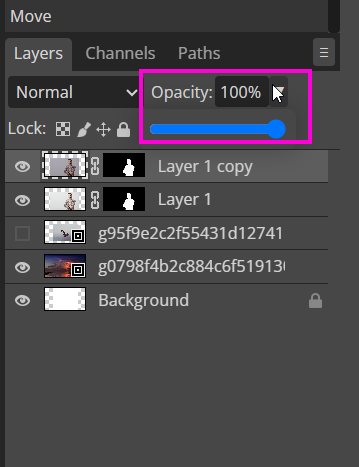
Duplicate the Subject layer first. Right-click on the subject layer in the layers panel and choose the duplicate option. Or simply press Ctrl + J or Cmd + J with the subject layer selected in the layers panel.
Now select the duplicated subject layer and then go to the Image >> Adjustments>> Match Color.
Select your project as the source and select the background image under the layer option.
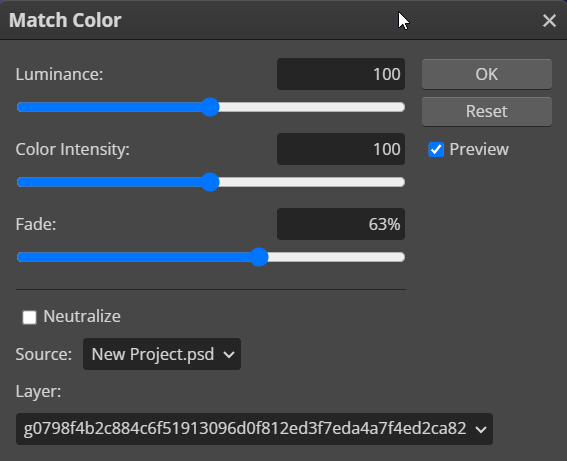
Now you will see that the color of the subject layer is changed, but it might look a bit harsh. You can use the Luminance and fade sliders to adjust the intensity of the colors. Adjust the sliders until you achieve a natural-looking image.

Now you can reduce the opacity of the duplicated layer if you want to further decrease the intensity of the colors.
Conclusion
In this post, we learned how to adjust an image by matching colors from another image. In the first example, we turned a colored image into Black and White with some texture by simply borrowing from a source image.
In the second example, we changed the color of a player’s jersey to match the color of the jersey of other players. We also covered how to make a good selection and how to Rasterize an image.
Thanks for reading & feel free to check out more of our articles!
Expert Rating
Summary
Matching colors in Photopea involves using Mach color option. While it may be moderately challenging initially, it becomes functional and scalable, enabling cohesive and visually appealing designs in graphic design projects.


