
DaVinci Resolve offers a wide range of blurs you can add to your videos. Every blur creates a unique effect and makes your clips more exciting and dynamic. There are a few blur effects that are available in the Studio version. We will skip those in this tutorial and focus on the ones we can use in the free version.
In this guide, we will cover the various blurs available in the Effects Library and then we will look into blurring effects on the Color page. The Inspector is where you can adjust the blur effects you have added to your clips.
Every Blur Effect In DaVinci Resolve 18
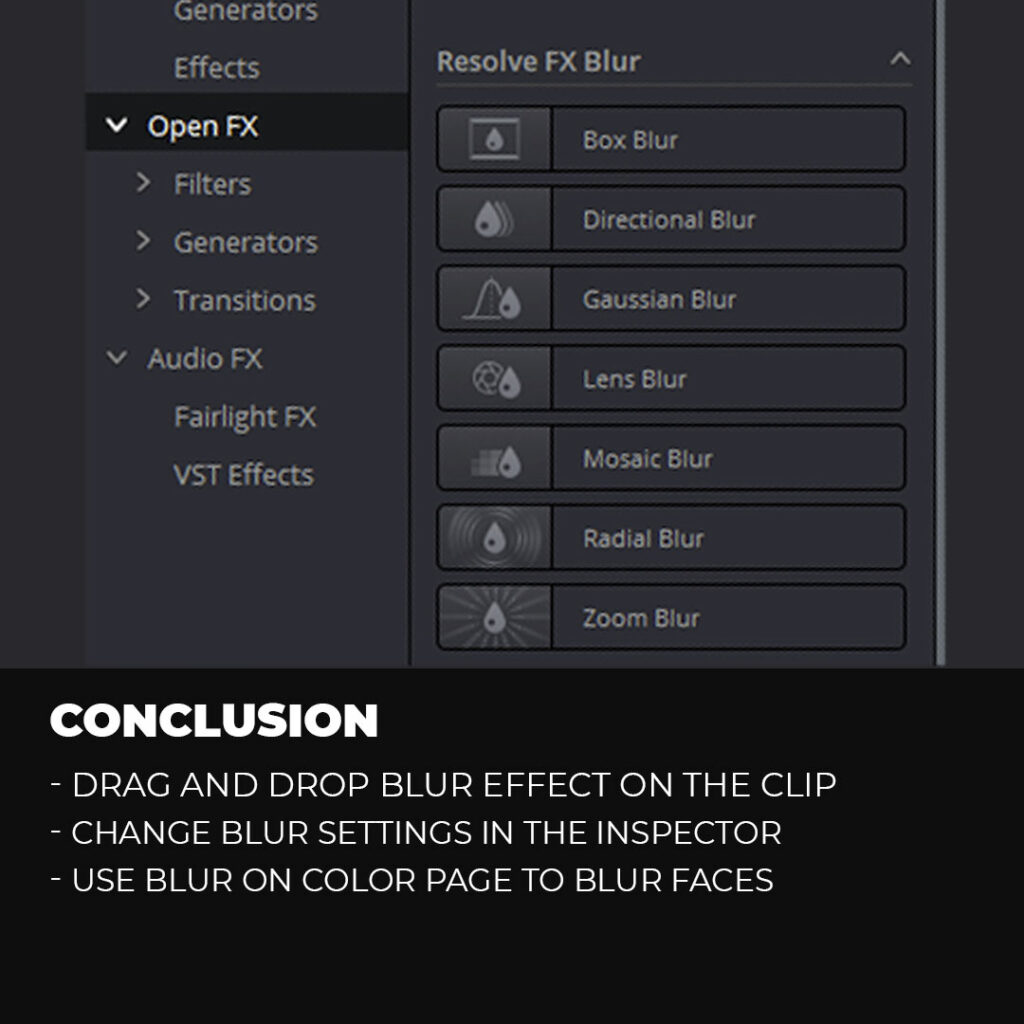
To open the Effects Library, you have to go to the Edit page by clicking on the third icon at the bottom. Click on the Effects button to open it, then click on Open Fx.
The first group of effects will be the Blur effects.

To add one, you have to drop any preferred blur effect on any clip in your timeline.
Box Blur
The first effect will look at is the Box blur. As the name suggests, this effect blurs in rectangular shapes. If you look really closely after applying the effect, you will be able to see a rectangle pattern when blurring.
If we open up the effect controls in the Inspector, then we’ll be able adjust the effect. Start by selecting the video clip with the blur effect, click on the Inspector and make sure you are on the Effect tab.
Horizontal and Vertical Strength
The strength sliders let you adjust the strength of blur lines. You can adjust them proportionately or separately by clicking on the checkbox Same horizontal/vertical.
Number of Iterations
This setting allows you to apply the effect multiple times. Basically, the number of iterations means how many times the blur is applied. The higher the number, the smoother the effect.

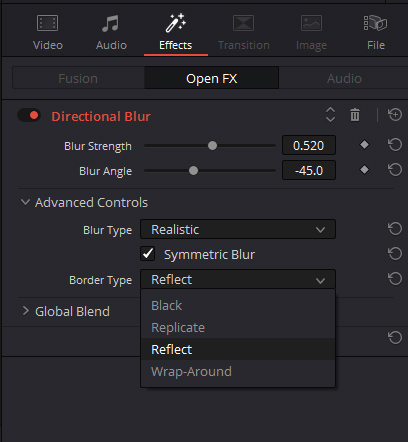
Directional Blur
Directional blur blurs the video clip at a specific angle. You can choose the angle and strength of the blur as preferred.
Go to the Inspector to change the settings.
Blur Strength
This slider controls how much blur you want to apply to your video.
Blur Angle
You can choose the direction of the blur with the help of the angle slider.
Blur Type
There are two blur types in the settings:
- Stylized
- Realistic
The use of the Realistic option is recommended.
Border Type
When you apply the blur effect, it affects the edges of the video. The border setting allows you to choose how you want the border to the look like.
These are the options available.
- Black
- Replicate
- Reflect
- Wrap-around
We will be using the Reflect setting, you can choose other settings according to the effect you are trying to create.
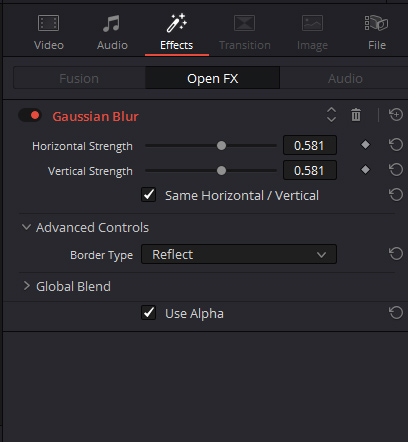
Gaussian Blur
Next, we have Gaussian blur. The Gaussian blur is pretty much the simplest and most common type of blur as it is applied evenly across the entire clip.
Horizontal and Vertical Strength
You can adjust the horizontal and vertical strength of it is you need to. It doesn’t have a particular shapes visible like with a Box blur. You can uncheck the horizontal /vertical check box if you want it to blur more in one direction. Generally, it’s going to get you a very simple smooth blur.
Mosaic Blur
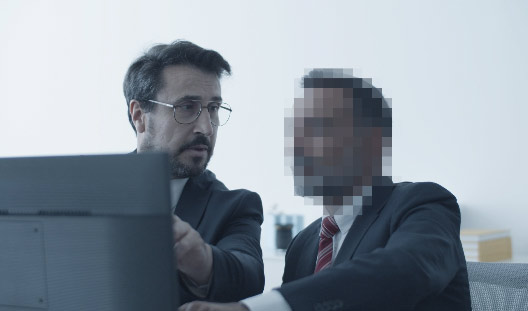
Mosaic blur basically takes your clip and pixelates it. This is the effect that is used to blur or sensor faces or objects in a video.
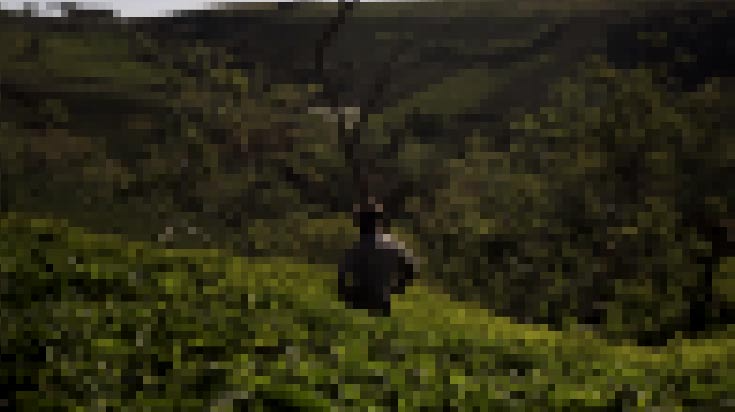
Pixel Frequency
Pixel frequency means how small or large you want your pixels to be. The higher the value, the smaller the pixels will be, and vice versa. And as you increase the value, your image or video will get less blurry.
Cell Shape
Cell shape determines the shape of the pixels. By default, the shape of the pixels will be square, but you can choose from the other two options, hexagons or triangles.
X Offset
The X-offset slider will shift your blur pixels to the left or to the right.
Y Offset
The Y-offset slider will shift your blur pixels up or down.
Aspect
This option will stretch your pixels inwards or outwards.
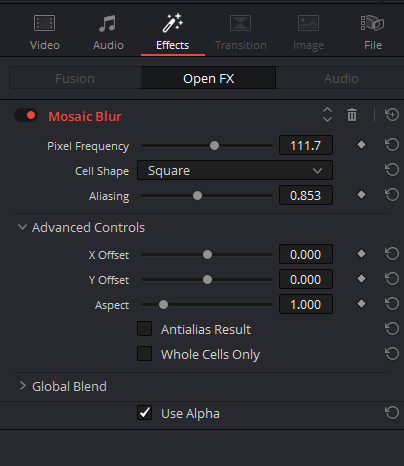
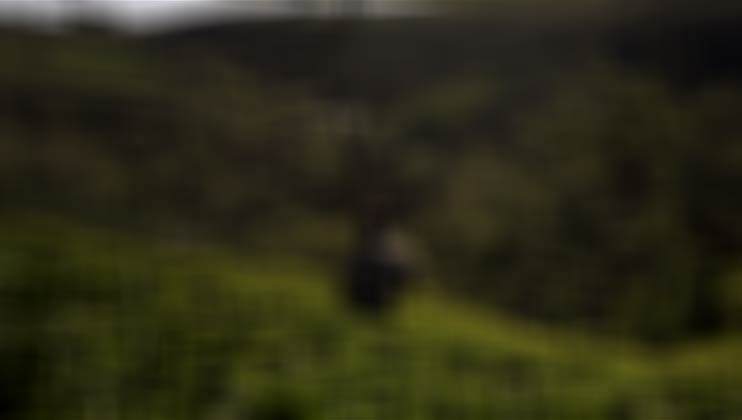
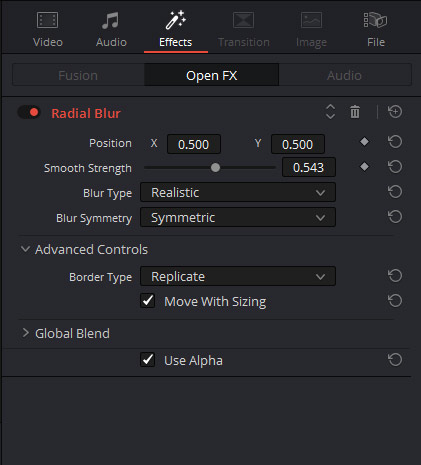
Radial Blur
In the radial blur, there is a center point from where the blurring starts from. Then it is reverberated from that center point outwards in order to create the radial effect. The blur rings expanding outwards look like if you looked at the underside of a CD.
Position X and Y
When adjusting X and Y positions, we can change the position of where that center point is.
Smooth Strength
This setting will increase or decrease the smoothness of the blur rings.
Border Type
The border type is the same as we have discussed in other blurs, it will determine how the edges look like.
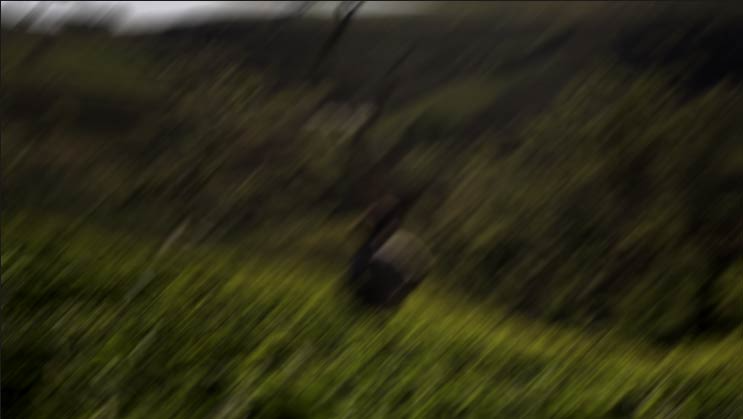
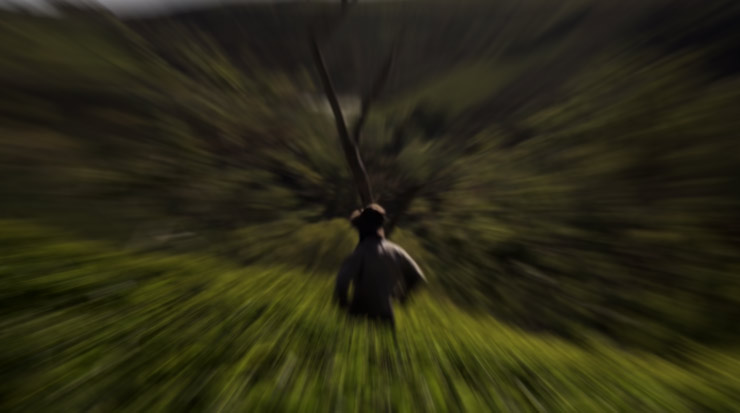
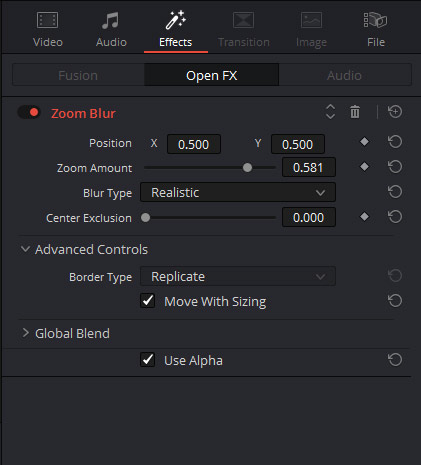
Zoom Blur
The Zoom blur is very similar to the Radial Blur. The difference with the Zoom blur is it doesn’t create rings, it creates straight rays from that source point into every direction. But just like with the Radial blur, we can adjust the position of that center point from the Inspector.
Position X and Y
Changes the centre point of the rays.
Zoom Amount
Determines how much zoom you want your video to have from the center.
Center Exclusion
This setting is important, it basically means how much area you want to exclude around the center point of the blur rays.
This allows you to bring the centre of the clip into focus. As you can see in the image, the rays are starting away from the center, so the subject is not blurred. Center Exclusion Value = 0.316.

Blur On the Color Page Of DaVinci Resolve 18
All the blurs we have discussed are available in the Effects Library on the Edit page. A Blur panel is also available inside the Color page. It is not as advanced as the blurs we have discussed above, but it can be quite useful as it can be applied quickly.
Go to the Color page, and you in the middle of the screen you will see several palettes. Go to the 12th button and this is the Blur Palette.
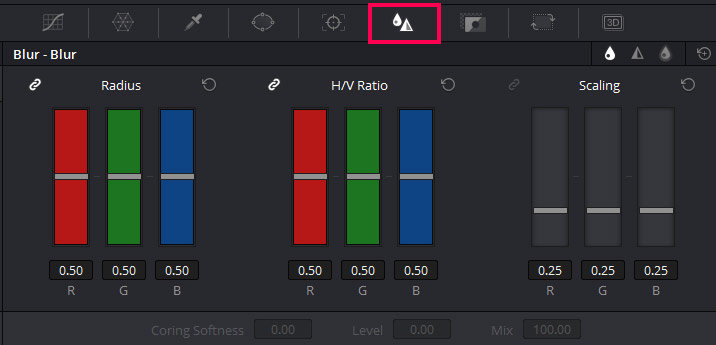
The three 3 modes of the Blur palette are Blur, Sharpen and Mist. Make sure that the first icon (looks like a tear) underneath the Centre Palettes is selected.
As you can see above, there are three sliders each control- Radius, H/V Ratio and Scaling. The colors red, green and blue mean that by adjusting each slider these particular colors will be affected equally. If you click on the link/chain icon, you will be able to adjust each color individually.
Radius Slider
The radius slider allows you adjust the blurring or sharpness of the clip. If you take any slider up, the clip will be blurred. But if you take it down, the clip will be sharpened.
H/V Ratio
This control is used to control the directionality of the blurring or the sharpening. If you take it up, it will blur horizontally and if you bring it down, it will blur vertically. This slider will only work if you drag the Radius slider up to add the blurring. If you move the Radius slider down, the H/V slider will not show any changes.
How To Blur Face In DaVinci Resolve 18?
Now, let’s talk about a practical example of using blur. In this example, we will explain how you can blur a face and track the blur according to the movement of the face. You can use this technique to blur or censor anything in your video.
Select the clip and go to the Color page. Now go to the Window palette in the and click on the Round mask option.
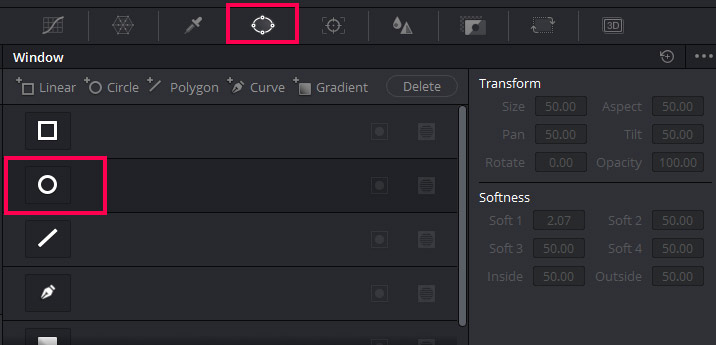
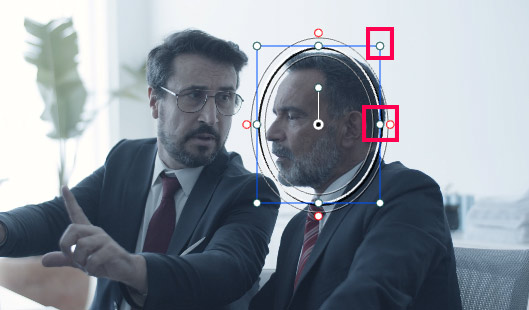
Scale the circle according to the size of the face in the video. To scale the mask, hover over the white points and the cursor will change to a pen tip. Click and drag the handles to encircle the face.
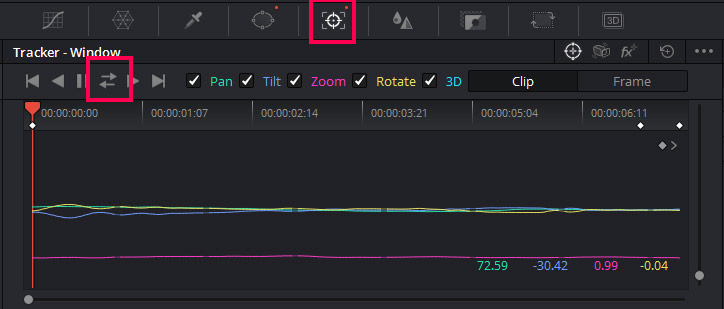
When you are happy with the mask, move on to the Tracker palette and click on the Track Forward and Reverse button.
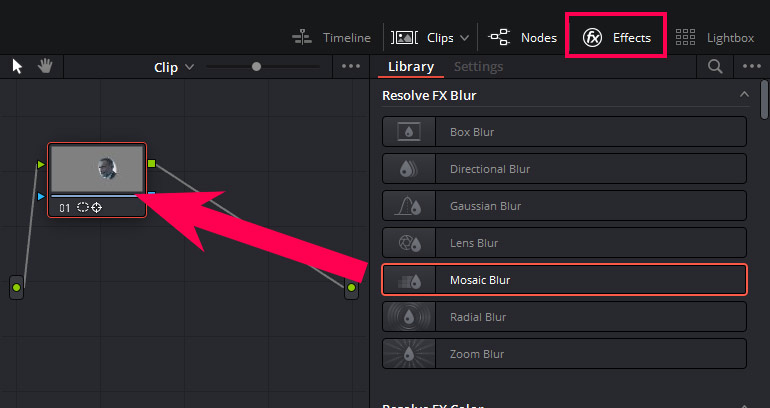
Now that the mask is tracked, we need to apply the Blur. We will be using the Mosaic blur in this example to pixelate the face. Go to the Effects Library and drag mosaic blur onto the node.
You can change the effect settings from the Inspector as discussed above.
Conclusion
We have covered the blur effects available in DaVinci Resolve. We first covered the blur effects available on the Edit page, how to apply them, and what kind of settings you can adjust from the Inspector.
We then moved on to how to add a blur effect from the Color page and what settings you can change. And in the end, we worked on a practical example by blurring a face and tracking the blur effect so that it would remain on the face while the clip is playing.
That is all for blurring in DaVinci Resolve 18!
Thanks for reading & feel free to check out more of our articles!
Expert Rating
Summary
Learning to add blurs in Da Vinci Resolve 18 can help to create a variety of visual effects, such as emphasizing a subject or adding a sense of depth to a scene. It is a relatively easy process to learn and can be applied to individual clips or entire timelines, making it a functional and scalable tool for video editing.


