Importing and Exporting Different File Formats in DaVinci Resolve 18
There are a lot of video and audio formats you need to work with on day to day basis. But when working in DaVinci Resolve, you will not be able to import and export files in every format.
In this guide, we will be covering the general import process. We will also talk about Different methods to import file formats like AVI and mkv because sometimes you will be unable to import them directly.
How To Import Media In DaVinci Resolve?
There are multiple ways to import media into DaVinci Resolve.
- Import through the File menu
- Import from the media pool
- Drag and drop
- Keyboard shortcut
To import media through the file menu:
- Go to the file menu.
- Go to the import option and then click on media inside the import menu.
- Now a window will pop up; find your media where you have stored it and click open.
Import media from the Media pool In Davnici Resolve
To import media from the media pool.
- Right-click and click on import media.
- A window will pop up; find the media and open it in DaVinci Resolve.
Drag and drop media in DaVinci Resolve
You can also import media in DaVinci Resolve by dragging and dropping.
- Open the folder where you have stored your media.
- Select single or multiple clips and then drag and drop them inside the media pool.
- And the media will be imported inside DaVinci Resolve.
Import Media in DaVinci Resolve With Keyboard Shortcut
To import media with a keyboard shortcut inside DaVinci resolve:
- Click inside the media pool and press Ctrl + I or Cmd + I.
- A window will pop up, find and select your media and click open.
Read this detailed guide if you are new to resolve.
Importing Different File Formats In DaVinci Resolve
In this section, we will cover how to import more complex file formats, which DaVinci Resolve may not support.
How to Import mp4 Files In DaVinci Resolve?
Importing the mp4 files inside DaVinci Resolve is very easy.
- Click inside the media pool and press Ctrl + I or Cmd + I. You can also right-click inside the media pool and choose import > media.
- A window will open up in both of the above cases. Find and select mp4 files and then click open.
Now the mp4 files will be imported inside DaVinci Resolve.
Why can’t I import mp4 files in DaVinci Resolve?
DaVinci Resolve may not import MP4 files due to some reasons.
Reasons
Unsupported file formats or incompatible audio/video codecs can cause mp4 import issues.
- Corrupted MP4 files might be the cause of the problem.
- Large file sizes can also lead to mp4 import issues (this issue rarely happens, mainly when you have a slower computer).
- Outdated versions of DaVinci Resolve may be incompatible with MP4 files.
Solutions
To resolve the problem
- Make sure the files are not corrupted; if they are, find a way to recover them.
- Compress large files if needed (Use a video converter like Handbrake)
- Keep DaVinci Resolve software up to date.
How to Import mp3 Files In DaVinci Resolve?
To import mp3 files, you can use any of the 3 methods discussed above.
- Right-click inside the media pool, choose import media, or press Ctrl + I or Cmd + I.
- Find and select your files and click open. Or drag and drop mp3 files directly into the media pool.
And the files will be imported without any issues.
How to Import AVI Files In DaVinci Resolve?
As we have mentioned earlier, DaVinci Resolve sometimes doesn’t support AVI files, so you cannot import them directly.
Note: Try the above methods to import AVI files first. If you are unable to import, then use the following method.
To import AVI files, you need to convert them to a DaVinci Resolve friendly format first and then import them.
Convert AVI file to Mp4.
To convert AVI files to mp4, we will be using a free video encoding software called Handbrake.
- Visit the Handbrake website.
- Go to the “Download” section and choose the installer file that matches your operating system.
- Install the software and open it.
- Go to File and select Open Source.
- You can choose a single file or a whole folder for batch processing.
- Choose your AVI video file. You can also drag and drop the AVI file into the handbrake.
- Select the desired preset for your output resolution under Web or General options.
- Click on Summary and choose MP4 from the Format dropdown menu.
- Go to the Video tab and select H.264(x264) as the codec.
- Choose the Constant Framerate option.
- Set the output folder location and rename the file with the .mp4 extension.
- Click on Start Encode to begin the conversion process.
- Once the encoding is complete, the video will be saved in the selected folder. Now the file is ready to be imported into DaVinci Resolve.
Note: You don’t necessarily need to convert the files to MP4; you can choose any other Resolve supported format as well.
There will now be no problems importing the file.
How to Import mkv Files In DaVinci Resolve?
The older versions of DaVinci Resolve do not support mkv files, and importing them directly into the video editing software was impossible.
- Try the simple import method first. Drag and drop the mkv file into the media pool. If it is imported, then you are good to go.
If it is not importing, then you need to convert the mkv file into an mp4 file or any other editor-friendly format.
Sometimes you will face an issue of no audio with mkv files. You can see the video, but there will be no audio. This is because Resolve is unable to recognize the format. You need to convert your Mkv file into a different format to fix that.
Convert mkv to mp4
You can use any video encoder, but we will use hand brake, a free video encoding software. Follow the steps below to convert an MKV video file to MP4 using Handbrake:
- Go to the Handbrake website and download the software for your operating system (Windows or Mac).
- Install the Handbrake software and open it.
- Select “File,” then “Open Source,” and choose your MKV video file.
- Choose the suitable preset for resolution (usually found under “Web” or “General” settings).
- Click “Summary” and select “MP4” from the format options.
- Go to the “Video” tab, choose “H.264(x264)” as the video codec, and select “Constant Framerate.”
- Set the output folder location, and click Start Encode.
- Wait for the conversion process to complete. Find the converted video file in the selected folder and import it into DaVinci Resolve.
- You’re done!
Now import the file as you would import any other mp4 file.
Export Different File Formats in DaVinci Resolve
To export different audio and video formats, you need to go to deliver page of DaVinci Resolve.
Export Video Formats In DaVinci Resolve
To export different file formats, go to the deliver tab and choose the file and location.
Chekc out our detailed guide on the export page and best export settings in DaVinci Resolve.
Export Mp4 file format
To export the video files in mp4 format:
- Choose Custom Export from the Presets tab.
- Set the format to quick time.
- Codec to H.264.
- Next, set your resolution or frame rate according to your video.
- Click on add to render queue button.
- Go to render queue and click on render all.
And that’s how you export in mp4 format.
Export AVI file format
Everything is the same as we have described in the mp4 file format section.
- You just need to change the format to AVI instead of quick time.
- Dial in the rest of the settings according to your video and export.
You can export all the other formats using the same techniques.
Export Audio Formats in DaVinci Resolve
To export different audio formats, you need to select audio only from the presets tab on the deliver page.
After selecting the audio only preset:
- Go to the audio tab and choose the format and codec.
- For mp3, choose mp3; for any other format, choose the respective codec.
You can experiment with other audio formats as well.
Conclusion
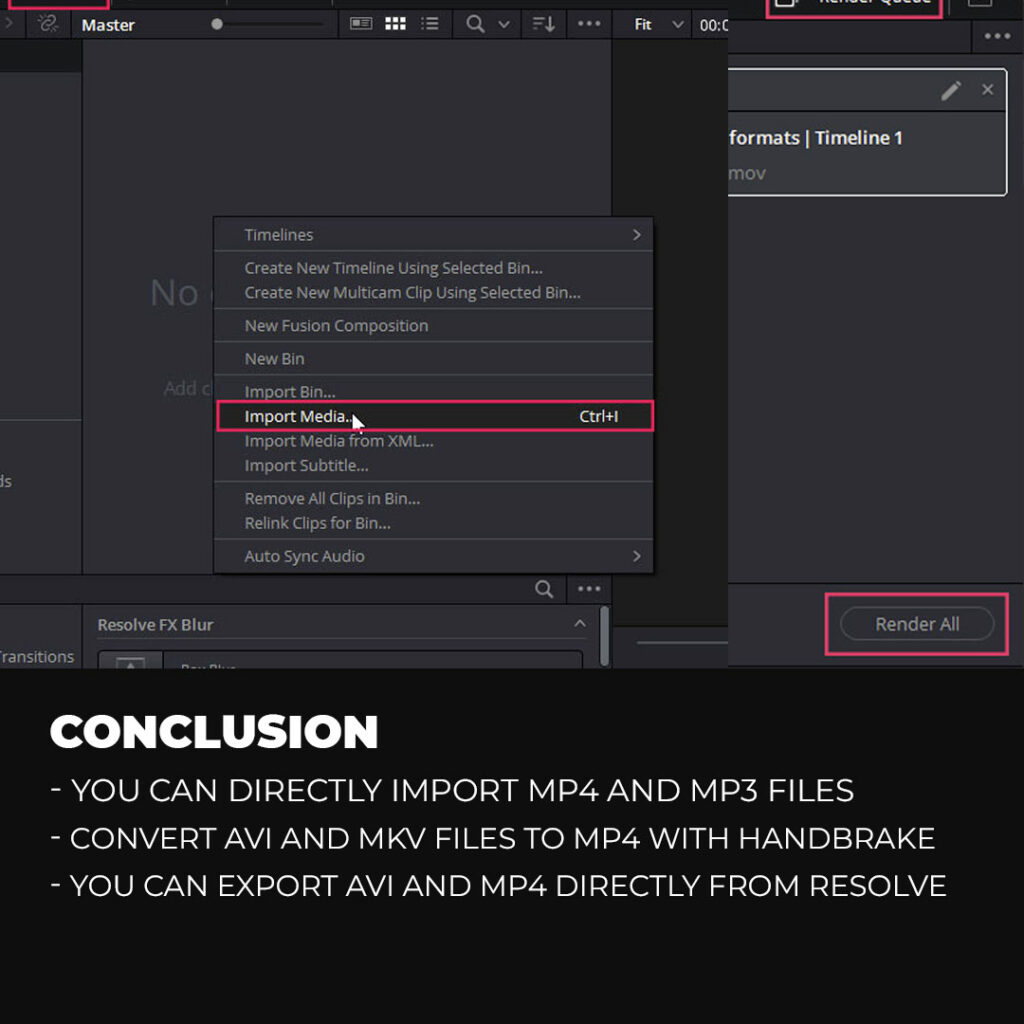
There are alot of file formats that DaVinci Resolve supports, and you can import them directly. But sometimes, DaVinci Resolve will cause issues while importing and exporting media files.
To import the supported files is very easy; go to media pool and press Ctrl + I or Cmd + I to import media; this method only works with the supported file formats.
If you cannot import certain file formats, it means that DaVinci Resolve cannot decode the Codecs used in the video.
To import files like AVI and mkv, you need to encode your videos into different formats which DaVinci Resolve can read. We have used the handbrake to change the format of the video.
Encode unsupported file formats into DaVinci Resolve supported format using handbrake and import the files.
Thanks for reading & feel free to check out more of our articles!
Author Rating
Overall Rating
Summary
In DaVinci Resolve 18, importing and exporting different file formats is a straightforward process that becomes easier with practice. While it may require some initial learning, it offers functional and scalable capabilities, allowing seamless integration of various file formats into your editing workflow for versatile video production projects.

