How to Draw a Car | A Step-by-Step Tutorial
The first automobile, commonly known as a car, was invented in 1885 by German engineer Karl Benz. He created the Benz Patent-Motorwagen, which is considered to be the world’s first true automobile.
The invention was driven by a growing need for faster and more efficient forms of transportation, as many people were making use of horse-drawn carriages, chariots or trailors as means of transportation before then.
The automobile revolutionized mobility and paved the way for the modern transportation systems we have today, and in this tutorial, you will learn how to draw one of those systems – a dazzling car – in 9 easy steps.
| Steps | Complexity Level |
| The Wheels | 2 |
| The Car’s Body | 2 |
| The Cabin | 2 |
| The Bumpers | 3 |
| The Fenders & Lights | 2 |
| The Windows | 3 |
| The Handles & Doors | 3 |
What You Will Need
- A sheet of paper or a sketchbook
- Pencils (2b, 3b or 5b)
- An eraser
- A ruler (optional)
- Coloring supplies
- 25-30 minutes
How to Draw A Car
While drawing a car may seem complicated at first, breaking it down into simple steps can make it easy and manageable. By following this guide and practicing regularly, you can easily pull off this design.
Feel free to check out the outline provided below for some insight on all the steps, grab all of your drawing tools and make sure you have the allocated time available before you begin.

Step 1: Draw the Wheels
We’ll start off this drawing tutorial by sketching the wheels. Before you begin sketching, flip your paper onto a landscape orientation so you have more room to draw other elements later on.
On the middle section of your drawing paper, start by drawing a circle. The circle should not be too big as this is what will serve as the rim of our first wheel. To add the tire, simply draw another circle around the first one. This represents the first wheel.
For the second wheel, leave a small horizontal space from the first wheel and repeat the process.. Make sure the elevation and height of the second wheel is the same as that of the first wheel.
The key here is to keep the two wheels the same size and try and draw as perfect a circle as possible.
- Draw a small circle on the middle of your drawing paper
- Add a larger circle around the first circle drawn to represent the wheel
- Draw the second wheel using the same process
- Make sure both wheels are the same size

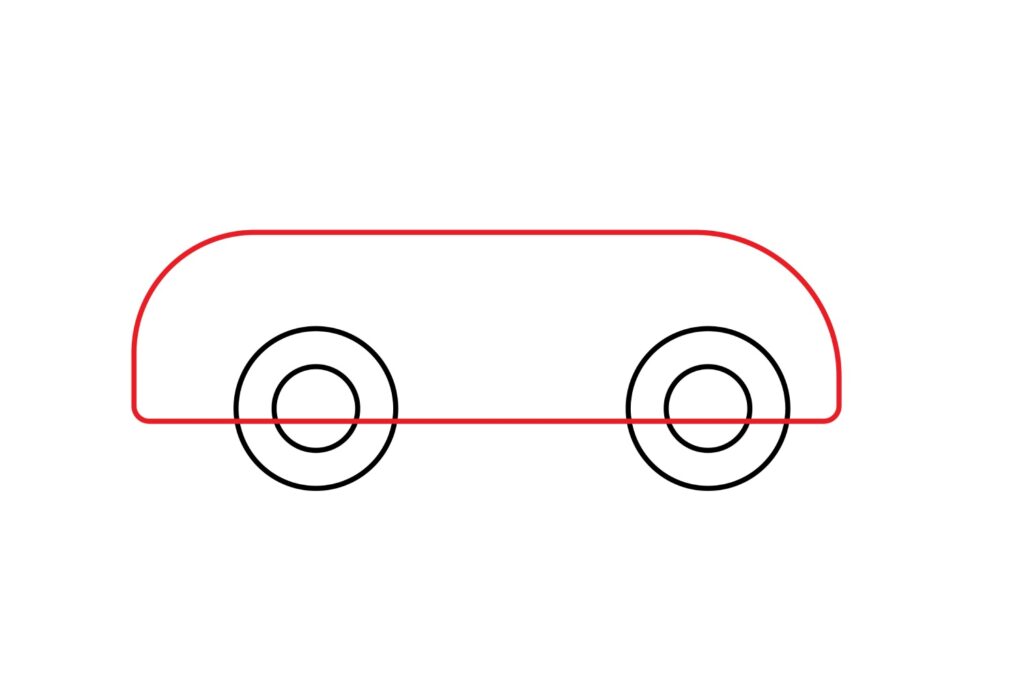
Step 2: Draw the Body
Now that the wheels are done, we can go ahead and add the body of our car. For this step, we’ll use the wheels as a guide for the size of the body.
First, draw a horizontal rectangle. The base of the rectangle should cut through the middle of the wheels and extend slightly to the left of the front wheel and to the right of the rear wheel.
The height should not be too high because we are drawing the bottom part of the car’s body.
With the rectangle ready, we need to make some changes so that it looks like a car. For that, we will make the top left and right corners rounded. Add a curved line inside the top corners, then use your eraser to remove the sharp corners.
Finally, erase the lines that cut through the wheels.
- Start by drawing a large horizontal rectangle above the wheels
- Round the upper corners of the rectangle so that they’re smoothly curved
- Erase the bottom lines that cut through the wheels
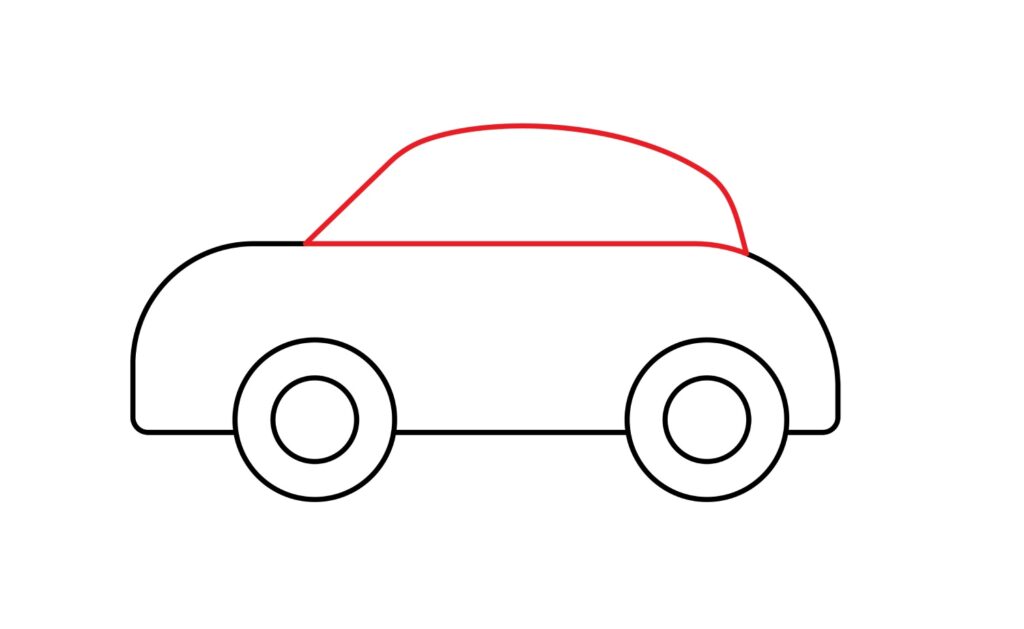
Step 3: Draw the Cabin
The next thing we are going to add to our car is the closed cabin. For this, we will be adding it towards the right upper part of the body.
You need to draw a curved line starting a short distance from the top left corner of the body. The curved line should go up slightly and then curve to connect with the top right corner of the body.
Alternatively, you can draw a rectangle on top of the body of the car. The rectangle should start a short distance from the top left corner of the car’s body.
Next, add a curved line starting from the bottom left corner of the rectangle and extend it upwards until it connects with the top of the rectangle.
Ensure that the left corner is curved in a diagonal fashion, while the right corner is smoothly rounded.
- Draw a small rectangle above the body of the car
- Make sure the left corner of the rectangle is curved in a diagonal fashion
- Add a smoothly rounded curve on the right side of the rectangle
Step 4: Add the Bumpers
If you have been keen while observing cars, you may have noticed that the bottom front and rear part usually has a protrusion. This is known as the bumper. They absorb impact in the event of a slow-speed collision. It also protects the headlights from being damaged.
To add the bumpers to our car, we will draw a small oval shape on the bottom right and bottom left part of the car’s body. This will serve as the front and rear bumpers. Erase the lines that cut through the bumper.
Additionally, add a long, thin rectangle along the bottom line of the car’s body. Once finished, erase the lines that cut through the wheels.
- Add a small oval shape on the bottom right and left part of the car’s body
- Erase the corner edges of the body that cut through the bumpers
- Add a long rectangle along the bottom line of the car’s body
- Erase the line of the rectangle that cut through the car’s wheels

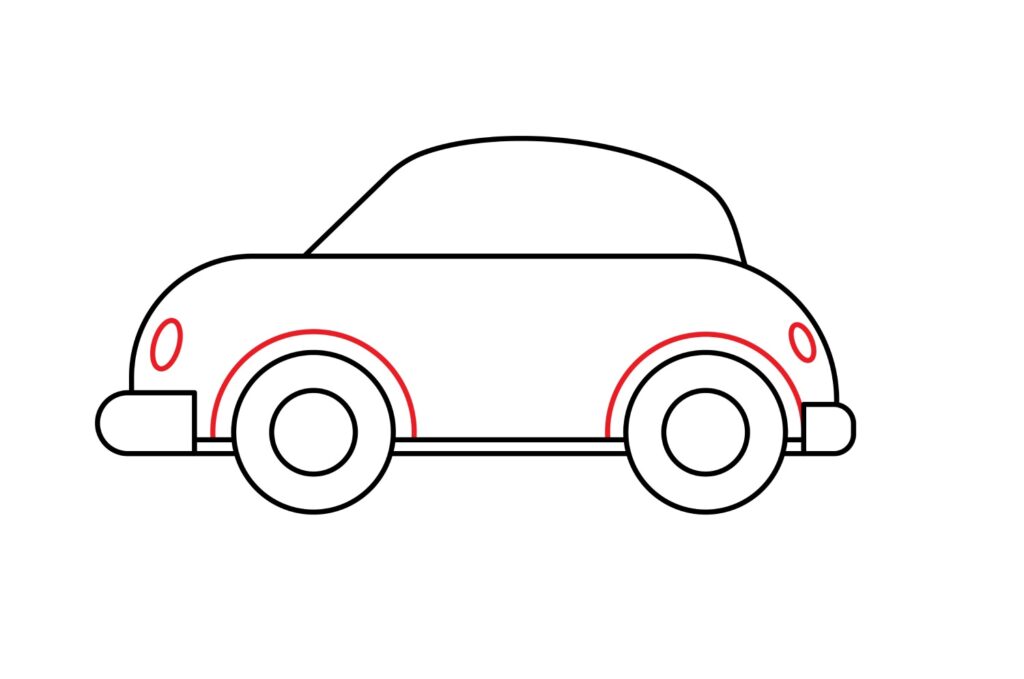
Step 5: Draw the Fenders and Lights
Fenders gained popularity in the 1930s. They’re there to protect the braking systems and tires from mud. The feature also keeps dirt and mud from being thrown into the air when the tires are rolling.
In order to complete this step, start by drawing a curved line above each wheel. Ensure that there’s a small space in between the wheel and the line.
Next, add the lights First, we need to draw the headlights which help the driver to drive at night. For that, we will add a small oval shape on the left part of the car’s body, right above the front bumper.
A car also needs rear lights to help other motorists see it at night and know when the driver hits the brakes. For that, we will add another small oval shape on the right side of the body, above the rear bumper.
- Draw a curved line above each wheel to represent the fenders
- Draw a small oval shape right above the front bumper (left)
- Draw another oval shape above the back bumper (right)
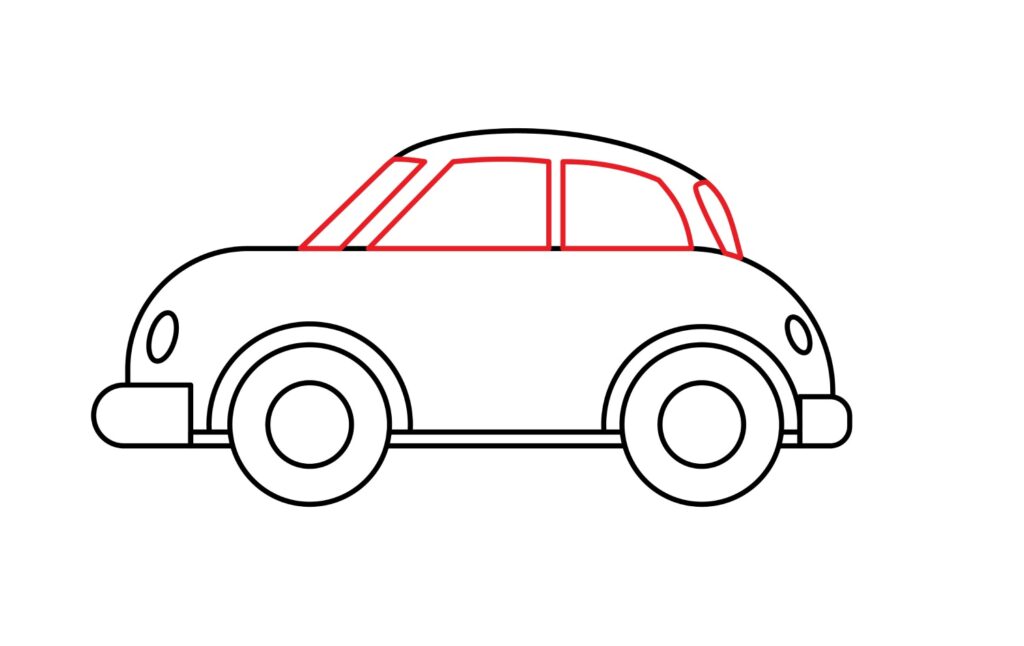
Step 6: Draw the Windows
Windows help the driver and passengers see outside. The front windscreen is the window the driver uses to see the road ahead, while the side windows and rear window allows passengers and the driver to have a clear view of the surroundings of the vehicle.
For the front windscreen, draw a diagonal rectangle that’s parallel to the front end of the car on the cabin. Do the same for the rear windscreen.
The side windows will sit between the front and rear windscreen, therefore, use the available space to draw two windows. Make sure the lines don’t overlap. You should have something that looks like this.
- Draw a thin diagonal rectangle on the left side of the cabin
- Draw a similar shape on the right side of the car’s cabin
- Draw two shapes resembling squares between the front and rear windows
Step 7: Draw the Handles and Doors
To complete the sketching part of our tutorial, it’s now time to add the handles and the doors.
For the doors, start by drawing a horizontal line across the base of the car’s body. The line should be between the two fenders we drew earlier.
Next, draw a vertical line from the middle of the side windows and connect it to the horizontal line we added between the fenders.
We then need to add two vertical lines. The first one should start from the bottom left corner of the front side windows and stop slightly above the front fender.
The second should start from the bottom right corner of the rear side window and stop slightly above the fender. Now use curved lines to connect the two vertical lines to the bottom line we added between the fenders.
Draw a thin oval within each shape – along the upper right side – to represent the door’s handles.
- Ensure that both doors are in alignment with the side windows
- Curve the lower half of each door to match the curves of the fenders
- Add thin ovals along the upper right corners of each door for the handles

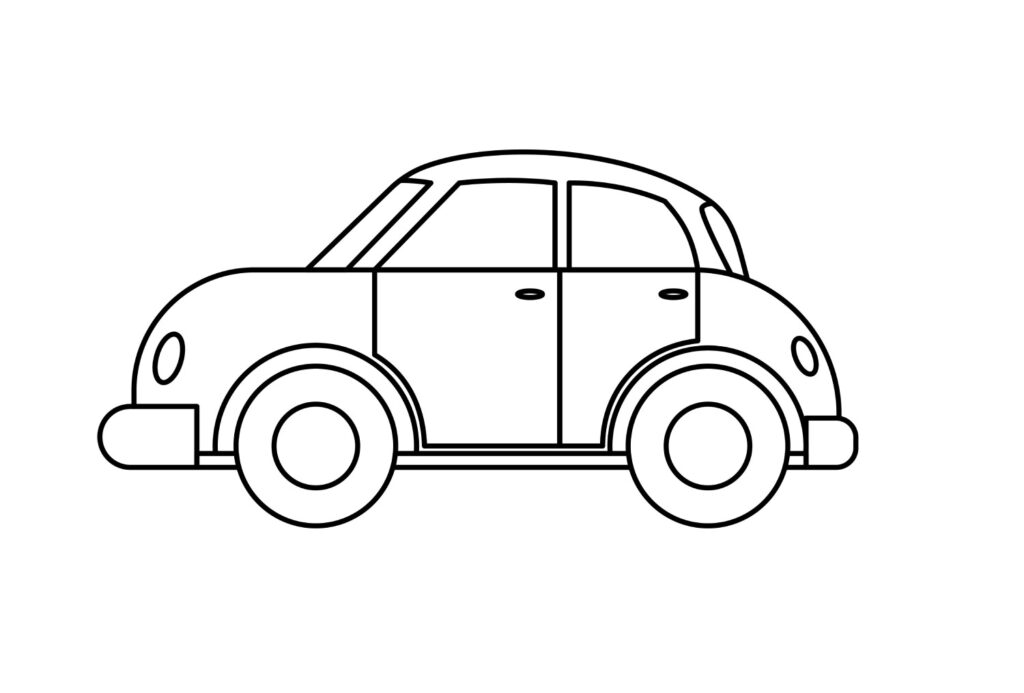
Congratulations! Your car Drawing is complete
The fundamental sketching process is now complete. Take some time to assess the work you have done thus far. If there’s anything you would like to fix, do so now with the use of your eraser and some patience. You’re welcome to use the image below for analysis.
Taking your car Drawing to the Next Level
It is okay to leave the drawing as it is, though if you want to attract attention with your art, we advise that you follow the remaining steps.
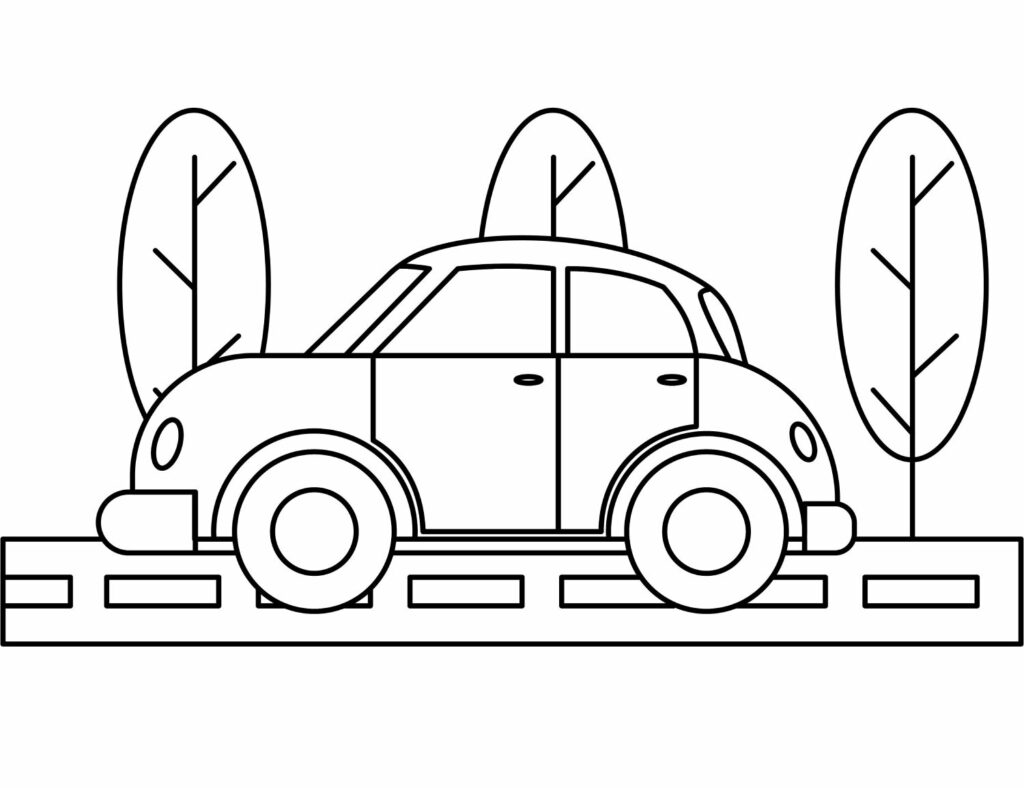
Step 8: Adding a Background
The first thing you should consider doing is adding a road beneath the vehicle. You could also add a few trees in the background.
Other details you can add include some clouds in the far background, a name on the side of the vehicle, and electric poles. You can also draw some hills in the distance. Remember, this step is all about exploring your imagination, so feel free to add whatever imagery you want to the surroundings of your sketch.
Be sure to check out different vehicle tutorials and assess their backgrounds. This may ignite some ideas on what you could draw. A few great examples include, how to draw a taxi, a camper, a truck, an F1 car, or even a police car. Each of these tutorials have varying backgrounds to choose from!
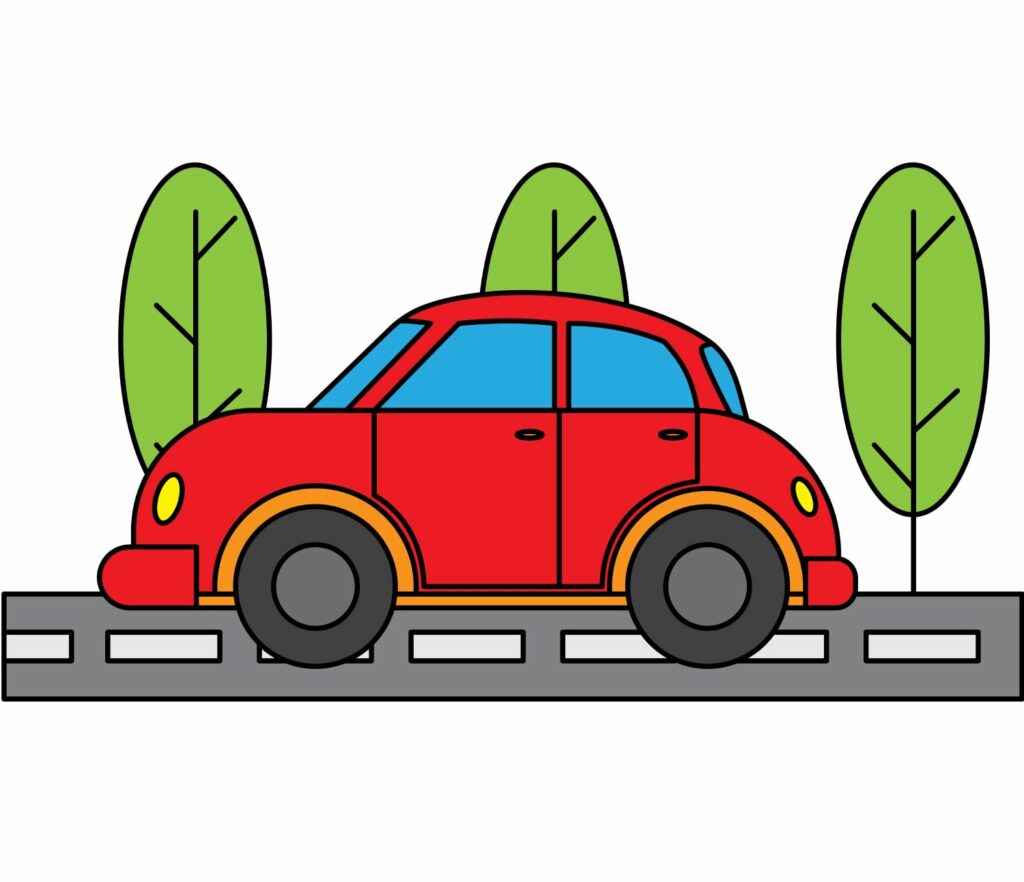
step 9: Adding Color
Make your drawing stand out among the rest by adding vibrant colors to both your car sketch and your chosen background.
To suit the theme we have used for our background, we’ve gone ahead and colored the surrounding trees with green, and the road beneath the car with gray. If you’ve chosen a similar theme, feel free to color in your drawing the same way.
If you have your own colors in mind, you’re welcome to use them! Just remember to use different colors on each step you drew.
E.g., black for the wheels, orange for the fenders, red for the bumpers, body and cabin of the car, a bright yellow for the lights and a nice blue for the windows.
These different colors highlight each part and compliments each other quite well, as you can see below.
Bonus Tips
Study car anatomy to understand the basic shapes and proportions of different car parts such as the body, wheels, windows, and headlights.
Look at real cars or high-quality photos to study details like reflections, shadows, and textures.
Experiment with different angles and perspectives to create a sense of depth in your car drawings.
Try using markers, pens or digital tools to find what works best for you.
Pay attention to small details like door handles, logos, grilles and other distinctive features that make each car unique.
Step back from your drawing periodically to freshen your eyes and assess your progress objectively.
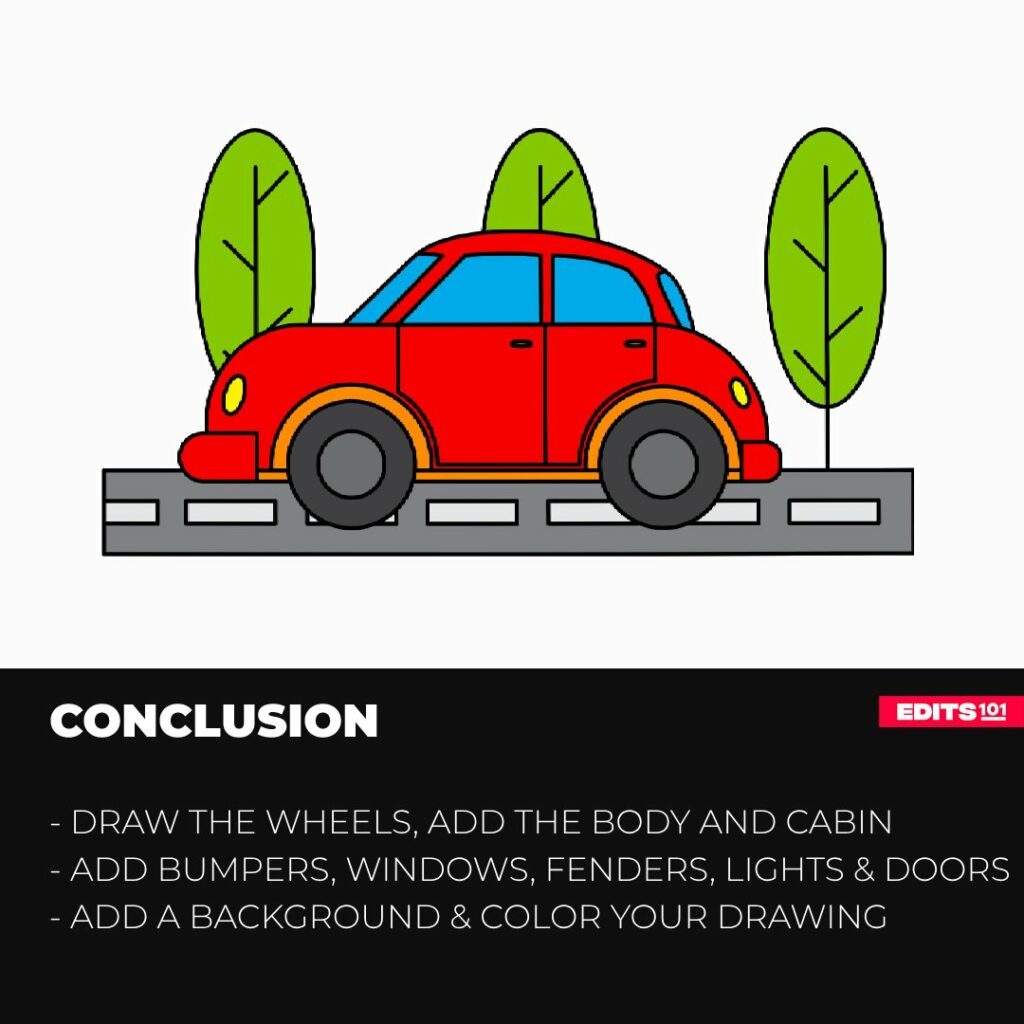
Conclusion
Job well done for successfully completing your drawing of a sleek car. You’ve completed quite a bit of work today by drawing the wheels, body, cabin, bumpers, lights, fenders, windows and doors.
You even added a background and colored it to make your drawing unique. For that, give yourself a pat on the back!
The best part of this tutorial is that you can also use these steps – with a few modifications – to draw any car that you want. These steps will guide you while drawing on your favorite sketching software, as well.
The important rule to remember is that it takes practice to become a good artist. Never allow frustrations to get the better part of you, and always have fun. See you next time in another tutorial!
Thanks for reading & feel free to check out more of our articles!
Author Rating
Overall Rating
Summary
This tutorial will teach you how to draw a car using 9 easy-to-follow steps. You will also learn how to enhance the overall quality of your drawing and make it more visually appealing.