How to Draw an Electric Car | 9 Easy Steps
Are you guys for another ride? Today, we will draw an electric car.
Thomas Edison began developing an electric car battery in 1899 after the first electric vehicle was built in 1832. New York City cabs were predominantly electric in the early 1900s. If you switch to an electric car, your carbon footprint can be cut in half. Previously, electric cars were incredibly well-liked. Porsche Made the First Gas-Electric Hybrid in the World. In Space, EVs Are Regaining Popularity. Prices for EV batteries are going down.
Now gear up! We are going to draw an incredible piece of art.
What you will need
- A pencil
- An eraser
- A sheet of paper
- Coloring kit
- Ruler
- 30 minutes
how to Draw an electric car
We will use the simple directions that are provided in this guide to sketch an electric car. Our drawing will be ready after following 7 to 8 steps in this article. We will get going without further ado.
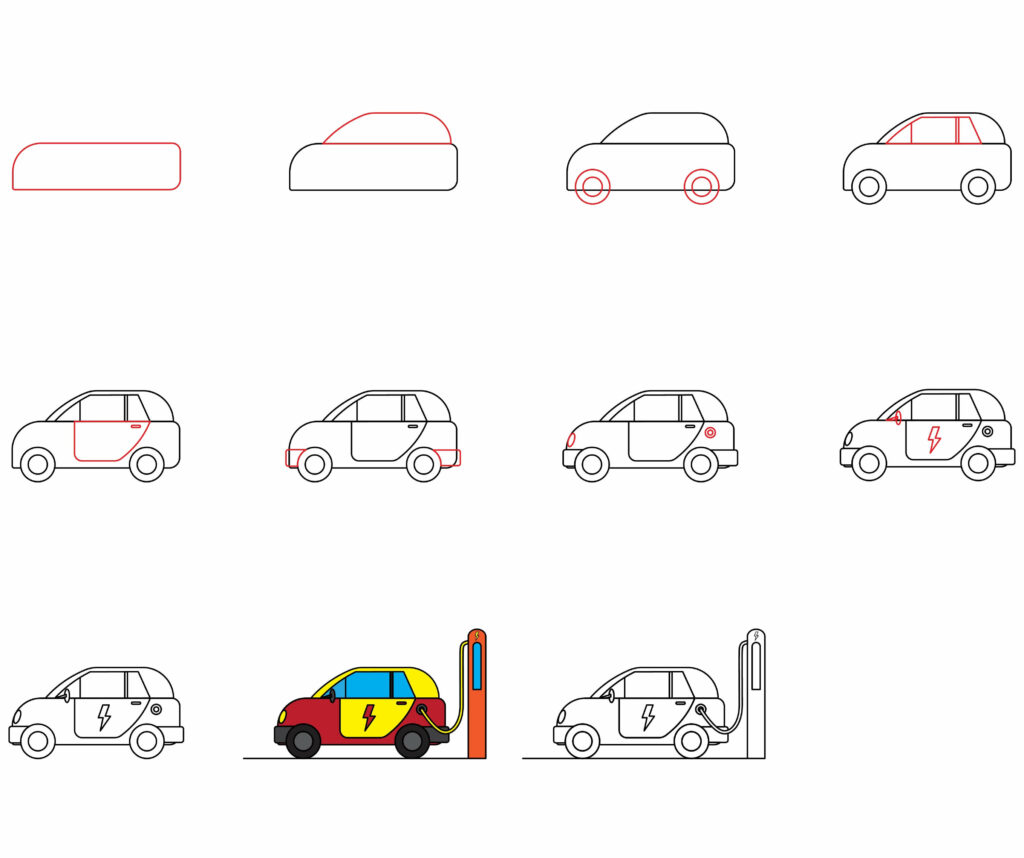
Step 1: Draw the car’s main body
The car’s main body will be our electric car’s base. The major part of an electric vehicle is the electric traction motor. Electrical energy is transformed into kinetic energy by the motor. The wheels are turned by this energy. The electric motor is the key feature that sets an electric car apart from a normal vehicle.
To draw the main body, we will make a rectangle having three sides curved and one side with a sharp corner. One of the three curved sides will be more rounded than the other two. This rectangle will be lying horizontally on the page.

To draw a rectangle, you will need to make two parallel vertical lines and two horizontal lines lying perpendicular to each other. They will joined by curved lines except for the lower left corner, as shown in the image.
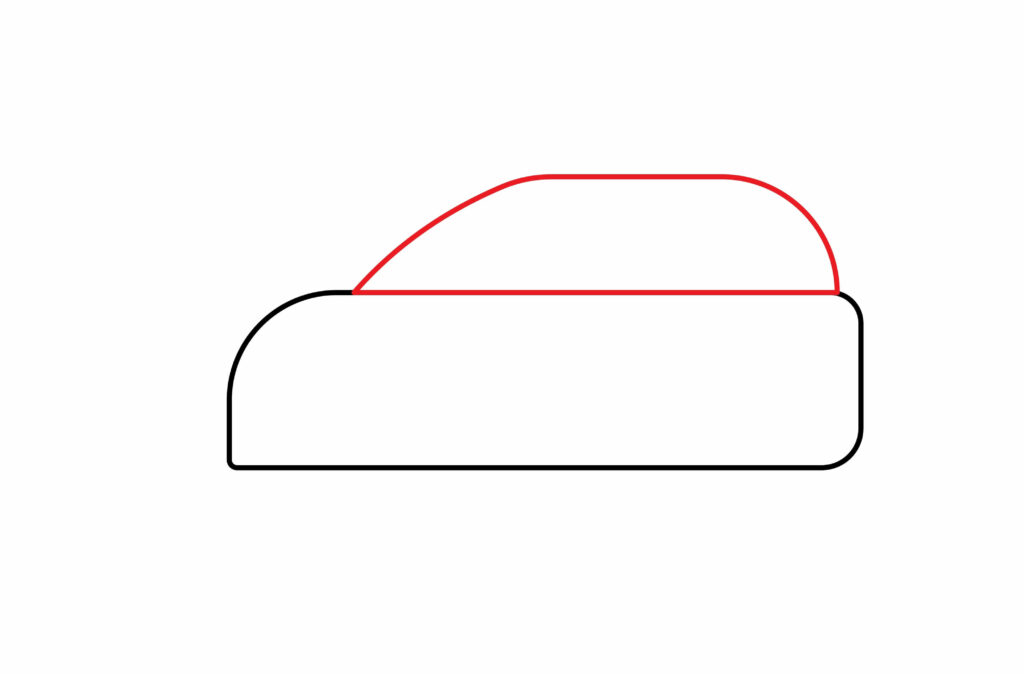
Step 2: Draw the cabin of the electric car
Now, we will draw the cabin of the car that consists of all the main functional parts of the car. Here, the windows of the car are also present.
We will draw a few lines over the car’s main body to make the car’s cabin. The shape will be like a half oval or something like the half part of the eggshell.
Step 3: Draw the wheels
The electric also consists of wheels so we will draw the wheels of our electric car in this step. Electric vehicles (EVs) require special, energy-efficient wheels. EV-specific wheels utilize less energy and have lower rolling resistance, increasing the range of the vehicle.
Draw two concentric circles on the lower part of the main body’s sides. For the best-looking circles, mark a dot on the page as the center of the circle. From this dot, mark four more dots (top, bottom, right, and left) around it at the same distance. Now, gently connect all these dots with curved lines. That’s how we will make an amazing circle.
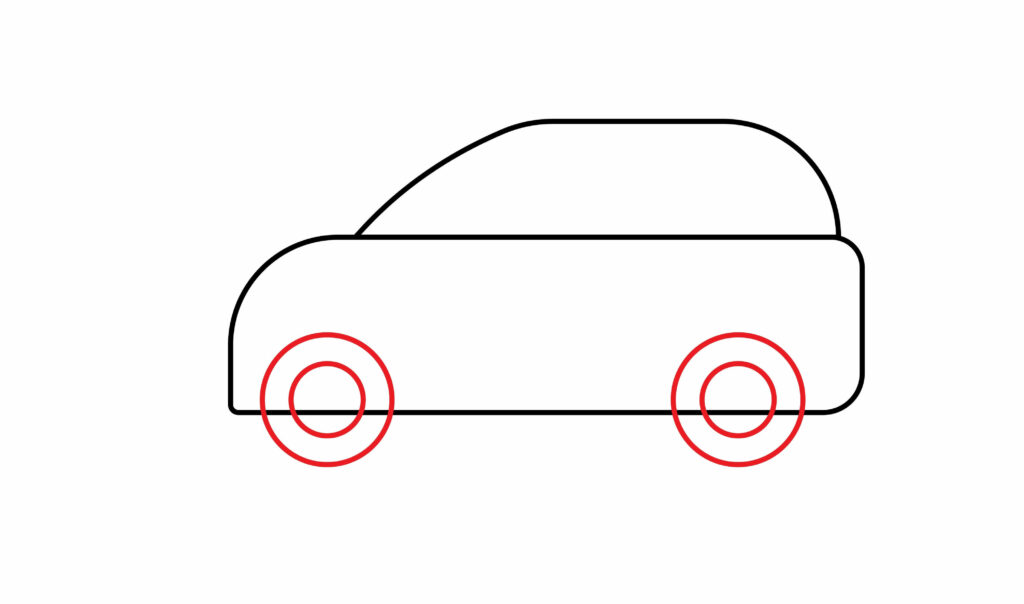
We can also use any round lid to make the circle. We’ll draw these circles at the bottom right and left. Inside the left circle, draw another circle. Repeat the same pattern for the right circle. After making the wheels, we will erase the lines of the main body that overlaps the wheels.
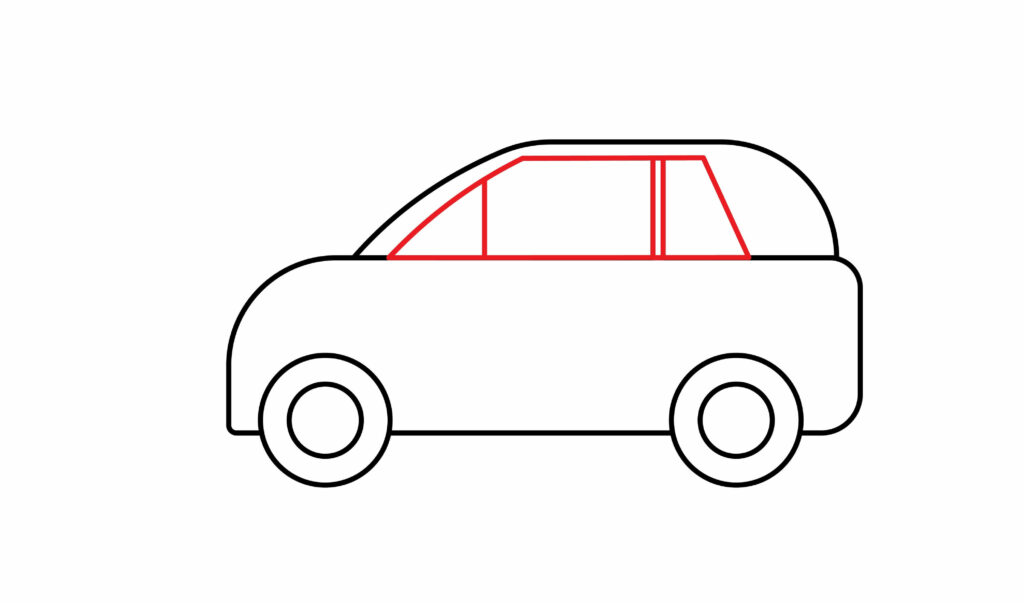
Step 4: Draw the windows
An electric 12-volt battery with switches and wires powers electronic automobile windows. There is a battery, an output source, and wires to link them, just as in any circuit. This is a simplified version of something that is far more complicated than cars. But to draw the windows will be a piece of cake.
To make the windows, draw a trapezoid shape inside the cabin of the car. If trapezium is a new shape for you, do not worry. We will guide you step by step on how to draw a trapezoid. Draw two parallel lines horizontally. The above line will be smaller than the line drawn below.
Now, simply connect both lines with angular lines inclined towards each other. Now that you are done with the trapezoid extend some lines vertically upward from the base of the trapezoid, as shown in the image.
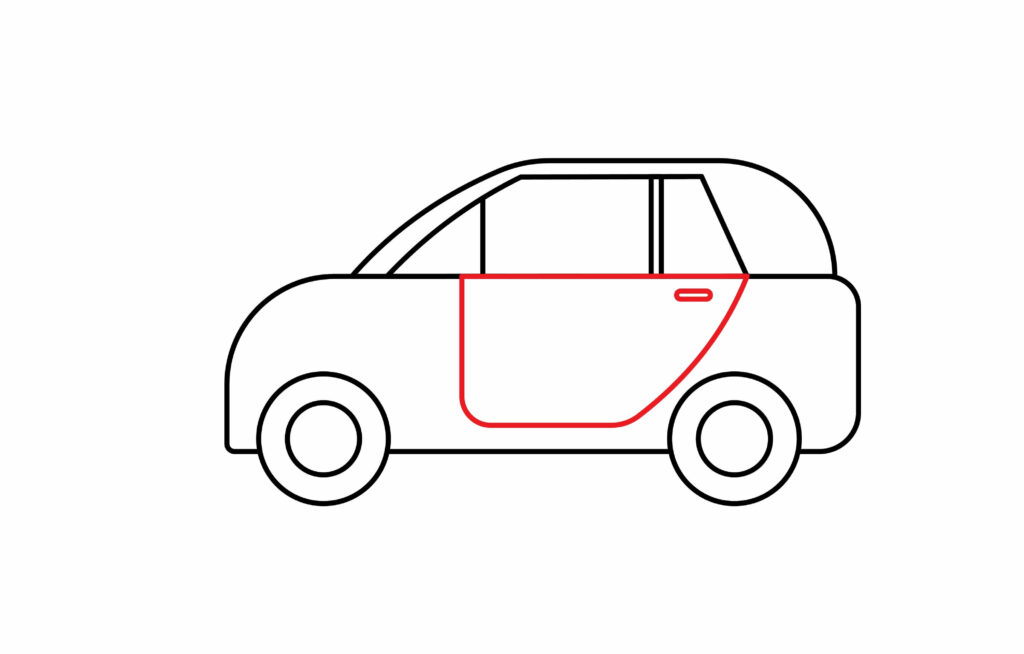
Step 5: Draw the door and door lock
Now we will move on to make our car’s door and door lock. A reversible switch or an electronic sensor with an internal magnet are both components of an electric car door lock.
Draw an inverted trapezoid for the door in the car’s main body. A guideline for drawing a trapezoid is given in the previous step. For the door lock, simply draw a small rectangle on the rear side of the main body.
Step 6: Draw the front and back bumpers of the car
Car bumpers (bumper covers) include protruding plastic or metal, enclosing energy-absorbing components. They are made to minimize damage from low-speed collisions and absorb impact to automobiles’ front and rear.
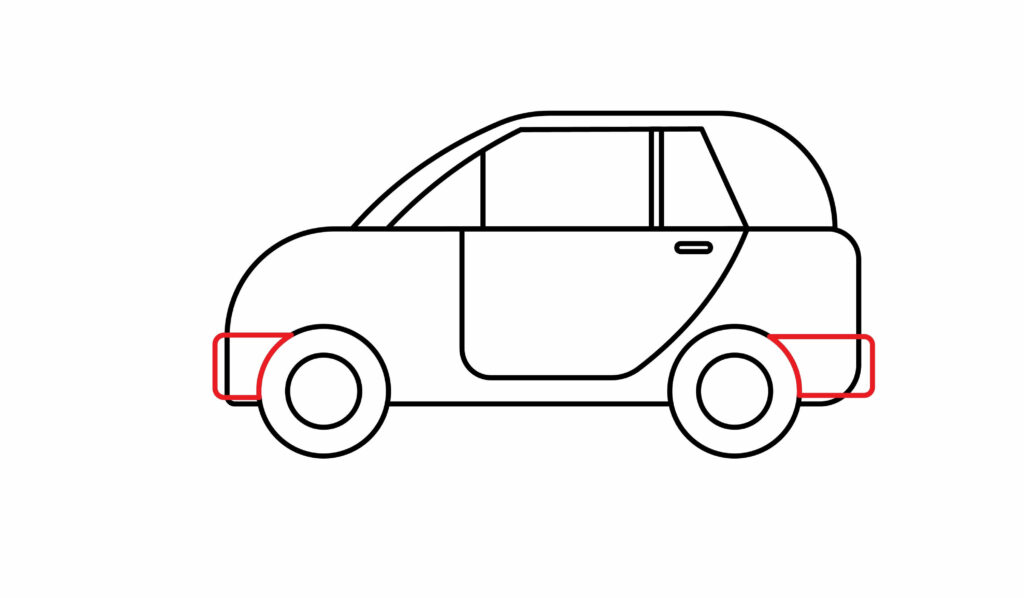
To make the bumpers, draw a rectangular shape near each wheel of the car. These rectangles will be drawn on the front and back of the car’s main body.
Step 7: Draw the headlight and charging point
Electric cars have headlights so that they can light the way during the night. And instead of a fuel point, this car has a charging point as it is an electric car. This is the point where you connect the charger and recharge your car.
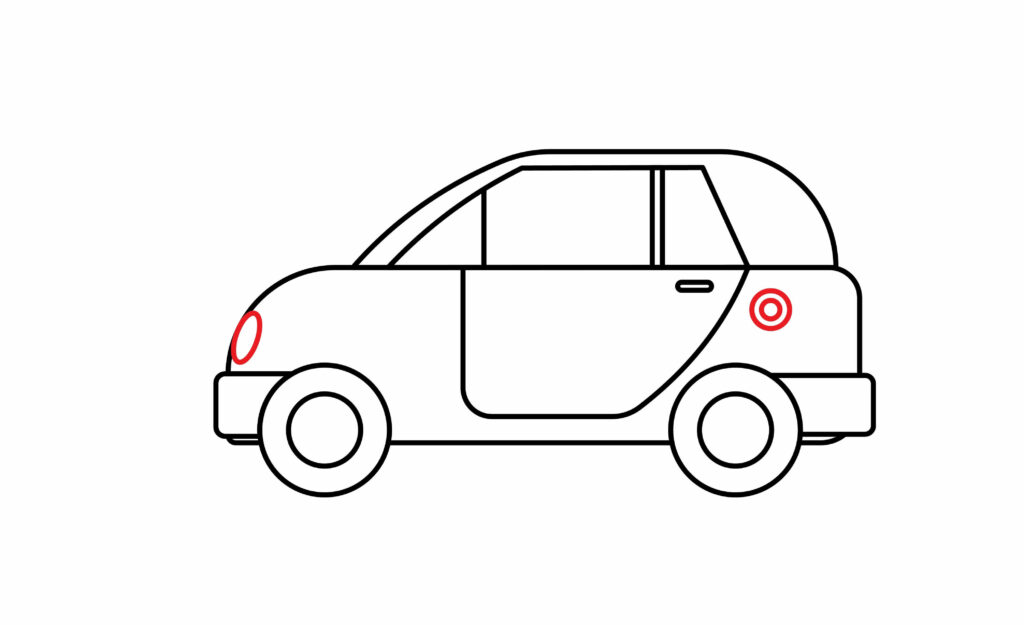
Make a small oval in front of the car’s main body to draw the headlight. For the charging point, draw two small concentric circles.
Step 8: Draw the looking mirror and electric sign
The looking mirror is an important part of a car. You can rotate or depress a button inside the car to change the glass on your wing mirrors if your car has an electric wing mirror. Electric wing mirrors frequently have heated mirror glass as well!
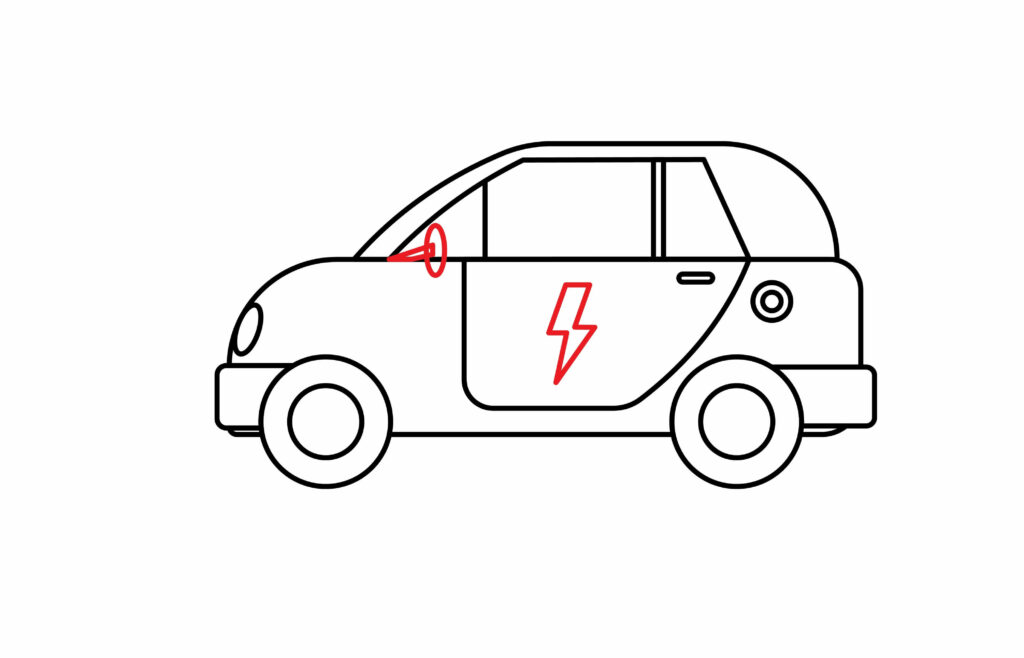
To make the looking mirror, draw a vertical oval in the triangular window present in the cabin of the car. Make sure to connect that oval to the corner with lies. For the electric sign, draw the symbol in the center of the car’s main body.
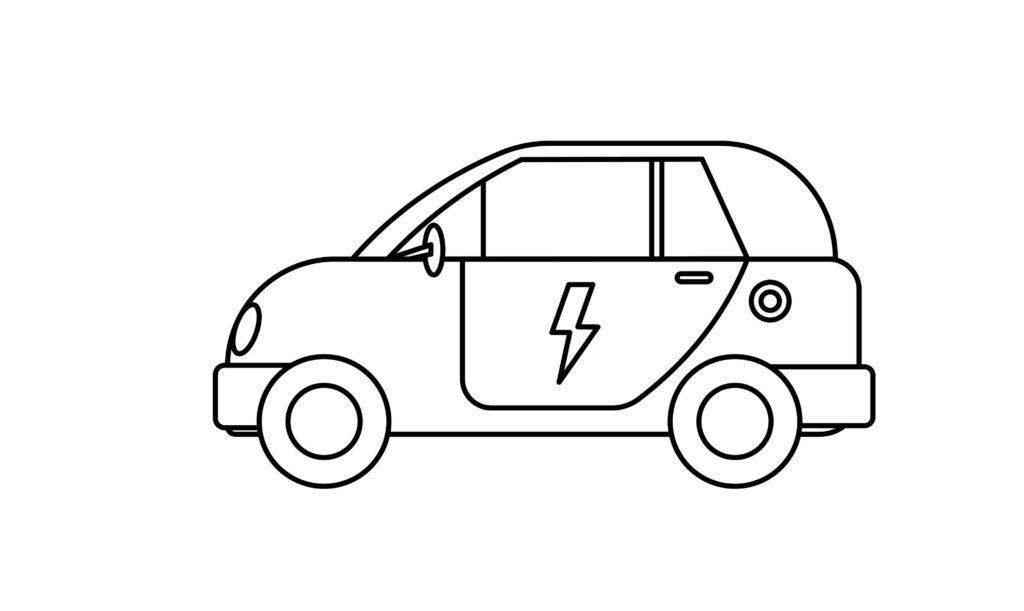
Step 9: The electric car is ready
Woohoo! Our electric car is ready to hit the road. We are sure that you followed every step and did an amazing job. Did you enjoy the procedure? But wait! We are not finished yet. Yes, exactly. We will play with colors to make this drawing magical.
Taking your electric car drawing to the next level
The term “art” refers to a wide range of human endeavors and the resulting works that reflect technical mastery, aesthetic beauty, emotional heft, or mental concepts. It’s time to unleash our imagination and create a truly remarkable drawing.
Art is enjoyable, as we all know. We must experiment with several techniques to make our drawing seem its best. Don’t stop at the fundamental drawing; give it a perspective. But how do we go about doing this? Do not be concerned; we will help you. The actions listed below can help your drawing stand out.
Adding background to your drawing
Our car looks plain and boring. We have no background to our drawing that gives a story. To have a complete story, our drawing must have a background.
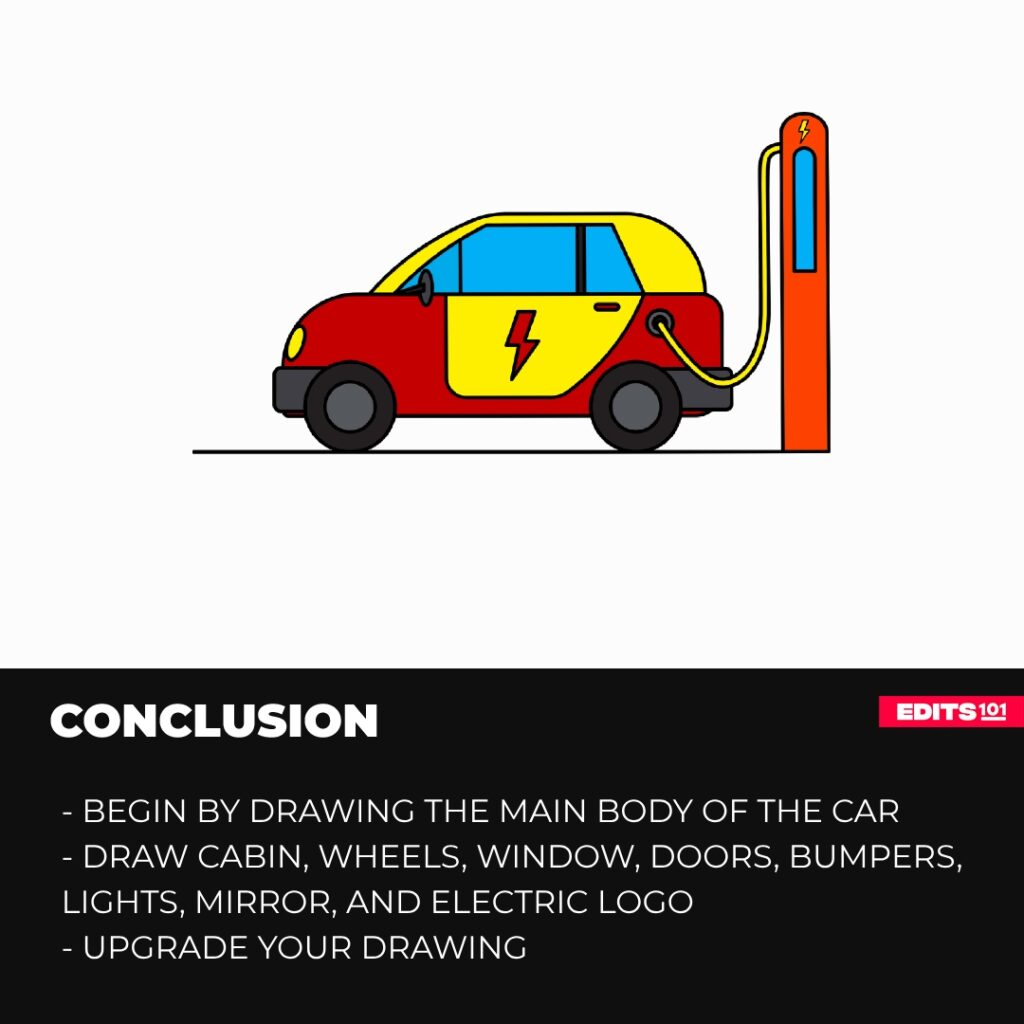
Most likely, our electric car might be going somewhere. It might be parked or running on the road. As you can see in the image, our car is getting recharged at a charging station. You can draw a charging station. We can never go wrong with a bright blue sky in the background.
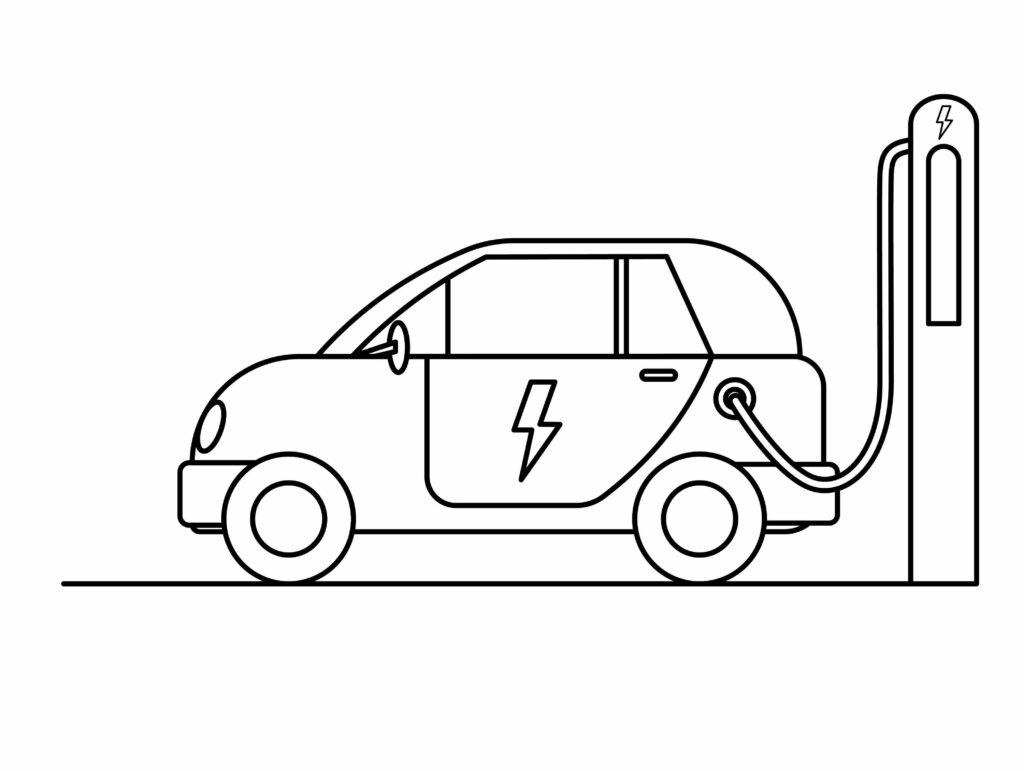
This is just an idea; you can add any kind of background to your drawing that suits you or the story that you have in your mind. Just make sure that no line from the background overlaps our electric car.
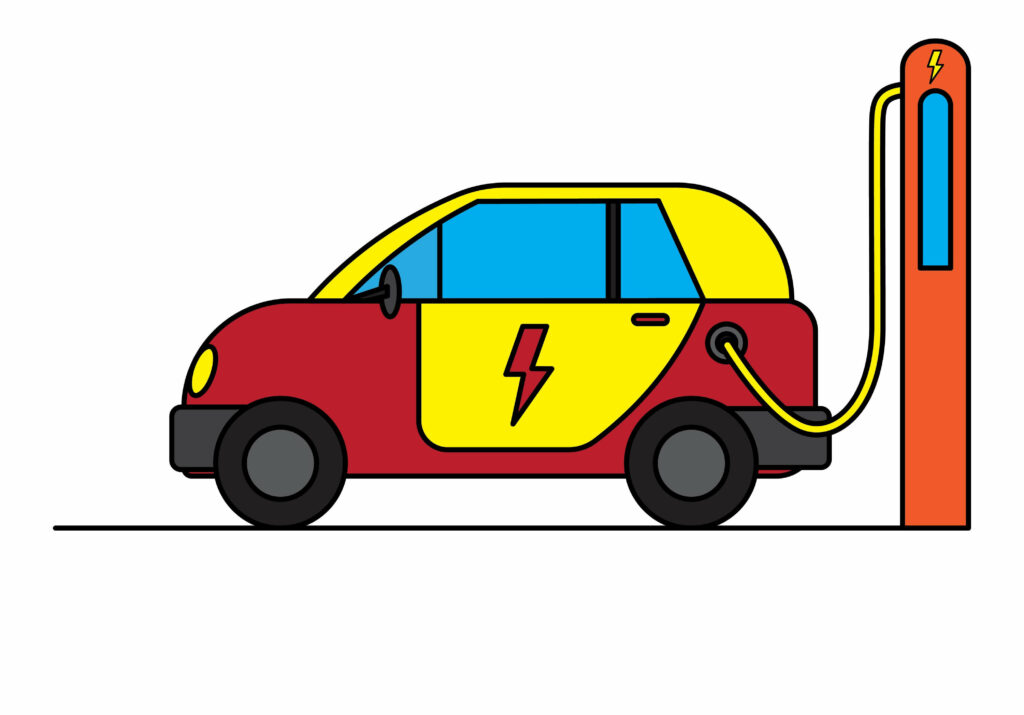
Adding colors to your drawing
Now begins the fun part. Grab a brush and work some magic on your creation. The color spells will impart charisma and attractiveness to your drawing. The image will appear to be alive. The use of color in creativity is the focus of this section.
The background and they can both be colored whichever you choose. The secret to an amazing drawing is to color it nice and tidy. Try different colors in the different parts of the electric station. In the end, you’ll love your art.
P.S Bonus Tips
By using your imagination, you can customize your drawing in any possible way. We will give you some ideas that can help you customize your drawing.
Imagine having a person standing near the car, waiting for it to get recharged. Or maybe the electric car running on the road. You can draw some bushes on the roadside. You also add some street signs or traffic signals on the road.
You can do some designing on the car of your own choice.
Our drawing looks wonderful! Let me tell you, these are just a few ideas. You must experiment with many ideas and see what goes best for your drawing.
Conclusion
In a short time, you were able to make an amazing drawing by following the simple steps.
Drawing isn’t difficult if you follow the steps. For making the electric car, we drew the main body and then drew the cabin of the car. Later, we made the windows, wheels, headlight, bumper charging point, and looking mirror.
Take it slow and carefully follow each step as you draw. Keep in mind that perfection is not achieved on the first try. Continually improve your skills to become a perfectionist.
Thanks for reading & feel free to check out more of our articles!
Author Rating
Overall Rating
Summary
This guide explains how to draw an electric car in a simple and effective way. You will learn a few interesting facts about this vehicle by reading this guide.