How to Draw a Police Motorcycle | Step-by-Step Guide
Motorcycles are used for both short and long trips because they are fast, convenient, and versatile. If you would like to learn how to draw a beautiful police motorcycle, today is your lucky day. A police motorcycle is a two-wheeled vehicle that is propelled by an engine.
In this lesson, you will learn how to draw a police motorcycle and also understand the different parts that a motorcycle has. These simple instructions will help improve your artistic abilities and all you need to do is follow the steps carefully.
What You Will Need
- A pencil
- A drawing paper
- An eraser
- Coloring supplies
- 30 minutes
Drawing the Basic Structure of a Police Motorcycle
To make it easy for you to draw a police motorcycle, we will discuss easy-to-follow instructions together with matching illustrations. Here are the steps we will follow.
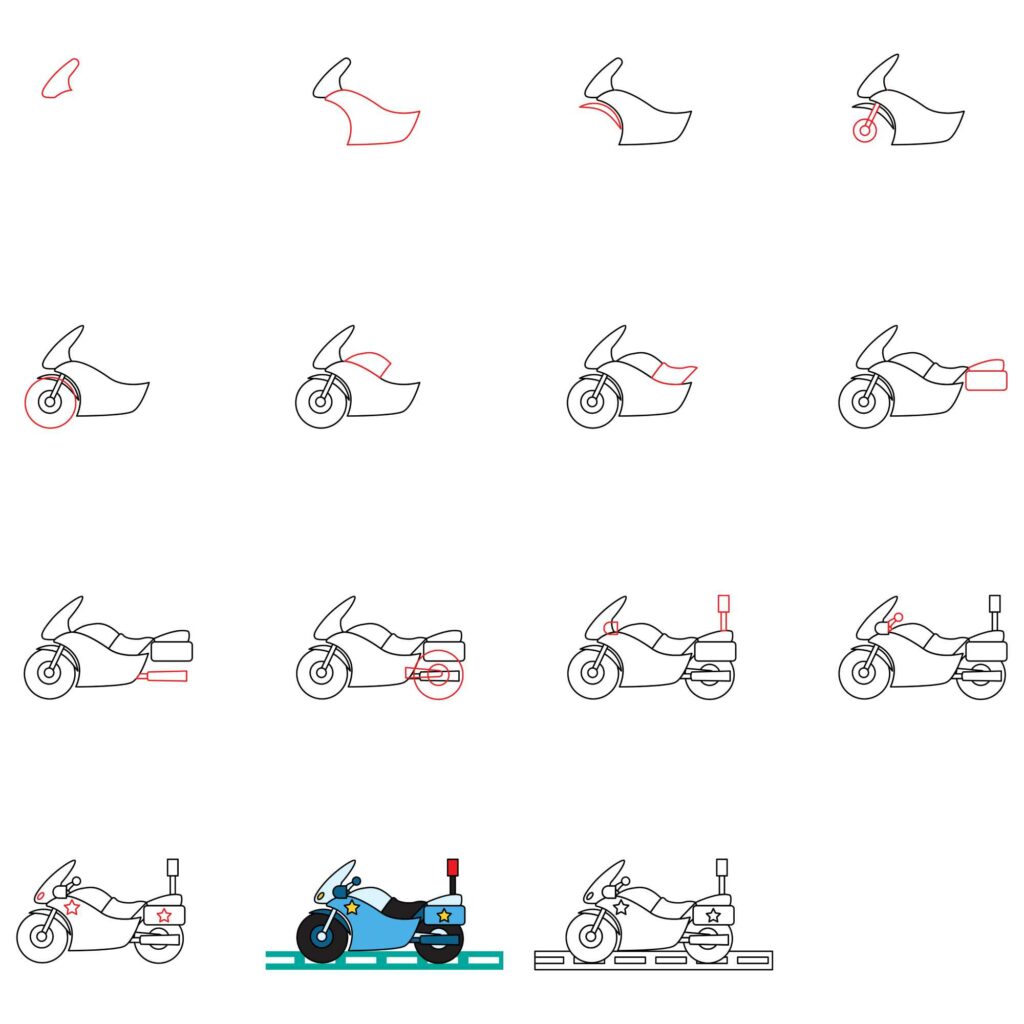
Step 1: Draw the Windshield
Considering the incredible speeds police motorcycles can achieve, it is important to protect the policeman from the wind and flying debris. This is why a motorcycle needs a windshield. The windshield also creates an aerodynamically formed window that reduces wind resistance and enables the motorcycle to move faster.
The windshield is the topmost part of a motorcycle so we will draw it fast. From the top left end of your drawing paper, create a shape that looks like the one illustrated below. Make sure you leave enough space on the left for the windshield.
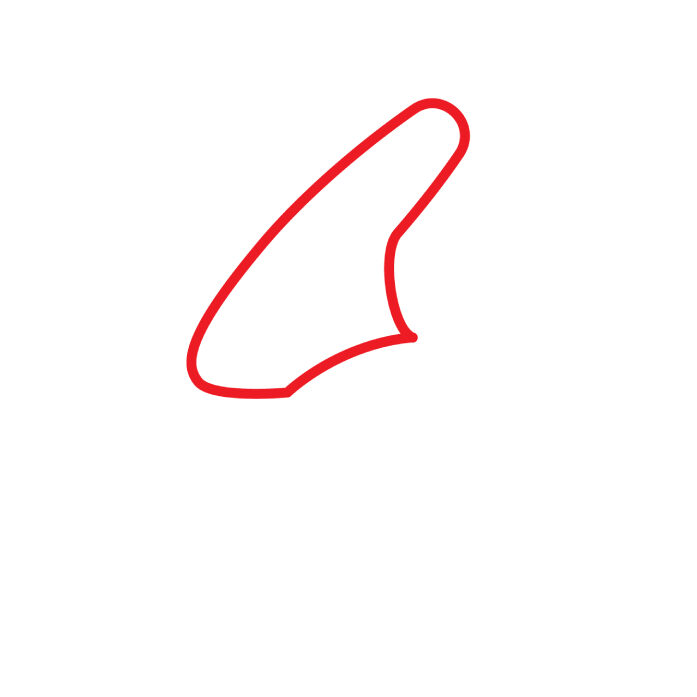
If you are having trouble drawing the shape, simply start by drawing a slanted rectangle with rounded corners. Add a triangle on the right side of the rectangle with the first point starting at the middle of the rectangle and the other touching the bottom right corner of the rectangle.
The lines of the triangle should be curved a bit. Use the eraser to remove the line that separates the triangle and the rectangle so that you have a single shape.
- Draw a diagonal rectangle with rounded edges
- Add a triangle to the right side of the rectangle
- Erase the line that separates the rectangle and the triangle
Step 2: Draw the Body
The body of a police motorcycle sits below the windshield. This is the part that houses the engine, crash bar, brake pedal, exhaust pipe, gearbox, and other components of a motorcycle. The seat and fuel tank are located on the body.
To draw the body, we need to create a shape similar to the one in the below illustration.

You can achieve this shape by first drawing a rectangle that sits below the windshield. Next, draw a wavy line starting from the top left corner of the rectangle, raise it a bit then bring it down so that it ends in the middle of the right side of the rectangle.
Next, to create room for the front wheel, draw an arch starting from the top left corner of the rectangle and ending on the bottom line of the rectangle. We then need to add a curved line starting from where the top wavy line ended and connect it to the bottom line.
Erase the sections of the rectangle that are outside our new shape. You should now have a shape that looks like the one in our illustration.
- Draw a rectangle below the windshield
- Replace the top of the rectangle with wavy lines
- Replace the left side of the rectangle with an arch
- Erase the unused parts of the rectangle
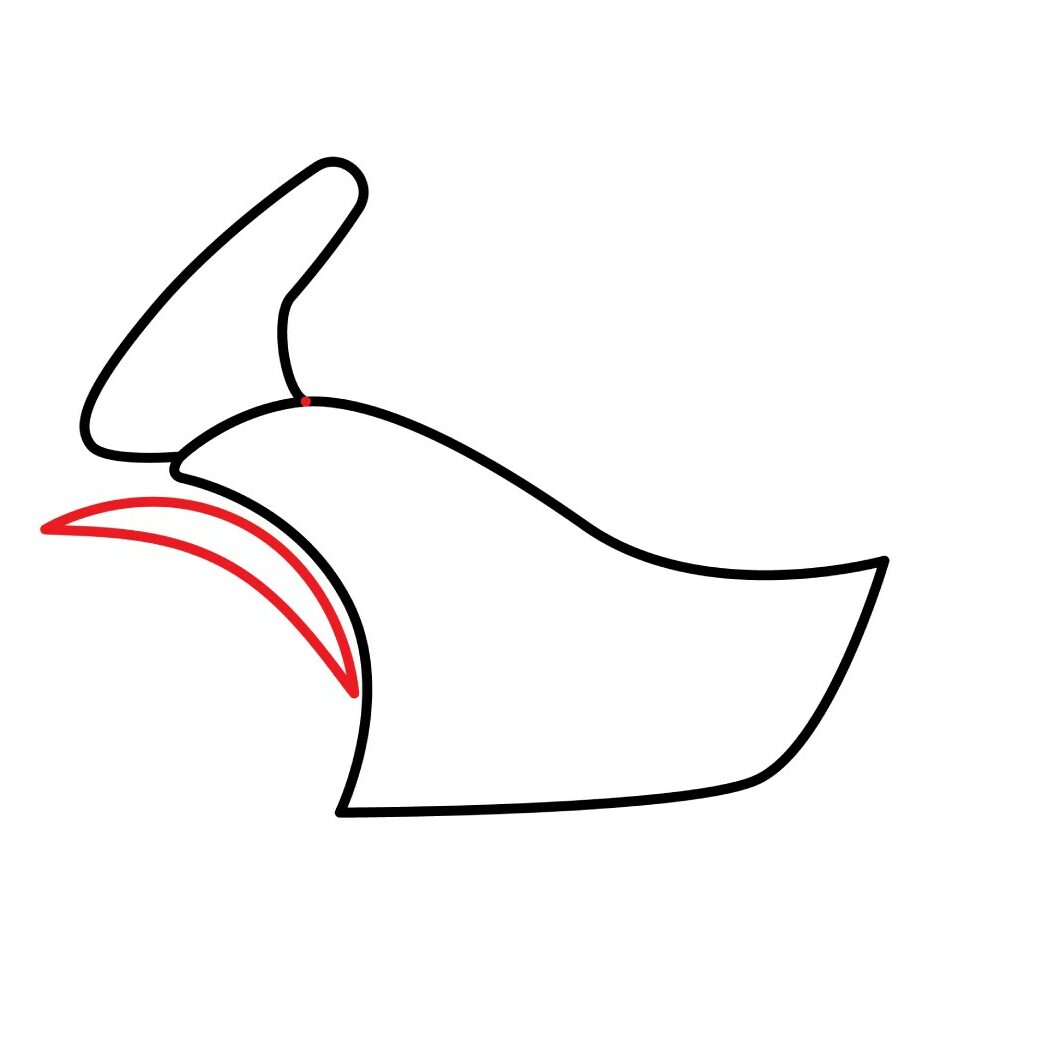
Step 3: Draw the Front Fender
A police motorcycle needs a front fender to keep the rider and the body of the motorcycle safe from debris. The front fender keeps dirt, water, and mud from flying back onto the motorcycle.
To draw the front fender, start by adding a curved line that takes the form of the arch we added for the front wheel. Add another curved line that joins with the first line to form a crescent shape like the one shown below.
- Use two curved lines to form a crescent shape
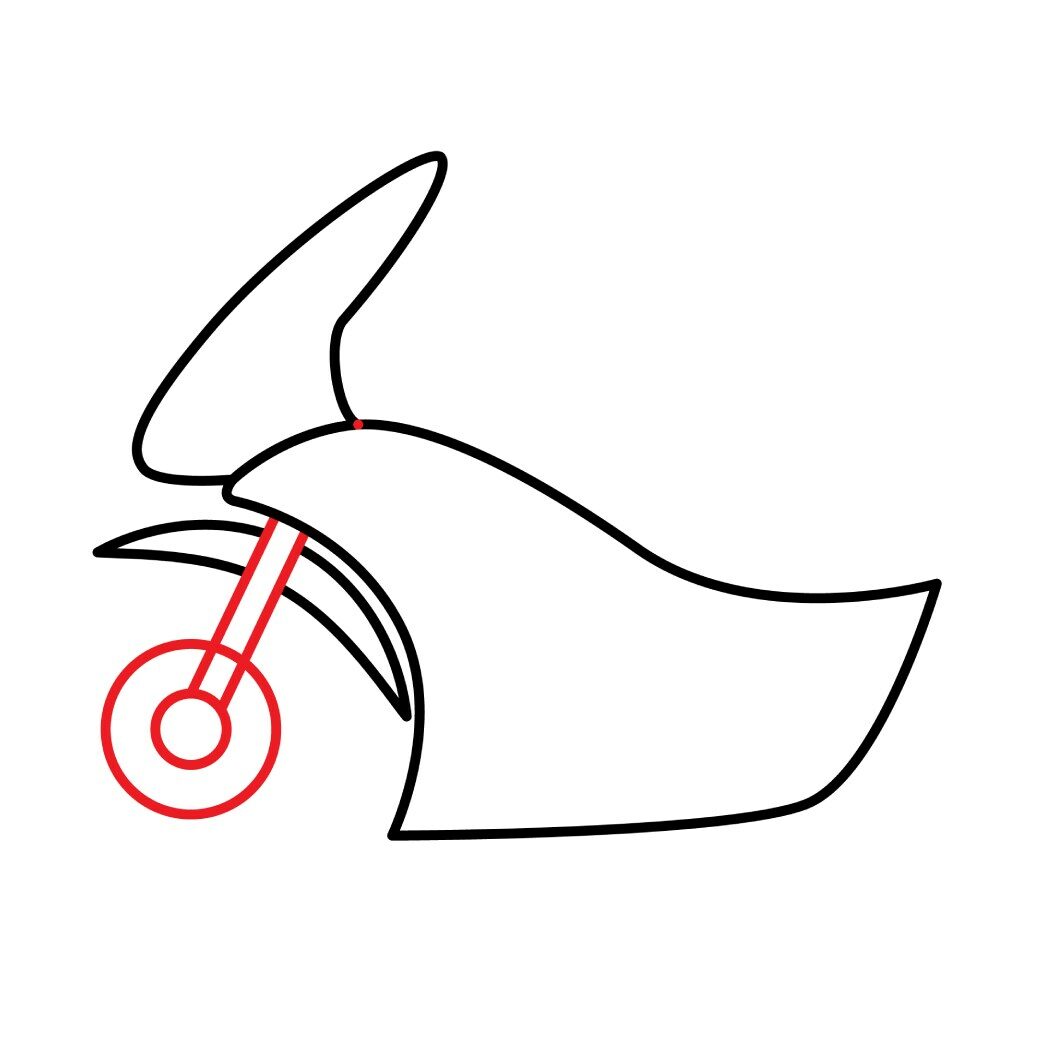
Step 4: Draw the Steering Tube and the Disk Brake
The steering tube is also known as the fork tube. This is the tube that connects the handlebars to the front wheel. The front suspensions are also mounted here to increase comfort when the rider is on rough terrain.
To draw the steering tube, add two parallel lines starting from the top left end of the motorbike’s body and slant diagonally past the front fender and stopping close to the bottom of the bike’s body.
At the bottom end of the parallel lines, add a small circle to serve as the center of the disk brake. You then need to add another circle over the small circle to form the brake disk.
Use your eraser to remove the lines of the fender and disk brake that go through the steering tube. This is because the steering tube sits outside the front fender and the disk brake.
- Use two parallel lines starting below the windshield and slanting to the left
- At the bottom, add two circles, one inside the first to form the brake disk
- Erase the lines that cut through the steering tube
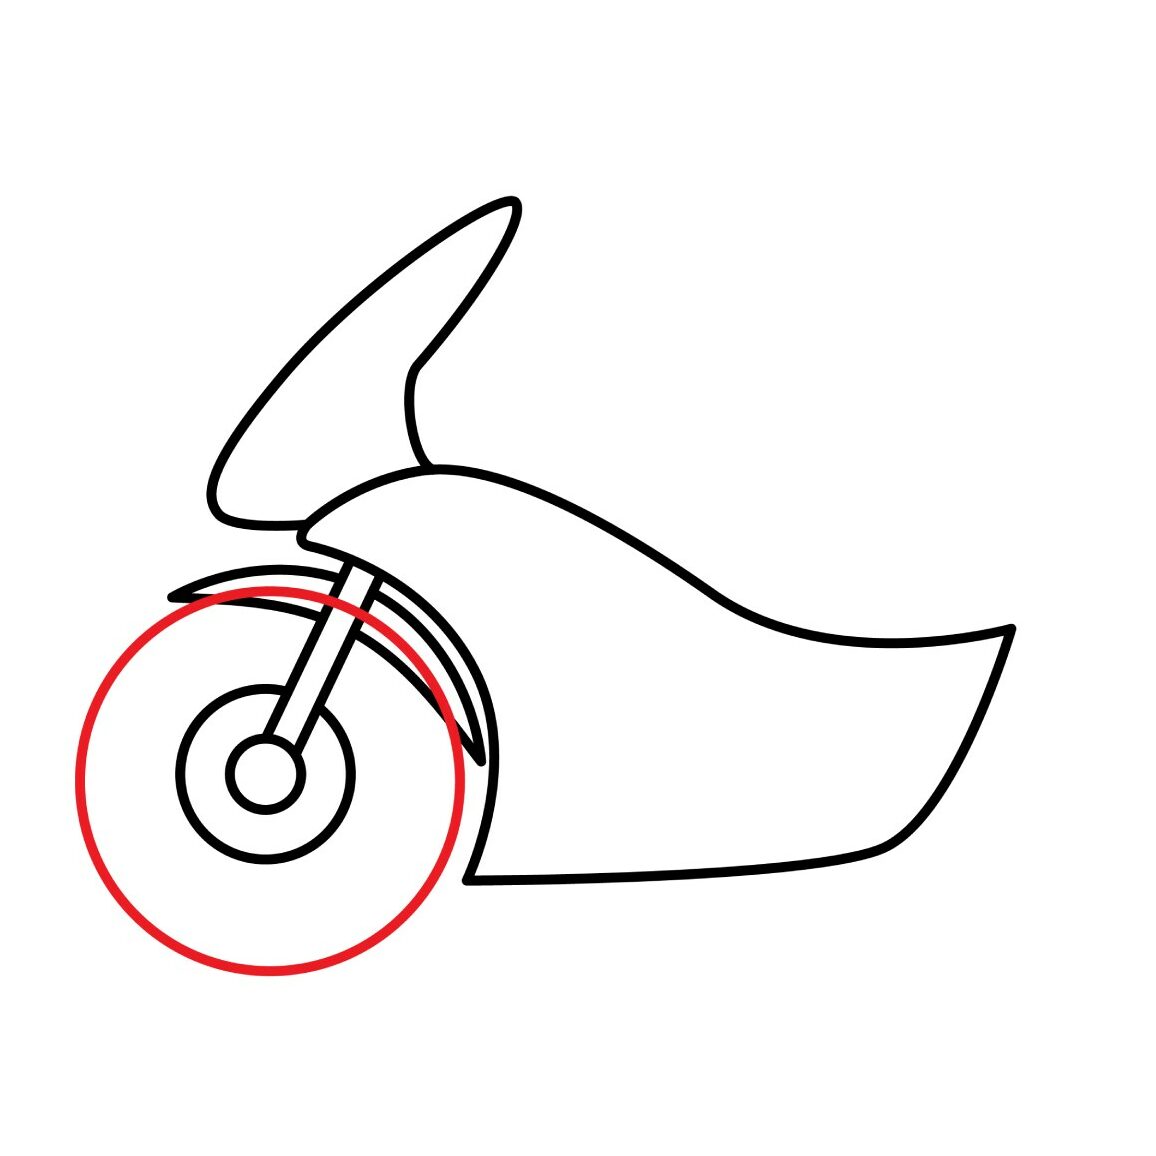
Step 5: Draw the Front Wheel
For the front wheel, we need to use the middle of the brake disk as the center and draw a large circle that moves slightly into the front fender. The circle should also be big enough to suspend the body of the motorcycle above the ground. Use the erase to remove the lines that pass over the steering tube and the front fender.
- Draw a large circle over the brake disk to serve as the wheel
- Erase the part of the circle that cuts through the fender and steering tube
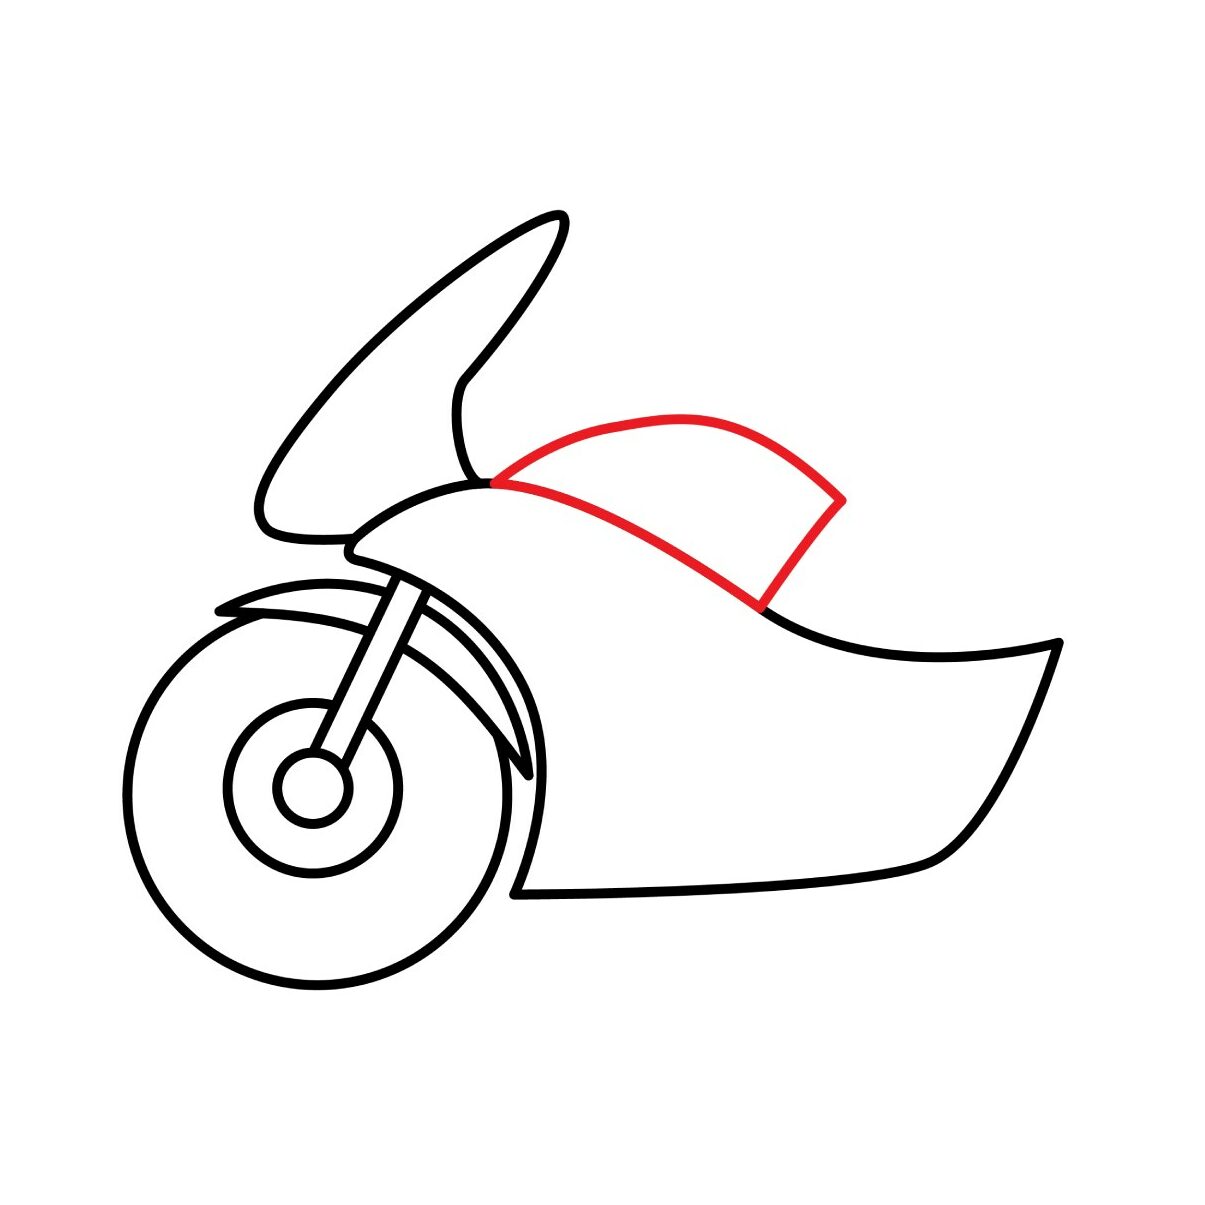
Step 6: Draw the Fuel Tank
A police motorcycle is powered by an engine. For the engine to work, it needs fuel. The fuel tank is located above the body of the motorcycle and just behind the windshield.
Draw a curved line that starts from the point where the windshield and the body of the motorcycle meet. The line should extend to almost the middle part of the motorcycle’s body. Connect the curved line to the body with a diagonal line as shown in our illustration below.
- Draw a curved line starting from the bottom of the windshield to the middle of the bike’s body
- Use a diagonal line to connect the curved line to the body
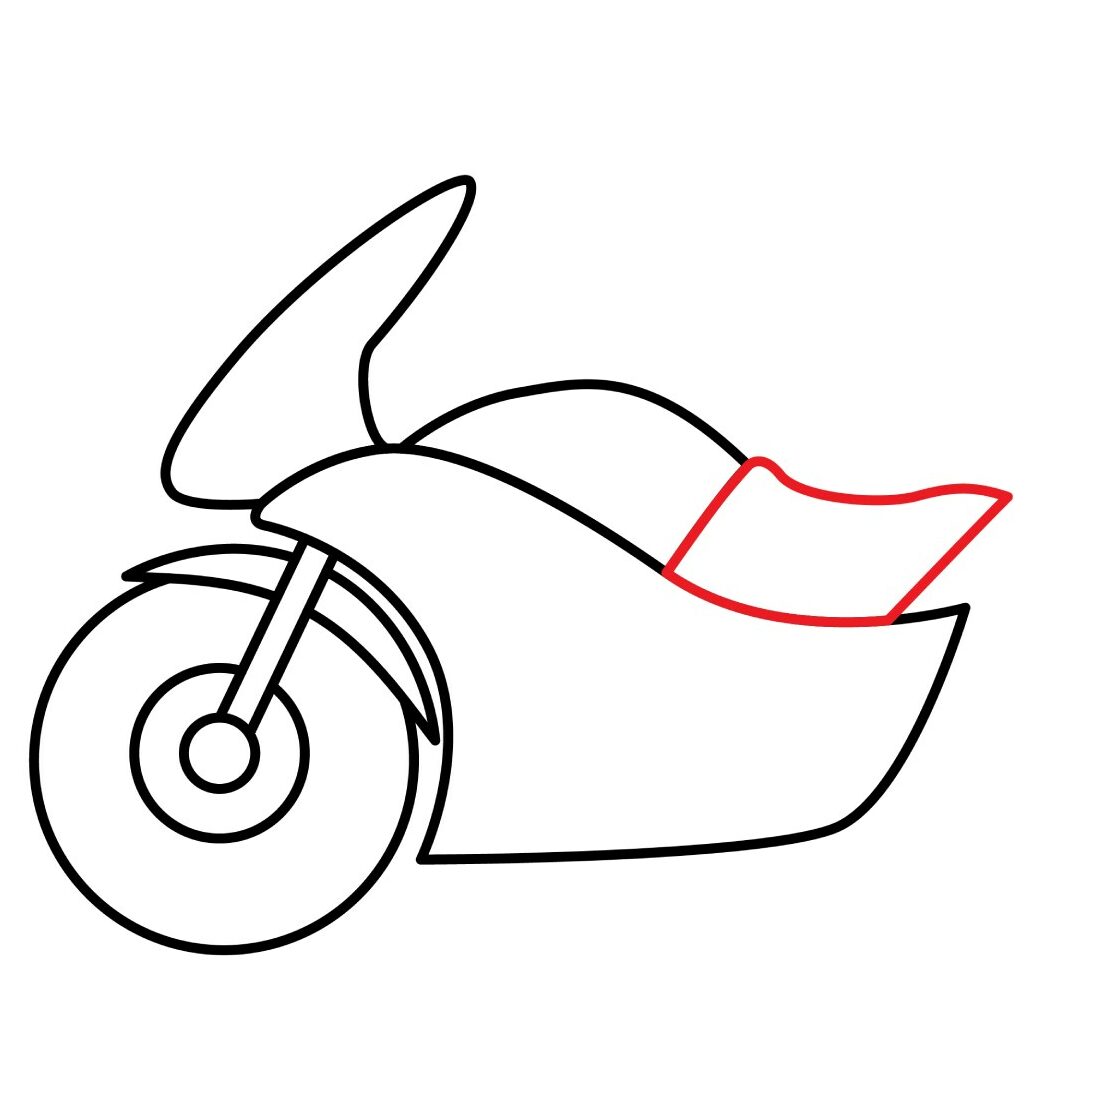
Step 7: Draw the Rider’s Seat
The seat of a motorcycle is located behind the fuel tank. Use a curved line starting from where the top right edge of the fuel tank stops and extend the line so that it ends slightly behind the body of the motorcycle. Connect the curved line to the body of the bike using a diagonal straight line.
- Add a curved line starting from the top of the fuel tank to the back
- Connect the line to the body using a diagonal line
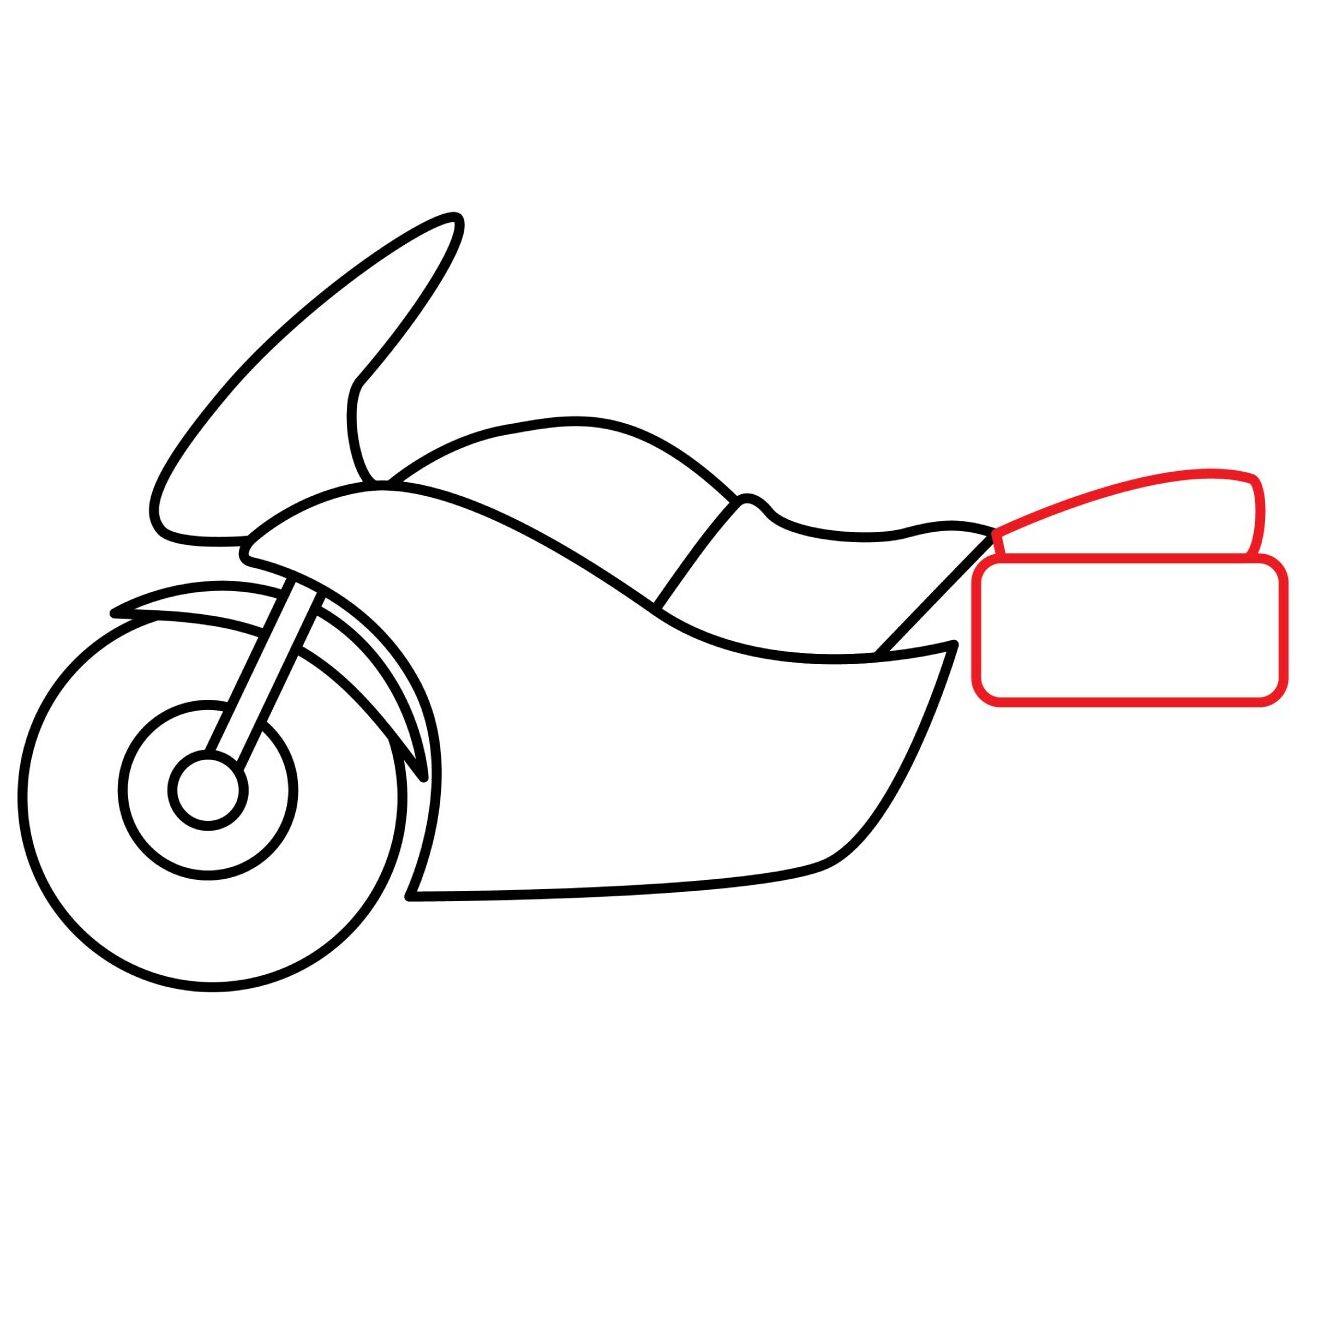
Step 8: Draw the Passenger’s Seat and the Toolbox
The passenger seat on a motorcycle is located behind the rider’s seat. To add it, draw an oval shape that is narrow on the end that connects to the rider’s seat. The shape should not be too long.
For the toolbox, add a rectangle with rounded edges below the oval shape. The rectangle should go slightly into the oval shape so that the bottom of the passenger seat is flat. Use the eraser to remove the part of the oval shape that runs through the rectangle.
- Add an oval shape behind the rider’s seat for the passenger seat
- Add a rectangle below the passenger seat to serve as the toolbox
- Erase the part of the oval shape that cuts through the toolbox
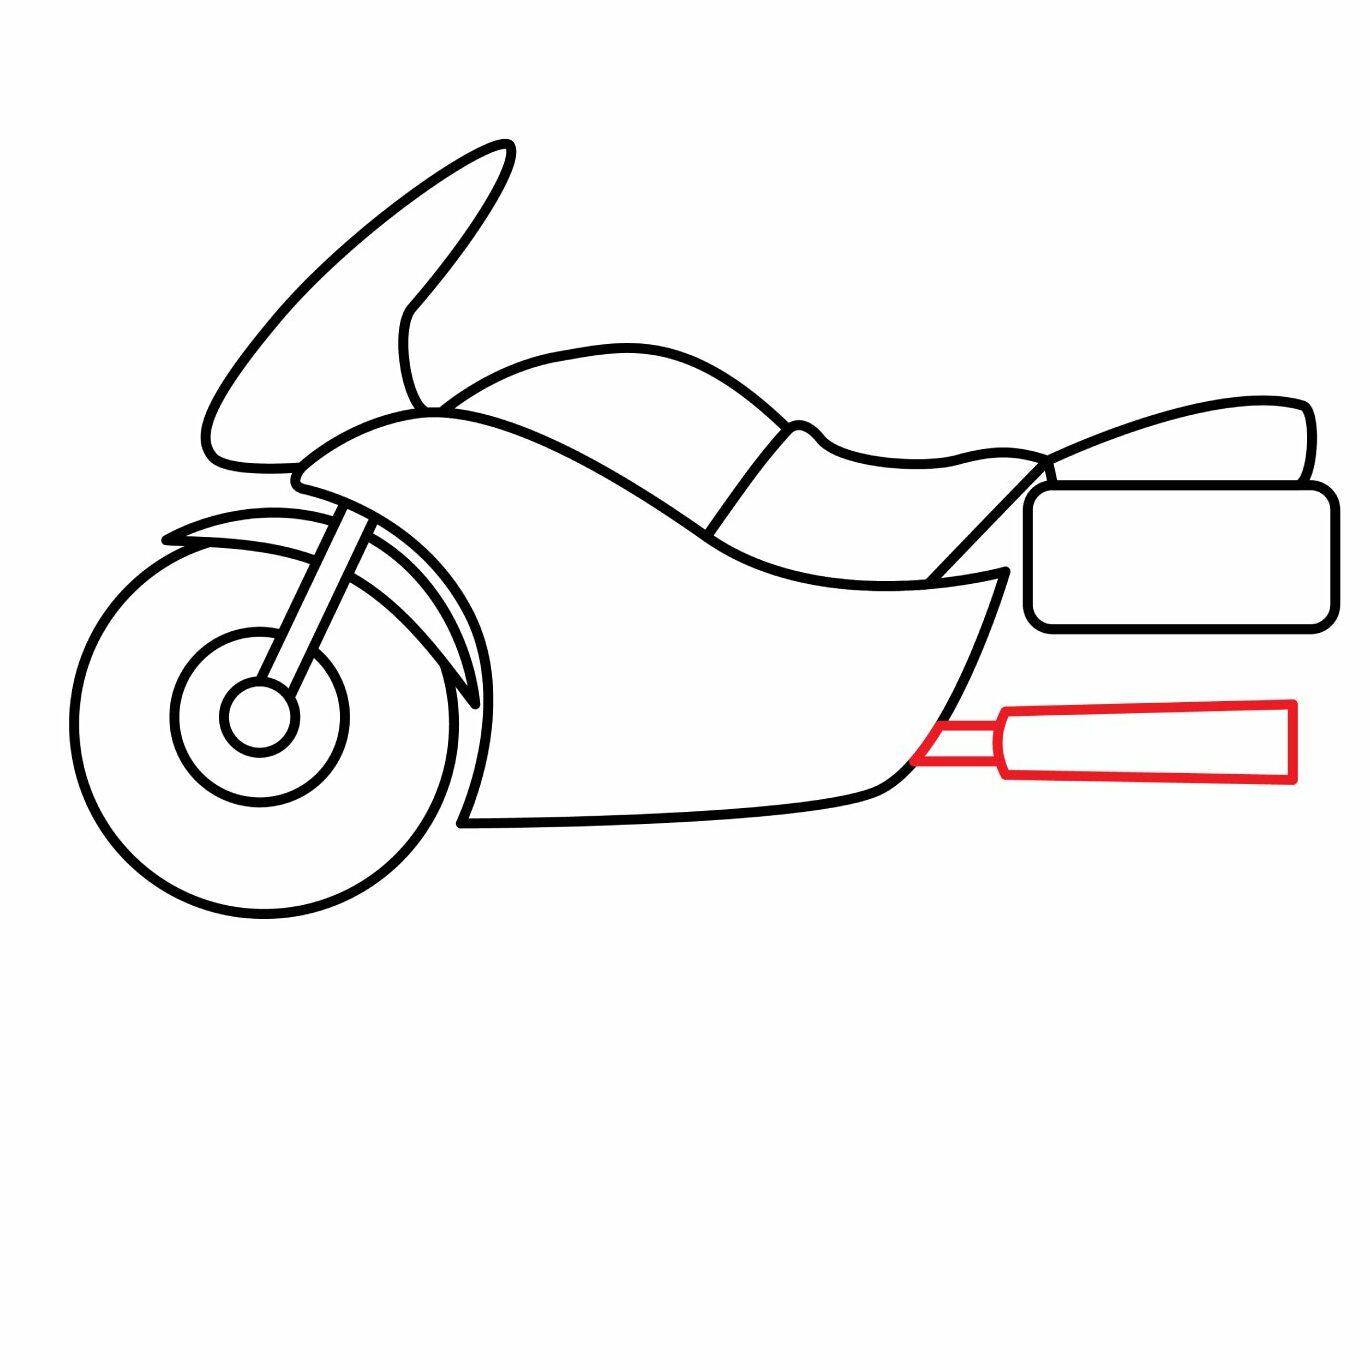
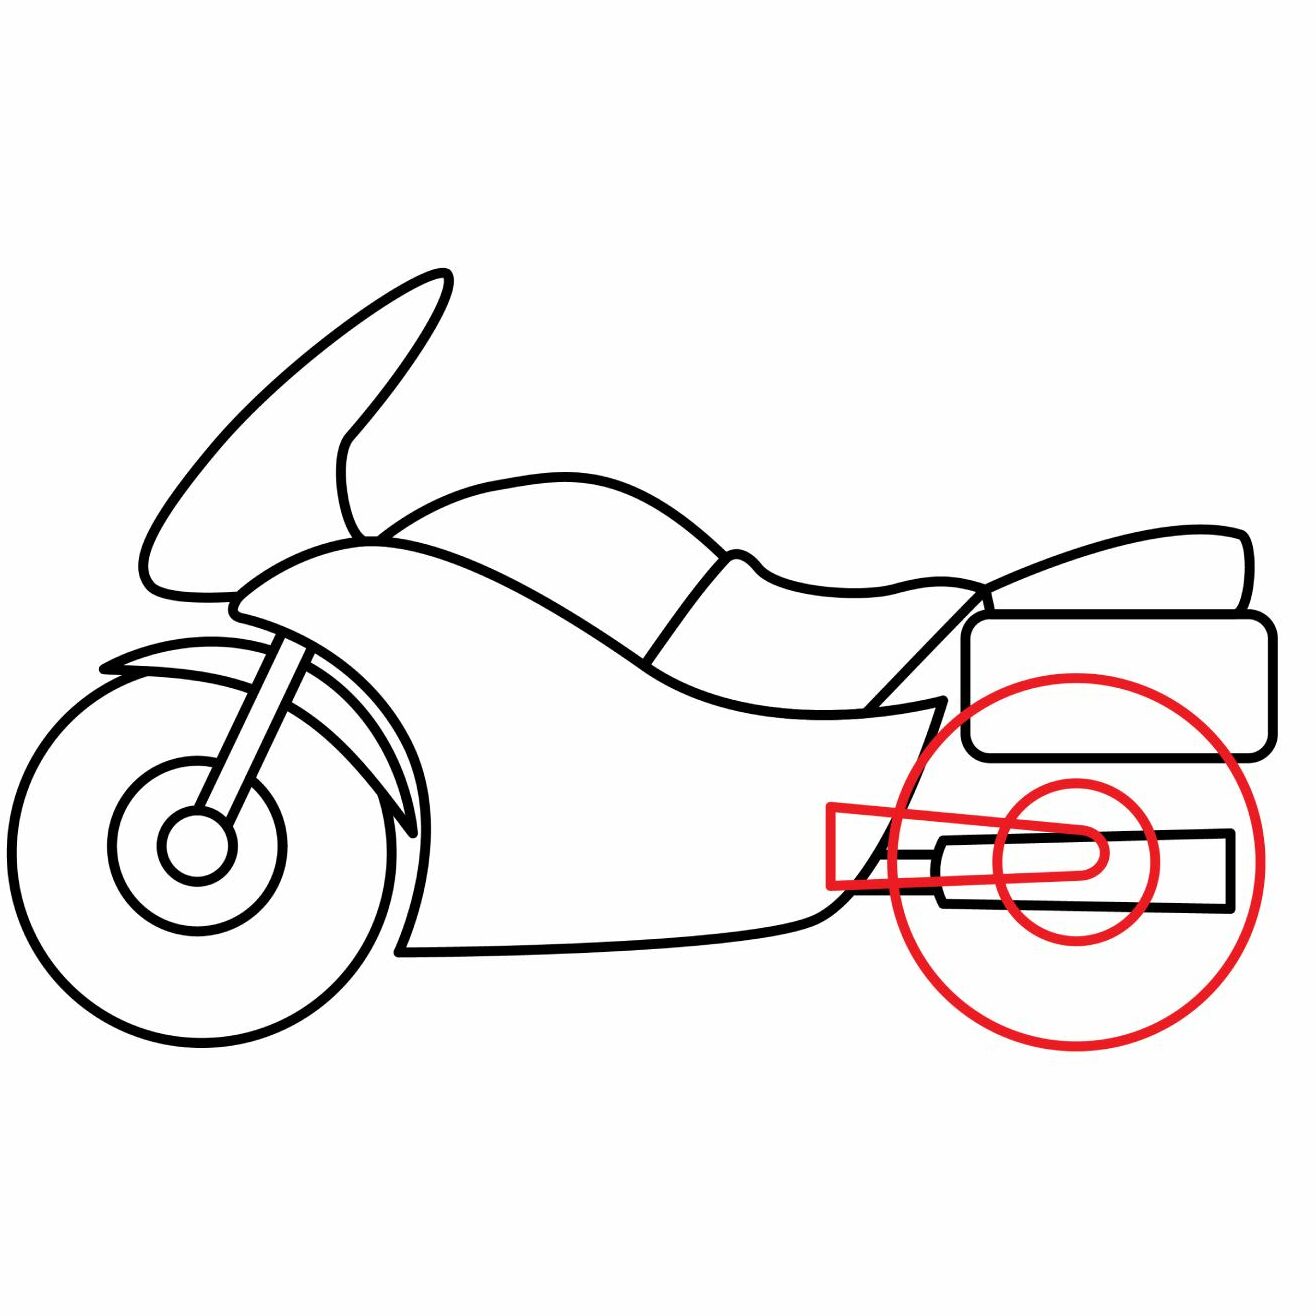
Step 9: Draw the Exhaust Pipe
The engine needs an exhaust pipe to remove exhaust fumes. The exhaust pipe is located below the passenger seat and extends to the back of the motorcycle.
Draw a small rectangle starting from the bottom right side of the motorcycle’s body. You then need to add a larger rectangle that connects to the small rectangle. The new rectangle should widen gradually towards the right.
- Draw a rectangle starting from the bottom right of the body
- Add a wider rectangle to the first rectangle
Step 10: Draw the Back Wheel
For the back wheel, draw a small circle right below the toolbox. This will serve as the rear brakes. Keep it at the same level as the brake disk we added for the front wheel.
Add an elongated oval shape that starts inside the circle we added for the rear brakes. The shape should widen and connect to the bottom right body of the motorcycle. This will serve as the housing for the chain that brings power to the rear wheel from the engine.
For the rear wheel, draw a large circle that is the same size as the front wheel. The circle should cut through the toolbox but should not go into the body of the motorcycle. You should have a shape that looks like this.
The next step is to erase the lines that went over the exhaust pipe, toolbox, and the body of the motorcycle.
- Draw a small circle below the toolbox to serve as the rear brake disk
- Add an elongated oval shape that connects the brake disk to the body
- Draw a large circle over the brake disk to serve as the rear wheel
- Erase the lines that cut through the toolbox, exhaust pipe and the body
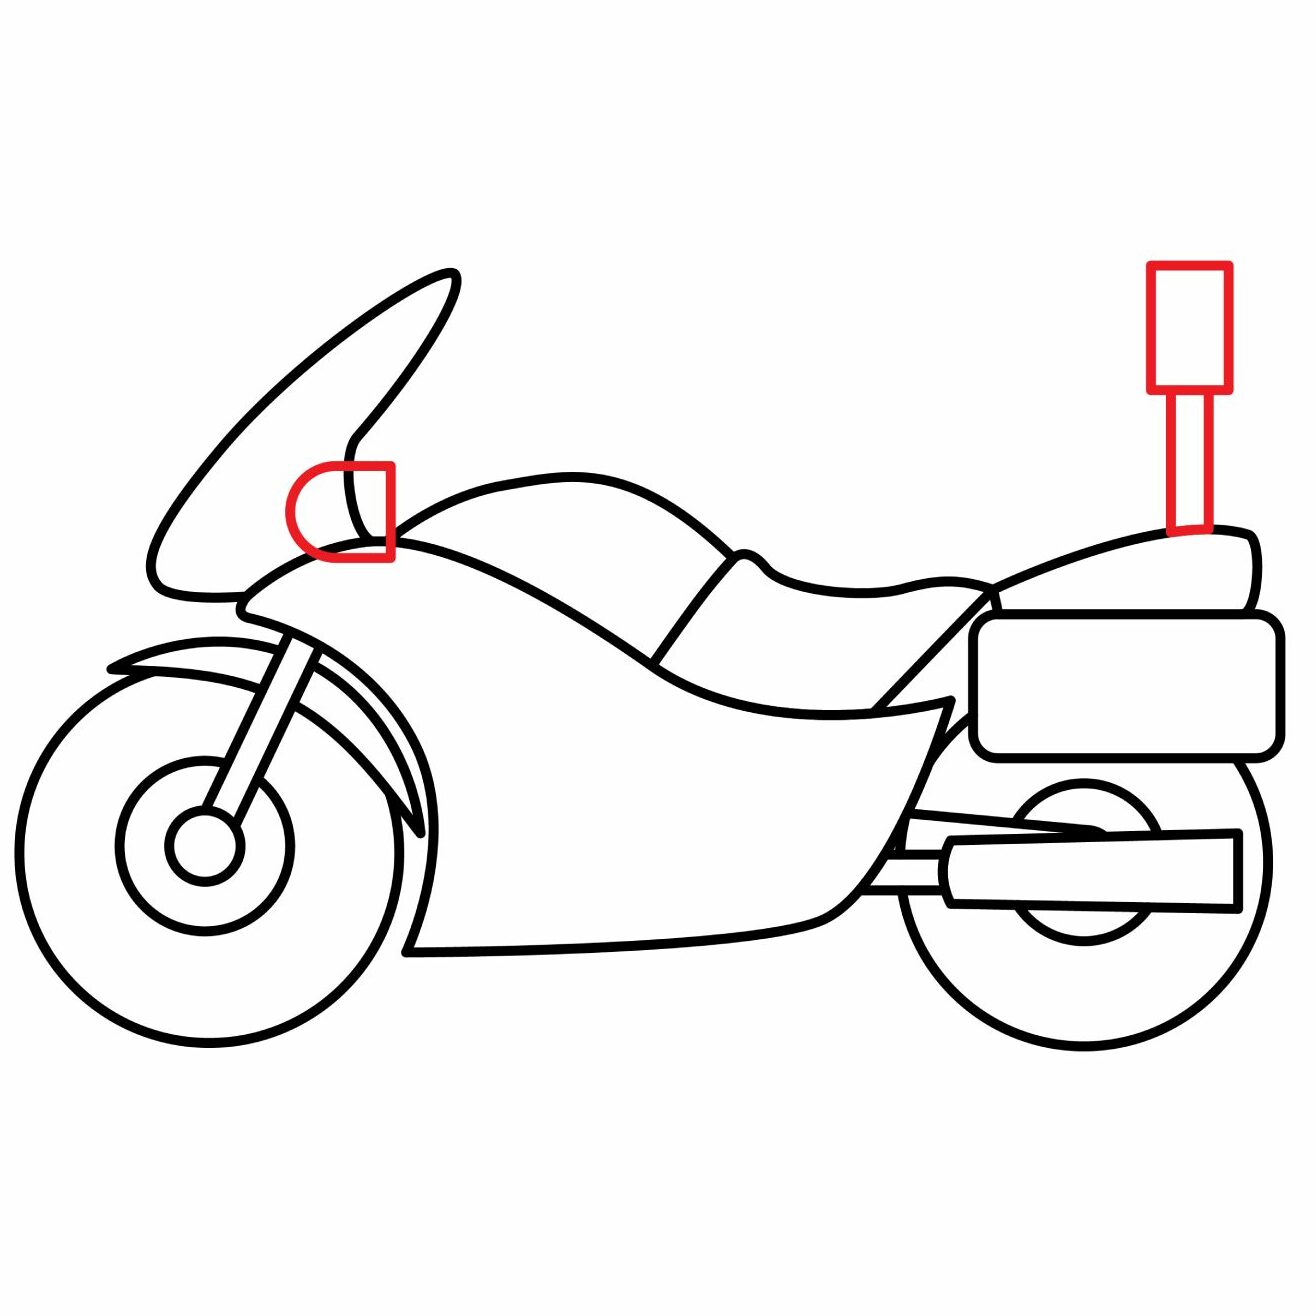
Step 11: Draw the Mirror and the Siren
The side mirror helps the rider to look back without turning their head. Draw an oval shape at the point where the windshield and the body meet. The right side of the oval shape should be flattened. Erase the lines that go inside the shape we added for the mirror.
For the siren, add two vertical lines rising from the back end of the passenger seat. Add a rectangle shape on top of the vertical lines to depict the siren.
- Draw an oval shape at the bottom right part of the windshield
- Make the right side of the oval shape flattened
- Add two vertical lines on the passenger seat and a rectangle on top for the siren
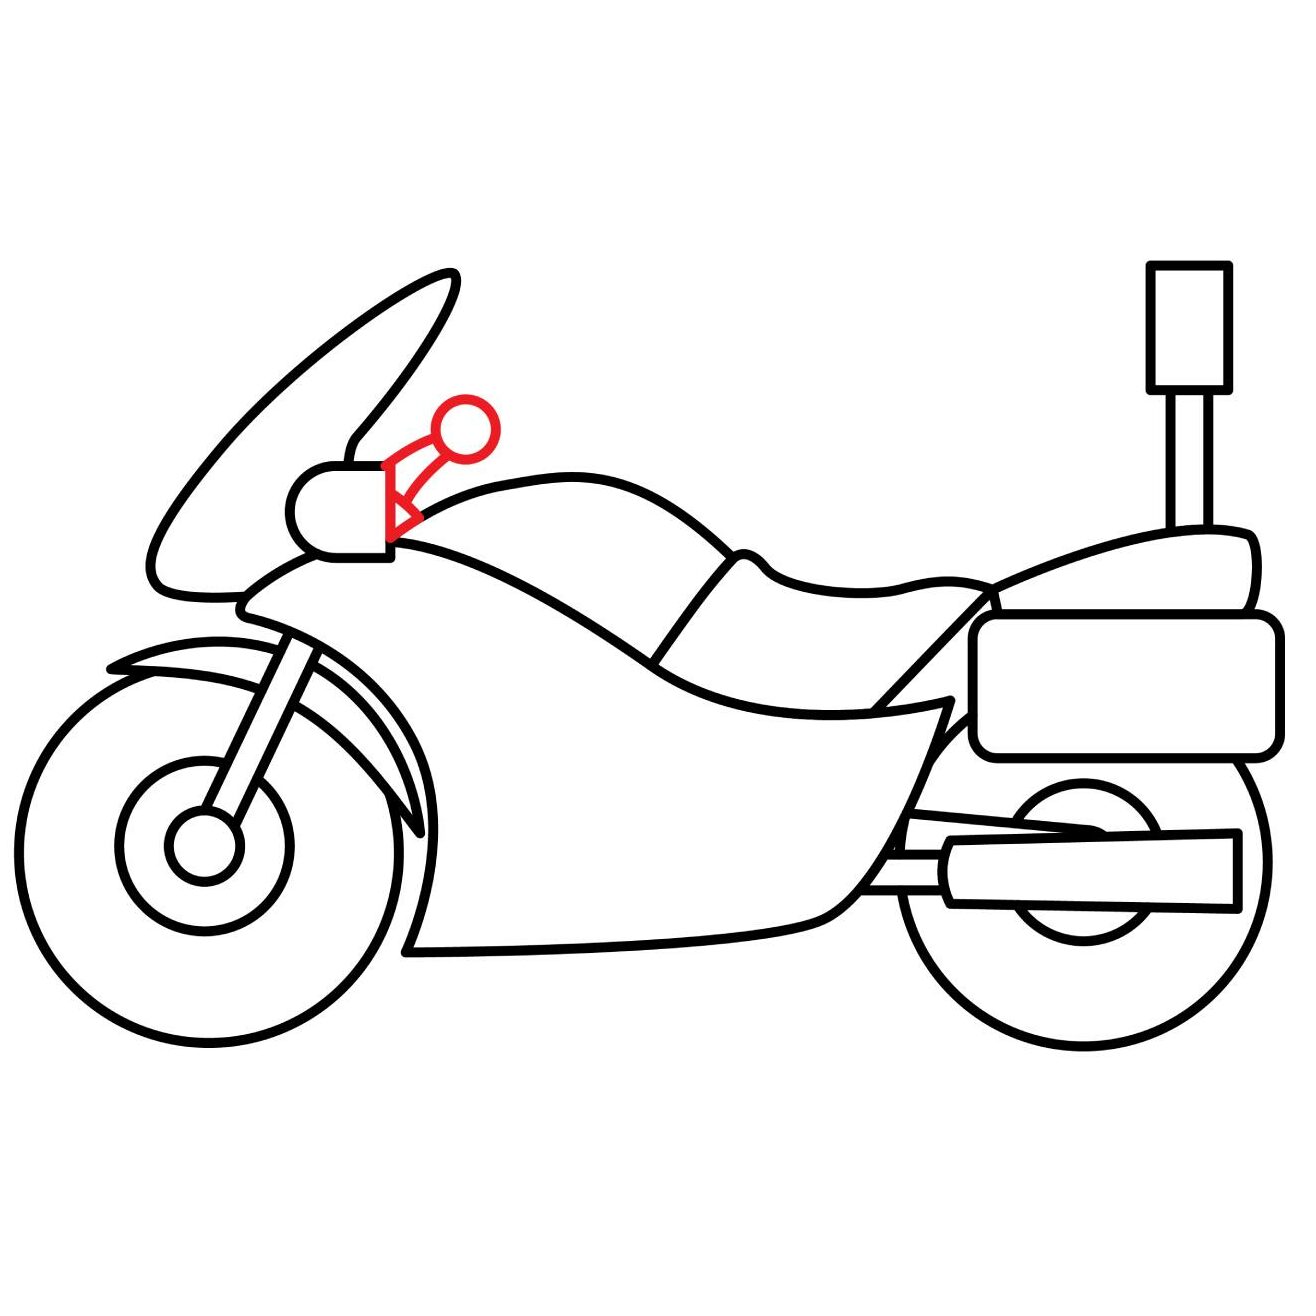
Step 12: Draw the Handle Grip
The handles have controls for the engine. To add them, draw a small circle slightly above the fuel tank and connect it to the motorcycle with two diagonal lines as shown below.
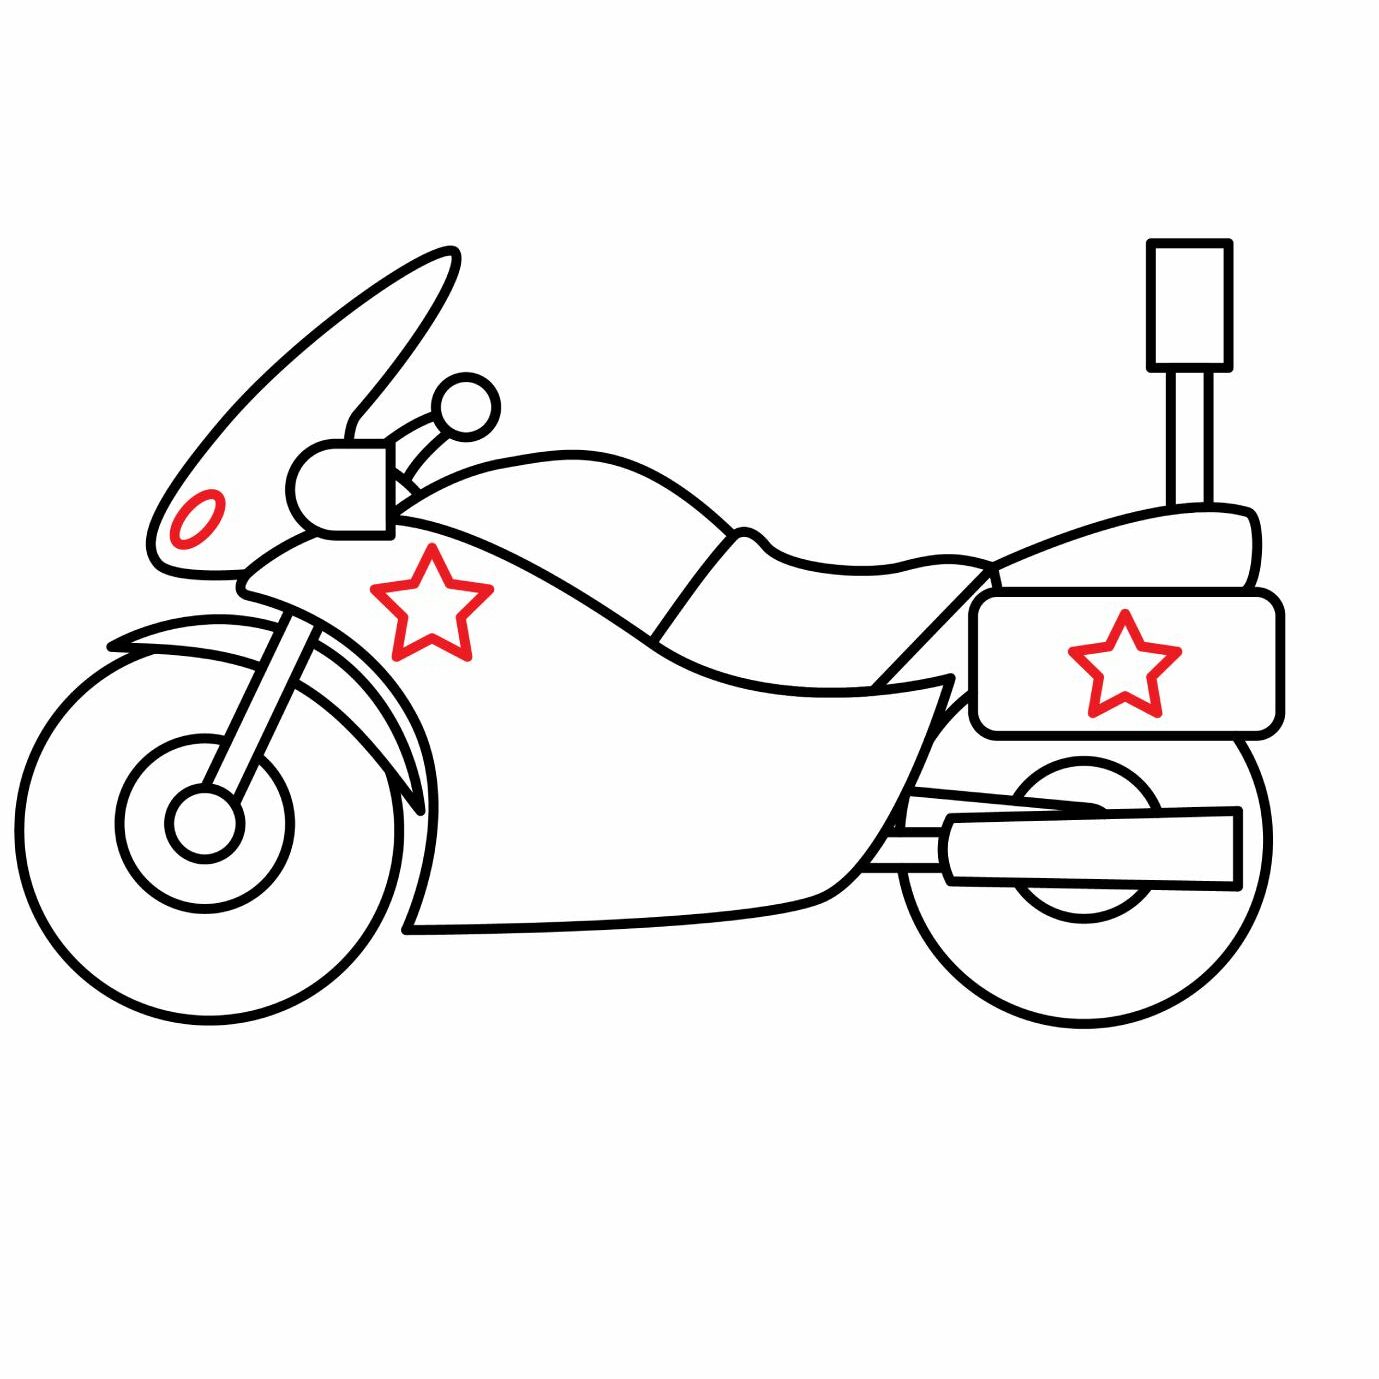
Step 13: Draw the Headlights and the Police insignia
Add a small oval shape at the bottom right of the windshield to depict the headlight. You should then add two police insignias, one on the left part of the motorcycle’s body and the other on the toolbox. For our police motorcycle, we use a star as the police insignia.
- Add an oval shape below the windshield to depict the headlight
- Draw a police insignia of your choice
Advance Your Drawing
While our police motorcycle looks complete, we will add a few more details to make it look better.
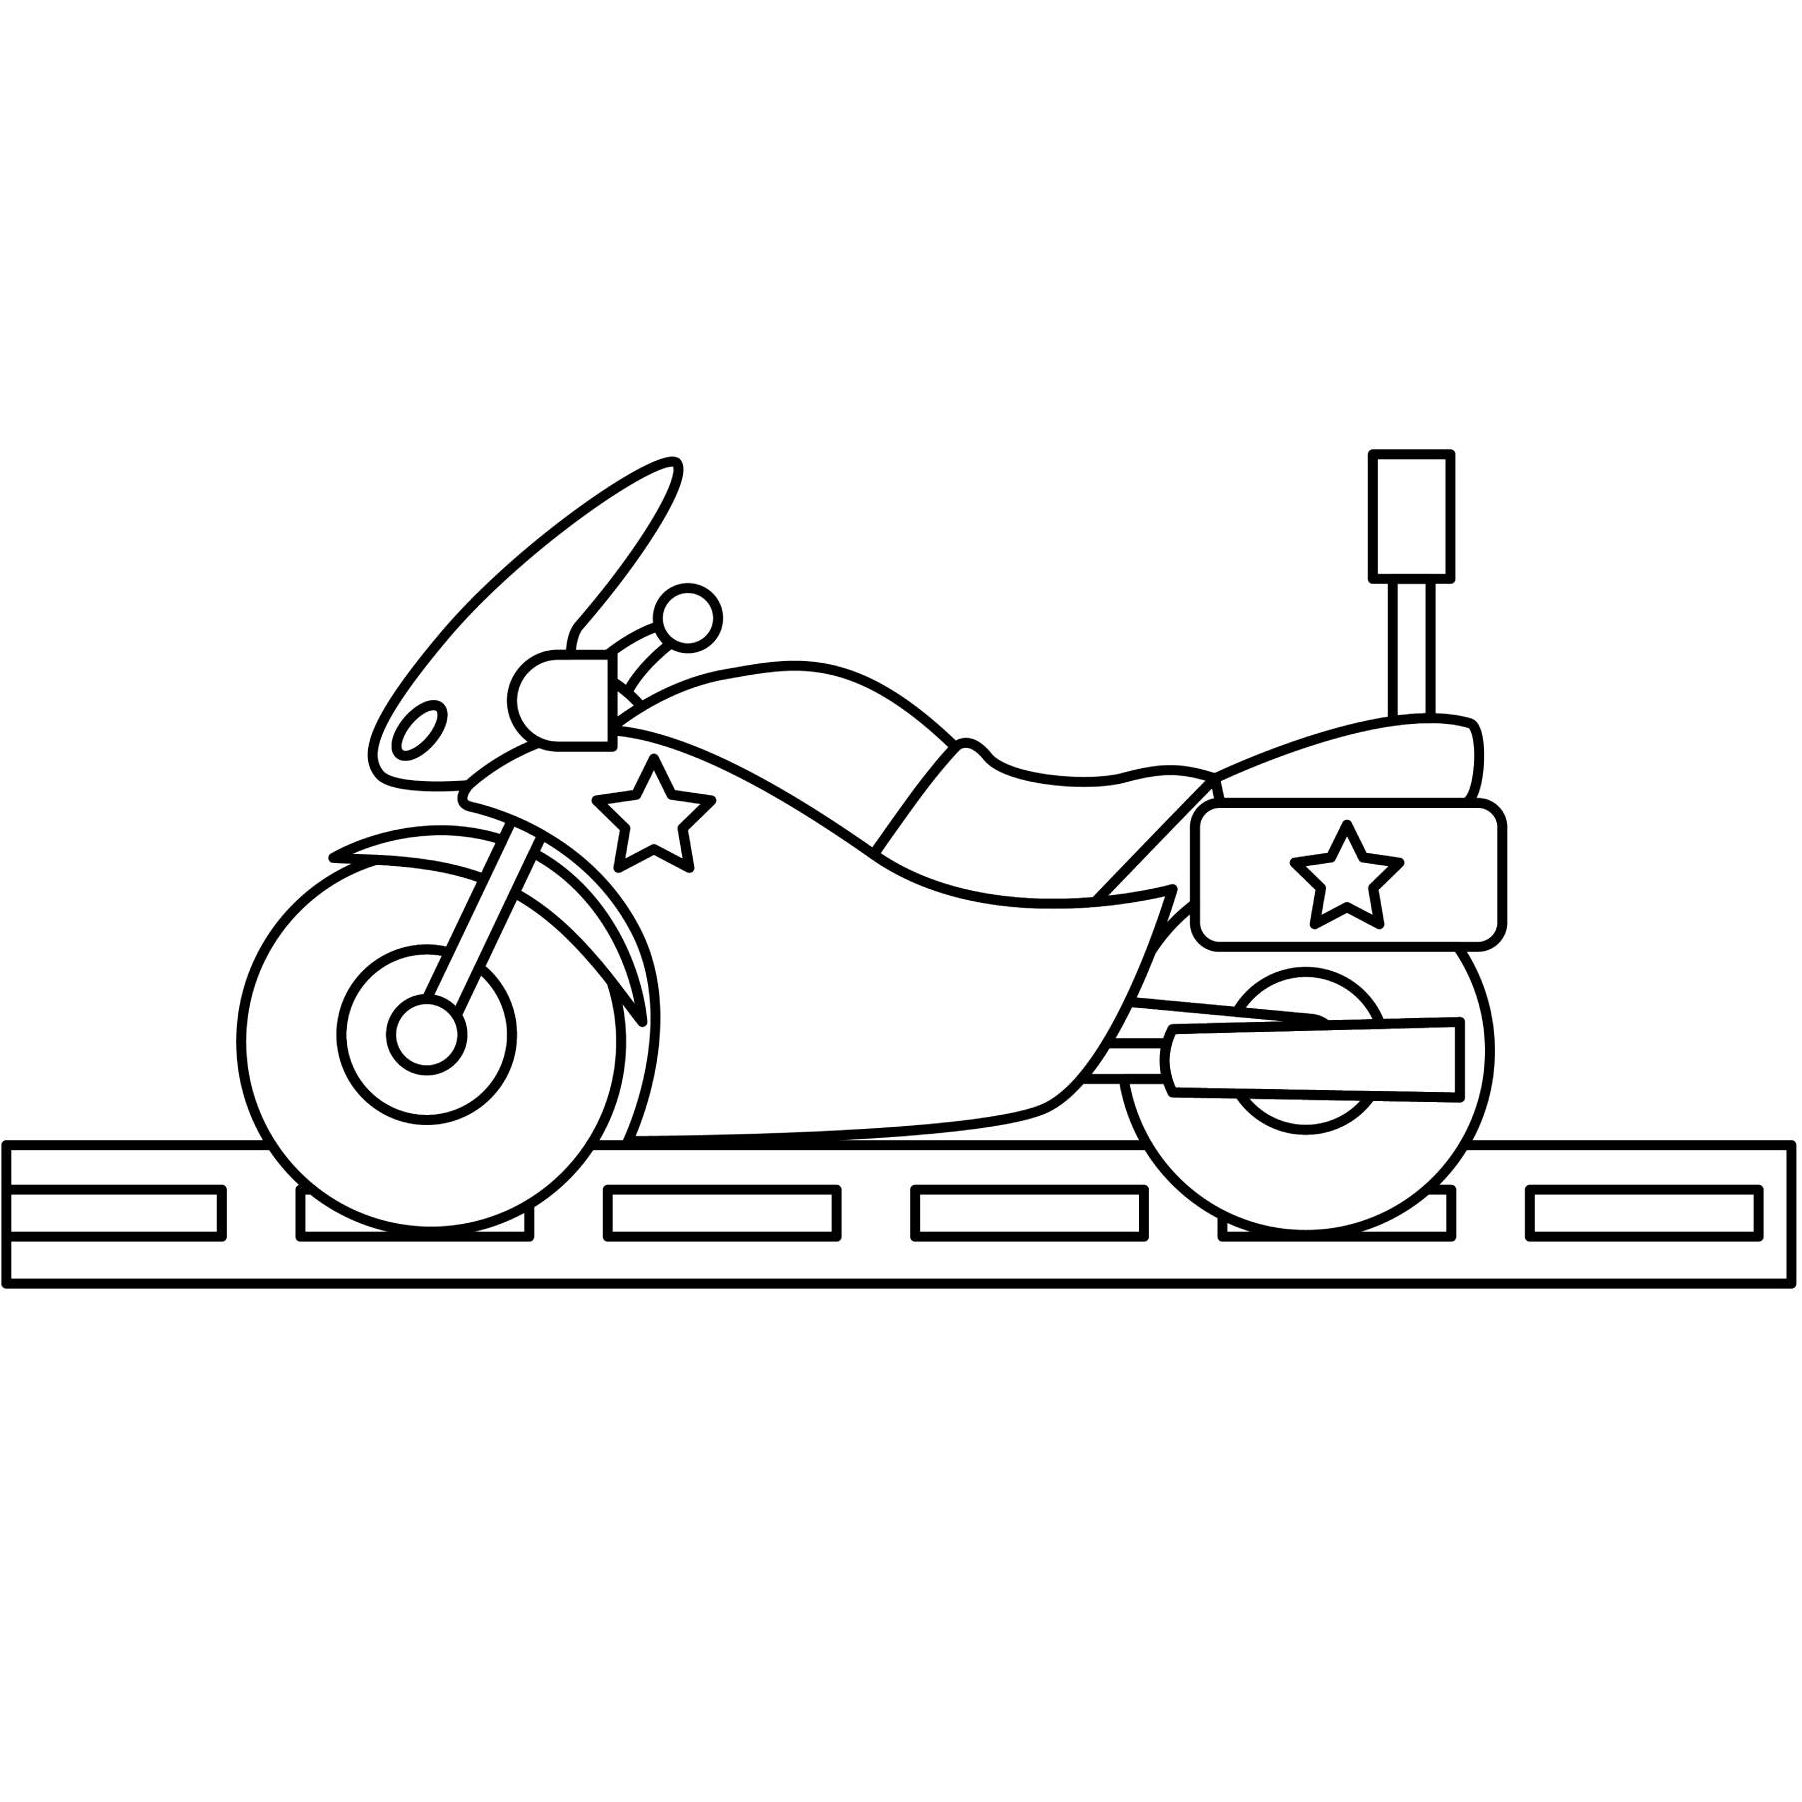
Step 14: Add a Road
The most important thing you need to add to your police motorcycle drawing is a road. You can do so by adding a rectangular shape below the motorcycle. For the road markings, add a series of small rectangles in the middle of the larger rectangle.
If you want, you can add more details in the background such as trees or electric poles.
- Use horizontal rectangles to add a road
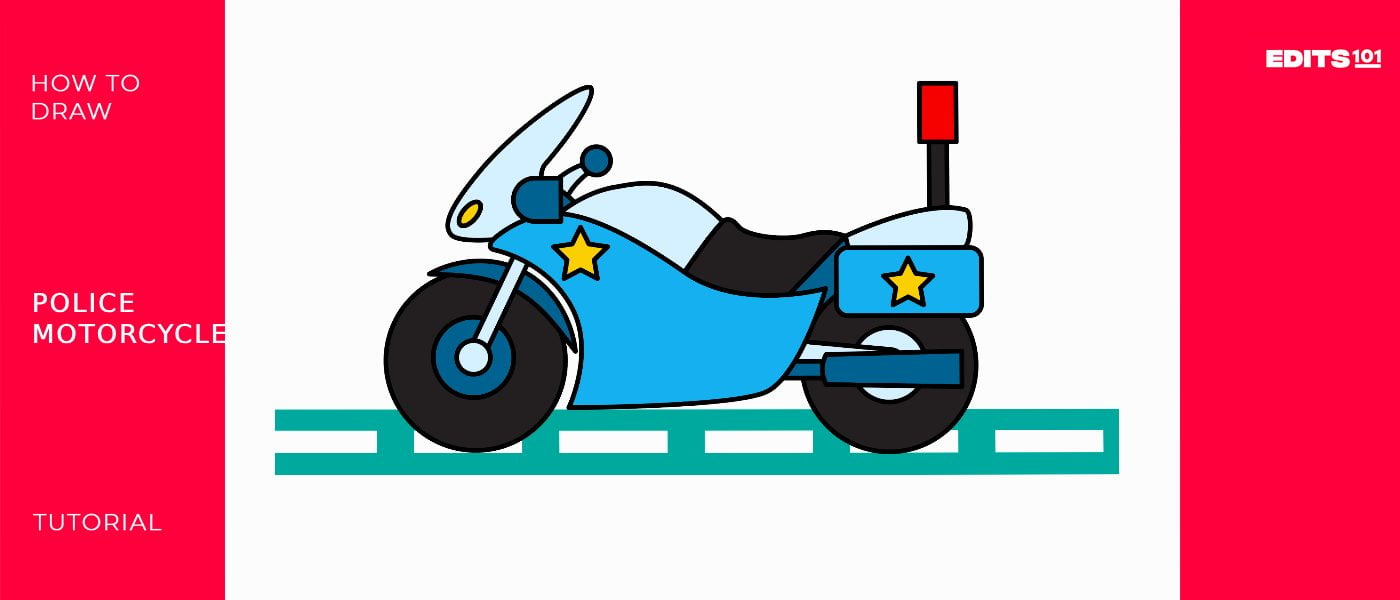
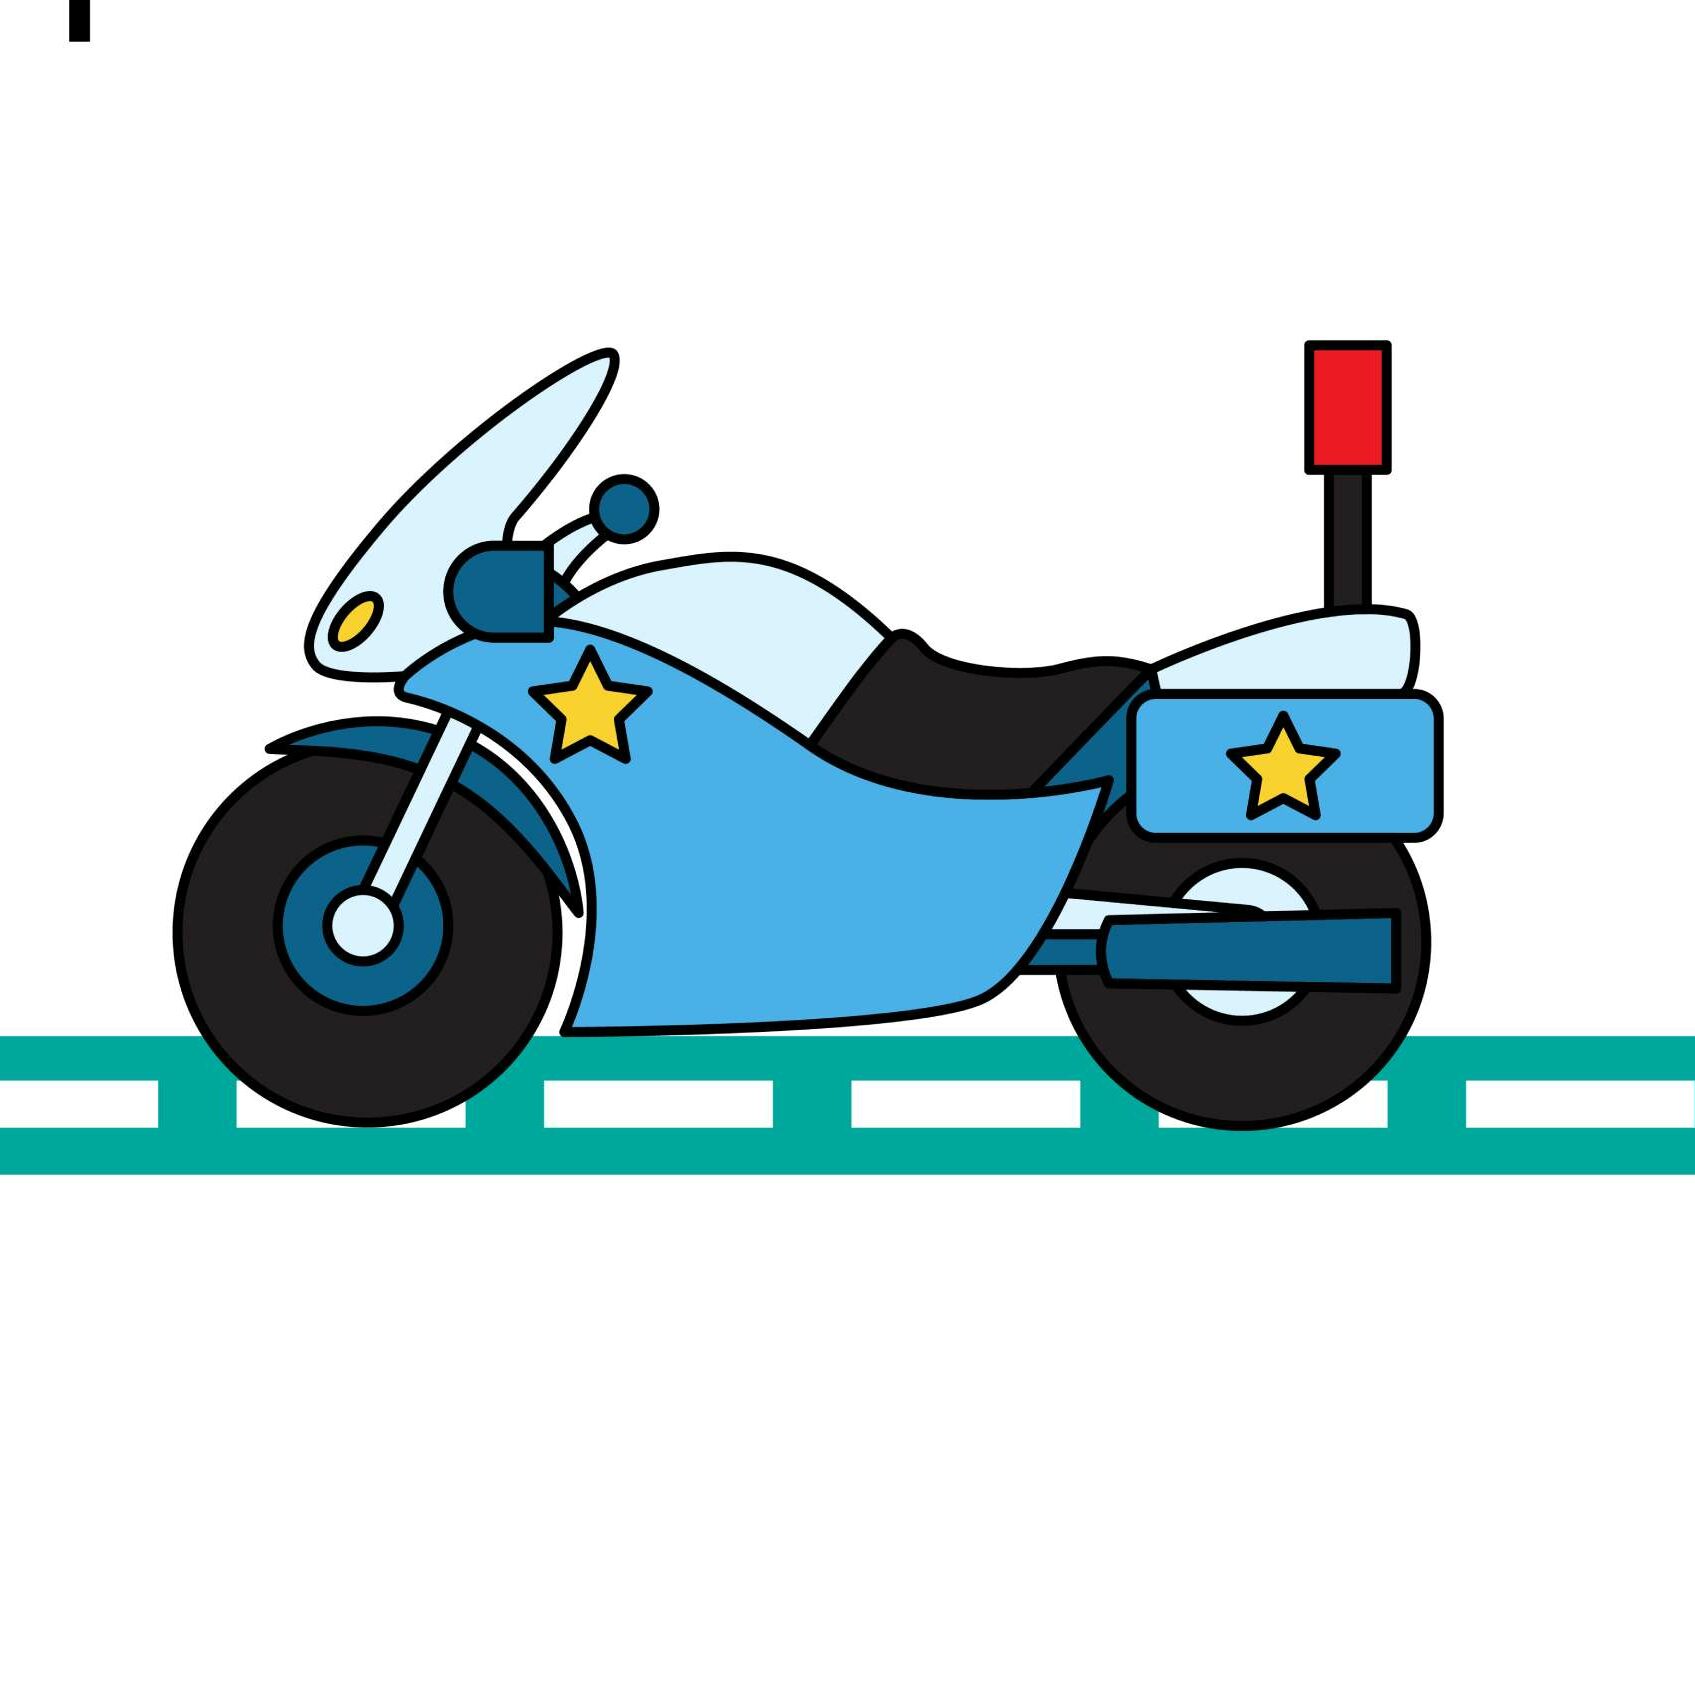
Step 15: Color Your Drawing
The final step is all about coloring the drawing. Take out your coloring supplies and go wild. Here are our final results.
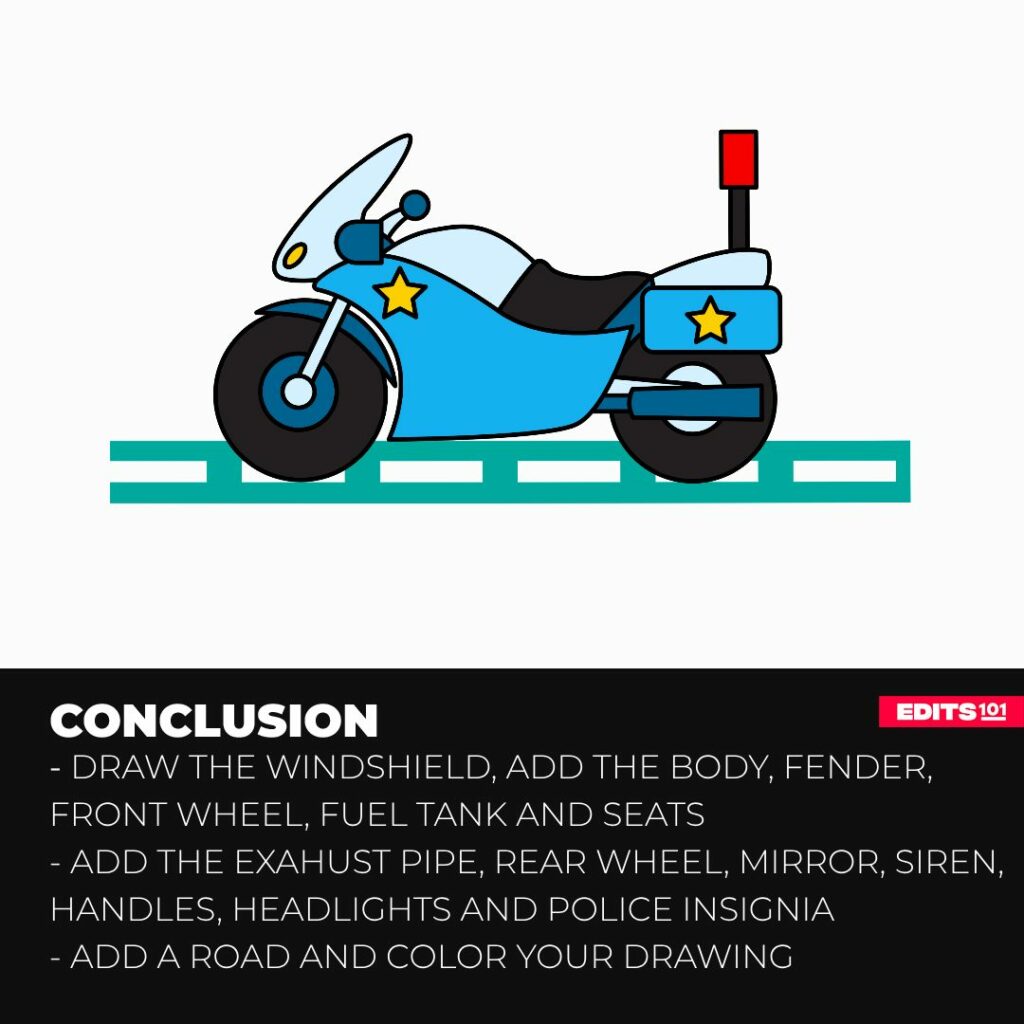
Conclusion
Drawing a police motorcycle involves adding one part at a time. In our drawing, we started by drawing the windshield then added the body, fender, front wheel, fuel tank, seats, toolbox, exhaust pipe, and rear wheel. We then refined our drawing by adding a mirror, siren, handles, headlight, police insignias then colored our drawing.
Hopefully, you have learned a lot about police motorcycles in addition to how to draw a good motorcycle. Keep practicing and you will get better.
Thanks for reading & feel free to check out more of our articles!
Author Rating
Overall Rating
Summary
The post is a step-by-step guide on how to draw a beautiful police motorcycle. You will also learn the names of the parts that make up a police motorcycle.