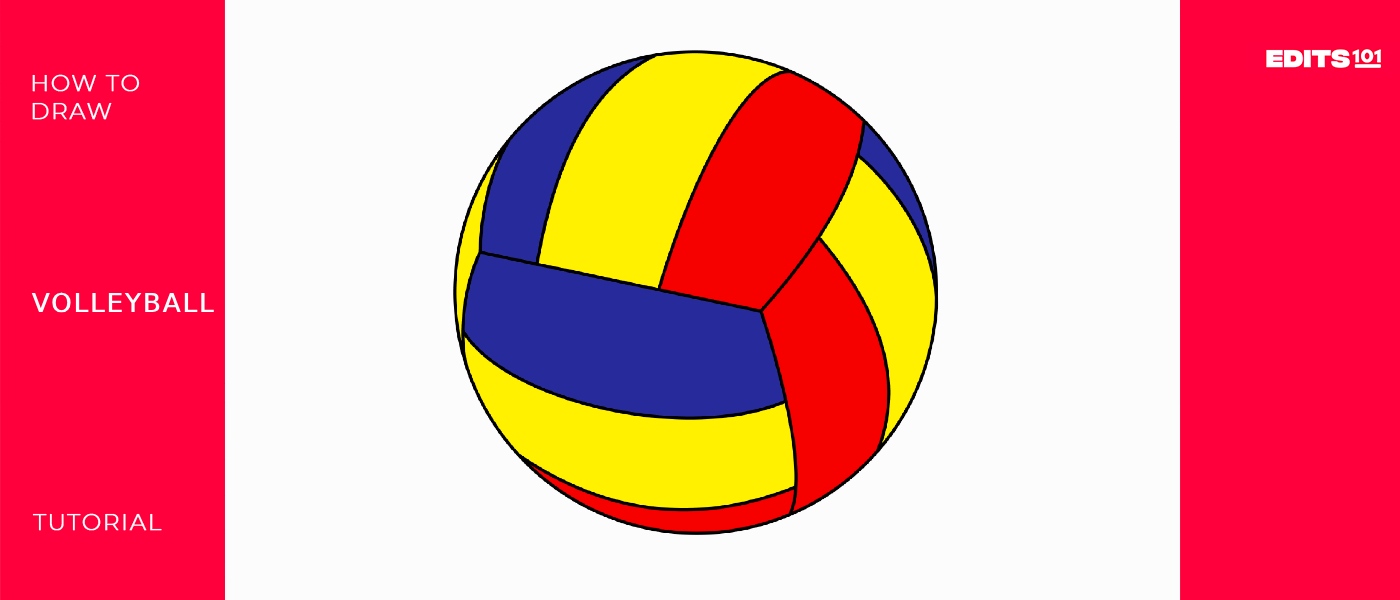
How To Draw A Volleyball | A Quick And Easy Guide
Today, we will draw a volleyball. Volleyballs may seem tricky initially, but with some simple shapes and techniques, anyone can create their own volleyball artwork.
Volleyball, invented by William G. Morgan in 1895, began as an indoor sport called “Mintonette” aimed at being less strenuous than basketball. It quickly gained popularity and became an Olympic sport in 1964. Beach volleyball, a variant played on sand with teams of two, also emerged as a widely enjoyed recreational and professional activity. “Volleyball” derives from the volleying action used to move the ball over the net. International competition sets the net at specific heights for men and women.
| Steps | Complexity (1-5) |
| Step 1: Draw the Baseline Circle | 1 |
| Step 2: Add the Dividing Sew Line | 3 |
| Step 3: Include Realistic Details | 4 |
What You Will Need
- Paper
- Pencil
- Eraser
- Ruler or Straightedge
- Coloring Supplies (optional)
How to draw a volleyball
Drawing a volleyball is a great way to practice shading, perspective, and working with basic geometric shapes. Now that we have the essential drawing tools, we will move on to the step-by-step process of how to draw a volleyball.
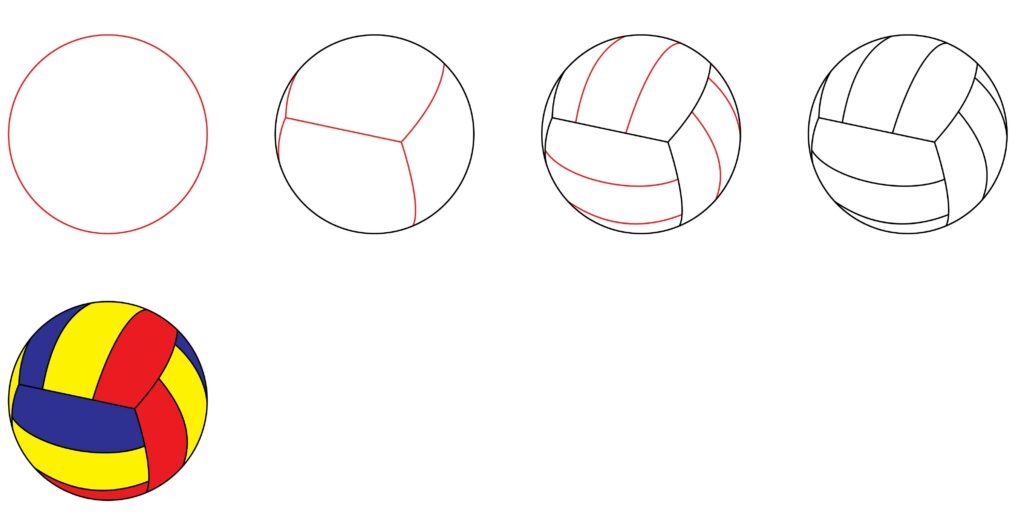
Step 1: Draw the Baseline
A volleyball is a ball used to play indoor volleyball, beach volleyball, or other less common variations of the sport. Volleyballs are spherical and typically comprise eighteen nearly rectangular panels made from synthetic or genuine leather. Six parts, each with three panels, make up the arrangement of these panels.
First, softly draw a horizontal line across the middle of your page with your pencil and ruler. This will serve as the volleyball’s baseline.
Next, draw a circle centered on the baseline in the middle of the paper just like we drew in softball. To ensure you have space to add information later, make sure the circle is manageable. The circle should barely touch the top and bottom of the baseline.
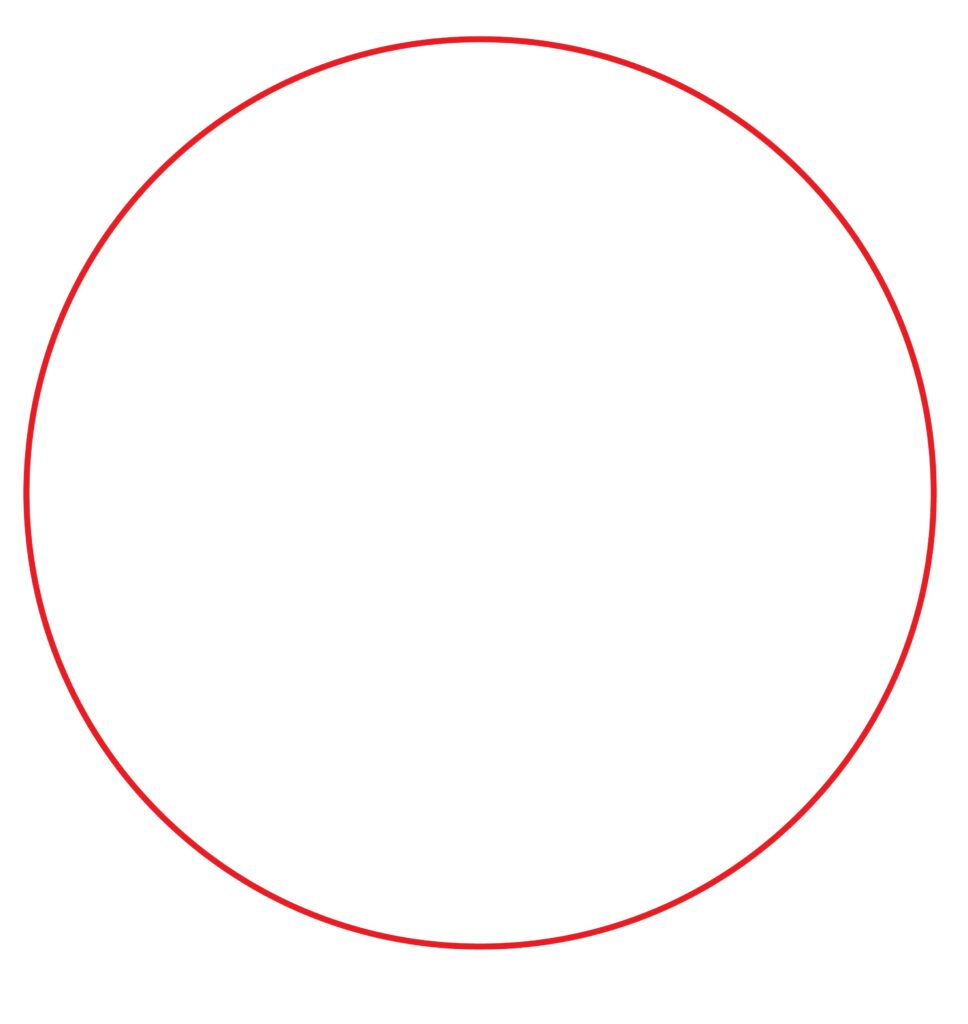
This circle will become the basic shape for the volleyball. All the details will be added around this foundational shape.
- Draw a horizontal baseline across the middle of the page
- Center a circle on the baseline, touching the top and bottom
- The circle will become the base for the volleyball shape.
Step 2: Draw the Dividing Sewline
Typically, indoor volleyballs are made from leather, whereas outdoor balls will usually be made from a composite material that is resistant to water.
The next step is to draw the sewn divides on the volleyball. Lightly sketch a curved line down through the center of the circle, like drawing the side of a bowl. Then, add straight lines across the curve to make the volleyball panels.
Draw about 5-7 straight lines bisecting the central curved line. Make the lines various lengths and angles to create panels of different shapes and sizes just like we drew in rugby ball. The lines should go all the way to the edges of the circle on both sides.
This dividing sewn line gives the volleyball its distinctive segmented look. Don’t worry about perfect symmetry – varying the panels creates a more realistic effect!
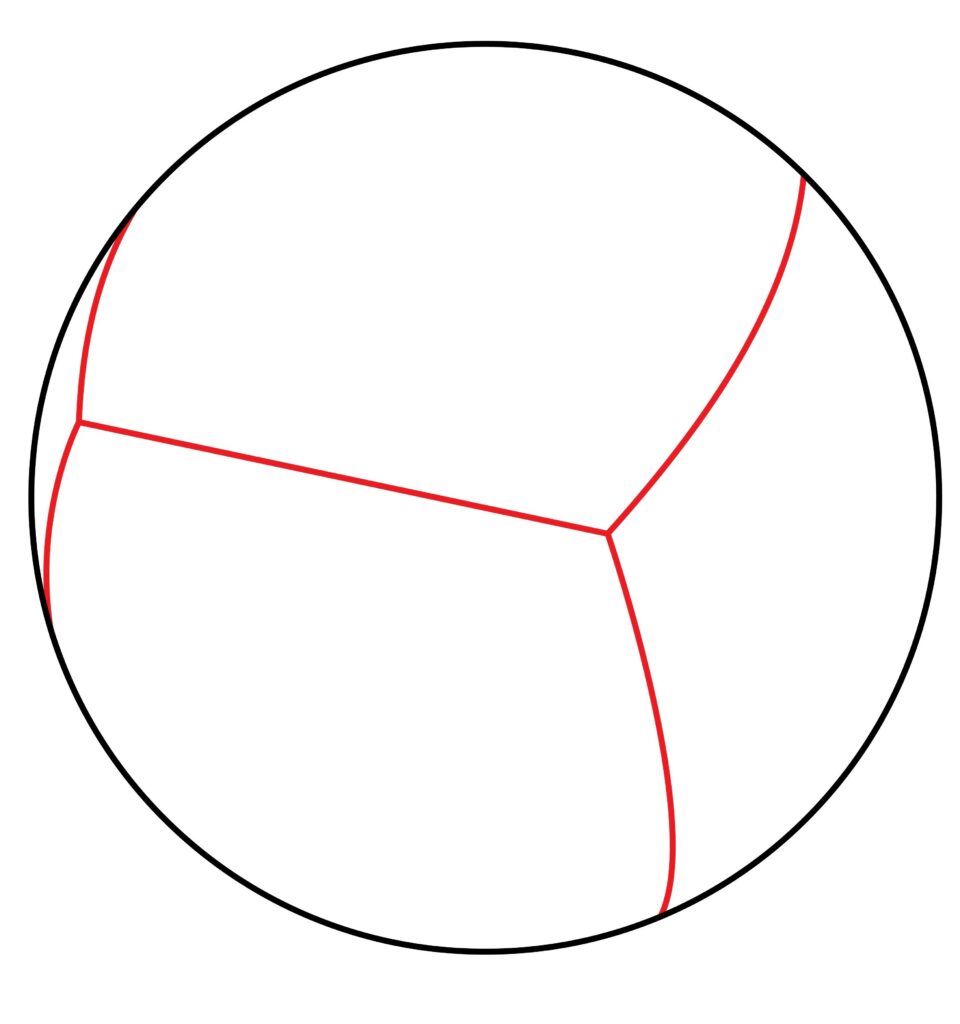
- Draw a curved line through the center of the circle
- Add 5-7 straight bisecting lines of different lengths
- Lines should bisect the entire circle on both sides.
Step 3: Draw Some Details
Now, it’s time to add some details to make your volleyball drawing more realistic. Go over the curved and straight lines you already drew and make them a bit darker. This will help them stand out and give a 3D effect.
Then, draw a series of smaller curved lines inside each volleyball panel to show the texture of the leather. These small curves should go in various directions – some vertical, some horizontal, some diagonal. Make sure to overcrowd the panels – 10-12 turns in each one is plenty.
Finally, draw a circle with a dot in the center on either side of the volleyball to represent the logo patches. Add any other minor details you want to personalize your volleyball!
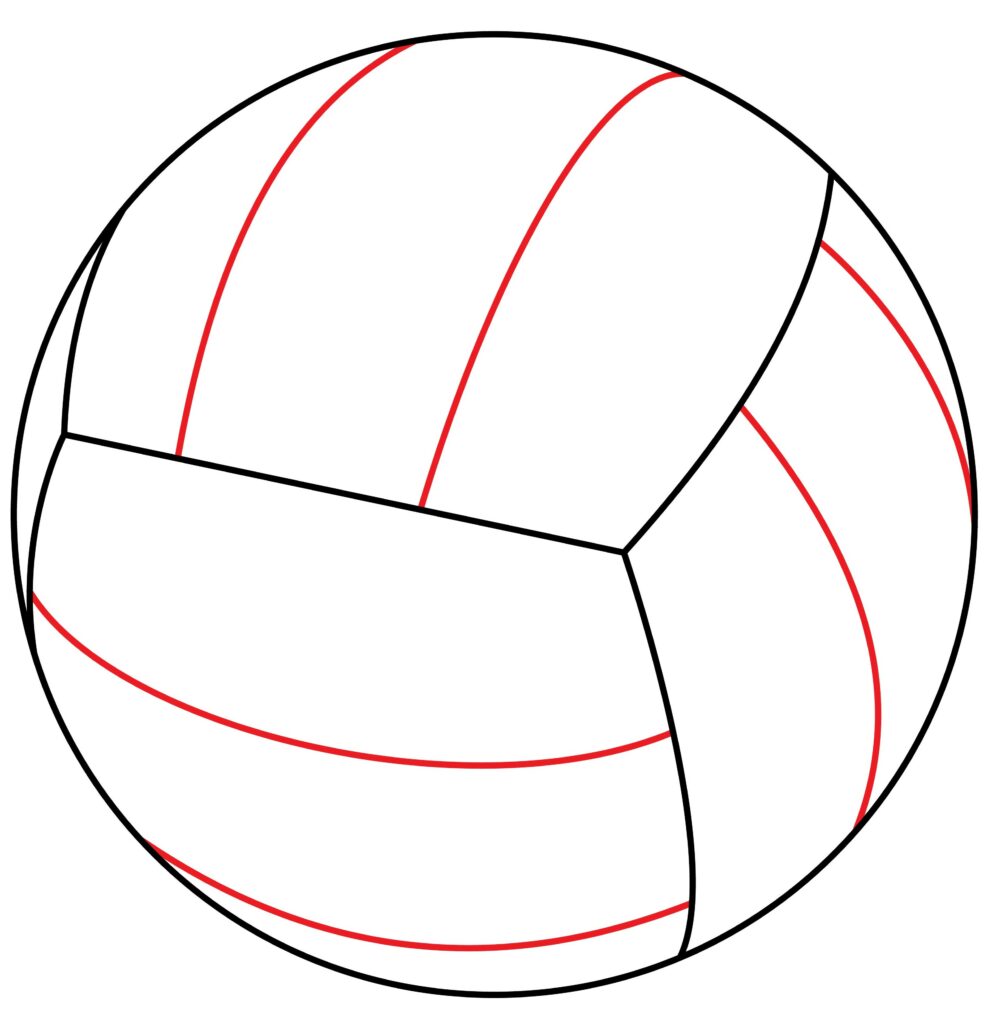
- Go over existing lines to darken them
- Add small curved detail lines in each panel
- Draw simple circles for volleyball logo patches
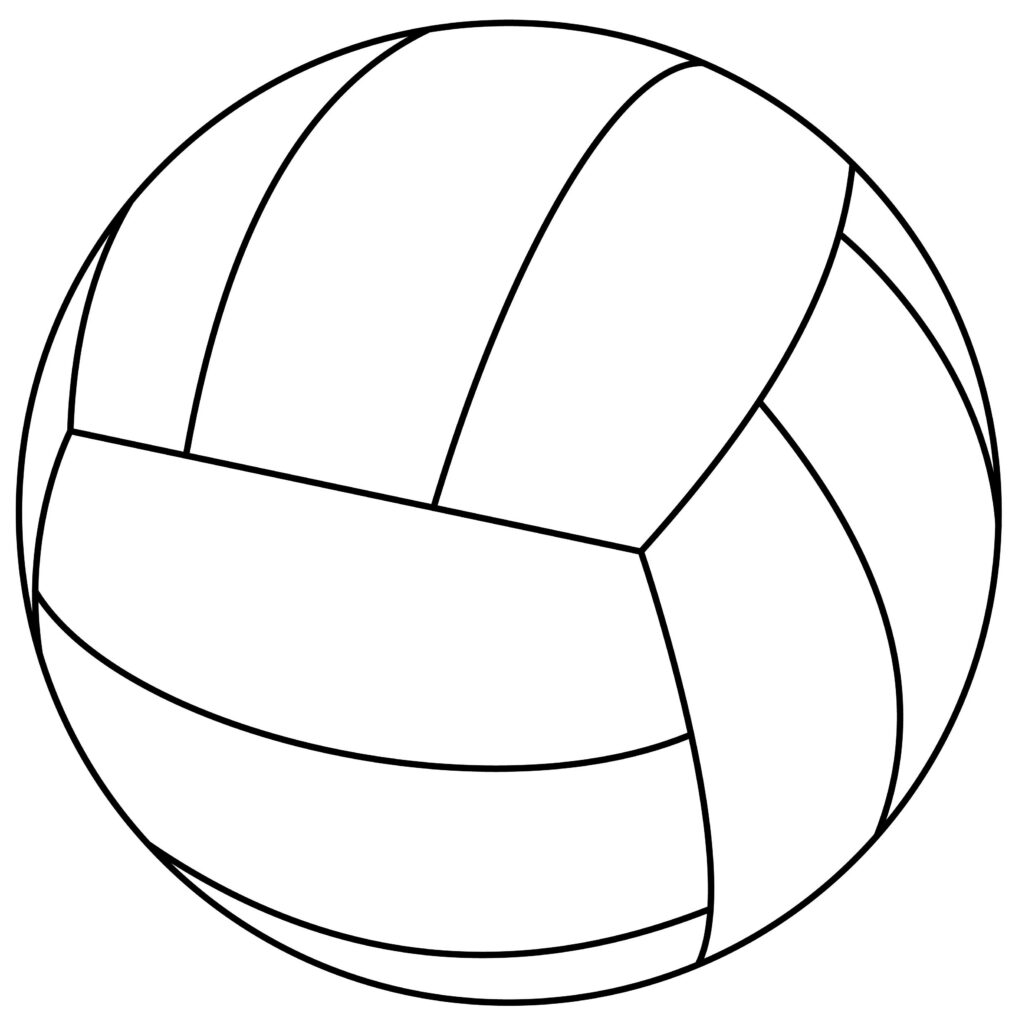
Step 4: Your volleyball is ready.
Excellent work! You now have a completed pencil drawing of a volleyball. You can enjoy some ice cream from a passing-by ice cream truck as a reward.
Take a moment to look over your whole drawing and observe how the different elements come together to create the overall image. The initial circle provides the base shape, the bisecting lines divide it into panels, the small curves add texture, and the logos provide finishing details.
Now is the time to take your volleyball drawing even further if you wish! Here are some suggestions.
Taking your volleyball to the next level
Go over the entire drawing with darker pencil strokes to make the lines stand out. Use your pencil eraser to lighten any mistakes. Use coloring supplies to add color to your volleyball. Try shading the panels to make it look 3D.
Draw a background scene like a beach or volleyball court to place your volleyball in context. Personalize it more by adding your name or fun designs. The most important thing is to have fun and be proud of the volleyball you created!
Adding a Background
Adding a background to a drawing is crucial as it provides context, depth, and atmosphere to the artwork. It helps to establish the setting in which the subject of the drawing exists, allowing viewers to understand better the narrative or mood the artist is trying to convey. The background also helps to guide the viewer’s eye, directing their focus toward the main subject or elements of interest.
Draw a simple beach scene – sand, ocean, sun in the sky. Position the volleyball in the sand, or add a volleyball flying towards the net. Draw a grassy backyard or park. Add trees, flowers, fences, etc. Put the volleyball in the grass. Draw a volleyball court with boundaries, a net, and players. Place the ball on the court.
Coloring the Drawing
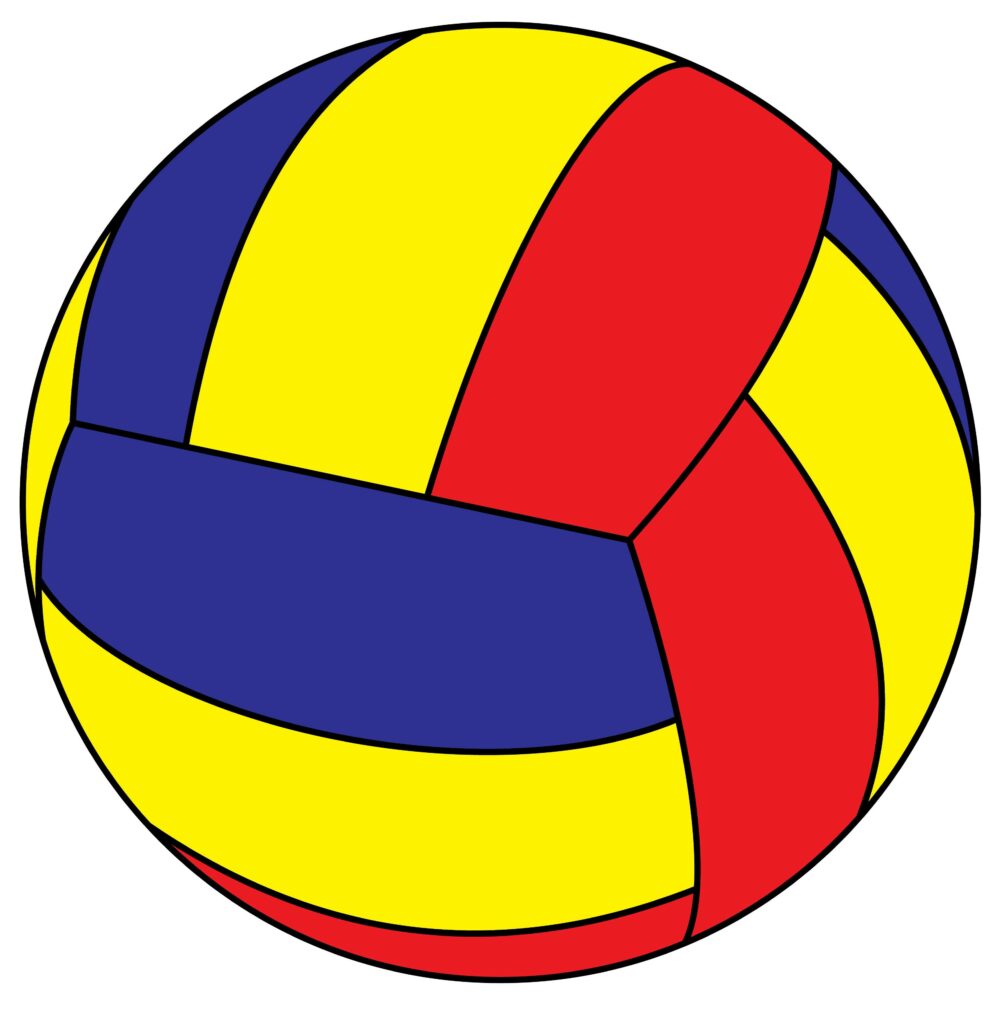
Colors are like magic for artists! They make drawings look alive and exciting. Artists use colors to make things pop out, show feelings, and make their pictures look real. It’s like turning a boring black-and-white drawing into a super cool and colorful masterpiece. Colors help artists make you look at certain parts of their picture, tell you how they feel, and add special touches to make everything look just right. It’s like the finishing touch that makes drawings awesome!
Color is like an artist’s special language and creative superpower. While making good art is important, what brings a drawing to life and engages people the most is adding lots of vibrant colors. Colors make the picture stand out and feel complete, giving it that extra something special.
Get creative and make the ball colorful! You can use colored pencils or markers to add different colors, just like we did with the skateboard for a fun look. To make the ball look 3 dimensional, use light shades to add highlights and dark shades to add shadows. Don’t forget to add colors to the background too, like brown for fences, green for grass, and blue for water.
Bonus tips
Try drawing the volleyball from different angles – side view, above, and below. This builds perspective skills. Draw a player setting or spiking the ball to show motion and action like a soccer player we drew before. Use a kneaded eraser to lighten in highlights and shadows for more realism. Outline with a marker or pen, then erase pencil lines for a clean look.
The possibilities are endless for taking your volleyball drawing to a more advanced level! Start simple, practice the techniques, and have fun making it your unique drawing.
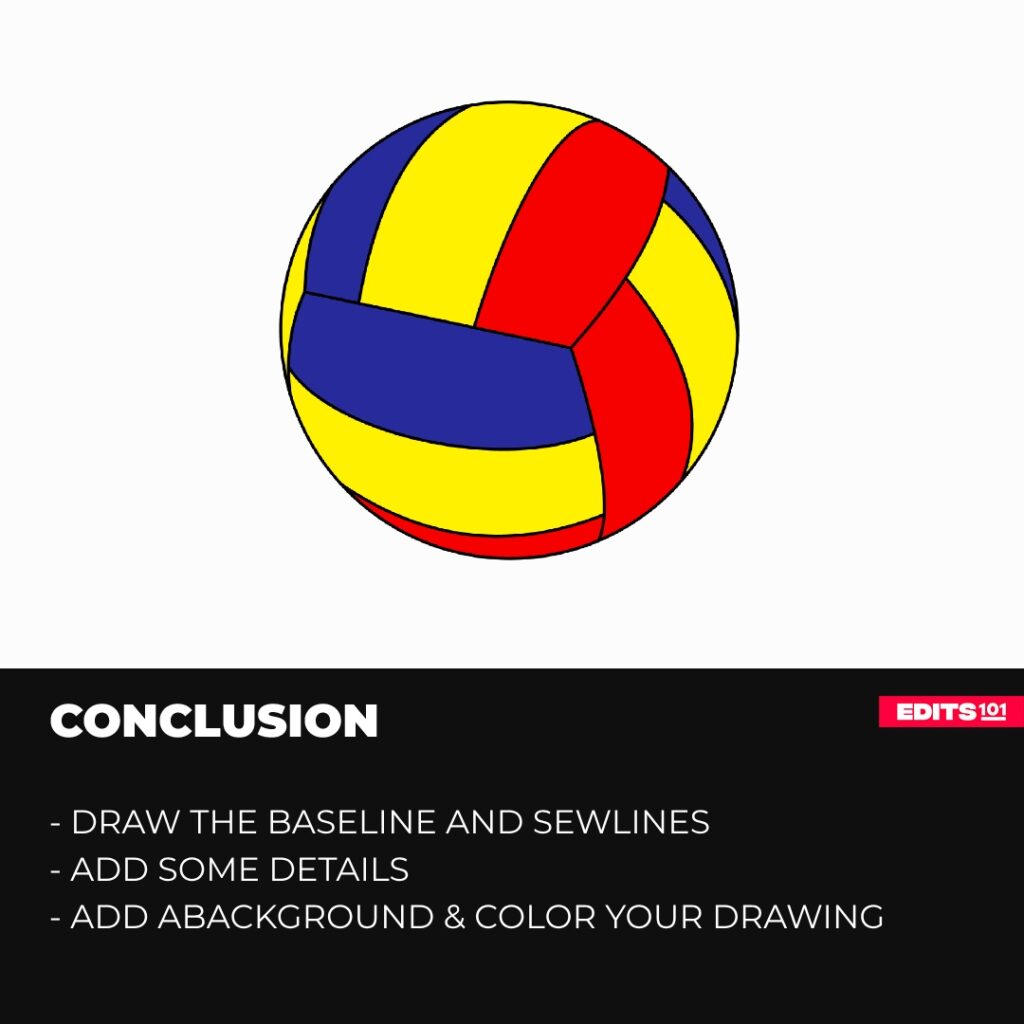
Conclusion
Drawing is a fun activity for everyone, no matter how old you are or how good you think you are at art. In this post, we learned an easy way to draw a simple volleyball. We started with basic shapes and added details step by step to create our volleyball artwork.
As you practice these basic drawing skills, you’ll feel more confident and be able to make your volleyball drawing even cooler. You can add colors, backgrounds, and your special touches to make it one-of-a-kind!
Let’s recap what we did in this guide. We started by drawing the baseline, then added the dividing sew lines and finally put in the details to create the sketch of the volleyball.
Drawing takes time and practice, but it’s so rewarding. Feel proud of the volleyball you made and show it off to inspire others to express themselves through art. Now, with the techniques from this post, you have the skills to draw volleyballs and turn your ideas into artistic drawings.
Thanks for reading & feel free to check out more of our articles!
Author Rating
Overall Rating
Summary
This guide explains how to draw a volleyball in 4 simple steps. You will also learn a few interesting facts about this ball.