How to Draw a Rugby Ball | Very Quick Guide
Today, we are going to learn how to draw a rugby ball step by step. We will be helping you learn how to bring this iconic sports symbol to life on a piece of paper or on your favorite sketching app. But first, let’s look at what a rugby ball is.
The rugby ball is a unique, oval-shaped ball that is used in the sport of rugby. The elongated shape is what distinguishes it from balls used in sports like soccer. It is good to note that the oval shape improves gripping and handling thus facilitating various passes, kicks, and maneuvers that are involved in rugby gameplay. We will share more interesting facts as we cover today’s lesson.
| Step | Complexity Level |
| Drawing the Outline | 1 |
| Adding Stitch Lines | 2 |
| Drawing the Sew Line | 2 |
| Coloring | 1 |
What You Will Need
- A clean sheet of drawing paper, preferably A4 size.
- A pencil
- An eraser for correcting any little mistakes along the way.
- Markers or colored pencils for adding vibrant colors.
- 10 Minutes
How to Draw a Rugby Ball Step by Step
To make it easy for you to follow along, we will be drawing a simple rugby ball. We have also included an image with all the steps we will be following throughout the lesson. Study the below image keenly so that you understand what will be involved in each step.
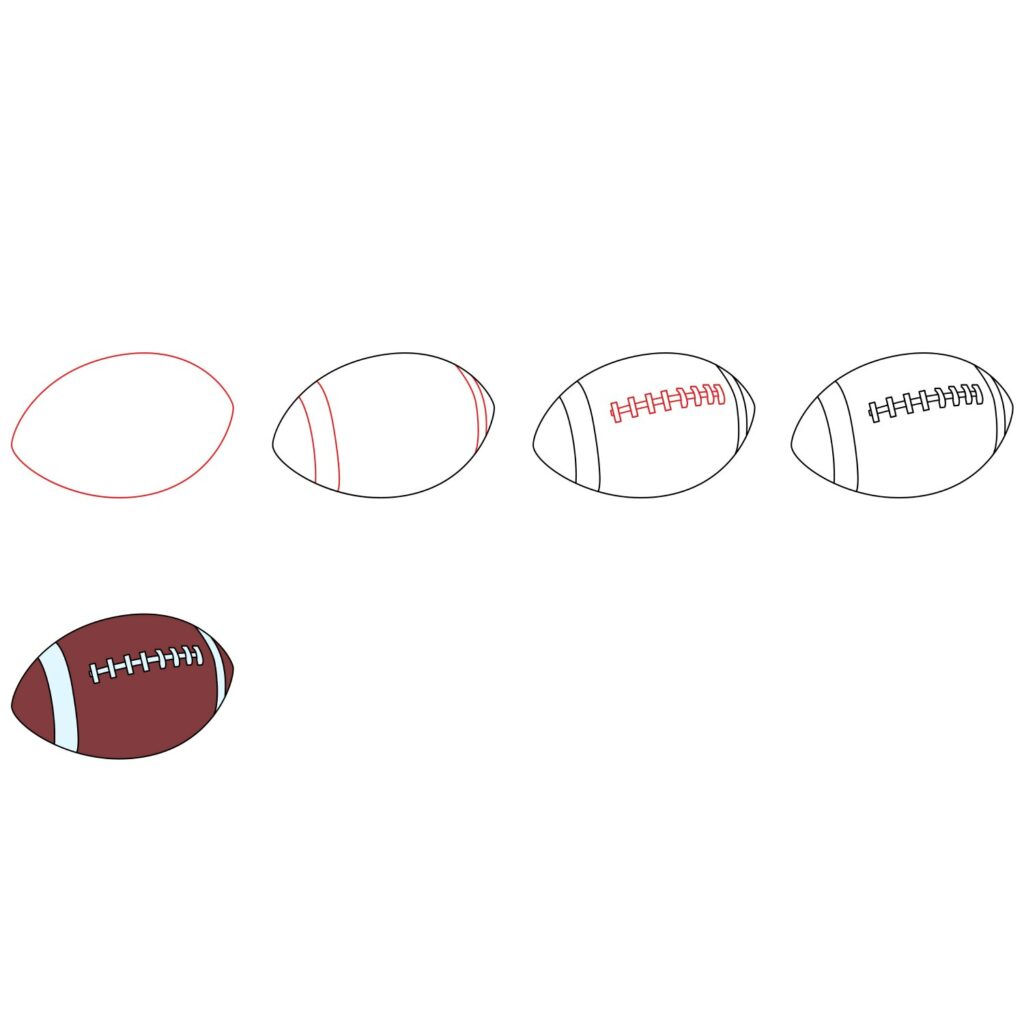
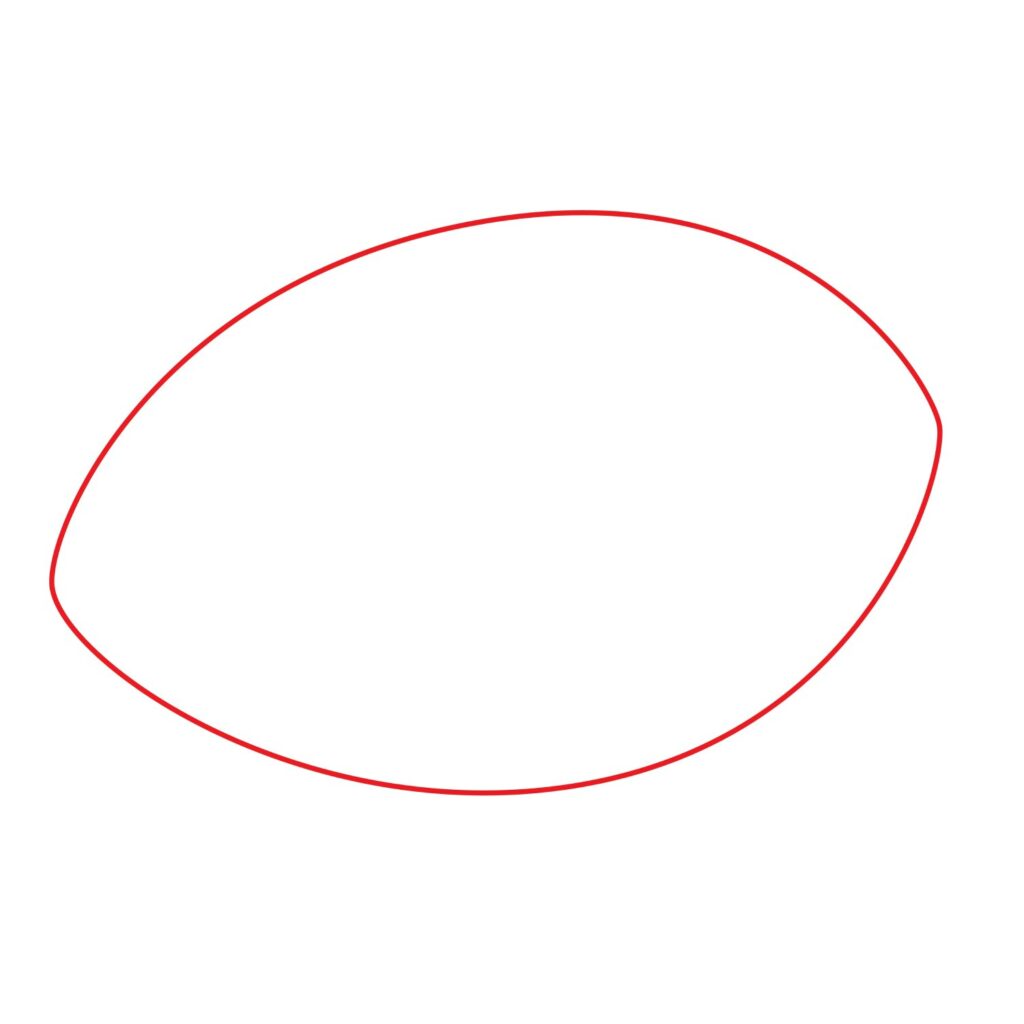
Step 1: Draw the Outline
The first thing you need to do is draw the outline of the rugby ball. This is important because we first need to get the dimensions of the ball set before we start adding the tiny details that turn the elongated oval shape into a realistic rugby ball. The oval shape sets the foundation for your drawing.
Using your pencil, draw an oval shape in the middle of your drawing paper. The oval shape needs to be big because it is the largest part of our drawing. You can achieve a perfect oval shape by first drawing the top half of the oval using a curved line that bends upward. For the bottom part, use a line that bends downwards and connects to the first curved line at the ends.
- Draw a curved line that bends upward for the top part of the ball
- Add a curved line that connects to the ends of the first line and bends downward to complete the bottom part of the oval shape
Step 2: Add Stitch Lines
Now that the outline of our drawing is ready, we can go ahead and start adding details that turn it into a realistic rugby ball. We will start by adding the distinguishing patterns that are on either end of the rugby ball. These are usually stitch lines that maintain the structure and durability of the ball.
To add these essential details, you need to draw a pair of curved lines in the area close to the tip of the oval shape. You should do the same for the other end of the oval shape. Your ball should now look something like what we have below. As you can see, this simple detail really enhances the rugby ball by giving it a more realistic appearance.
- Add two curved lines close to the tip of the oval-shape
- Add another pair of curved lines to the other end of the oval-shape

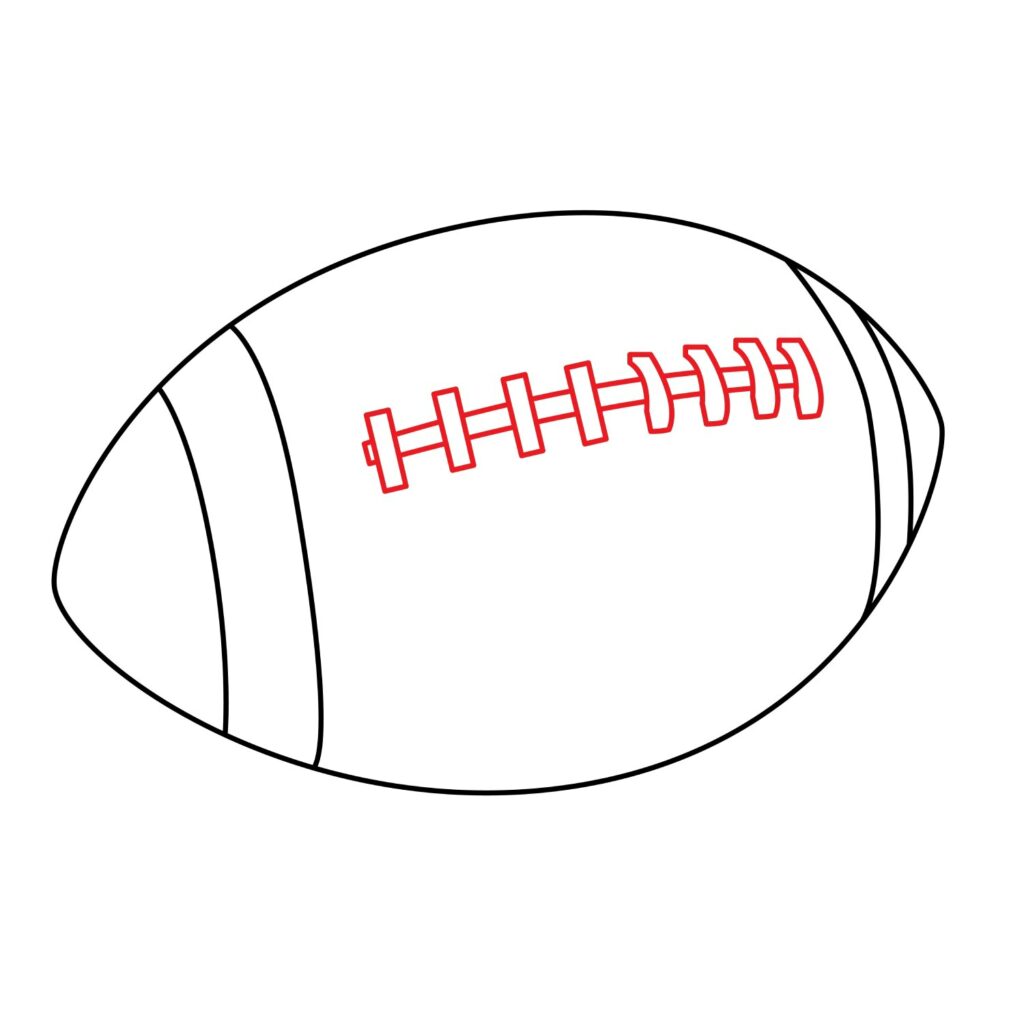
Step 3: Draw the Sew Line
Unlike a soccer ball or a softball, a rugby ball has something that looks like laces on one side. These are known as sew lines. They are made not only to strengthen the ball but also to improve the grip of a rugby player. The sew lines add more depth and dimension to our artwork. In this step, we will be focusing on adding these distinctive sew lines.
To add the sew lines, start by drawing two parallel curved lines in the space between the two curved lines we added on the ends of the ball. The lines should curve slightly to show that our drawing is curved and not flat. Next, add vertical rectangles along the length of the curved line. The sides of the rectangles don’t need to be smooth. Next, erase the lines that cut through the vertical rectangles. Your drawing should look like what we have below.
As you can see, drawing the sew lines makes the drawing look authentic and ready for action on the field.
- Draw two, slightly curved parallel lines in the space between the stitch lines we added earlier
- Add vertical rectangles along the length of the curved parallel lines
- Erase the lines that cut through the vertical rectangles
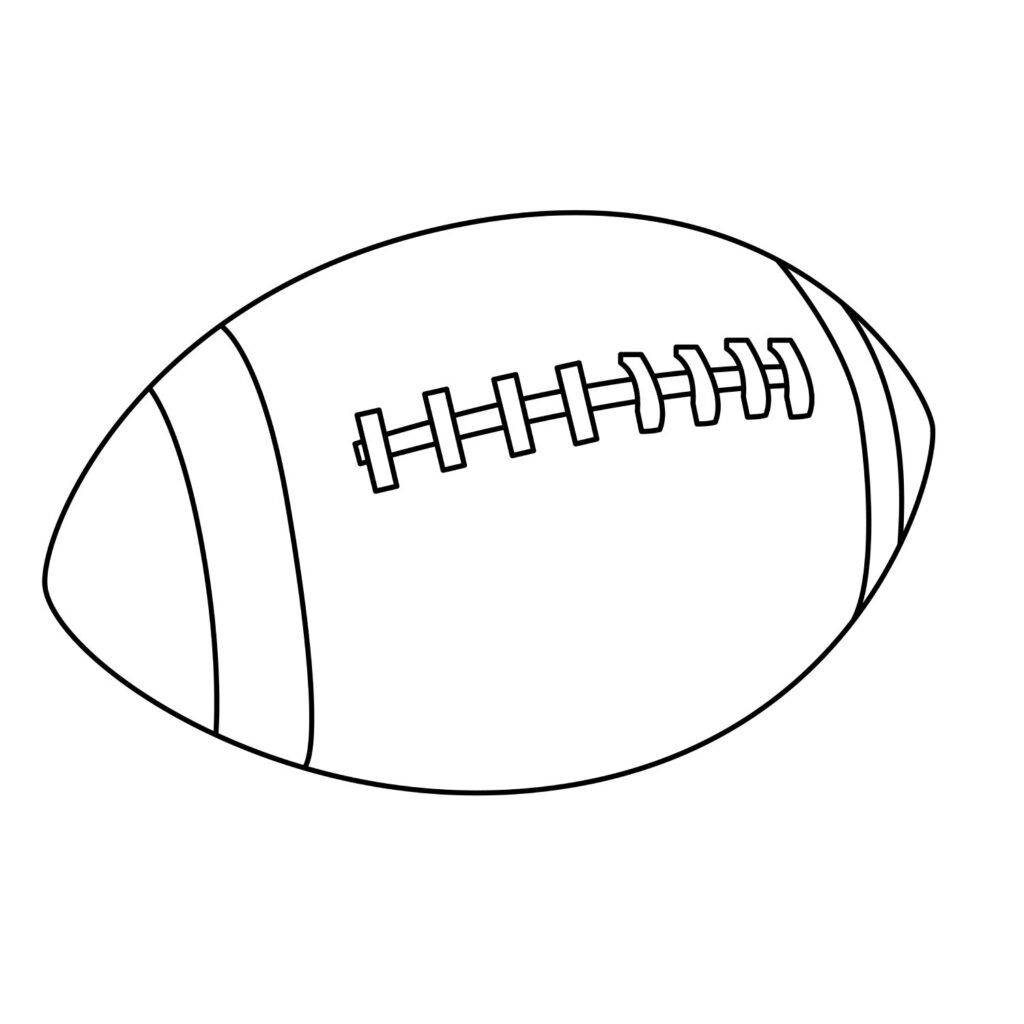
Step 4: Congratulations! Your Drawing is Ready.
Take a moment to admire your creation. You have successfully captured the essence of a rugby ball. Well done! Remember, every artist has a unique touch. Your rugby ball doesn’t have to look exactly like ours. Embrace the individuality of your artwork.
Take the Drawing to the Next Level
While you will get away with it if you leave your drawing as it is, it is always good to add a few more details so that your drawing stands out. There are several things you can do to take your drawing up a notch.
Step 5: Add a Background
One of the best things you can do is add some background to your rugby ball. You may consider placing your rugby ball on a rugby pitch. You don’t have to draw the complete rugby field or stadium around it. You can simply add the goal line. Doing so will create a dynamic scene and showcase your ball in action.
You may also consider adding a name to your rugby ball. The name can be that of your favorite rugby jersey number, your own name, or the name of a popular brand name. The choice is yours.
Step 6: Color Your Drawing
The final step is the most fun. It is all about making your rugby ball stand out by coloring it. Take out your colored pencils or markers and start coloring your rugby ball. You can stick to traditional colors or get creative with your own unique design. You can also experiment with shading and blending colors to make your rugby ball pop. You should also consider using a mix of shades to create highlights and shadows.
Remember that this is your ball and you can use any colors that you want. However, to avoid concealing the details we added, you should use different colors for various details like what we did in our drawing.

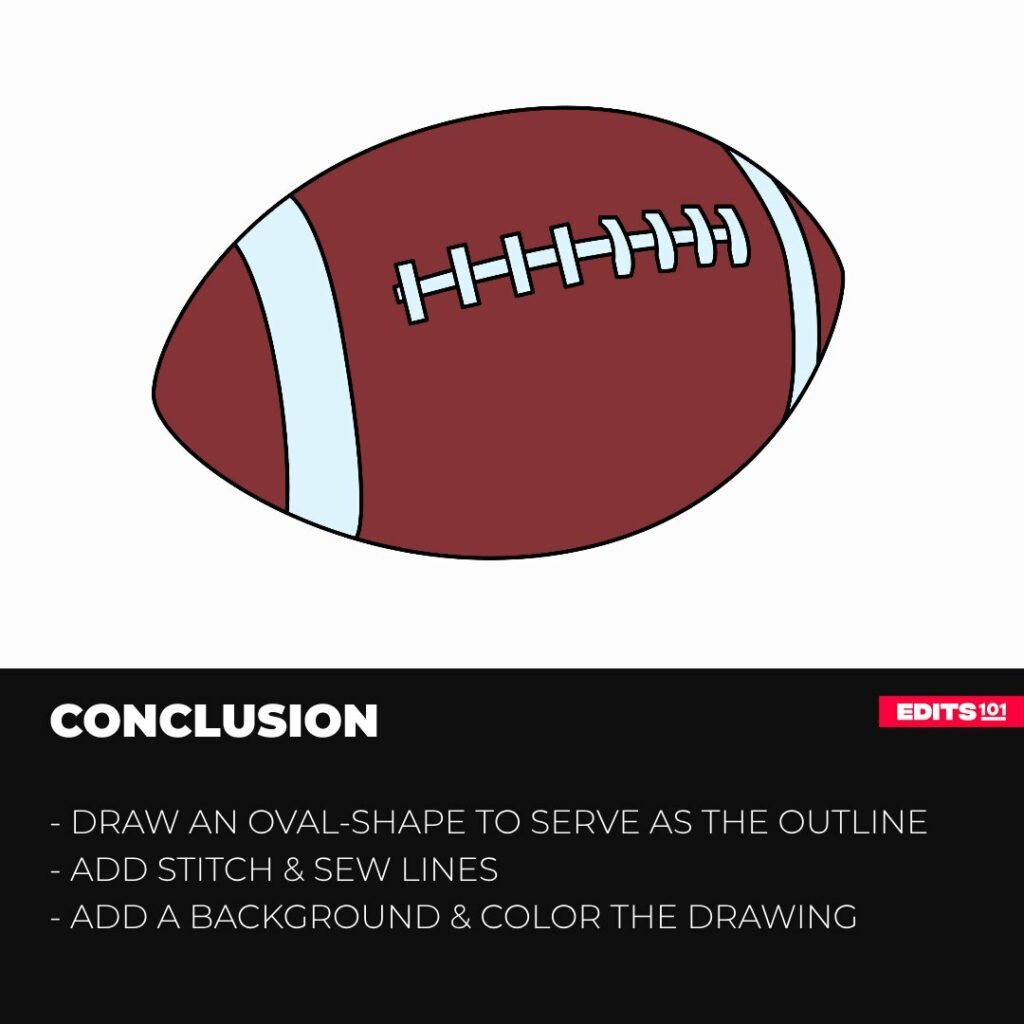
Conclusion
Drawing a rugby ball is quite easy. There are no complicated steps. In our drawing, we started by drawing the outline of the ball. The outline served as the foundation of our rugby ball. We then turned the oval shape into a realistic rugby ball by adding distinctive details. We started with the stich lines on the ends of the ball then added the sew lines in the middle of the ball. To make our drawing stand out, we colored it, using different colors for the various parts of the ball.
Congratulations on completing the lesson. We hope you had as much fun as we did and you ended up with a rugby ball that is as beautiful as ours or even better. If not, don’t be frustrated. You will notice a significant improvement when you attempt to draw the ball again.
Remember that the beauty of art lies in the joy of creation. Keep exploring, keep drawing, and most importantly, keep having fun on your artistic journey!
Thanks for reading & feel free to check out more of our articles!
Author Rating
Overall Rating
Summary
This easy guide will teach you how to draw a rugby ball. You will also learn interesting facts about this ball and how to achieve a realistic drawing.