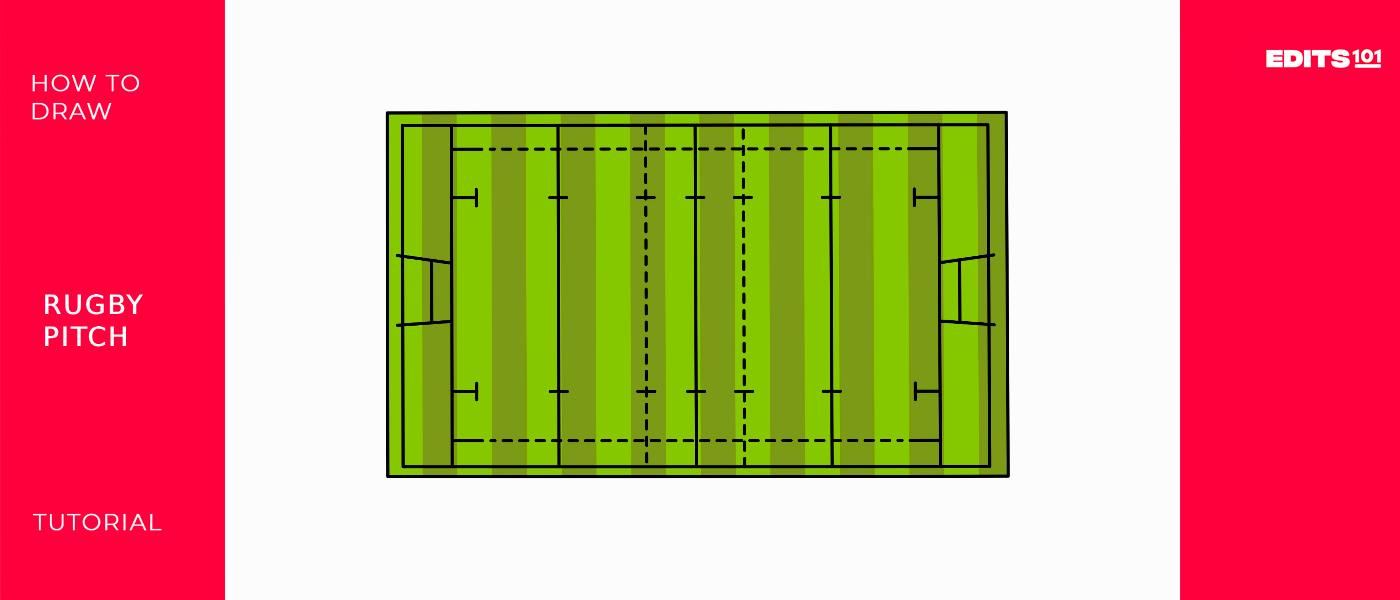
How To Draw A Rugby Pitch | An Easy Step-By-Step Tutorial
Rugby is an exciting sport that originated in England in the early 1800s. It has grown into one of the most popular sports worldwide, with millions of fans. Learning to draw a rugby pitch can be a fun way for young aspiring artists and rugby fans to get creative.
This beginner’s guide will walk us through the steps for drawing a fundamental rugby pitch. With a bit of practice, you can bring the action of a rugby match to life on paper!
| Steps | Complexity level |
| Draw the field | 2 |
| Draw the in-goal area | 2 |
| Draw the 5m lines | 3 |
| Draw the halfway line and 22m lines | 3 |
| Draw the 10m lines | 4 |
| Draw the goalposts | 2 |
What you will need
- Paper
- Pencil
- Eraser
- Ruler
- Coloring supplies (optional)
how to Draw a rugby pitch
Having basic drawing supplies like paper, pencils, an eraser, and a ruler is all you need to get started. Coloring supplies like crayons, colored pencils, or markers can also be helpful if you want to add color to your rugby pitch drawing later. Now that you’ve gathered your drawing tools, we will begin the fun part – learning how to draw a rugby field!
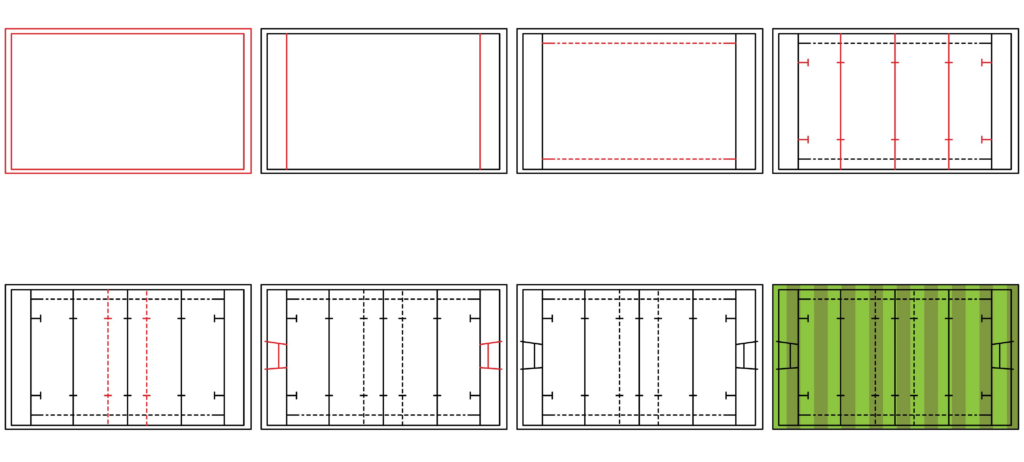
Step 1: Draw the field
To start, lightly draw two rectangles near the middle of your paper, with the smaller rectangle inside the larger one. The larger rectangle represents the boundaries of the entire rugby field, while the smaller rectangle is the playing area. Make sure to leave enough space around the field for adding details later. Use a ruler to draw straight lines and make the rectangles proportional. The playing area should take up most of the overall space.

- Lightly draw two centered rectangles, one inside the other
- Use a ruler to draw straight lines
- Leave space around the rectangles for details
- Make the inner rectangle slightly smaller for the playing area
Step 2: Draw the in-goal area
The in-goal area is the section at each end of the rugby field beyond the playing area. Lightly draw two vertical lines at both ends of the inner rectangle you already drew, extending from the goal line to the outer field boundary. Make these lines straight using a ruler. The in-goal area should be rectangular and proportional to the playing area. Leave enough space for adding details later.
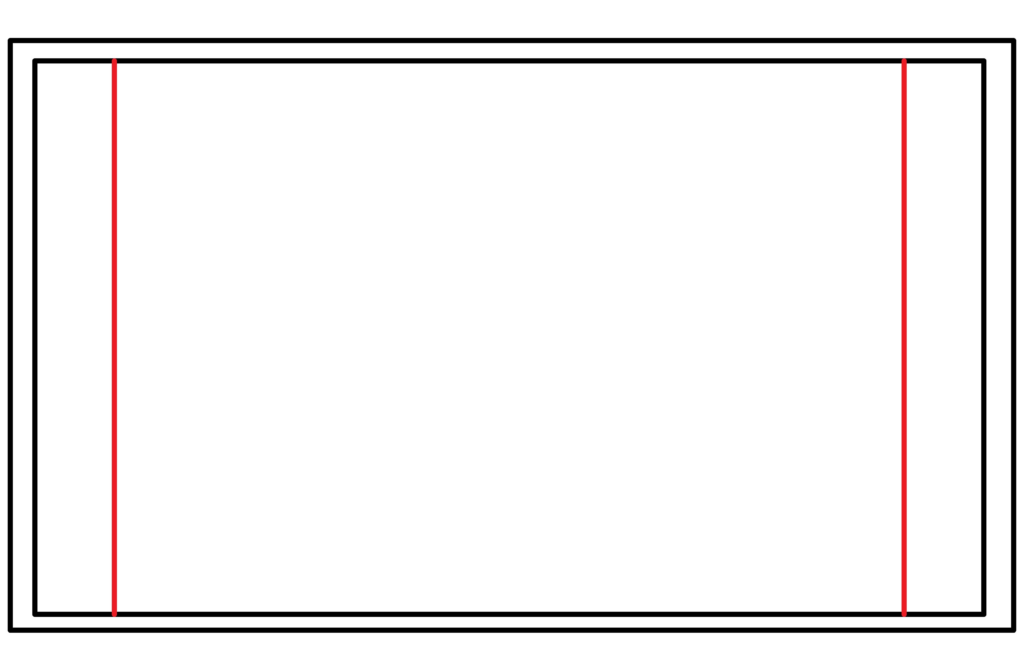
- Lightly draw vertical lines at both ends to mark the in-goal area
- Use a ruler to keep the lines straight
- Make the in-goal area rectangular and proportional
- Leave space around for adding details later
Step 3: Draw the 5m lines
Rugby pitches have 5-meter lines marked on each side of the playing area. These help indicate positions for lineouts. To add these, lightly draw two horizontal dashed lines on each side of your playing rectangle. Use a ruler to remove the dashes evenly. Make sure to leave gaps between each dash. Position the lines 5m from the try line on each side.
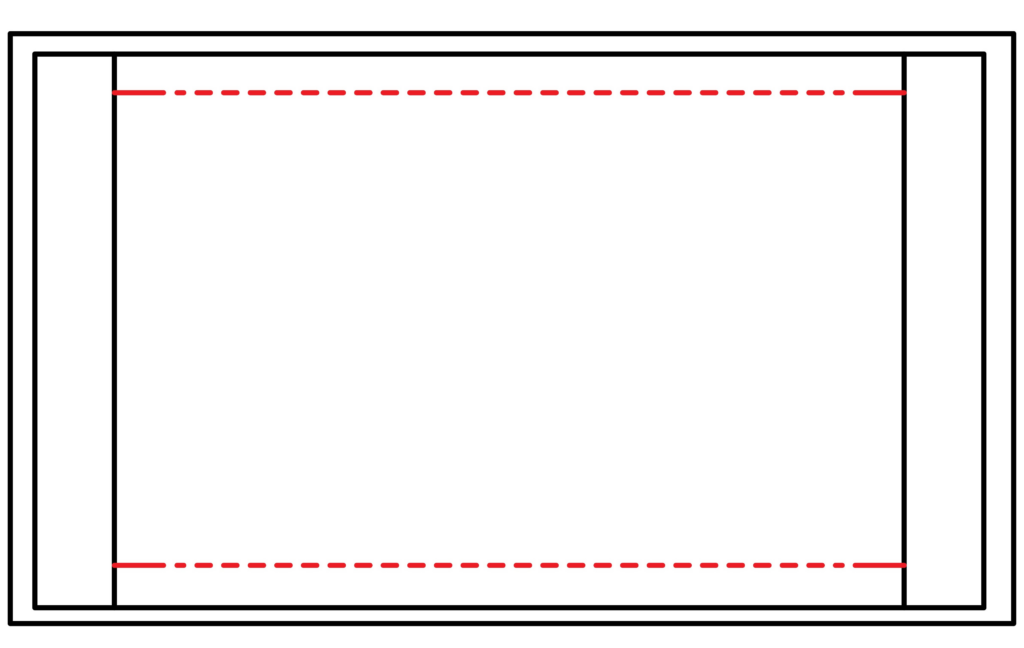
- Lightly draw two horizontal dashed lines on each side
- Use a ruler to space the dashes evenly
- Position the lines 5m from each try line
- Leave gaps between each dash
Step 4: Draw the halfway line and 22m lines
The halfway line divides the field into equal halves on a rugby pitch. To add this, lightly draw a straight vertical line from one touchline to another, bisecting the playing area. Use a ruler to keep the line straight.
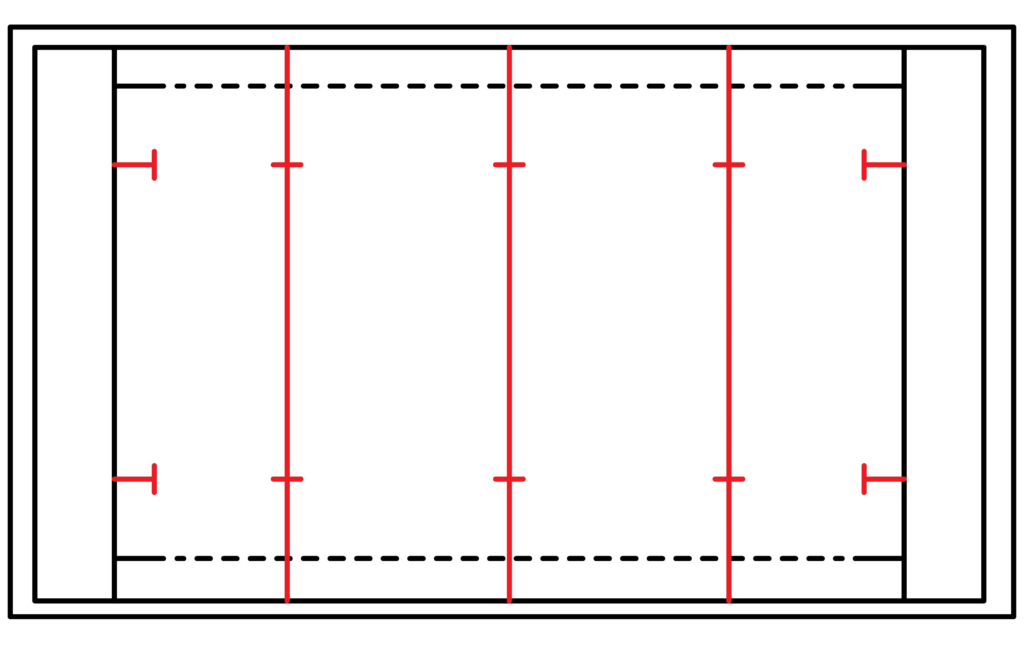
The 22m lines mark significant territory on each side of the halfway line. Lightly draw two additional straight vertical lines on each half of the field, 22m from each try line. Use a ruler to evenly space and draw straight lines.
- Draw a straight vertical line to mark the halfway line
- Use a ruler to keep the halfway line straight
- Add two more vertical lines 22m from each try line
- Space and draw the 22m lines evenly on each half
Step 5: Draw the 10m lines
The 10m lines are two dashed lines drawn 10 meters from the halfway line on each side of the pitch. To add these, lightly draw two vertical dashed lines in each half of the field, 10m from the halfway line. Use a ruler to space the dashes evenly.
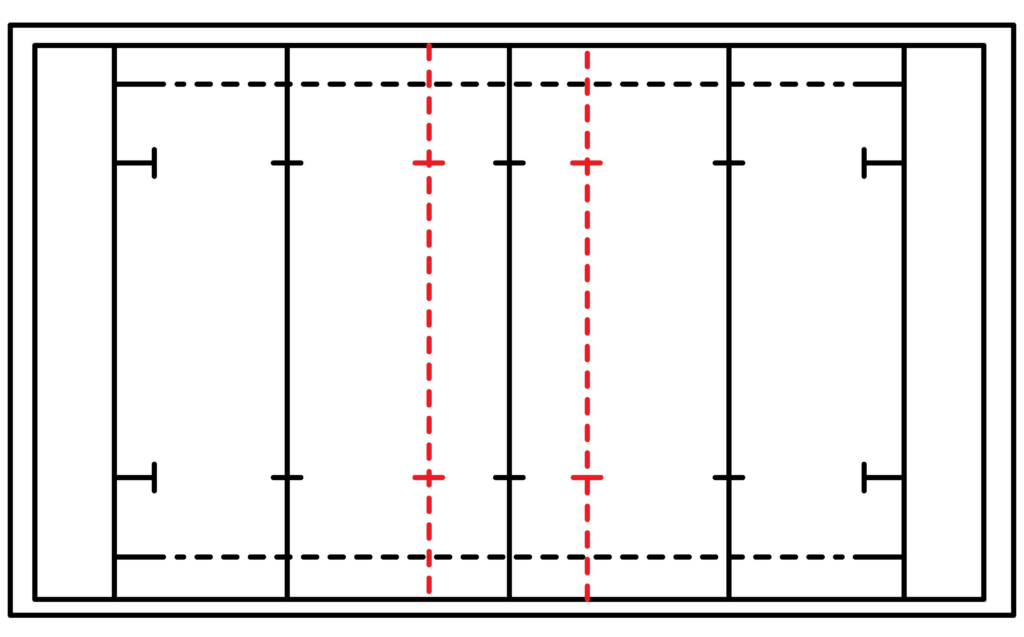
These lines indicate where scrums take place. Leave small gaps between each dash. Ensure the 10m lines are parallel with the 22m and halfway lines.
- Lightly draw two vertical dashed lines on each half
- Position 10m from the halfway line
- Use a ruler to space the dashes evenly
- Leave gaps between dashes
- Draw parallel with other field lines
Step 6: Draw the goalposts
Goal posts mark each end of the pitch where tries are scored. To add these, first draw two short horizontal lines on the goal line at each end of the field. Position them equally spaced from the touchlines.
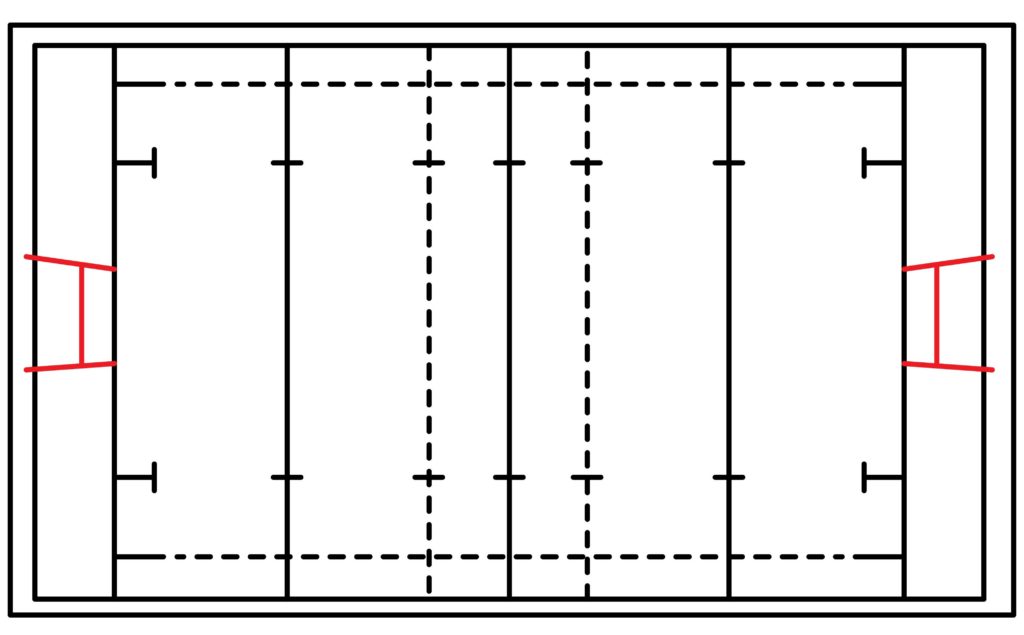
Then, draw a vertical line connecting the two horizontals, making a “H” shape. Erase any parts of the vertical line outside the horizontals. Make all lines for the goalposts straight using a ruler. The posts should be centered on the goal line.
- Draw two short horizontals equally spaced on each goal line
- Connect with a vertical to make “H” shape posts
- Erase any parts outside the horizontals
- Use a ruler to keep lines straight
- Center posts on each goal line
Step 7: The rugby pitch is ready
The rugby pitch is ready to have a match. You did an excellent job. You created your rugby pitch, and we’re sure you followed every instruction. You can use a marker to outline the drawing to make it stand out. To improve the appearance, we will remove the pencil marks after tracing.

The actual fun is about to start. We are going to improve and add authenticity to our drawing. Can you produce a more refined picture with your creativity and imagination?
Taking your rugby pitch drwaing to the next level
Now that we are done with the sketching, we will upgrade our rugby pitch with a background and color.
Adding a Background
A background gives your rugby pitch context and makes it more attractive. You can get creative with different background options. Consider drawing crowds of excited fans in the stands surrounding the stadium for a realistic rugby setting. Use simple stick figure shapes to outline groups of people. Add some waving flags or banners to show team spirit! If drawing figures is tricky, keep them simple, with lines or dots representing the crowds.
Another option is making your pitch an outdoor field with a bright blue sky above. Start by coloring across the top third of your paper light blue. Then, use cotton ball dabbing or sweeping curved lines to add fluffy white clouds. You can also draw in a bright yellow sun peeking out! For a grassy field, use short, light green vertical lines around the edges of the pitch.
Color the Drawing
Adding color to your rugby drawing brings it to life visually. Use a green pencil, marker, or crayon to color in the main playing area. Make sure to leave white for the lines you already drew. For the in-goal areas, consider reddish-brown like dirt or mud outside the main field.
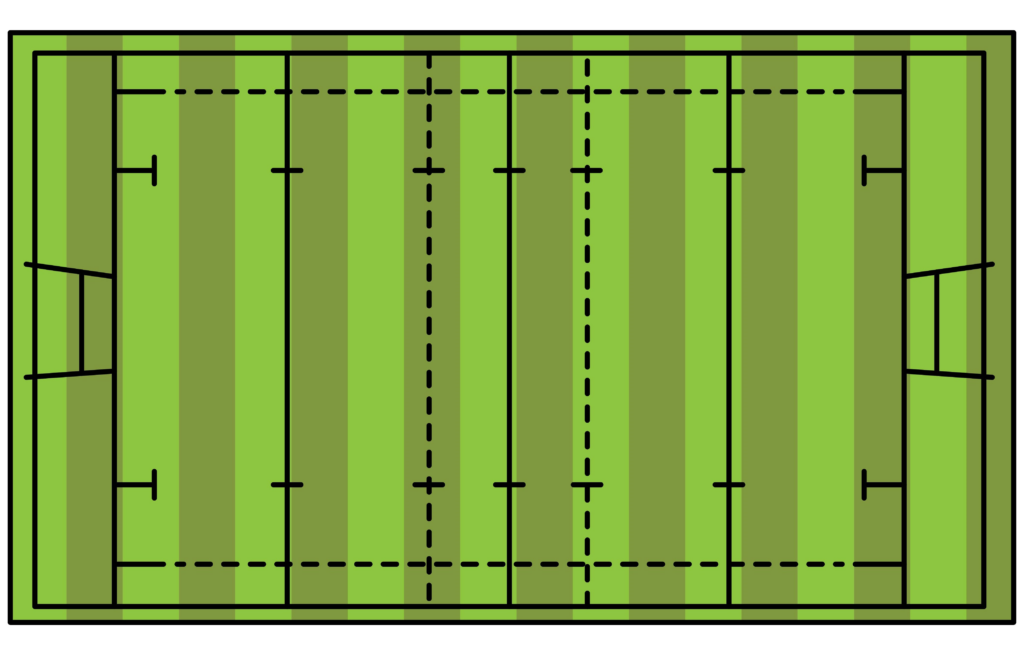
For the lines, go over them in thick white to make them stand out. To color the goalposts, use bright yellow on the vertical and top horizontals. The bottom horizontal can be green for grass. For a blue sky background, use light blue. Add other colors that make sense, like grey for concrete stadium stands or crowds in colorful clothes. Have fun experimenting with different color combinations to make your rugby pitch vibrant!
Bonus Tips
Lightly sketch lines first in pencil before going over in pen or marker. This allows for mistakes and easy erasing. Use a ruler or straight edge for straight lines like the pitch markings. This helps accuracy. Look at photo references of actual rugby pitches to see small details to include. Consider the size and proportions as you draw. The playing area takes up most of the space. Be creative with the scene and setting! You can design your fictional pitch. Add interest by drawing action like players, referees, or coaches on the field.
Practice drawing basic rugby ball shapes to include in your scene. Have fun! Art should be an enjoyable, creative process. Relax, and don’t worry about perfection.
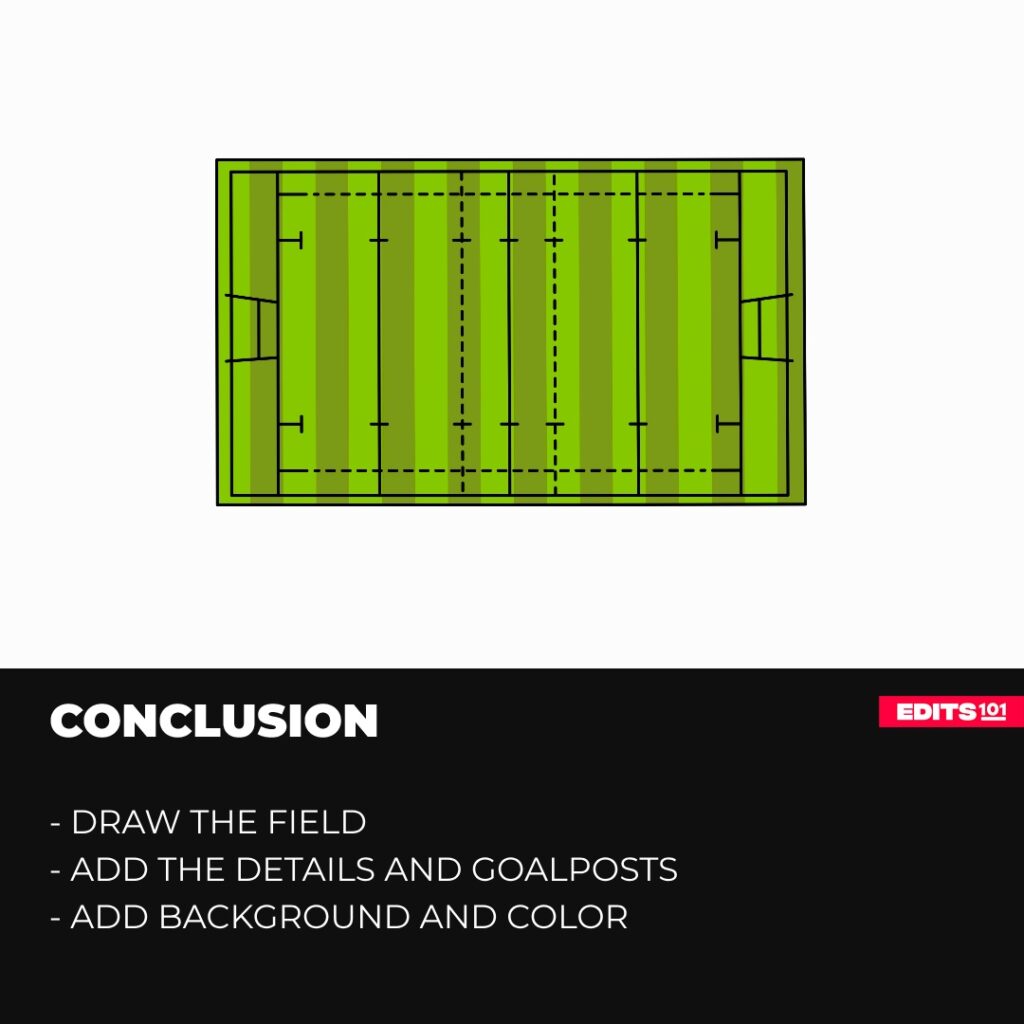
Conclusion
Drawing a rugby pitch is a great way to combine sports and art. Following the steps in this guide, you can learn how to illustrate an essential rugby field on paper. Start with the outlined playing area, in-goal areas, and goal posts. Then, build your skills by adding finer details like line markings and backgrounds. The final result will be your unique rugby pitch drawing that any rugby fan would love!
Rugby pitches make for dynamic canvases to bring sports action to life through drawing. Unleash your inner artist and get creative with different renditions. Add colors that pop, interesting backgrounds, or rugby players in step. Approach it with an imaginative spirit and dedication through practice. Before you know it, you’ll tackle rugby pitch artistry like a pro. So grab your drawing tools and get ready to bring the excitement of rugby to the page!
Thanks for reading & feel free to check out more of our articles!
Author Rating
Overall Rating
Summary
In this post, you will learn how to draw a rugby pitch while learning about the various sections that make up a professional pitch.