How to Draw a Horse Trailer | In 9 Simple Steps
If you have ever watched a classic Western movie, you probably saw a horse cart. You might have also seen one in the museum or on the streets.
These vintage vehicles have a timeless appeal, and drawing one can be a lot of fun! Before cars gained popularity, horse carts used to be the vehicles people used when traveling.
In this easy-to-follow guide, we’ll break it down into easy steps.
What You Will Need
- A pencil
- An eraser
- A ruler
- A drawing piece of paper
- Coloring supplies
- 30 minutes
How to Draw a Horse Cart
A horse cart is a pretty simple vehicle. To make this easy, we will only draw the cart and exclude the horses. Here are the simple steps we will follow in this guide. Please review these steps so that you understand what will be involved.
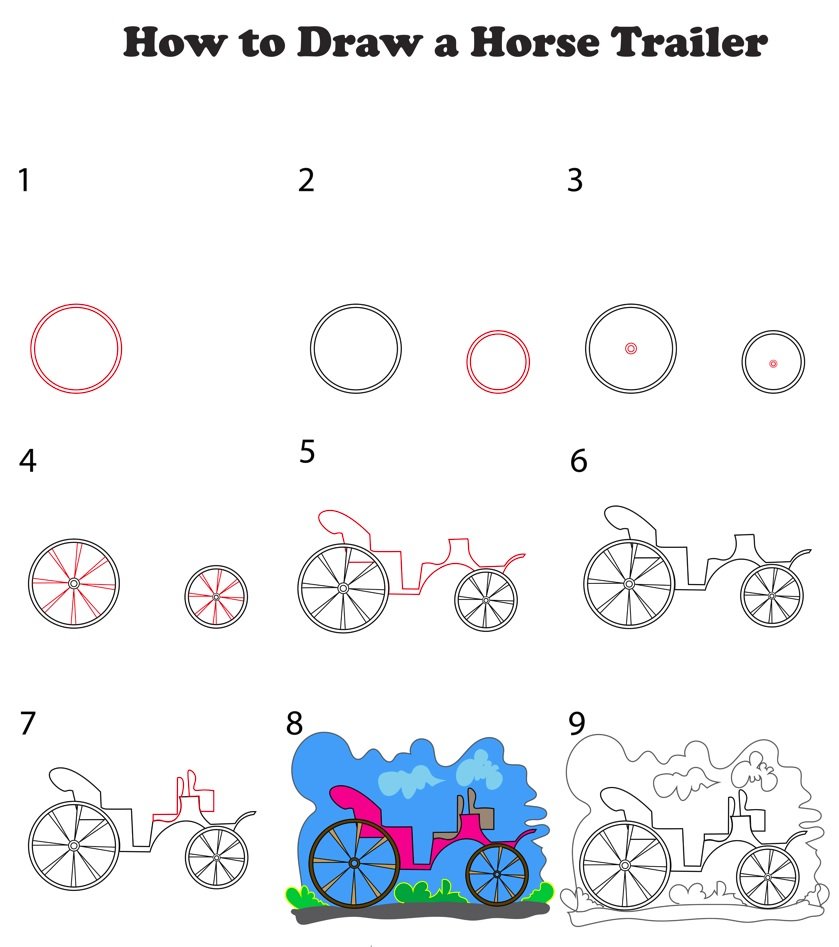
Step 1: Draw the Rear Wheel
As mentioned above, a horse cart is a vehicle. Like all other vehicles, the cart needs wheels to move, just like the double-decker bus, but slightly different. In the past, wheels used to be made of metal. However, the horse carts you see today will have some rubber on the bottom of the wheels.
The horse cart we will be drawing will have four wheels. Remember that due to the perspective of our drawing, we will not be able to add the wheels on the opposite side of the cart. This is because those wheels will be hidden out of sight. As your skills improve, you can draw the horse cart with a different perspective and add the wheels on the other side of the cart.
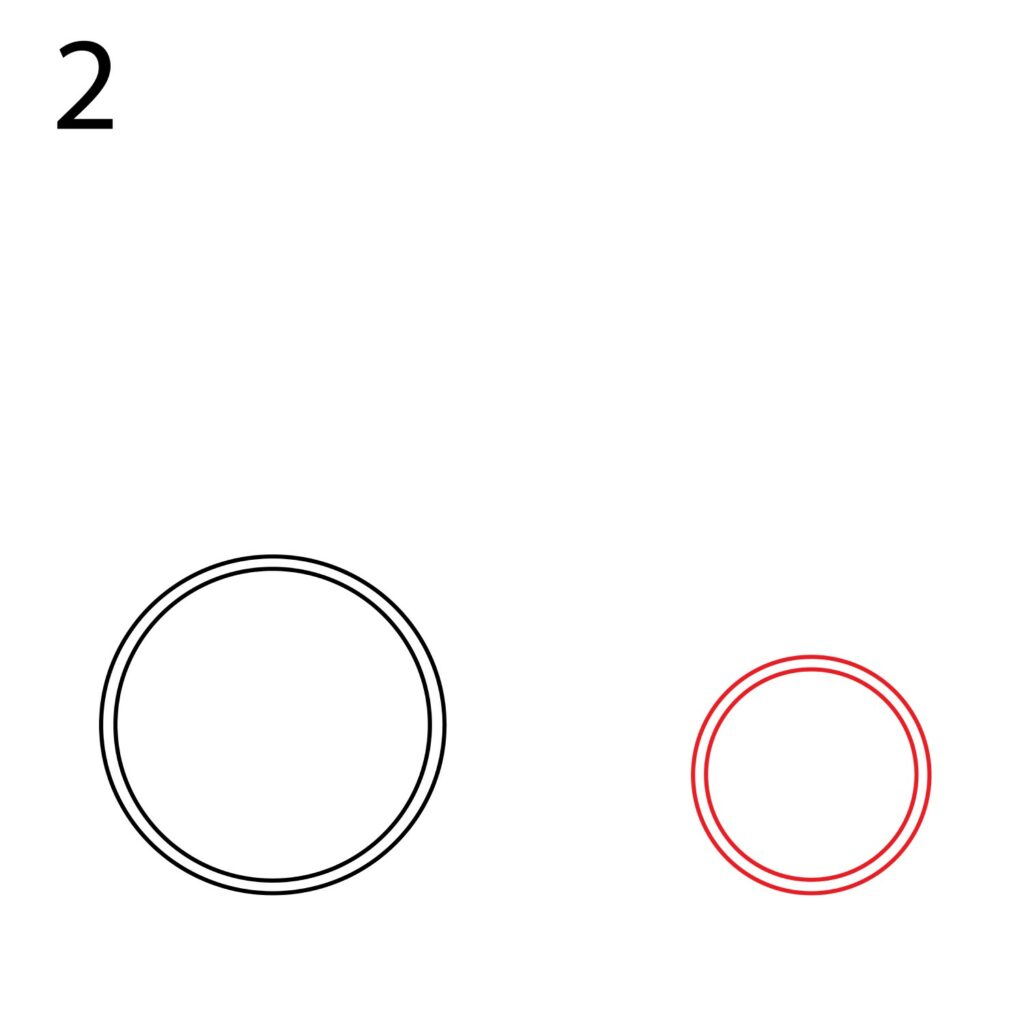
We will start by adding the rear wheel, which is much bigger than the front wheel. Draw a circle close to the bottom left part of your drawing paper. Try to make the circle as smooth as possible. Next, add another circle inside the first one. The new circle should be as close to the larger circle as possible. You should have something that looks like this.

Step 2: Draw the Front Wheel
Now that the rear wheel is ready, we need to add the front wheel. As aforementioned, the front wheel of the horse cart is slightly smaller. This is so that the footrest can be at a lowered, comfortable position.
To add the front wheel, we first need to take note of the level at the bottom of the rear wheel. This is because the front wheel should be at the same level. Next, draw a circle a short distance from the rear wheel. Just as we did with the rear wheel, draw another circle inside the first wheel. You should now have something that looks like this.
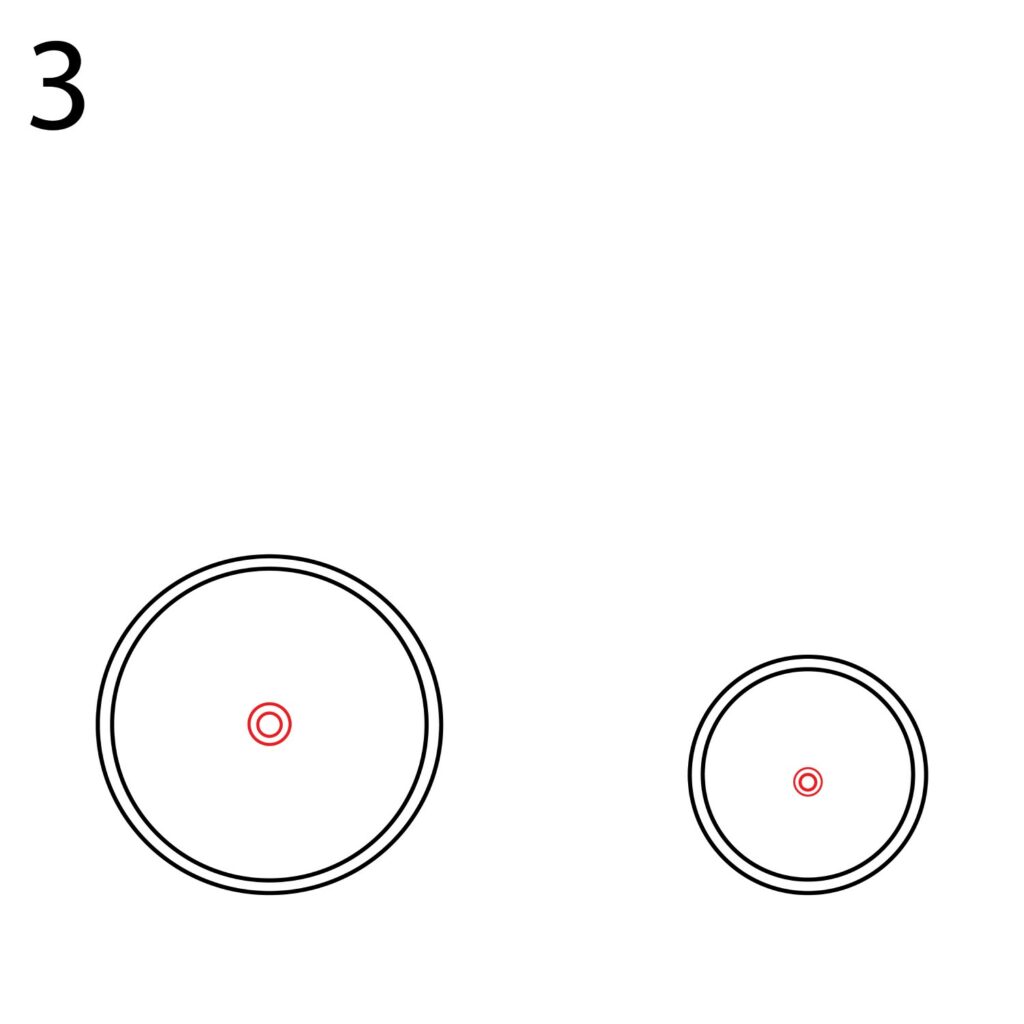
Step 3: Draw the Hubcaps
Before we can proceed with adding the body of the horse cart, we will start by adding the hubcap. The hub is the wheel assembly that connects to the horse cart. It has a bearing to allow smooth rotation. The hub might become stuck and wear out faster if dirt gets in. The hubcap is what protects the hub from dirt and debris.
We will add a small circle in the middle of the rear wheel to represent the hubcap. Try and add it at the very center of the wheel. Do the same for the front wheel.
Step 4: Add Spokes to the Wheel
The wheels of a horse cart look a lot like your bike, and they also have spokes. The wheel spokes are rods that start from the center of the wheel (hub) and connect to the traction part of the wheel. The wheel would not work without the spokes because it would be in different pieces.
To add the spokes, start with the rear wheel. If you have a ruler, now is the time to use it. Start by drawing a straight line from the hubcap to the inner circle we added for the wheel. Repeat the process until you have several spokes that are well-spaced. Do not add too many spokes, which would make the wheel unrealistic. Next, move to the front wheel and do the same.

The wheels of our horse cart are now ready. We are done with the most demanding part of drawing a horse cart. Next, we will be adding the body.
Step 5: Add the Body of the Horse Cart
Now that the wheels are ready, it is time to add the most important part of a horse cart: the body. We will be using a couple of shapes to add the body.
First, we will use a ruler to add a rectangle in front of the rear wheel. The rectangle should cover a quarter of the rear wheel and protrude towards the right slightly. Next, we will erase any section that goes through the wheel.
Next, we will add the rear seat on the upper part of the wheel. Use a shape that bends towards the left so that the seat looks comfortable.

For the front part of the horse cart, we will start by adding a curved line starting from the bottom right corner of the rectangle we added earlier to the top of the front wheel. Next, we will use curved lines to add the front seat and the footrest. Your drawing should look something like this.
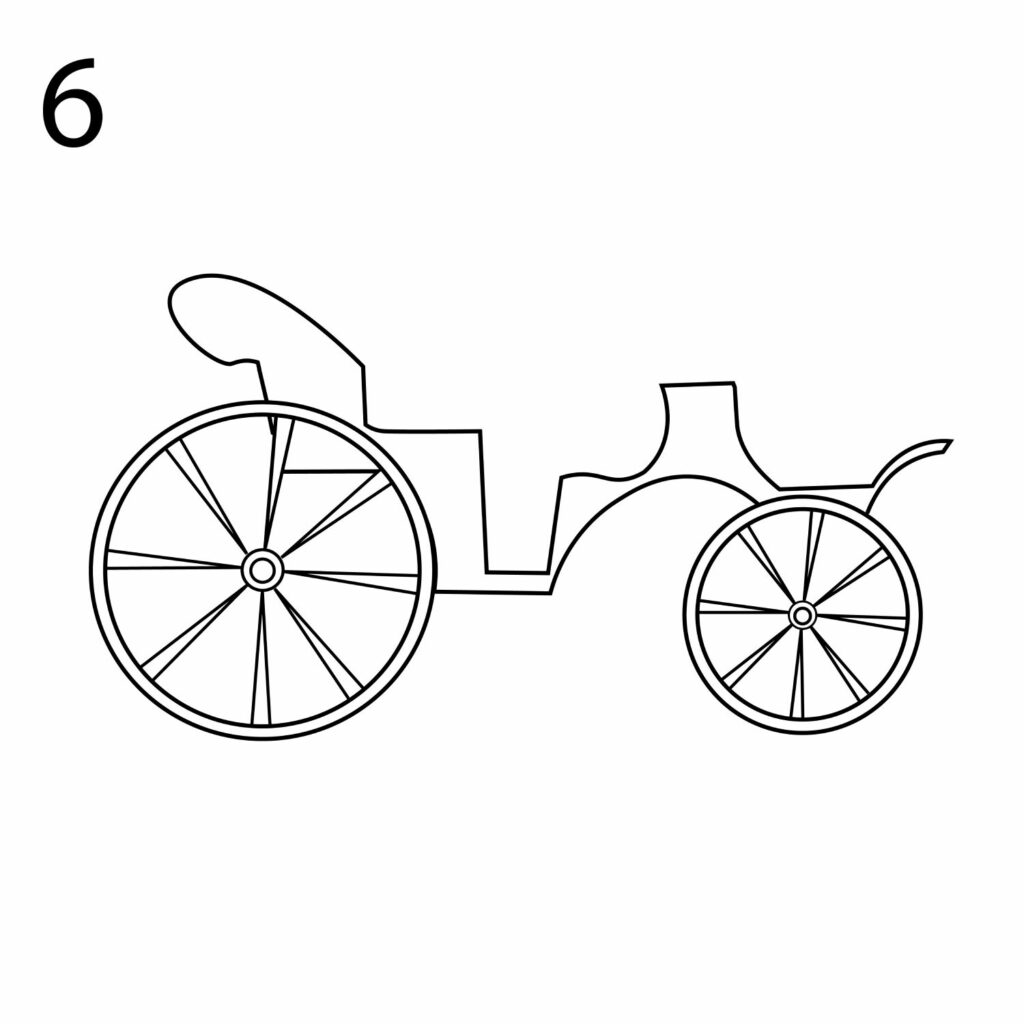
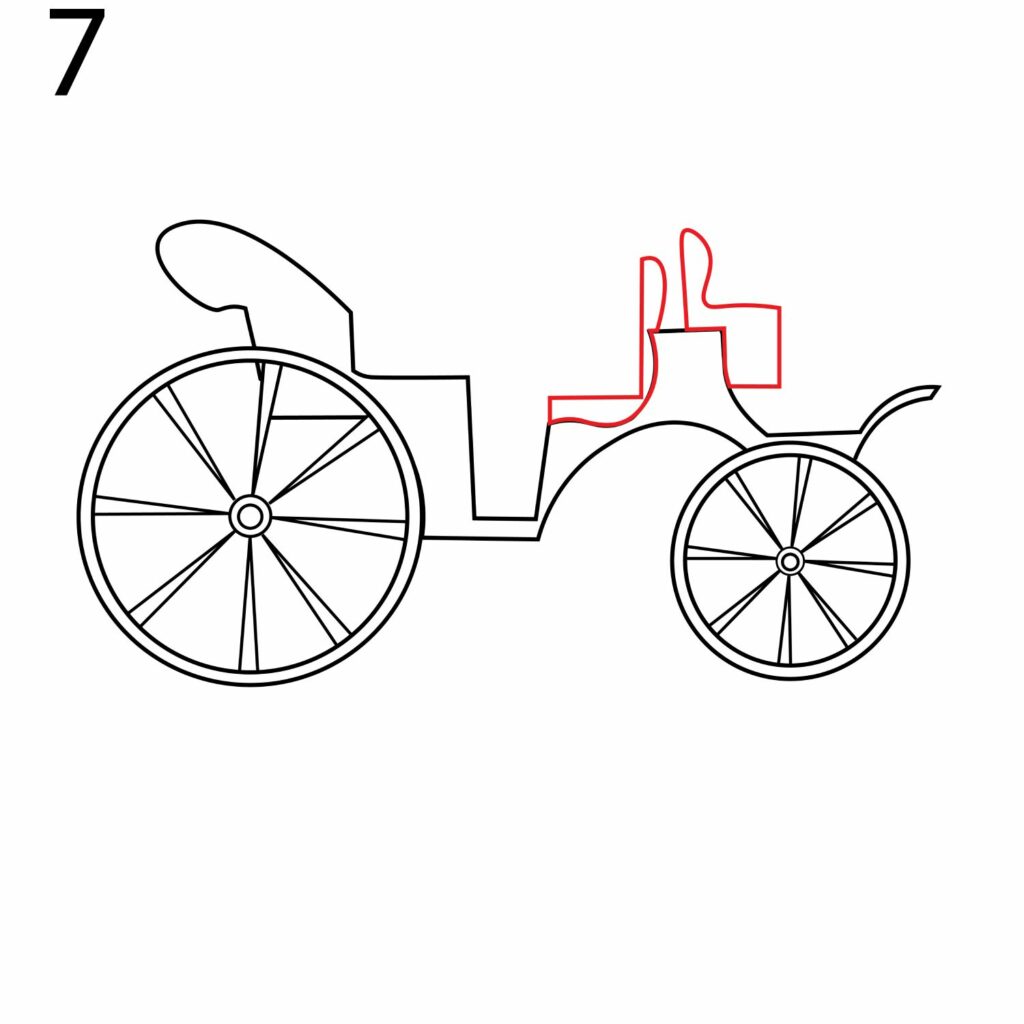
Step 6: Add Details to the Front Seat
Some classic horse carts allowed passengers to be able to sit facing each other. We will be drawing such kind of a horse cart. We will add a right-angled shape right behind the front seat to represent the passenger seat that faces backward.
We will then add an elevated front seat for the driver. This needs to be elevated so that the driver can see the area in front of the horse that will be drawing the cart.
Take the horse cart Drawing to the Next Level
If you kept up with our steps, your drawing should now be ready. You should consider improving the areas that are too far off. It takes a lot of practice to draw, so don’t underestimate yourself if your cart doesn’t look like the one we have drawn.
While we can leave our horse cart as it is, the outline is too basic. We need to add more details to make it to look more impressive.
Add a Background
The first thing we will add to our horse cart drawing is a background. We will start by adding a rough road beneath the wheels. Next, we will add a bush below the cart and on either side of the wheels. Once that is done, we will add clouds and a rough frame around the horse cart.
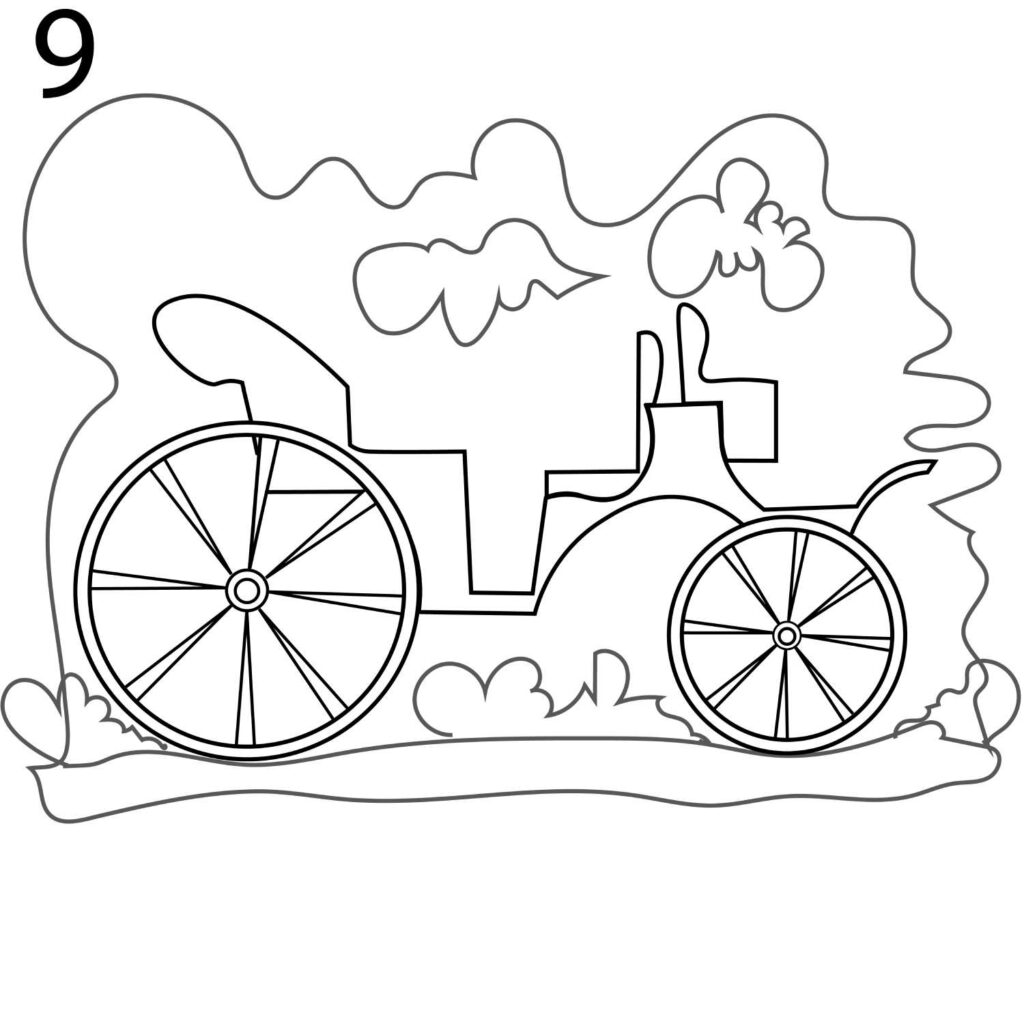
You don’t have to do exactly what we have done here. So, as long as the items you add do not overlap with the horse cart image, you can add as many details as you want. It is also okay to add your name on the side of the horse cart.
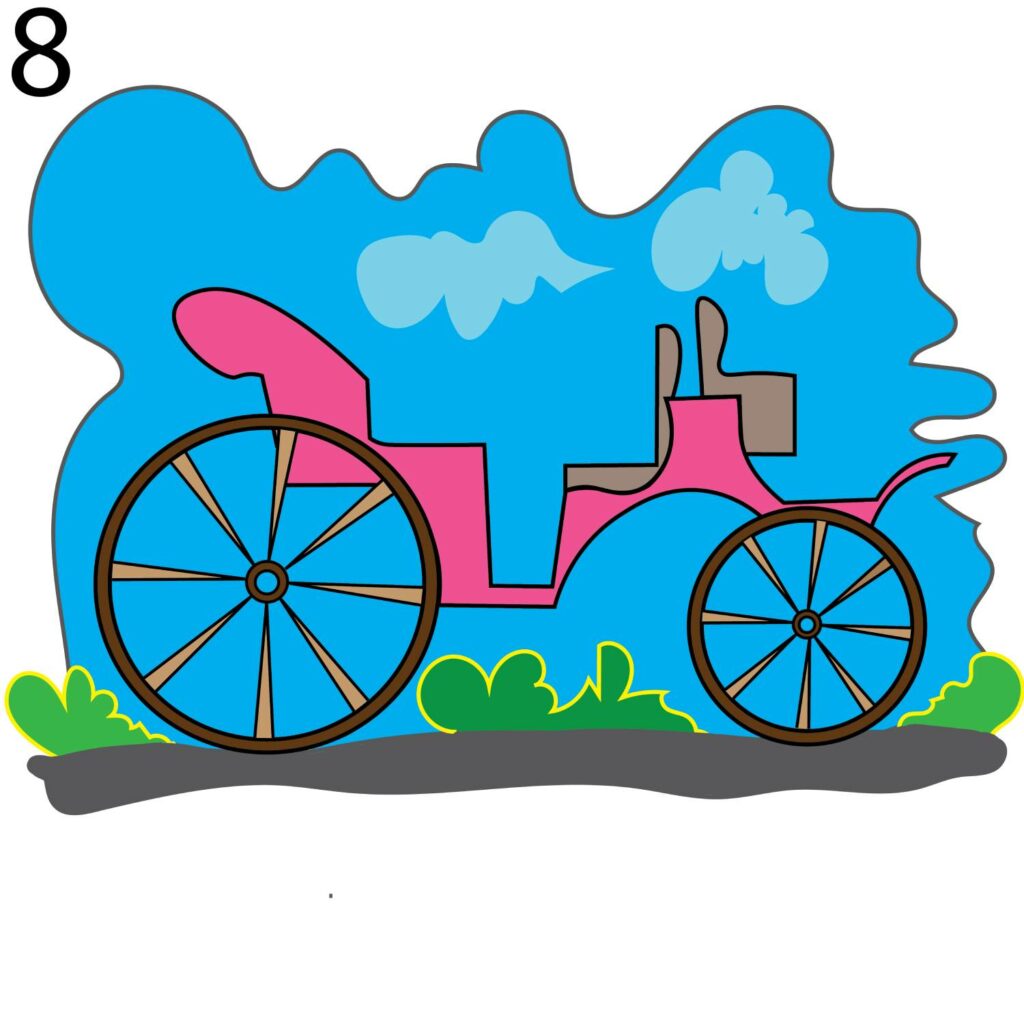
Color Your Drawing
Once you are satisfied with the details in and around your horse cart, you can bring out your coloring supplies and color the drawing. There are no rules on which colors you can use. You can use only two different colors or combine all the colors in your coloring supplies. The key is to let your imagination run wild. Here is what we did to our drawing.
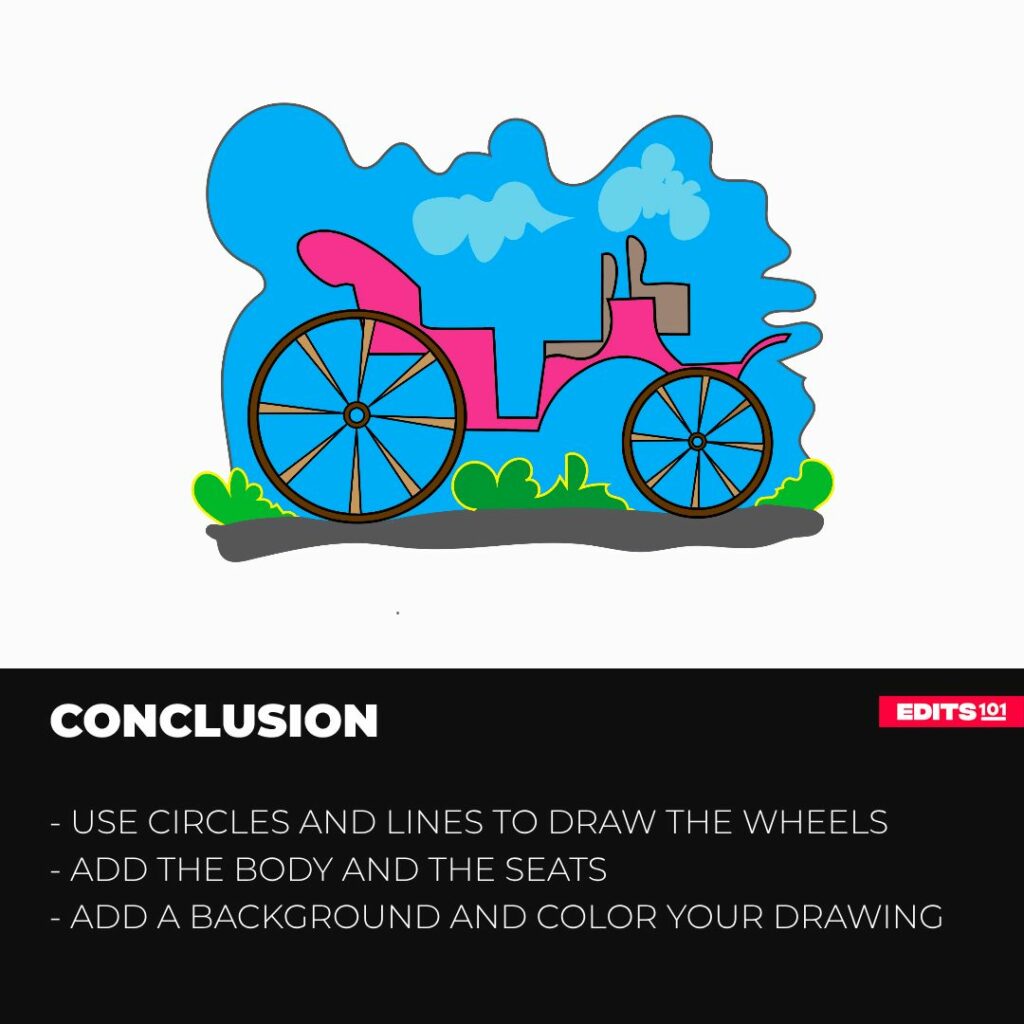
Conclusion
Drawing a horse cart is a lot of fun, provided you know what needs to be done. We drew the wheels to create a beautiful horse cart drawing and then added the cart’s body. We took our drawing further by adding more details to the cart and adding a background. Coloring the drawing came last to give it more life.
Thanks for reading & feel free to check out more of our articles!