How to Draw a Soccer Goal Post in 10 Steps
Hello, there young artist. Thank you for joining our lesson. Today, we will learn how to draw a beautiful soccer goal post. You definitely love soccer, right? You are probably a member of your school team or simply enjoy watching a soccer match. Whatever the case, you will definitely have fun with today’s lesson. It is one of the easiest drawings we have covered so far.
A soccer goal post consists of two upright posts equal to the corners and joined at the top by a horizontal crossbar. The goalposts may be made of metal, wood, or other sturdy materials. The posts can be rectangular, square, elliptical, or round. Now that you understand what a goalpost is, let’s learn how to draw one.
What You Will Need
- A pencil
- A marker
- A ruler
- An eraser
- A drawing piece of paper
- Coloring supplies
- 30 minutes of your time
How to Draw a Soccer Goal Post
As you learn how to draw, you will learn about the different parts that make up a goalpost. We will draw the goalpost from the front to make it easy for you to follow our steps. That way, we will not have too many details to add. You can change the perspective of your soccer goalpost once you learn how to draw a beautiful one.
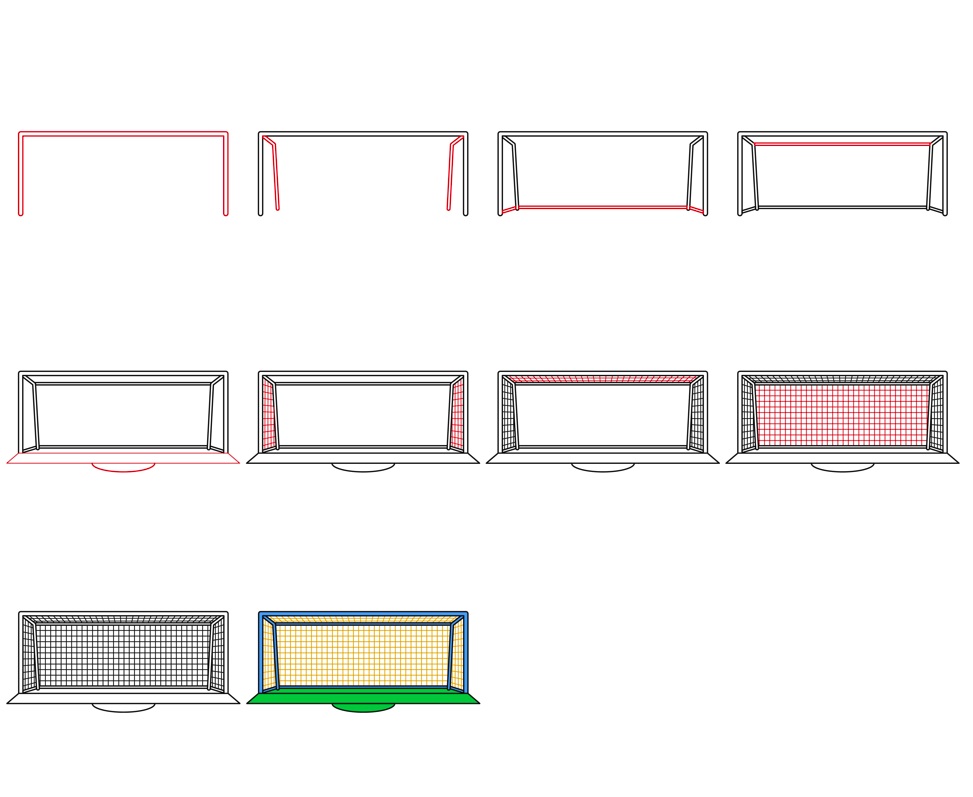
Take some time to study the below image. It has the steps we will be following throughout the process. Studying the steps will help you anticipate every step and avoid making mistakes that may force you to start over.
Step 1: Draw the Bars
As aforementioned, a soccer goalpost is made up of bars of different materials. Metal is the most common material because it is strong enough to withstand direct hits from a kicked ball. The bars are usually sections that are joined together.
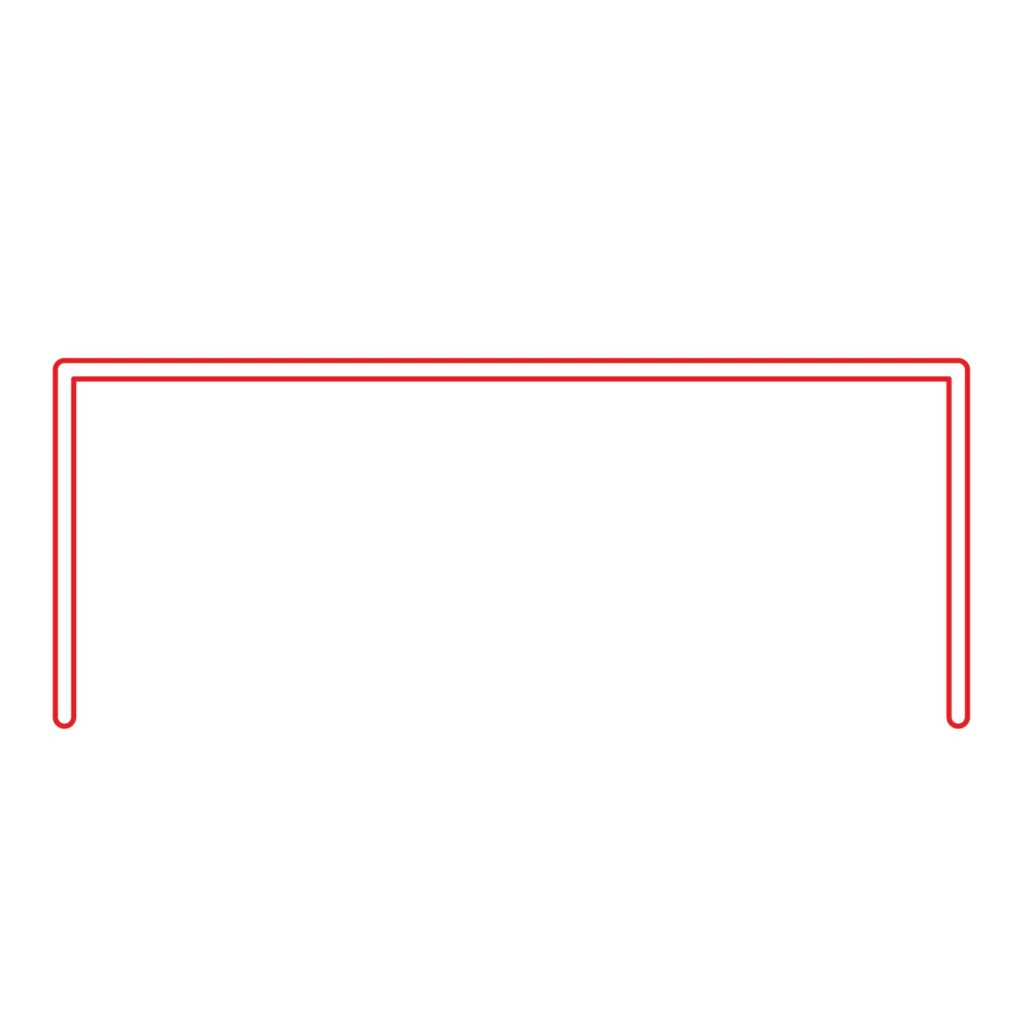
To draw the upright posts and the connecting horizontal bar, we are first going to draw a horizontal rectangle. The rectangle should start from the left margin to the right margin. Don’t make it too tall because soccer goalposts are rectangles, not squares. Once the rectangle is ready, add another small rectangle inside it. Leave a small space all around.
We now need to remove the bottom part of the two rectangles using your eraser to leave us with a tube-like structure. Connect the ends of the rectangles at the bottom. You should also consider making the top corners a bit rounded. Your drawing should look like this.
It is common to find a field with a Soccer goalpost that doesn’t have a net. It remains a free-standing structure like the one we have above. In today’s lesson, we will not be drawing a basic goalpost but rather a realistic match goalpost. For that reason, we will add a net to the back of the goalpost.
Step 2: Draw the Net Stand
If you have seen a soccer goalpost, you have seen that the back part of the next has a net. The main purpose of the net is to arrest the ball so it doesn’t go too far away. The net also helps contain the ball so that there is no debate on whether the ball went into the goalpost or not. The next is held in place by a stand. This is what we will be adding next.
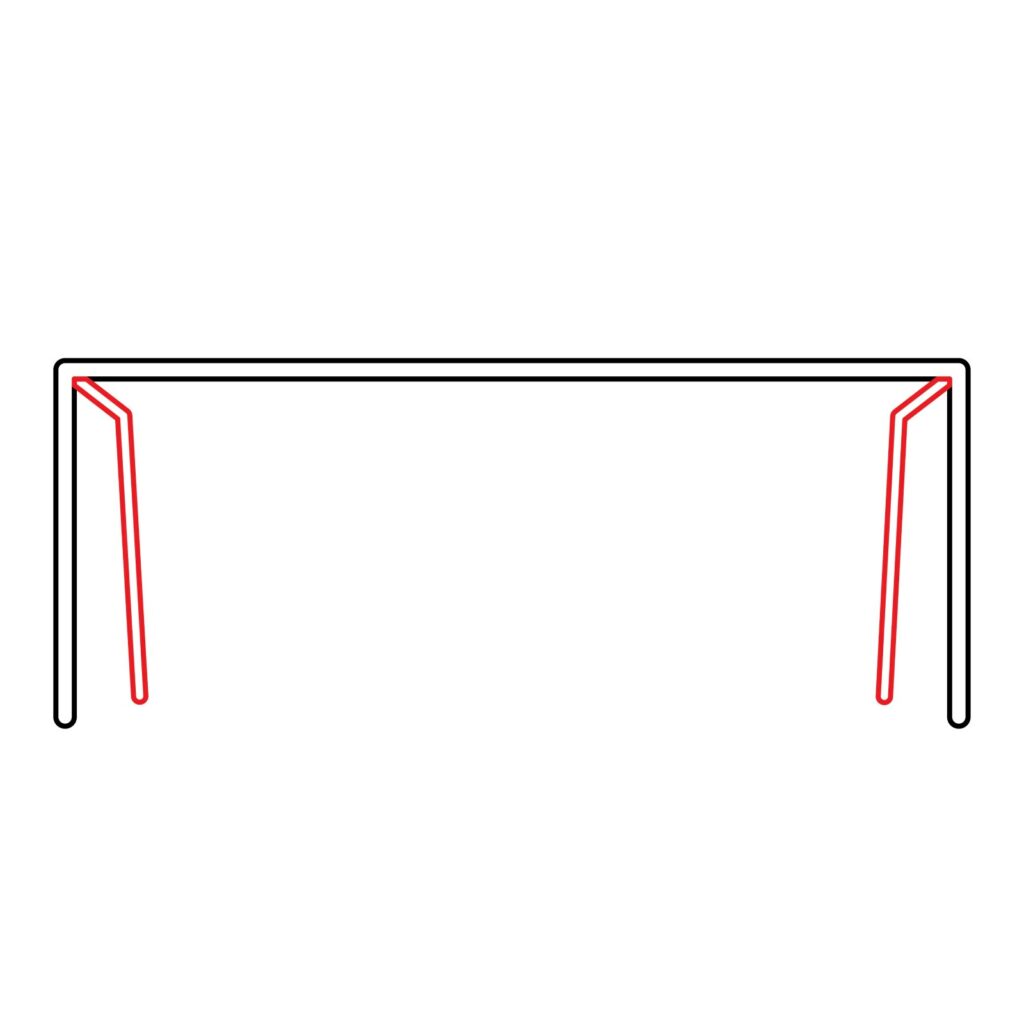
We are going to start by adding a diagonal tube-like structure starting from the top left corner of the goalposts. The shape should extend slightly towards the right, then slant diagonally towards the base of the goalposts. This will serve as the roof and the pre-bent tension bars for the net. Repeat the process on the top right corner and this time make the tube-like structure bend towards the left. Your drawing should look like this.
Step 3: Draw the Base of the Goalpost
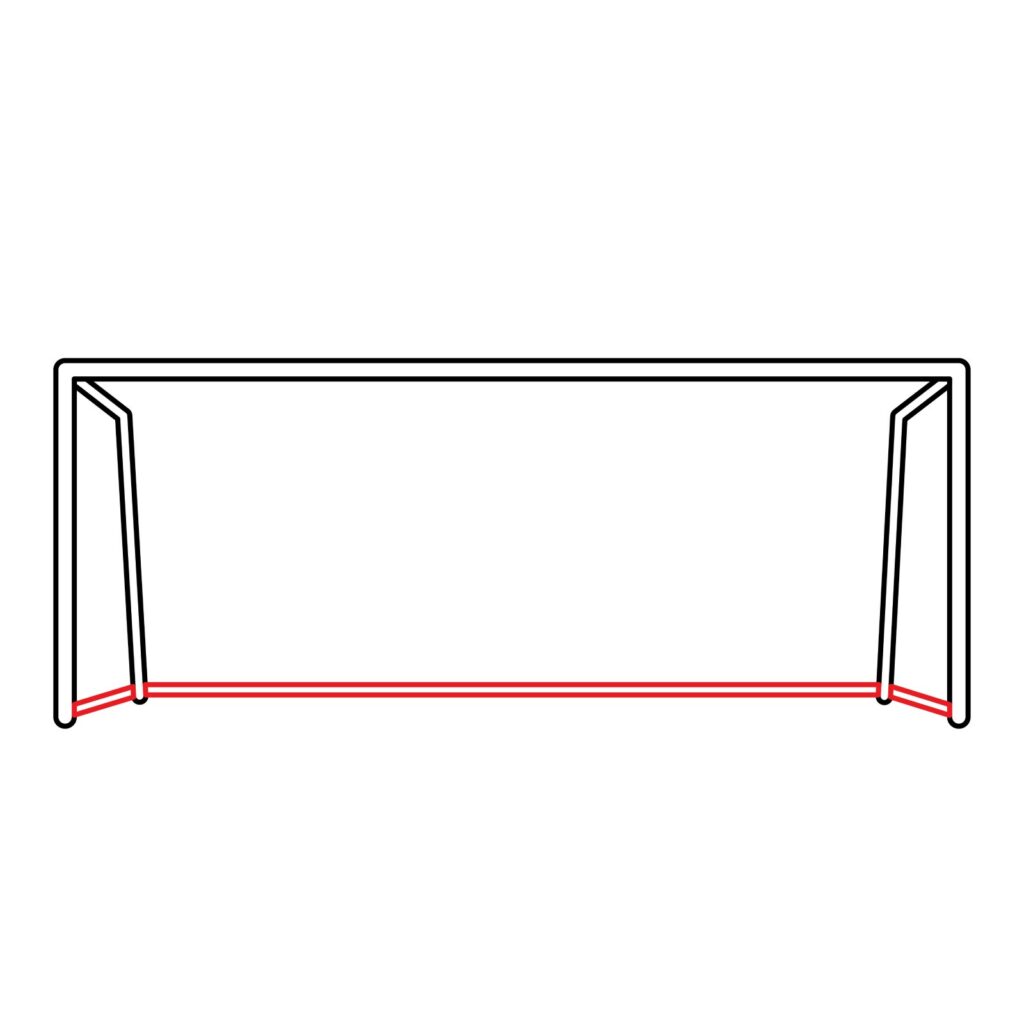
To complete the basic structure of the goalpost, we are going to add a base. The base is the bottom-most structure that joins all the bars at the bottom so that they are more rigid. Joining the bars also makes it possible to move the soccer goalpost around without tampering with its integrity.
Using your ruler, you need to draw a line that starts from the base of the left front bars and then connects to the base of the left net stand. Use the ruler to draw another line connecting the base of the net stand. You will also need another line to connect the net stand to the right-front bars. Repeat the process, adding a parallel line over the first one so that the lines resemble a tube-like structure, as shown in our illustration below.
Step 4: Draw the Roof Bar
To be able to fasten the net to the soccer goalpost, you will need to add a roof bar. This is the bar that connects the top part of the net stand. It is simply a horizontal structure parallel to the goalpost’s top part.
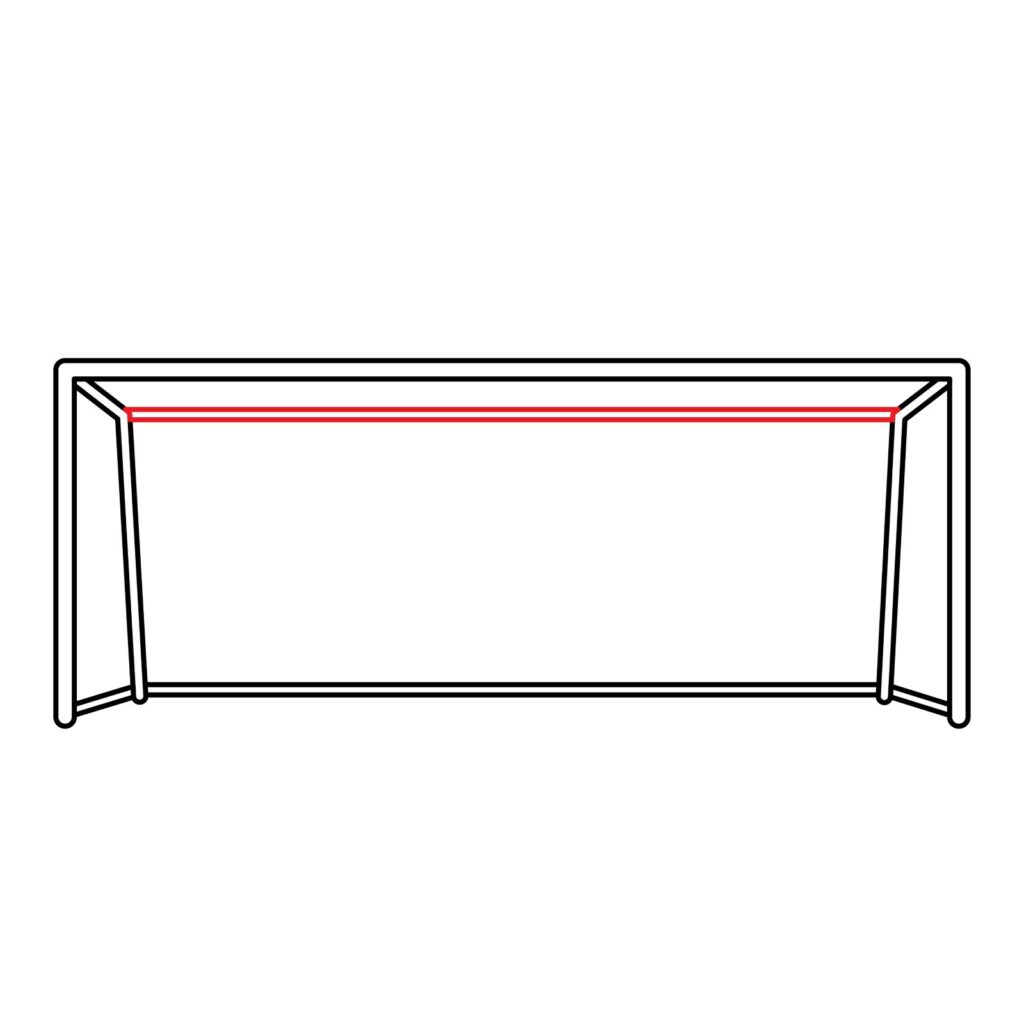
The basic structure of our soccer goalpost is now done. It is not uncommon to find players using a goal post that looks like the one we have above without the net in the back. We will, however, not leave our goalpost like this.
Step 5: Draw the Goal Box
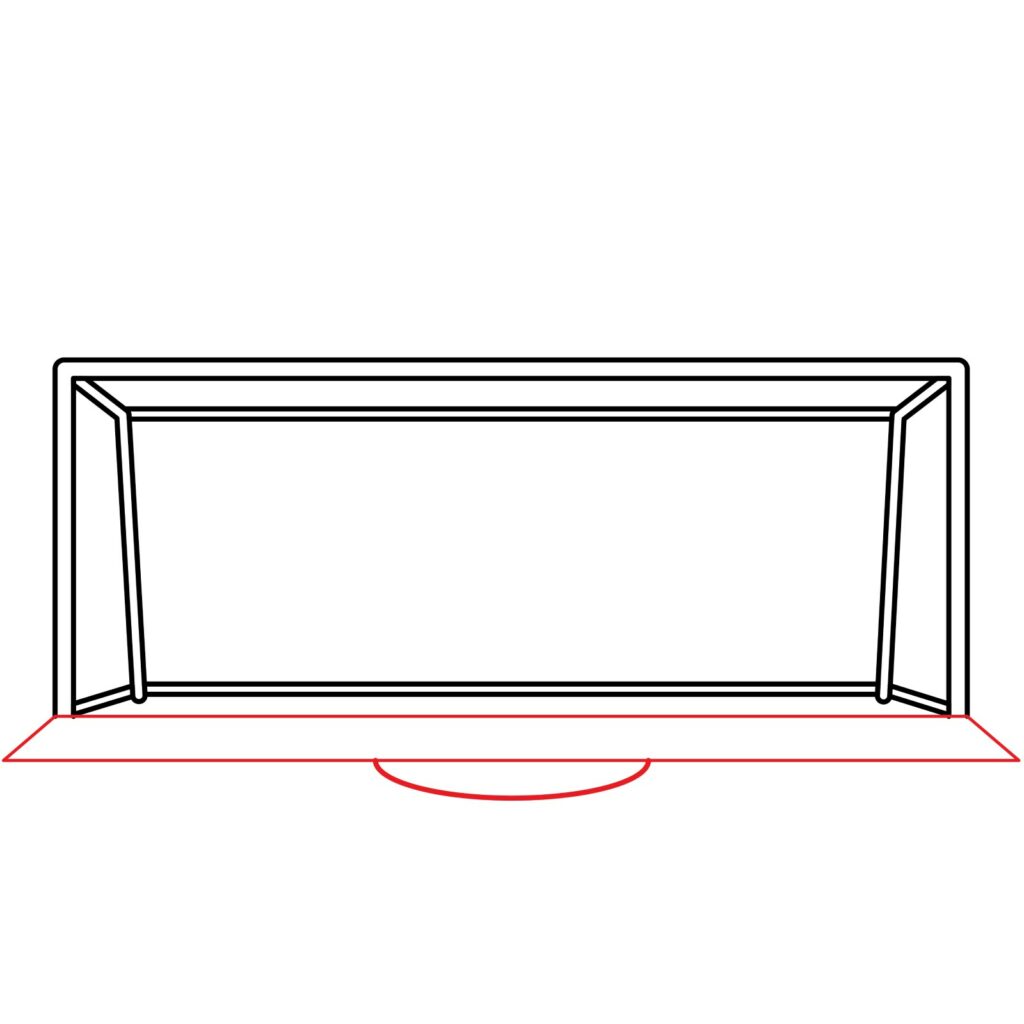
A soccer field has markings that differentiate the different regions. The main regions are the goal area, the penalty area, the penalty arc, and the center spot. The region immediately after the soccer goalpost is known as the goal area. This region is located within an area known as the penalty area. It is called the penalty area because any offense by the players will lead to a penalty kick. We are going to add the penalty area next.
To do so, we will start by adding a horizontal line that connects the base of the two goalposts. Next, we will draw a diagonal line starting from the left goal post’s base and extending it towards the left. We will add another diagonal line from the base of the right goalpost and extend it towards the right. Next, we will add a horizontal line that connects the ends of the two diagonal lines.
Since the Penalty Arc is attached to the Area, we must add it. For this, we need to add a semi-circle at the end of the Penalty Area, as shown in our illustration.
What we need to do now is add a few more details so that the goalpost looks professional. Keep in mind that adding tiny details to your drawing will help you stand out as a great artist.
Step 6: Draw the Net
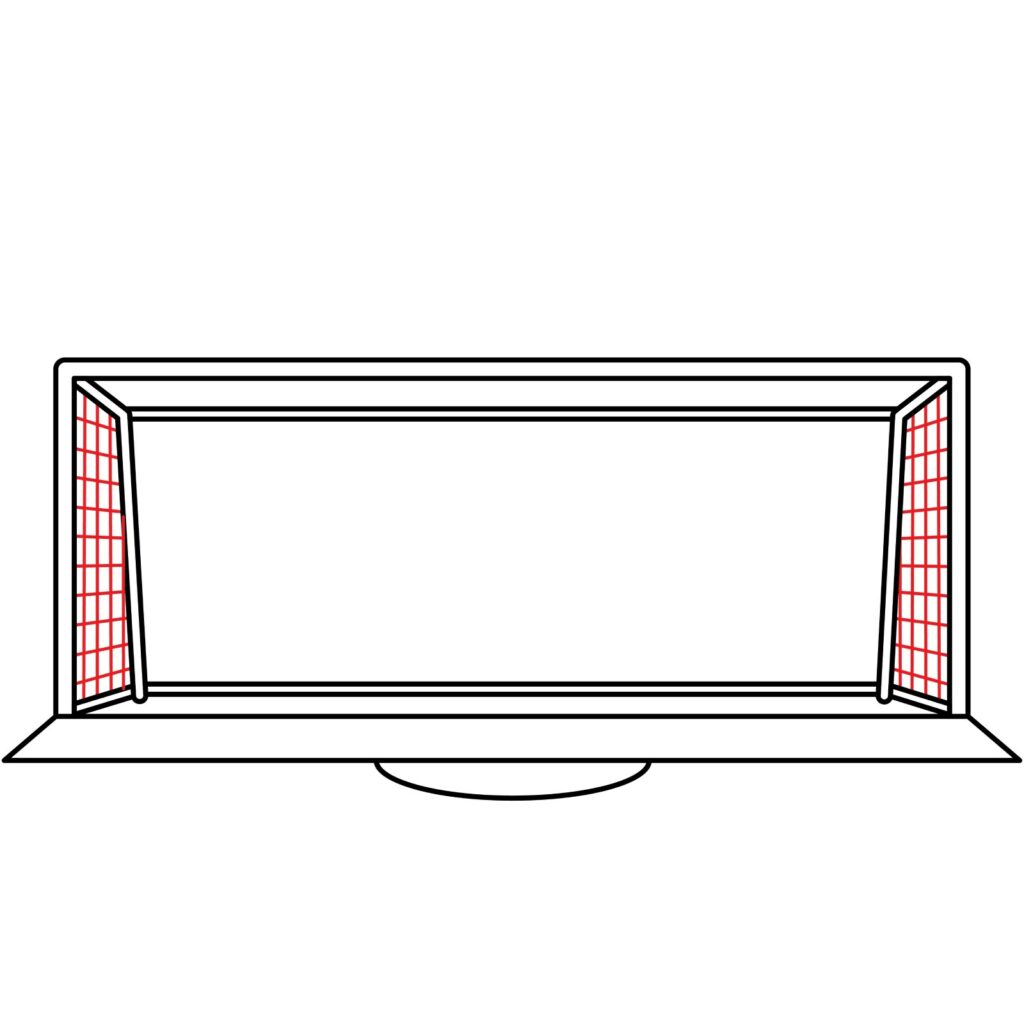
The soccer goalpost has a net on the back. First, we will add horizontal and vertical lines on the right and left sides of the goalpost. This will create a checkered shape that represents the sides of the net.
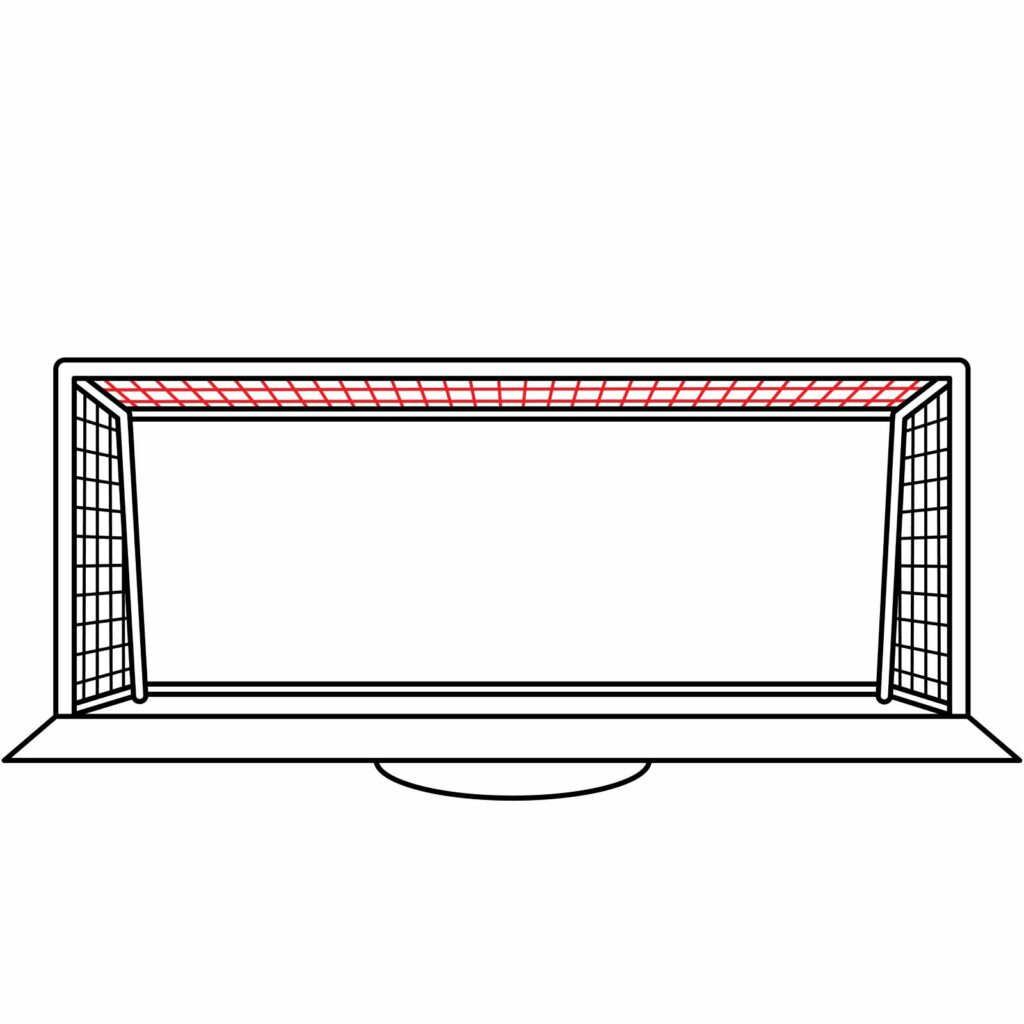
Next, we will add another checkered shape on the roof of the goalpost. Due to the perspective of our goal post, we will not simply use vertical lines at the top. We will only use one vertical line to connect the goalpost roof’s center to the net stand’s roof. Next, the lines to the left of the vertical line should slant slightly toward the left, whereas the ones to the right of the line should slant slightly towards the right. You should add at least two horizontal lines to create the checkered shape.
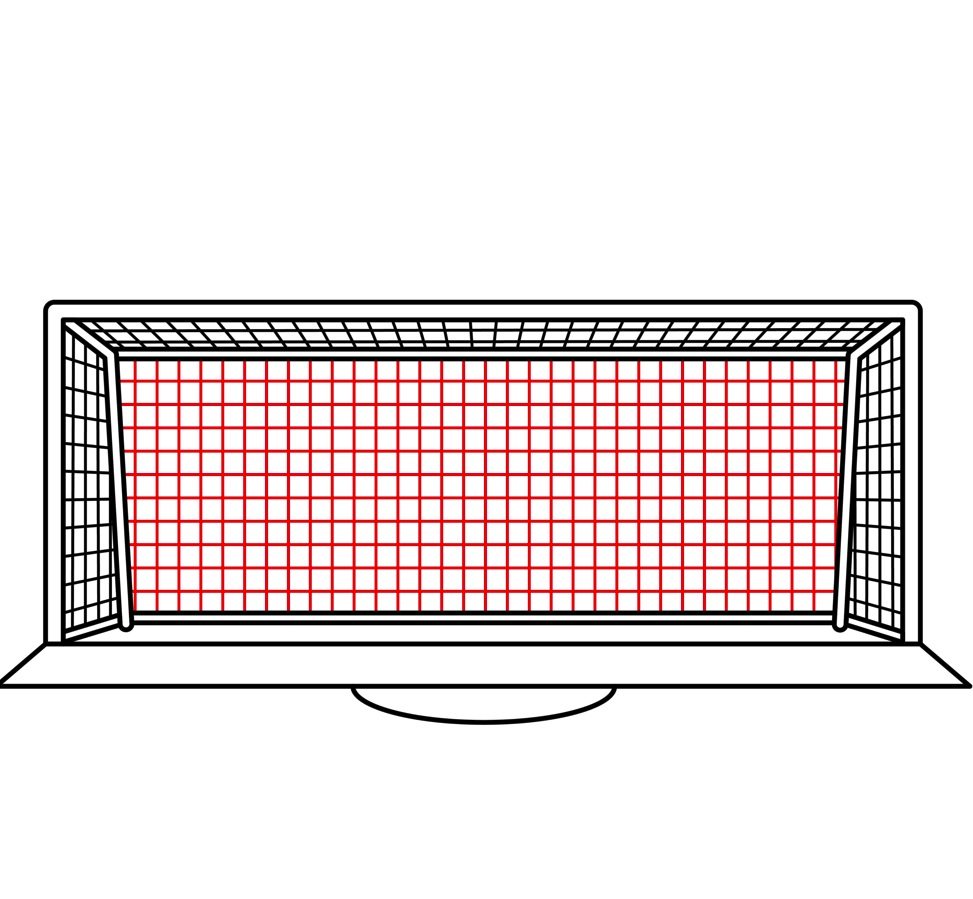
For the back of the soccer goalpost, we are going to use horizontal and vertical lines to create a checkered shape. This is how our goalpost should now look like.
Take the Drawing to the Next Level
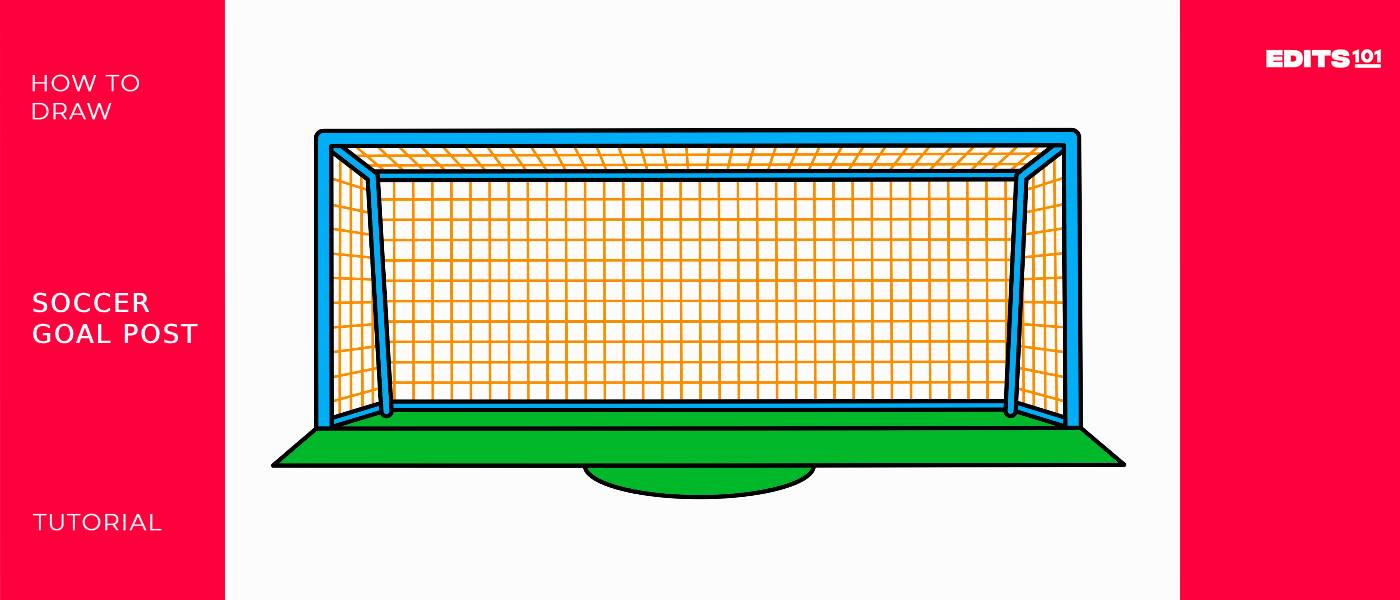
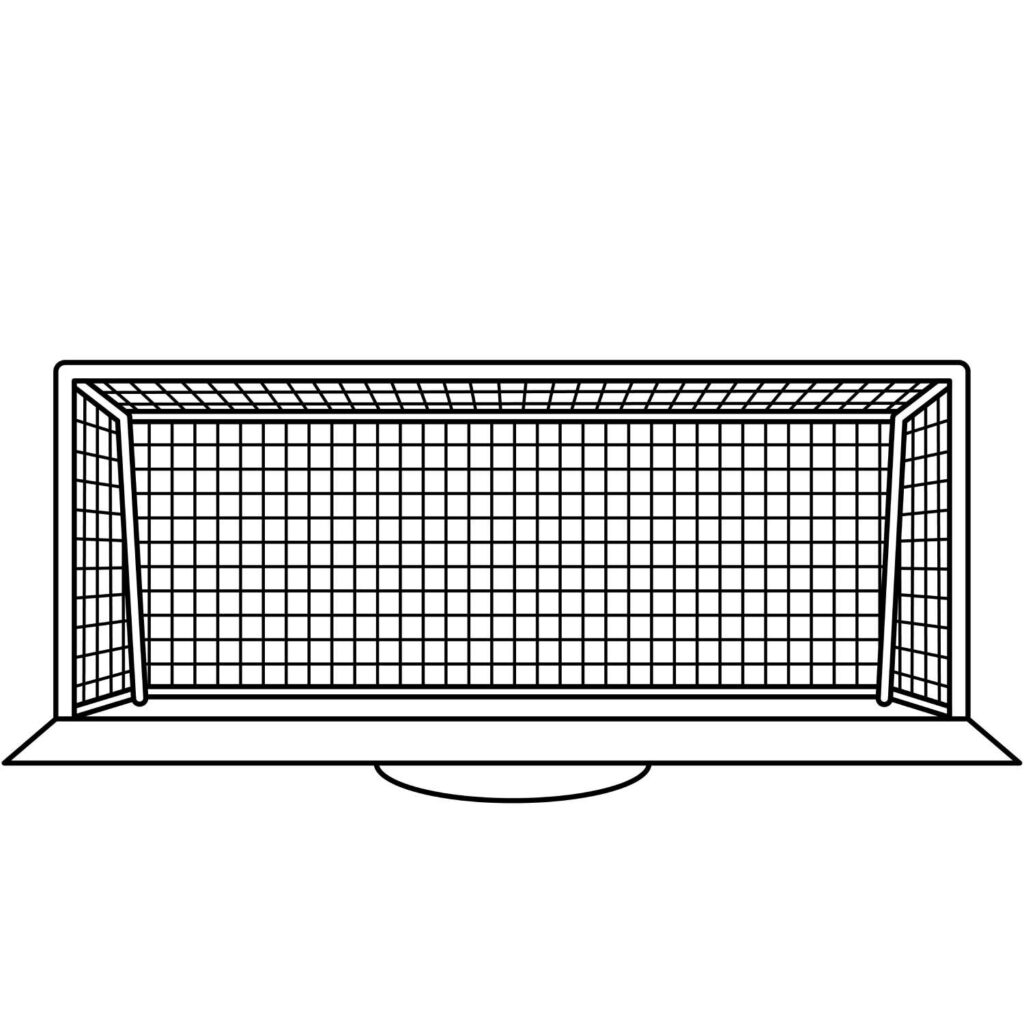
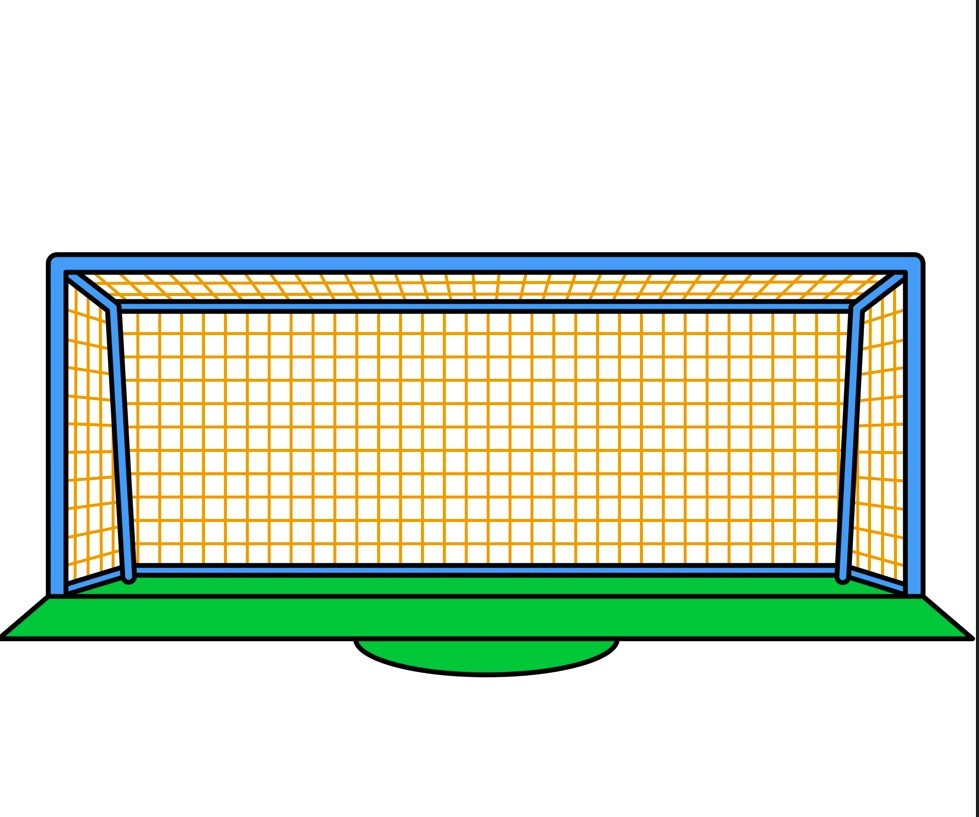
Congratulations! Our soccer goalpost is now ready. It should look something like this. For more realism, the checkered shape you add for the next should not cover the structure of the goalpost. You should also try making the spaces of the net the same size.
You would get away with it if you left your soccer goalpost as it is. But that is not what we will do with our drawing. We want to turn you into an amazing artist. For that reason, we are going to add a few details.
Add A Background
While we did not add a background to our drawing, it is always great to do so. You can add clouds over the goalpost and a soccer ball in the Penalty Area in your drawing. You can add some faint liens in the background to represent the stadium seats.
Color Your Drawing
The final step is to color the drawing. The grass is always green, so use a green color on the penalty area. For the goal post, you can use any color you want. There are no rules. For the net, you can consider changing the color of the lines instead of just adding a solid color over the net.
Conclusion
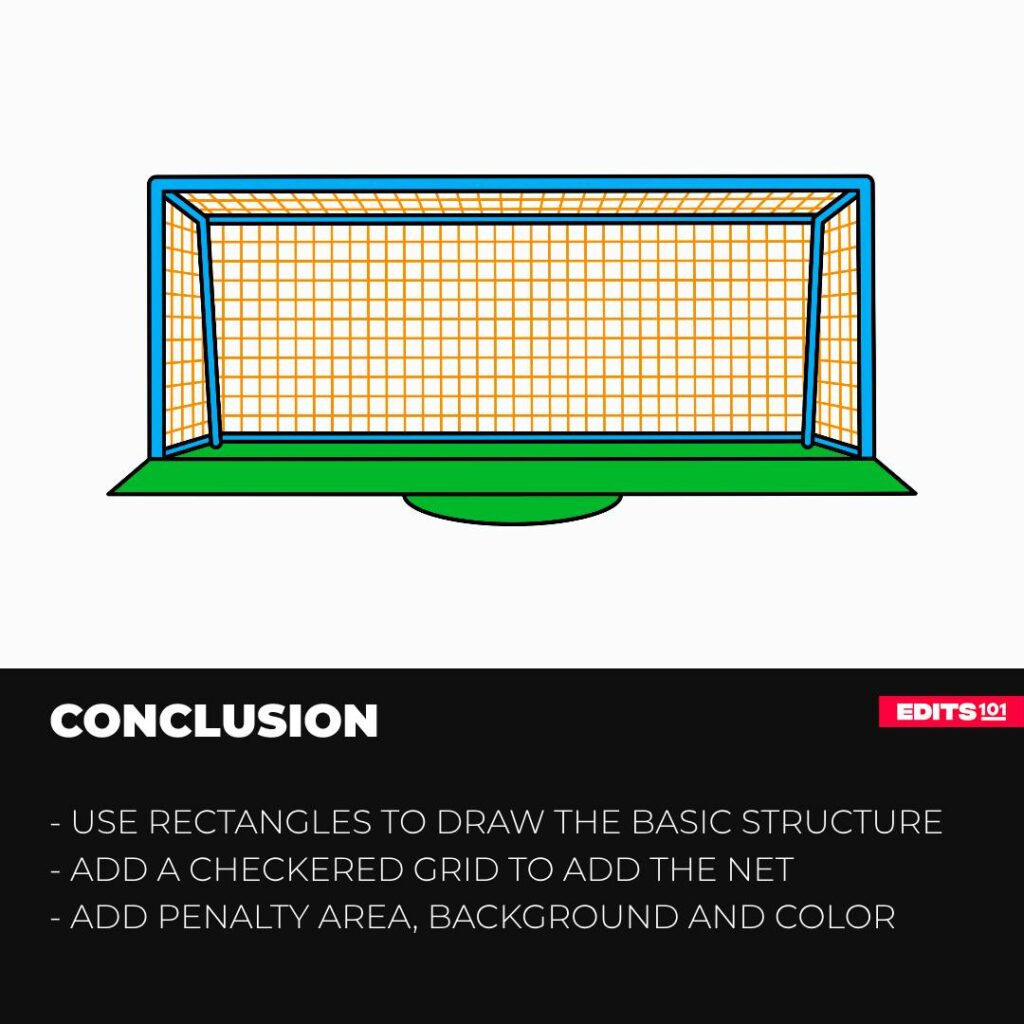
Drawing a soccer goalpost is the easiest drawing you will ever complete. We started by using rectangular shapes to create the goalposts. We then added the next stand using diagonal and horizontal lines. For the net, we added a checkered shape using lines. To advance our drawing, we added a penalty area and then colored the drawing.
You can use our steps to draw a soccer goalpost on paper or on your favorite sketching app. Keep in mind that practice is the key to becoming a great artist. If your drawing does not shape up perfectly, you will be amazed by how good it will look on your next attempt. Keep practicing and having fun!
Thanks for reading & feel free to check out more of our articles!
Author Rating
Overall Rating
Summary
The guide will show you how to draw a soccer goalpost. You will also learn how to advance your drawing so that you become a better artist.

