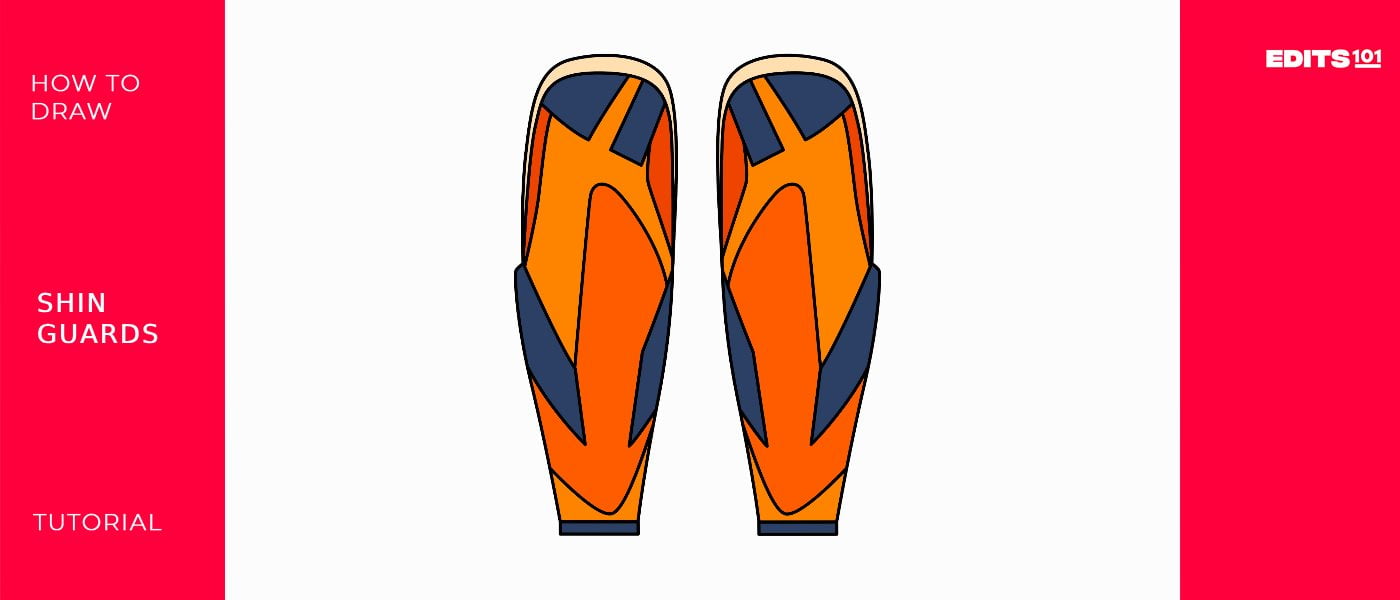
How to Draw Shin Guards Step By Step
I believe you want to become a great artist. Our job is to help you brush up on your drawing skills while at the same time arming you with the crucial information you need not just to become a good artist but also a well-informed artist. In today’s lesson, we will look at how to draw shin guards. What are they?
If you are a sports fan, you have seen players wearing some pieces of equipment on the front part of their legs, specifically the shin. These are known as shin guards or shin pads. The equipment is designed to be strapped around the front of an athlete’s shin so as to offer protection from injury. Shin guards are commonly used in such sports as baseball, association football, hockey, cricket, lacrosse, and mountain bike trials. In today’s lesson, we will teach you how to draw these important pieces of equipment.
What You Will Need
- A pencil
- An eraser
- A ruler
- A drawing piece of paper
- Coloring supplies
- 30 minutes
How to Draw Shin Pads
The shin guards are basic equipment but play a very important role in sports. They can be made of many different materials, including foam rubber, fiberglass, metal, plastic, or polyurethane. They are perfectly formed to fit around the shin.
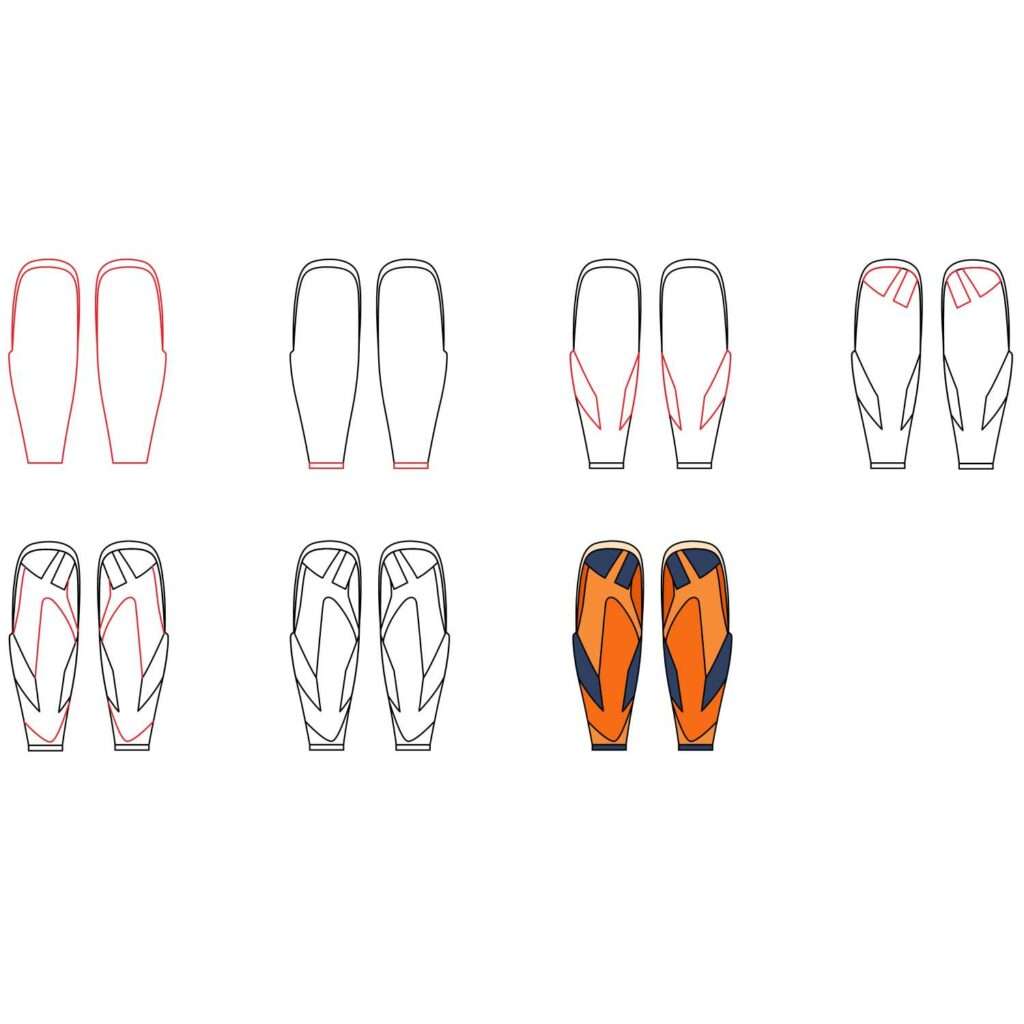
Since these pieces of equipment mainly come in pairs, we will draw two shin pads. We will use a very simple approach so that you don’t get confused or unable to complete a beautiful drawing. The below image has the steps we will be taking. Study it so that you know what will be involved.
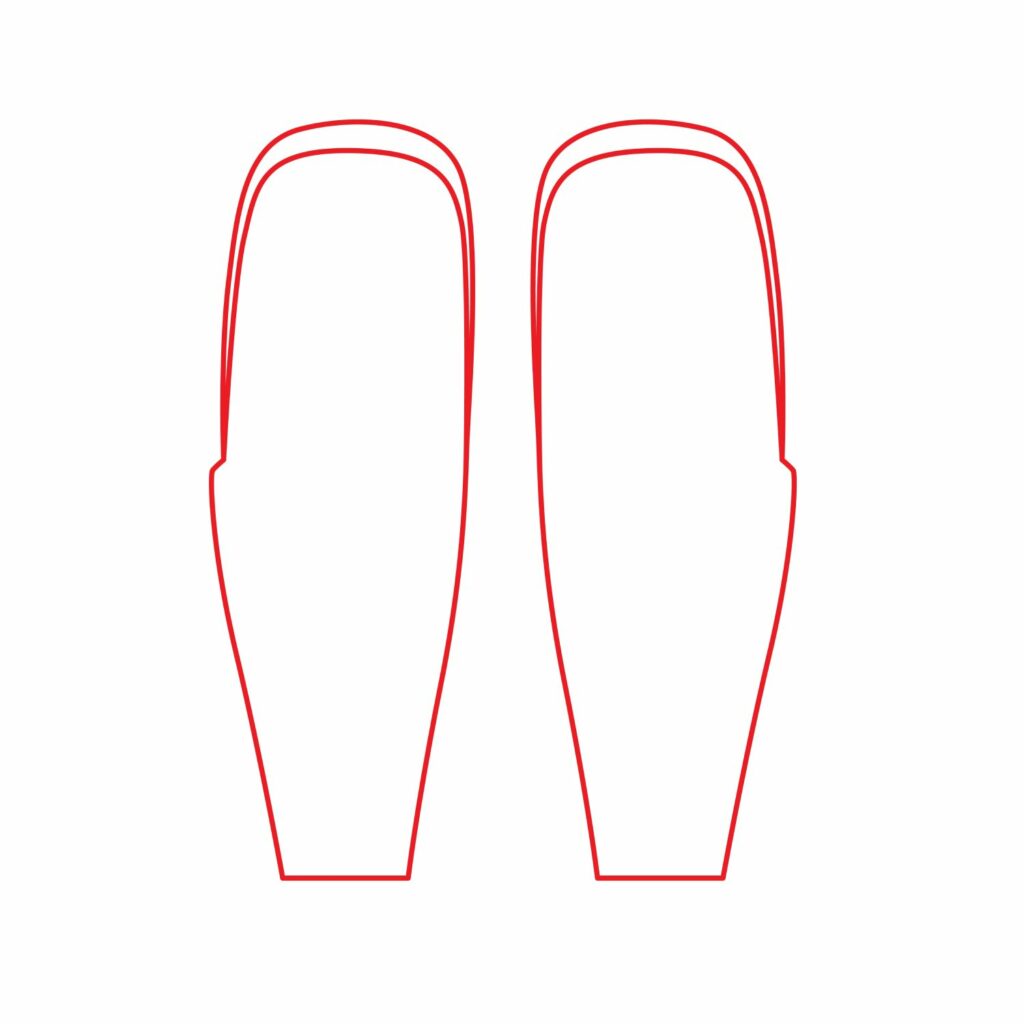
Step 1: Draw the Basic Layout
The first thing we are going to do is draw the basic structure of both shin guards. These have to be drawn side by side. They should also be vertical. Here is what we are going to do.
Using your ruler, draw two vertical rectangles positioned side by side. The vertical rectangles should start from the top of the drawing paper all the way to the bottom. Try and make them as identical as possible.
To turn the rectangles into shin pads, we will start by rounding the top part of both rectangles. Simply add a rounded top and erase the flat and square corners.
The upper knee flap is located at the top of the shin guard. This part is made of rubber for added comfort and to protect the athlete’s knees from being injured by the rigid structure of the shin guard. We will add another curved line below the rounded top to indicate that our guard has a rubber knee flap. The inner curved line should extend almost to the middle part of the guard to indicate that the top area of the shin guard has rubber to protect the player’s shin sufficiently.
We are now going to make the bottom part of the rectangles narrower. For that, we will start by adding a diagonal line to the left side of the left rectangle. The line should start from the middle of the rectangle’s height and slant slightly to the right to join a short distance to the right of the bottom left corner. Do the same to the rectangle to the right, only this time add the diagonal line to the right side of the right rectangle and slant it to the left. Erase the section of the rectangle that sits outside the new shape.
We are also going to affect the other side of the rectangles by adding a slightly curved line that starts from the middle of the rectangle’s height and connects to the bottom. Erase the unused part of the rectangles. You should now have something that looks like this.
Step 2: Draw the Bottom Rubber
For comfort, shin pads usually have a rubberized bottom part. The bottom is made of rubber in order to keep the upper part of the feet from being injured by the shin guard. The rubber is added to the bottom part of the guard.
Adding the rubber bottom part is very easy. Simply add a horizontal rectangle at the bottom of each shin pad. The rectangle should not be too wide. Here is what your drawing should look like.

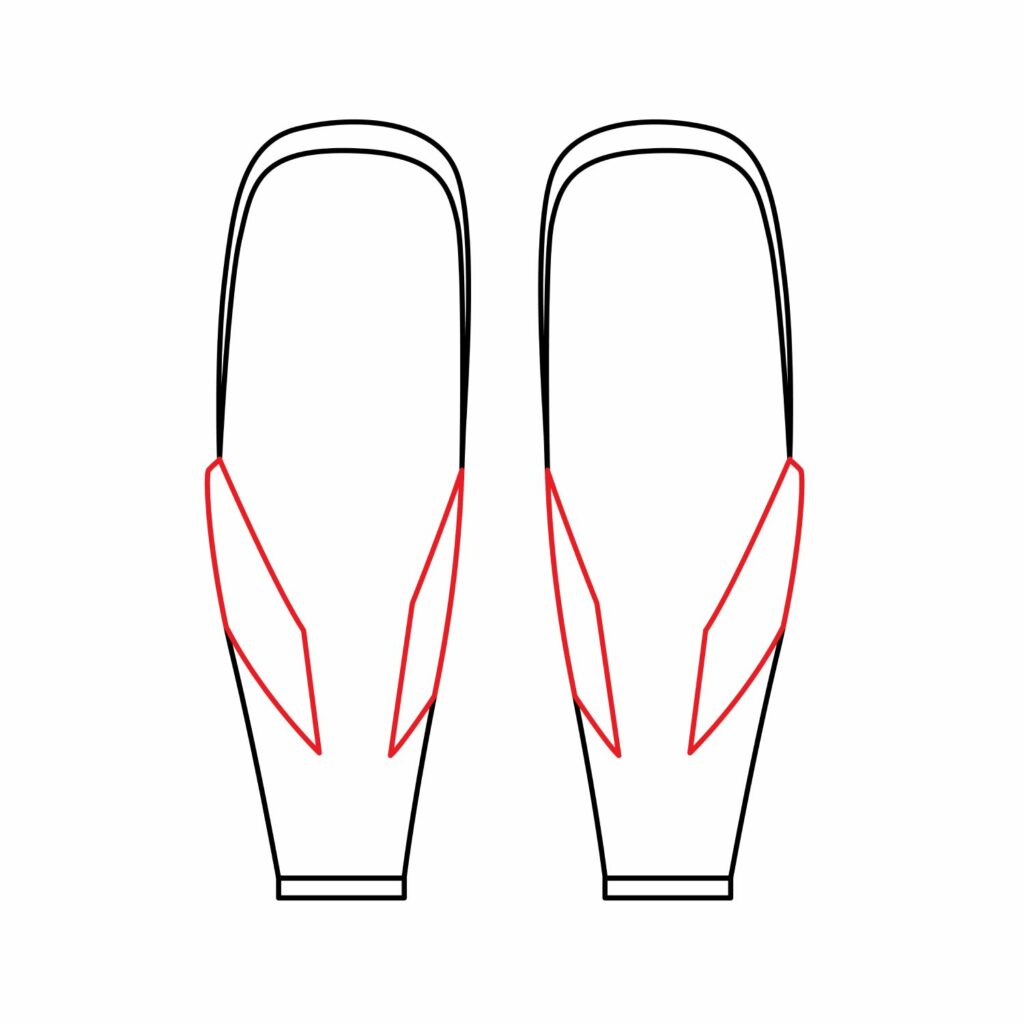
Step 3: Draw the Calf Protector
Most of the impact comes from the front of the player’s shin. That is why the shin pad is designed to be rigid enough to absorb the impact before it gets to the player’s shin. However, there is a chance that the back part of the player’s leg can be hit. This is more so when playing cricket or hockey. To offer protection, the shin guard usually has a calf protector. The calf is the back part of the leg.
With that in mind, we are going to add the calf protector next. To do so, we will start by adding two slightly slanted lines in the middle of the lower part of the shin guard. The lines should be next to each other and not too long. Make sure you leave some space between the diagonal lines.
Next, we will draw a diagonal line starting from the middle part of the shin pad and connecting to the top of the line we added. Add a diagonal line connecting it to the shin guard’s side from the slanted line’s bottom. Repeat the process for the other shin pad. Your drawing should look something like this.
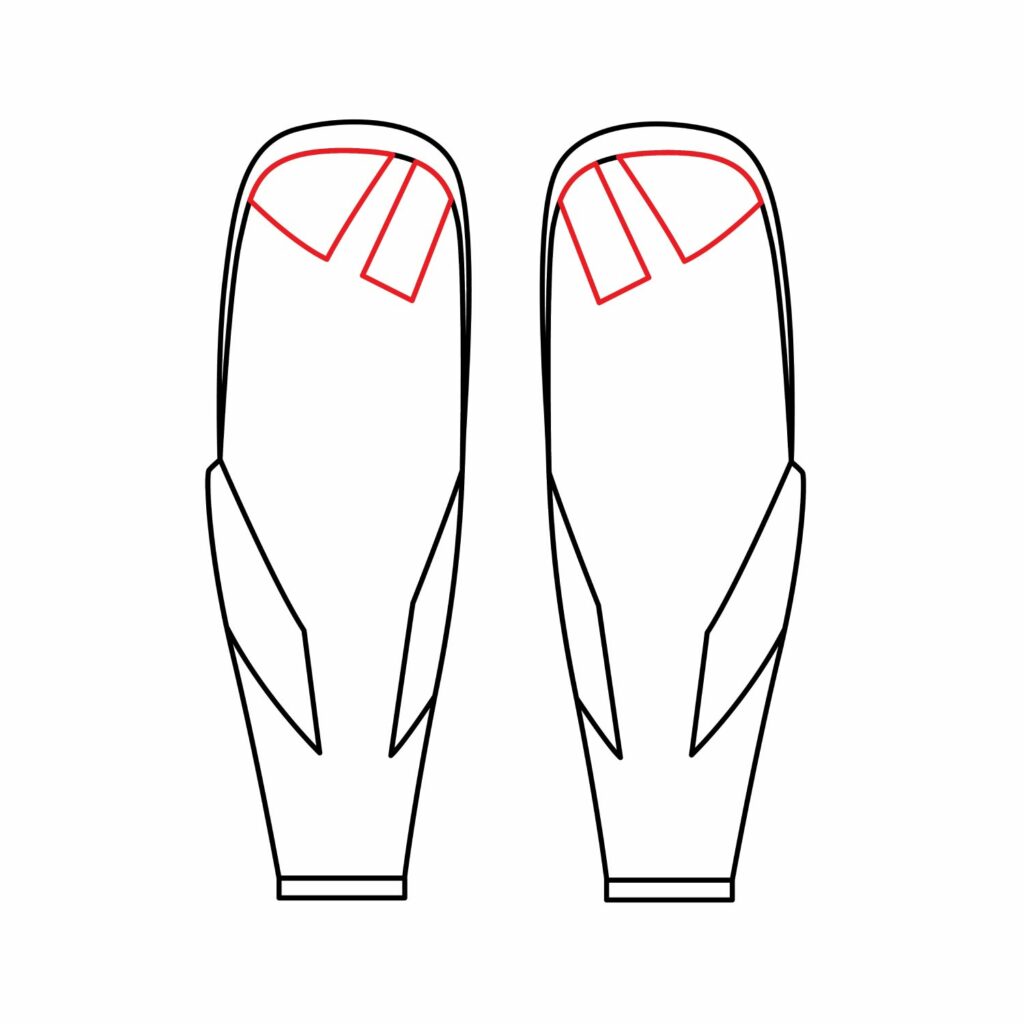
Step 4: Draw the Knee Flap
The knee flap is the flexible part of the shin guard that allows the player to move comfortably while protecting the sides of the knee. The knee flaps are located on the upper part of the shin guard.
For the Knee Flap, we are going to start with the left shin pad. We will add a diagonal rectangle starting on the inside of the top right corner and extending it slightly to the left. We will then add a triangular shape in the top left corner. We will do the same for the right shin pad. Here is what your drawing should look like.
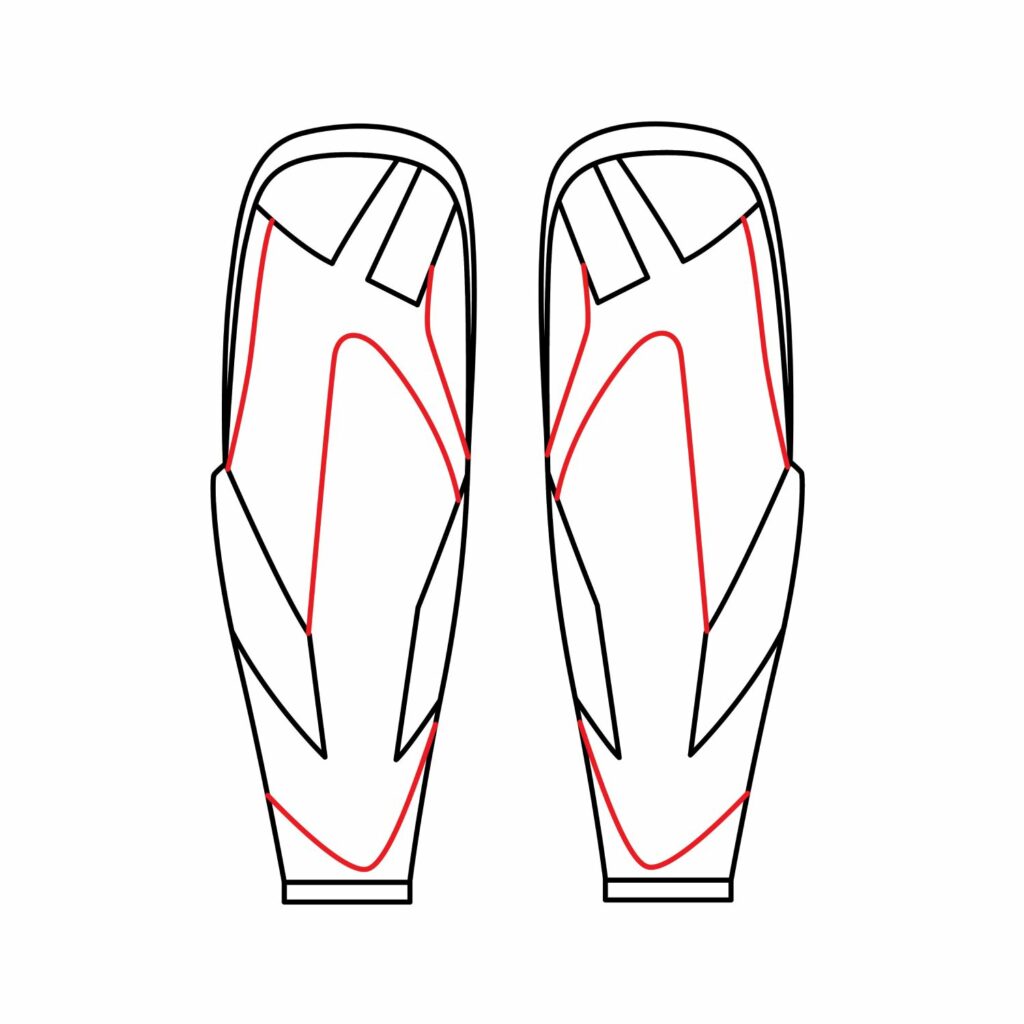
Step 5: Draw the Padded Inner Lining
For added protection, the inner part of the shin guard is padded. It is made using a soft material that offers a comfortable fit around an athlete’s leg. The padding further helps reduce the impact on a player’s shin when the guard is impacted. We are going to draw the inner lining next.
For this, we will simply play around with random shapes. We will start by adding a curved line at the bottom part of the shin guard. Next, we will add a curved line between the calf protectors and two lines starting from the knee flaps and extending to the middle part of the shin pad. Here is how our drawing looks so far.
Step 6: Refine the Drawing
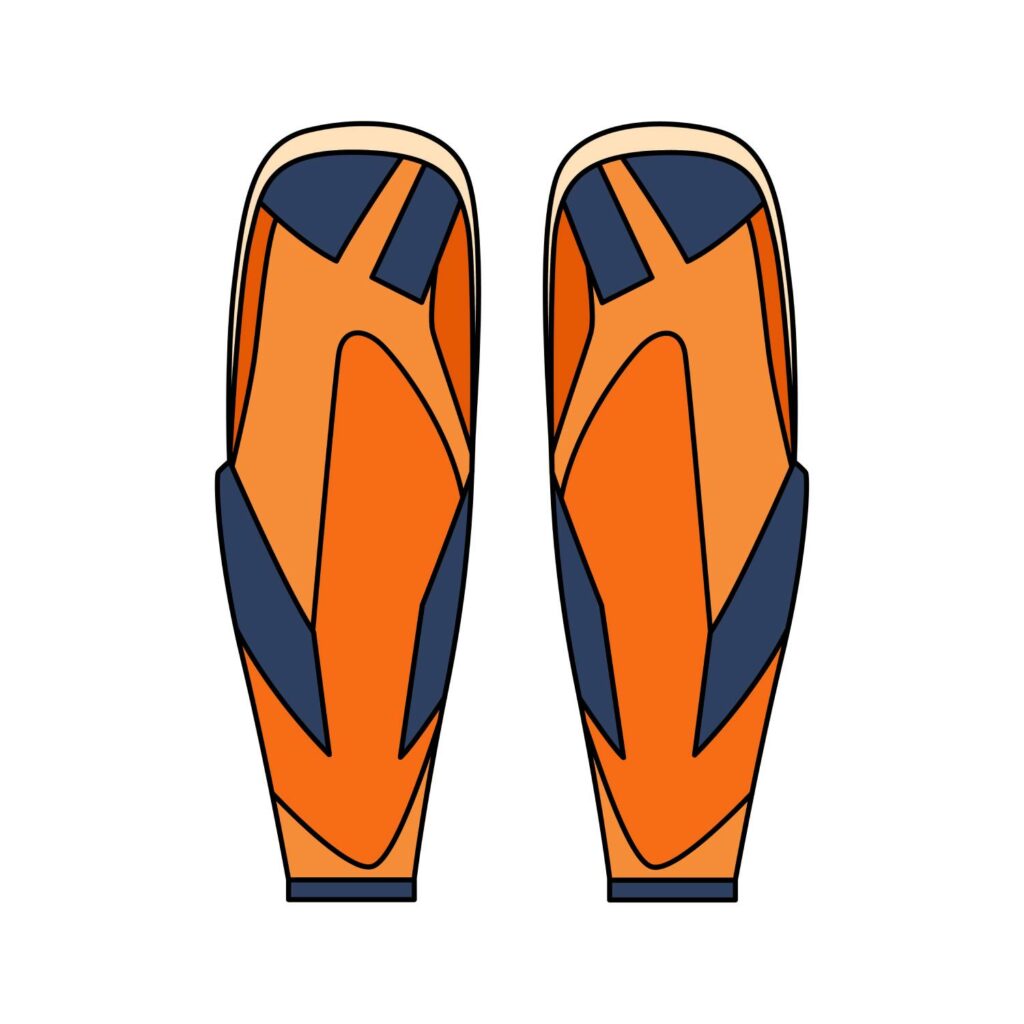
Our knee guards are now ready. All that is left now is for you to improve the areas that don’t look too perfect. This is how our shin guards look so far.
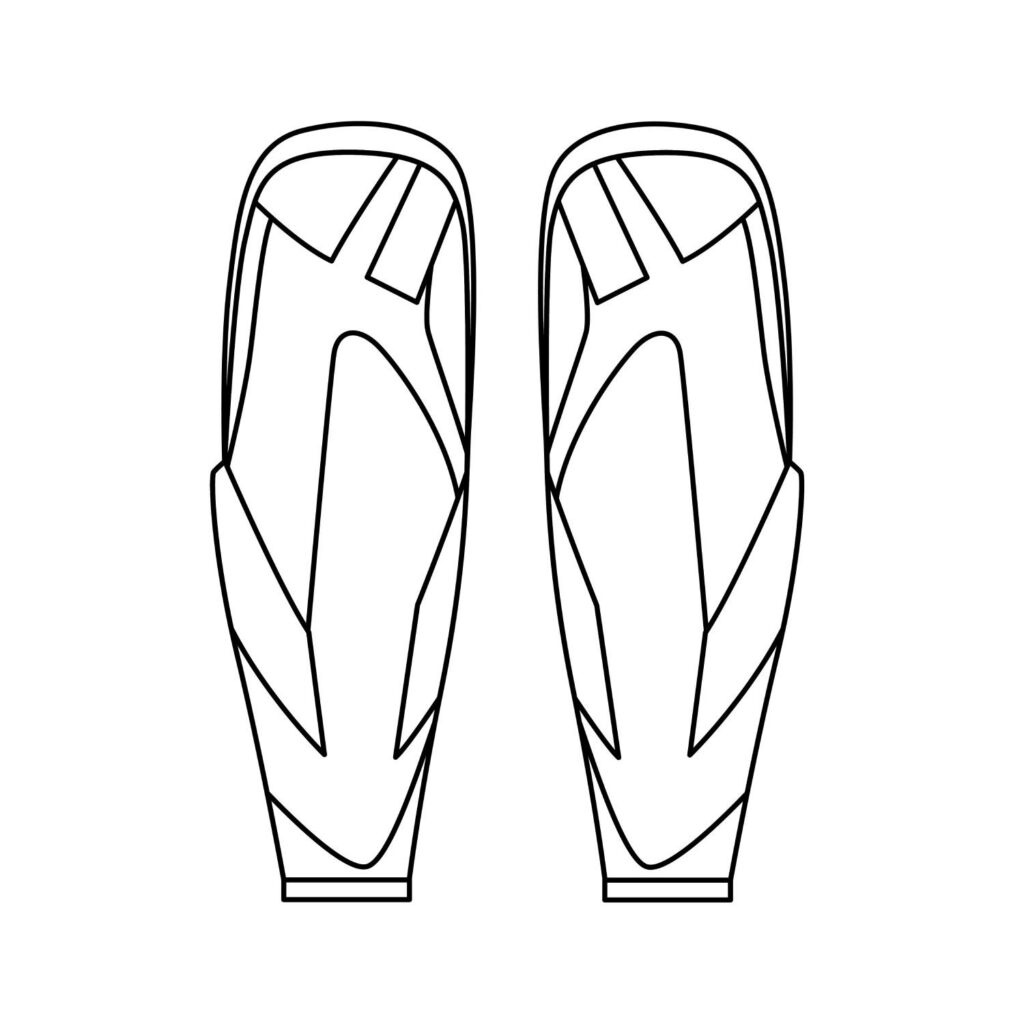
If your drawing doesn’t look as perfect, it is not something to worry about. You must understand that most people don’t get everything right first. It takes practice to become a good artist. On your next attempt, you will notice that your drawing will look much better. This is because you now have an idea of what is needed to draw shin guards.
Take the Drawing to the Next Level
Although leaving the drawing as it is okay, we will not do that. This is because our goal is to turn you into an amazing artist. For that to happen, we need to add more details that transform our drawing from a basic drawing to a realistic pair of shin guards. Here is what we will do.
Add Some Background
Consider adding some background to your drawing to advance your drawing and demonstrate how creative you are. For example, you can add a hockey stick in the background or draw some shapes to represent the locker room. You can also add a name to your shin guards.
Color the Drawing
The next thing you must do is add some color to your drawing. This is the final touch that will make it pop out. Remember that this is your shin pad, so use any combination of colors you want. A good tip is to use different colors for the calf protector, knee flap, and the knee flap. You can also use different colors for the inner lining, like the way we did in our drawing.
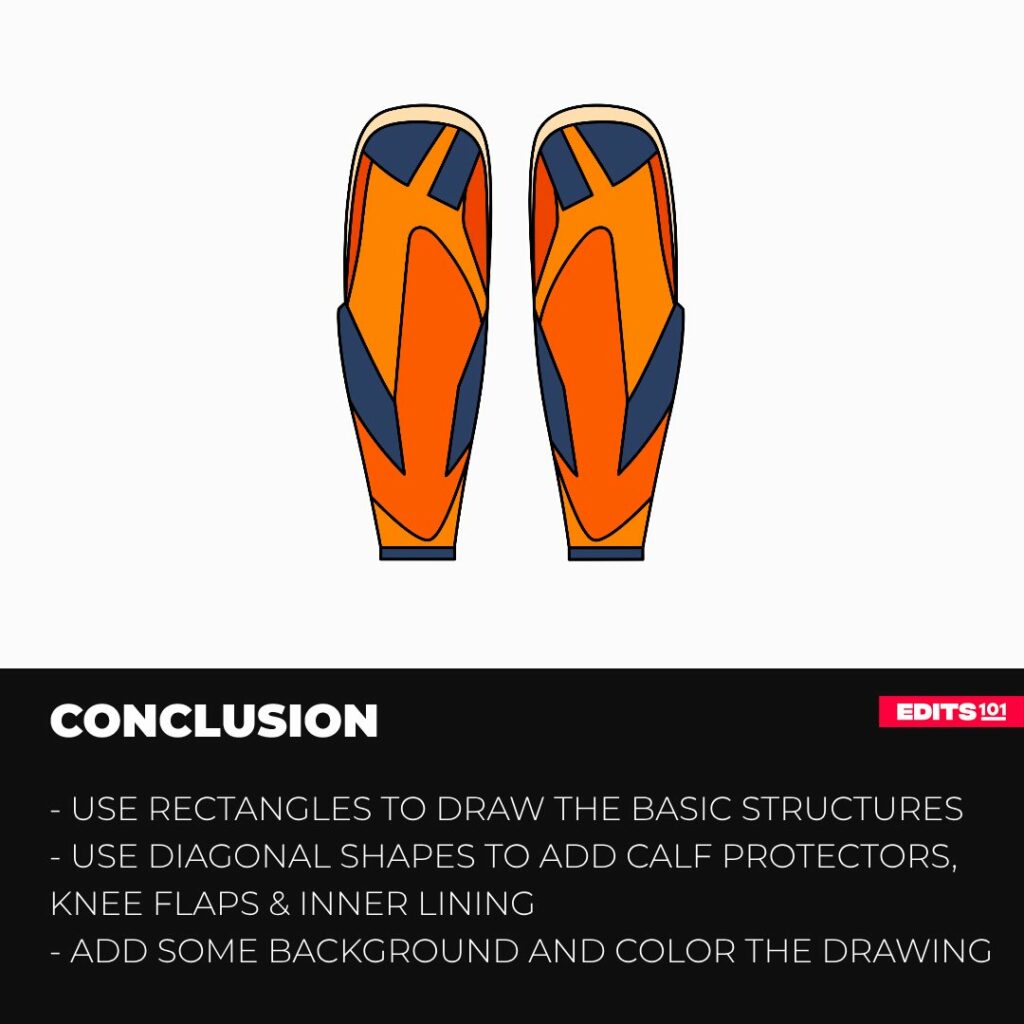
Conclusion
Drawing shin guards requires that you pay attention to detail. The simple details turn the drawing from a basic rectangle into a realistic shin pad. We started by drawing the basic structure of the shin pads using a rectangle, then turned it into a shin guard by making the top rounded and narrowing the bottom part. We added the calf protectors using diagonal shapes and the knee flap and inner lining. We then colored our drawing to make it appear and distinguish the various sections.
As we always say, it is only with practice that you will become a great artist. Never allow frustration to put you down. Always have fun.
Thanks for reading & feel free to check out more of our articles!
Author Rating
Overall Rating
Summary
Learn how to draw shin guards. You will also learn about the different parts that make up this essential piece of equipment.