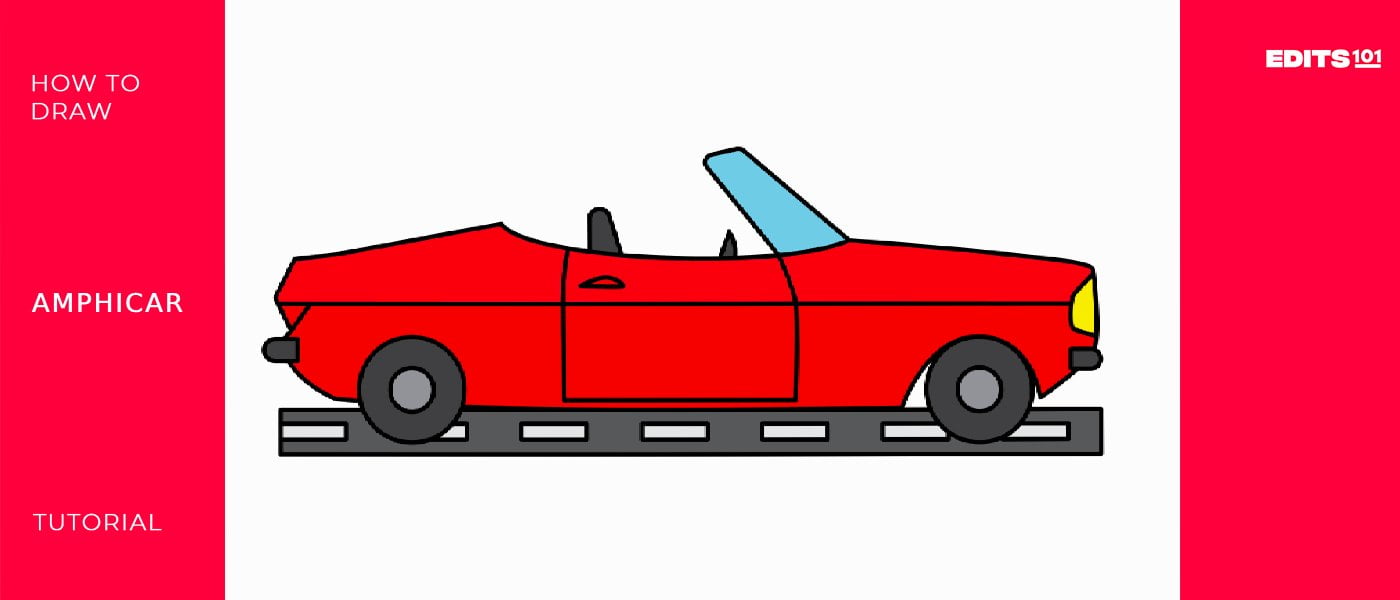
How to Draw an Amphicar | Simple Tutorial
Have you ever wished cars could drive on water? How fun would that be, right? Well, you will be happy to know that the Amphicar was designed to drive on land and water. Pretty interesting, right? Even more intriguing is that this vehicle was manufactured in the 1960s. Makes you wonder why they stopped.
The amphi-car is an automobile like any other. It has an open roof and is engineered to drive safely on water. It has a pointed and sharply cut away below to achieve that, and the wheel is set low. It is also good to note that the front and rear bumpers are located low on the body to help the vehicle drive smoothly on water. Today’s lesson will teach us how to draw an Amphicar.
What You Will Need
- A pencil
- An eraser
- A ruler
- A drawing piece of paper
- Coloring supplies
- 30 minutes
How to Draw an Amphicar
Drawing an Amphicar is not that complicated. It is similar to drawing any other vehicle, only with a few differences. To help you draw an impressive vehicle, we will tackle the drawing from a side view; this is the simplest way to draw a vehicle. Later on, once you get the gist of drawing an Amphicar, you can advance your drawing by drawing the vehicle from a different perspective or even from a real photograph. Here are the steps we will be following.
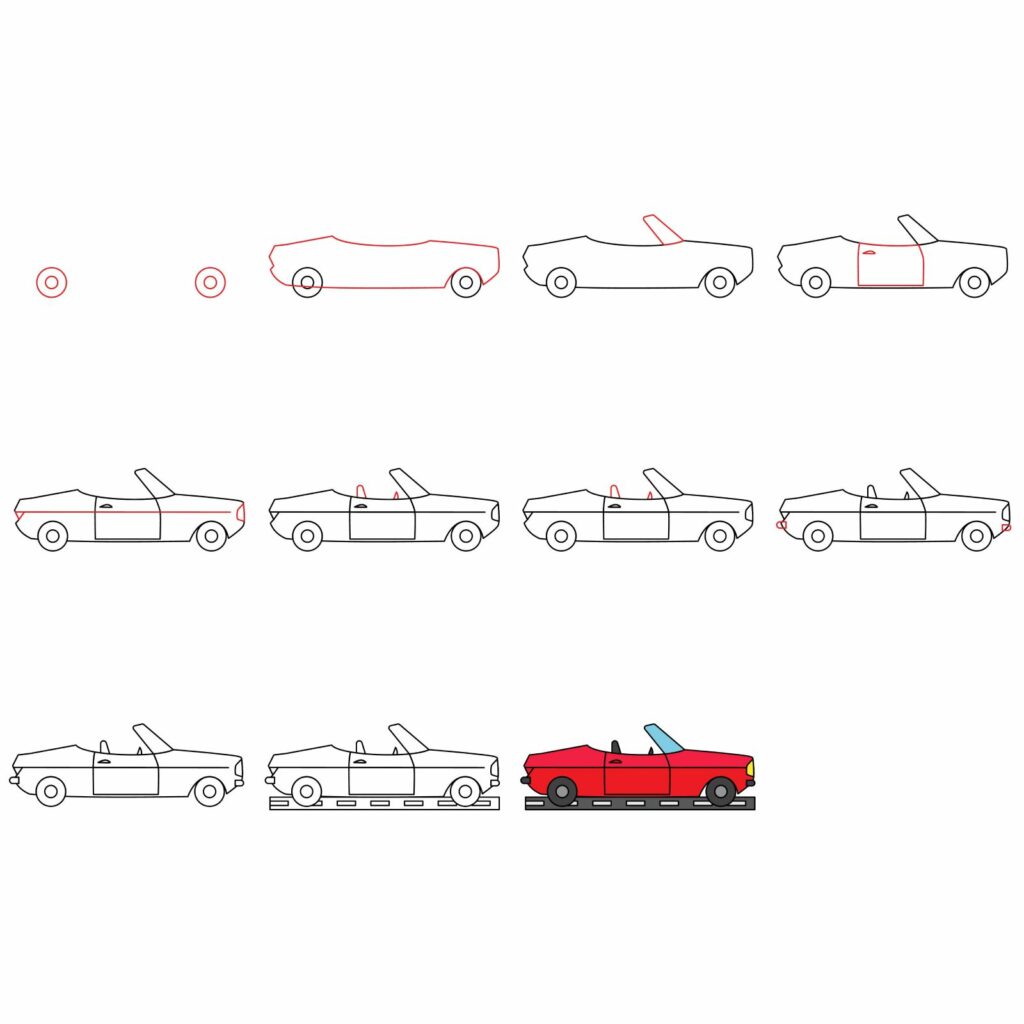
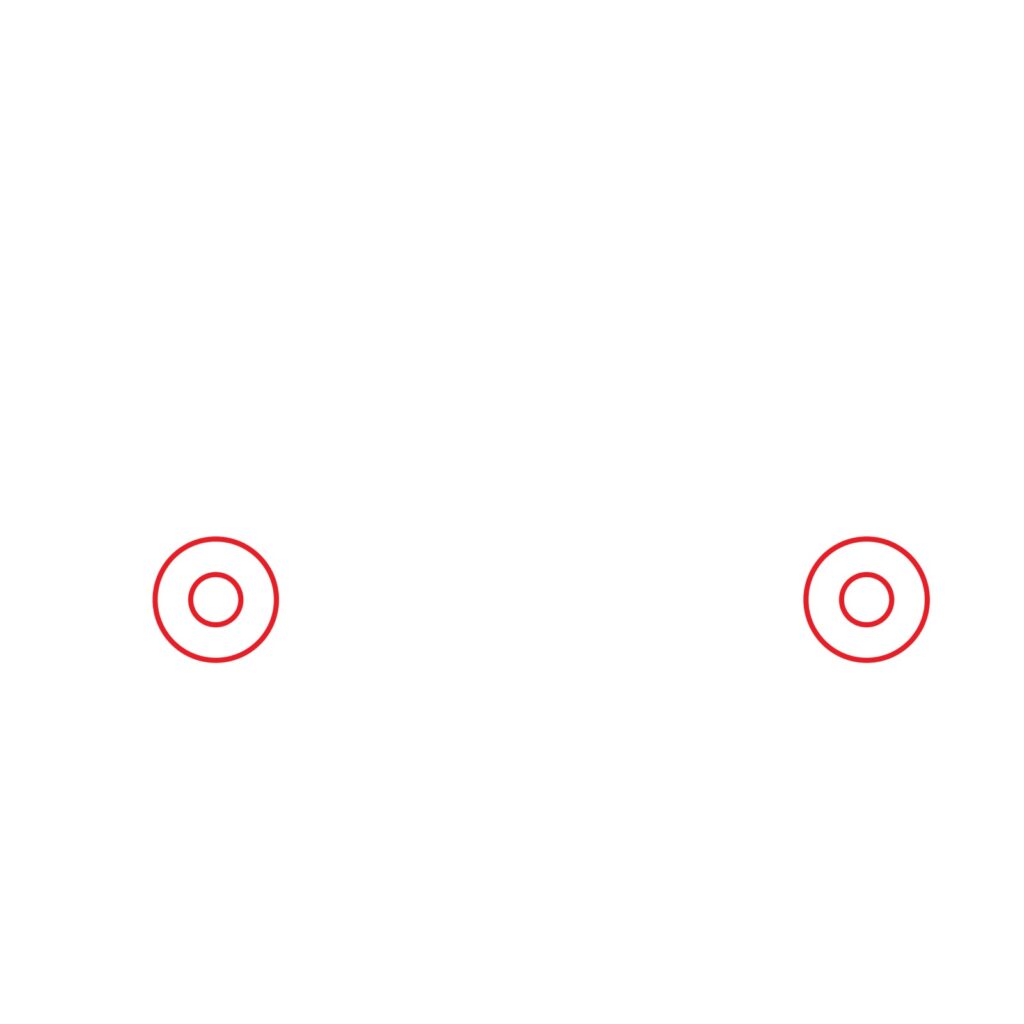
Step 1: Draw the Wheels
To be able to drive on land, an Amphicar needs wheels. However, unlike other vehicles, the wheels on this vehicle are a bit small and set low. All the same, the wheels are the first things we are going to draw.
From the middle of your drawing paper, start by drawing the front wheel on the right part of the drawing paper. Make sure there is enough space between the front wheel and the right margin. To draw the wheel, draw a smooth circle and add another circle in the middle. That will form the front wheel. For the rear wheel, draw it close to the left margin of your drawing paper. It should be the same size as the front wheel and at the same elevation. Here is what your drawing should look like.
Step 2: Draw the Main Body
With the wheels ready, we can go ahead and add the main body of the Amphicar. As aforementioned, this vehicle looks the same as other cars, with the main difference being the open roof. For this section, you will need to use your ruler.
Use your ruler to draw a horizontal rectangle that cuts through the middle of the wheels. The rectangle should not be too high and should extend slightly past the wheels. Next, we are going to turn the rectangle into a realistic car body.
Start by making the bottom left corner of the rectangle rounded. You should also add an indentation immediately above the bottom left corner. Next, add a diagonal line that starts slightly below the top left corner and slant it to connect to the rectangle’s top part. Next, erase the sections of the rectangle that sit to the left of the new features we just added.
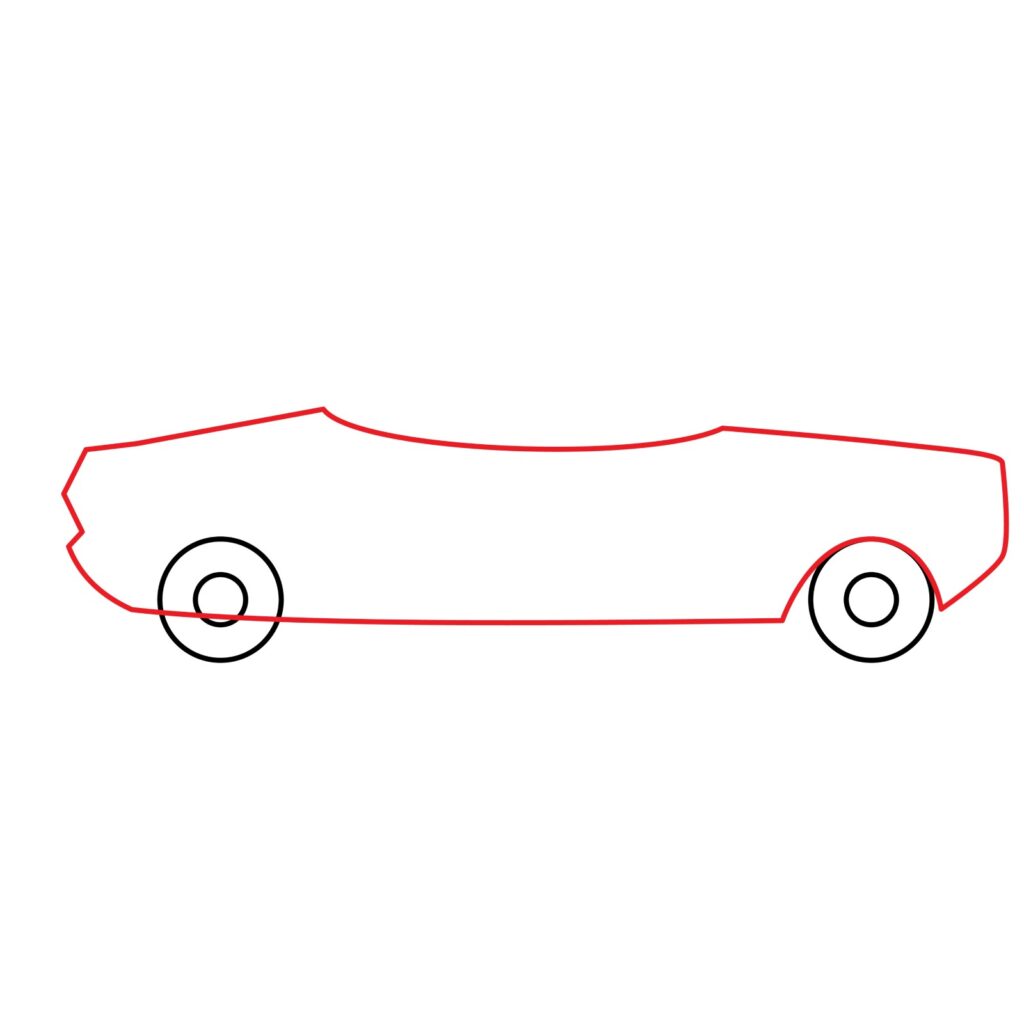
For the upper portion, we are going to add a curved line starting from the end of the diagonal line we added. The curved line should reconnect with the top of the rectangle at the area above the front wheel. Next, add a diagonal line starting from the end of the curved line and slant slightly to connect with the right side of the rectangle. You should then add a curved line to replace the bottom right corner of the rectangle. Add a curved line over the front wheel, then erase the parts of the rectangle that sit outside the sections we just added. Don’t forget to erase the part of the main body that cuts through the wheels.
Step 3: Draw the Windshield
We are now going to add the windshield. This is the front part of a vehicle that keeps the wind from getting in the face of the driver.
We are going to start by adding a diagonal line that rises from the right end of the curved line we added to the top of the car. The line should slant to the left and rise slightly. Next, add another diagonal line that starts slightly to the left of the first diagonal line and rises to almost the same level as the first one. The line should come close to the first diagonal line so that the new shape is narrower at the top. Connect the two lines with a rounded top to complete the windshield.

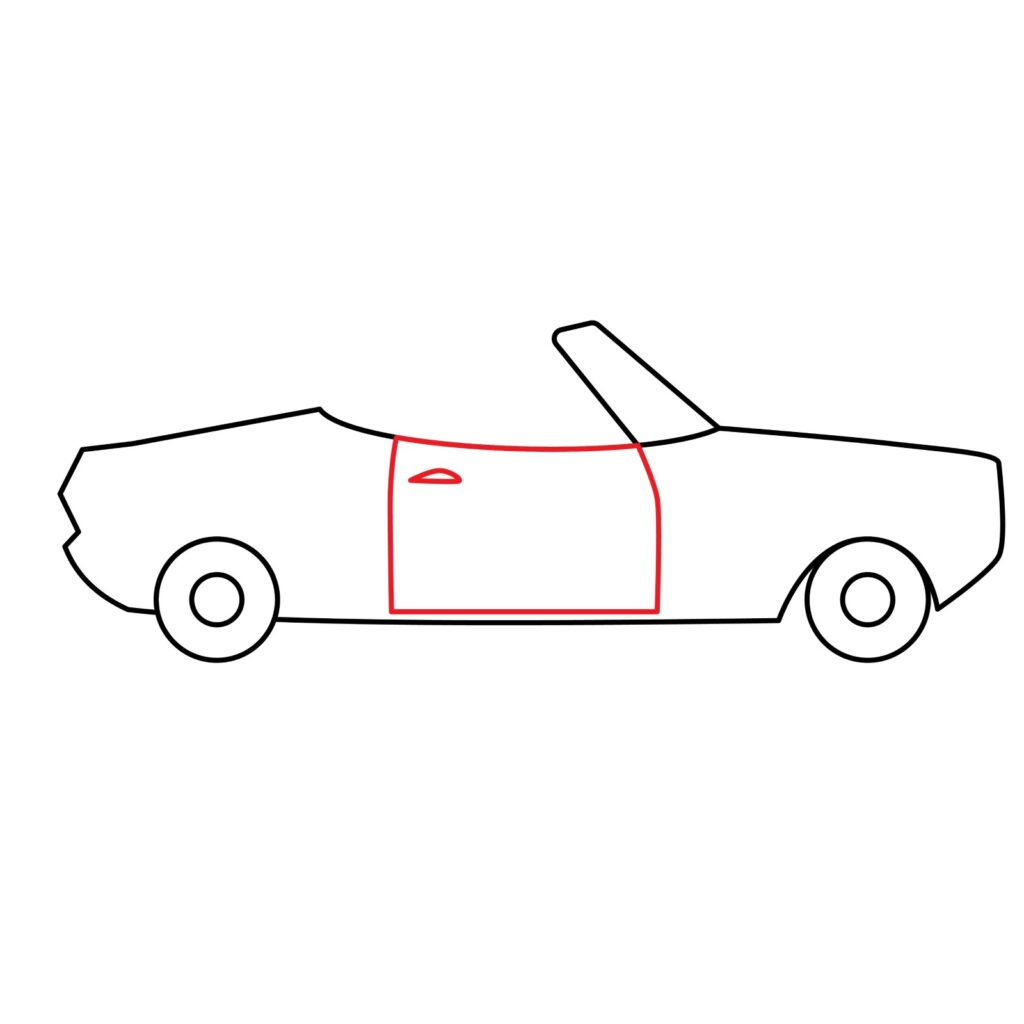
Step 4: Draw the Door
Our Amphicar is almost ready. The next thing we are going to add is the door. This should sit behind the windshield and extend close to the bottom of the main body. Start by drawing a vertical line close to the left part of the curved line we added on top of the body. The line should stop slightly above the base of the body.
Add another vertical line starting from the bottom left corner of the windshield. This line should bend slightly towards the right for a short distance, then extend downwards and stop above the bottom of the body. Add a horizontal line to connect the two vertical lines.
To complete the door, we need to add a door handle. Add a semi-circle close to the top left corner of the door. Your door should now look like this.
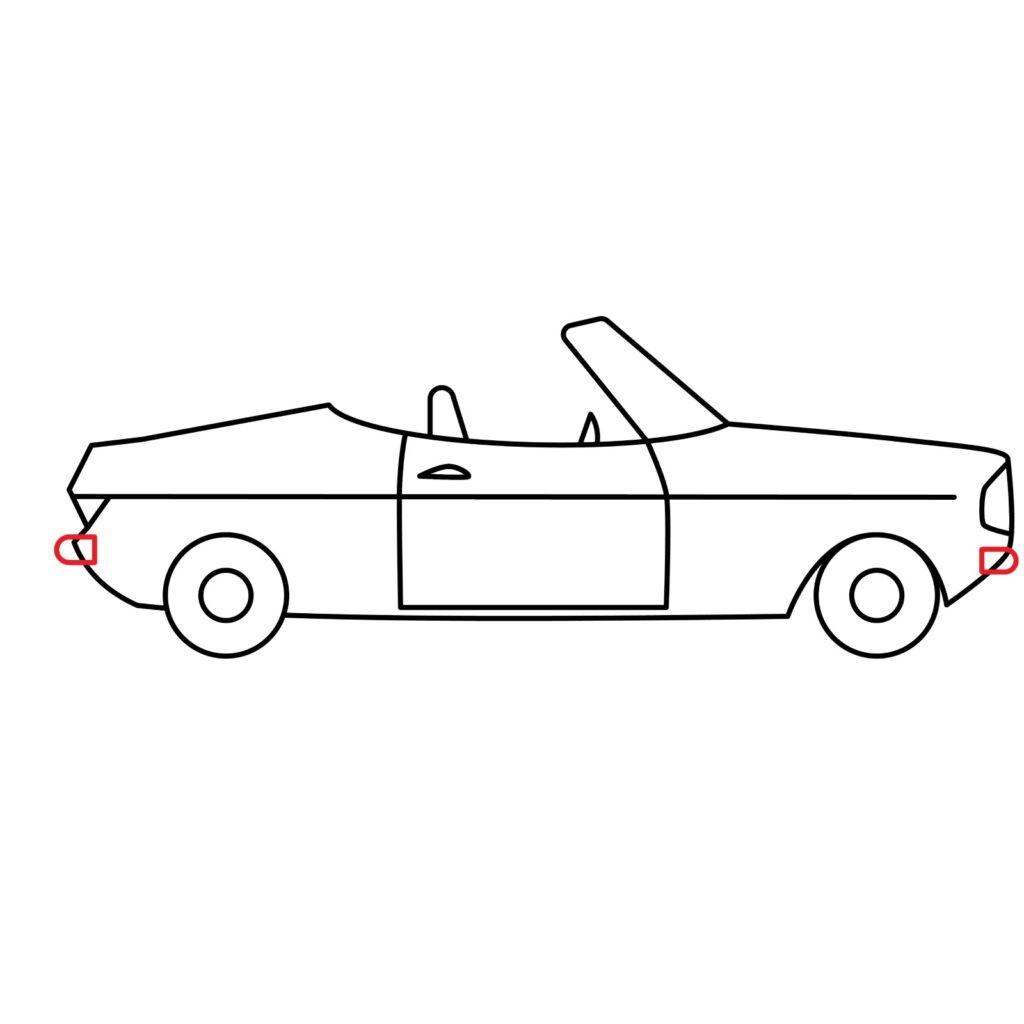
Step 5: Draw the Lights
Before adding the lights, we will start adding a line that cuts across the middle part of the main body. This used to be the signature of Amphicars. When on water, the water never rose above this line. To add the line, simply use your ruler to draw a line that starts from the indentation we added to the back of the vehicle and stops close to the front of the car.
We will start by adding the rear lights. These usually include the brake lights. To add them, simply add a small rectangular shape to the rear. The shape should sit below the signature line.
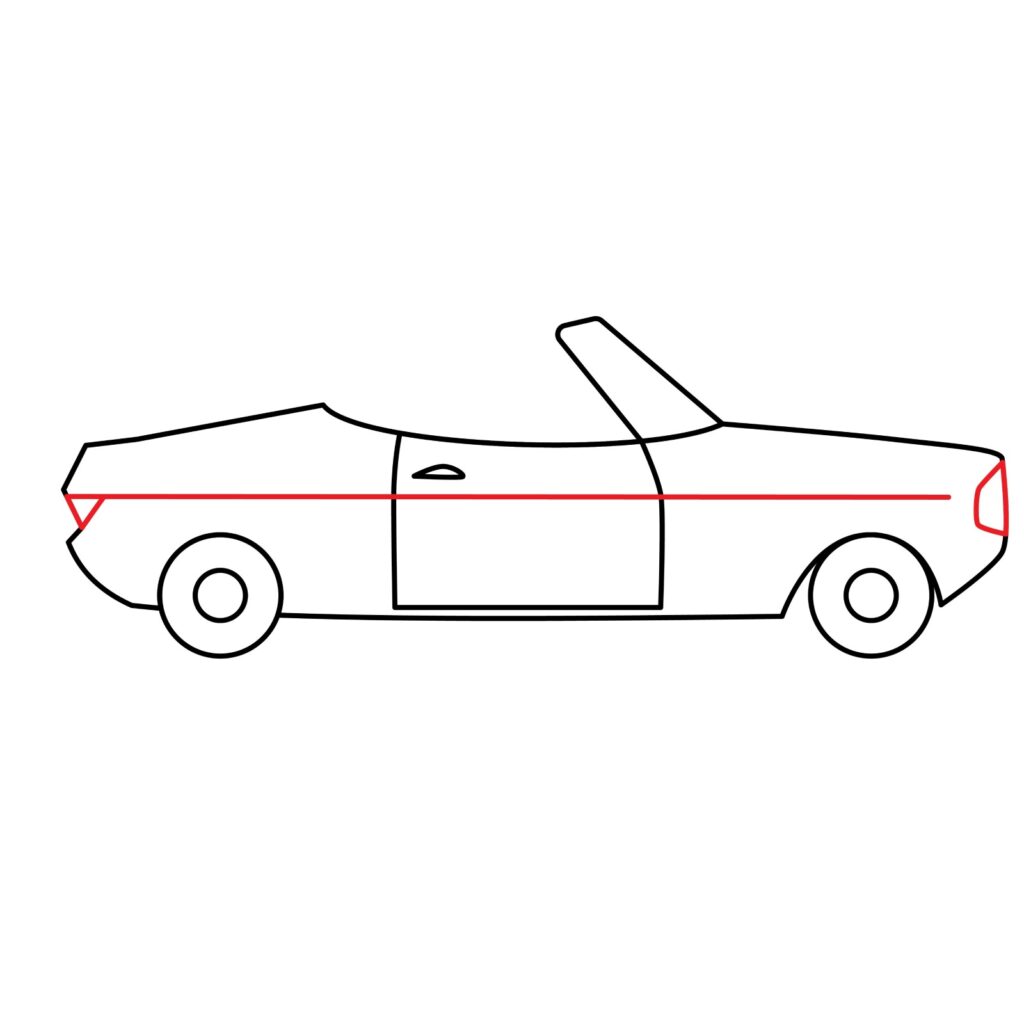
For the headlights, we are going to add an oval shape to the right of the signature line. This should sit below the hood (bonnet) and the bumper, as shown in our illustration.
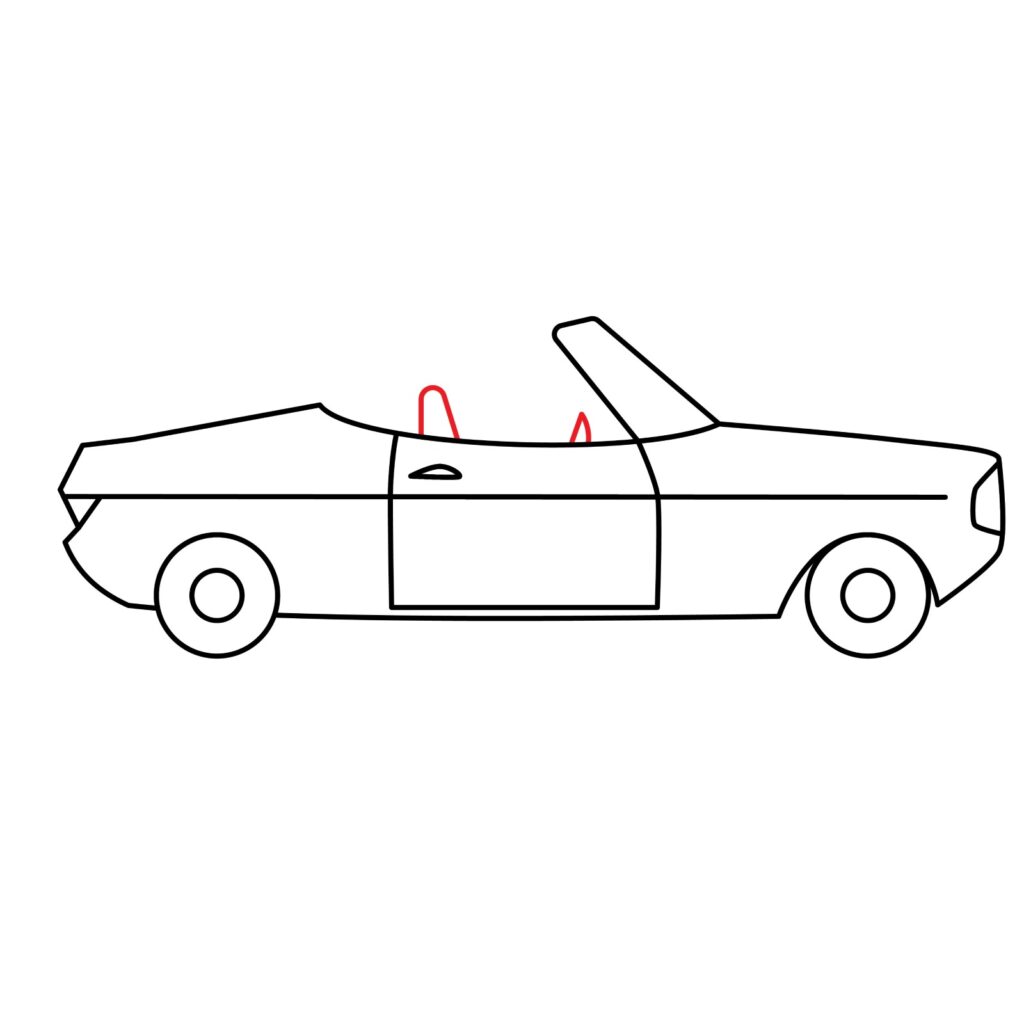
Step 6: Draw the Seat
Since the door of the Amphicar is closed, we cannot be able to see the whole seat. We will only be able to see the top of the seats. For that reason, we are simply going to add a small structure above the back side of the door.
We will also add the top part of the steering wheel. For that, we need an even smaller structure added behind the windshield.
Step 7: Draw the Bumpers
Every vehicle needs a bumper. This is a small structure that is designed to absorb low-speed impacts. These structures are located on the front and rear of a vehicle.
To add the bumpers, we will be using small rectangles. For the rear bumper, we will add a small, horizontal rectangle below the rear lights. For realism, we will make the left corners of the rectangle rounded. The front bumper sits below the headlights. We will do the same thing we did for the rear bumper, the only difference being that the right corners will be rounded.
Step 8: Refine the Drawing
Congratulations! Our Amphicar is now ready. All you need to do now is refine it by erasing any overlapping lines. Start with the lines that cut through the bumpers.
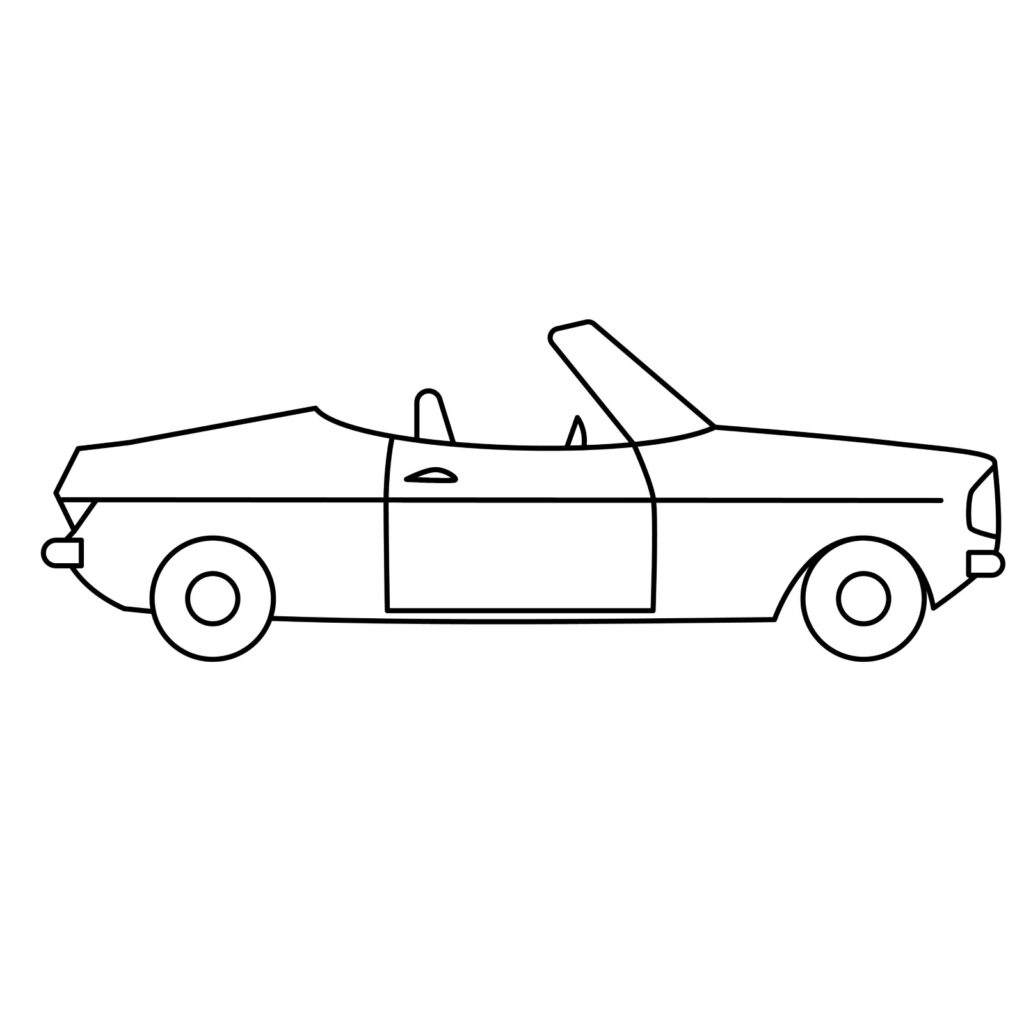
If you are new to drawing, you might not get the perfect result you see in the images. There is always room for improvement. The key to becoming a great artist is to keep practicing. You will notice a significant improvement on your next attempt.
Take the Drawing to the Next Level
We are not going to leave our drawing as it is. To distinguish yourself as a good artist, you have to be willing to add more details to your drawing. Adding more details helps a drawing stand out.
Add a Background
The first thing you should consider adding is the road. We used horizontal rectangles to add a road. You do not need to stop there. You can add some background clouds and electricity poles or trees.
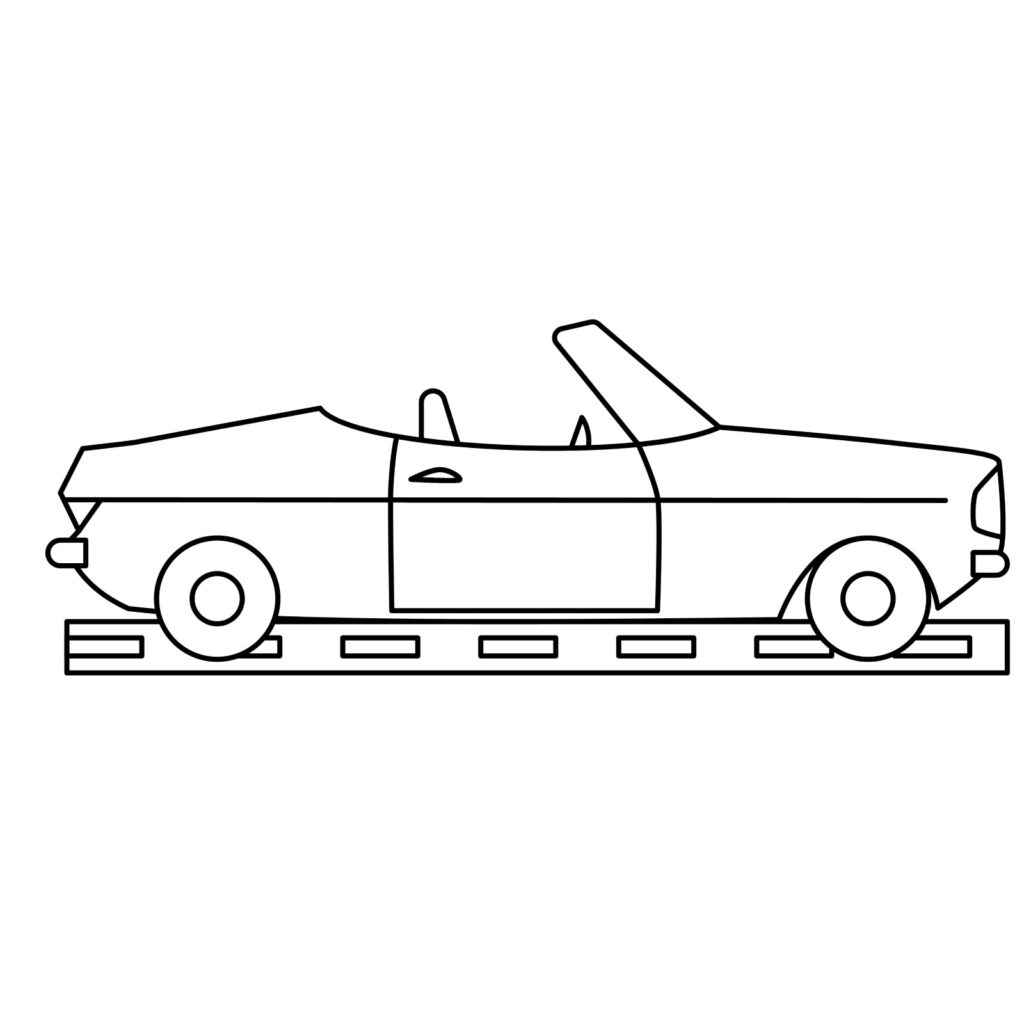
Bearing in mind that an Amphicar can drive on water, you don’t have to add a road. You can use wavy lines below the vehicle to imply it is already in the water. You can also write a name on the side of the vehicle. Show us how imaginative you truly are.
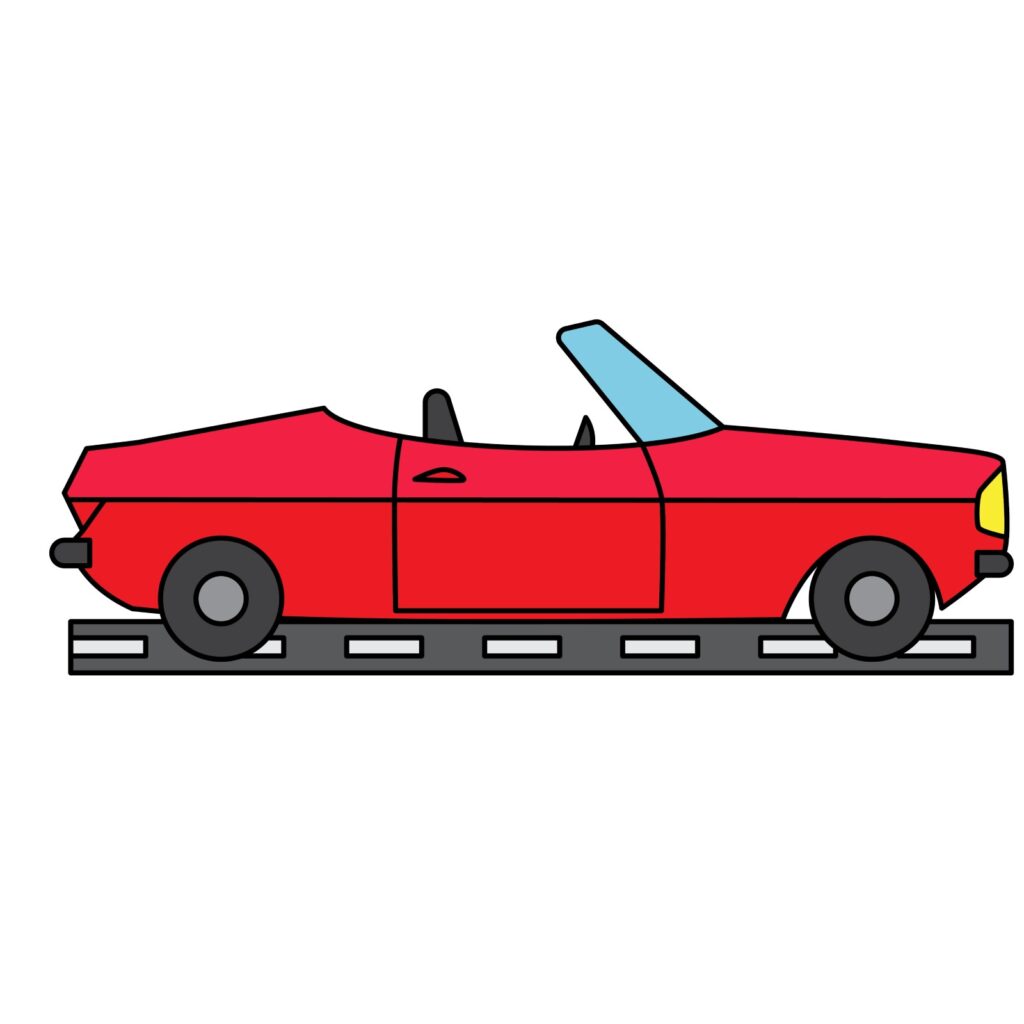
Color the Drawing
The final step in today’s lesson is all about coloring your drawing. Take out your coloring supplies and add color to your drawing. There are no rules on the colors you can use.
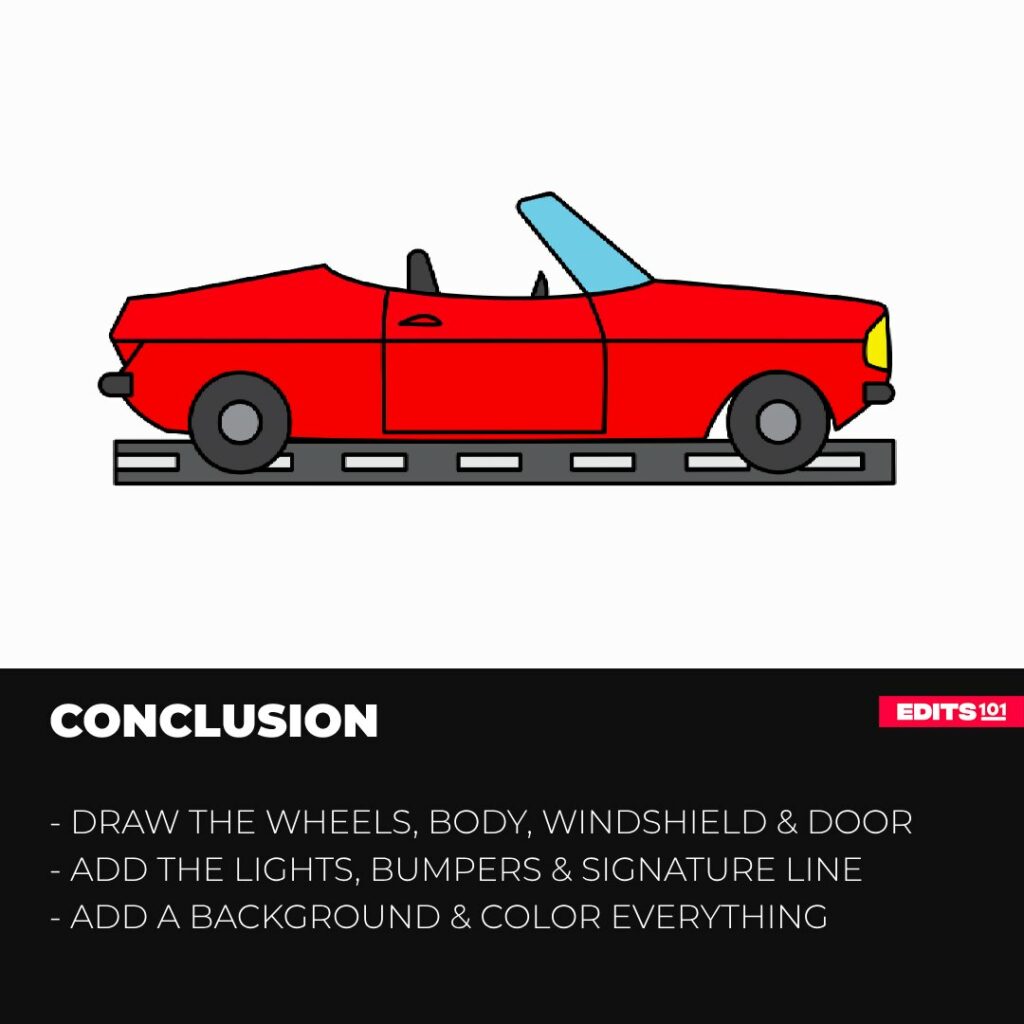
Conclusion
Drawing an Amphicar is pretty easy. You simply work with shapes. In our drawing, we started by using circles to draw the wheels, then added the main body using a rectangle. We then added the windshield, door, lights, and seat. We added some background details to advance our drawing and then colored it.
It takes practice to become a remarkable artist. Don’t let frustrations get to you if things don’t shape up as well as you want them to. You will notice significant improvement the more times you practice.
Thanks for reading & feel free to check out more of our articles!
Author Rating
Overall Rating
Summary
Learn what is an amphicar and how it is different from other cars. You will also learn how to draw an amphicar step by step. The guide is perfect for kids.