How to Draw a Bus | Step-by-Step Tutorial
Do you love vehicles? Maybe you’re a fan of robust vehicles with strong engines and sturdy frames? If so, you’re definitely in the right place because in this tutorial, we’re going to be teaching you how to draw a bus in 10 easy-to-do steps.
Learning to draw a bus can help you improve your observation skills and attention to detail. It also helps you break down complex shapes into simpler forms, which is always useful for problem-solving.
Before we begin though, let’s take a look at the standard definition of a bus.
A bus is a large public transportation vehicle that usually runs on fixed routes and schedules and is used to transport passengers from one location to another within a city or region.
What You Will Need
- Drawing paper
- Pencils (2b, 3b or 5b)
- An eraser
- A ruler (optional)
- Drawing compass (optional)
- 40-45 minutes

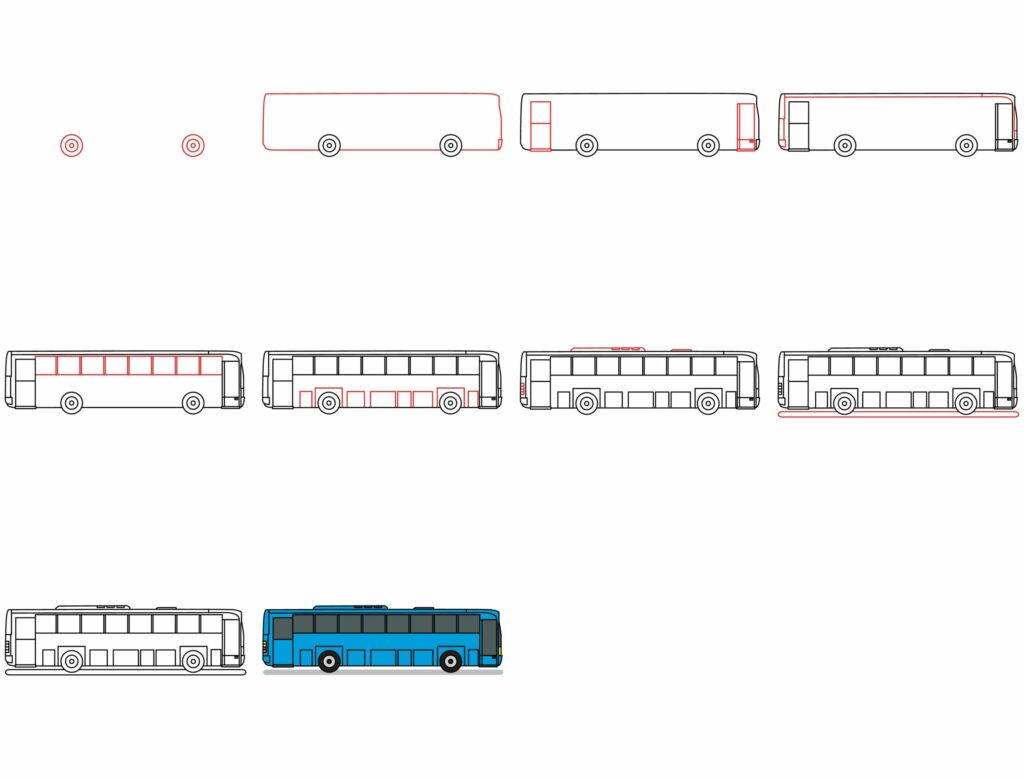
How to Draw a Bus In 10 Steps
While it may seem difficult at first, drawing a bus is well within reach if you follow this guide. Glance over the outline provided below to understand and prepare yourself for each drawing step before you begin!
Step 1: Draw the wheels
Start by placing your drawing paper in a preferred orientation, either landscape or portrait, to fit your desired result.
Next, draw two small circles along the bottom half of your page. Make sure the circles are accurately spaced apart and drawn on the same level.
Then, draw two smaller circles inside each big one to resemble the look of real wheels. You might benefit from using a coin or bottle cap to trace round circles.
- Place your paper in either landscape or portrait mode
- Draw two small circles along the bottom half of your page
- Draw two smaller circles inside each big one to resemble real wheels

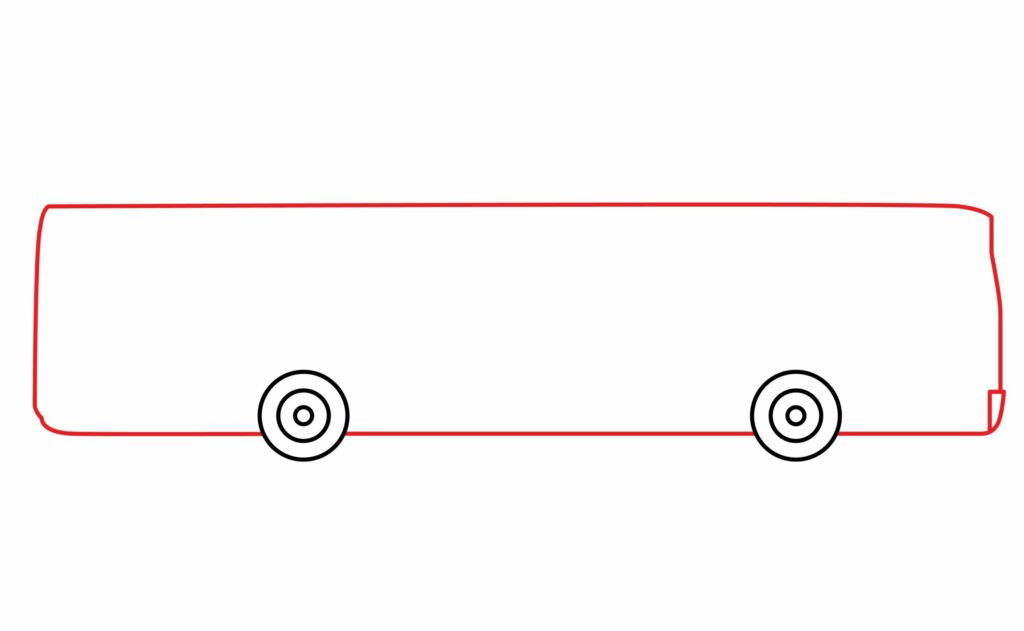
Step 2: Draw the body
Draw a large rectangular shape over both wheels to resemble the body of the bus. If it’s necessary, don’t shy away from using a ruler to draw straight lines!
Make sure the bottom line of the rectangle does not overlap with the wheels, and that the back part is slightly longer than the front. Also, add a small little square on the bottom-right corner of the rectangle.
- Draw a big rectangle over both wheels for the body of the bus
- Don’t overlap the bottom line of the rectangle with the wheels
- Make sure the back part of the bus is a bit longer than the front part
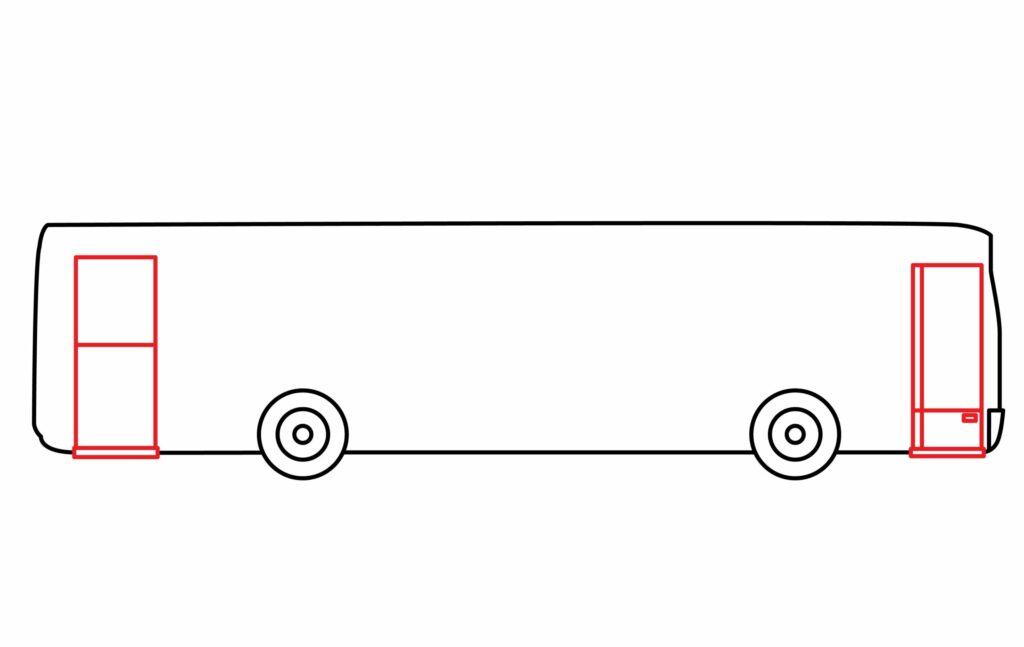
Step 3: Draw the front and back doors
Since we’re drawing a pretty big bus, you’ll need to draw two small vertical rectangles over the body – one in the front and one in the back to resemble the doors of your bus.
Make sure the bottom of each rectangle touches the bottom of the bus and that the top part ends before it reaches the roof. You also want to avoid drawing the rectangles too close to the sides of the bus.
Add two horizontal lines in each door and a vertical line along the side of the front door for added detail.
- Draw two small vertical rectangles on the body of the bus for the doors
- Add two horizontal lines in each door and a vertical line plus handle in the front
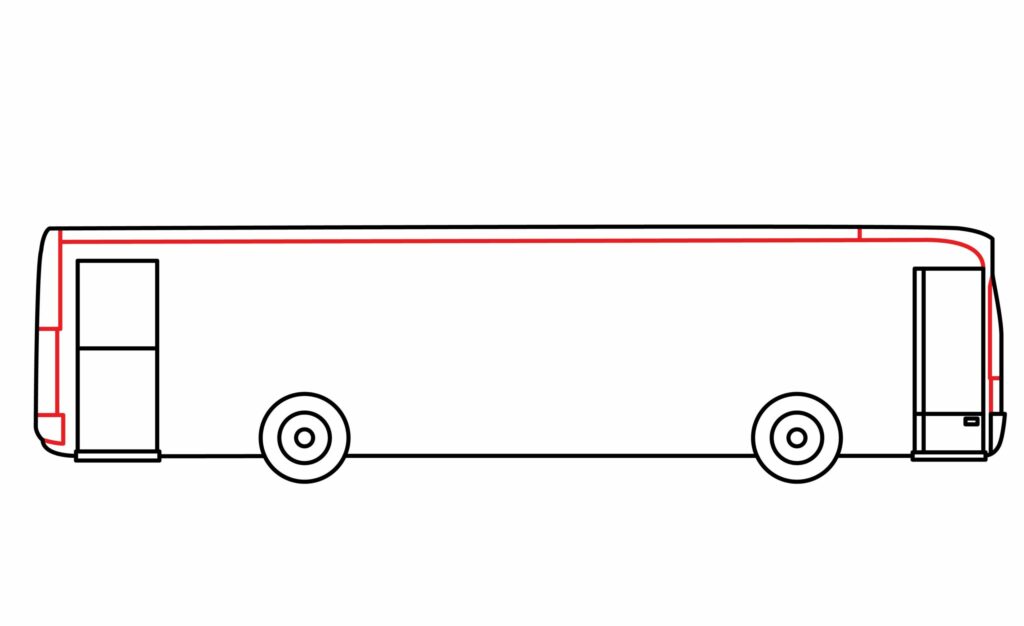
Step 4: Add Extra Details
If you’re like me and you love creating things that are as close to the real-life thing as possible, then add some extra details to the body of your bus to make it more dimensional.
Start by drawing a long horizontal line below the roof of the bus. Add some shapes on both the back and front side for definition.
- First draw a long horizontal line beneath the roof of your bus
- Then add a few shapes along the sides of the bus for added detail
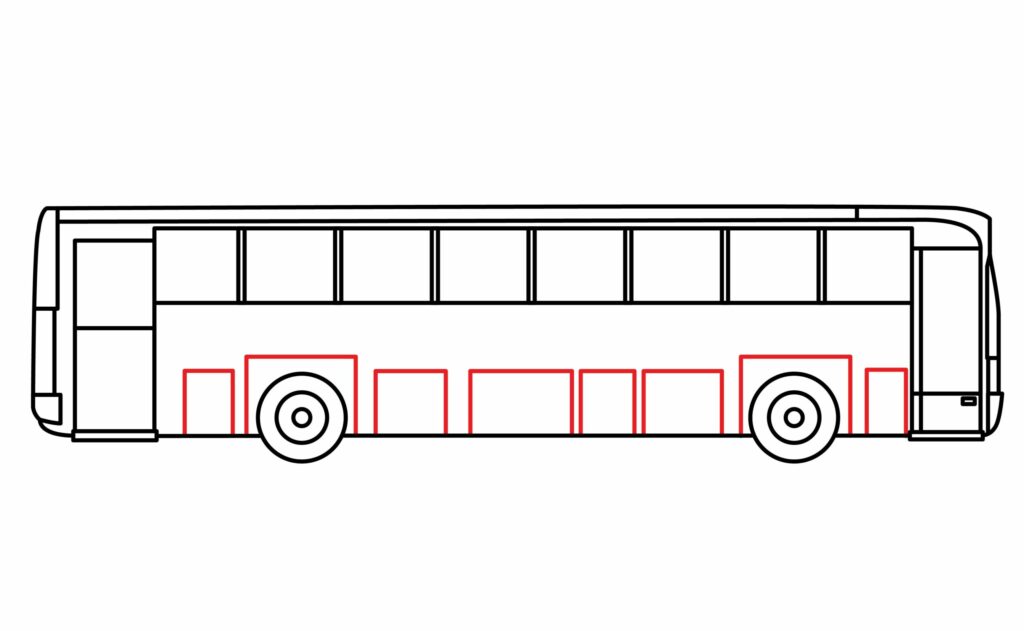
Step 5: Draw the windows
Draw a long horizontal rectangle on the upper part of the bus, then add a series of squares within the rectangle by drawing vertical lines. Make sure each square is roughly similar in size and that there’s a thin space between them.
- Start by drawing a long horizontal rectangle along the upper part of the bus
- Draw a series of vertical lines within the rectangle to resemble squares
- Make sure each square is the same size

Step 6: Draw the luggage carrier
Draw a few shapes along the bottom part of the bus to represent the luggage compartment. To make each one unique, exchange rectangles for squares as you add them onto your bus.
- Draw a series of shapes along the bottom part of the bus
- Make sure the first shape is a rectangle and the second one is a square
- Also ensure the shapes don’t overlap with the wheels
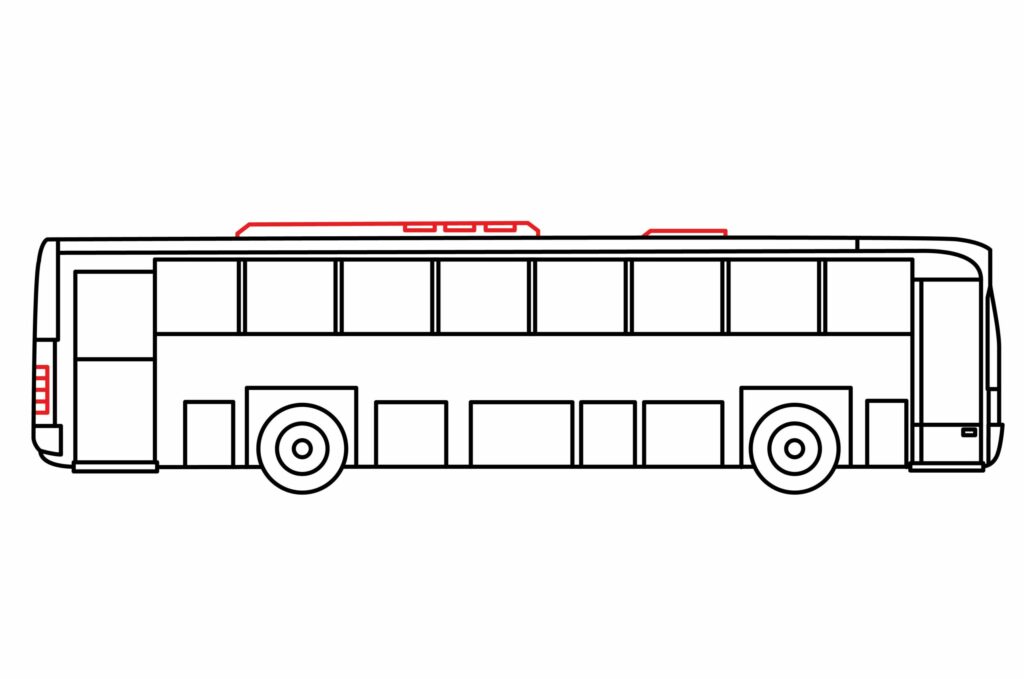
Step 7: Draw the AC vents and backlight
Draw the backlights on the bottom side of the back of the bus by adding four small squares. Then, on the top of the bus, draw the AC vents with some horizontally curved lines.
- Start by drawing four small squares on the back of the bus for backlights
- Draw the air conditioning vents using horizontally curved lines on top of the bus
- Add three small rectangles in the one vent for detail
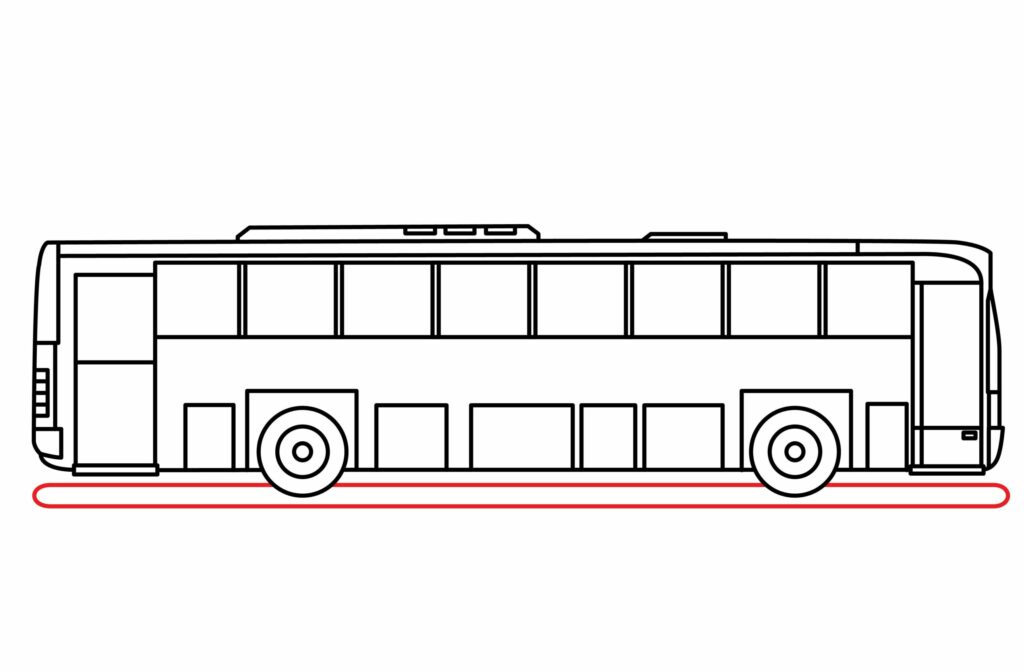
Step 8: add a road
Finish off your sketching process by adding a road beneath your bus. Do this by drawing a long horizontal rectangle with curved sides along the bottom part of the wheels.
- Draw a long horizontal rectangle beneath your bus to resemble a road
- Make sure the corners of your bus are round
- Avoid overlapping the upper line of the rectangle with the wheels
Congratulations! Your Bus Drawing is Complete
The sketching process is now fully complete! How did you fair? Was drawing a bus easier than expected, or did you find yourself struggling with a few steps?
You may notice that we have only covered eight steps while mentioning ten in the beginning of our lesson. That is because the drawing process is not exactly over yet!

Taking your drawing to the next level
While teaching aspiring artists how to draw different things, we always strive to push forward the importance of tackling a new challenge with arms wide open.
Why leave your bus drawing as it is now when you can add a background and color to make it even more authentic?
Of course, you’re not obliged to follow the rest of the tutorial, though it will surely improve the quality of your bus sketch.
Step 9: Adding a background
This step is all about where your imagination and creativity leads you.
You could add a cityscape behind your bus, with tall buildings and busy streets to give the impression of a vibrant urban environment.
You could even include a peaceful countryside scene with rolling hills and lush greenery for a more serene setting.
Another option would be to depict a coastal landscape with blue waters and sandy beaches, creating a sense of relaxation and freedom.
Whatever you decide, we’re sure your drawing of a bus will stand out and attract attention.
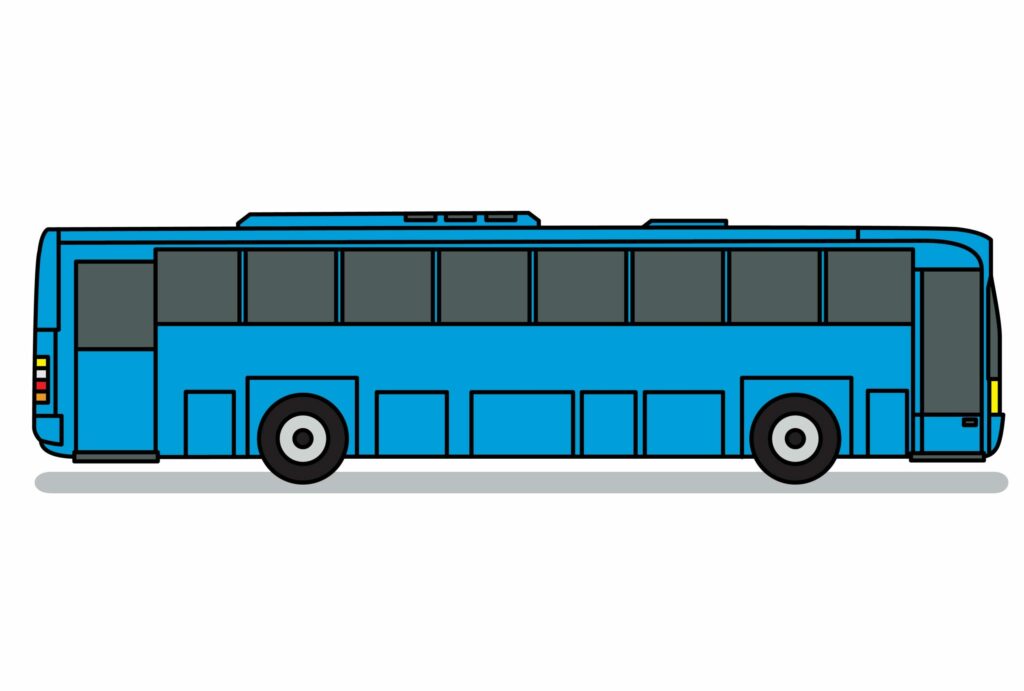
Step 10: adding color
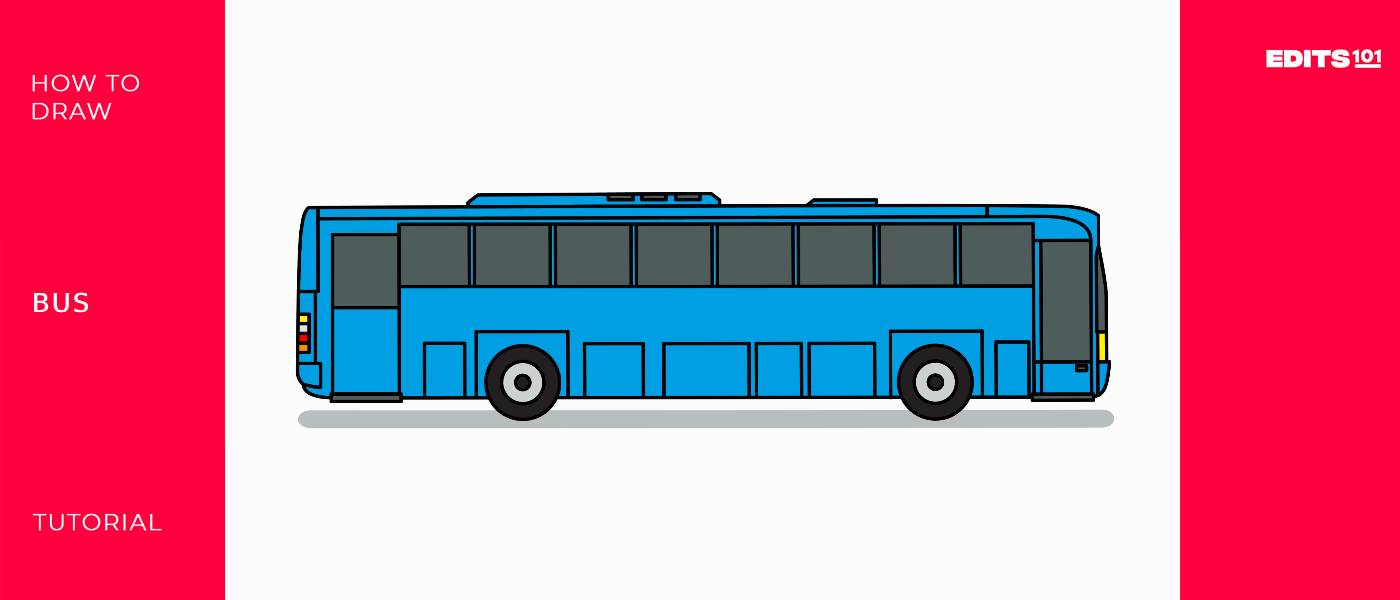
Make your bus pop by adding bright and inviting colors. Once again, you’re encouraged to be as unique as possible and use your favorite colors.
Just be sure to use different colors for different things. For example, coloring the main body blue while coloring the windows gray, and the wheels black. Also use realistic colors for the lights, so they’re easily distinguishable.
Bonus Tips
Interact with other budding artists on our YouTube channel. It’s a great way to gain a sense of community and learn new things.
Add darker shades to areas where shadows would naturally fall to make your bus more three-dimensional.
Draw a few little figures inside the windows to show people riding the bus.
Add unique details like stickers, graffiti, or personalized license plates to showcase your personality.
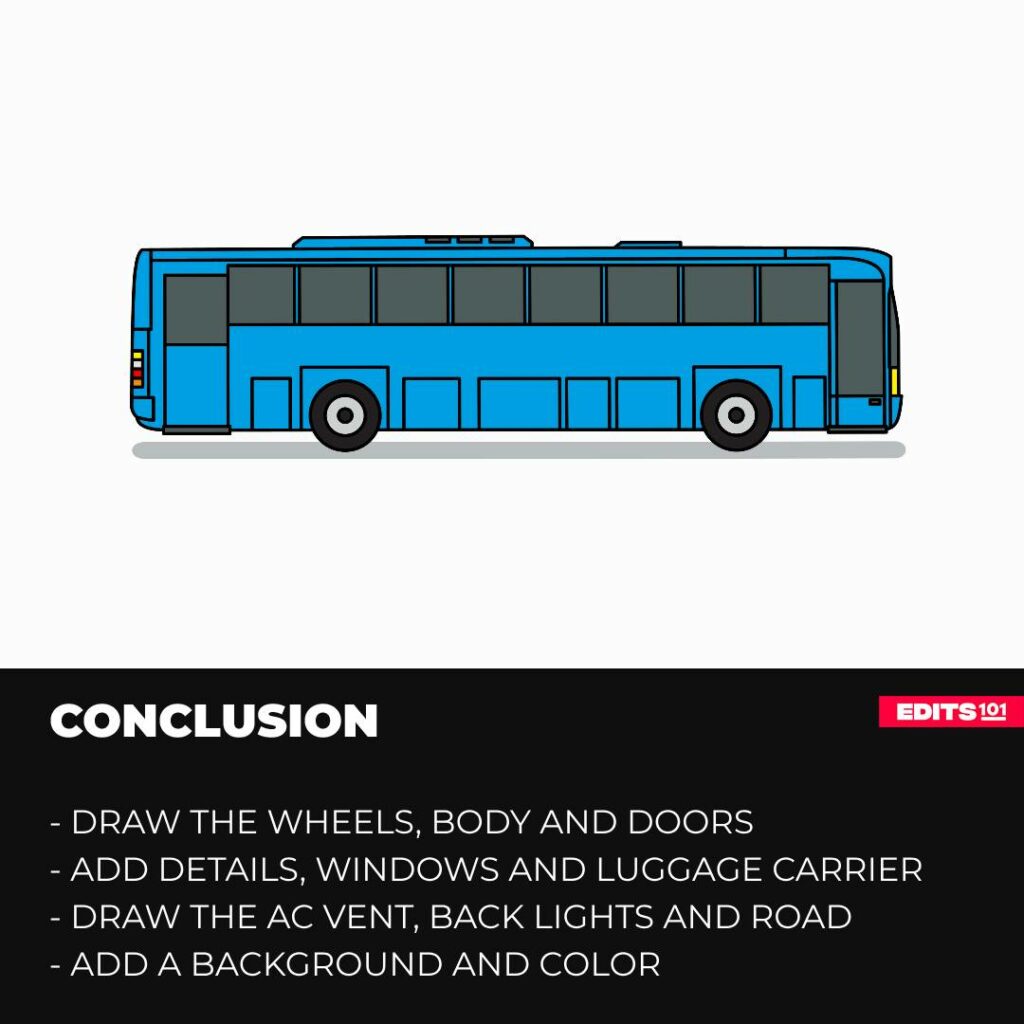
Conclusion
Today, you’ve learned how to draw a bus from start to finish. Beginning with the wheels, you laid the groundwork for the bus, then made up its body and added doors for passengers to enter and leave.
Moving on, you framed the windows, added a luggage carrier for convenience, and included important details like AC vents and backlights.
Congratulations on completing today’s lesson and hone your skills even further by trying out other tutorials.
Thanks for reading & feel free to check out more of our articles!
Author Rating
Overall Rating
Summary
This tutorial will effectively teach both kids and adults how to draw a bus and enhance it with use of a background and color in 10 easy steps.