How to Draw a Karate GI | A Step-by-Step Guide
If you’re looking to add depth to your black belt and dojo drawing, or merely searching for a new challenge, this might be the perfect tutorial for you! In today’s lesson, we will be exploring the sport of karate with an easy, step-by-step tutorial on how to draw a karate gi.
A karate gi is a traditional uniform worn by practitioners of karate. It consists of a jacket and pants, often made from thick canvas or cotton material.
The gi serves multiple purposes in karate training and competitions, including allowing for freedom of movement, showing respect for tradition, absorbing sweat during practice, and providing modesty.
| Steps | Complexity Level |
| The Torso Region | 2 |
| The Sleeves | 3 |
| The Belt | 4 |
| The Pants | 5 |
What You Will Need
- A4 sheet of paper
- Pencils (2b, 3b or 5b)
- Eraser
- Ruler (optional)
- Colored pencils or markers
- 20-25 minutes
How to Draw a Karate GI
Grab your paper, eraser, and drawing pencils before you get started. Also, check out the outline below for some insight on each step that lies ahead. Take breaks as you draw to keep an eye on your progress, and regularly compare your work with the images we provide to make sure you’re on the right track.
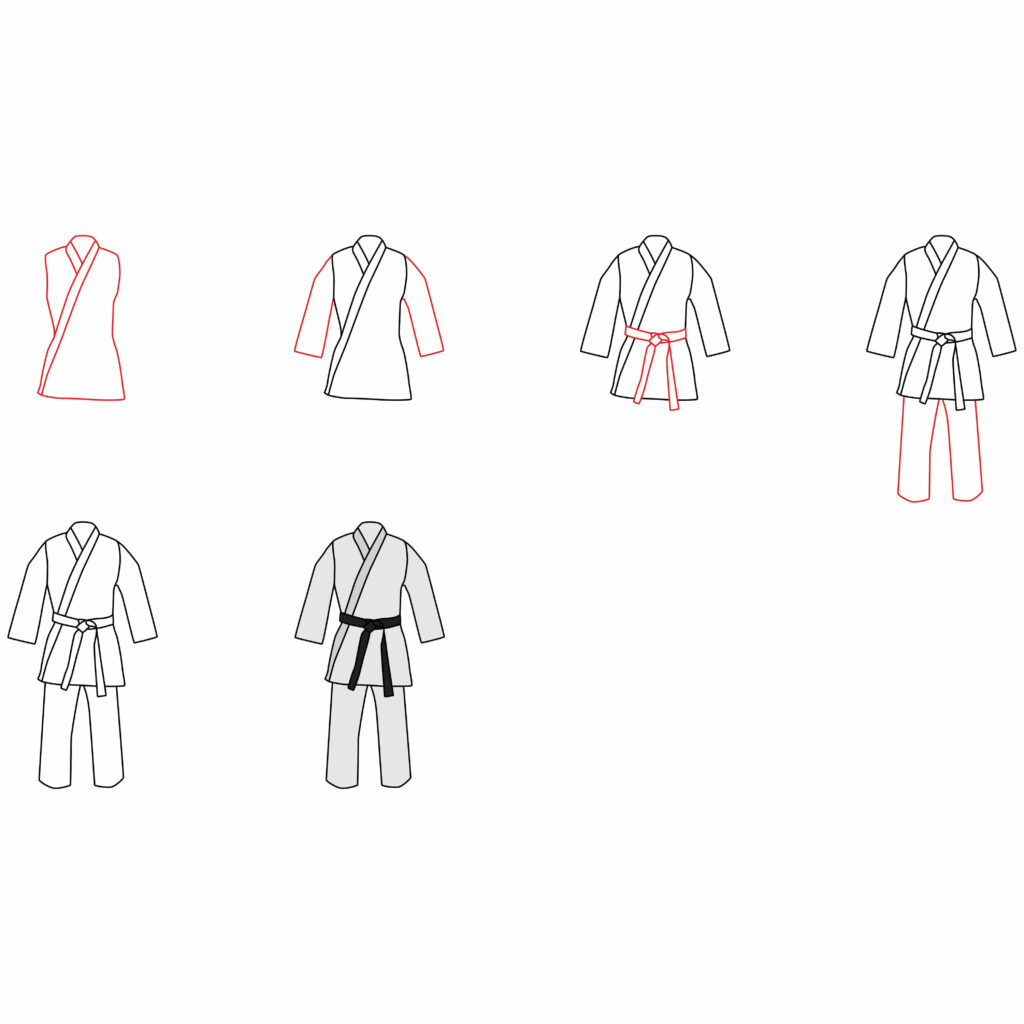
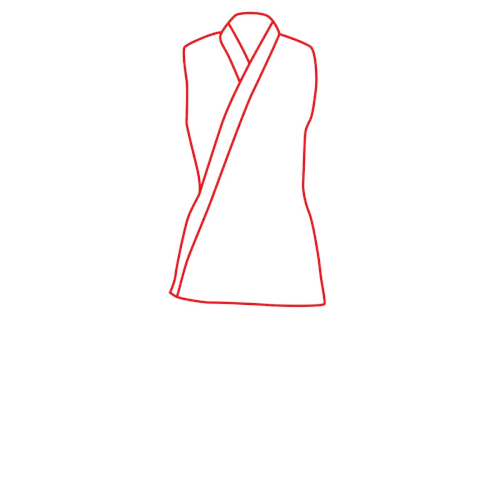
Step 1: Draw the Torso Region
Start by flipping your drawing paper in a preferred orientation and sketching the torso region of the jacket along the upper part of your page. Begin with a small curved line for the collar, then add a diagonal line on each side for the shoulders.
Next, draw a wavy vertical line running down each end of the shoulder blades for the outline of the torso. Make sure your lines curve outward around the bust, inward around the waist and flare out along the hips.
Add the traditional gi jacket style by drawing diagonal lines along the bottom of the collar in a parallel fashion.
- Draw a small curved line for the collar and two diagonal lines of the shoulders
- Draw a wavy vertical line running down each end of the shoulder blade
- Add the traditional gi jacket style by drawing diagonal lines below the collar

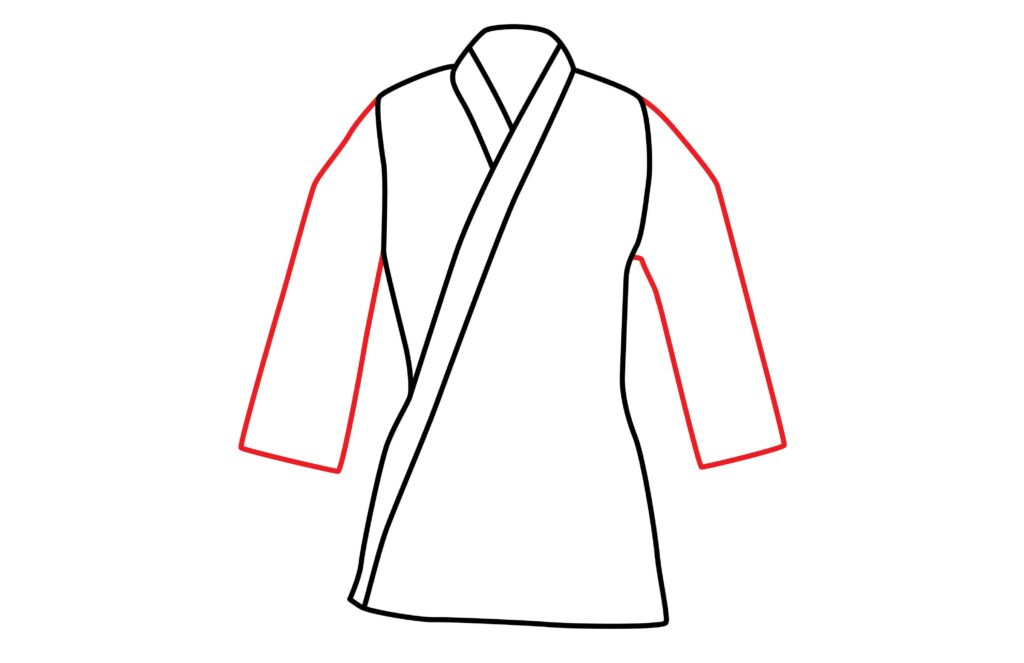
Step 2: Draw the Sleeves
I often find it easier to start with one arm as opposed to both when drawing sleeves. You may benefit from this technique as well. Start by drawing a wavy vertical line from the corner edge of the left shoulder blade.
When the line is just below the waist area, cut off the sleeve by drawing a horizontal cuff, and adding an ascending vertical line that connects to the underarm region. You may need to practice this technique a few times to make sure it’s perfect.
When you’re happy with the result, draw the same thing on the right side of the torso and make the sleeve as symmetrical as possible. Now that the sleeves and torso is complete, you have a karate gi jacket.
- Start by drawing a wavy vertical line from the corner of one shoulder blade
- Cut off the sleeve by drawing horizontal line once it reaches the waist area
- Add an ascending diagonal that connects to the underarm region
- Repeat the process on the remaining side
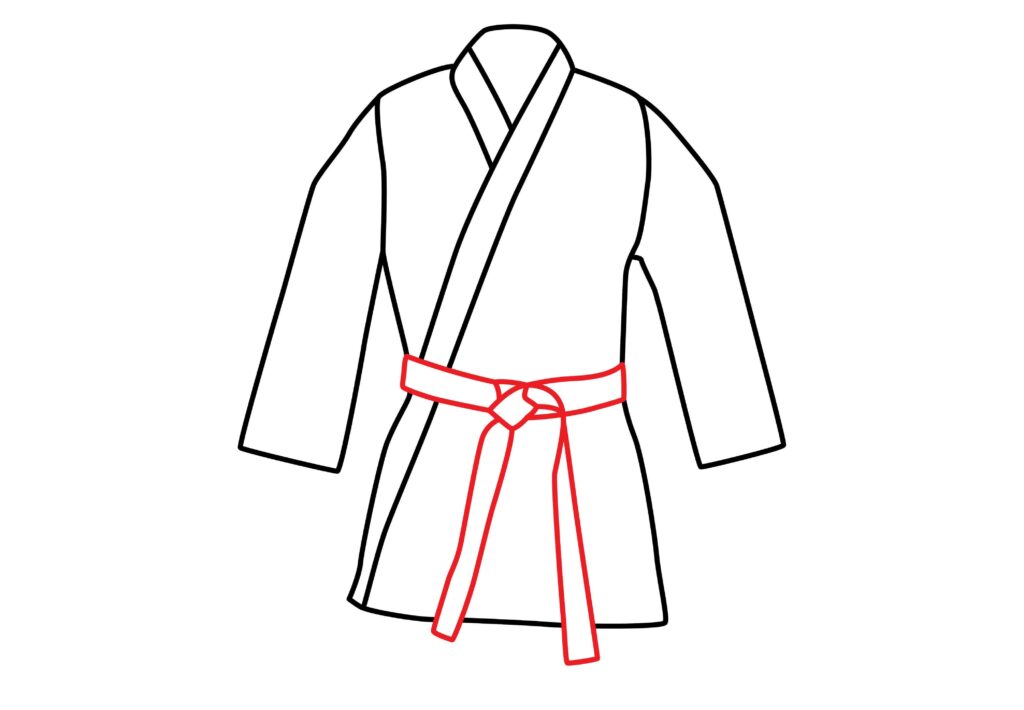
Step 3: Draw the Black Belt
If you did our black belt drawing tutorial, you will surely glide through this step. If not, don’t fret, the design is relatively easy to complete.
Draw a thin rectangle across the waist of the jacket. Add a small cube in the center for the knot and draw a vertical rectangle extending from each side of the knot.
Make sure the front fabric of the belt is long enough to appear realistic, slightly going over the bottom of the jacket.
- Draw a thin rectangle across the waist of the jacket
- Add a small cube in the center for the knot
- Draw a vertical rectangle extending from each side of the knot
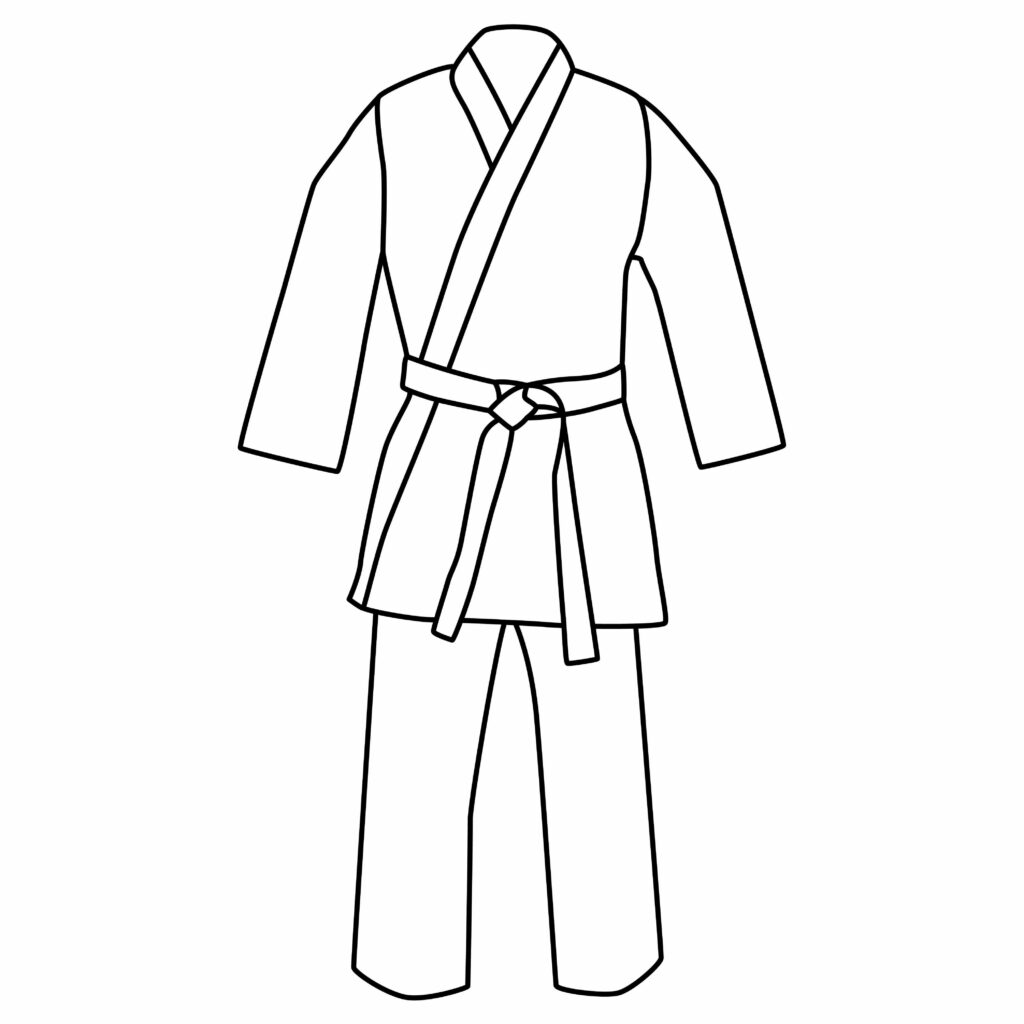
Step 4: Draw the Pants
Similar to the sleeves, start with one pant leg before completing the other. Draw a wide vertical rectangle starting from the bottom-left side of the jacket. Erase the right vertical line and replace it with a slightly wavy line instead.
Repeat the same process on the remaining side for the right pants leg. Ensure the bottom of each pant leg is rounded as opposed to straight.
- Draw a wide vertical rectangle starting from the bottom-left side of the jacket
- Erase the right vertical line and replace it with a slightly wavy line instead
- Repeat the same process on the remaining side

Congratulations! Your Karate GI Drawing Is Complete
Now that your drawing is complete, take a step back and assess the outcome. Are you happy with your results? If not, take your time and correct any possible mistakes. Once you’re content, be sure to carry on with the rest of the tutorial!
Taking Your Drawing to the Next Level
We regularly encourage students to think outside the box, and push themselves out of their comfort zones with their drawings. You are not obliged to complete these steps, however, they will surely heighten the appeal of your sketch.
A great way to determine this is to scroll down to the end of this tutorial and compare your current drawing to the image below. Ask yourself which one you would proudly call yours, and let that answer guide your decision.
step 5: adding a Background
Consider depicting a traditional karate gi in a serene setting, such as a peaceful Japanese garden with cherry blossom trees in the background.
Another idea could be to showcase different martial arts weapons like nunchucks and swords alongside the gi, symbolizing various training elements.
You might also explore creating a dynamic scene of a karate practitioner in action, executing a powerful kick or strike, capturing the essence of discipline and strength associated with martial arts practice.
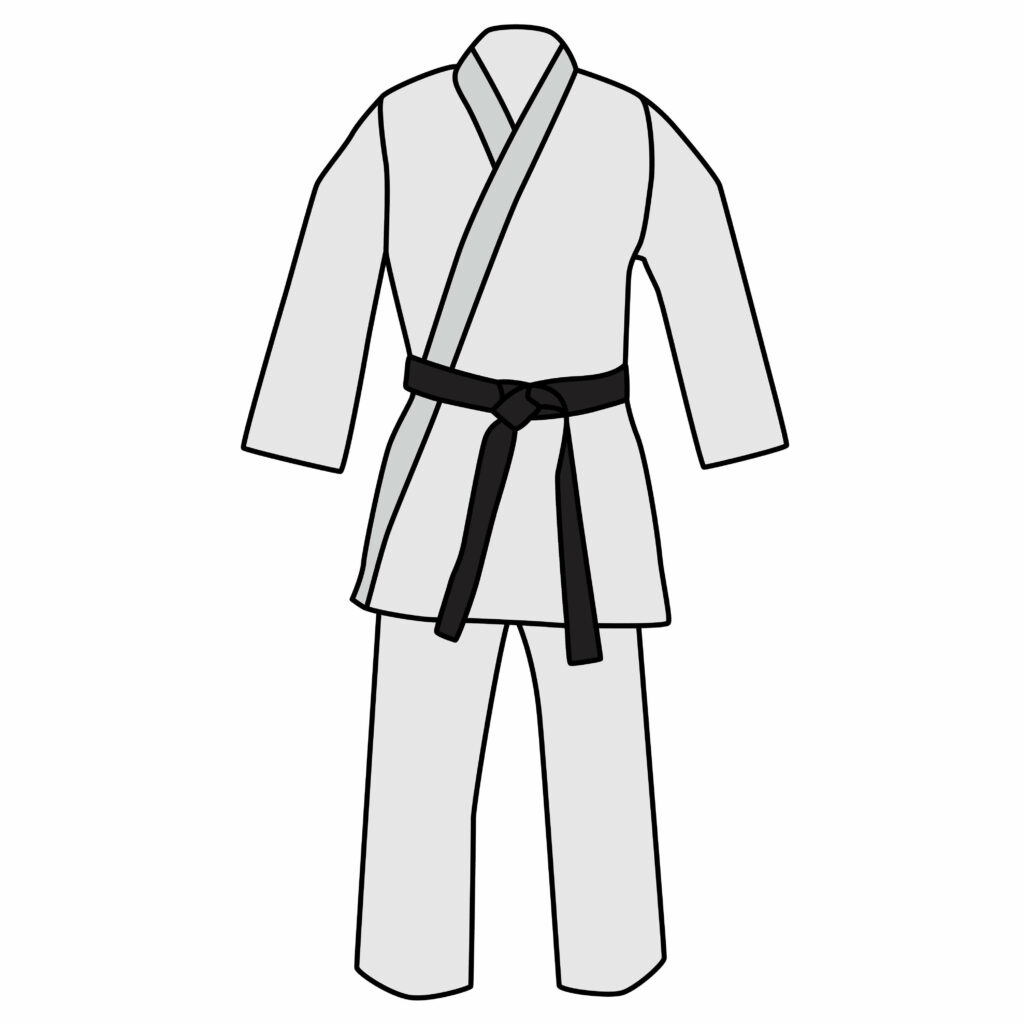
step 6: adding Color
For your karate gi drawing, select two gray tones that will constrast nicely against the color of your paper, and black for your belt.
Color the center of your gi with light gray and use a darker gray for the lapels of the jacket. Then, color your belt with black while avoiding the transferral of color onto the rest of your gi.
Bonus Tips
Write your name and the date on your page for a personalized touch.
Visit a few visual learning platforms to receive some extra tips and guidance on how to draw a karate gi.
Implement shading along the side or bottom of the drawing to create shadows.
Interact with other budding artists on YouTube to gain a sense of community and share your experiences with drawing.
Conclusion
From reading through the functionality of a karate gi to drawing a collection of different shapes including the collar, torso, sleeves and pants, you completed a great deal of work and implemented advanced drawing techniques.
While not easy, you managed to finish something you set out to do, which is always commendable. So job well done! Keep pushing yourself to improve as you explore different drawing tutorials.

Thanks for reading & feel free to check out more of our articles!
Author Rating
Overall Rating
Summary
This tutorial will guide you through sketching a basic Karate Gi and then enhancing it to achieve a more realistic and detailed appearance.