How to Draw a Jumbo Jet | A Step-by-Step Guide
If you’ve made use of our airplane, biplane, and jet tutorial before, you’re definitely going to love this lesson! Today, we’re exploring the world of aircrafts a little bit further with an informative and easy tutorial on how to draw a jumbo jet.
Perhaps you’re wondering what exactly a jumbo jet is and how it differs from a regular jet. Well, it’s all in the name. Jumbo hints at something large and dynamic, which is exactly what a jumbo jet represents.
Commonly known as a wide-body airliner, a jumbo jet is a large commercial aircraft designed to transport a high number of passengers over long distances.
Jumbo jets are usually much larger than regular jets, with multiple aisles and seating configurations that can accommodate hundreds of passengers. They also have more powerful engines and longer range capabilities, allowing them to fly non-stop on intercontinental routes.
| Steps | Complexity Level |
| The Body | 4 |
| The Window | 2 |
| The Left Wing | 2 |
| The Left Engine | 3 |
| The Right Engine | 3 |
| The Left Elevator | 1 |
What You Will Need
- A4 sheet of paper
- Pencils (2b, 3b or 5b)
- An eraser
- A ruler (optional)
- Color Supplies
- 20-25 minutes
How to Draw a Jumbo Jet
Even if you have never tried your hand at drawing an aircraft, we’re sure you can comfortably execute a jumbo jet drawing by following these simple steps.
Make sure you have all the required drawing materials and that you glance over the outline provided below to prepare yourself for each step that lies ahead.

Step 1: Draw the Body
Kick off your jumbo jet by flipping your paper in a landscape orientation and drawing the body.
Imagine your drawing a big fish with its mouth pointing to the bottom of your page and its fin pointing upward, and try to replicate that image as best you can.
Drawing the body involves drawing the right wing and elevator as well, so be sure to include the wing on the right side of the body and the elevator on the tip of the body.
- Start with a long, gentle curve for the main body
- Add two curved lines for the right wing on the side of the body
- Sketch a series of slight curves for the elevator

Step 2: Draw the Window
Draw a curved rectangular shape on the front of the jet to indicate the cockpit’s window. If you want, you can add another rectangle within the first shape or shade the corners for extra detail.
- Draw a curved rectangular shape on the front of the jet
- Ensure your lines neatly connect with the side of the jet
- Feel free to shade the corners to add extra detail and definition

Step 3: Draw the Left Wing
Draw a similar curved shape as you have done with the right wing, bearing in mind that they should be symmetrical. Additionally, ensure the starting lines of the wing don’t overlap with the side of the body.
- Sketch the wing by drawing a smooth curved line on the left side of the jet
- Ensure the wing’s shape is symmetrical with that of the right wing
- Ensure the starting lines of the wing don’t overlap with the side of the body

Step 4: Draw the Left Engine
Draw two small circles next to each other underneath the left wing of the jet. Repeat the circular shapes a few times to ensure dark lines or use a higher pencil grade with accurate lead thickness.
Next, draw a smaller circle inside each circle using lighter strokes to ensure thin circles and draw a diagonal line on the side of each circle that connects with the wing to attach the shapes and resemble the look of an engine.
- Draw two small circles side by side underneath the wing
- Draw a smaller circle inside each circle
- Add a diagonal line on the side of each circle that connects with the wing

Step 5: Draw the Right Engine
Draw the right engine by repeating the same process of the left engine on the right side. Only this time, ensure the circles are slightly bigger than the ones on the left, and that there’s a small space in between them and the wing.
- Mirror the left engines on the right side of the jet
- Ensure the circles are slightly bigger than the ones on the left
- Start drawing the circles below the wing, not attached to the underside

Step 6: Draw the left Elevator
Draw a small bell curve attached to the back side of the jet. Ensure the curve aligns with the right elevator, and that it’s slightly smaller than the one on the right for accurate dimension.
- Add the left elevator with a small bell curve on the back of the jet
- Ensure the left elevator is symmetric to the right elevator
- Also ensure the lines do not overlap with the side of the jet

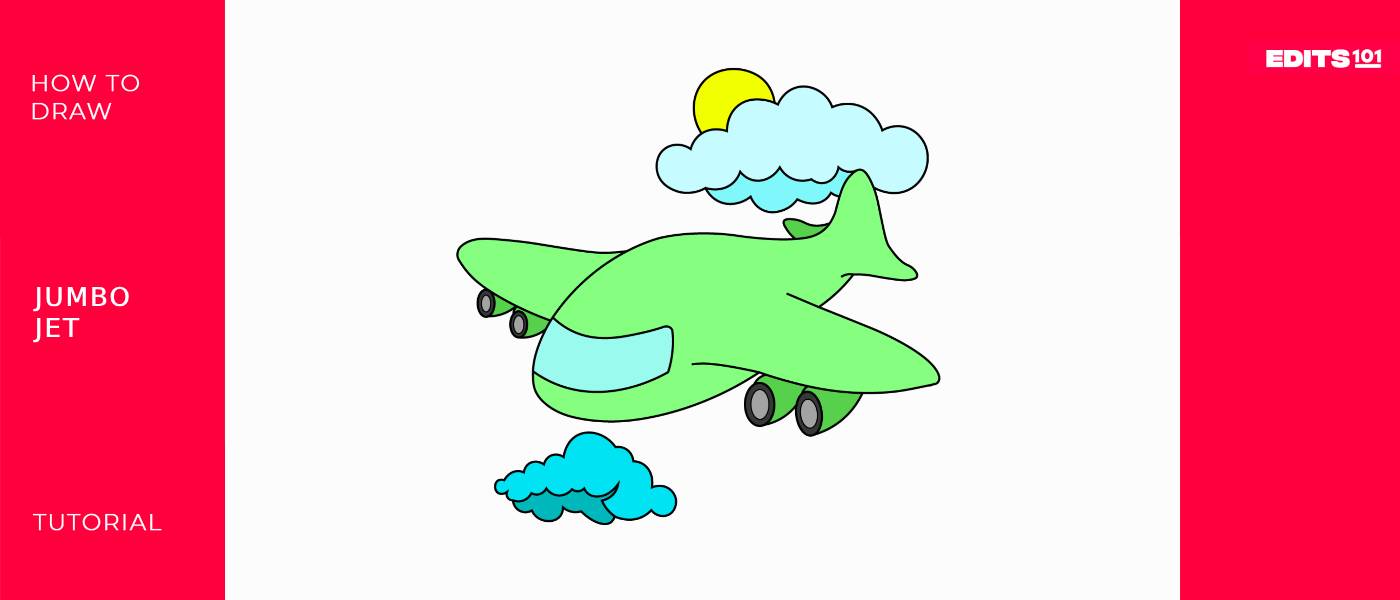
Congratulations! Your Jumbo Jet Drawing is Complete
And there you go, a jumbo jet drawing, complete. How did you fair with your drawing? Was it easier than expected, or a bit difficult?
Assess the outcome of your sketch as you give your drawing hand a well-deserved break. Utilize this time to make any possible corrections before carrying on with the rest of the tutorial.

Taking your drawing to the next level
For some, this is the best part of the drawing process. While being optional, adding a background and coloring in your drawing is enjoyed by many as it elevates a simple black-and-white sketch and gives it an extra edge.
Step 7: Adding a Background
There are a few background ideas to choose from for your jumbo jet drawing. If you’re going for an active landscape, you could draw a few clouds surrounding your jet to make it appear as though it’s flying.
Additionally, you could include an airport runway with other planes, ground crew workers loading baggage, fuel trucks or service vehicles, a control tower in the distance, passengers boarding the plane via a jet bridge, and maybe some distant cityscape or mountains to add depth to the scene.
Of course, these are only a few ideas to play around with. We’re sure whatever you decide to add to your background will be brilliant.

Step 8: Adding Colors
Now that you have decided on a background, it’s time to add some color to your jumbo jet. You are welcome to use a selection of your favorite colors.
We have done the same with our sketch, and colored the main body green, used a light blue for the window and some black and gray tones for the engines.
Make sure whatever colors you decide to use differ for the different parts of your jet to highlight and compliment each individual part.

Bonus Tips
Interact with other artists on YouTube or visual learning platforms to get some advice on how to draw a jumbo jet.
Personalize your sketch by adding your name or a logo of your choice to the jet’s body.
Study images of jumbo jets or study a few planes flying overhead if possible to gain a deeper sense of familiarity with its design.
Use high-quality materials such as artist-grade pencils or markers for better precision and clarity as you draw.
Conclusion
Congratulations for reaching this part of the drawing tutorial! If you completed each step, you deserve a round of applause because you truly accomplished quite a feat.
Starting with a simple curve for the body, you added the integral parts like the elevators for pitch control, the towering fin for stability, and the powerful engines for thrust.
The cockpit’s window came next, a small but crucial detail, followed by the sweeping wings and the protective shell of the engines. Let this be another sketch added to a growing collection, and explore new objects to draw as you go forward.

Thanks for reading & feel free to check out more of our articles!
Author Rating
Overall Rating
Summary
This tutorial is structured for both kids and young adults, and teaches them how to draw a jumbo jet with background and color in 8 easy steps.