How to Draw an Airplane | Easy Drawing Guide
In today’s lesson, we will be taking a look at how to draw an airplane. You have seen one flying over your home or even flown in one more time than you can remember. But do you know how to draw one?
The airplane was invented by the Wright Brothers and was first flown in 1903. It was, however not until 1914 that the first passenger airline service took off from St. Petersburg. Even since, airplanes have gotten better. They are much safer, more comfortable, and faster. While learning how to draw an airplane in this tutorial, you will learn a lot about the different parts that make up an airplane. Let’s get started.
What You Will Need
- A pencil
- An eraser
- A drawing piece of paper
- Coloring supplies
- 30 minutes
How to Draw an Airplane
Drawing an airplane is not as complicated as you might think. As you will notice in today’s lesson, achieving a beautiful airplane drawing only requires combining several shapes. We will be drawing a very simple airplane so that you don’t get lost. All you have to do is follow our steps carefully and you will love the final results. Here are the steps we will be following.
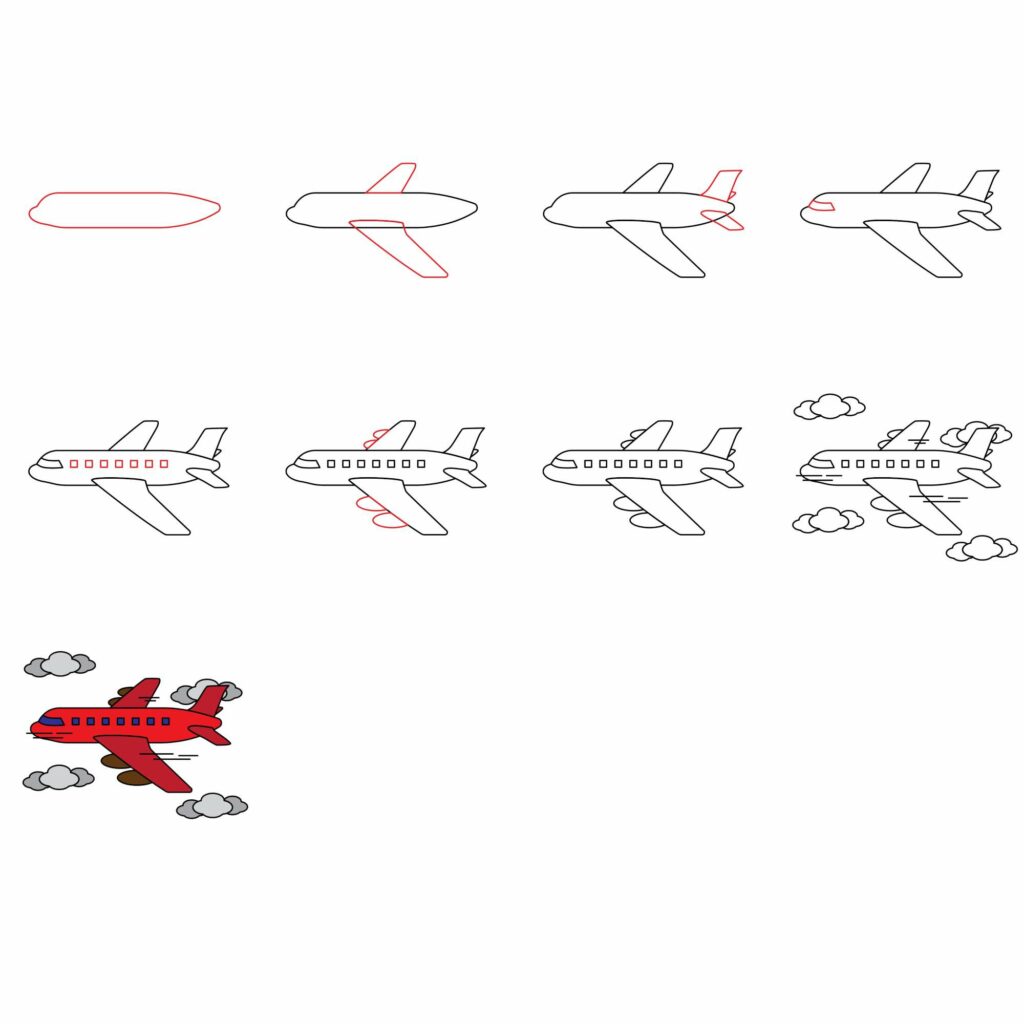
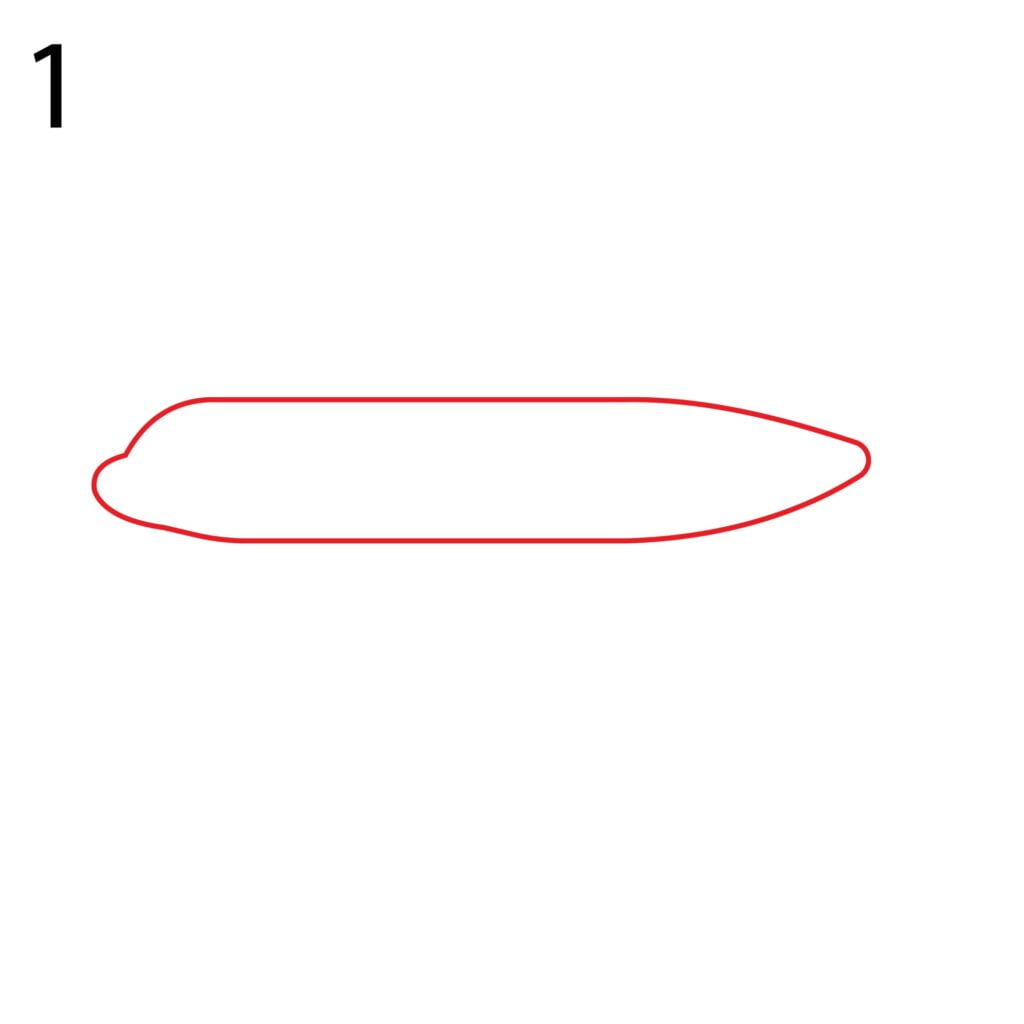
Step 1: Draw the Fuselage
The body of an airplane is known as the fuselage. This is the part that holds the different parts of the plane together and makes it possible for an airplane to safely ferry passengers. Considering the fuselage is the largest part of an airplane, we are going to draw it first.
Drawing the fuselage is very easy. Simply start by drawing a horizontal rectangle in the middle of your drawing paper. Next, we will start by creating the rear part of the plane by making the rectangle narrower on the right end.
For the front end (Cockpit), we will add curved lines starting from the top line of the rectangle and then curving the bottom left corner of the rectangle. Erase any part of the rectangle that sits outside the new shape. Your drawing should now look like this.
Step 2: Draw the Wings
An airplane cannot fly without the wings. The wings are what give it stability while flying. The wings also have features known as flaps that help the pilot increase or reduce the elevation of the airplane. It is also good to note that the jet engines are also mounted on the wings.
We will start by adding the left wing which will go below the fuselage. For that, we will start by drawing a short straight line in the middle of the fuselage. This will serve as the mounting for the wing. Next, we are going to draw a diagonal rectangle with a straight line as the base. The rectangle should lean towards the right and must narrow gradually towards the end.
Due to the perspective of the airplane, we will not be able to see the mounting for the right wing. As a result, we will simply add a similar diagonal rectangle on top of the fuselage. The rectangle should slant towards the right and gradually narrow towards the end.
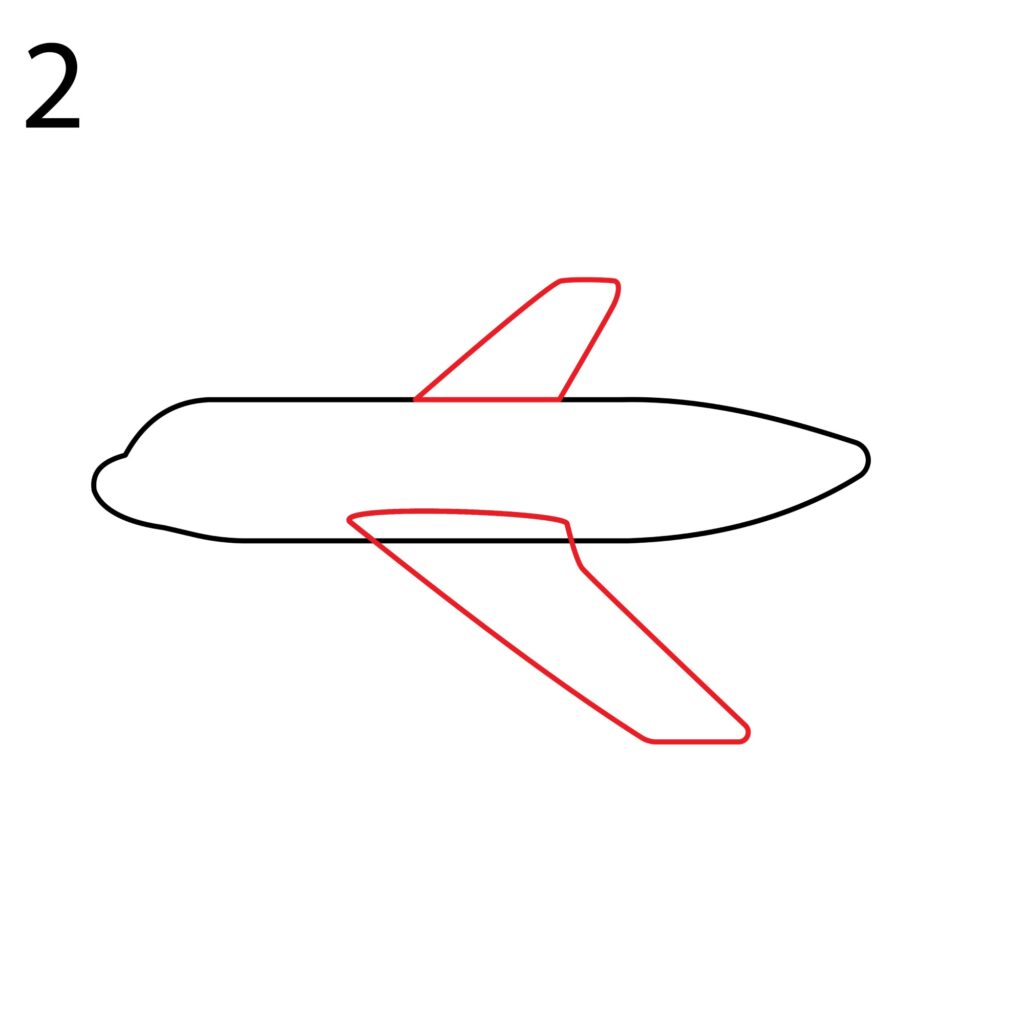
Erase the lines that cut through the left wing. Our plan is shaping up, isn’t it?
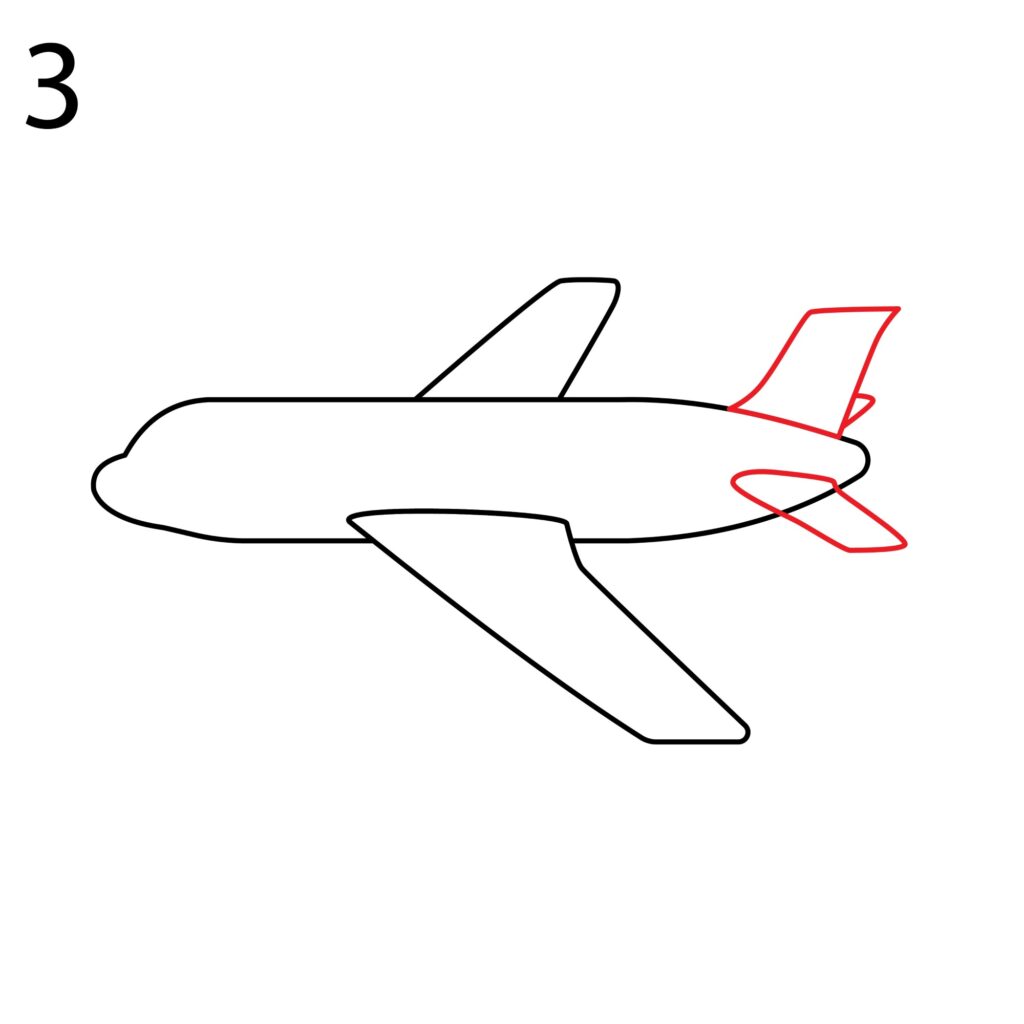
Step 3: Draw the Vertical and Horizontal Stabilizers
While the wings we just added play the biggest part in helping an airplane fly and also add stability and make it easier for the pilot to control it. These additional wings are the vertical and horizontal stabilizers. These are the small wings you see at the rear of an airplane.
We will start by adding the vertical stabilizer. This keeps the airplane from rolling while in the air and also houses the rudder which helps change the yaw (moving the plane on a vertical axis). To add the vertical stabilizer, add a diagonal rectangle that sits on the rearmost part of the fuselage. The rectangle should not be too wide or long. To add realism, make the front and back parts of the rectangle a bit curved.
Next, we are going to add the horizontal stabilizers. These sit directly below the vertical stabilizer. They have features known as elevators which help change pitch (moving plane on horizontal axis). While they are parallel to the main wings, the vertical stabilizers are smaller. Just like we did with the wings, draw a diagonal rectangle on the side of the area below the vertical stabilizer. Make it narrower towards the end.
Due to the position of our airplane, we will not be able to see the other horizontal stabilizer that sits right opposite the left one. You can go without adding it or add a small shape like we did with our drawing. Make sure you erase any lines that cut through the new shapes we added.
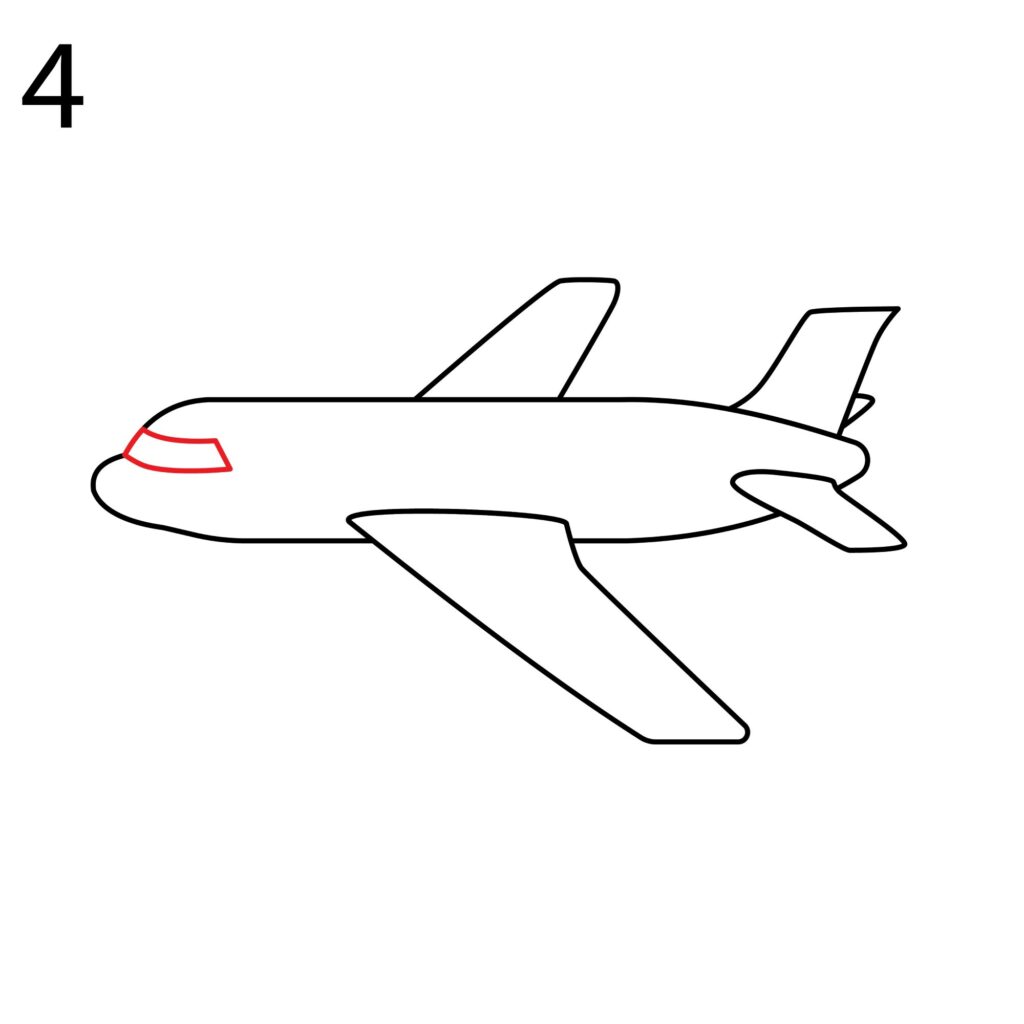
Step 4: Draw the Cockpit Window
As aforementioned, the cockpit is at the front end of an airplane. This is where the pilot and co-pilot sit when flying the plane. To be able to see what is in front of them, the cockpit has a window. To add the window, we will simply draw a curved rectangle on the front end of the airplane.
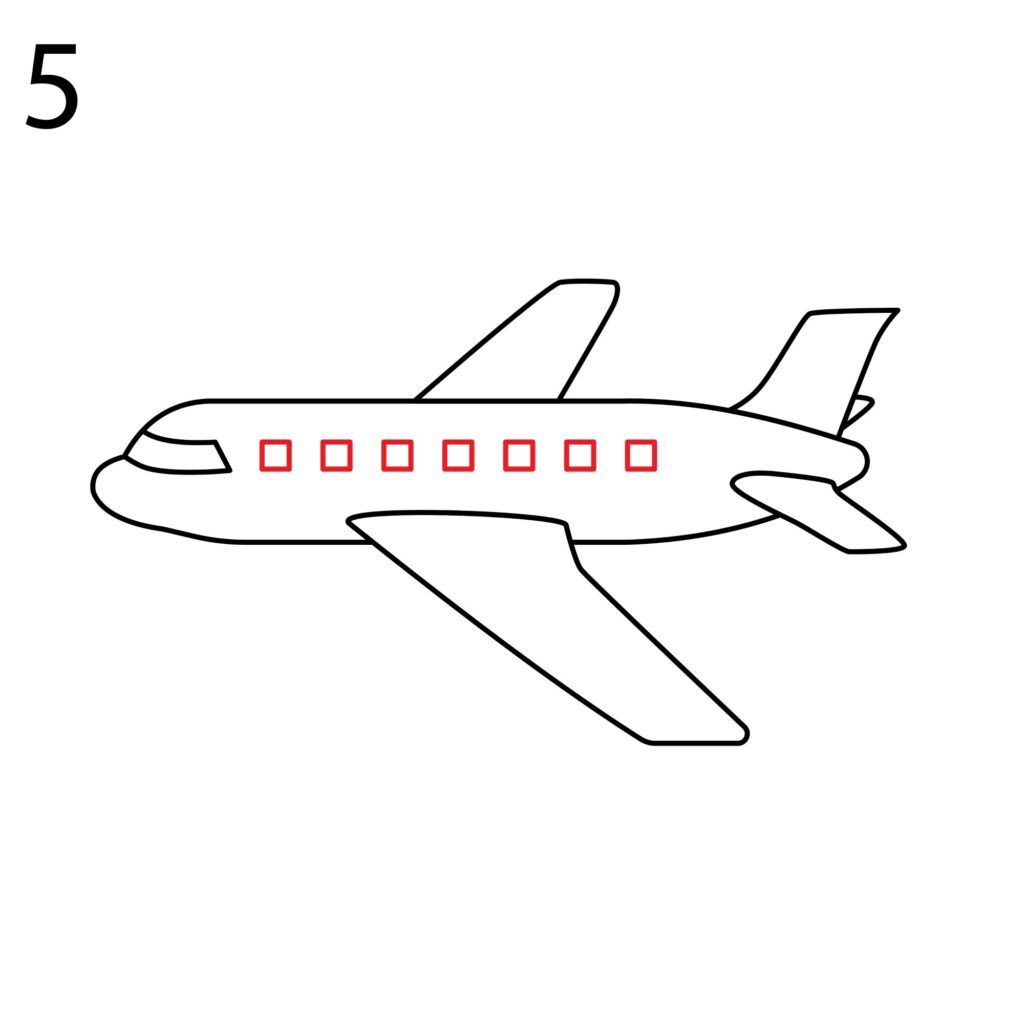
Step 5: Draw the Windows
Since we are drawing a passenger plane and not a military or cargo plane, we are going to add windows to the side of the fuselage. The windows allow natural light to get into the passenger cabin and also enable passengers to look outside at the beautiful clouds.
We are going to add several small windows along the length of the fuselage. If you have a ruler, you can use it to draw proportional windows that are of the same size and in the same position. If you don’t have a ruler, don’t worry. You can draw the windows freehand.
Start by adding a small square right behind the window we added for the cockpit. The window should not be too big. You then need to add similar windows behind the first one to the back of the fuselage. Here is what we did to our airplane.
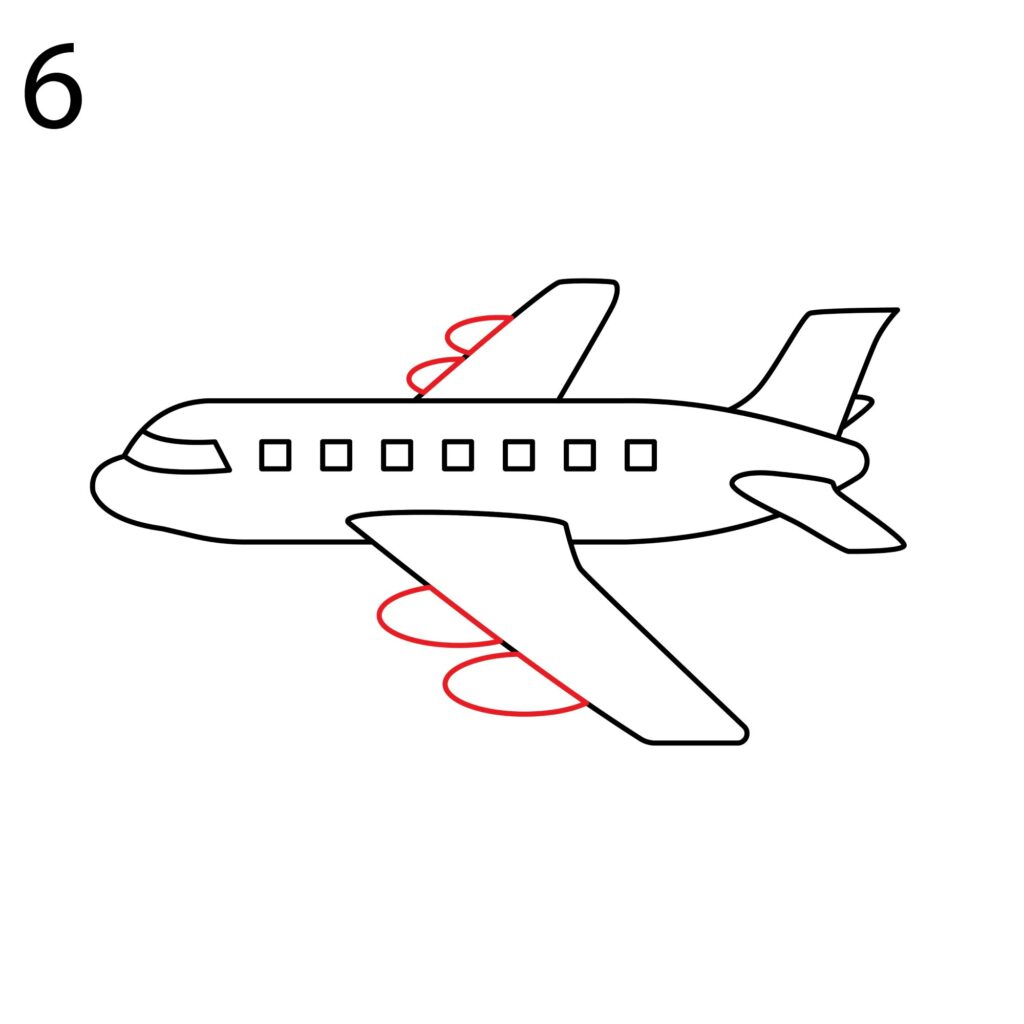
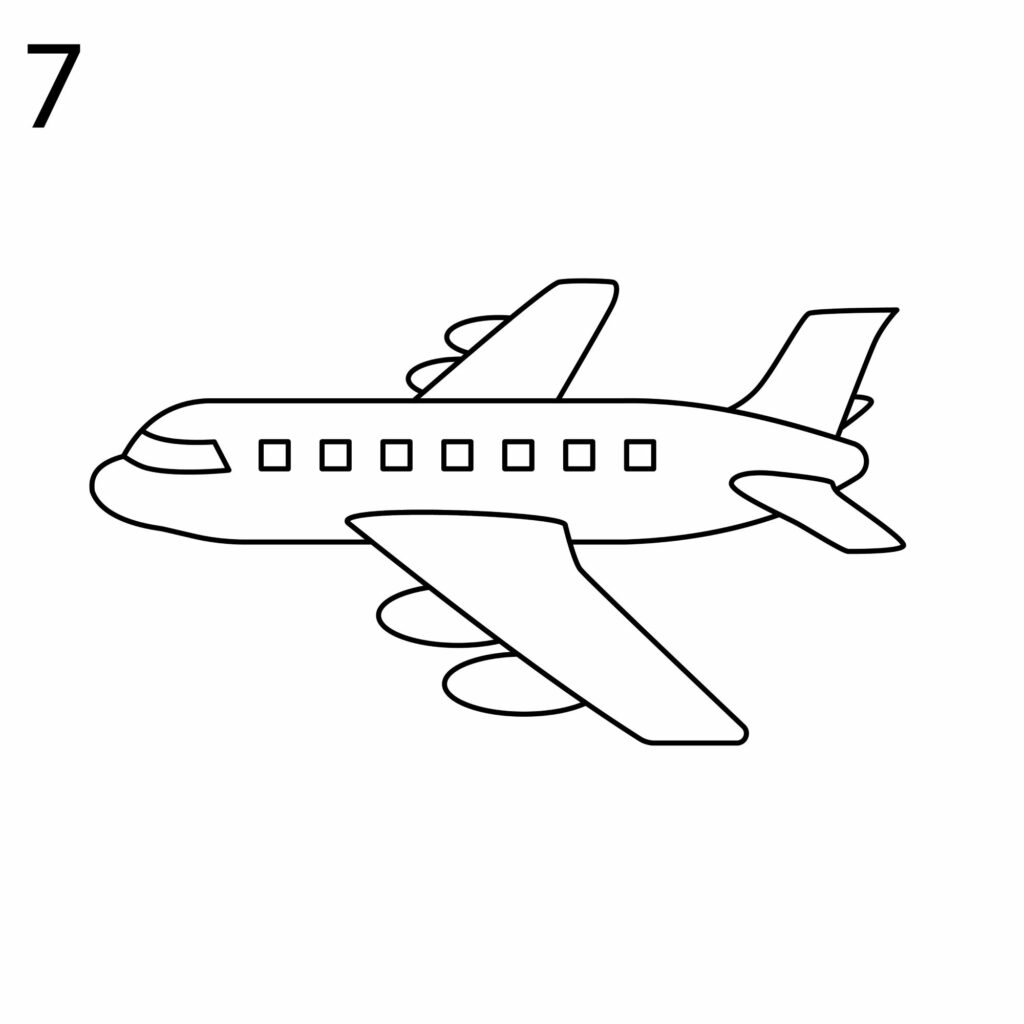
Step 6: Draw the Jet Engines
To be able to fly, an airplane is powered by jet engines. These are powerful engines that are mounted under the wings. Unlike the engine of a car or motorcycle, jet engines work by compressing and shooting out gases at the rear. The jet of gas is what pushes the airplane forward.
It is very easy to add the jet engines. Since we are drawing a four-engine airplane, we are going to add two engines under each wing. To draw the engines, simply add two semi-ovals under each wing. The semi-ovals for the right wing should be smaller since they are further away.
Step 7: Refine Your Drawing
By following the first 6 steps, your airplane should now be ready. If it doesn’t look as good as ours, now is the time to refine it by erasing the sections that are way off and redoing them.
You must, however, note that it takes practice to be a good artist. Don’t be frustrated if your drawing doesn’t look as good. There is still time for practice. Most people get it right after the second or even the third attempt. For now, if it is not too perfect, you can use it as it is. You will do better on the next attempt.
Take the Drawing to the Next Level
To become a great artist, you must always take the time to add additional details to your drawing. Adding finer details is what will set your drawing apart. There are a couple of things we will add to make our drawing more impressive.
Step 8: Add Clouds
The first thing we are going to do is add some clouds around the airplane. This will help indicate that the airplane is airborne. Take care not to cover your airplane with the clouds. The clouds need to be in the background.
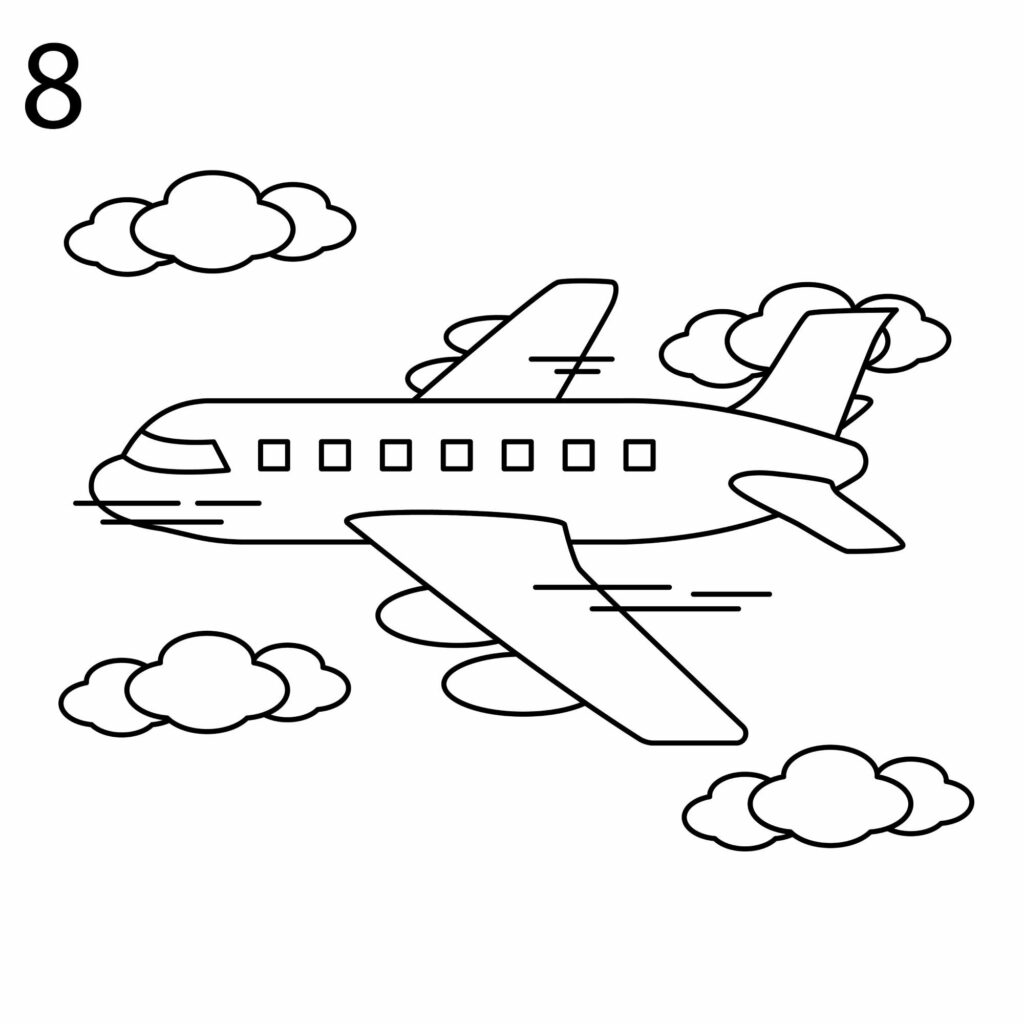
The clouds are not the only things you should add to your airplane. If you want, you can add some tiny horizontal lines to indicate that the plane is moving very fast. You can also add a name to the side of the airplane and the sun in the background. Let us see how imaginative you are.
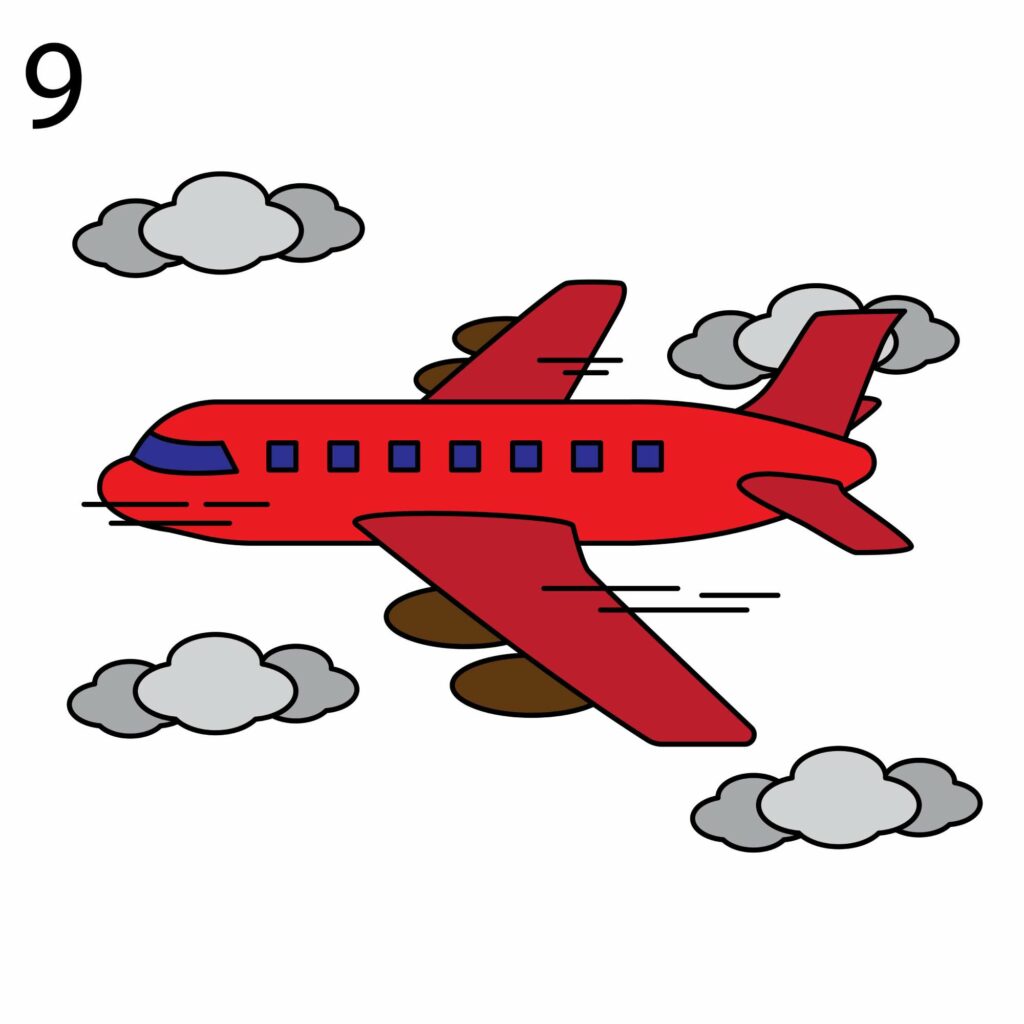
Step 9: Color Your Drawing
The last step is the most fun! It is all about adding color to your drawing. Take out your coloring supplies and go wild. You can use different colors for the different parts of the airplane and grey colors on some of the clouds to indicate that they are rain clouds. Here is what we did to our drawing.
Conclusion
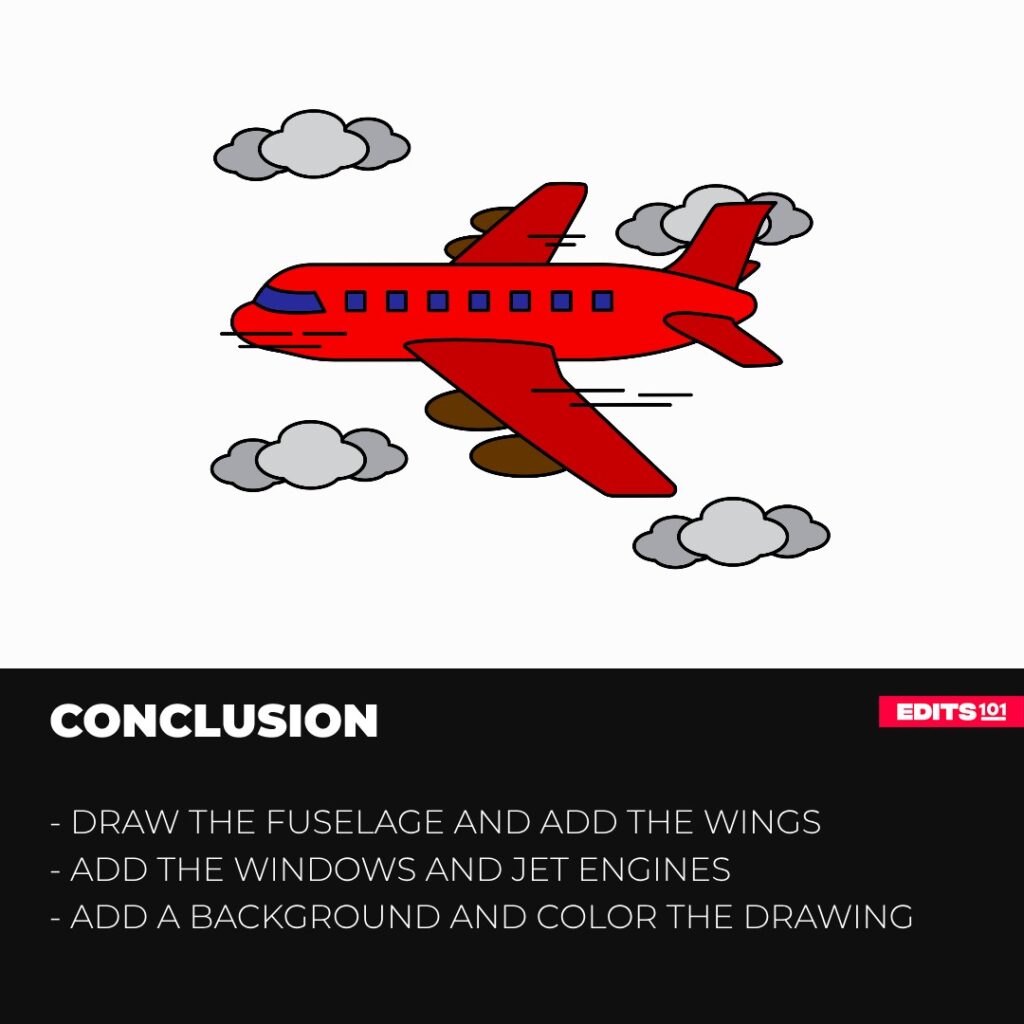
In this step-by-step tutorial, you learn how to draw a beautiful airplane by following simple steps. We started by drawing the fuselage and then added the wings, windows, and jet engines. To make our drawing more impressive, we added some clouds around the airplane and then colored everything.
You can use these steps not just to draw an airplane freehand but also to sketch one on your favorite software. Moreover, you can follow our steps to draw an airplane from a real photo. Keep practicing and never forget to have fun.
Thanks for reading & feel free to check out more of our articles!