How to Draw a Cherry Picker Step By Step
When you first heard of a cherry picker, the first thought that came to mind was cherries, right? You are not the only one. While the name comes from the original purpose of this machine which was to help people pick cherries, cherry pickers have nothing to do with cherries. Today, cherry pickers are mainly used for repairing telephone lines and pruning trees. They are a movable platform that has a bucket-like attachment at the top for carrying a worker.
In today’s lesson, we will be focusing on how to draw this amazing vehicle. So long as you follow our steps keenly, you will be able to draw a beautiful cherry picker by the end of this tutorial. You will also learn about the different parts of a cherry picker. Let’s get started.
What You Will Need
- A pencil
- An eraser
- A drawing paper
- A ruler
- Coloring supplies
- 30 minutes
How to Draw a Cherry Picker
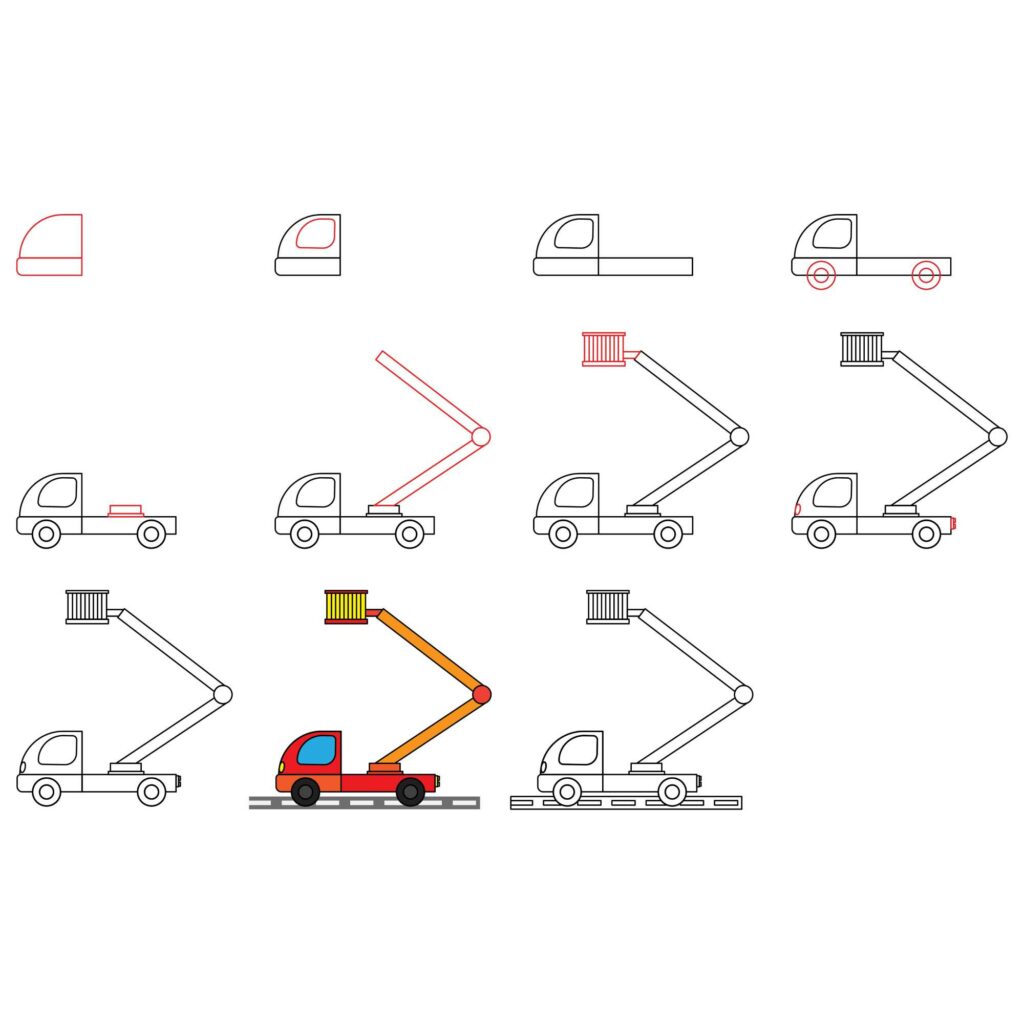
Drawing a cherry picker is all about combining a bunch of shapes. That is why we added a ruler to the list of items you will need. We also included an eraser because we will use it quite a lot not just to erase errors but also to refine our drawing. Here are the steps we will follow.
Step 1: Draw the Cherry Picker Head
As aforementioned, a cherry picker is a movable platform. For this to be possible, it is mounted on a vehicle. The first thing we will draw is the vehicle.
From the bottom left corner of your drawing paper, you need to draw a rectangle. The horizontal rectangle should not be too wide or too long. This will serve as the bottom part of the cabin for our vehicle.
Next, add a vertical line starting from the right side of the rectangle. The line should not be too long. It is meant to be the back of the cabin. Next, add a curved line starting from the top of the vertical line we just drew and ending at the top left corner of the rectangle. You should have something that looks like this.
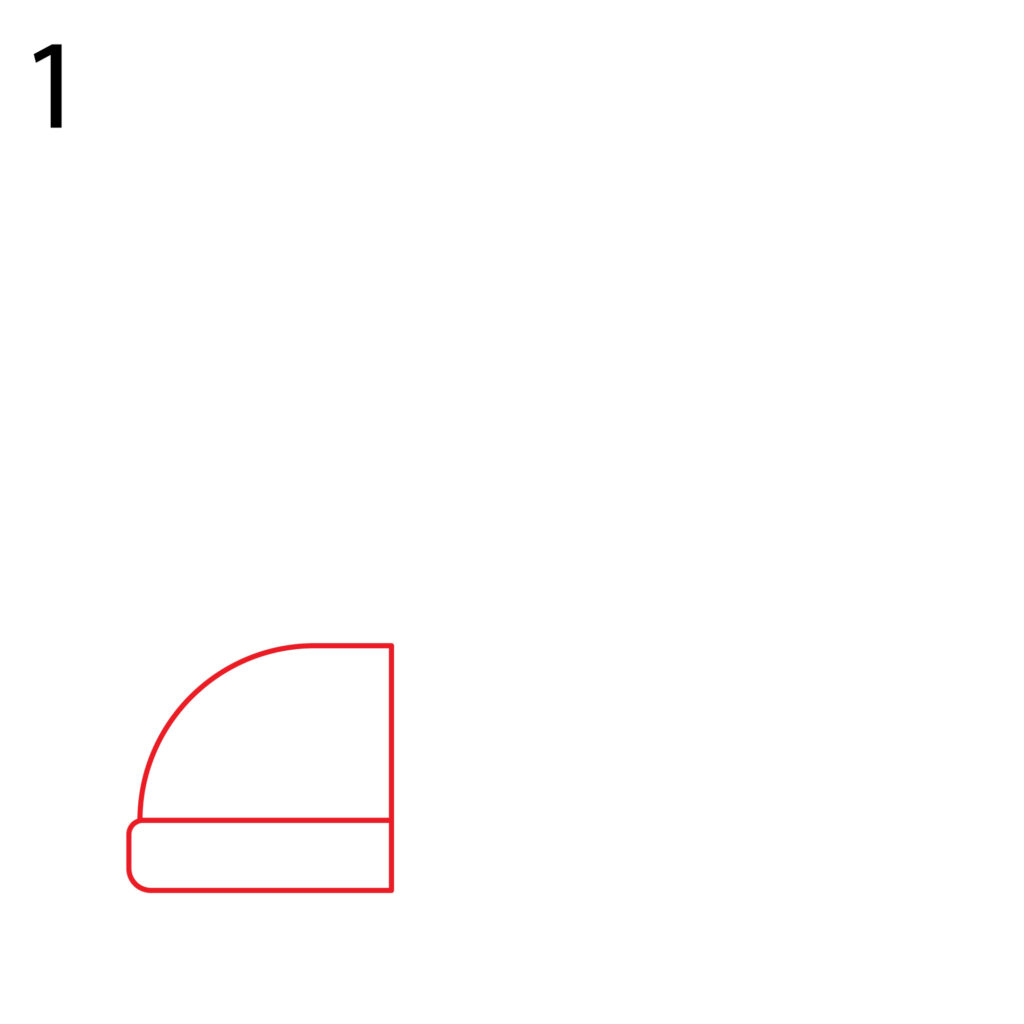
To refine our cabin, we need to make the left corners of the rectangle rounded. The curved line for the cabin should also be a bit flat at the top.
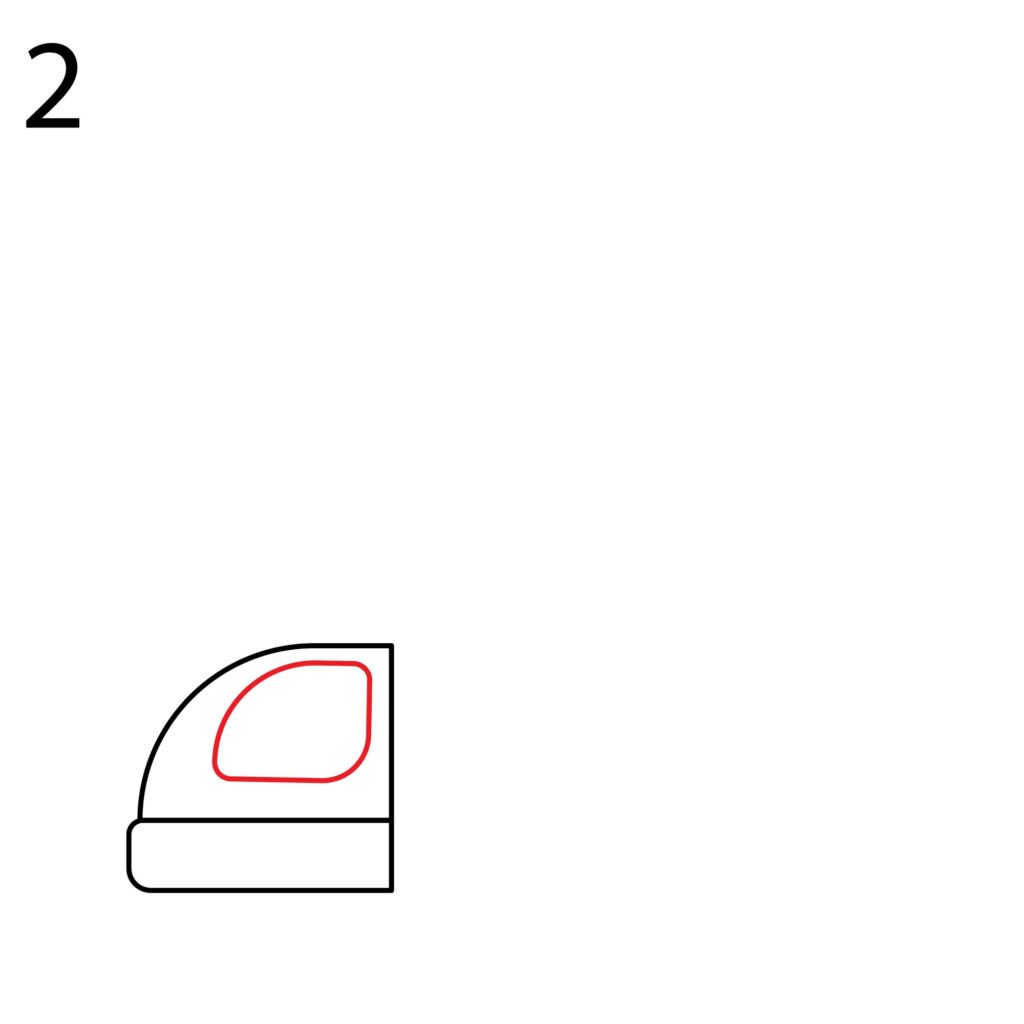
Step 2: Draw the Cabin Window
Now that the structure of the cabin is complete, we need to add a window. For this, we are going to draw a quarter circle inside the top part of the cabin. This will serve as the window for your cabin. Make the sharp corners a bit rounded.
Step 3: Draw the Cargo Bed
The next step is to add a cargo bed. This is the area where the cherry picker is installed. It should be right behind the cabin.
To add the cargo bed, simply draw an elongated rectangle behind the cabin. The height of the rectangle should be the same as the height of the first rectangle we added for the cabin. The rectangle should, however, be longer because it needs to be able to accommodate the cherry picker. Don’t make it too long because we need some space on the right margin for additional details later.

Step 4: Draw the Wheels.
Our truck needs to be able to move around. This will only be possible if it has wheels, right? The next thing we need to do now is add the wheels. This is the simplest thing to do.
At the bottom part of the cabin, draw a tiny circle. The bottom of the cabin should cut through the center of the circle. We then need to add another bigger circle that goes over the first circle. This will form the front wheel.
Next, we need to add a small circle at the far right section of the cargo bed. The circle should be the same as the one we added for the front wheel. It should also not be too far back because the wheel needs to fit under the cargo bed. You then need to draw another circle over the smaller one to form the rear wheel. You should have something that looks like this.
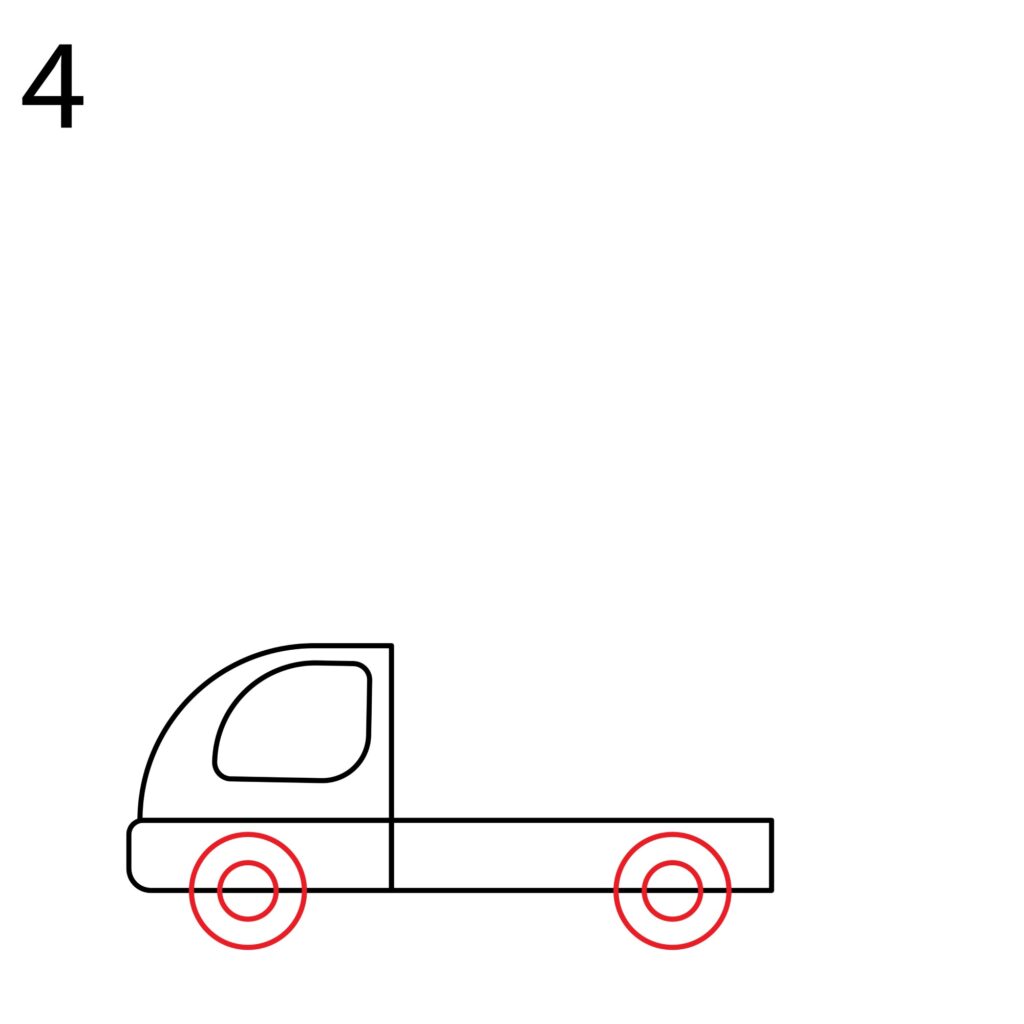
Make sure that the wheels are at the same level and of the same size. The wheels should also not be taller than the height of the bottom part of the cabin or the cargo bed. Once you are done, use your eraser to remove all the lines that cut through the circles.
Our truck is now ready. All we need to do now is add the cherry picker.
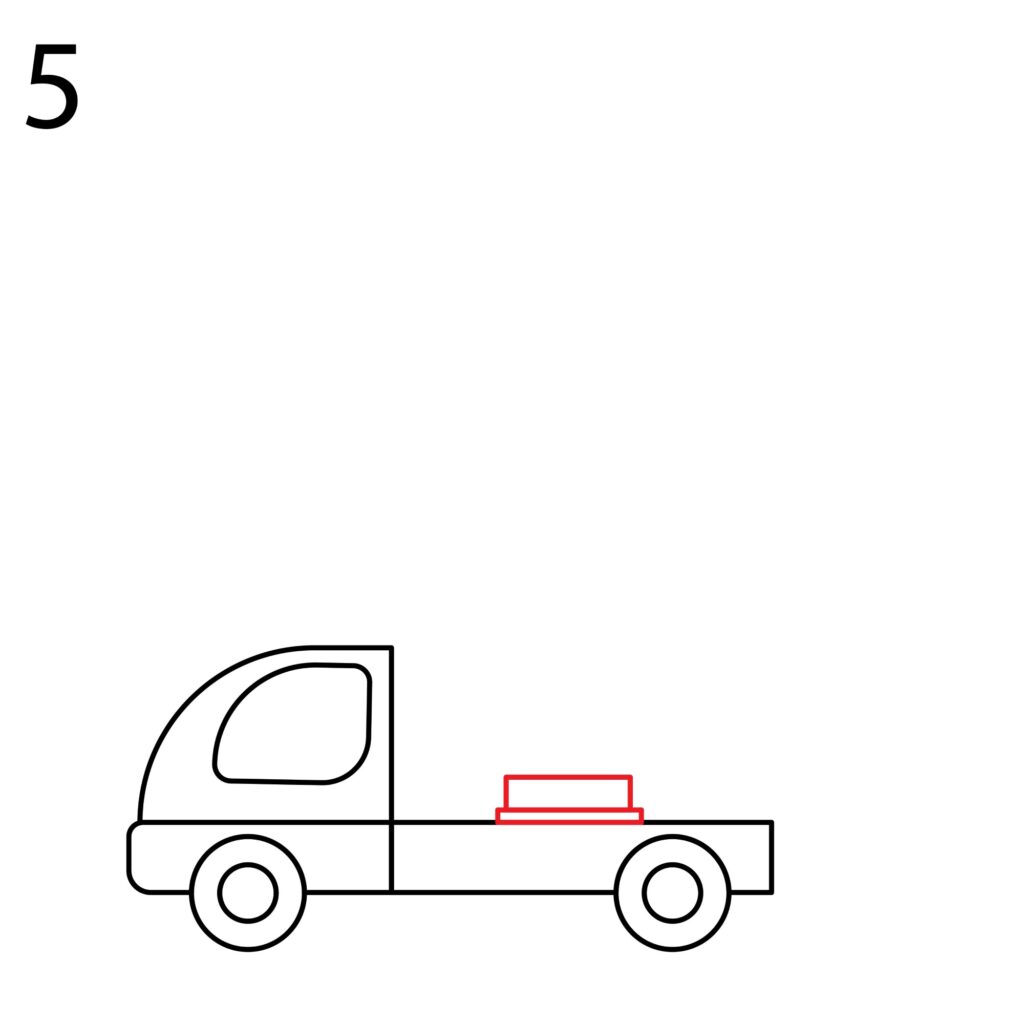
Step 5: Draw the Base of the Cherry Picker
The first thing we have to do when drawing the cherry picker is to add its base. The base is the platform that fastens the cherry rig to the truck. It is what keeps the cherry picker from toppling once it is raised.
Start by drawing a tiny horizontal rectangle in the middle of the cargo bed. You then need to add another taller rectangle on top of the first one. This will form the base of the cherry bed.
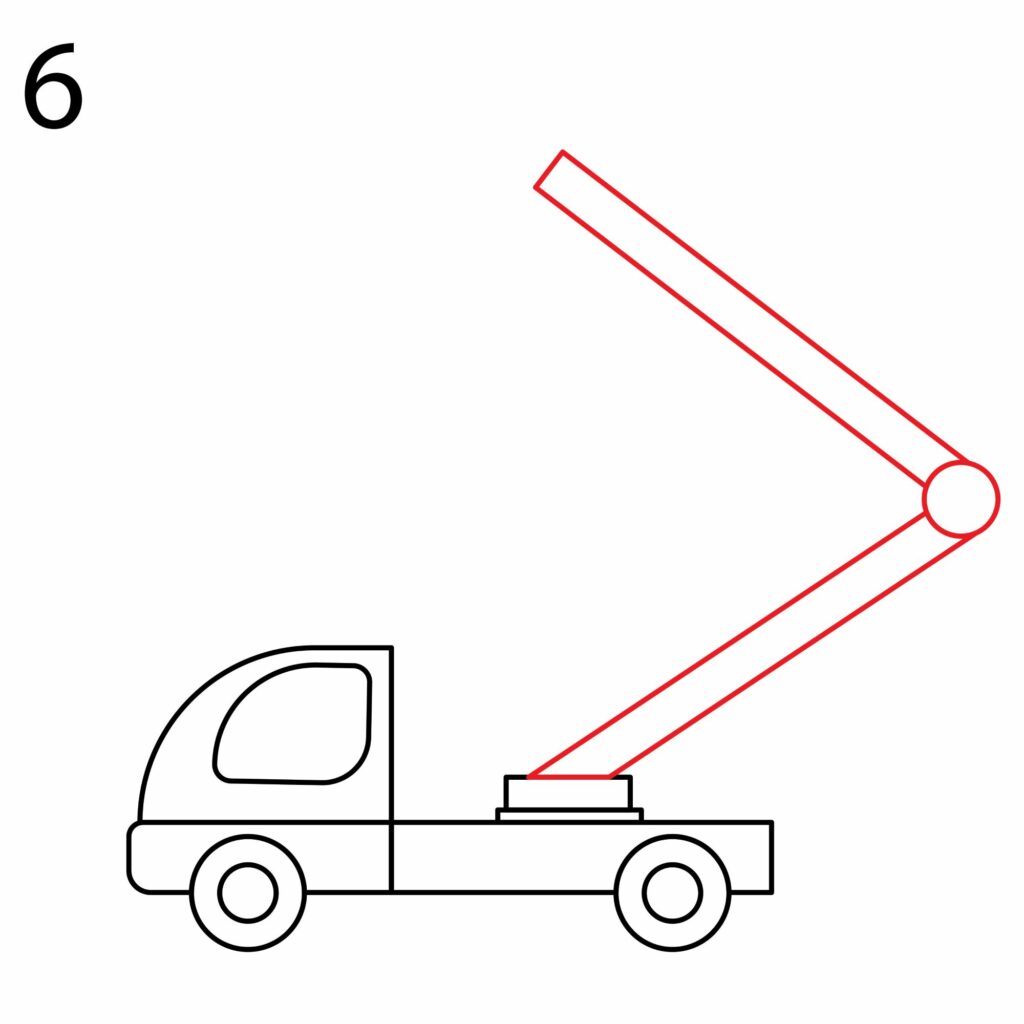
Step 6: Draw the Arm
Now that the base is ready, we need to add the arm. The arm is the section of the cherry picker that extends to lift, lower, and move the bucket attachment on which the worker stands. We are going to add a retractable arm to our cherry picker. For that reason, it will have two sections.
The first thing we need to do is draw a small circle over the truck. The circle will serve as the rotating section that connects the two sections of the arm and allows the arm to retract. Next, we will draw two parallel lines starting from the base we drew earlier and rising diagonally to connect to the circle. This will form the lower section of the arm.
Next, we will draw two parallel lines starting from the circle and rising diagonally in the opposite direction to the first lines. These will form the second part of the arm. Connect the parallel lines at the top. You should have something that looks like our illustration below.
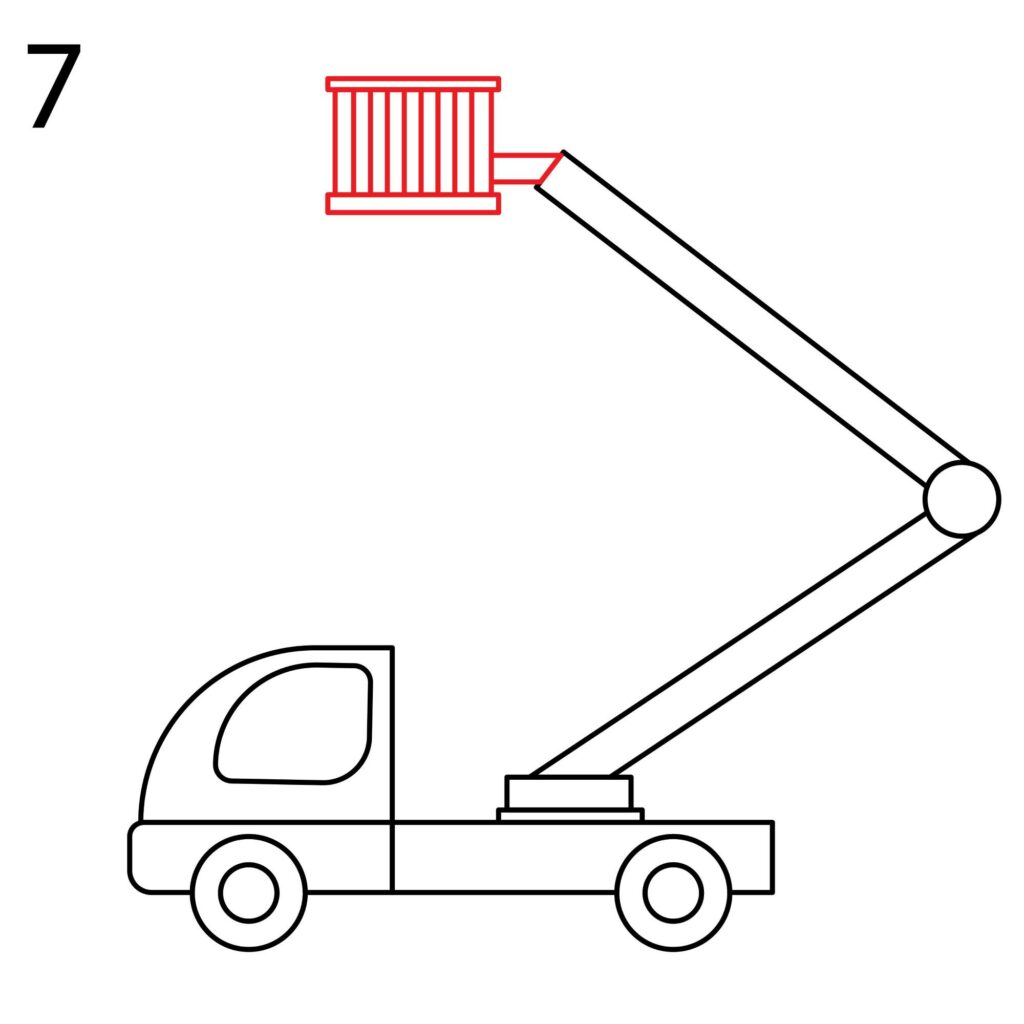
Step 7: Draw the Bucket
As aforementioned, the worker stands in a bucket-like attachment at the end of the cherry picker. The bucket has strong rails around it to keep the worker from falling off. In some cherry pickers, the bucket will have some controls that help the work raise or lower the bucket to a desired level.
To draw the bucket, we will first draw a square a small distance from the top part of the cherry picker’ arm. You should add some details to the bucket, like the ones we added in our drawing, to indicate that the bucket has rails around it. Next, connect the bucket to the arm with two parallel lines.
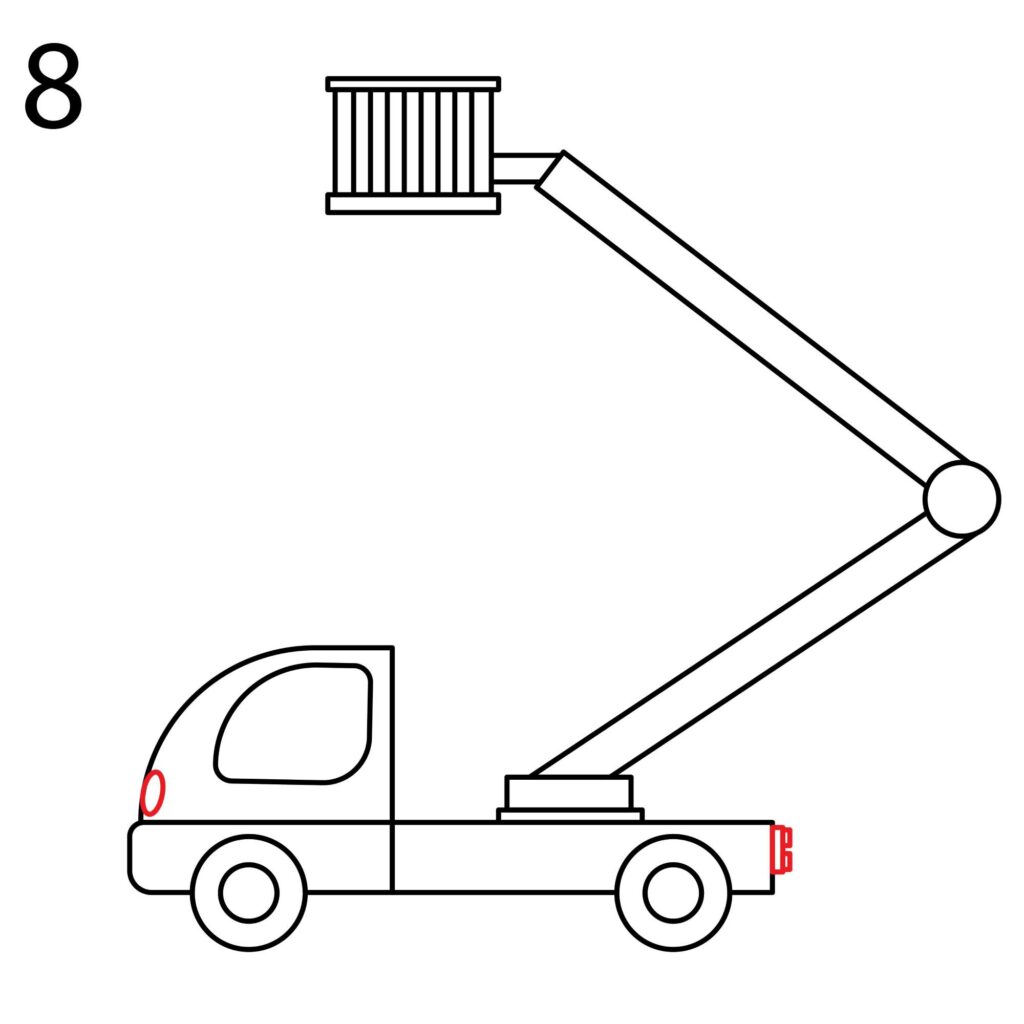
Step 8: Draw the Lights
When working on electric poles, for example, the cherry picker will be standing in the middle of the road. Other motorists need to be able to see it. That is why it has signaling lights to make it easy for motorists to see it.
First, we will draw the headlights which illuminate the way at night. For that, we will add an oval shape on the front part of the cabin. For the rear lights, we will add a rectangular shape at the rear end of the cargo bed, make the right part of the rectangle thicker.
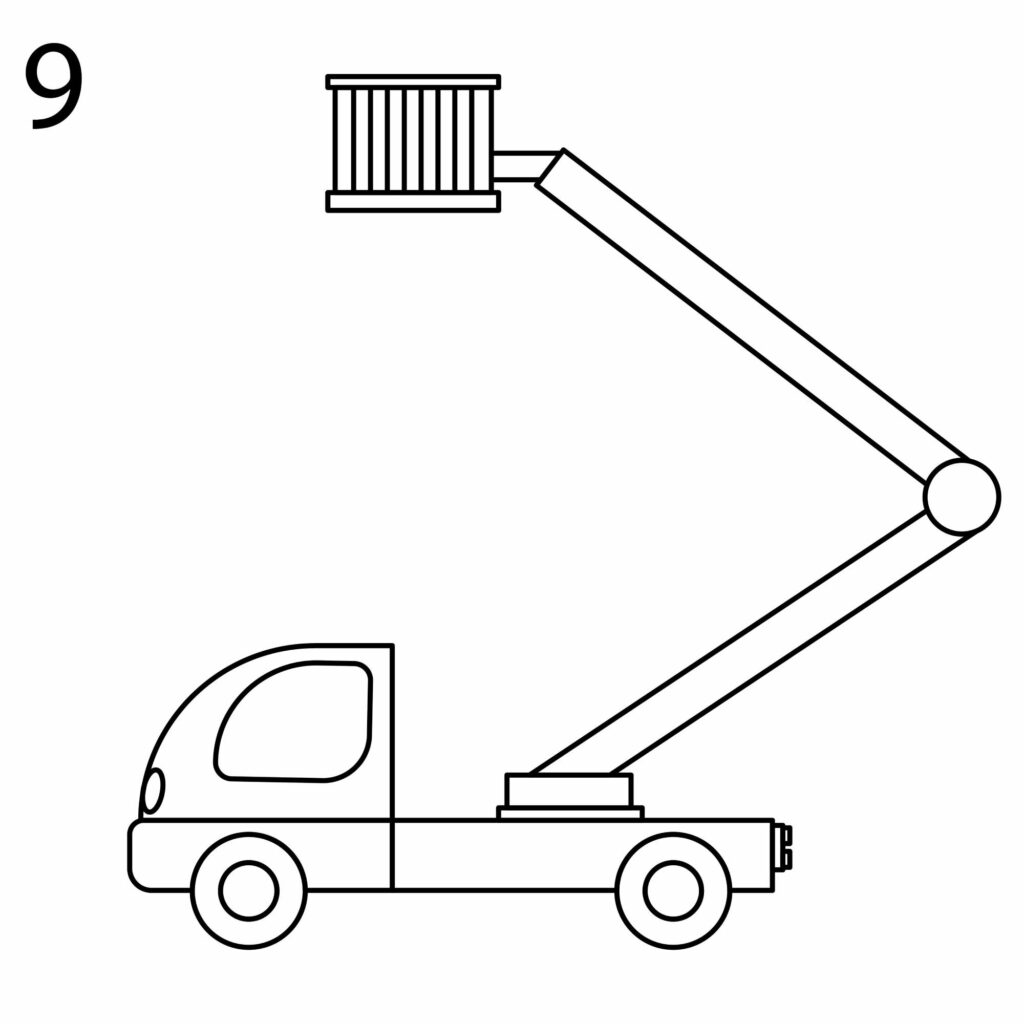
Step 9: Refine Your Drawing
Our cherry picker is now ready. It is time to make sure you did not miss anything. Start by erasing any lines that are overlapping. Next, if some sections of your drawing seem to be way off, it is time to remove and redo them.
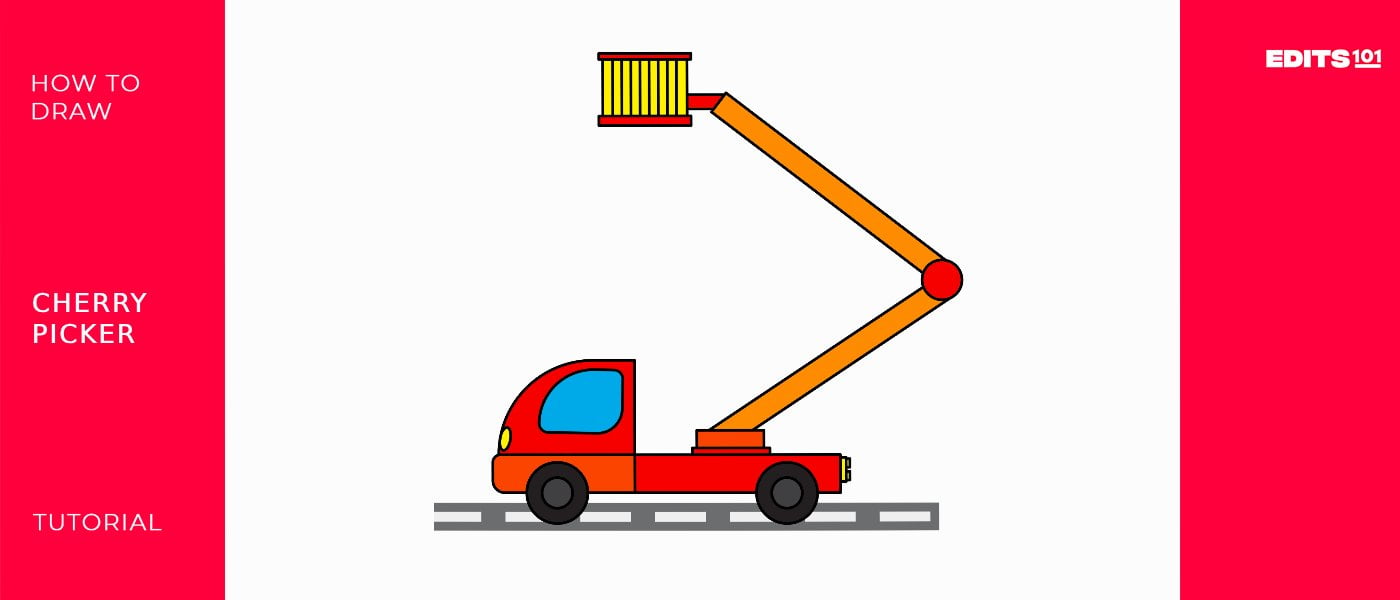
You should have a drawing that looks like ours if you have followed all the steps. Do not be frustrated if the results are not too great. It takes practice to draw a great cherry picker. Within no time, you will have a cherry picker that is better than ours.
Take the Drawing to the Next Level
You are impressed by what you have accomplished so far, aren’t you? Well, congratulations but we are not done yet. We need to add a few more details to our cherry picker.
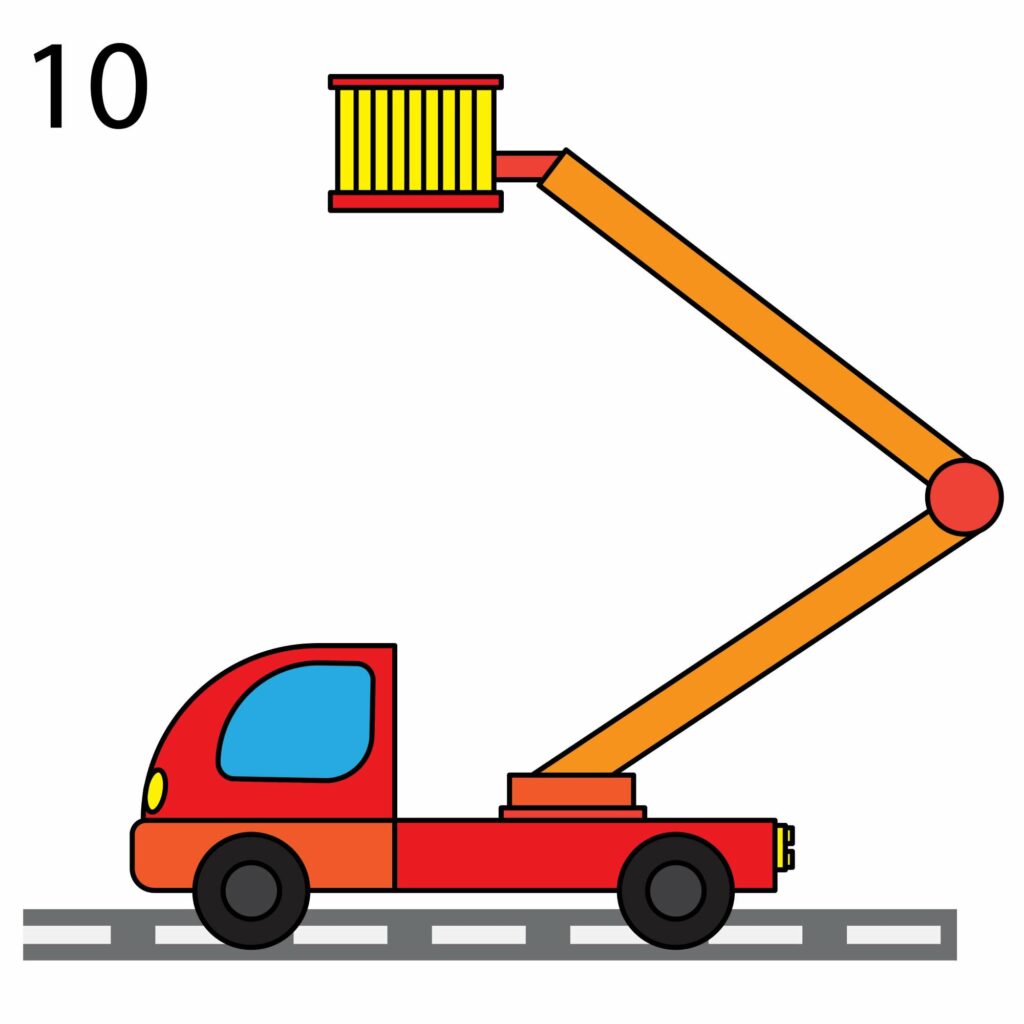
Add a Background
The first thing you should consider adding is a road. You don’t want your cherry picker to be floating around, do you? For the road, we added a rectangular shape under our truck. We also added a series of smaller rectangular shapes to represent road markings.
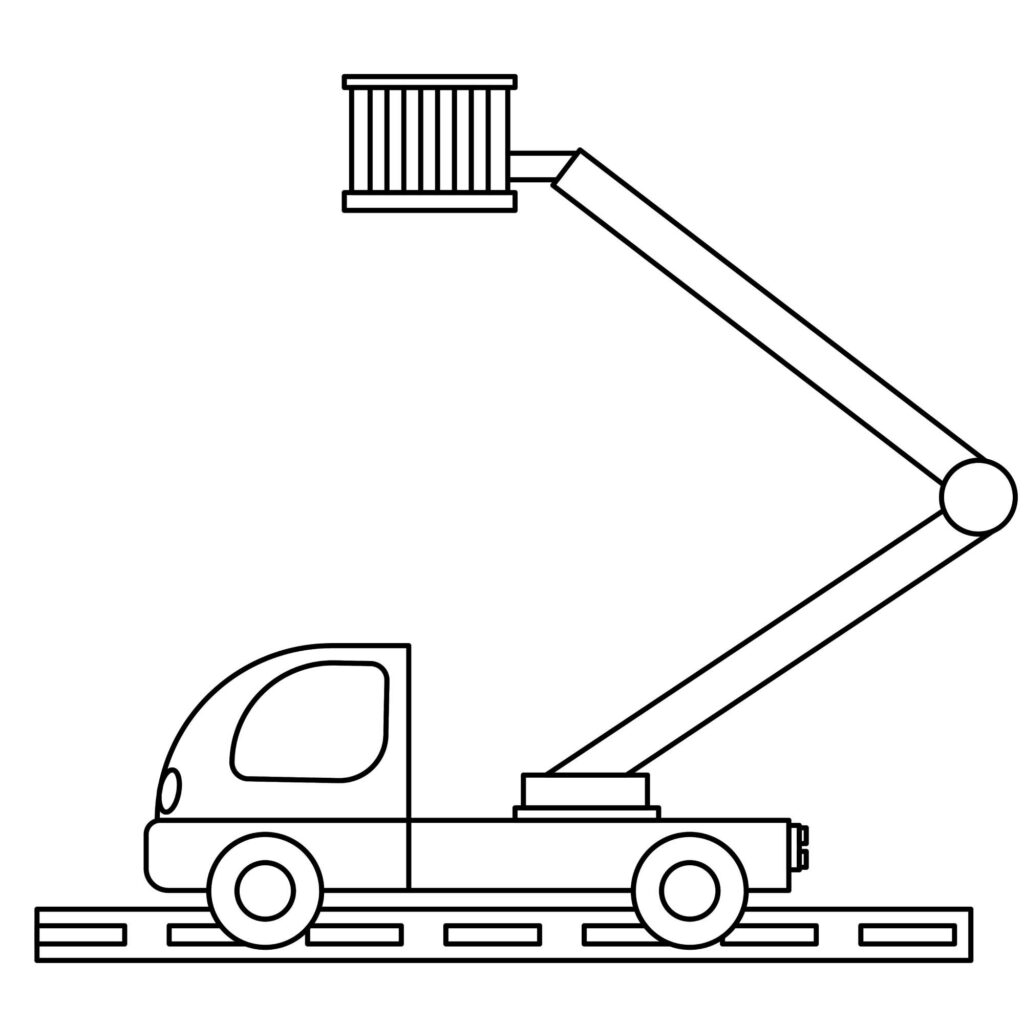
You can add more details to your drawing. For example, you can add a bush, an electric pole, and some trees in the background. You should, however, make sure that the details don’t cover the main focus of our drawing, the cherry picker.
Color Your Drawing
Once you are satisfied with your drawing, take out your coloring supplies and start coloring. You can go as wild with the colors as you want. You are only limited by your imagination.
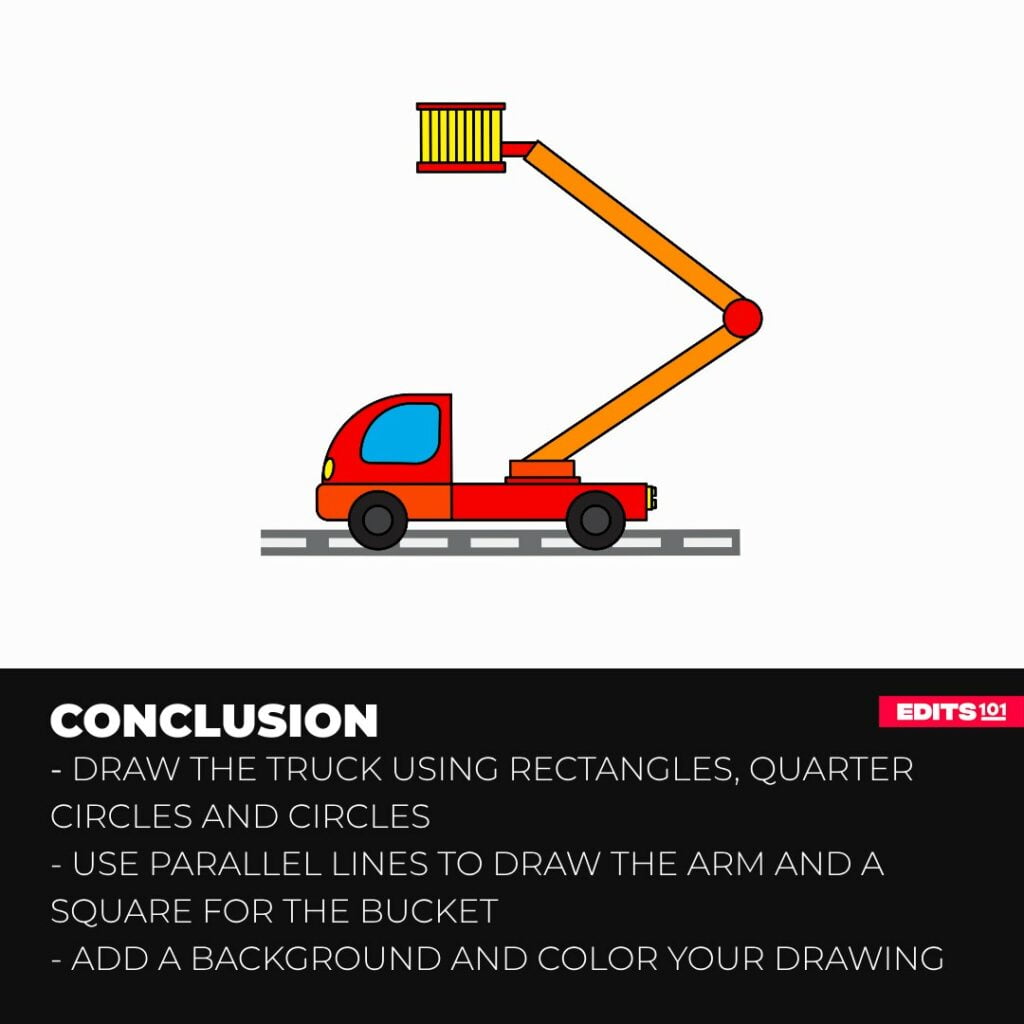
Conclusion
Drawing a cherry picker is all about playing around with shapes. We started by drawing the cabin using a rectangle and a quarter circle. We then added the cargo bed, wheels, the arm of the cherry picker, and the bucket. To advance our image, we added a road and colored our drawing.
That is all there is to drawing a cherry picker. You can start over as many times as you want. The key is not to get frustrated when you make mistakes and always have fun. Happy drawing!
Thanks for reading & feel free to check out more of our articles!