How to Draw a Street Sweeper in a Few Easy Steps
So you want to learn how to draw a street sweeper? Today is your lucky day. We will be looking at the steps you need to take to draw a beautiful street sweeper. You can use our steps to draw on paper or when using your favorite app. But first, let’s understand what a street sweeper is.
Just as its name implies, a street sweeper, also referred to as a street cleaner, is a machine that cleans streets. These cleaning machines are mainly used in cities where they are used by sanitation workers. You have probably seen one cleaning your street.
What You Will Need
- A pencil
- An eraser
- A drawing piece of paper
- A ruler
- 30 minutes
How to Draw a Street Sweeper
Today, you will learn how to draw a street sweeper. In the process, you will learn the different parts that make up a street sweeper. Follow our steps as keenly as possible to end up with a drawing that looks like ours or even better. You can advance your drawing later once you get the gist of drawing a basic street sweeper. Here are the key steps we will be following.
Step 1: Draw the Base of the Street Sweeper
To draw a street sweeper, we will only be combing a couple of shapes. The first thing we need to draw is the truck. To do so, we will start by drawing the base of the truck.
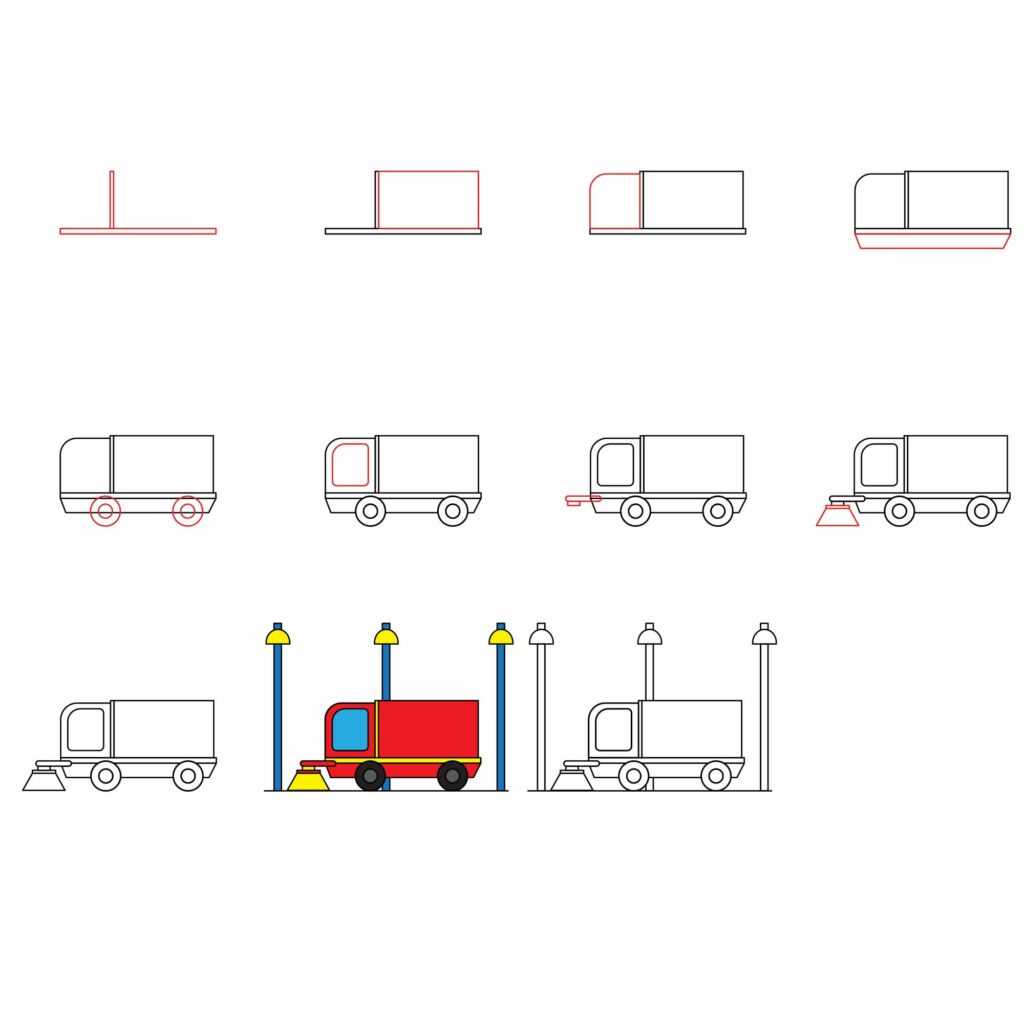
Draw an elongated rectangle in the middle of your drawing paper. The rectangle should leave ample space on the left and right margins. It should also not be too wide. It needs to be flattened. Next, add a vertical rectangle a short distance to the middle of the first rectangle. The rectangle should not be too long and it should also not be too wide. You should have something that looks like this.
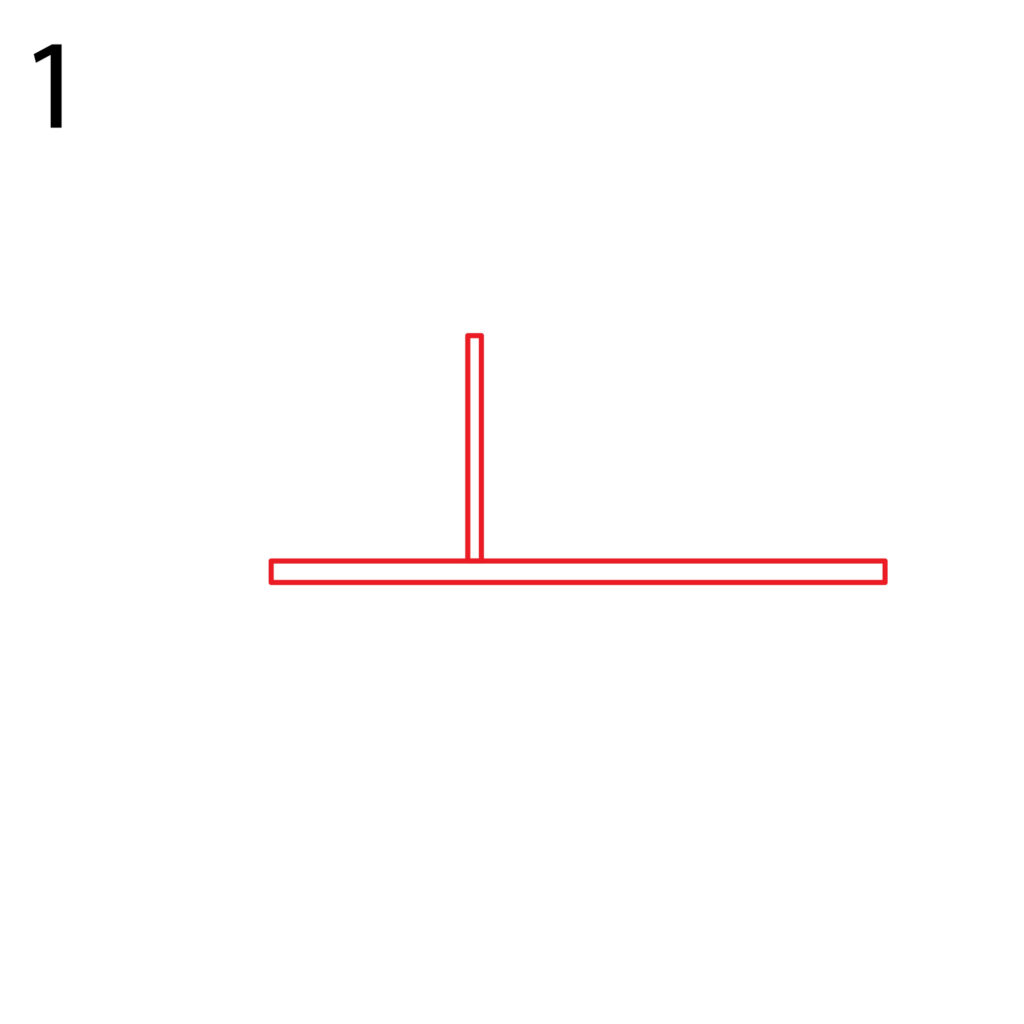
This shape will form the base of our street sweeper. We will now add more details to the shape to form the truck.
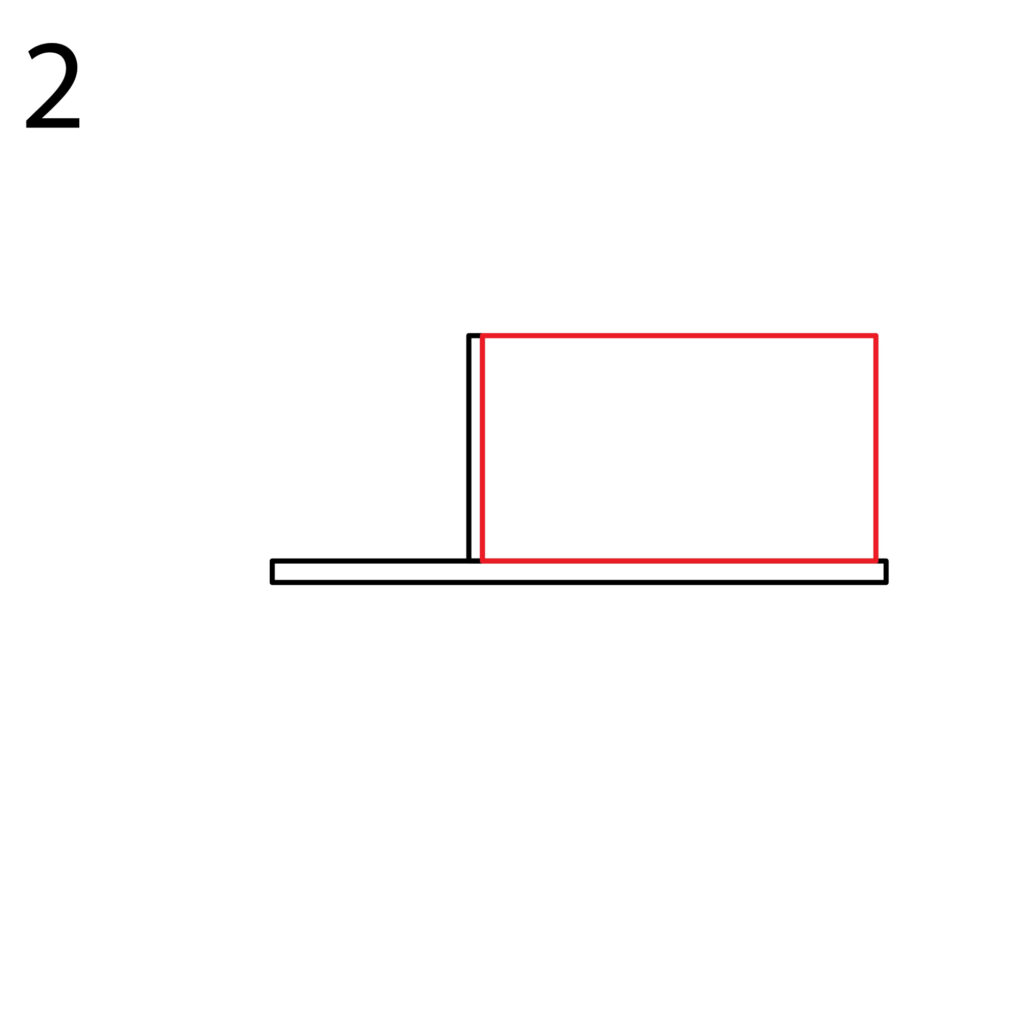
Step 2: Draw the Back of the Truck
The back of the sweeper truck is what holds most of the components needed for street cleaning. The cargo area has the following:
- Filter system that cleans vacuumed dirt
- Fan motor system that powers the sweeper
- Fan motor pressure that blasts debris out of the way
- Lifting adjustment with suction mouth
- Garbage area
- Water for cleaning the streets
- Vacuum system
The cargo area is enclosed. As a result, we will only add a rectangle to form the cargo area. Using your ruler, draw a rectangle that starts from the top of the vertical rectangle we added for the base and stretches backward to the right end of the horizontal rectangle. You should have a shape that looks like our illustration.
Step 3: Draw the Cabin
The street sweeper has to be driven by a worker. As a result, the worker needs a cabin. To draw the cabin, start by adding a rectangle on the opposite side of the vertical line. The rectangle should be shorter than the cargo and should cover the entire front part of the truck as shown below.
Next, to make our truck more aerodynamic, we will make the top left corner of the cabin rounded. Simply erase the top left corner and replace it with a rounded corner.
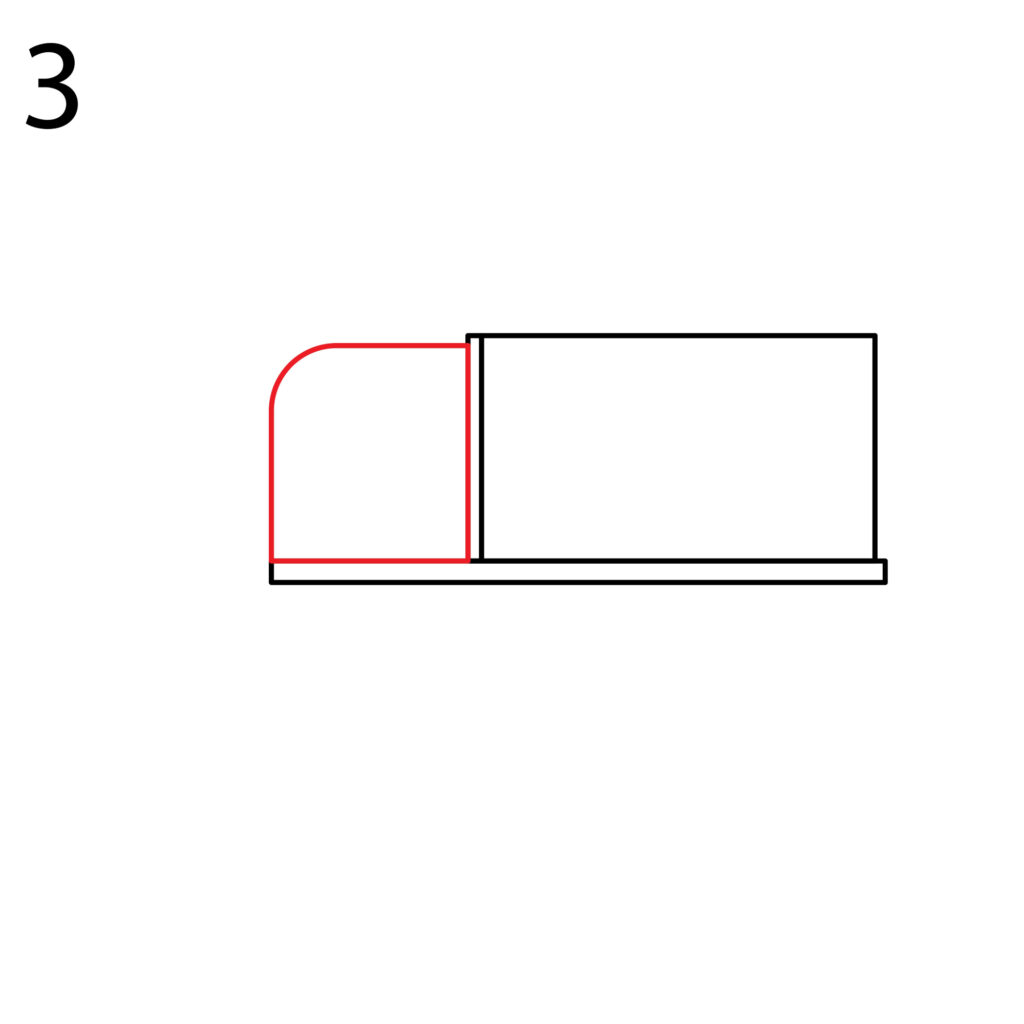
Our truck is almost ready. I hope you are keeping up.
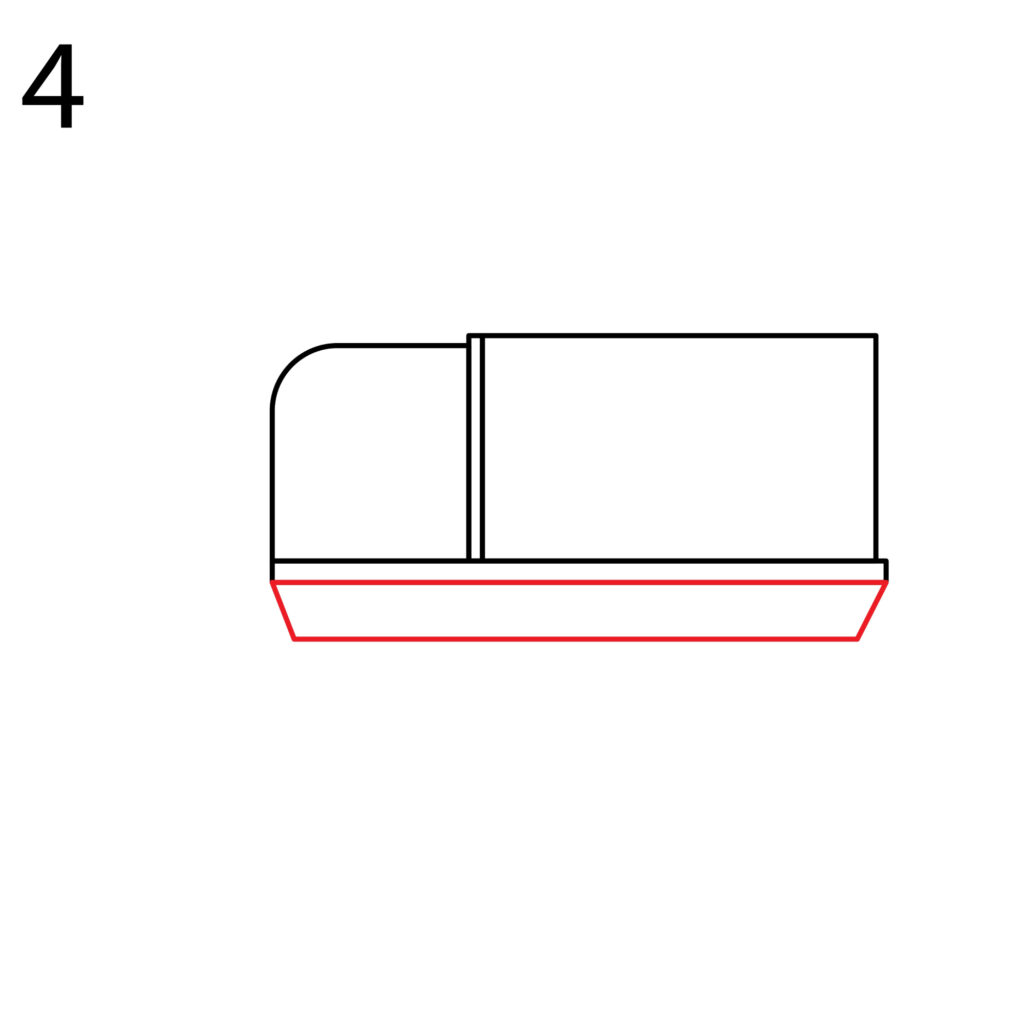
Step 4: Draw the Chassis
A street sweeper carries heavy loads which include equipment and water. For that reason, it needs a strong chassis to support all that load. The next thing we will add is the chassis.
For the chassis, we will draw a rectangle underneath the first horizontal rectangle we added for the base of the truck. We will then add diagonal lines on the left and right sides of the rectangle so that the sides curve inwards. Next, use your eraser to remove the parts of the rectangle that are outside the diagonal lines. Your drawing should now look something similar to what we have in the illustration below.
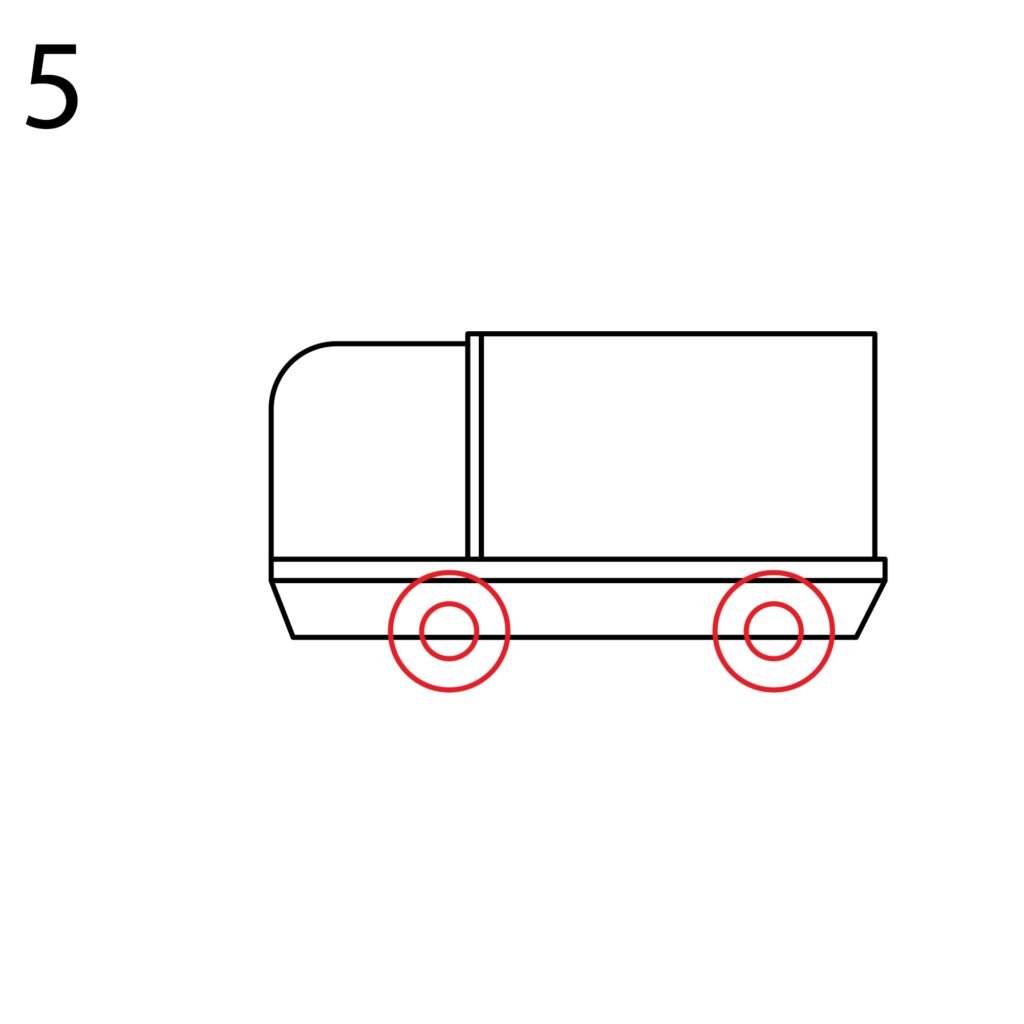
Step 5: Draw the Wheels
Our truck is almost ready. What we need now is the wheels to make it possible for it to move around. Adding the wheels is the fun part.
We will start with the front wheel. Start by drawing a small circle on the bottom line of the rectangle we added for the chassis. You should then add another larger circle over the small circle. Do the same for the rear wheel.
Unlike a car, the wheels of a street sweeper are designed to support the weight of the load it carries. As a result, the front wheel will be more towards the back of the cabin as shown in the illustration. Make sure the wheels are of the same size.
Next, we need to use the eraser to remove the lines that cut through the wheels we just added.
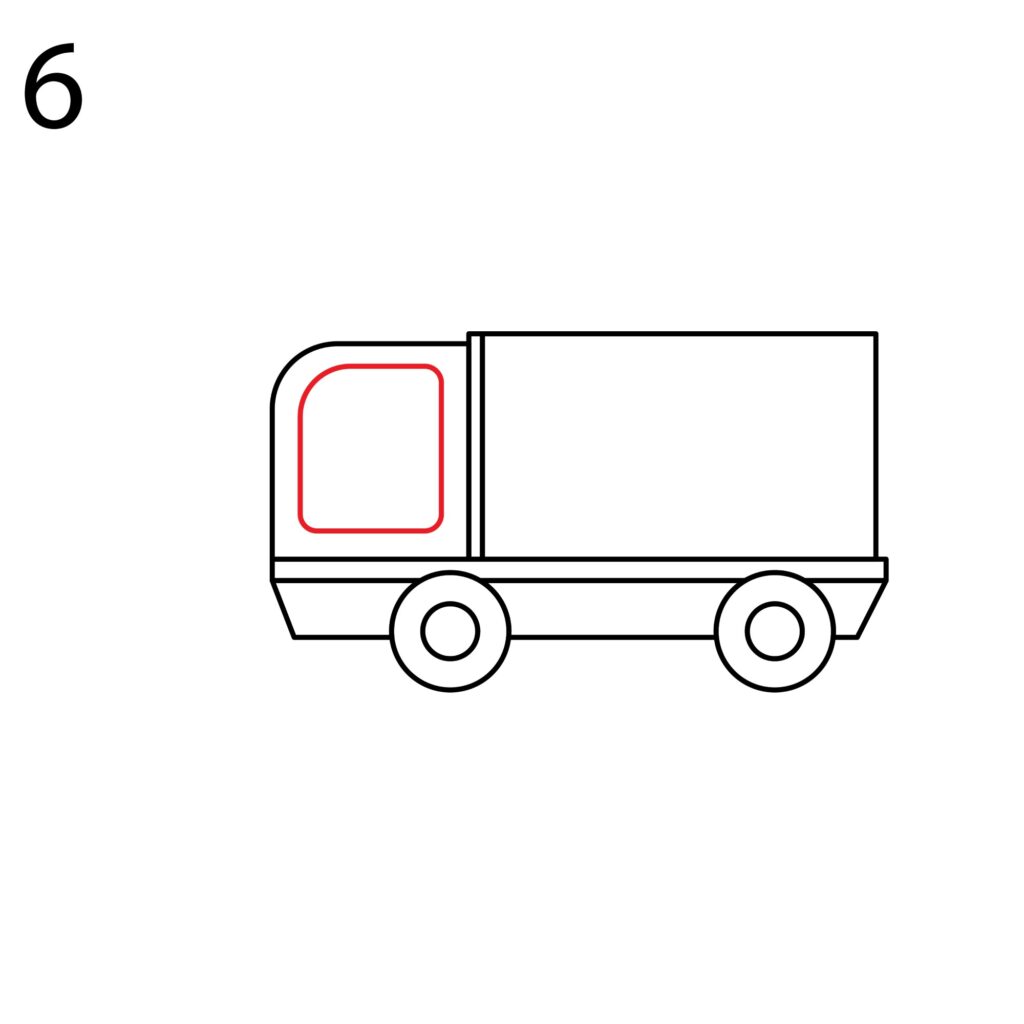
Step 6: Draw the Cabin Door
Our worker needs to be able to get in and out of the truck easily. For that, we will need to add a door. The unique thing about our truck is that our door will all be glass so that the worker can be able to see everything around him.
We need to add a rectangle with curved edges inside the cabin. You can start by drawing a rectangle that fits within the cabin then use your eraser to make the corners rounded. The top left corner should be more curved to match the front end of the truck.
The truck is now ready! Bravo! All we are left with is adding the street sweeper.
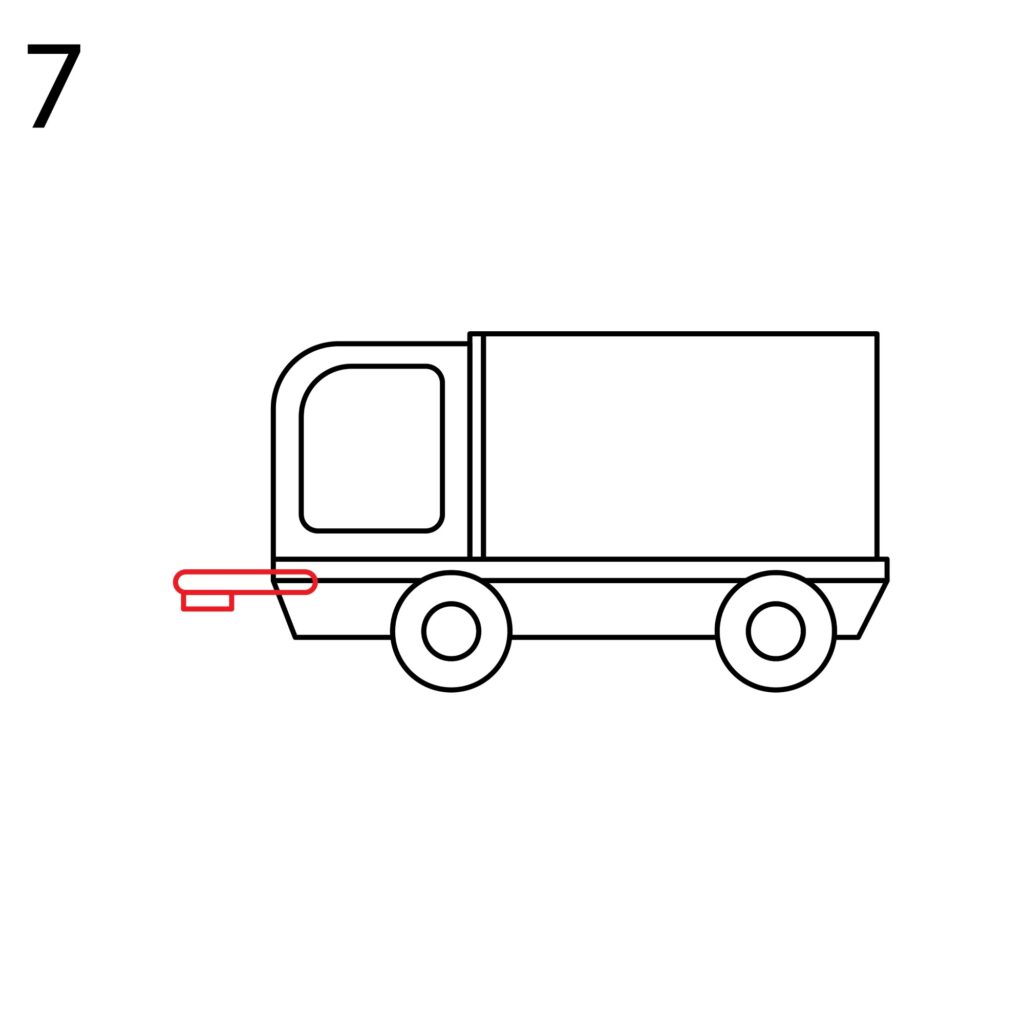
Step 7: Draw the Mounting for the Sweeper
There are many types of street sweepers. They include:
- Mechanical sweepers which are more traditional
- Vacuum sweeper that sucks up dirt
- Regenerative-air vacuum sweepers which use high air pressure to dislodge dirt
Another distinction you will notice is with the location of the sweeping mechanism. A street sweeper may have a sweeping mechanism beneath it or in front. In the street sweeper we are drawing, the sweeping mechanism is located in front of the truck.
To draw the sweeper, the first thing we need to do is draw the mounting. This is the platform that supports the sweeper and contains all the connections for the equipment in the cleaning mechanism.
Start by drawing a horizontal rectangle that starts from the base platform of the truck and extends forward a bit. Make the corners of the rectangle rounded. Beneath the left end of the rectangle, add a small rectangle. This will form the attachment area.
Step 8: Draw the Sweeper
The final step involves adding the sweeping mechanism. For this, we will start by drawing a narrow, horizontal rectangle beneath the mounting. The rectangle should be slightly longer than the mounting. Next, we will draw two diagonal lines that extend from the rectangle, downwards to the ground. We will connect the rectangles with a straight line. You should have a shape that looks like this.
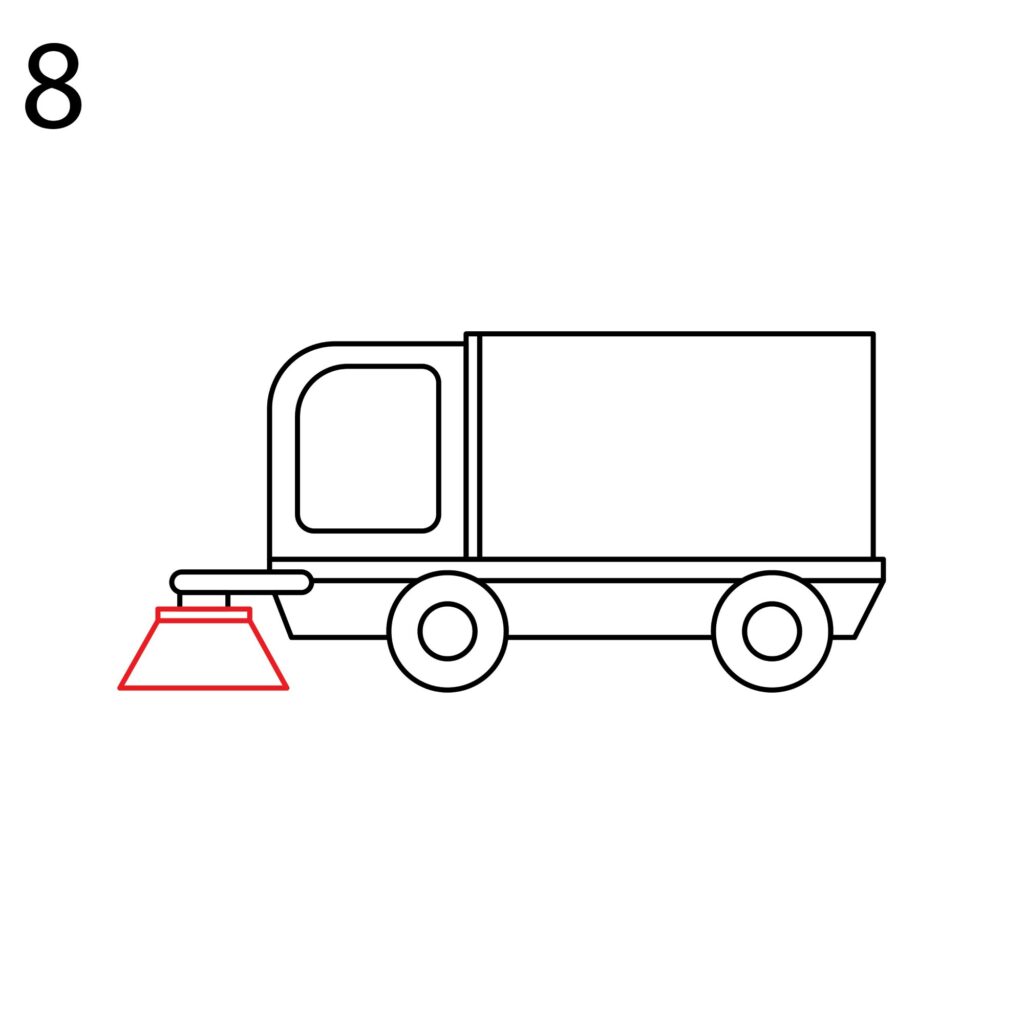
Keep in mind that the sweeper sweeps over the ground. With that in mind, it should not extend below the level of the wheels.
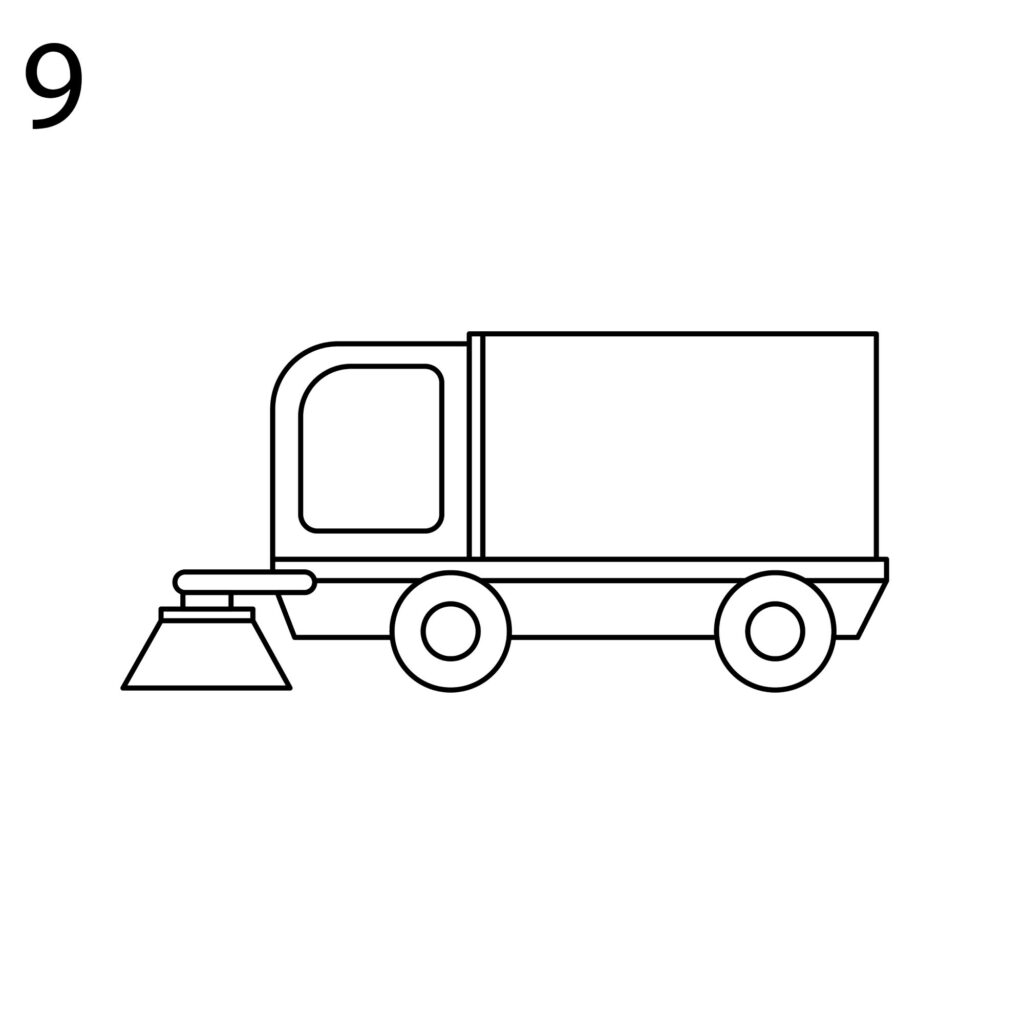
Step 9: Refine the Drawing
Our street sweeper is now ready. Does yours look similar to ours? If not, now is the time to improve it by erasing the areas that are too far off and redoing them.
Keep in mind that you will not be able to get everything right the first time. Do not get upset. You will do better on your next try.
Take the Drawing to the Next Level
The best way to make your drawing more impressive is by adding a few more details to it. More details move your street sweeper from a basic drawing to an advanced drawing.
Add a More Details
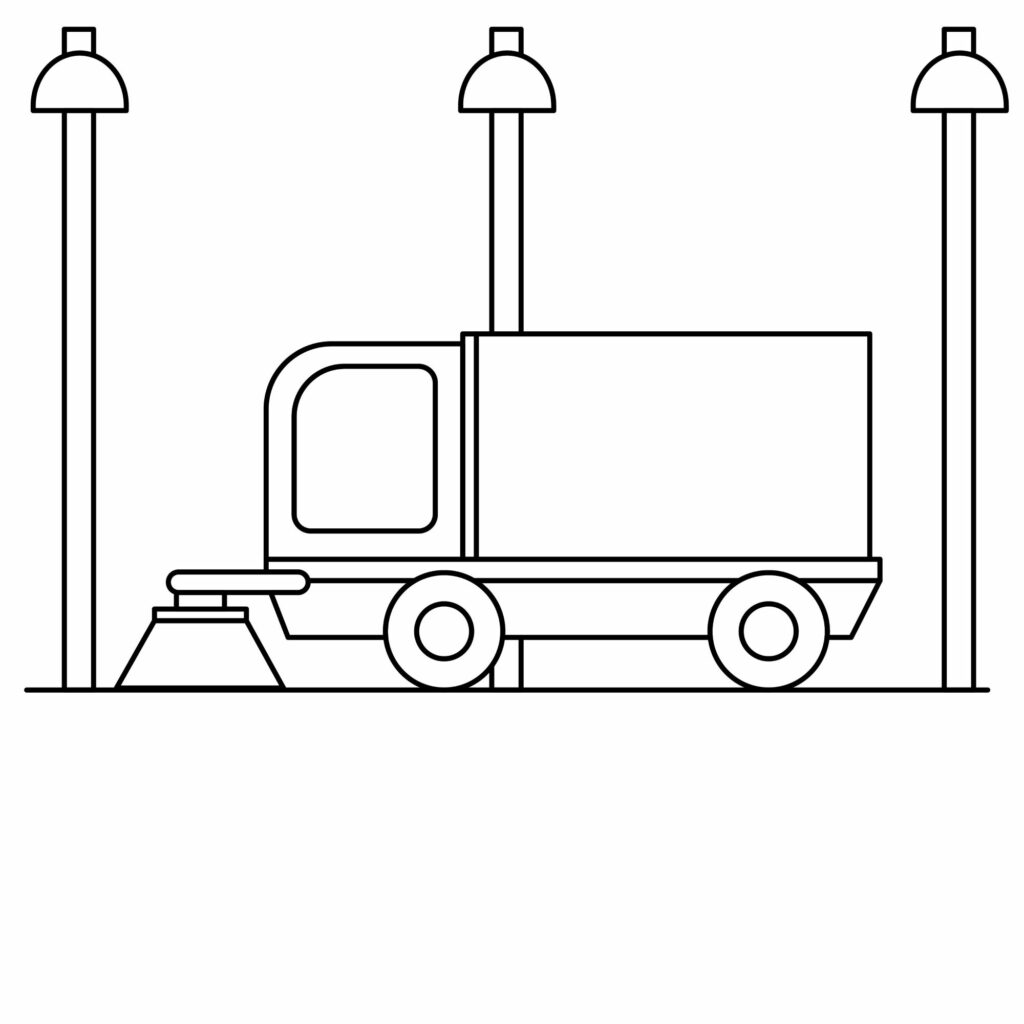
To improve our drawing, we will start by drawing a straight line beneath the wheels and the sweeping mechanism. This will form the road that the street sweeper is cleaning. Make sure you just remove the lines that go beneath the line for the road.
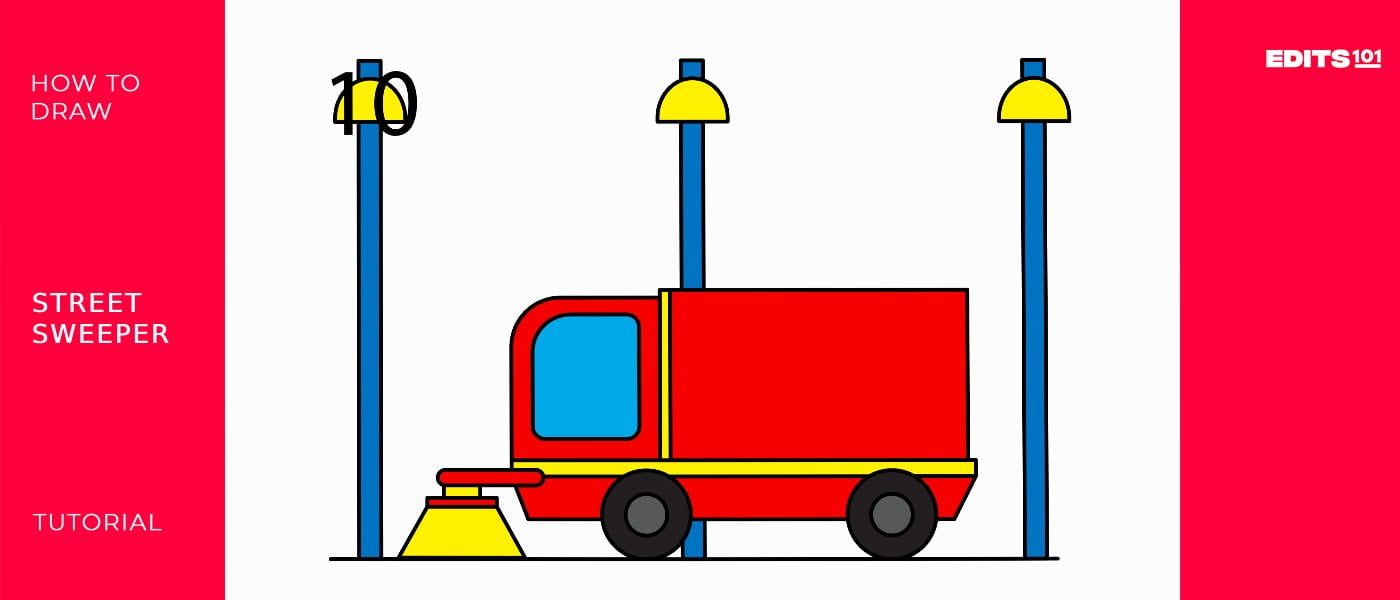
Next, we will add a few street lights to indicate that our street cleaner is actually on a street. You can add as many details as you want including your name on the side of the truck and some lines on the sweeping mechanism to show that it is a brush. Here is what we did with ours. We did not add too many details so that it is easy for you to follow.
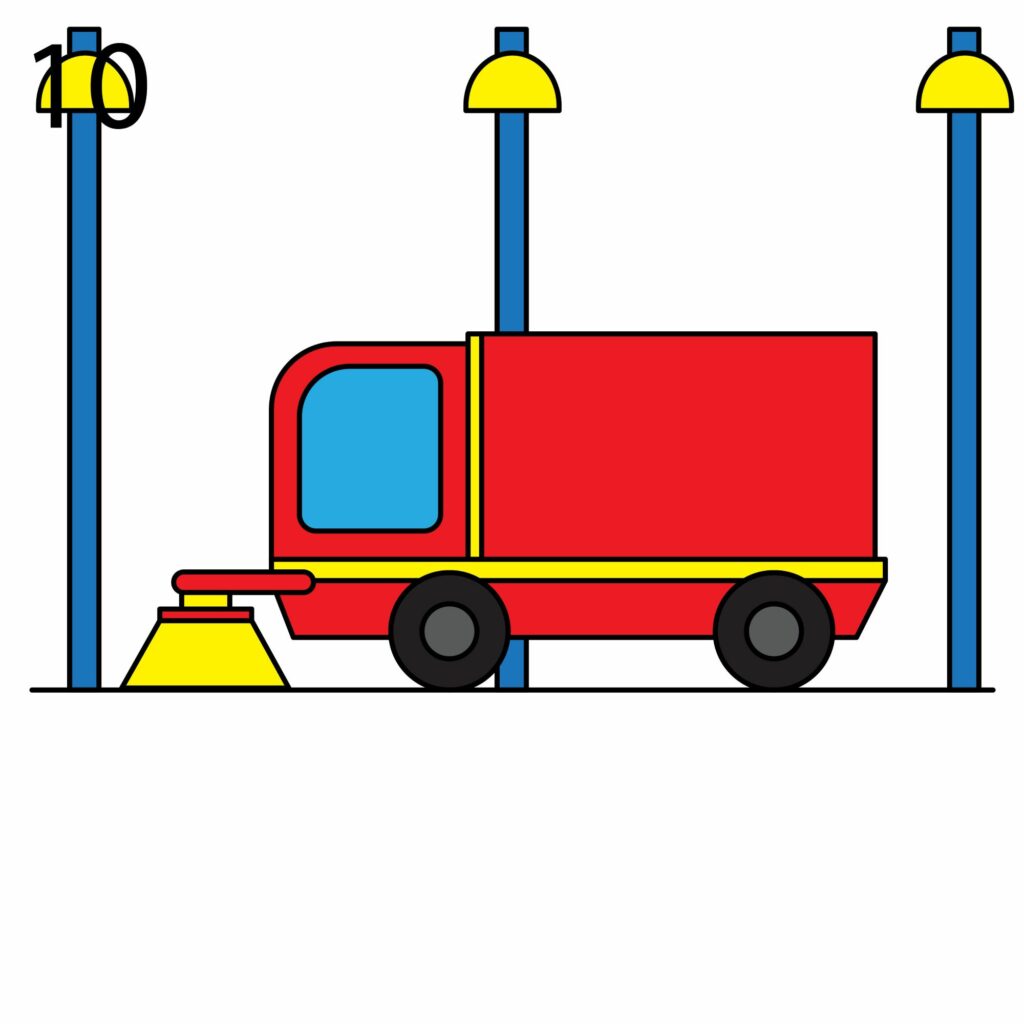
Color Your Drawing
The final step is the most fun. Take out your coloring supplies and add color to your drawing. Let your imagination go wild. Here is what we did to our drawing.
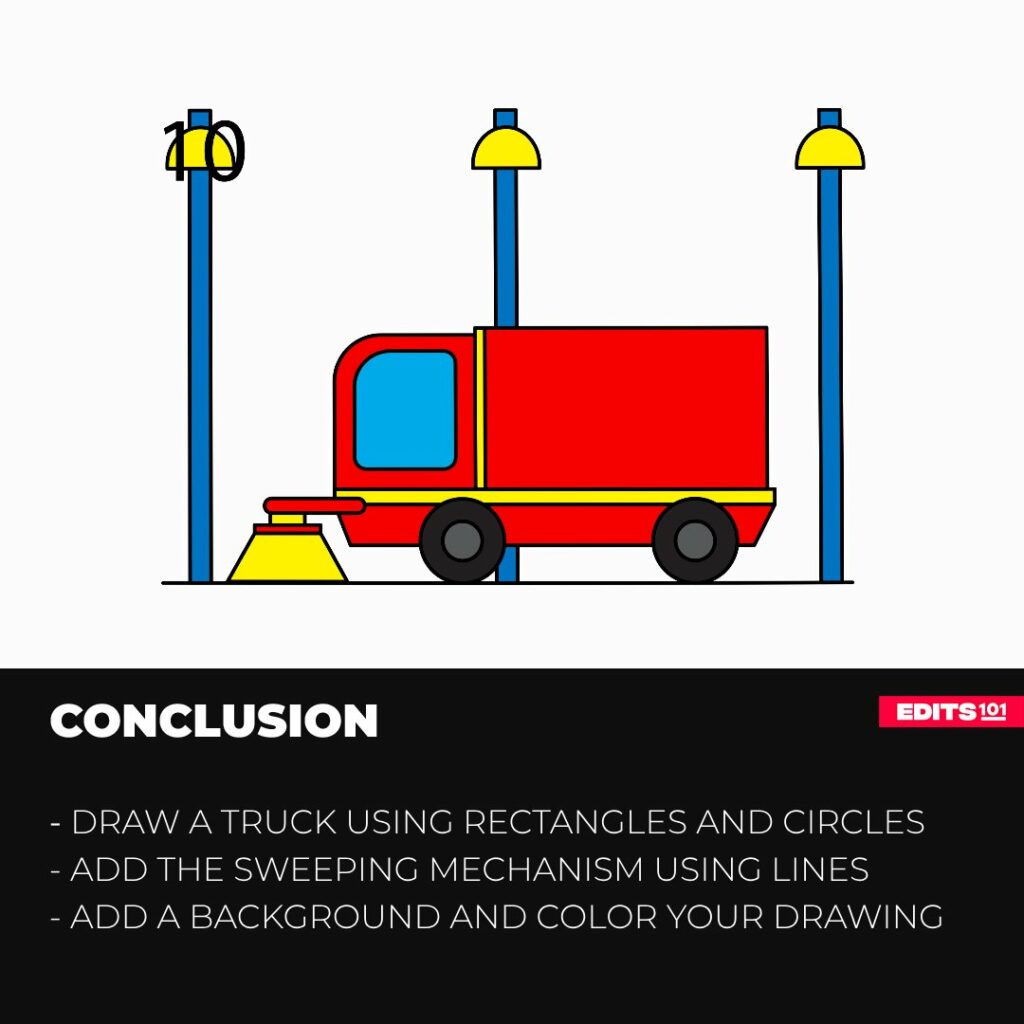
Conclusion
As you can see, we combined a bunch of shapes to draw our street sweeper. We started by drawing the base using rectangles then added the cargo area, cabin, wheels, and then the wheels. We drew the sweeping mechanism last and then added a background. We colored our image in the final step because we didn’t want the colors to spill on areas we didn’t want to color.
It takes practice to be a good artist. Do not feel bad if your drawing does not look exactly like ours. There is still room for improvement. Just start again and since you know what is expected, you will get better results. The third time is the charm, right? Have fun.
Thanks for reading & feel free to check out more of our articles!