How to Draw a Volkswagen Beetle | A Step-By-Step Guide
A Volkswagen Beetle, also known as a bug, is a small and classic car that was first invented in Germany many years ago.
Known for its spacious interior which comfortably seats four passengers, a cool dashboard layout and a large rear hatch that provides a lot of cargo space, the Volkswagen Beetle is a popular choice among drivers looking for a unique driving experience.
In today’s tutorial, you’re going to be learning how to draw your very own Volkswagen Beetle in 9 easy steps!
| Steps | Complexity Table |
| The Body | 3 |
| The Fenders | 2 |
| The Wheels | 2 |
| The Hubcaps | 2 |
| The Center Caps | 2 |
| Refine the Body | 3 |
| The Windows and Handles | 3 |
What you will need
- Drawing paper
- Pencils (2b, 3b or 5b)
- An eraser
- A ruler (optional)
- Drawing compass (compass)
- Color Supplies
- 30-35 minutes
How to draw a Volkswagen Beetle
While it may seem challenging due to the number of steps, each step is comprised of simple lines and shapes which makes the process relatively easy to complete.
By following this step-by-step guide, you will have a beautiful depiction of a Volkswagen Beetle ready to add to your collection of drawings.
But before you can do that, you first need to make sure you have all of your drawing tools available, enough time to devote yourself to your drawing and that you check out the outline below to get a clear sense of what each step entails.

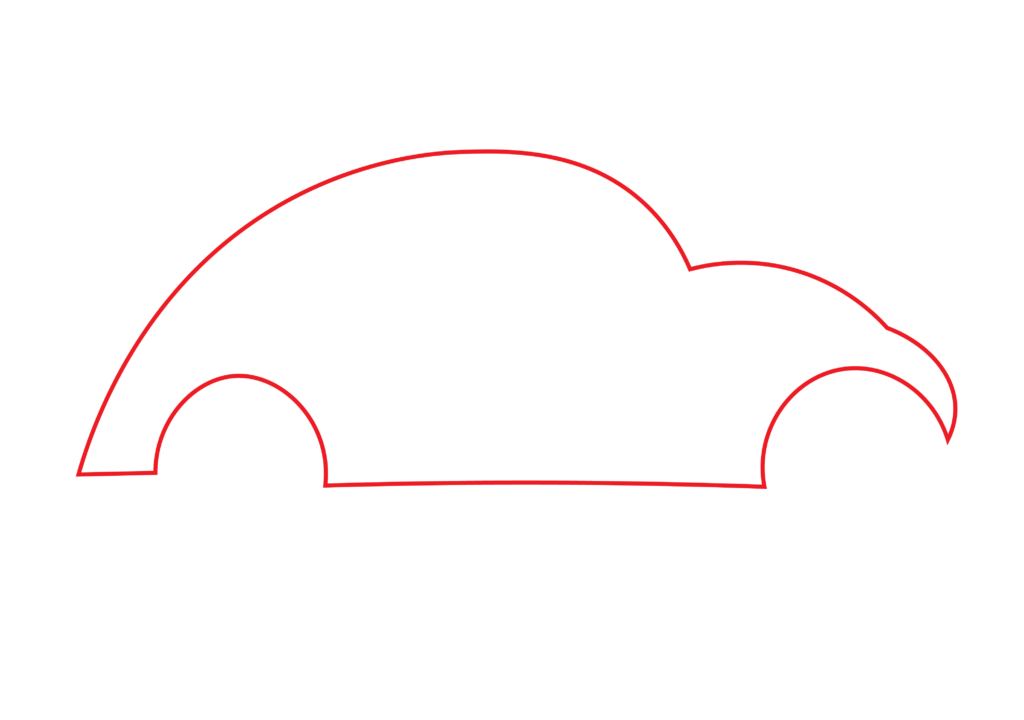
Step 1: Draw the Body
Let’s kickoff your drawing by flipping your paper into a landscape orientation. This will ensure you get the most of your drawing by highlighting small details and providing you with room to add a background later on!
Next, draw a large curved line for the top of the car’s roof. Make sure the left side of the curve extends downward, while the right side ends a bit higher. Then, starting from the right, add another rounded curve to resemble the hood of the car.
Once complete, draw a horizontal line straight across the bottom and add space for the wheels by drawing two semicircles that are evenly spaced apart.
Connect the bottom of the car with the top by neatly attaching the lines on the sides together.
- Draw a large, gentle curve at the top of your paper for the car’s roof
- Draw a straight line at the bottom of the paper to mark the bottom
- Draw two semicircles on the bottom line for the wheels
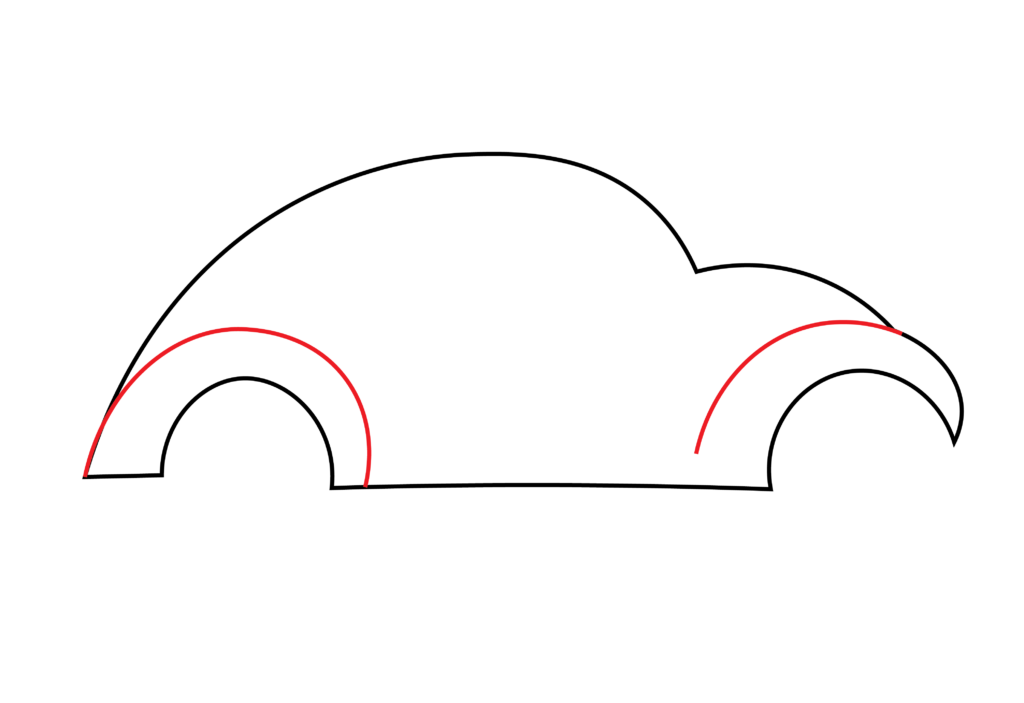
Step 2: Draw the Fenders
Now that your Beetle has a body, it’s time to add some definition with fenders.
Fenders are used to protect the wheel wells and body of the car from debris and road hazards.
To complete this step, draw a semicircle above each semicircle added in step one to resemble the fenders. Ensure the curves are similar to that of the semicircles, and that they are symmetrical for a neat look.
- Draw a semicircle over each wheel drawn in step one
- These semicircles will resemble the fenders
- Ensure both fenders are symmetrical
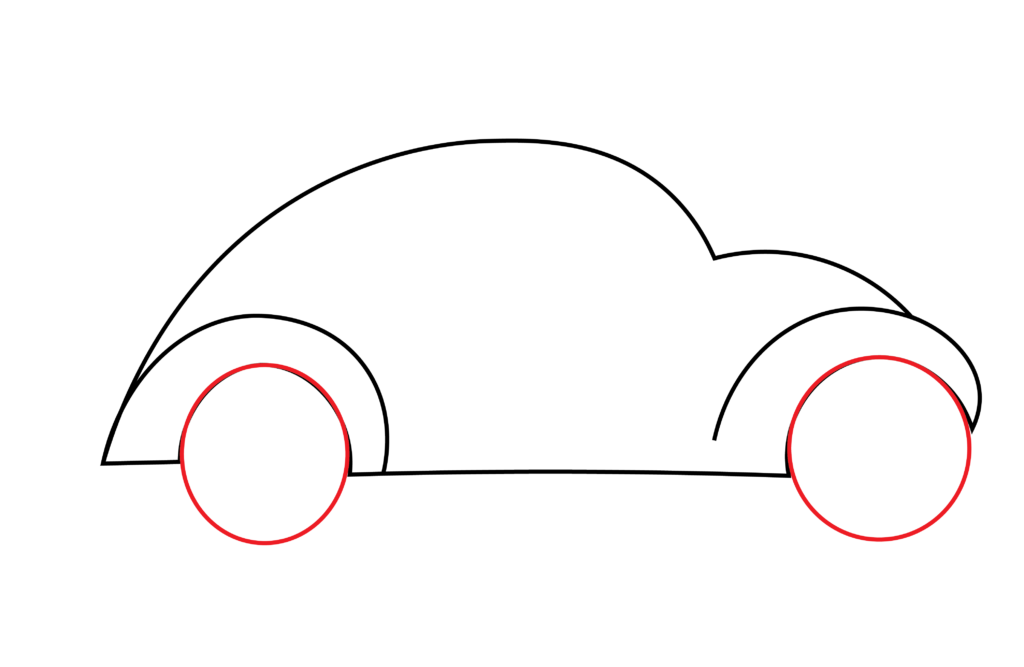
Step 3: Draw the wheels
Now that the body and fenders are in place, let’s roll onto the wheels, which are a crucial element of any vehicle.
For accuracy, you are encouraged to use a mathematical drawing compass or a household circular object like a bottle cap, coin or small plastic cup for smooth circles.
Draw a small circle within the empty space beneath each fender of the car. Both circles should be the same in size, and should extend the bottom of the beetle to ensure it looks realistic.
- Draw two small circles below the fender to resemble the wheels
- Make sure both circles are the same size and smoothly drawn
- The wheels should be longer than the baseline
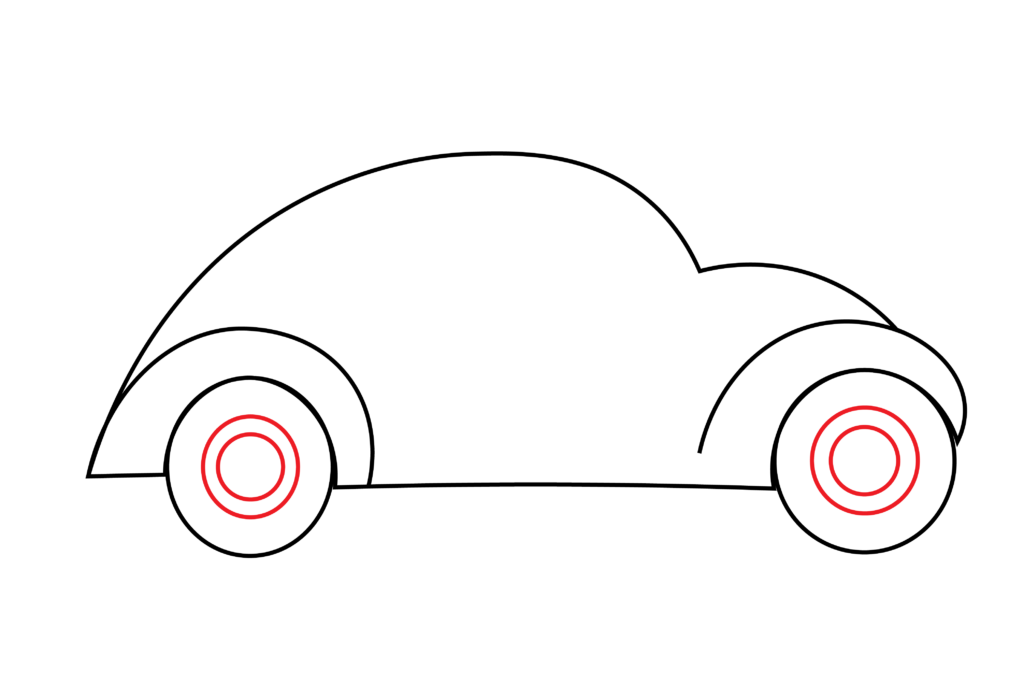
Step 4: Add the Hubcaps
Hubcaps are decorative covers that fit over the center of a wheel to improve the look of the car and protect it from dust and debris.
Now that you have the full outline of a Volkswagen Beetle, it’s time to refine the details of the car, starting with the wheels.
To add the hubcaps, draw a smaller circle within each wheel while maintaining a nice amount of space between the outline of the wheel. Next, add another smaller circle within the one you have just drawn for added detail.
- Draw a smaller circle inside the wheel for the hubcaps
- Add another smaller circles inside each wheel for added detail
- For accuracy, draw lightly first, then darken the circles when satisfied
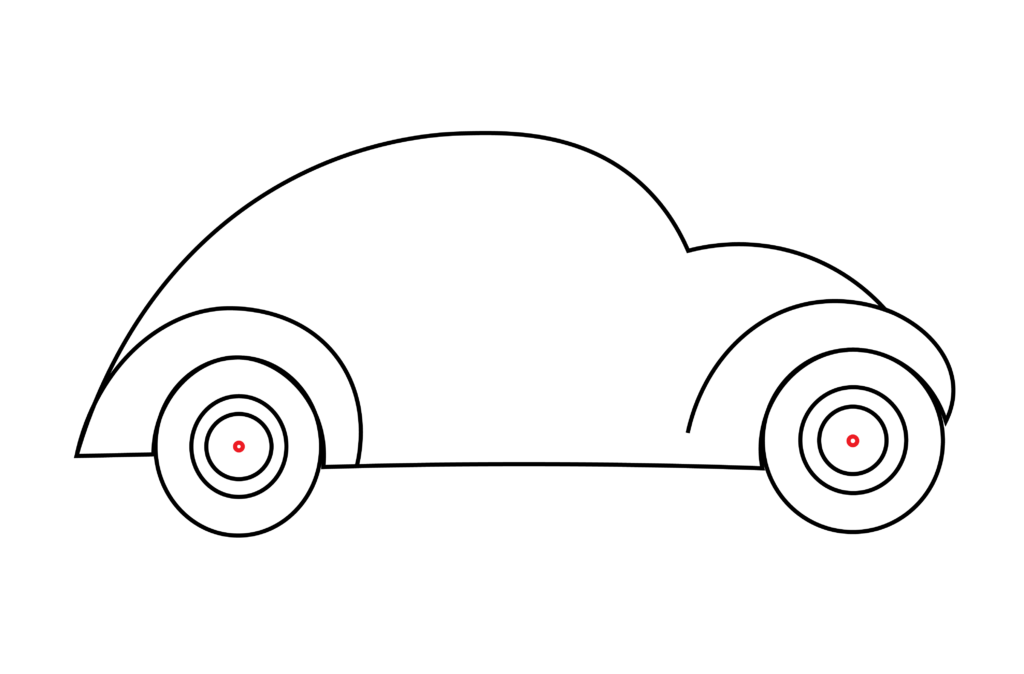
Step 5: Draw the Center Caps
To ensure your Volkswagen Beetle drawing looks even more realistic, be sure to include this step in your drawing process. While simplistic, it will definitely add definition and authenticity to your sketch.
In the center of each hubcap completed in step four, draw a tiny circle to represent the center caps, which acts as a bolt to ensure the hubcaps remain secure on the wheels.
- Draw a tiny circle within the center of each wheel for the center caps
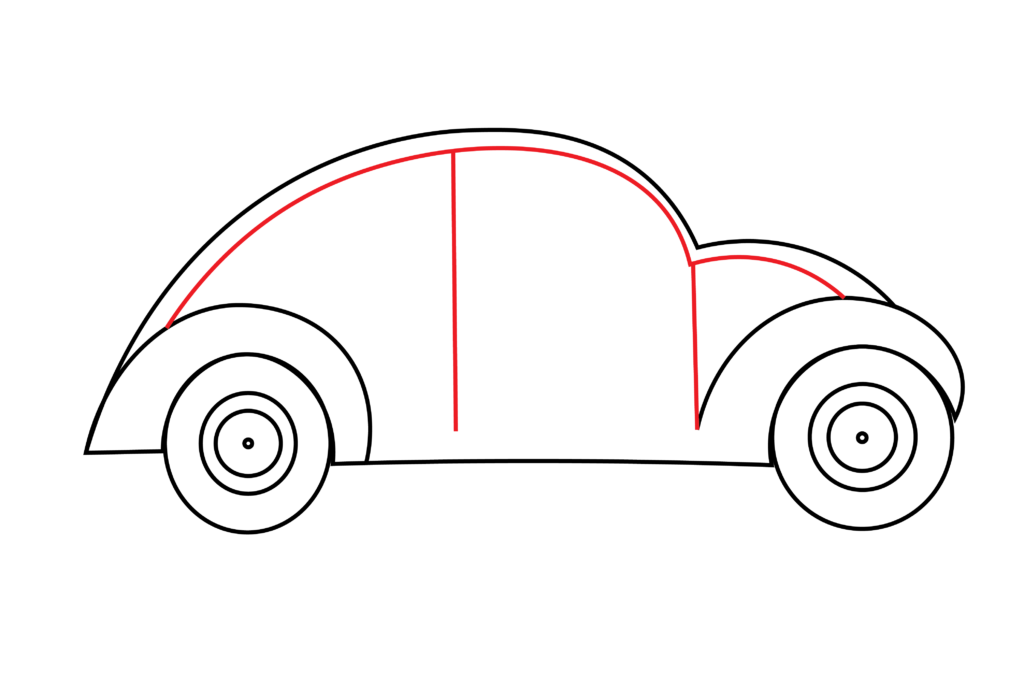
Step 6: Add Extra details
To give your drawing some dimension, and to assist you with drawing the windows and door handles in the next step, it’s now time to add some extra details to refine the width of the beetle’s body.
Start from the top of the windshield, and draw a smooth curve that extends to the back end of the car. Next, hint at where the doors are with a vertical line in the center of the car’s body.
- Draw the roof with a smooth line from the windshield to the rear end
- Represent the door edges with vertical lines
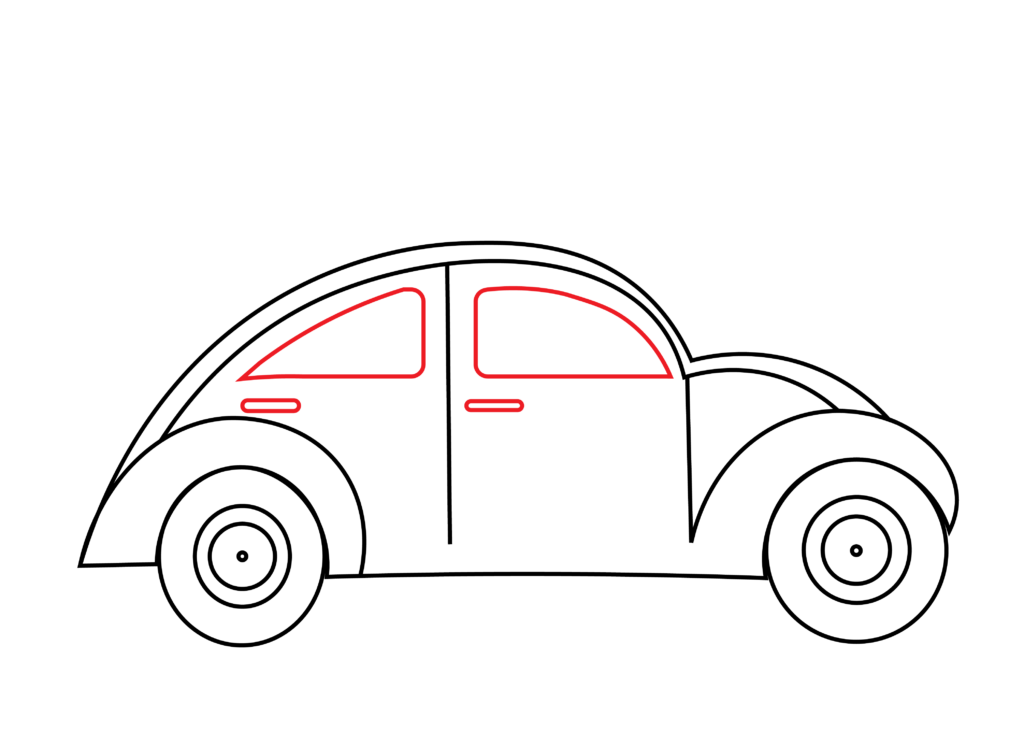
Step 7: Draw the Windows and handles
This is the final step of the sketching process! Add some character to your Volkswagen beetle by drawing the windows and door handles.
To start, draw two smaller, curved shapes that follow the body’s contour to resemble the windows of the car. This is where proportion is key. The windows should be big enough to look functional, but not so large that they dominate the design.
Lastly, draw two small horizontal rectangles along the left side of each door, beneath the windows, to represent the door handles.
- Draw two curved shapes inside the windshield – indicating windows
- Draw two smaller rectangles for the handles
Congratulations! Your Volkswagen Bettle Drawing is Complete
Your Volkswagen Beetle drawing is now complete. Great job adding all those neat details. Be sure to have a look at your drawing now that it’s finished to make sure you are on the right track.
Go back and double-check every detail. You can refine any lines that feel a bit wobbly, straighten up where needed, and smooth out the curves.

Taking your drawing to the next level
Now that you’ve brought your Beetle to life with careful lines and details, let’s make it stand out. If you’re feeling colorful, why not bring your drawing to life with some color? Or, if you like the classic look, leave it as a sketch. It’s your artwork, after all!
Step 8: Adding a Background
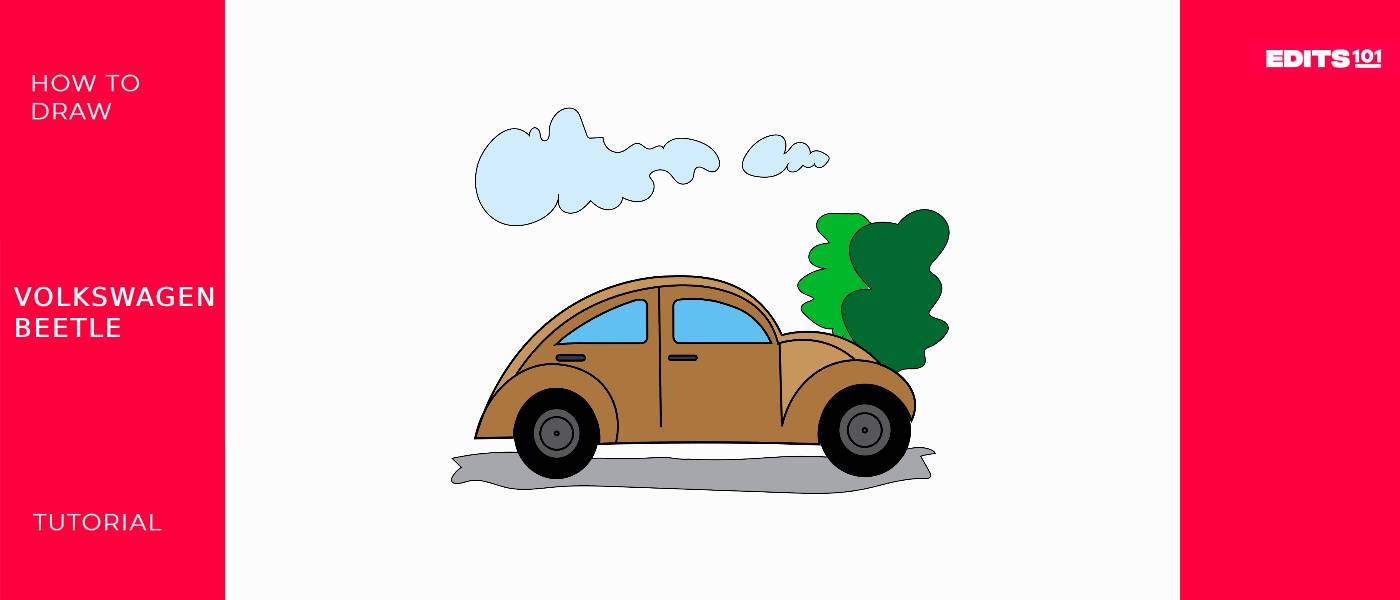
To place your Beetle in a setting, you can sketch a simple horizon line to give the car some ground to stand on, or perhaps add elements like trees, clouds, or even a sun to indicate a time of day.
In our illustration below, we see it parked near a tree, so why not incorporate a park of some sort in your background? The possibilities are endless, you only need to sort through them all and choose the perfect one for your design.

Step 9: Adding Color
The color of your drawing can say a lot about your personality. You might choose a color that fits with the classic Beetle look, like red, brown or sky blue.
Or perhaps you have your own color combinations in mind. Feel free to use whatever colors you prefer. If necessary, look at the colors in the provided picture for inspiration, or dive into your favorite colors to make it uniquely yours.
Remember to color neatly within your lines and to choose colors that compliment each other and your drawing.

Bonus Tips
Practice drawing circles and ovals with light pencil strokes to get the wheels and hubcaps right.
To make your car shine, leave a little white space when coloring for a reflective look.
If you mess up, turn that line into a new detail – art is all about creativity!
Watch YouTube videos of car drawing tutorials to make the process of drawing a Volkswagen Beetle all the more easier for you.
Conclusion
You’ve sketched the body, detailed the wheels, added depth with shadows, and brought personality with hubcaps. You’ve drawn the roof, added a touch to your drawing interior design, and placed your Beetle against a charming background.
Remember, your drawing skills will only improve with practice, so keep on drawing new things and sharing your work with others. From Edits101 to you, see you again in another awesome drawing tutorial.

Thanks for reading & feel free to check out more of our articles!
Author Rating
Overall Rating
Summary
This tutorial will effectively teach you how to draw a Volkswagen Beetle in less than 10 steps. You will also be provided with ample tips on how to make your black and white sketch better, like adding a background and adding some color.