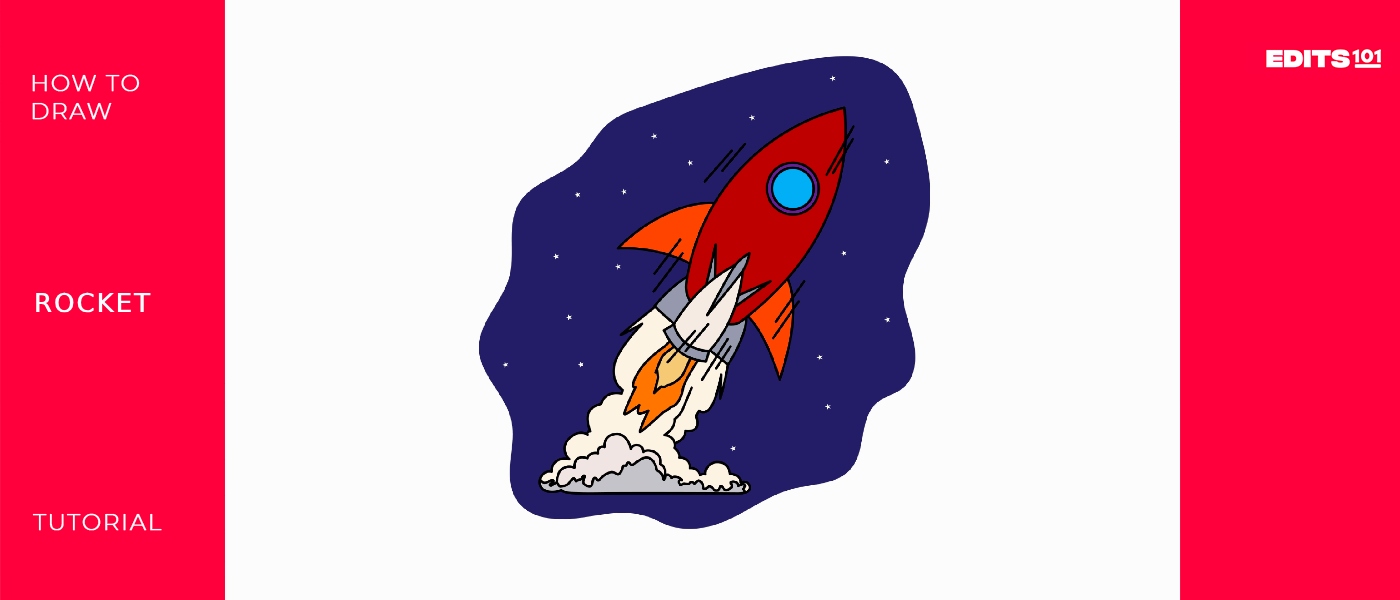
How to Draw Rocket | Fun Drawing
Today, we have brought another unique drawing for space lovers. We will travel through different galaxies together. We will make a rocket.
A rocket is a vehicle that uses jet propulsion power to accelerate without using the surrounding air as an airplane does. Combusting fuels produces a very high force on the ground, making it move against gravity. As rockets are meant to travel space, they cannot rely on air to fly, so it is necessary to travel in a vacuum within space, and it is a lot easier for it to work in space as there is no resistance to its motion.
What you will need
- A pencil
- An eraser
- A sheet of paper
- Coloring kit
- Ruler
- 30 minutes
How To Draw a Rocket
Ensure you have your oxygen tanks filled because we are visiting the moon. For this, you must follow each step carefully so we can have a safe journey with our fantastic rocket.
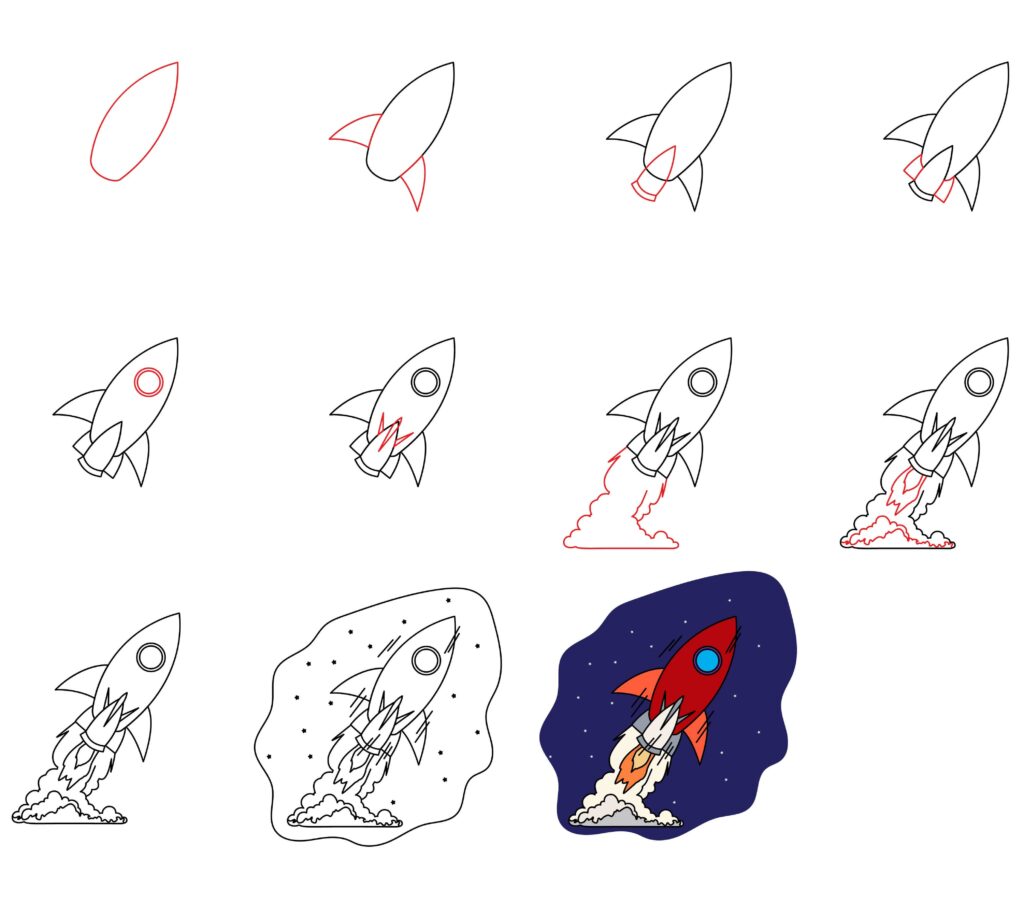
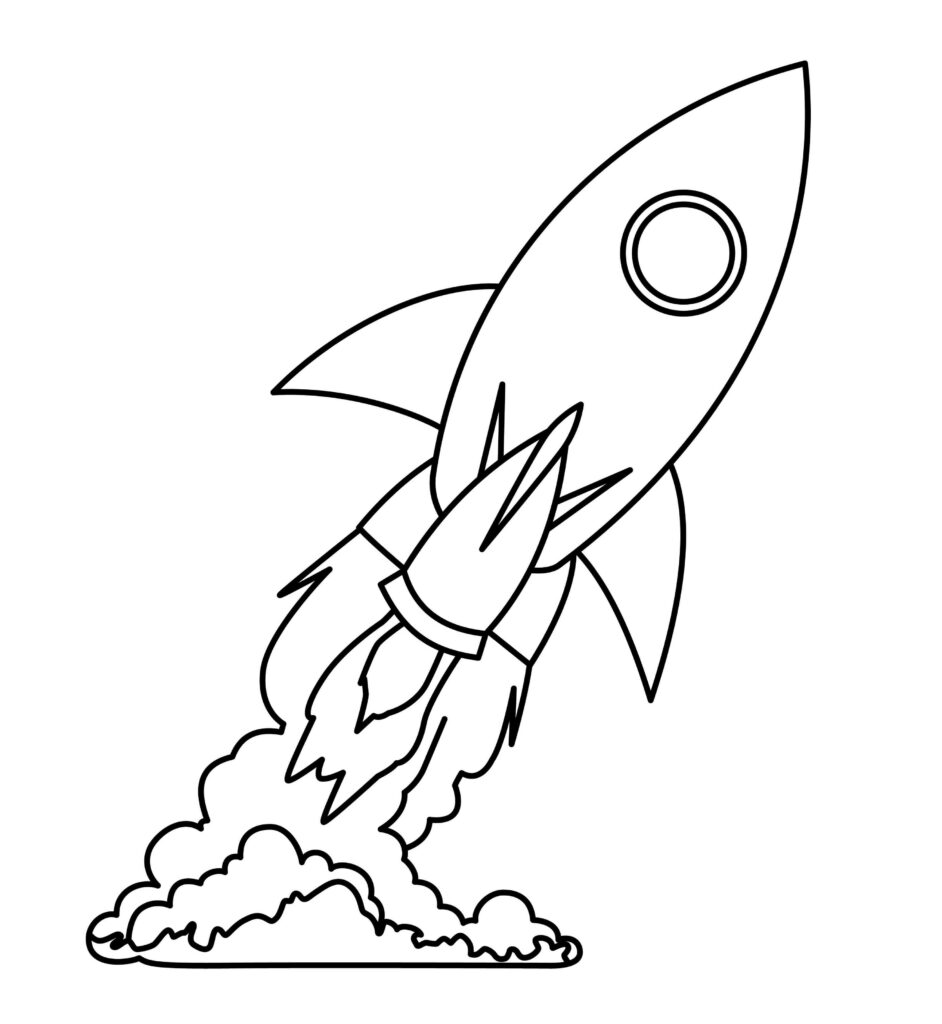
Step1: Draw the rocket body
Begin by drawing a long, narrow cylinder shape. This will be the main body of your rocket engine. You can make it as long or as short as you like, but remember that rocket engines are usually long and cylindrical.
Draw a long oval shape with a pointed end at one end and an almost flat base at the other. The pointy end is there to tear through the air as we move quickly through the air to save maximum energy.
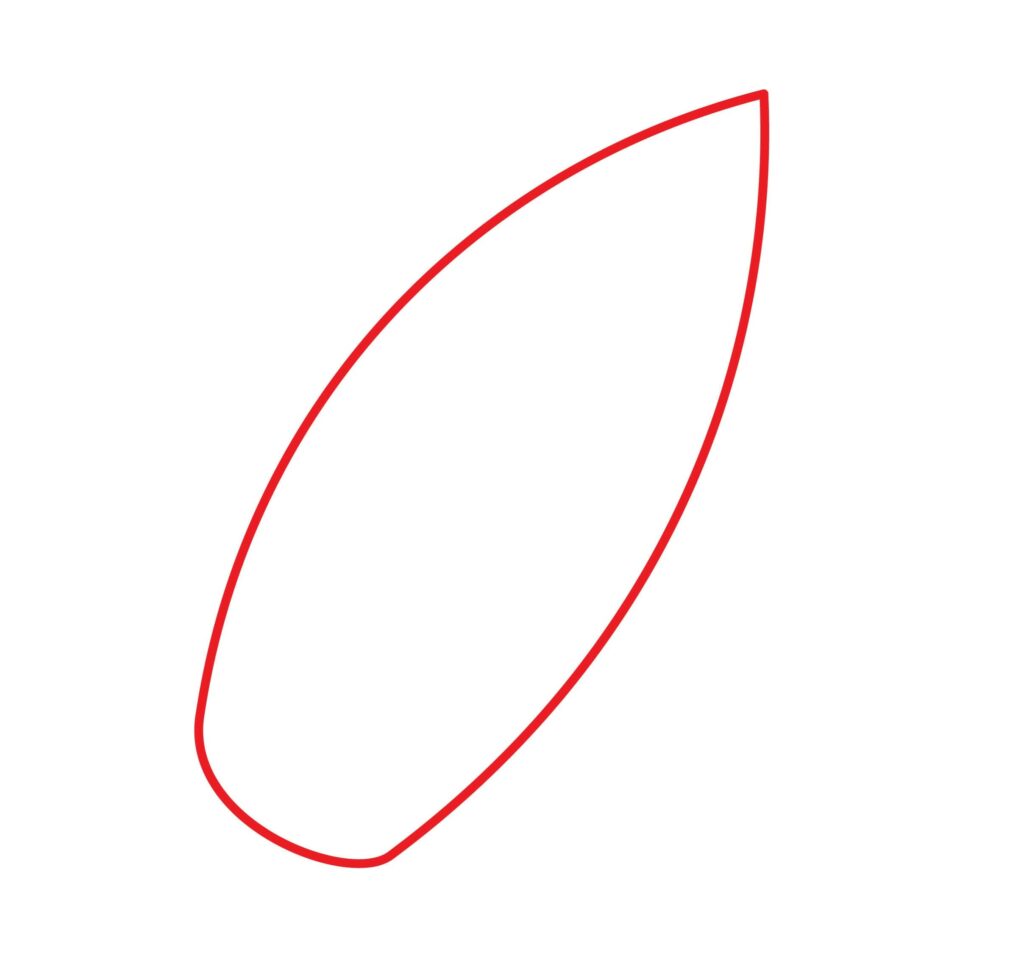
A rocket body is like a cylinder with a triangle at one end, but the connection points are rounded off to give it a smooth shape.
Step 2: Draw the wings
Rockets often have stabilizing fins, also called wings, near the bottom. Draw two or three fins evenly spaced around the base of your rocket engine. These fins help the rocket stay stable during flight. These wings are triangular, with the hypotenuse being slightly curved. The wings are like two shark fin-like objects at the lower end of the rocket.
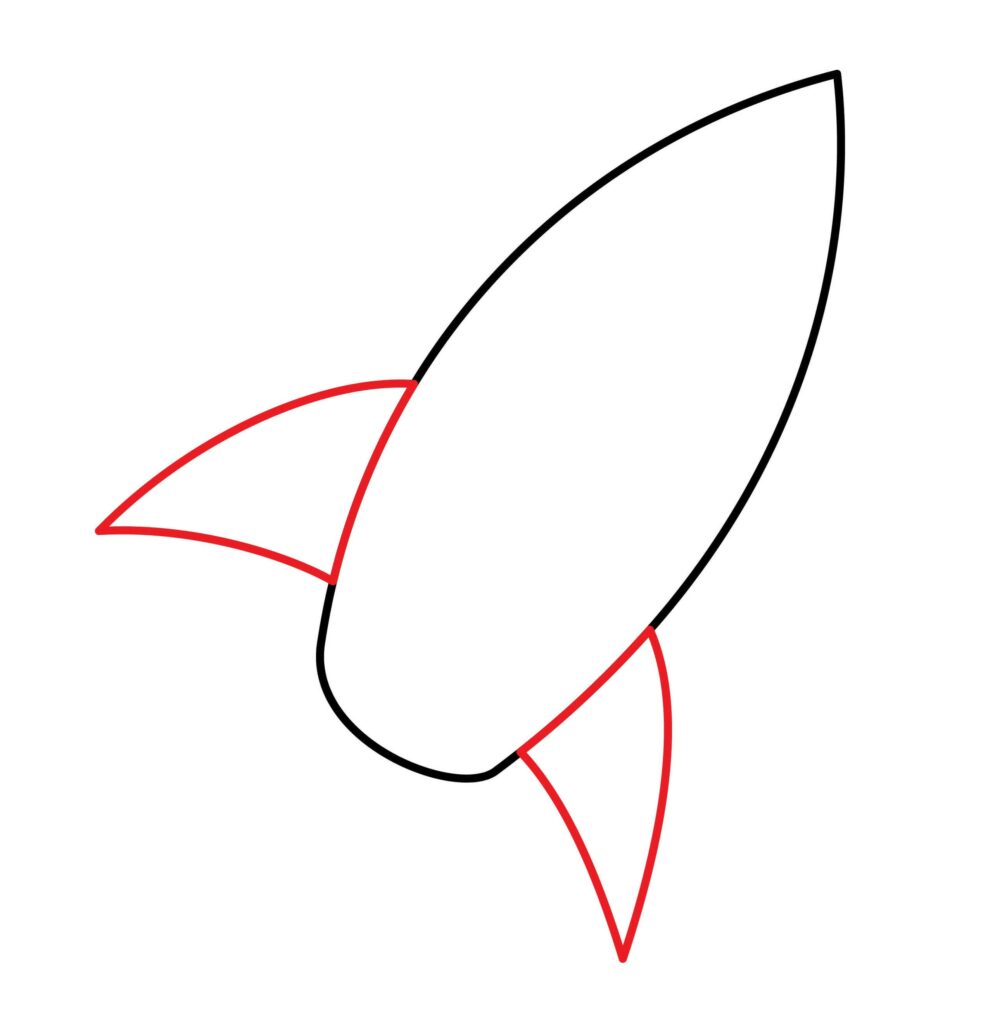
The essential use of a wing is for landing. Wings are usually dead solid weight, so landing the heavier, dense side at the lower end creates enormous stability.
Step 3: Draw the rocket engine
The engine is like a mini rocket attached to the lower end of the rocket below the wings. At the bottom of your cylinder, draw a cone shape with a pointy end. This cone represents the nozzle of the rocket engine, where the hot gases come out.
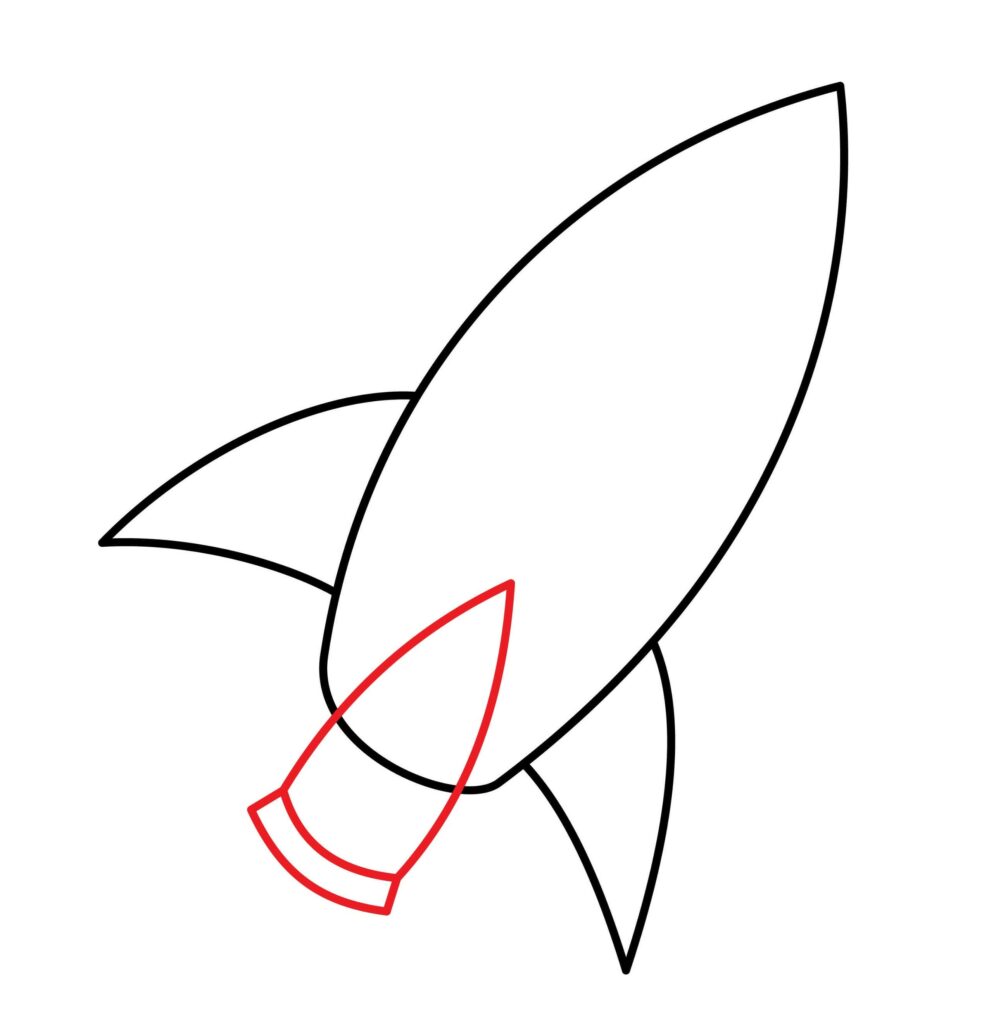
Make sure it’s centered at the bottom of the cylinder.
Step 4: Draw two more engines
To make your rocket even more impressive, consider adding additional engines. Many rockets have multiple engines for added thrust and stability because high energy is needed to move such heavy weights up to space against gravity.
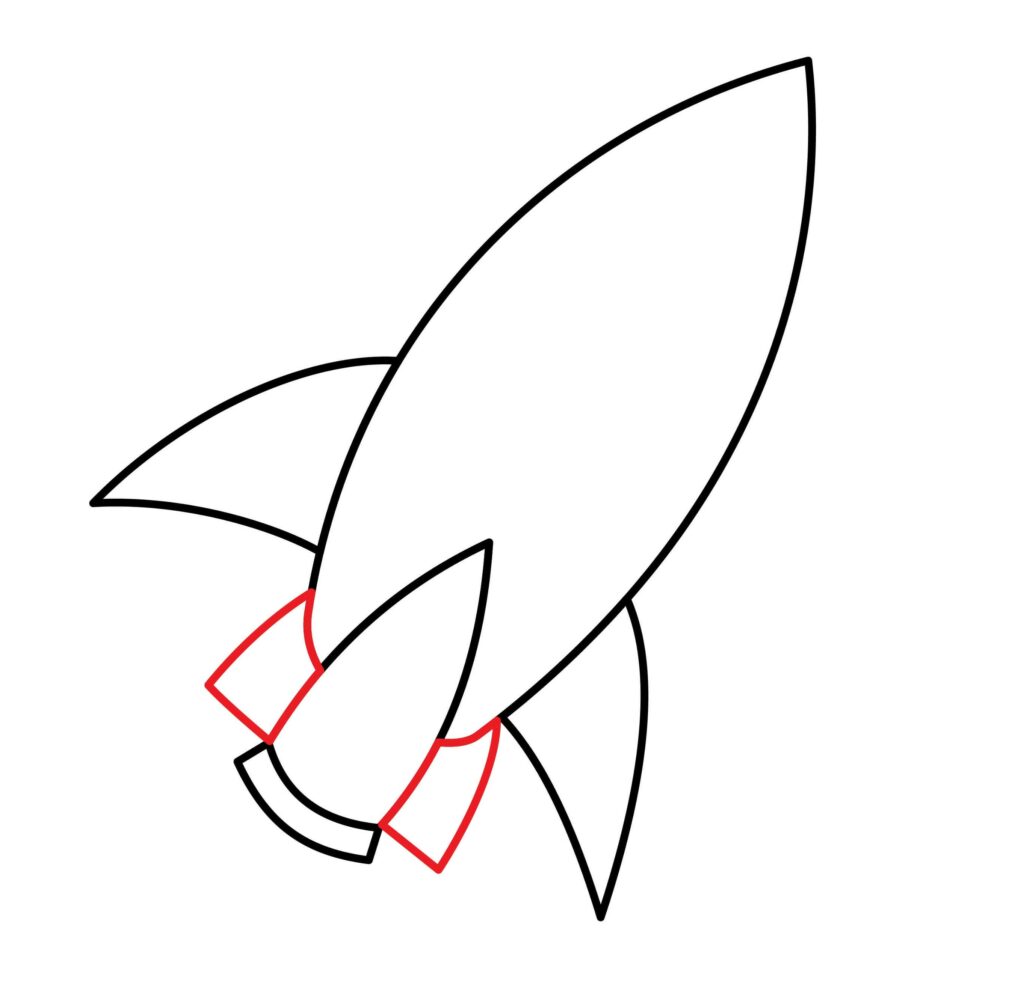
Draw two trapezoid shapes on both sides of the first engine, a smaller size than the front engine, to accentuate the realistic look.
Step 5: Draw the cockpit
The cockpit is the control room for the rocket; it also has a window for viewing what’s outside. It is the place from which the rocket is operated and is also used to communicate with the control tower on Earth when in space. Draw a small, rounded, or oval shape where the cockpit will be situated. This shape should be large enough to fit a person inside but not too big to overwhelm the rocket’s design.
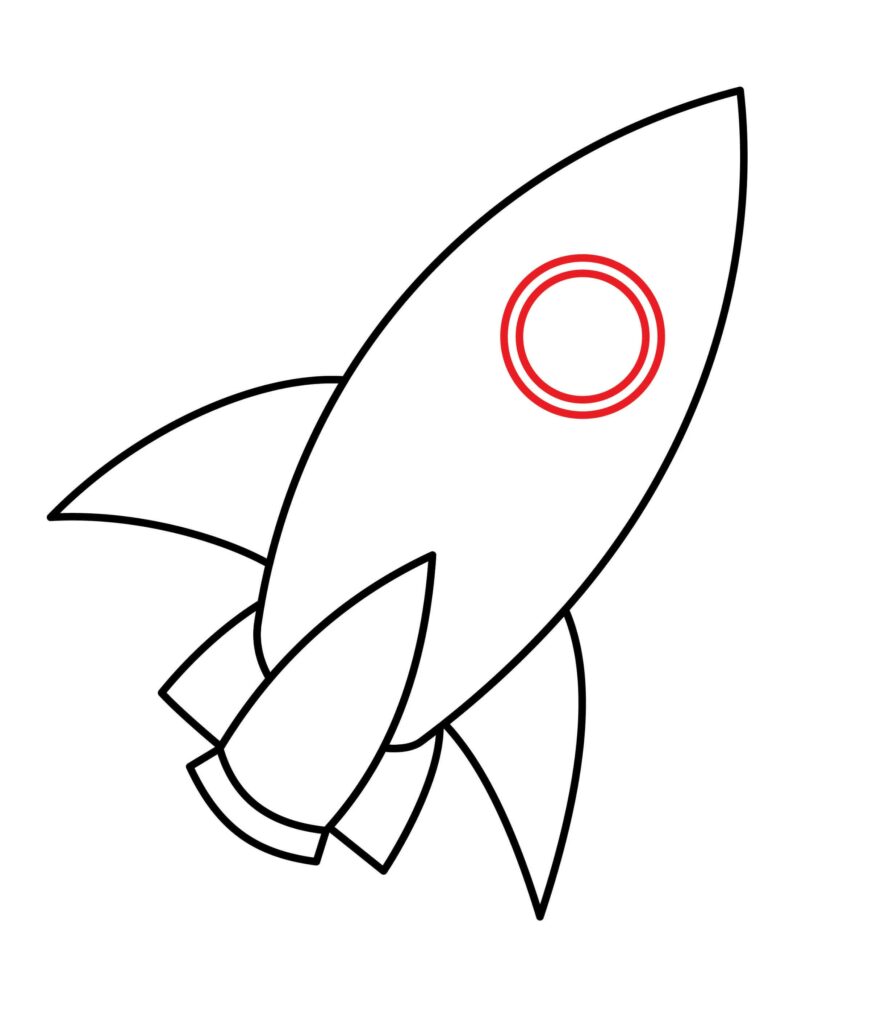
Draw two circles in the middle of the main body, like the image, to make the cockpit.
Step 6: Add Details to the engine
Adding details makes the image look so much better. We will create connection points for the rocket engines with the rocket’s body. You can also add small circles or ellipses around the nozzle area. These represent features like nozzles for steering the rocket or the attachment points for the engine. Draw the shapes as shown in the image.
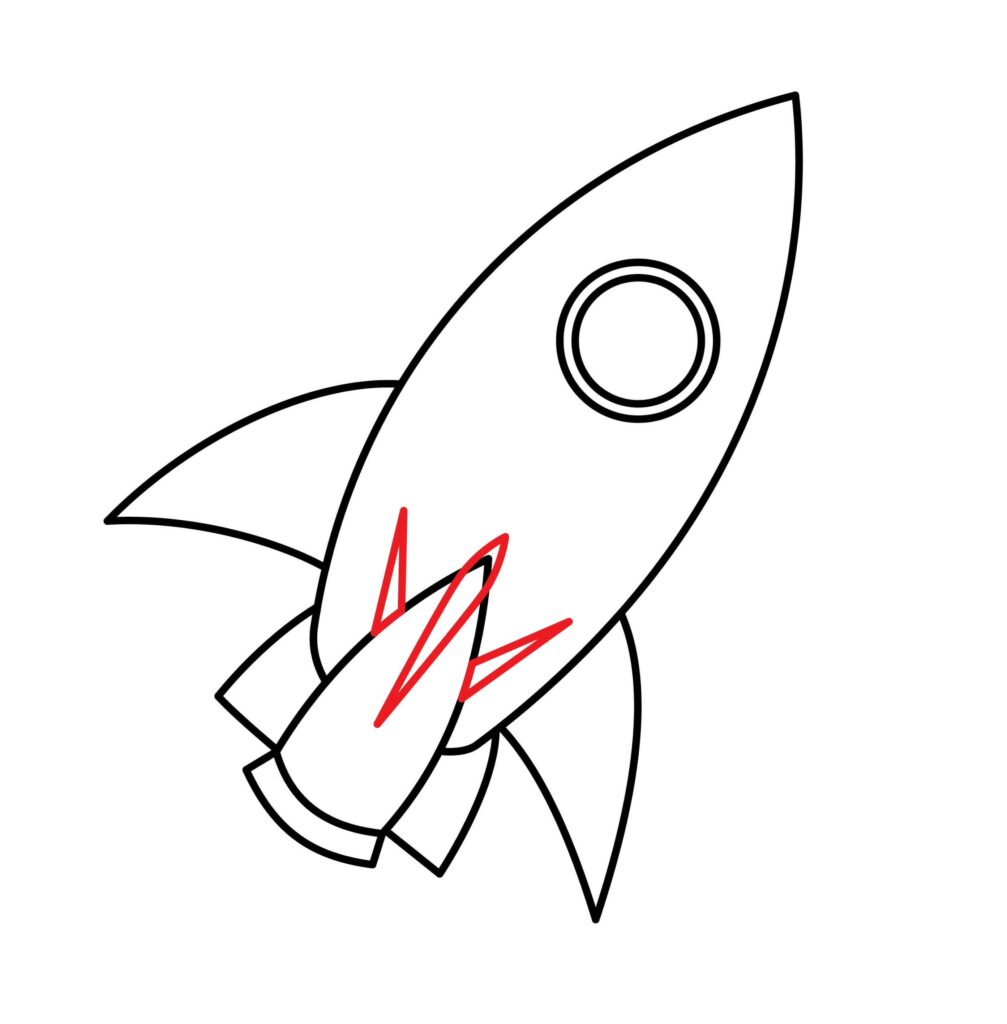
The details should be evenly spaced and not too close together to avoid cluttering your drawing.
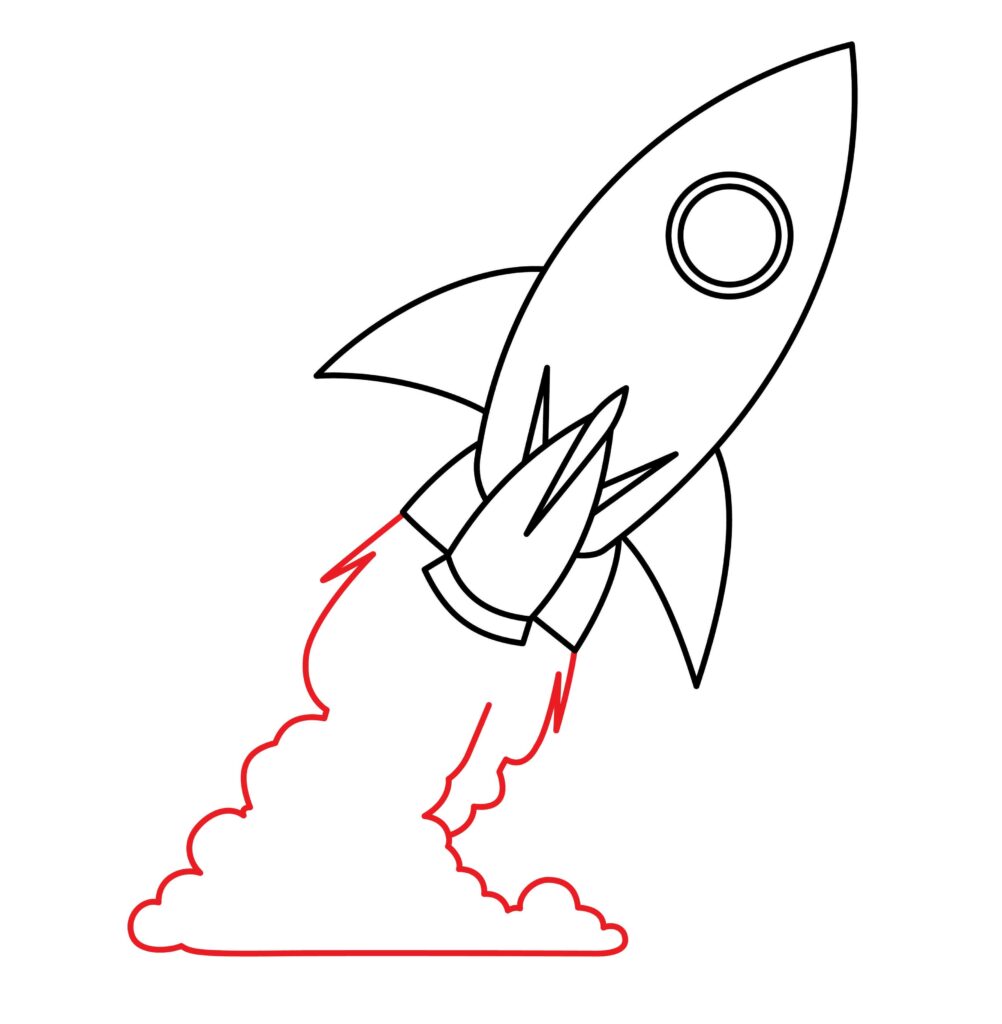
Step 7: Draw smoke
When the engine starts running, it creates so much smoke. We will also generate a lot of smoke around the machine to make our drawing more realistic.
To create a smoke effect behind your rocket engine, draw a series of small, curved lines or wisps of smoke extending from the nozzle area. These lines should be wavy and irregular, as smoke tends to billow and swirl.
Step 8: Draw Fire
Draw some flames from the bottom of the nozzle to make your rocket engine look like it’s firing. You can make wavy lines or zigzags to represent flames and hot gases.
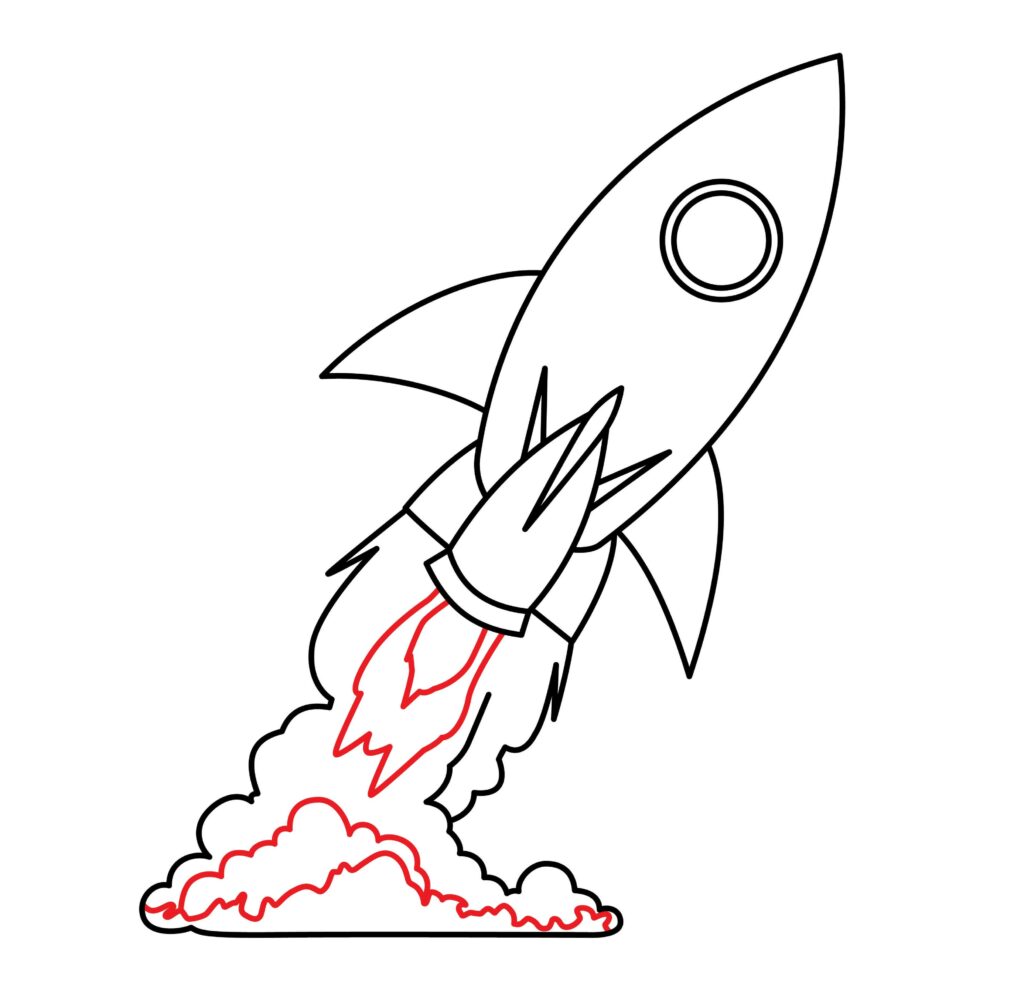
As shown in the image, we will create fire from the engine and spread it across.
Step 9: Your rocket is ready
Well, it is done! Your drawing is complete. This rocket is ready to take off and explore all kinds of planets and spaceships. As mentioned in the steps, we are so excited and hopeful that you created a spectacular image. You can make mistakes when drawing, so give it another look after completion. If it doesn’t look right, erase it and make it better; then, use an outliner to make it look 100 times better.
Wait to put your things away. The real magic is about to begin. We will make your drawing from looking like a drawing to a masterpiece picture.
Taking your Rocket drawing to the next level
Our brain has unlimited capabilities; there are billions of people, but all of them have different preferences, and they create other things because our brain is just as vast as the space you are about to explore. You can always add your ideas to the image to make it your personality.
This will make you more confident in your capabilities, and with so many ideas overflowing in your brain, you will be willing to create more unique stuff.
Grab your stationery and unfold your creativity.
Adding background to your drawing
Adding a background gives depth to your image. It makes it look more realistic and creates a long-lasting impression on the viewer. It also lets the viewer create a scene in his brain of the image. In a work of art, the background is the area that supports and accentuates the primary subject matter. It encompasses the piece’s elements and can be empty negative space or real things and people.
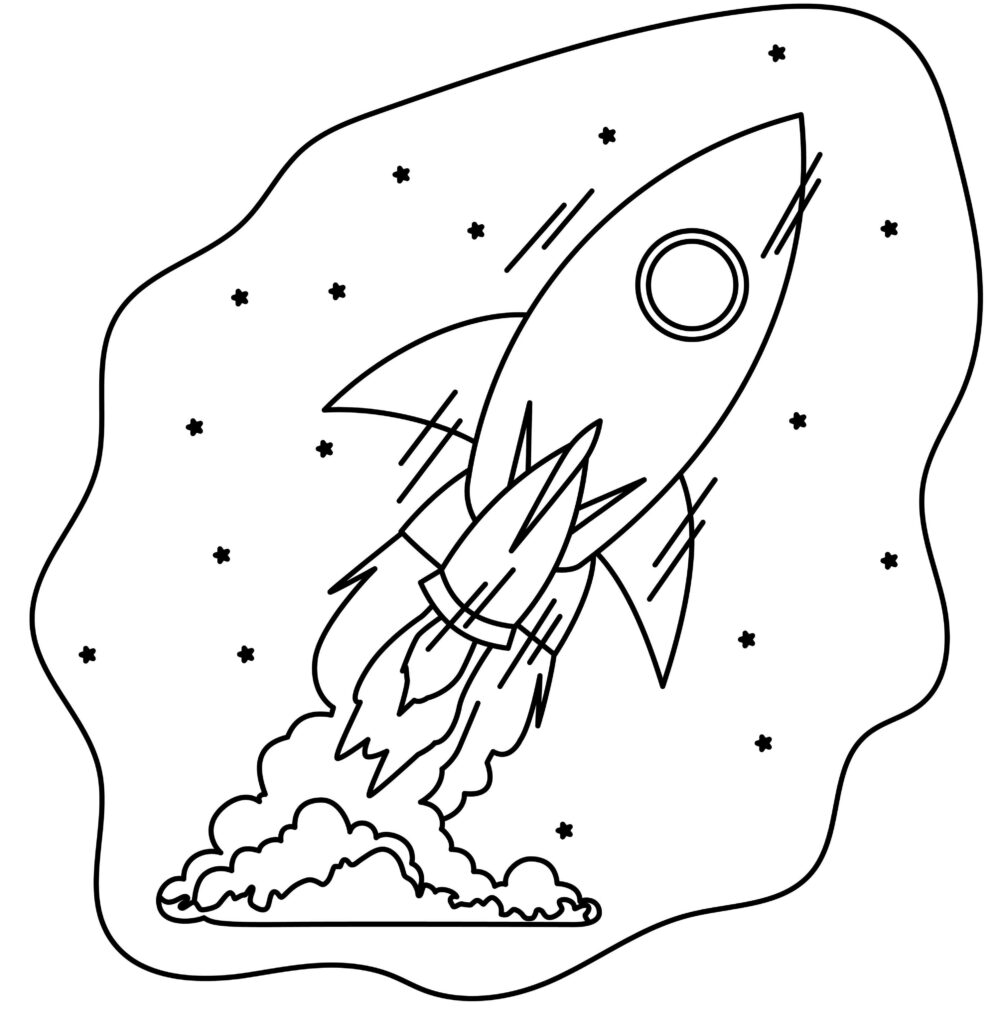
You can add planets, asteroid stars, and many other things to complete the picture, as the choices are limitless.
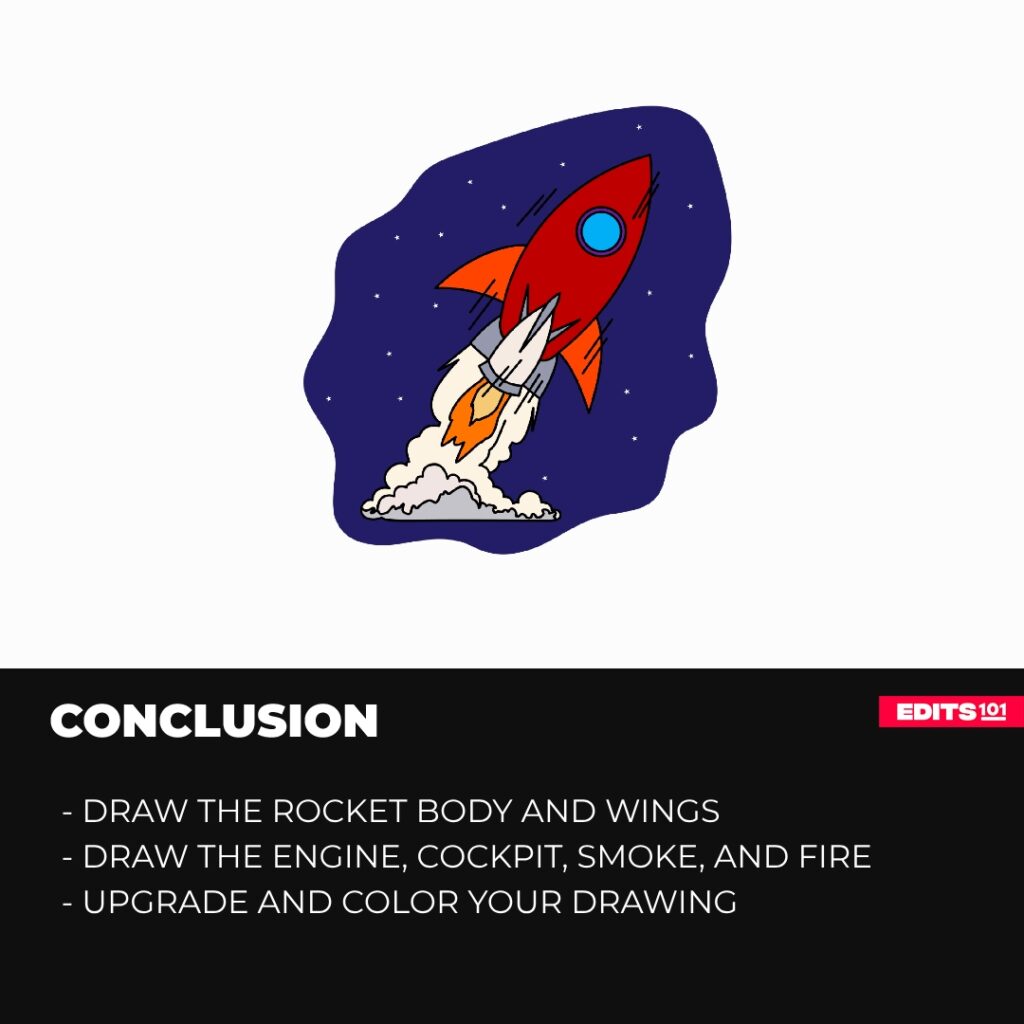
Adding color to your drawing
Your image looks dull; to give it life, we will add colors as we find nature attractive because it has so many beautiful colors that attract the human eye. The mood of a piece of art can be affected by different colors. Mood is our feeling when we quickly look at a work of art. To create the emotions we want in our artwork, we can use warm or cold colors to set the mood. Art loses a lot of its meaning when it isn’t in bloom. Your image will go from flat traces to vivid scenery. Always use relevant colors to make it look more realistic, but you can always use the color of your choice for the things that allow that, like the rocket.
We will add some colors to the drawing. The space is pure black with shining bright stars and golden burning sun. Make sure to use various colors in your picture to make it so much better to look at.

Add colors of your choice to the rocket and be realistic with the background.
P.S. Bonus Tips
Our drawing is completed, and we’re sure you enjoyed it as much as we did. As mentioned earlier, there’s no limit to one’s creativity. The drawing can be upgraded in any way. We added background and colors, but there’s more you can do.
You can create objects and flags on the rocket and many more things that show your personality. These are very few ideas, but as we know, we can do anything, so don’t limit yourself to ideas.
Conclusion
Our rocket is all ready now. It was a fun and easy process. We’re sure you followed each step without skipping and made a fantastic drawing. We started by making the rocket body, then the wings, then its engine, then the cockpit, then the data engine details, and then finished our rocket by drawing the smoke and fire effect.
Remember that drawing is a way of showing your creativity and thoughtfulness, and the more you draw, the better you will get, and more ideas will start flowing through your brain. Make sure to remember them, as they will help you a lot to make the drawing uniquely yours. If you don’t like the outcome, you can always do it again.
Thanks for reading & feel free to check out more of our articles!
Author Rating
Overall Rating
Summary
This guide explains how to draw a rocket.