How To Draw An ROV | A Comprehensive Guide
Today, we will draw an ROV and learn a few things about it.
Remotely operated underwater vehicles, or ROVs, are underwater drones and robots. ROVs can explore the underwater environment while the operator or pilot is comfortably on land. Since SCUBA divers seldom reach deeper than 100 meters and human-carrying submarines are expensive and uncommon, humanity’s capacity to explore and work in the waters is constrained without ROVs. The Poodle, created in 1953 by French inventor and photographer Dimitri Rebikoff, was the first ROV ever manufactured. His dive scooter was modified into The Poodle, an unmanned version with a tether and surface controls.
What you will need
- A pencil
- An eraser
- A sheet of paper
- Coloring kit
- Ruler
- 30 minutes
How To Draw an ROV
Are you guys ready for an amazing drawing experience while learning new things? All you have to do is follow each step carefully. By doing that, you will have a perfect drawing.
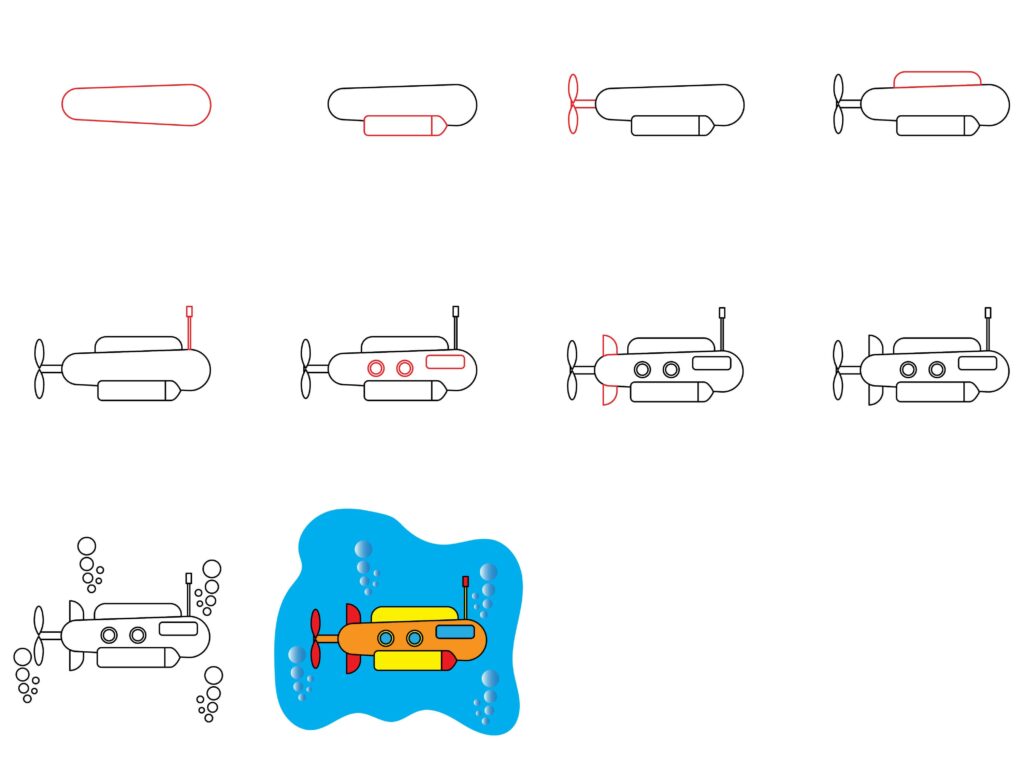
The following steps will show you how to do it. Make sure to follow each step.
Step1: Draw the main body
We will start by drawing the main body of the ROV that will act as a base for other structures. To make the base, all you have to do is to draw an oval. To make an oval, draw two parallel horizontal lines in the middle of the page. Then, these parallel lines with curved lines. We will widen one end of the oval as we draw the ROV’s main body.
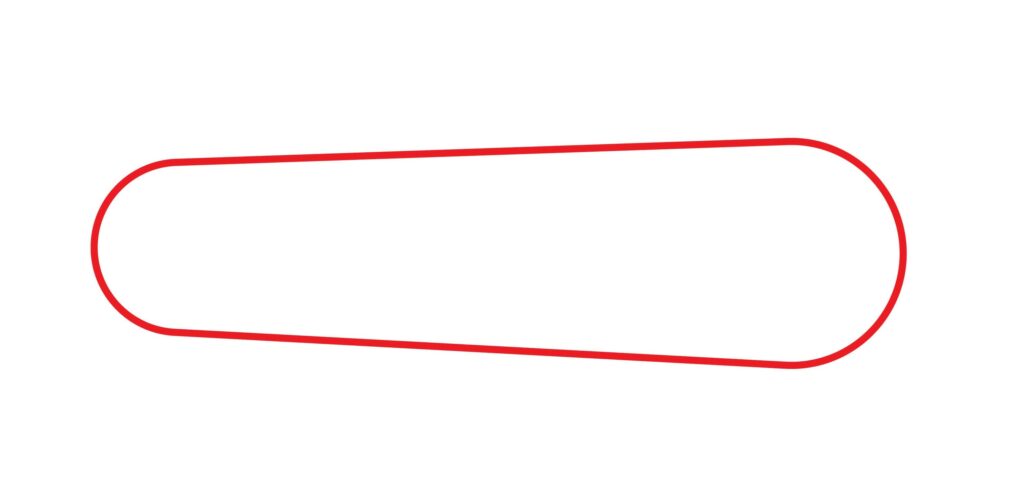
In the image given, we have widened it from the right side, and this part will act as the front of the ROV.
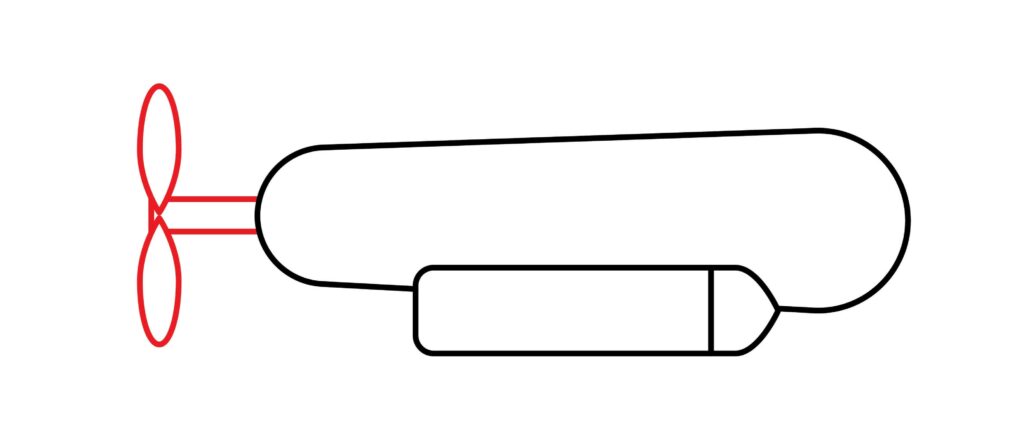
Step 2: Draw the side cabin
Its side cabin is enclosed on a remotely operated vehicle (ROV) main body or frame. Depending on the design and purpose of the ROV, this cabin has a variety of uses, including Equipment Storage, Payload Deployment, Navigation and Control Systems, Ballast and Buoyancy Systems, and Environmental Protection. So, we must take advantage of a very important component of ROV.
Draw a rectangle beside the main body baseline to make the side chamber. To draw the rectangle, make two horizontal parallel lines and join these lines with vertical parallel lines. On the right of this rectangle, draw a tomb-like shape.

Keep going! You are doing great.
Step 3: Draw the back fan
A fan at the rear part of the ROV propels it into the water. To make the back fan, draw a rectangle emerging from the back of the main body. This rectangle will be drawn in a horizontal direction. Now, draw two adjacent vertical ovals with narrow ends. Instructions to draw an oval and a rectangle are given in the above steps.
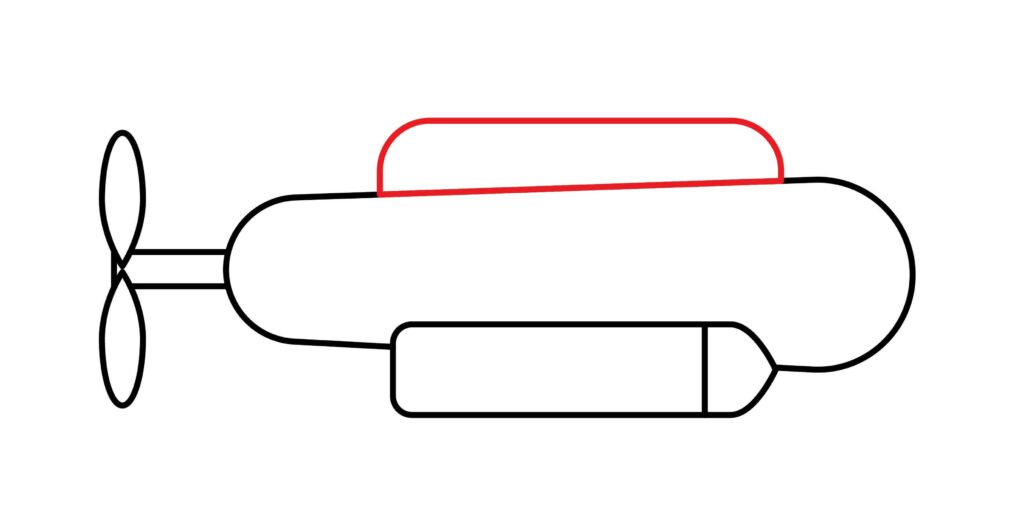
Step 4: Draw the roof
In this step, we will draw the roof of our ROV. To make the roof, draw a rectangle on the top of the main body of the ROV. This rectangle will share a common boundary with the main body at its base. Also, the vertex of this rectangle will be curved.
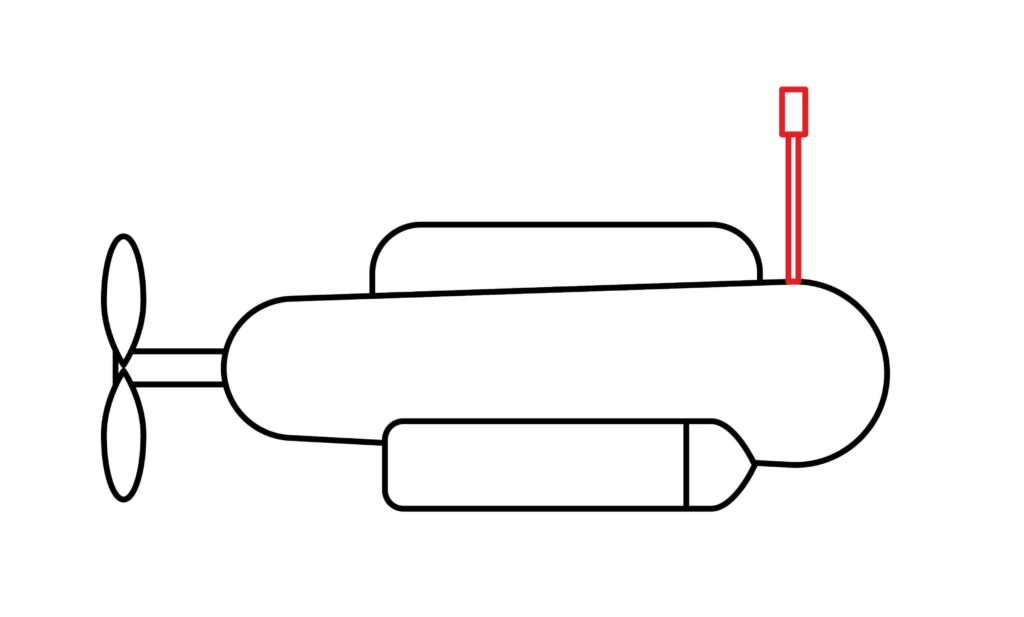
Step 5: Draw the remote antenna
The remote antenna is extremely helpful in difficult tracking situations where the antenna must be submerged, such as in rivers and marshes. Extend two vertical lines from the front top of the main body to make the remote antenna and place a small horizontal rectangle over the top of these lines.
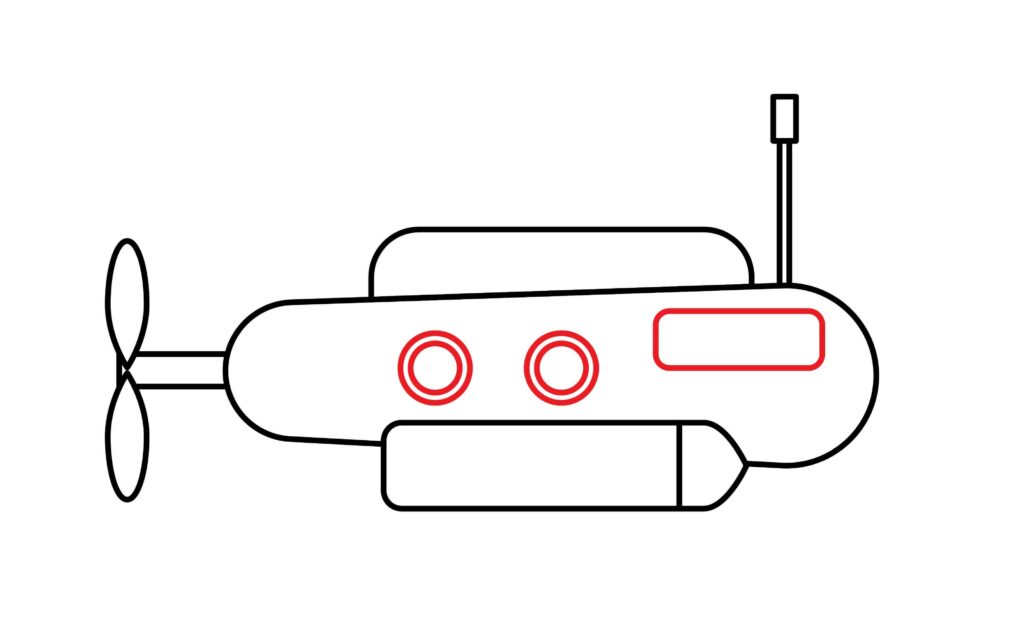
Step 6: Draw the window and front-looking window
The windows of ROV are made of very strong glass material so that it won’t break the water pressure. Draw two circles on the main body to make the windows. To get perfect circles, you can use a bottle cap or compass. A rounded corner horizontal rectangle is used to make the front-looking window on the front part of the ROV.
One more step, and we will be done.
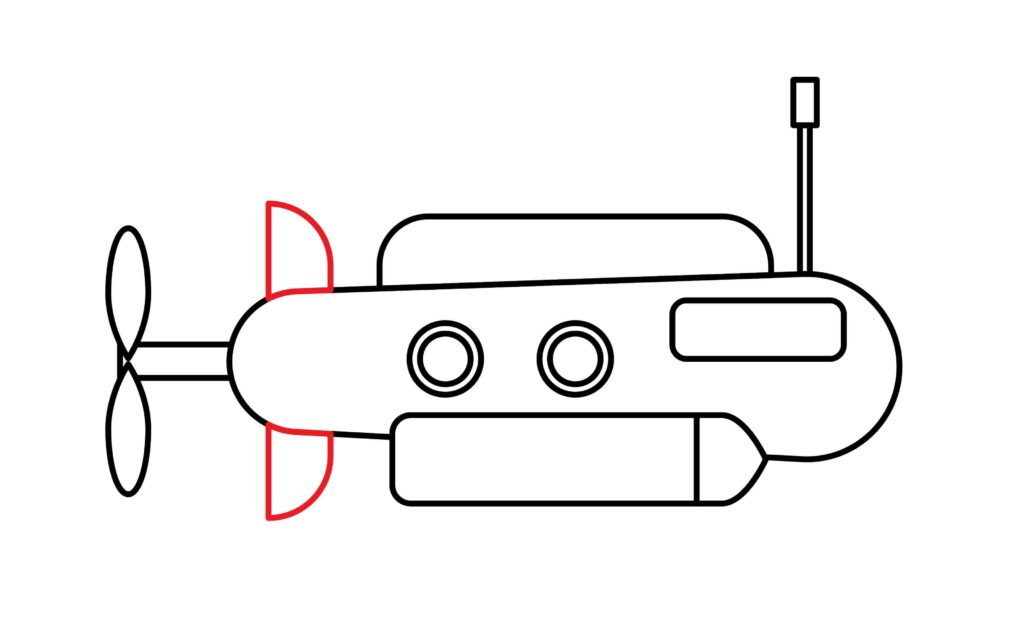
Step 7: Draw the back side wings
Back-side wings are also known as thrusters. For ROVs, thrusters are the main source of propulsion. They are fixed to the car and give it the propulsion to travel in all directions (forward, backward, up, down, and lateral). The ROV’s sides, front, and back are all possible sites for thrusters. To make these wings, we will draw a triangle on the top of the main body at the rear side and curve the hypotenuse of this triangle. Repeat this same procedure for the wing at the bottom of the body.
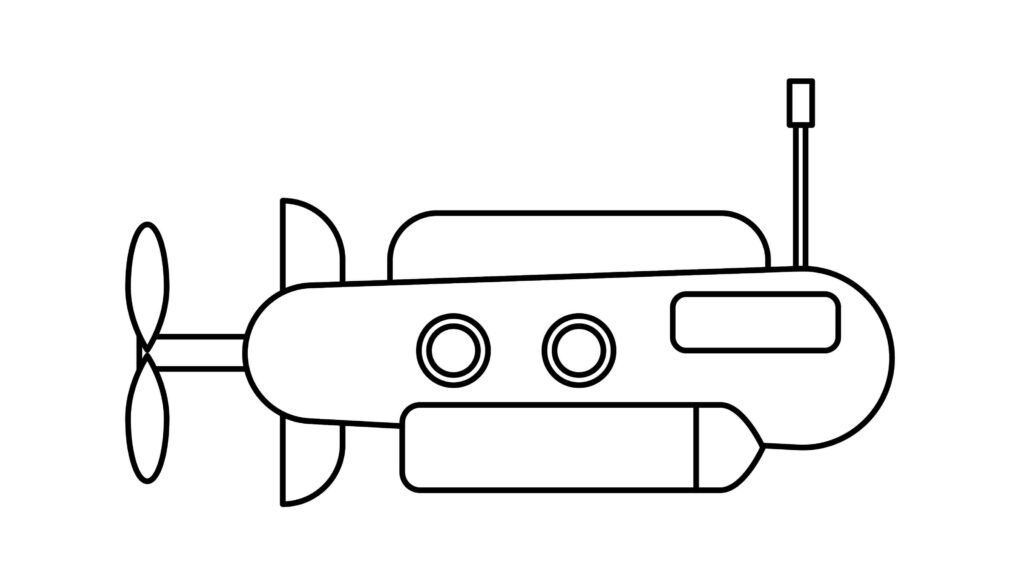
Step 8: Your ROV is ready
Your illustration is completed. Praise yourself for creating a fantastic drawing. As the instructions state, we are extremely happy and optimistic that you produced an outstanding image. Making mistakes when drawing is possible, so recheck it when you’re done. If it doesn’t look correct, go back and fix it. Then, use an outliner to improve the appearance.
Wait before storing your belongings. The true magic is just getting started. We’ll transform your drawing from a crude sketch into a beautiful painting.
Taking your ROV drawing to the next level
To improve your drawing, you must expand your skills, try new methods, and experiment with various styles. Remember that growing as an artist is a process rather than an end. Be gentle to yourself, keep asking questions, and keep challenging yourself. Enjoy the process of creating art and using it to express yourself. You may always add your ideas to an image to make it more unique. Your increased willingness to generate more creative work will also increase self-confidence and thinking. The steps that follow involve adding color and a background to our drawing.
Adding background to your drawing
The composition of the drawing can be balanced with a well-designed background. It can serve as a point of reference for the spectator and foster harmony between the subject and its surroundings. Background information is essential to a good narrative. They can include further details about the story, including the day of the week, the time of year, or a specific location. It may enable the audience to receive a more thorough report. A complete and precise backdrop is necessary for realistic or representational art to convey the illusion of reality successfully. It aids in placing the subject in a plausible setting.
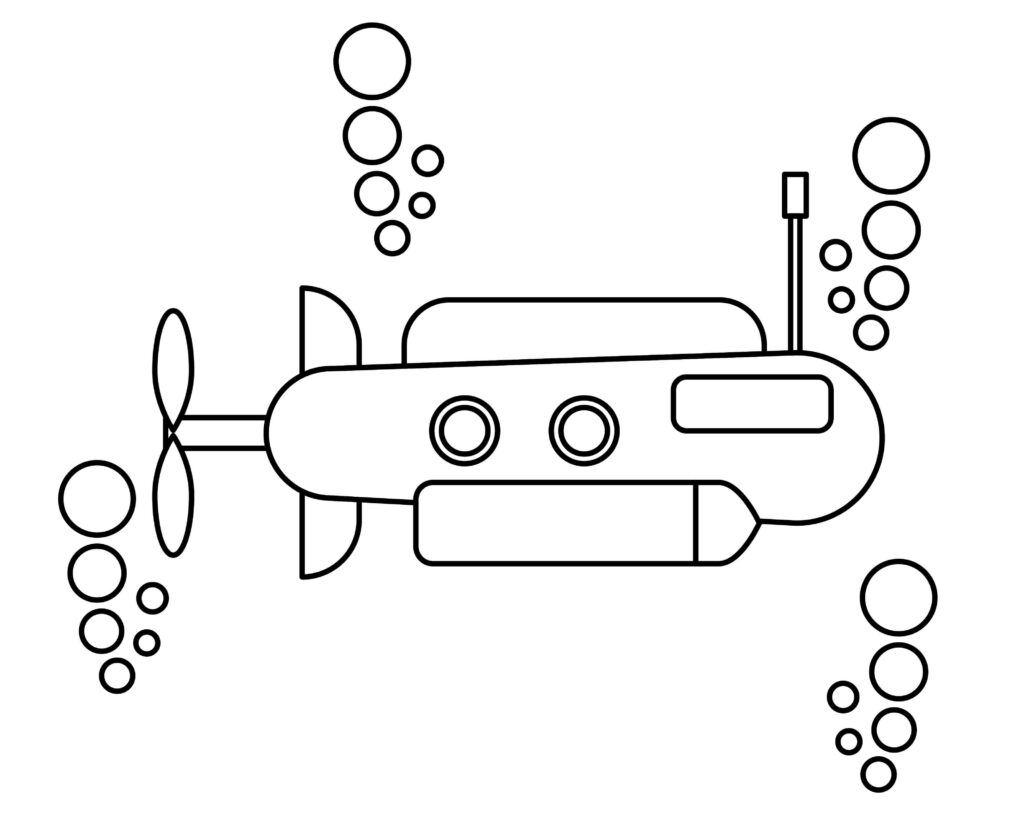
You can draw your ROV underwater. Make some pretty bubbles around the ROV. Bubbles can be made by simply drawing small circles. You can also draw some fish swimming around the ROV.
Adding colors to your drawing
Now is the time for you to express your creative side. Utilize your artistic talents to the fullest when coloring your drawing. Including color in your picture will make it more vibrant and alive. With color, the image seems full of life and exciting. We need to color it so it looks lively and new.
You should use any color you want for your ROV. You can color it metallic colors as it is made of metal. You can use blue for the windows and light blue or any shade of blue for the water. You can use different colors for the bubbles, but remember to outline the bubbles with a white color or pencil. It will give a 3D effect to the bubbles.
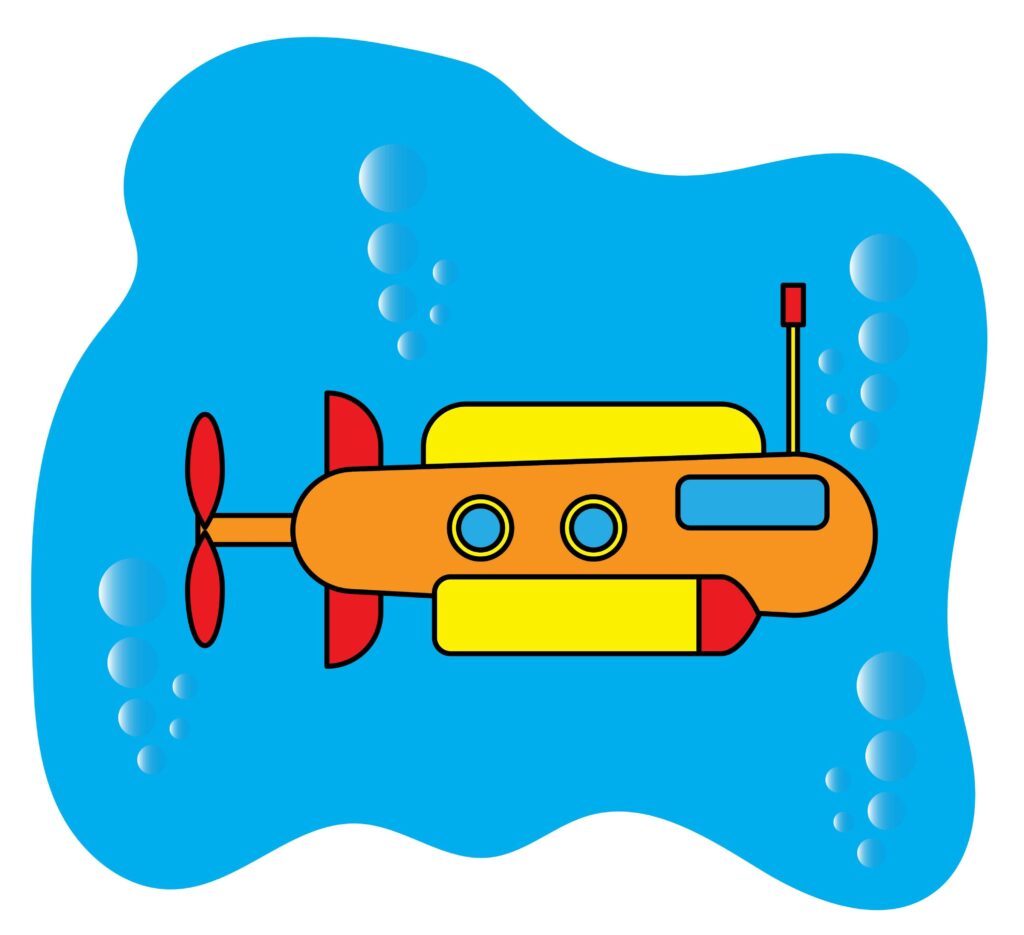
By merging and mixing, you can use different shades of colors to give an artistic effect to your drawing.
P.S. Bonus Tips
We’ve finished our drawing, and we hope you liked it as much as we did. There are no restrictions on one’s imagination, as was previously said. Any improvement can be made to the drawing. Although we provided a background and some colors, there is still more you can do.
You can make designs or patterns on the main body of an ROV; it can be a pattern you have seen on a submarine or would want to have on your own. It is better to draw it underwater. You make the plants present in the ocean around the drawing of the ROV. These are very few ideas, but as we know, we can do anything, so don’t limit yourself to ideas.
Conclusion
Our drawing is all ready now. It was a fun and easy process. We’re sure you followed each step without skipping and made a fantastic drawing. This guide explained each step most easily. We made the main body, side cabin, back wing, roof, remote antenna, window and front looking window, and backside wings.
The more you sketch, the better you’ll get, and the more ideas will come to you. Remember that sketching is a smart and creative approach to expressing yourself. Keeping them in mind will be quite beneficial in ensuring that the artwork is yours. You should always keep going, so if you’re unhappy with the outcomes, you can try again.

Thanks for reading & feel free to check out more of our articles!
Author Rating
Overall Rating
Summary
This guide explains how to draw an rov underwater. You will also learn a few interesting facts about this vehicle.