How to Draw an Ice Cream Truck | An Easy Drawing Tutorial
Ice Cream trucks are commercial vehicles that are used to sell ice cream. They can be actively seen in the summer seasons. Ice cream trucks are catchy and pleasing to look at. They’re a treasure for the kids. Kids love to roam around it when it’s selling ice cream.
The structure of an ice cream truck seems complicated. It has lighting, banners, ice cream machines, and many more items that we don’t see in an ordinary vehicle.
Having an ice cream truck on paper is fascinating for the kids. But often, they’re confused about how to draw it or where to begin. This guide will explore the step-by-step process of making an ice cream truck.
What you will need
- A pencil
- An eraser
- A sheet of paper
- Coloring kit
- Ruler
- 30 minutes
How to Draw an Ice Cream Truck
Drawing anything without following a plan will always end up in a mess. To have a satisfactory piece of art, we have created this guide. Without any worries, just follow this guide, and you will have amazing art within a few minutes.
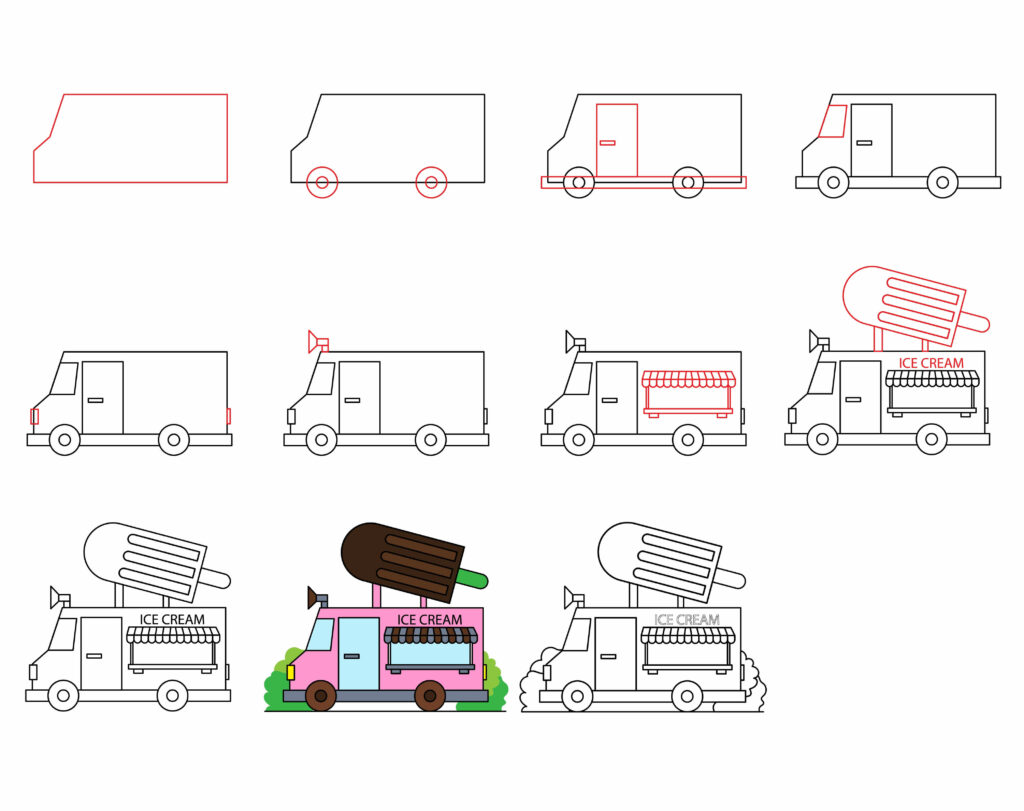
A truck has a large body and is its main part. We’ll first draw the main body and later focus on other components. It’s going to be an exciting process. Grab your stationary and let the magic begin.
Step 1: Draw the Truck Body
The truck body is the main part of the truck. It encloses all other components. It is a big structure and determines the size of the truck. For that reason, we have to do it carefully.
We’ll draw two horizontal parallel lines. Our truck body should be big, so we’ll keep a considerable distance between the lines. We’ll draw a straight line on the right side to join these two parallel lines. Remember, our upper line should be a little smaller. We’ll draw a small vertical line and two diagonal lines on the left side, as displayed in the image below. Our truck body is ready.

Step 2: Draw the Wheels
How fun it would be if our ice cream truck could fly. But alas, no such trucks are available. So we have to add the wheels to it to make it a road-driven vehicle.
Wheels support the truck body. They must be smooth enough for a comfortable journey. To draw the wheels, draw two big circles under the body of the truck. The position of the wheels is vital. Maintain a gap between the wheels.
We’ll add another circle inside each wheel to make the wheels stronger. It’ll provide the strength to bear more weight.
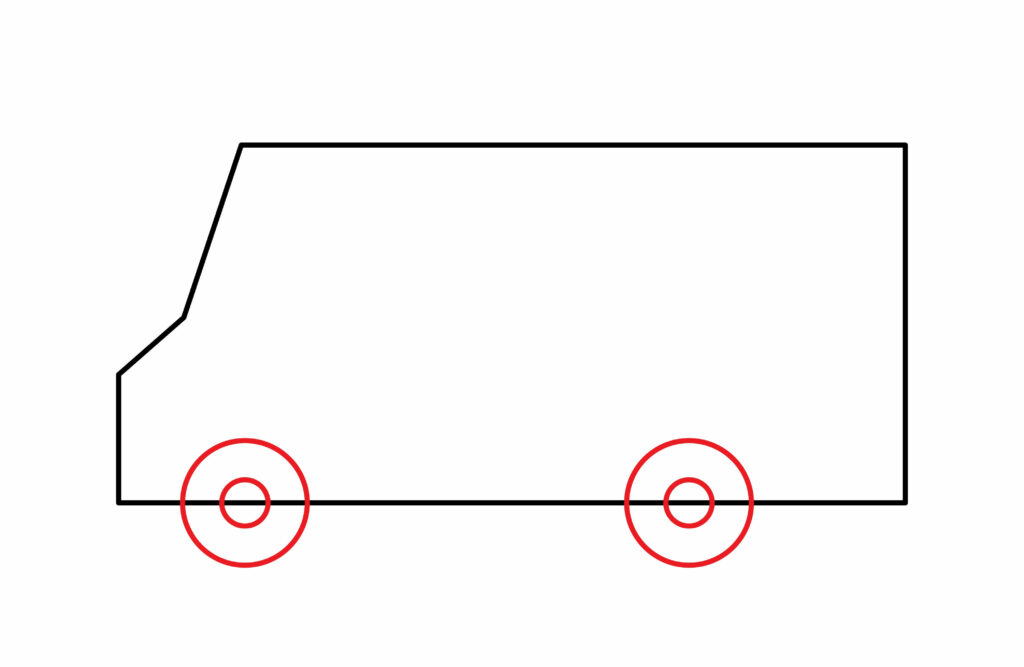
Remember, the circles must be smooth. We can use the freehand technique, or we can use any round lid for this purpose.
Sep 3: Draw the door and bumper
Without doors, we won’t have any privacy or security for our ice cream truck. We don’t want anyone to just barge in our truck and take the ice cream. For that reason, a door is a must.
To draw the door, we’ll make a large vertical rectangle on the body of the truck. This door should be present behind the front wheels. We’ll draw another rectangle in the middle left side of the door to make its knob.
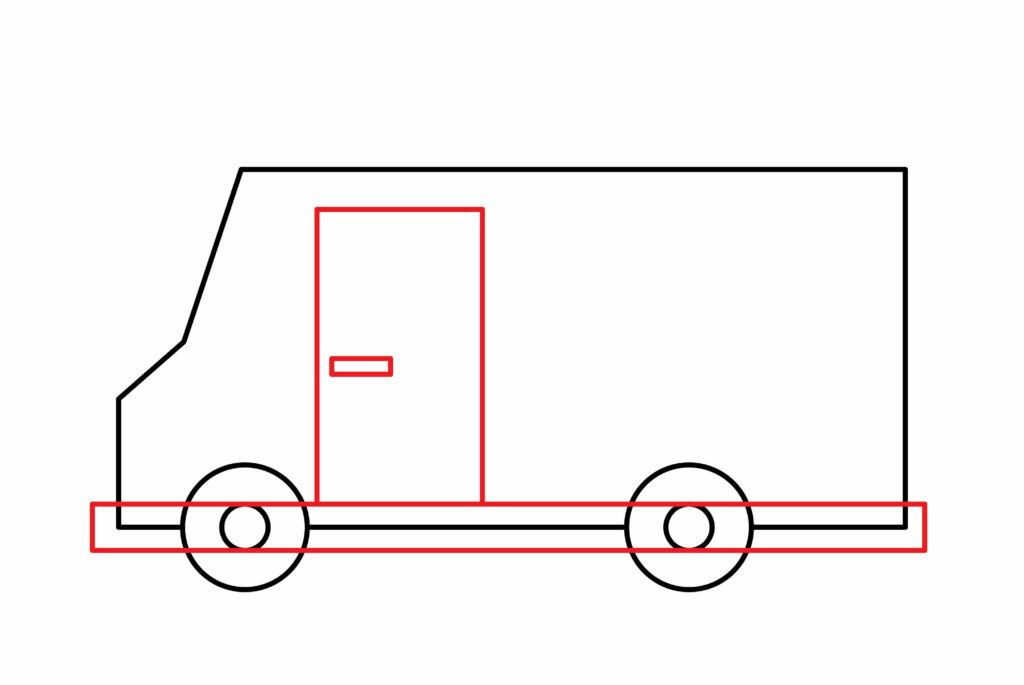
To make the bumper, we’ll draw a horizontal elongated rectangle at the base of the truck body. This rectangle should be outwards from the front and back sides of the truck. Erase the lines that overlap the wheels.
Step 4: Draw the front window
This window is more like a windshield. Without it, there would be a rush of air, and driving the truck would be difficult.
Draw a rectangle at the truck’s front side to draw this window. We will ensure that our window doesn’t come in contact with the door of our truck.

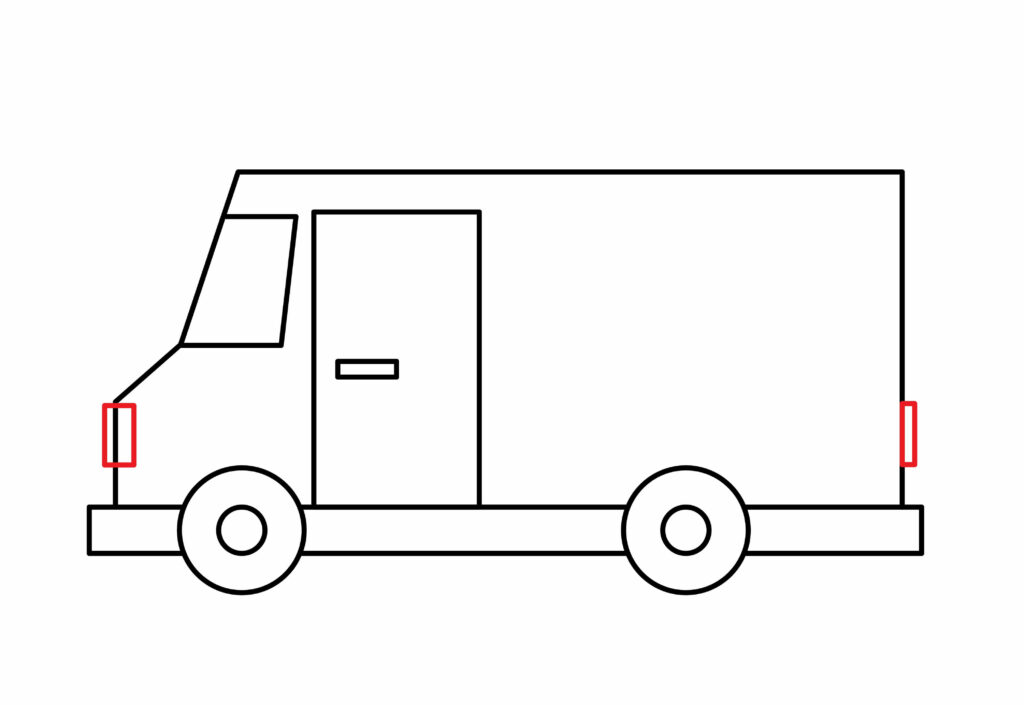
Step 5: Draw the lights
Some truck drivers operate their trucks at night. It should have all the features, including lightning, for smooth function.
We will draw small rectangles at the front and back of our truck body to make the lights. We will position the lights carefully. It must be near the bumper of the truck.
Step 6: Draw the announcing mic
How will the kids know if the ice cream truck has arrived in their area? The kids would feel sad if they missed the chance to have the ice cream.
To serve this purpose, all the trucks have an announcing mic. We will draw a small square at the top left side of our truck body to draw this announcing mic. We’ll make a horizontal rectangle on this square. Then, we’ll make a cone-shaped structure that will be attached to the rectangle.
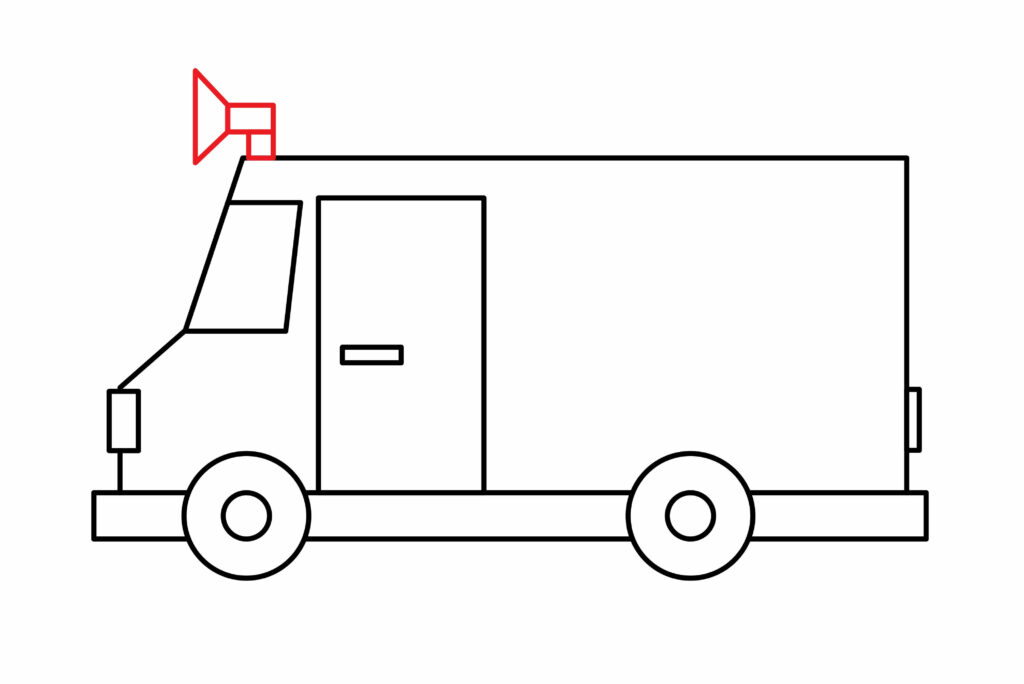
To make the cone-like structure, draw two straight lines moving away from each other and join them in a straight line. Our announcing mic is ready; no kid will be left behind.
Step 7: Draw the Serving Window
People don’t come out of the truck to serve the ice cream. Rather, it is served through a specific window. This specific window is termed the serving window.
We’ll draw a rectangle in the middle of the truck body to make this window. Erase the upper line of the rectangle and make tear-drop-like structures. Make two more small rectangles under the base of this rectangle to have a firm support.
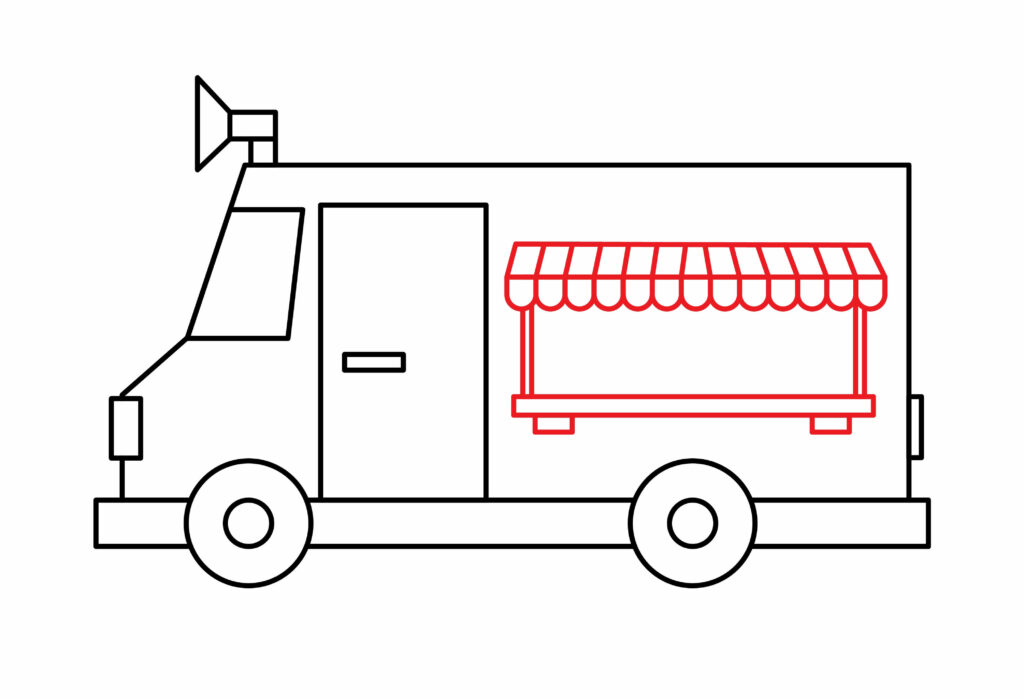
This is the area where the kids will be served. Make this area much more attractive for the customers. You can use your creativity to make it more decorative.
Step 8: Draw the ice cream logo
Our truck is incomplete without having an ice cream logo. Everyone must know the purpose of the truck just by looking at it.
You can make any type of logo for this truck. In our case, we will make a big ice cream bar on top of our truck body. We’ll make an umbrella-like structure supported by two rectangles at the base. It’ll be our logo.
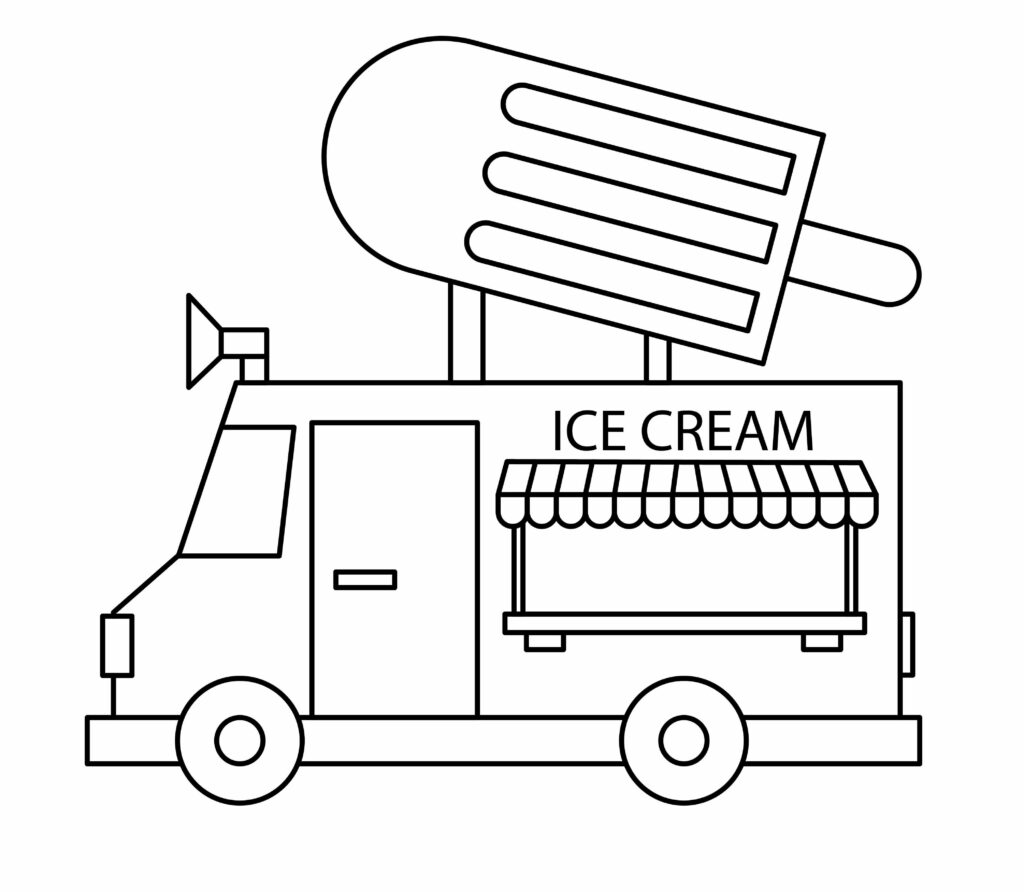
Above our serving window, we’ll also write “ice cream” to make it look more professional and catchy.
Step 9: The ice cream truck is completed
Congratulations, you did an amazing job. We’re certain that you followed our steps and made an amazing truck. We tried to explain each process most simply. If you don’t get your drawing right on the first try, try again without any frustration.

Make sure you follow each step. If you do so, we’re confident that your drawing would be great.
Taking your ice cream truck drawing to the next level
As ice cream has multiple colors, our truck must display colors too. Without colors, it seems dull. No customer would arrive at a truck that’s not appealing to them.
The same goes for drawing; without colors or a proper background, our drawing is too basic.
Adding colors and a background will give our drawing a professional look. Don’t worry; these are not giant steps. Rather, these are just two simple steps towards a better drawing. Let’s begin this.
Adding background to your drawing
We want to give our drawing a realistic look rather than make our truck look like it is floating in the air. You can imagine any place or background for your drawing.
We can usually see an ice cream truck in the parks. We’ll add bushes and trees as a background to our drawing. Adding such a background will increase the beauty of our drawing.
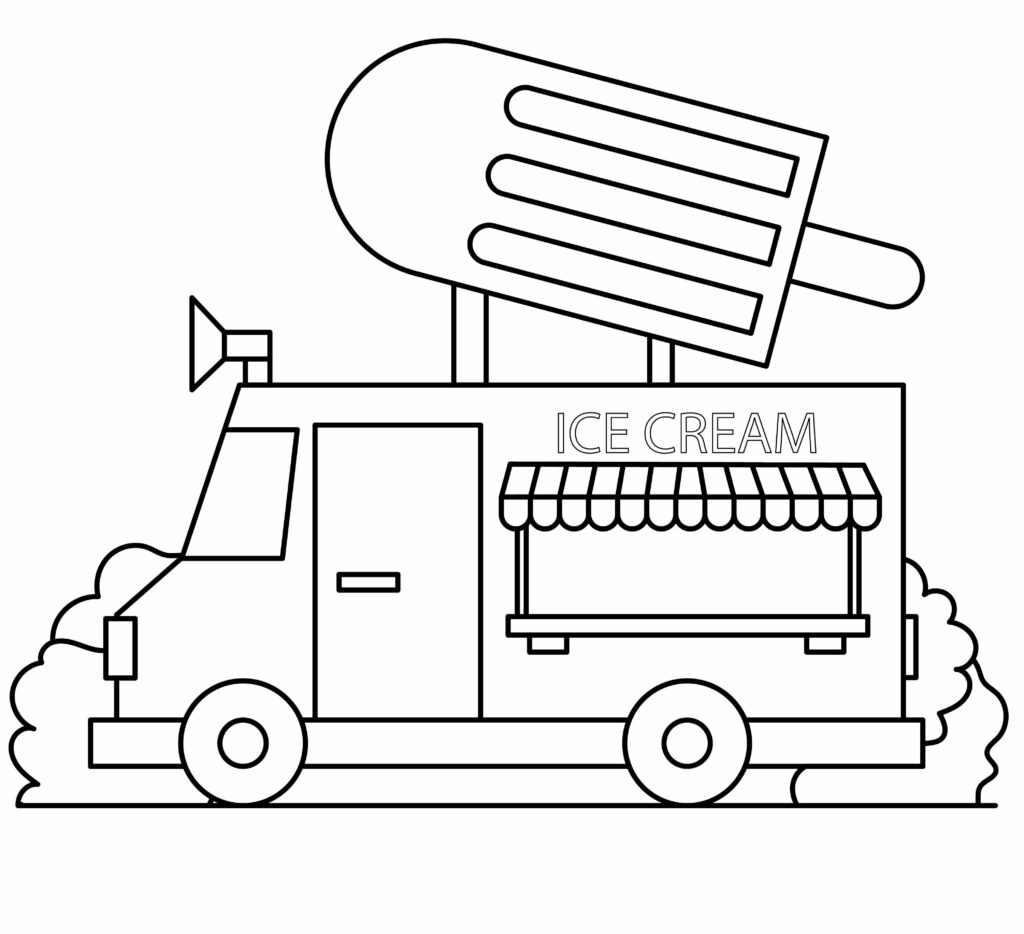
While making the background, make sure no line from the background overlaps our truck.
Adding colors to your drawing
This section demands your coloring skills. We have to make our truck as attractive as possible for our customers. We’ll add catchy colors to the serving window and the door. The wheels will be black or gray. We will add green color in the bushes and trees as nature demands it.
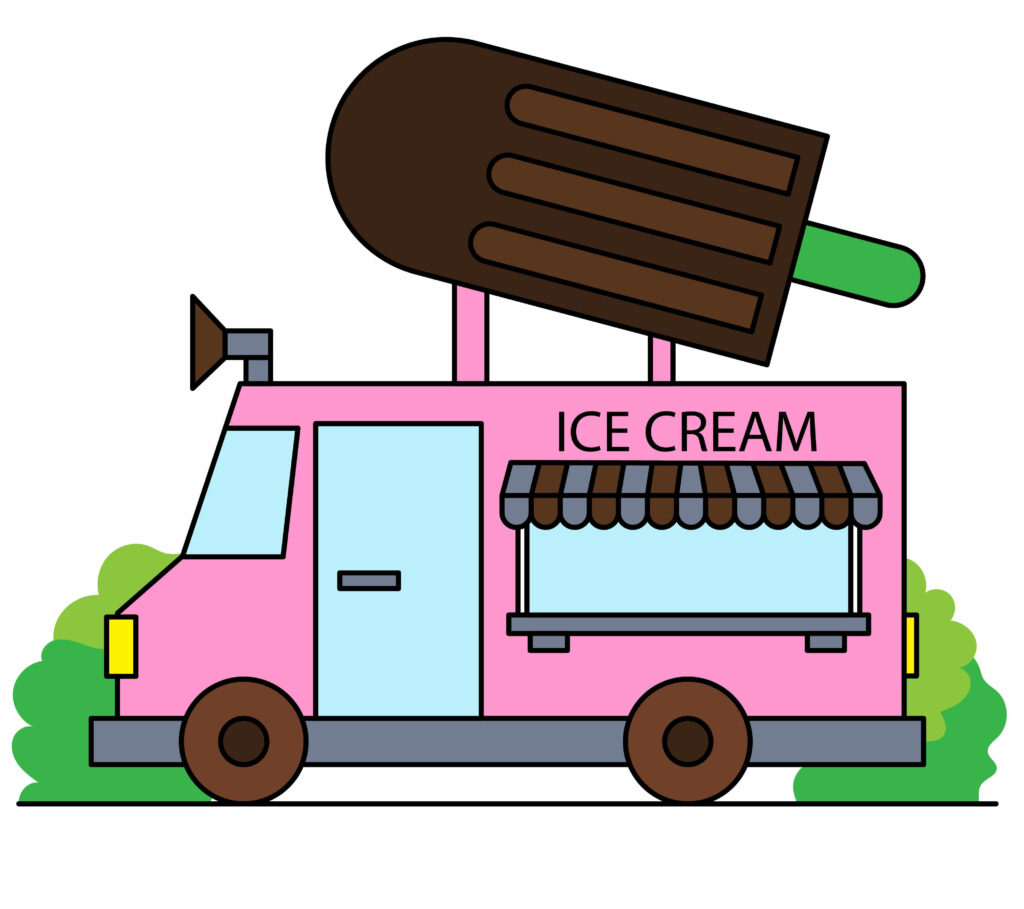
You can use crayons or poster colors to color your drawing. It’s up to your choice.
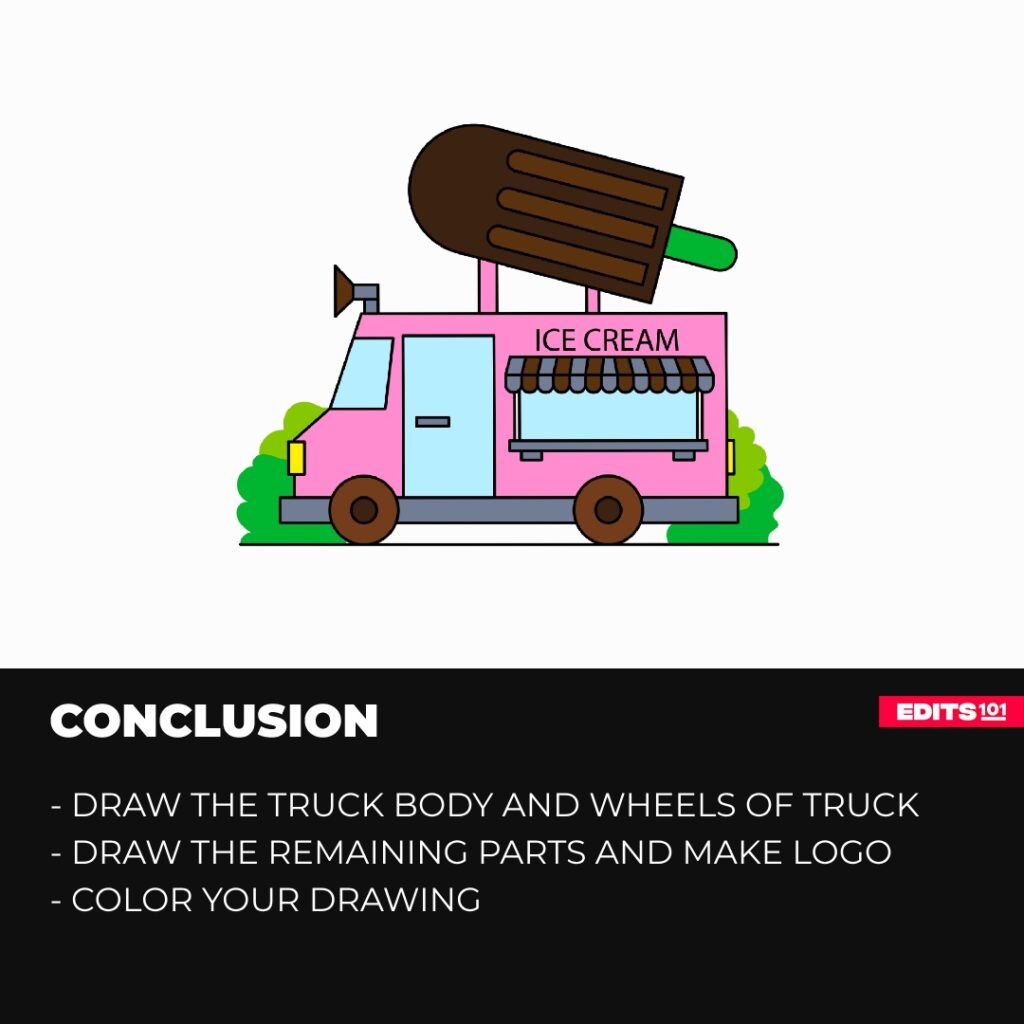
Conclusion
Drawing an ice cream truck is pretty easy. We started by making the body of the truck. Then we drew wheels and later installed the door and the bumper. We then added the window, the serving window, and other components.
If you follow all these steps, drawing an ice cream truck is nothing but a piece of cake. We want your drawing to be the best. That’s why we created this guide to aid you. This step-by-step guide is ideal for beginners.
To get exceptional at drawing, there’s only one way: practicing over and over again. One must take drawing as a fun hobby and shouldn’t get frustrated if drawing isn’t satisfactory for them. Just go for another try.
We hope that this guide has helped a lot in making your ice cream truck.
Thanks for reading & feel free to check out more of our articles!
Author Rating
Overall Rating
Summary
This guide explains how to draw an ice cream truck in a simple and effective way. You will learn a few interesting facts about this vehicle by reading this guide.