How to Draw a Karate Black Belt | in 5 Easy Steps
There are nine different solid color belts in the sport of Karate. Starting at white, as the color of the belt darkens, it represents a karate student’s progress in achievements, techniques, and perserverance.
The highest form of achievement for an aspiring karatist is a black belt. This signifies an advanced level of training, skill and discipline. There’s a common saying in the world of karate when discussing rank, “a black belt is merely a white belt who never quit.”
If you’re an aspiring martial artist, or perhaps you’re seeking a new challenge in drawing, then this is the perfect tutorial for you! Follow this guide and learn how to draw a realistic karate black belt in 5 easy steps.
| Steps | Complexity Level |
| The Knot | 3 |
| The Front Part | 2 |
| The Waist Section | 4 |
What You Will Need
- A4 sheet of paper
- Pencils (2b, 3b or 5b)
- Eraser
- Ruler (optional)
- Colored Pencils or Markers
- 25-30 minutes

How to Draw a Karate Black Belt
Grab all of your drawing tools and make sure you assess the outline below to prepare yourself for each step that lies ahead.
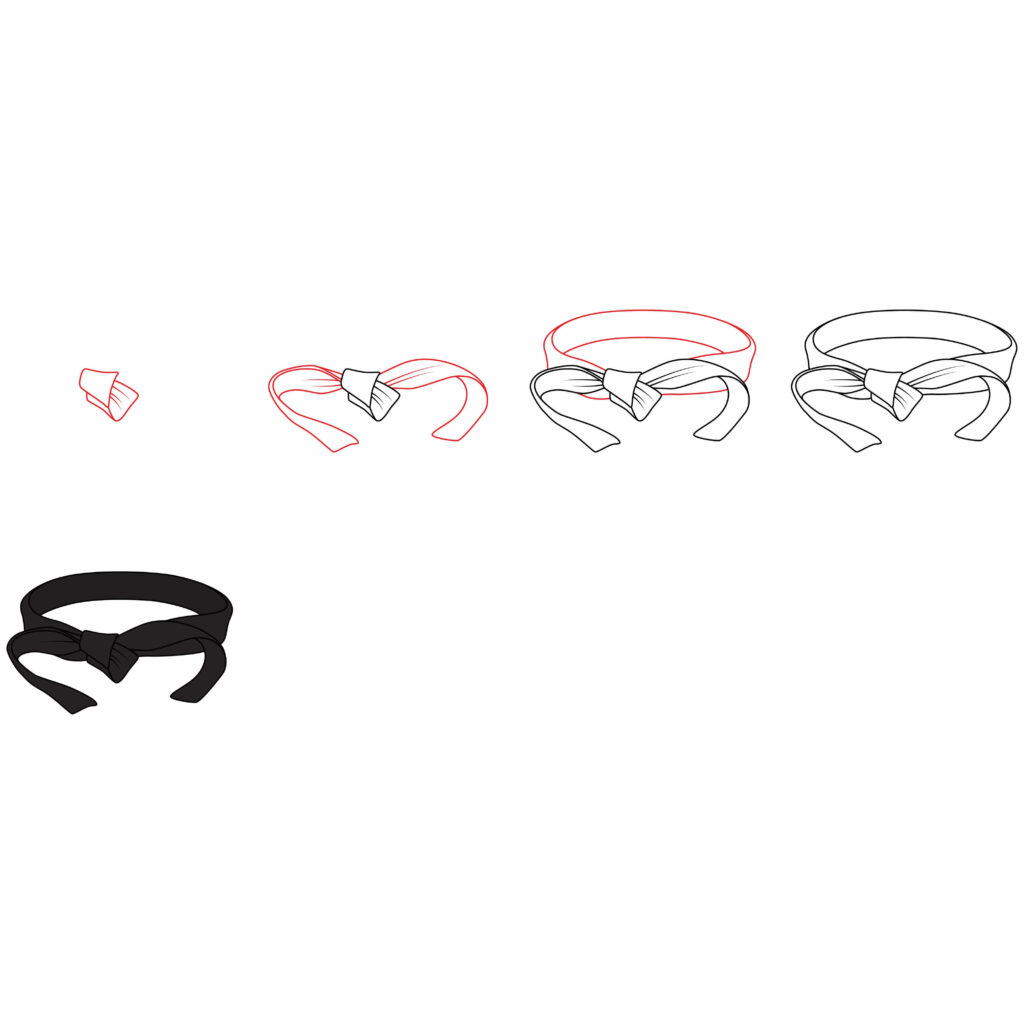
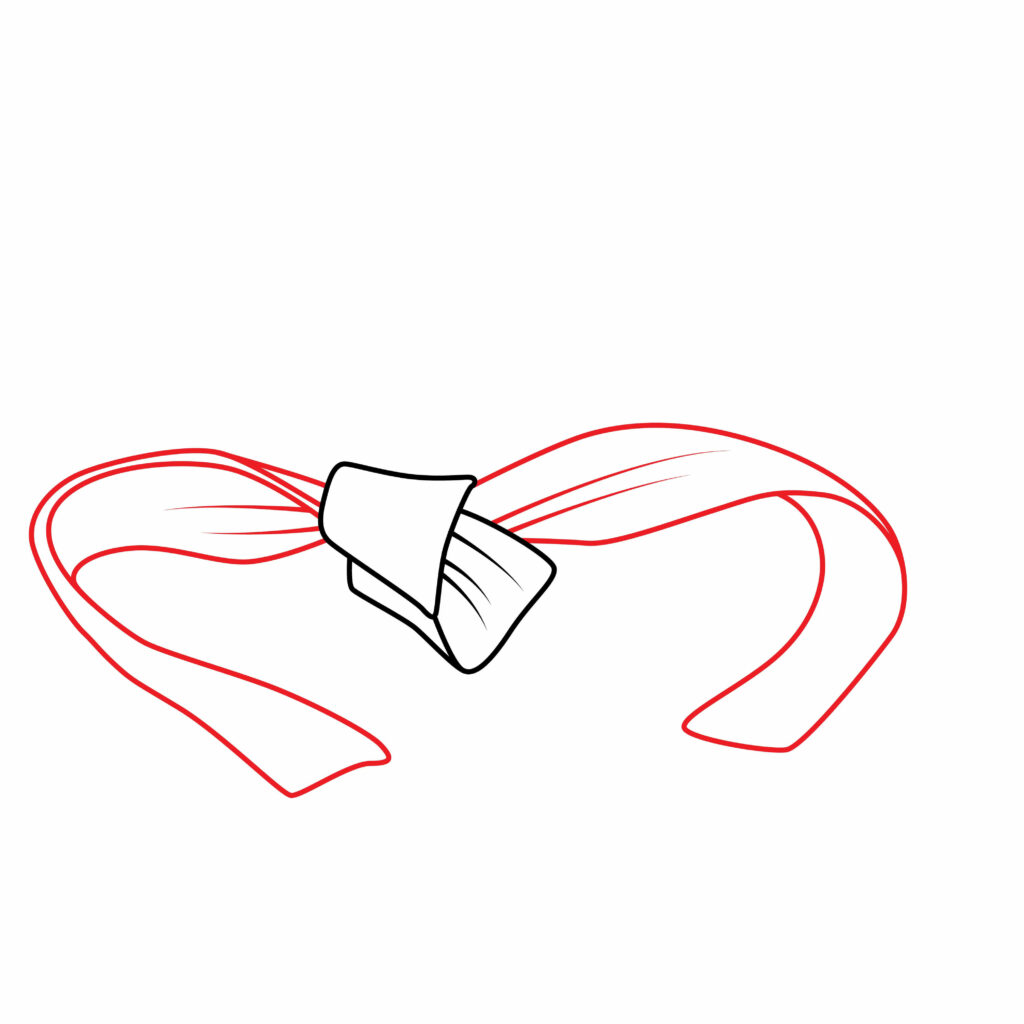
Step 1: Draw the Knot
Start by drawing the knot before adding anything else to your sketch. Place your paper in a preferred orientation and begin sketching in the center of your page.
Draw a slanted rectangle on one side, and then add a thinner slanted rectangle beneath. On the right side, draw a slanted square shape. Add a few downward strokes or slashes of your pencil to hint at the creases of the knot.
- Draw small slanted rectangle on the left side
- Add a thinner slanted rectangle below the first one
- Draw a slanted square shape on the side with lines inside to resemble creases

Step 2: Draw the Front Part
Pay close attention to the curved lines as you draw the front part of the belt. Start by drawing the fabric extending from the sides of the knot, curving the ends downward in a smooth motion.
Carefully attach the curved lines along the side to make the drawing appear realistic. Add a few strokes along the center of the belt for the creases in the fabric.
- Draw a curved rectangular shape extending from each side of the knot
- Curve the narrow ends of the rectangle downward
- Add carefully placed lines along the side to resemble the band-width
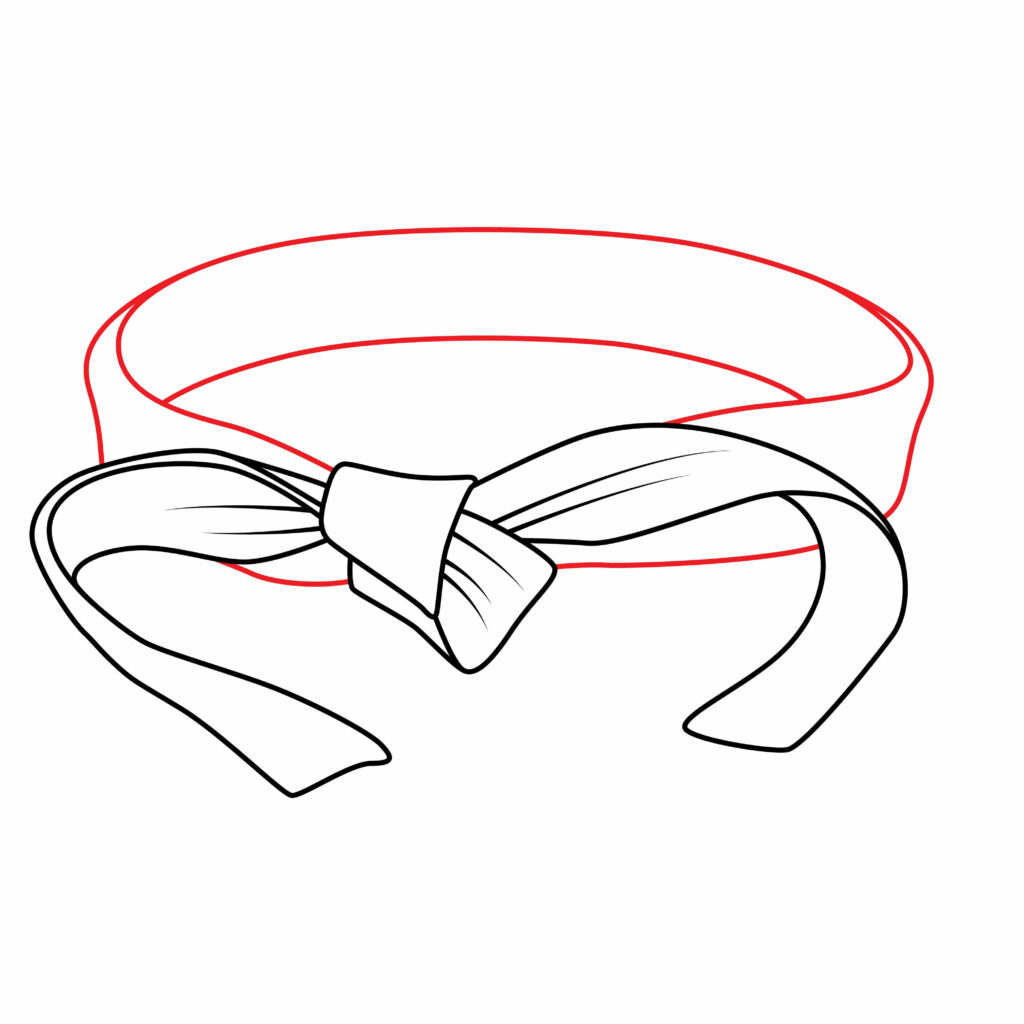
Step 3: Draw the Waist Area
Start by drawing the upper oval shape from the left side of the knot to the right side of the loose fabric. Make sure the oval is nice and wide. Draw a curved line on the inside of the oval, beneath the upper line to resemble band-width.
Once complete, add vertical lines on the sides to elongate the belt, and horizontal lines moving inward towards the belt’s center to piece everything together.
- First, draw a wide oval shape above the belt’s knot and loose fabric
- Draw a curved line inside the oval beneath the upper line
- Add vertical lines on the sides to elongate the belt
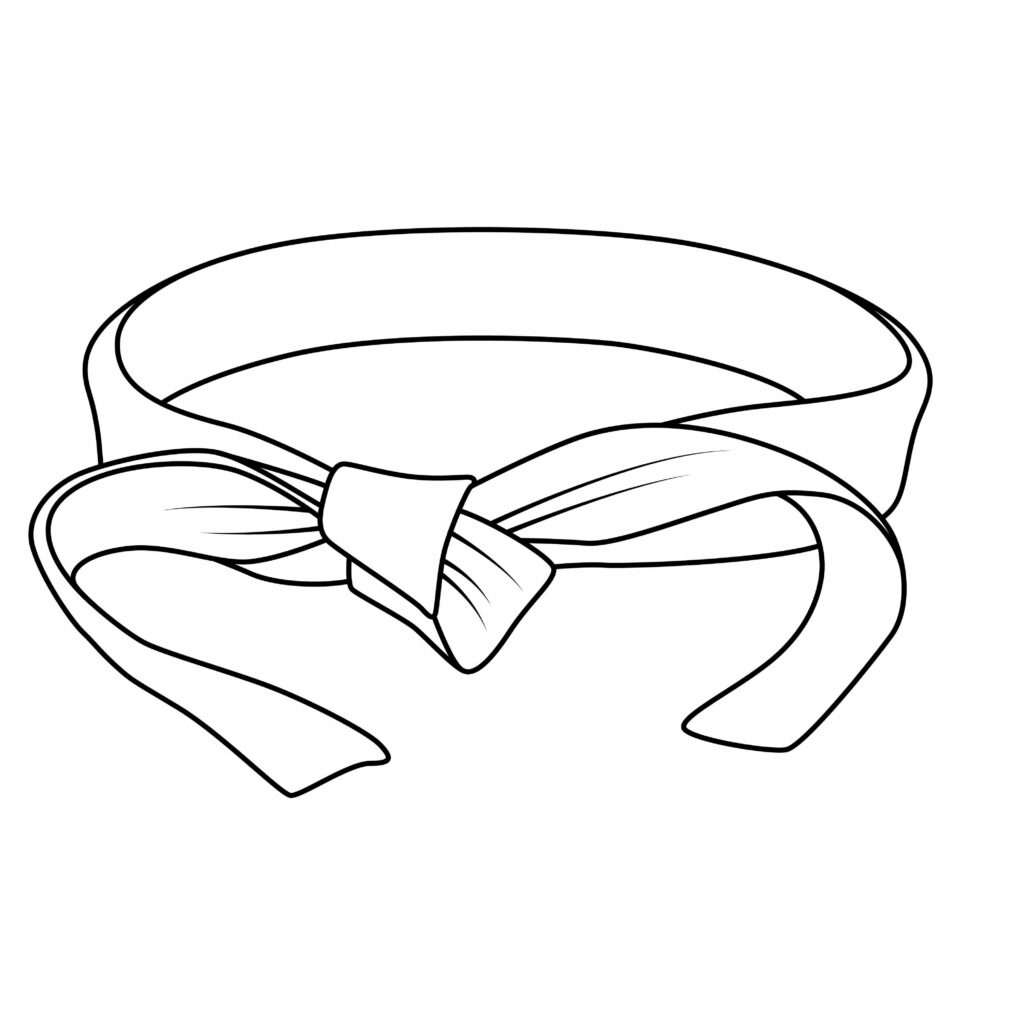
Congratulations! Your Karate Black Belt Drawing is Complete
Assess the outcome of your drawing as you give your drawing hand a well-deserved break. You’re welcome to use the image below for comparison and a guide for any necessary corrections. Once you are happy with the results, continue on with the rest of the tutorial.
Taking Your Drawing To The Next Level
Elevate your karate belt drawing by adding a background to create an holistic piece, and making use of color to boost your drawing’s visual appeal and authenticity.
step 4: adding a Background
So now that you have your karate belt set out before you, consider where you would like to place your drawing. Determine the theme, location, and range of motion of your belt.
Perhaps it’s being worn by a karatist, dressed in a gi while standing on the floor of a dojo? If you’re thinking about a more unorthodox approach, that is also great. Maybe your belt is lying outside, on a gym mat, over a shelf, against a wall… The possibilities are endless.
We are sure that whatever background you decide to use will highlight and compliment the nature of your drawing.
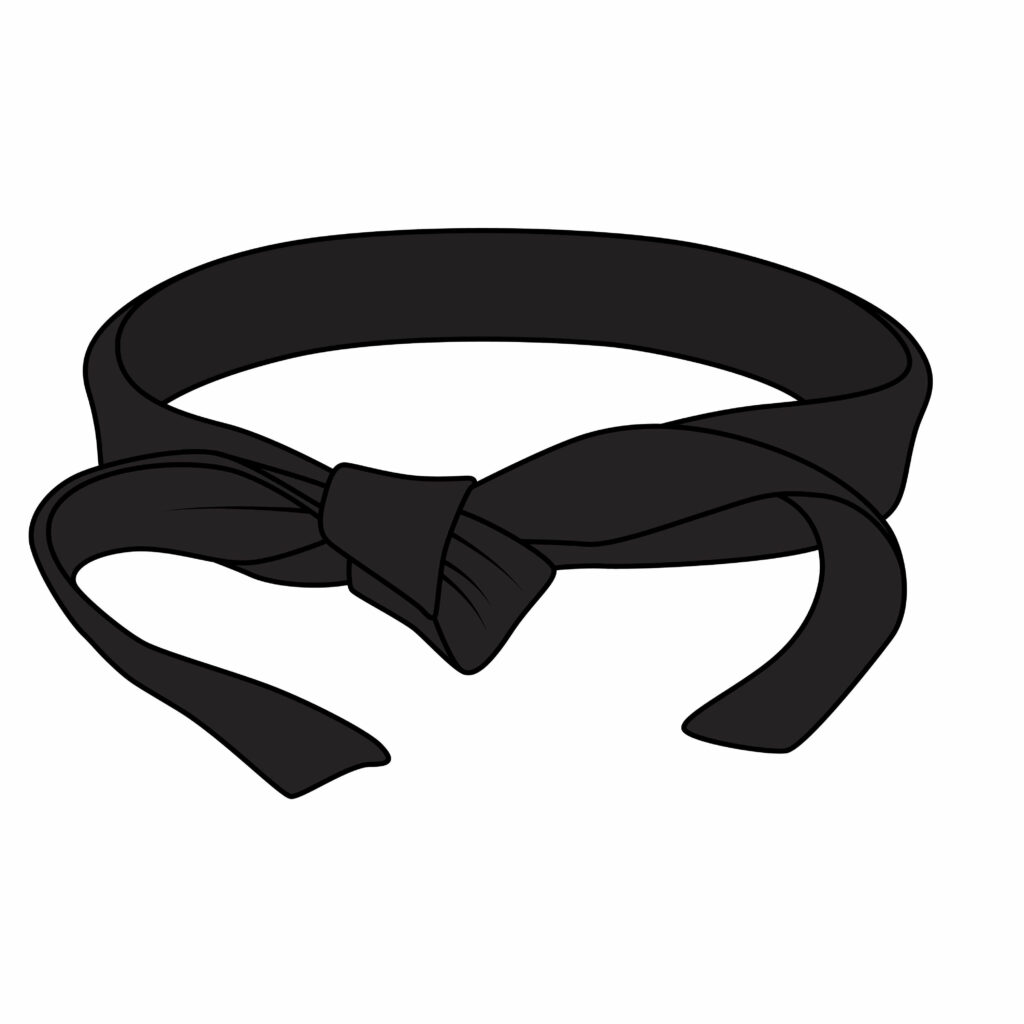
step 5: adding Color
Set your drawing pencils down and select your favorite coloring tools, be it pens, markers, pencils or crayons.
Grab your darkest shade of black and color carefully within the lines of your belt.
Additionally, you are encouraged to use a touch of silver or white on specific parts of the belt to make it appear as though it’s gleaming in the light – a popular technique used when shading called chiaroscuro.
Bonus Tips
Apply hatching to the parts of the belt where creases are visible for realism.
Watch YouTube videos explaining the techniques and perspectives used when drawing belts.
Write your name and the date of completion in the corner of your page for a personalized touch.
Share your drawing with others on visual learning platforms or your favorite social media app.
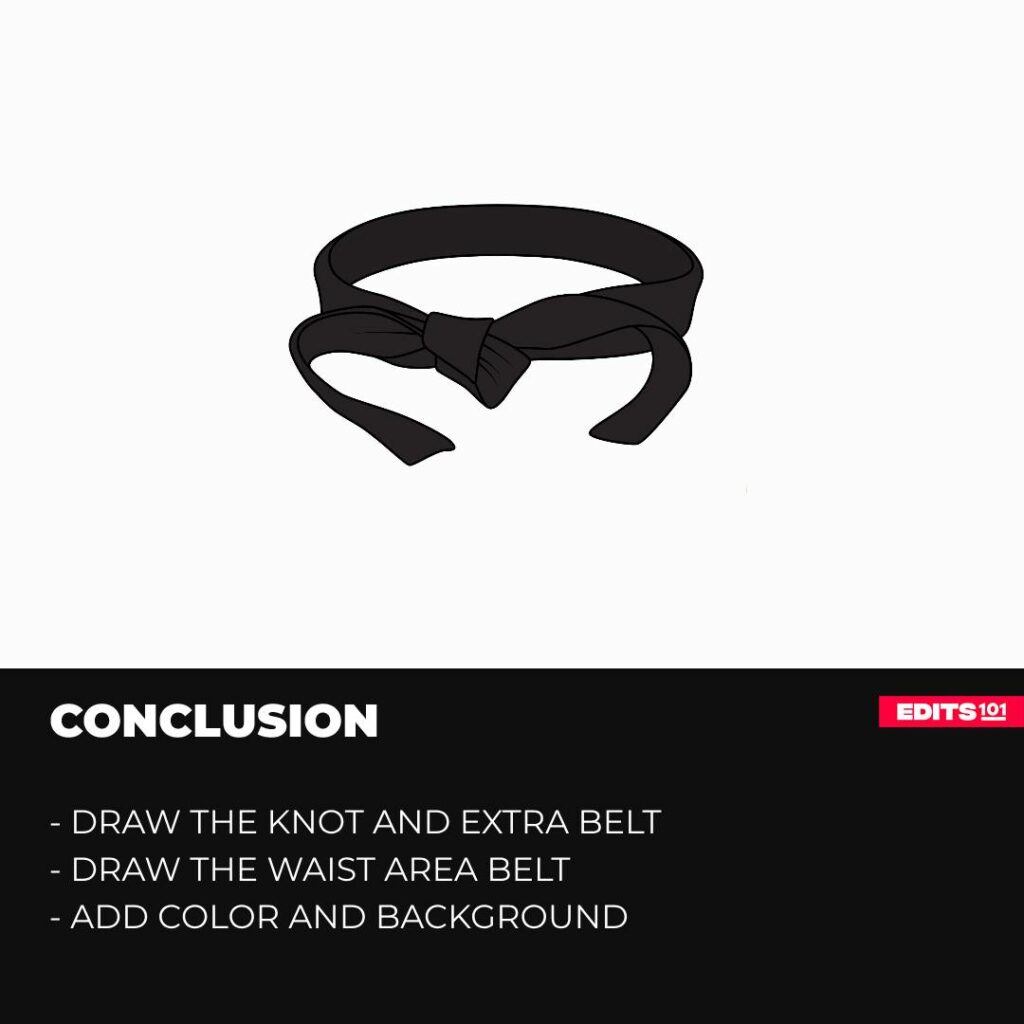
Conclusion
From reading through the symbolism of the karate black belt to drawing a series of different shapes as you created the knot, the front part of the belt and the waist area, you completed a great deal of work and implemented advanced drawing techniques.
While not easy, you managed to finish something you set out to do, which is always commendable. So job well done! Keep pushing yourself and continue to improve as you explore different drawing tutorials. From Edits to you, we’ll see you next time!
Thanks for reading & feel free to check out more of our articles!
Author Rating
Overall Rating
Summary
This tutorial will walk you through sketching a basic Karate Black Belt and then refining it to achieve a more realistic and detailed appearance.