How to Draw a Ski Helmet | A Step-By-Step Guide
Today, we’ll be covering all you need to know in order to draw your very own ski helmet in 7 easy-to-follow steps. While it may seem challenging at first sight, drawing a ski helmet is definitely achievable with a little time, practice and patience.
Now you may be wondering, why a ski helmet? Well, not only is this a cool object to tackle for ski enthuasists, it’s also a great tutorial for those in search of a new drawing challenge.
Before we go any further, let’s take a look at the standard definition of ski helmet: a ski helmet is a protective headgear worn by skiers to reduce the risk of head injuries while skiing. It’s specifically designed to absorb impact and provide cushioning in case of falls or collisions on the slopes.
Drawing a ski helmet is also a great way to sharpen your observation skills and spacial awareness as you transfer what you see on screen onto your drawing paper.
| Steps | Complexity Level |
| The Shell | 2 |
| The Ear Pads | 3 |
| The Strap & Buckle | 2 |
| The Chin Strap | 4 |
| The Extra Details | 3 |
What You Will Need
- A4 sheet of paper
- Pencils (2b, 3b or 5b)
- An eraser
- Coloring kit
- 20-35 minutes

How to Draw a Ski Helmet
Make sure you have all of the required drawing tools at your disposal and that you glance over the outline provided below for an idea of each step that lies ahead.
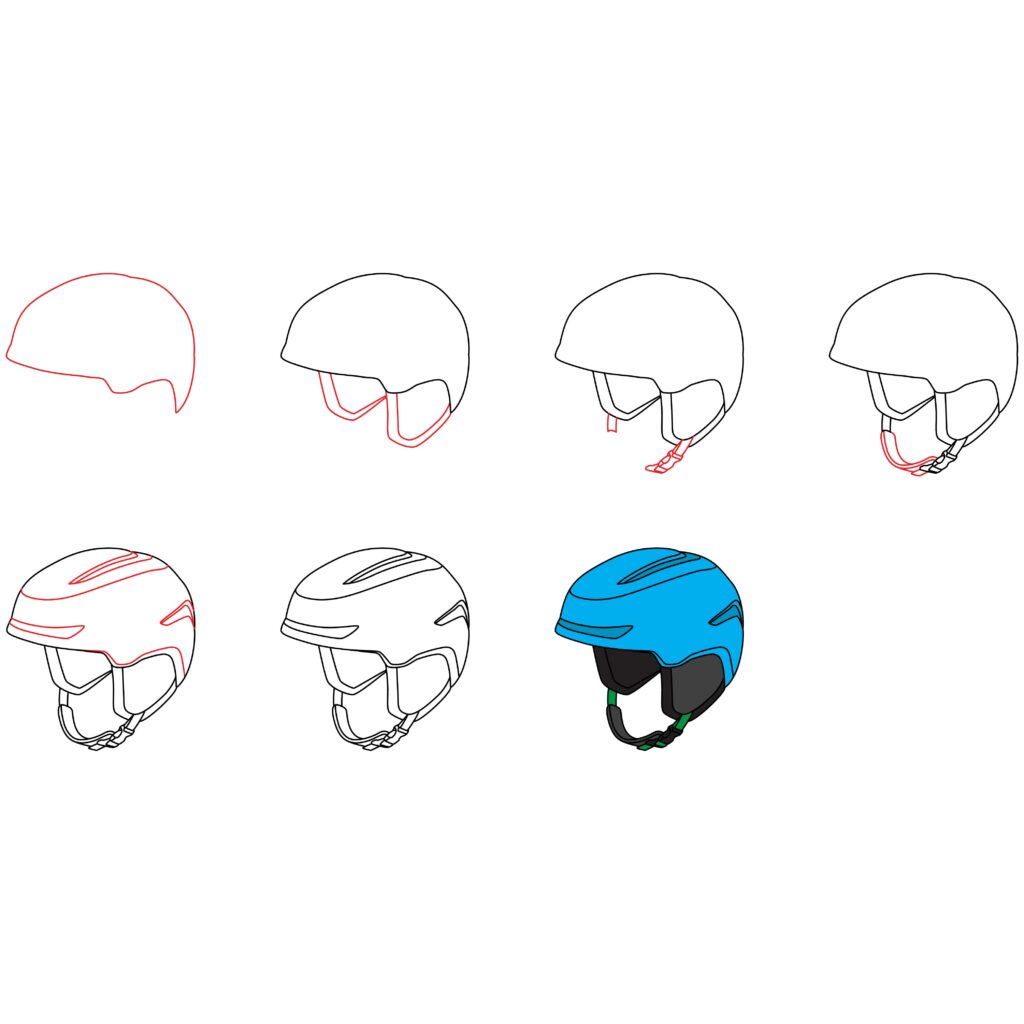
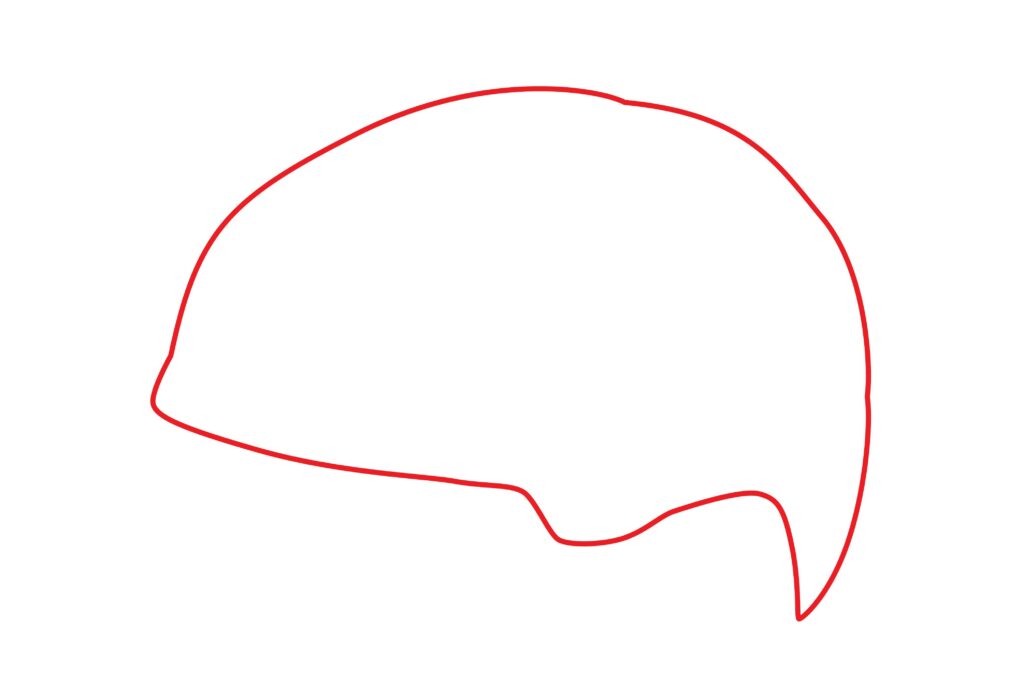
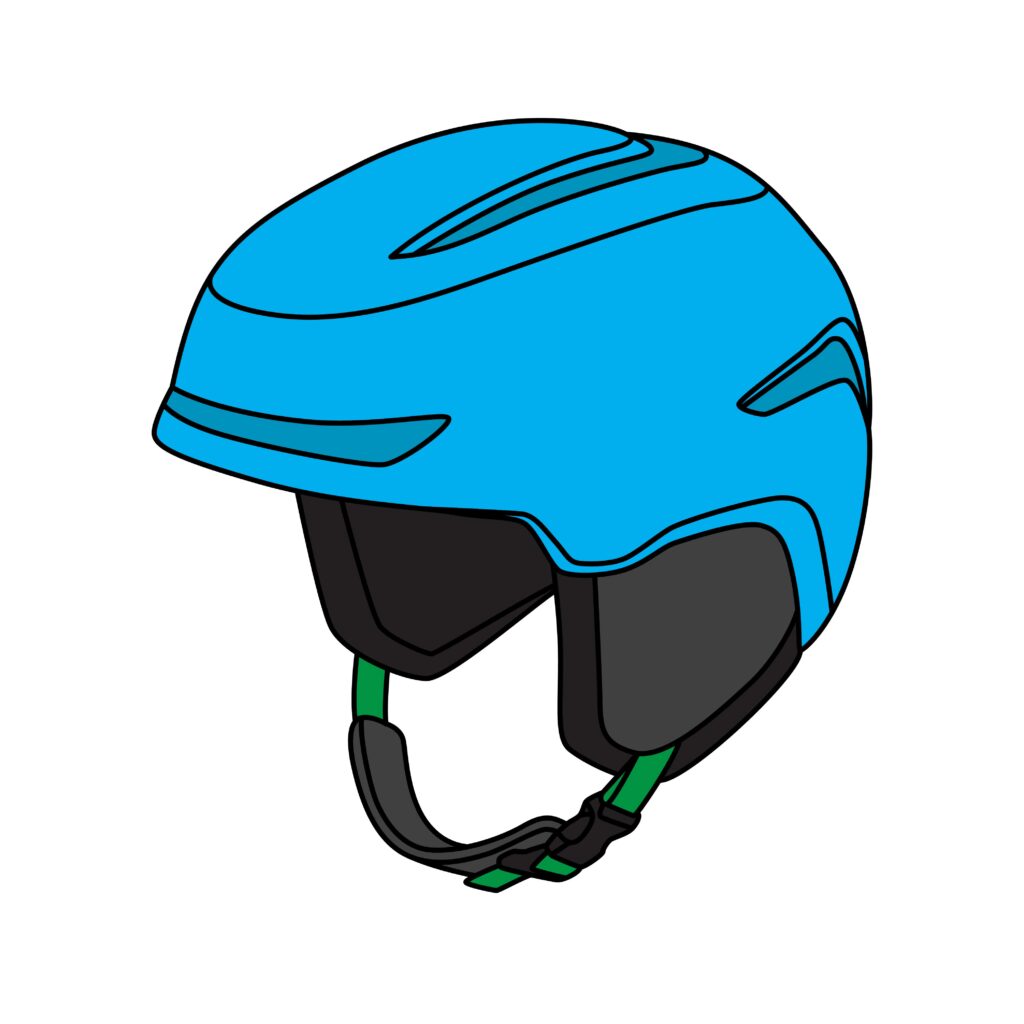
Step 1: Draw the Shell
Draw a large semicircle in the center or upper half of your drawing paper. Add slight indents along the upper curve of the semicircle to make it look realistic, and draw a series of curved lines on the bottom right side.
- Start by drawing a large semicircle in the center or upper half of your paper
- Add slight indents along the upper curve of the semicircle
- Draw a series of curved lines on the bottom right side
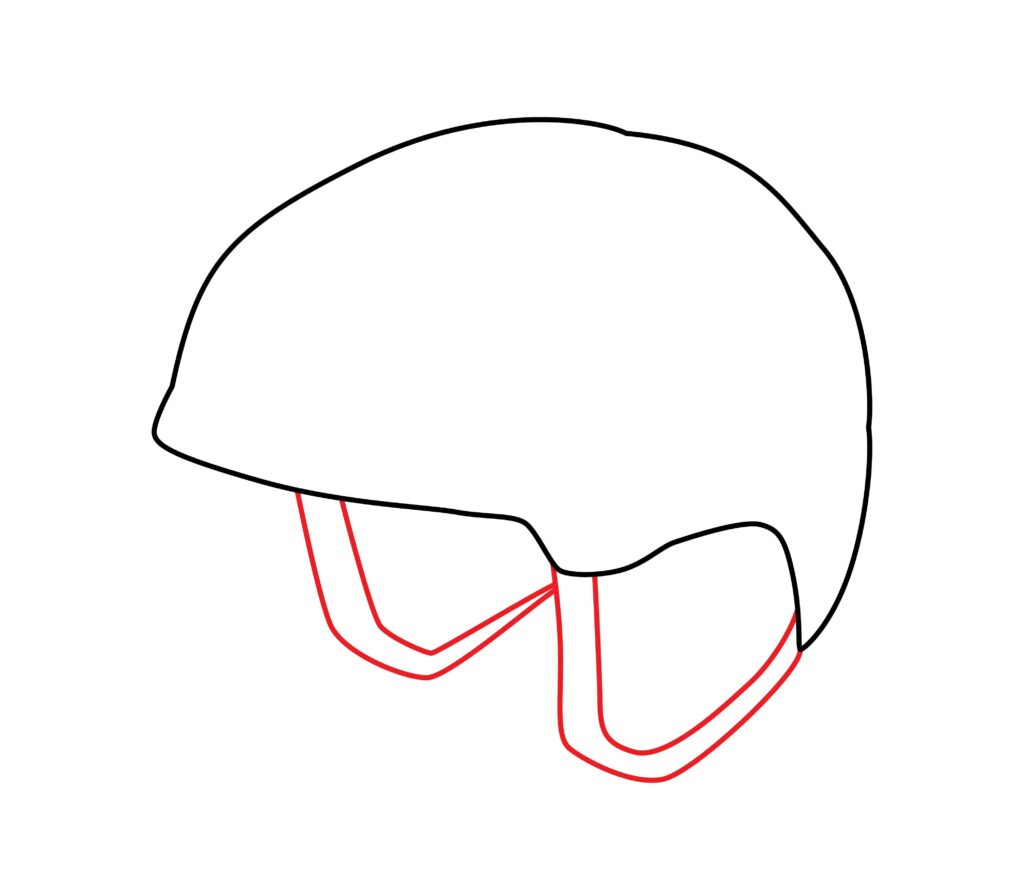
Step 2: Draw the Ear Pads
Start with the pad/strap on the right. Draw a thin diagonal rectangle extending from the bump of the shell and curve it smoothly until it connects with the right side of the shell.
Next, draw the same shape on the left side of the shell, however make sure the rectangle starts somewhere along the bottom mid-section of the shell and connects to the outer side of the right ear pad.
- Draw a thin diagonal rectangle extending from the bump of the shell
- Curve it smoothly until the rectangle connects with the right side of the shell
- Repeat the same process on the left, bearing in mind the different positions
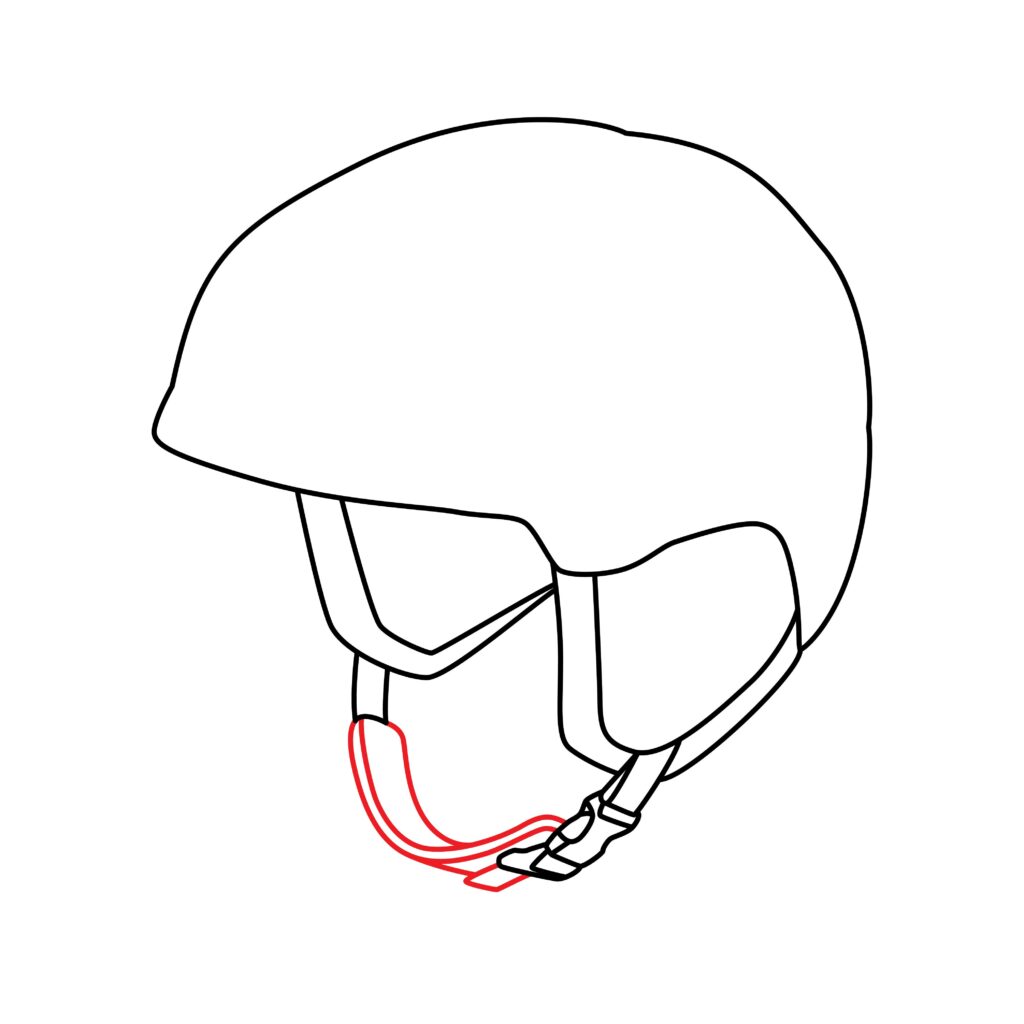
Step 3: Draw the Strap and Buckle
Start by drawing a small vertical rectangle below the ear pad on the left, ensuring the upper lines don’t overlap with the ear pad.
Then, draw another small vertical rectangle below the right ear pad, however this one should be longer and should include a series of lines and shapes across the width to resemble a life-like buckle.
- Draw a small vertical rectangle on the bottom of the left ear pad
- Draw a longer rectangle on the bottom of the right ear pad
- Add a series of lines and shapes across the width to resemble a real buckle
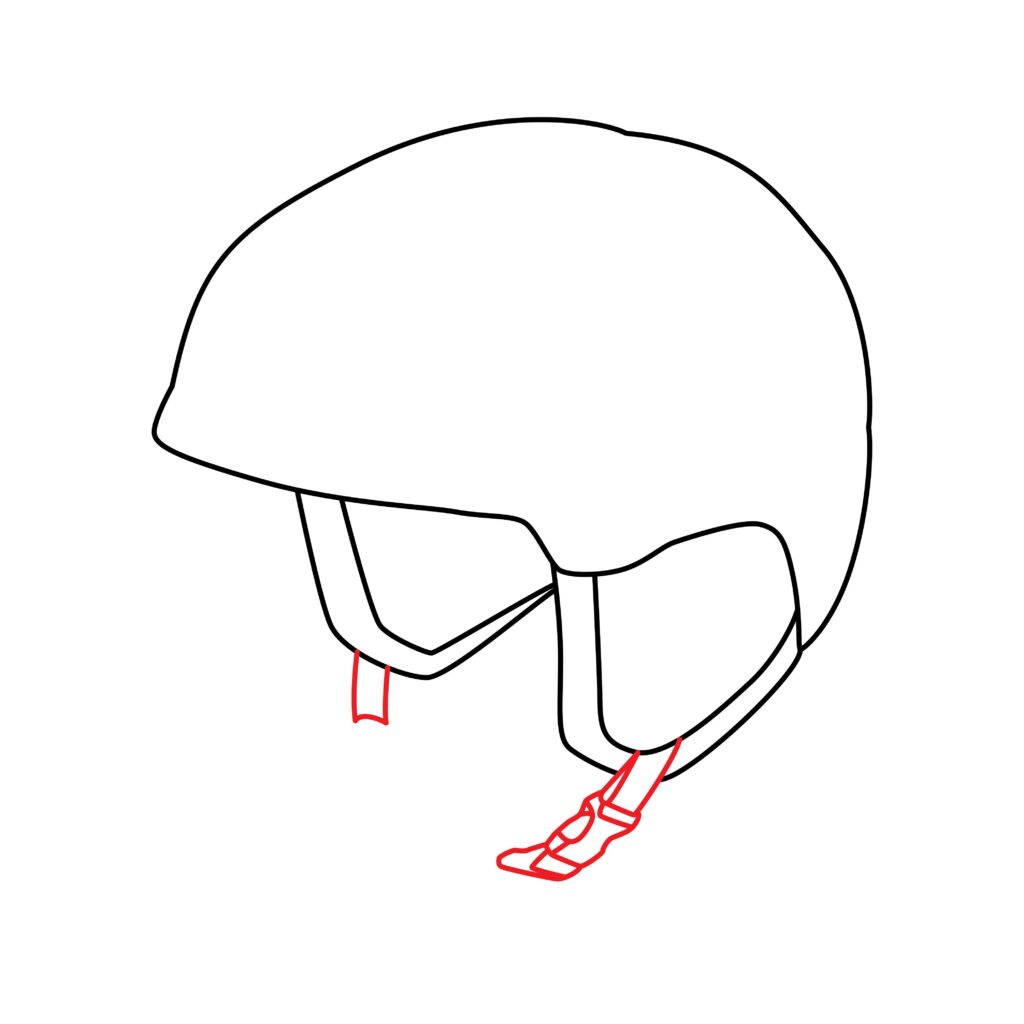
Step 4: Draw the Chin Strap
Draw a sequence of curved lines exteding from the side of the left ear pad to the right ear pad. Take your time and follow the image below closely to accurately depict a realistic chin strap.
- Draw a sequence of curved lines from the left ear pad to the right ear pad
- Add a small flap on the right side
- Follow the image closely to ensure you draw a realistic chin strap
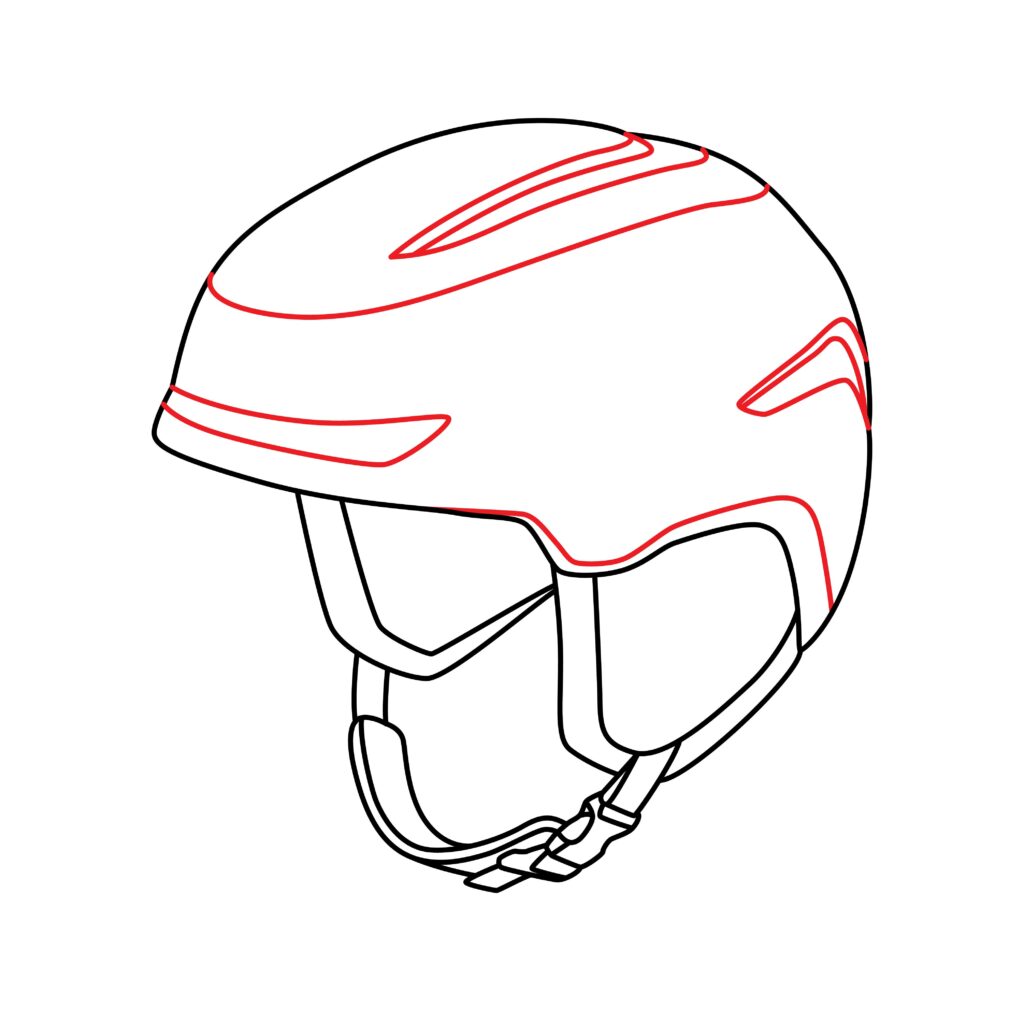
Step 5: Add Extra Details
Top off your ski helmet drawing by adding a few extra details across the width of the shell. Start by drawing a line that follows the same curves of the shell along the bottom-right side.
Then, draw a small curved rectangle on the left side of the shell. Once complete, add a series of lines along the top and upper right that mimic the lines we have drawn on our ski helmet below.
- Draw a line that follows the same curves of the shell along the bottom-right
- Draw a small curved rectangle on the left side of the shell
- Add a series of lines along the top and upper right side fpr contouring
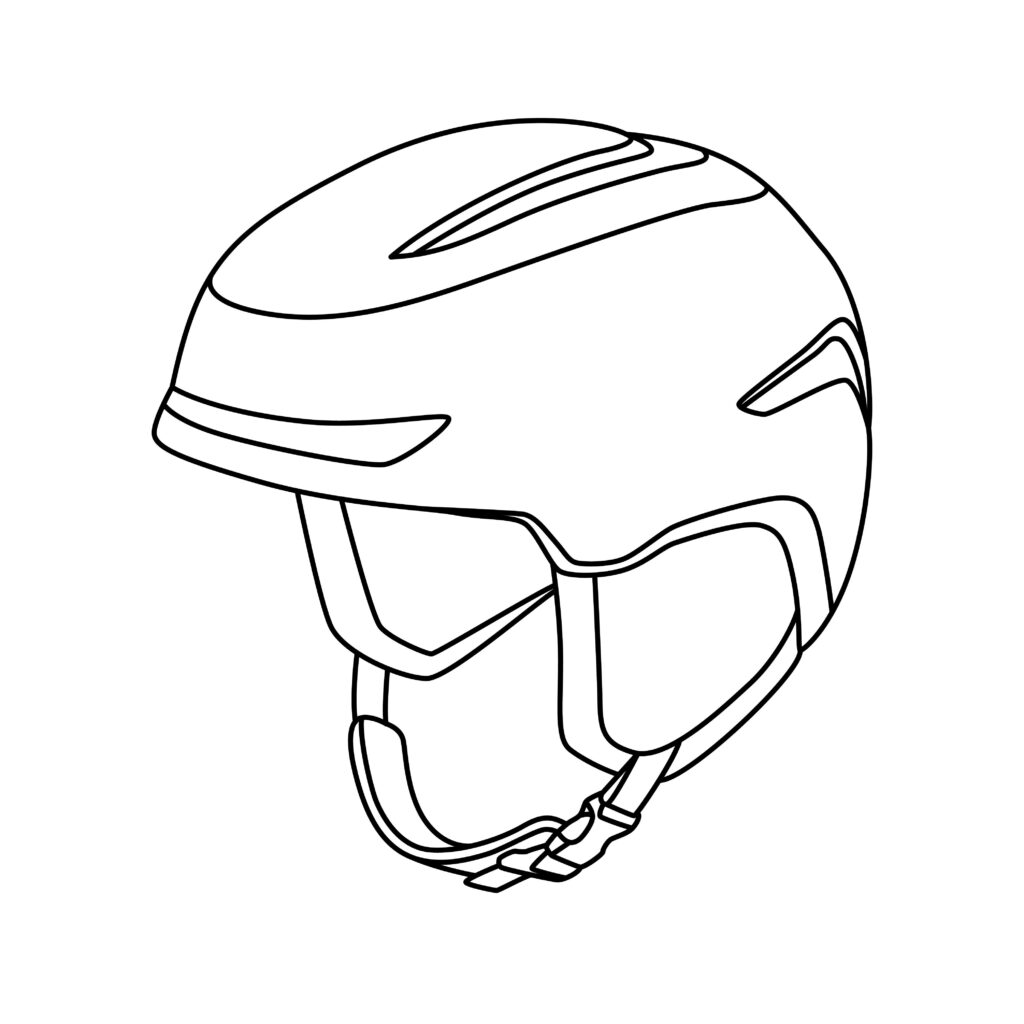
Congratulations! Your Ski Helmet Drawing is complete
How did you fair drawing a ski helmet? Was it perhaps easier than you expected, or did you find yourself struggling with certain steps?
You may have noticed that you have only completed five steps while we mentioned seven in the beginning of this lesson. That’s because we’re not exactly finished yet.
Taking your Drawing to the Next Level
Resist the urge to leave your drawing as it is. Here at Edits101, we believe that excellent work takes time, breaking a few boundaries and rebelling against comfort zones.
We always encourage our students to add a background and color to their drawings to enhance the overall visual appeal, authenticity and realism of their designs.
Step 6: adding a background
When selecting a background, it’s important to first determine the scene, location, time of day, and range of motion. Is your ski helmet lying on a patch of snow, having been discarded after skiing? Is it being worn by a skier, out on the slopes in a full ski gear?
You could set the scene on a snow-covered mountain slope with a clear blue sky and bright sun shining. Include skiers in the distance enjoying the slopes and perhaps some pine trees or other elements to add depth to the composition.
You can also add details such as ski poles, goggles, snowflakes falling, or even a small chalet in the background to enhance the winter sports theme. The overall atmosphere should evoke the excitement and beauty of skiing in a picturesque setting.
Step 7: adding colors
Set down your drawing pencils and pick up five of your favorite colors, whether it’s coloring pencils, markers, crayons, or pens.
Ensure you have five different colors, that two of them are the same gradient (e.g., light blue and dark blue) and that you have a few dark tones, as well.
When coloring, use a bright color for the majority of the helmet’s shell. Then, add a slightly darker tone to the shapes you draw in step five. This is going to give your drawing a more textured look, aiding in its three-dimensional nature. Lastly, color the ear pads and chin strap with a dark tone, while using a bright tone for the strap.
Bonus Tips
Watch a few YouTube videos to understand the perspective and proportions needed to draw a ski helmet.
Add some shading to the shell for contouring and authenticity.
Add your name and the date to the page to personalize your work and create a timestamp.
Interact with other budding artists on visual learning platforms to gain a sense of community and share your experience drawing a ski helmet.
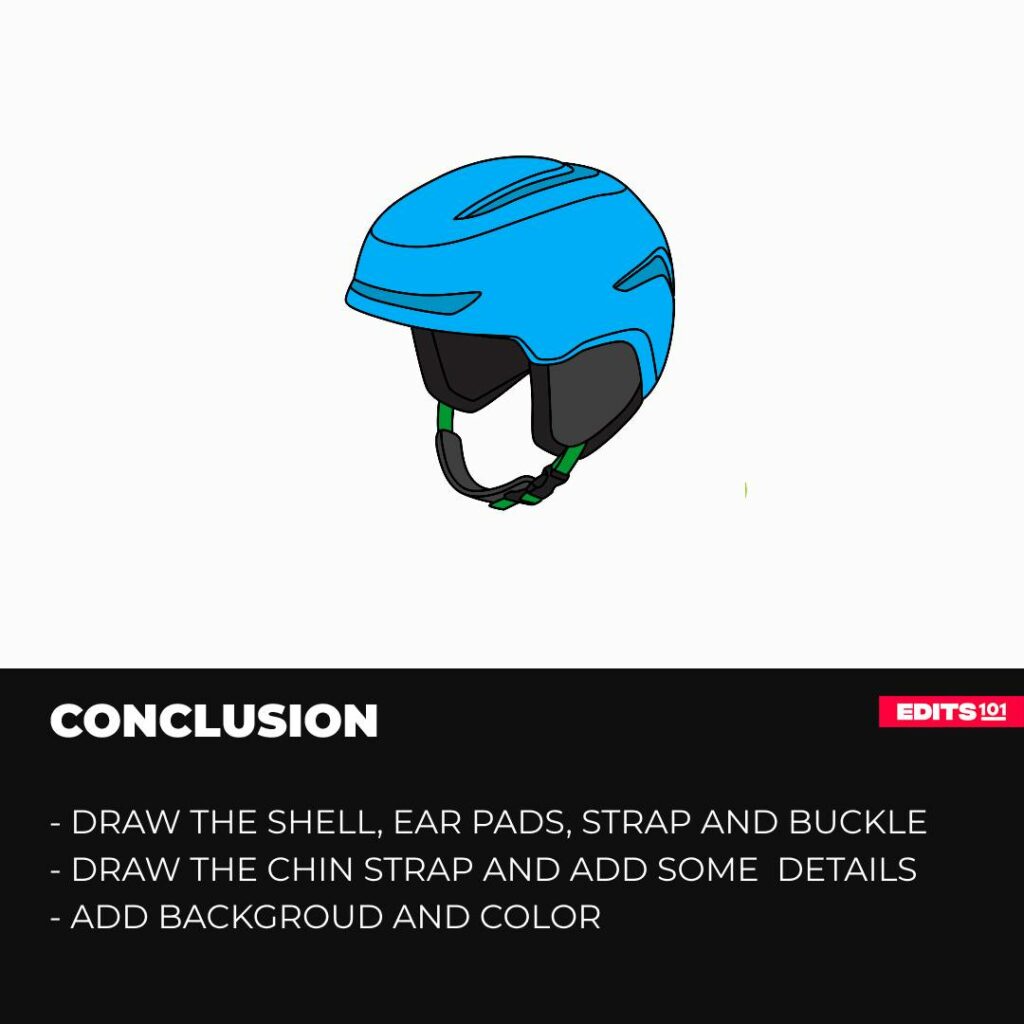
Conclusion
From reading about the functionality behind ski helmets to drawing a shell, ear pad, strap, buckle and chin strip, you completed a great deal of work.
While adding a background and coloring your sketch, you pushed yourself to continue with your drawing, which is commendable in and of itself.
Congratulations and job well done! There are many other tutorials that await you, so from Edits101 to you, see you next time!
Thanks for reading & feel free to check out more of our articles!
Author Rating
Overall Rating
Summary
This guide is for kids and young adults, aimed at teaching them how to draw a ski helmet and enhance it with a background and color in 7 easy steps.