How to Draw a Ski Boot | in 9 Easy Steps
Welcome back to another easy, informative and detailed drawing tutorial! In today’s lesson, we’re diving into the world of skiing with a guide on how to draw a ski boot in 9 easy steps.
A ski boot is a specialized type of footwear designed for use in skiing activities. It consists of a hard outer shell to provide support and protection, as well as insulation to keep the feet warm.
Ski boots are used to secure the skier’s feet to the skis, allowing for better control and responsiveness while navigating slopes. They are an essential piece of equipment for anyone participating in alpine skiing or snowboarding.
If you’re a fan of winter sports, or simply looking to challenge yourself with an intricate design, this is the perfect tutorial for you!
| Steps | Complexity Level |
| The Traction Sole | 3 |
| The Outline of the Shell | 2 |
| The Liner | 3 |
| The Cuff | 2 |
| The Buckles | 4 |
| The Adjustable Buckles | 4 |
| The Extra Details | 2 |
What You Will Need
- A4 sheet of paper
- Pencils (2b, 3b or 5b)
- An eraser
- A ruler (optional)
- Colored pencils or markers
- 35-40 minutes
How To Draw a Ski Boot
While it may seem difficult at first, drawing a ski boot is well within the realm of possibility if you follow this guide. Remember to take things slow, pause whenever you need a break, and regularly compare your progress with that of the images we provide to make sure you’re on the right track.
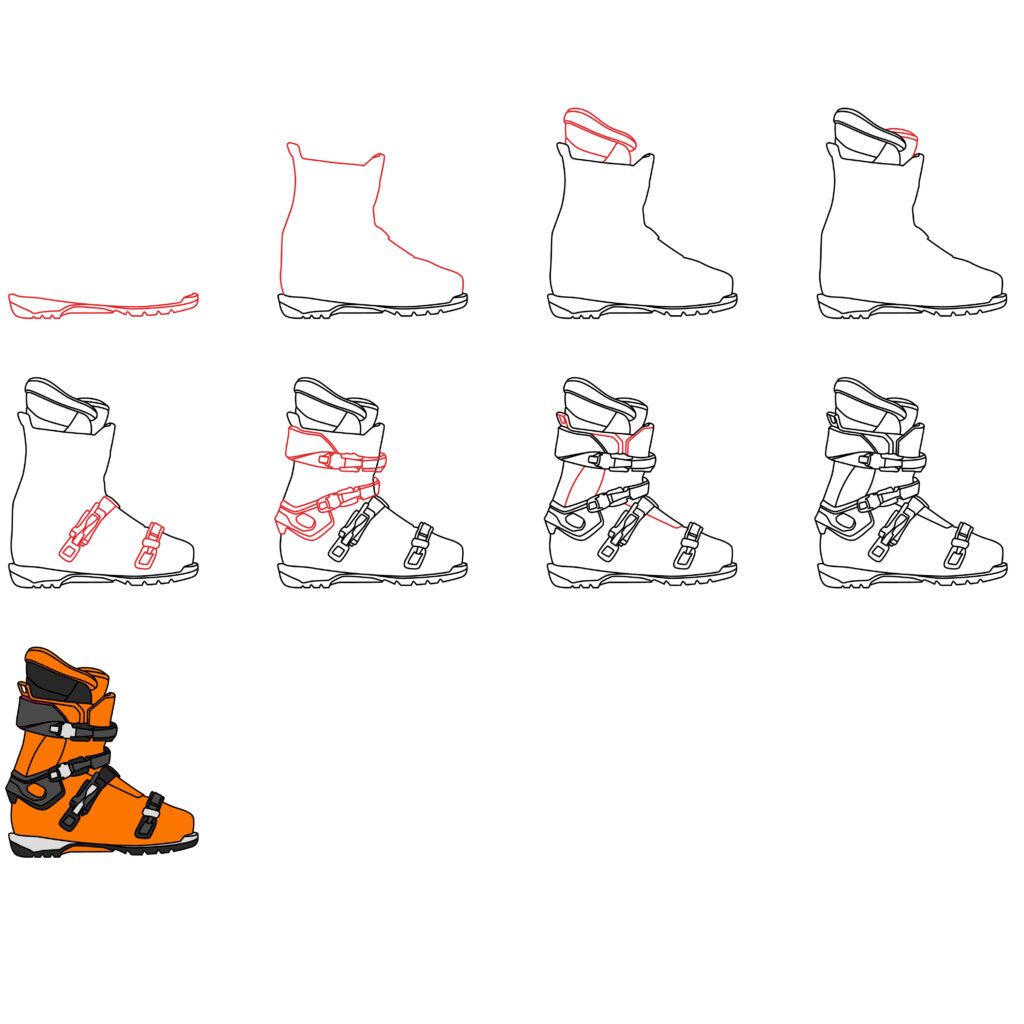
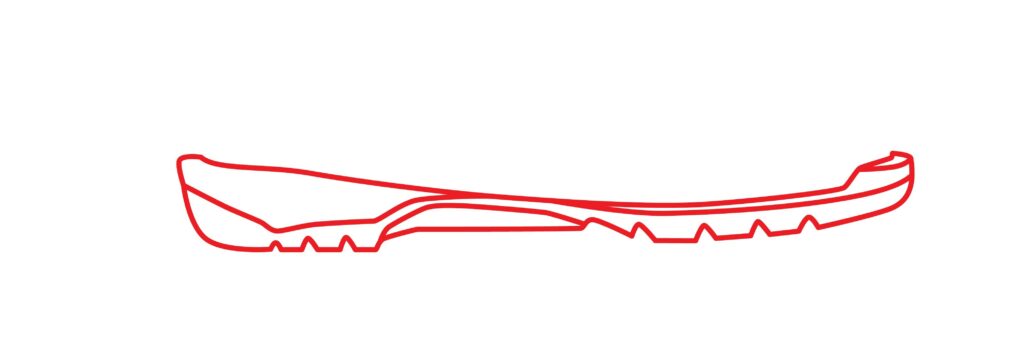
Step 1: Draw the Traction Sole
Flip your drawing paper in a preferred orientation to match your desired result. Then, start by drawing a long slanted horizontal line for the upper part of the shoe’s sole.
Next, curve the sides downward and draw a curvy horizontal line below. Ensure the left side is thicker than the right, and that you include little grooves on the sides of the bottom line to indicate the sole’s traction.
Add a few lines across the width of the sole to make it more realistic.
- Start by drawing a long slanted horizontal for the upper part of the sole
- Curve the sides downward and draw a wavy horizontal line below
- Draw little grooves, a.k.a zigzag lines, on the sides to indicate the traction
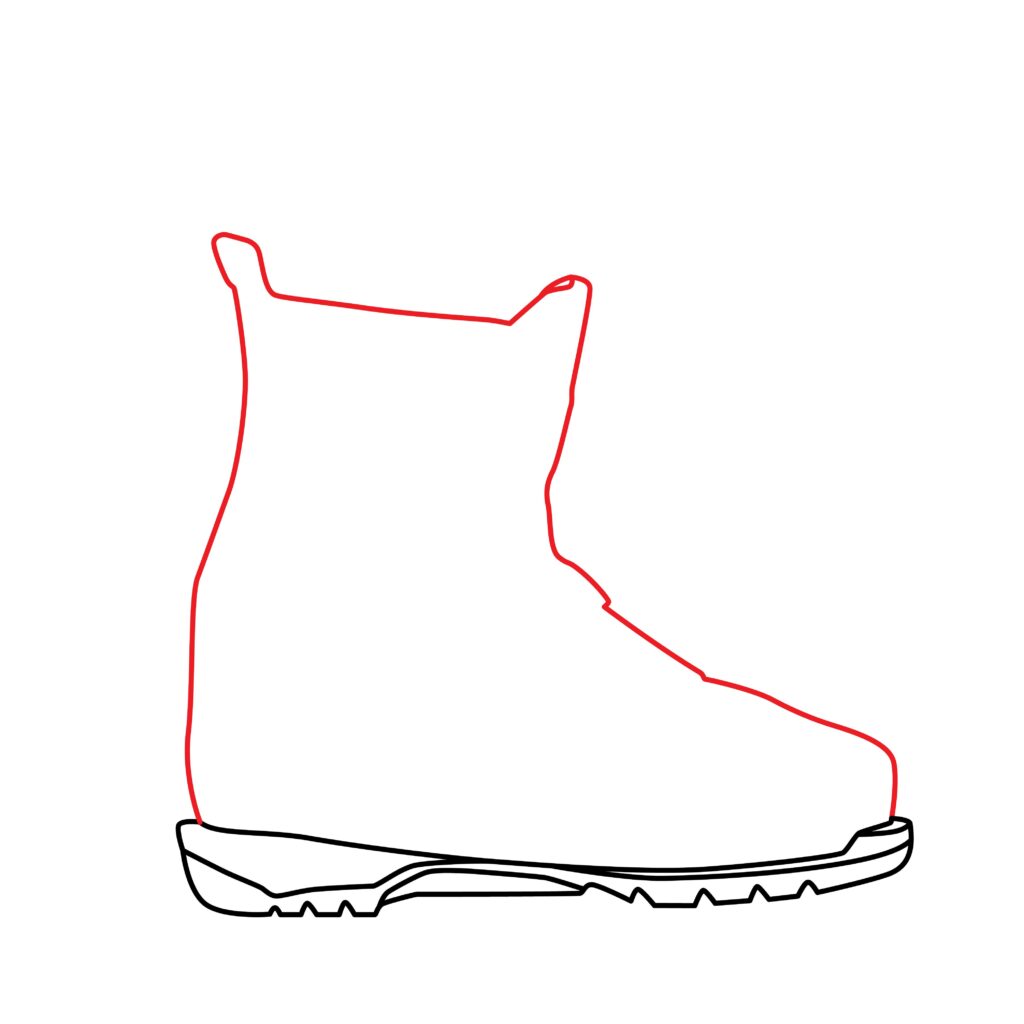
Step 2: Draw the Outline of the Shell
Draw a curvy vertical line extending from the top-left corner of the sole. When your line reaches the proper height, curve it to the right in a diagonal line.
Then add a wavy vertical and diagonal line running downward until it connects to the upper right side of the sole.
Ensure the back of the boot has a bump to resemble the heel of a foot, and that the front part has a realistic looking slope to depict the front part of a foot from a side angle.
- Draw a wavy vertical line that extends from the top-left corner of the sole
- Curve the line into a diagonal line once it reaches the proper height
- Add a wavy vertical and diagonal line that connects to the right side of the sole
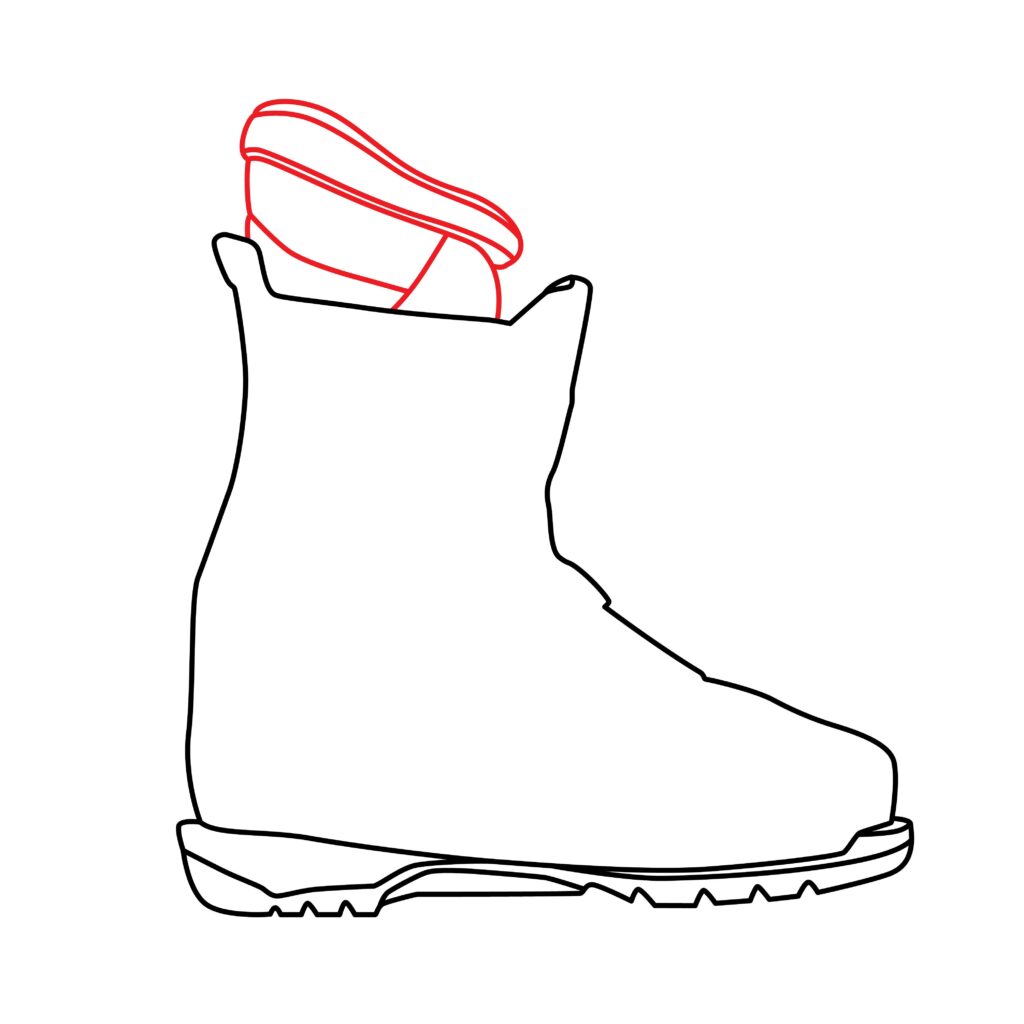
Step 3: Draw the Liner
Liners are another word for insoles placed inside the boot to secure a snug and comfortable fit for skiiers.
Draw a small rectangular shape on top of the shell. Then, erase the upper lines of the rectangle and replace them with a diagonal line running downward to the right.
Add a series of diagonal lines along the width of the liner for detail.
- Draw a small rectangular shape on top of the shell
- Erase the upper line of the rectangle and replace it with a diagonal line
- Add a series of diagonal lines along the width of the liner for detail
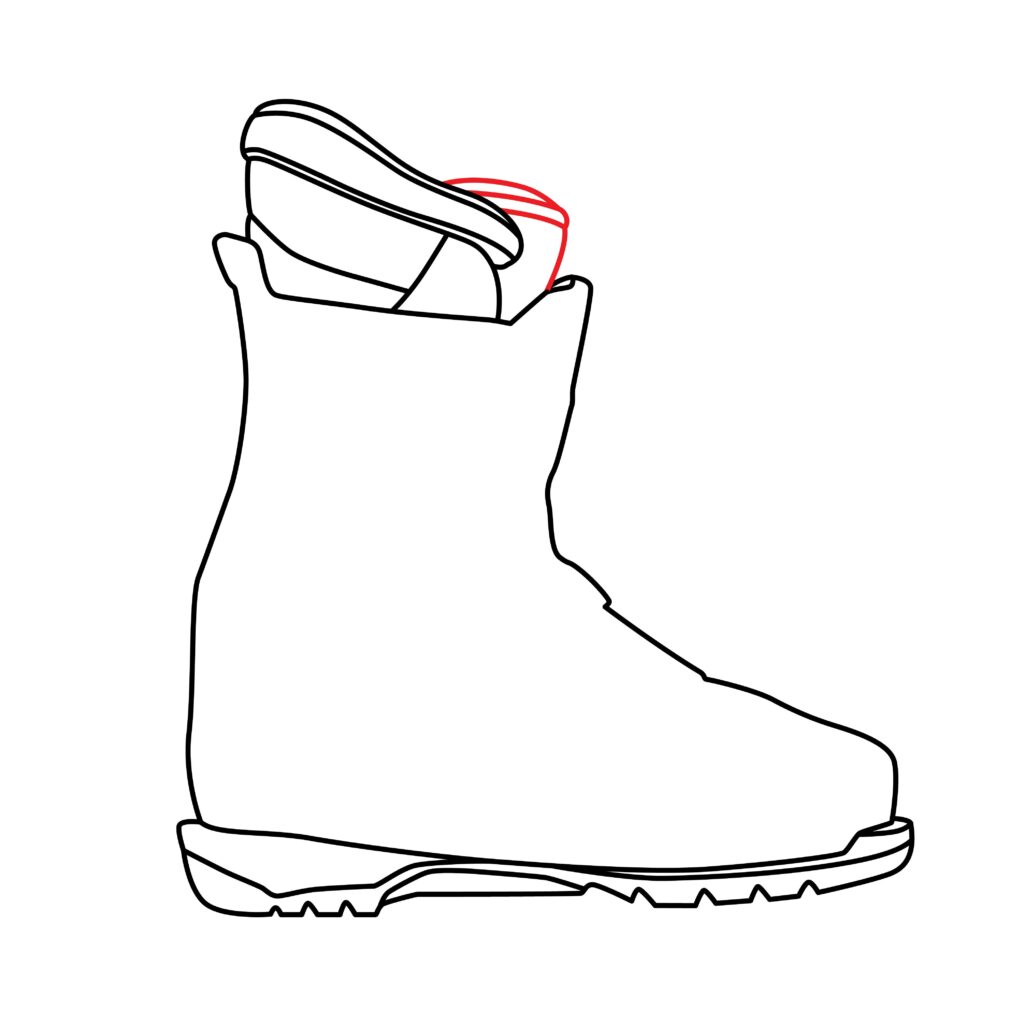
Step 4: Draw the Cuff
Adding the cuff is going to aid in making your drawing more three-dimensional, so be sure to include this step in your ski boot drawing.
First, draw an ascending diagonal line on the right side of the shell. When it’s aligned with the left side of the liner, draw three bumpy vertical lines that connect with the side of the liner.
- Draw an ascending diagonal line on the right side of the shell
- Draw three bumpy vertical lines that connect with the side of the liner
- Follow the image below for a guide on the line height
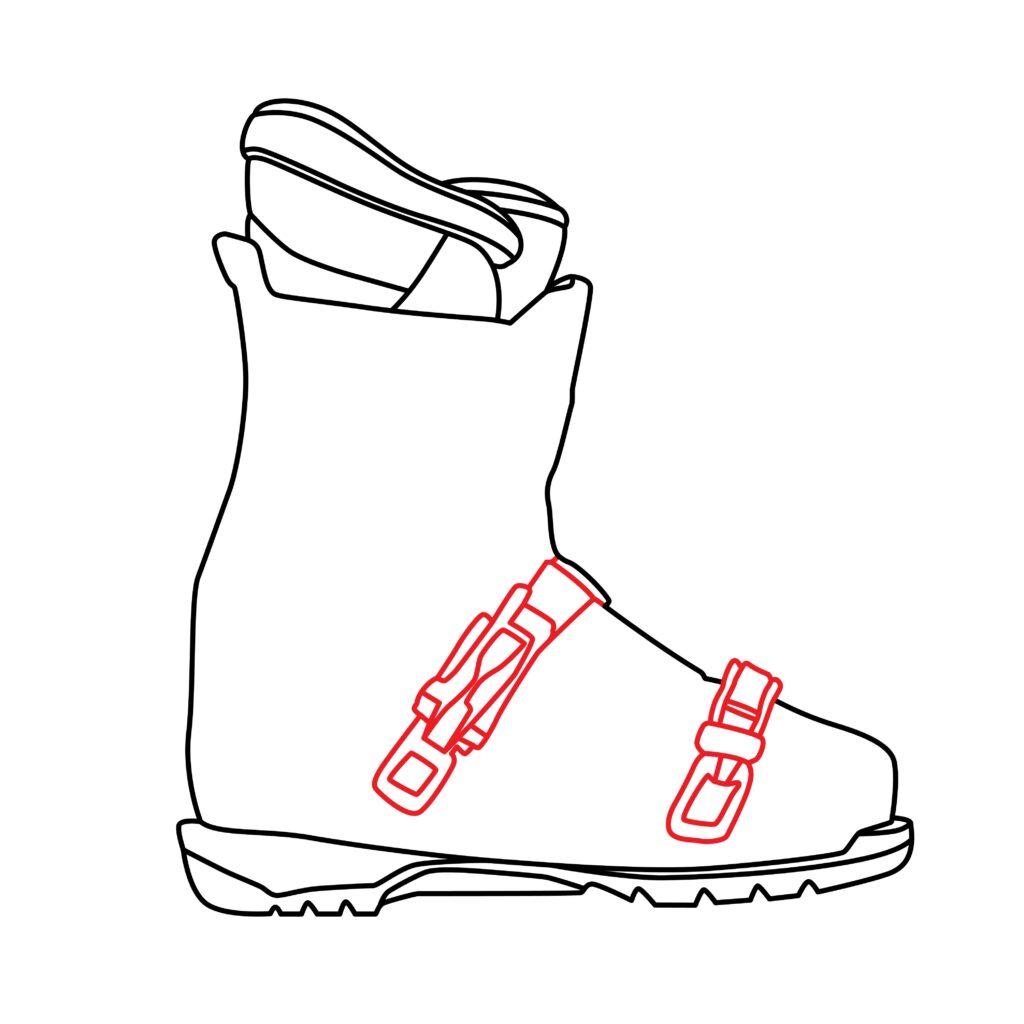
Step 5: Draw the Buckles
Draw two thin rectangles that go over the front of the boot, one closer to the toe region and the other closer to the ankle.
Ensure the rectangles do not touch the upper line of the sole.
Then, refine both rectangles by adding a series of shapes within them so that they resemble realistic buckles.
- Draw two rectangles over the front part of the boot
- Ensure the rectangles do not touch the line of the upper sole
- Use several vertical lines and shape for each buckle
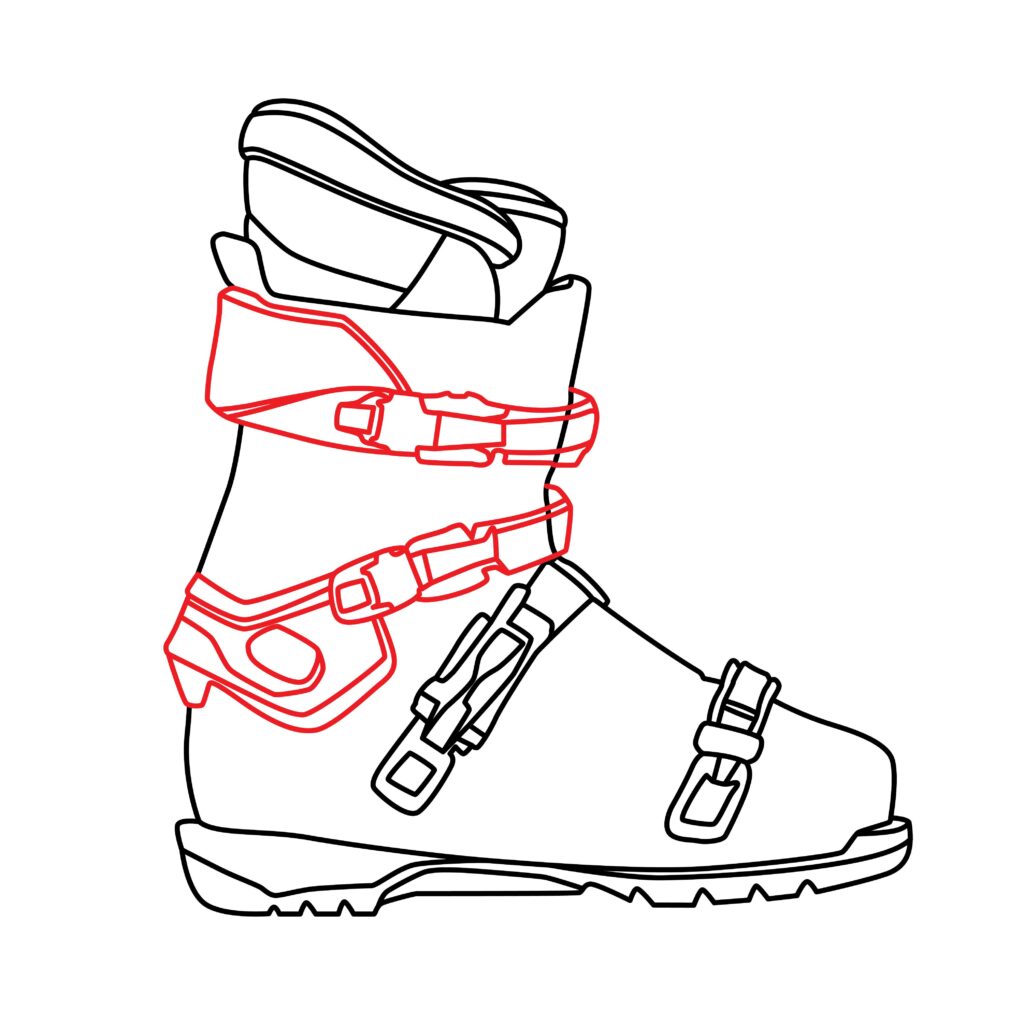
Step 6: Draw the Adjustable Buckles
Seasoned skiers are most likely aware that these buckles really come in handy while out on the slopes as they ensure ski boots are snug against the heel and foot when tightened.
Draw a rectangular and diagonal shape across the left side of the boot. Follow the image below closely as you add a series of shapes within each column to accurately depict the look of real buckles.
- Draw a rectangular and diagonal shape on the left side of the boot for buckles
- Add a series of lines and shapes within each column to depict realistic buckles
- Follow the image below as a guide
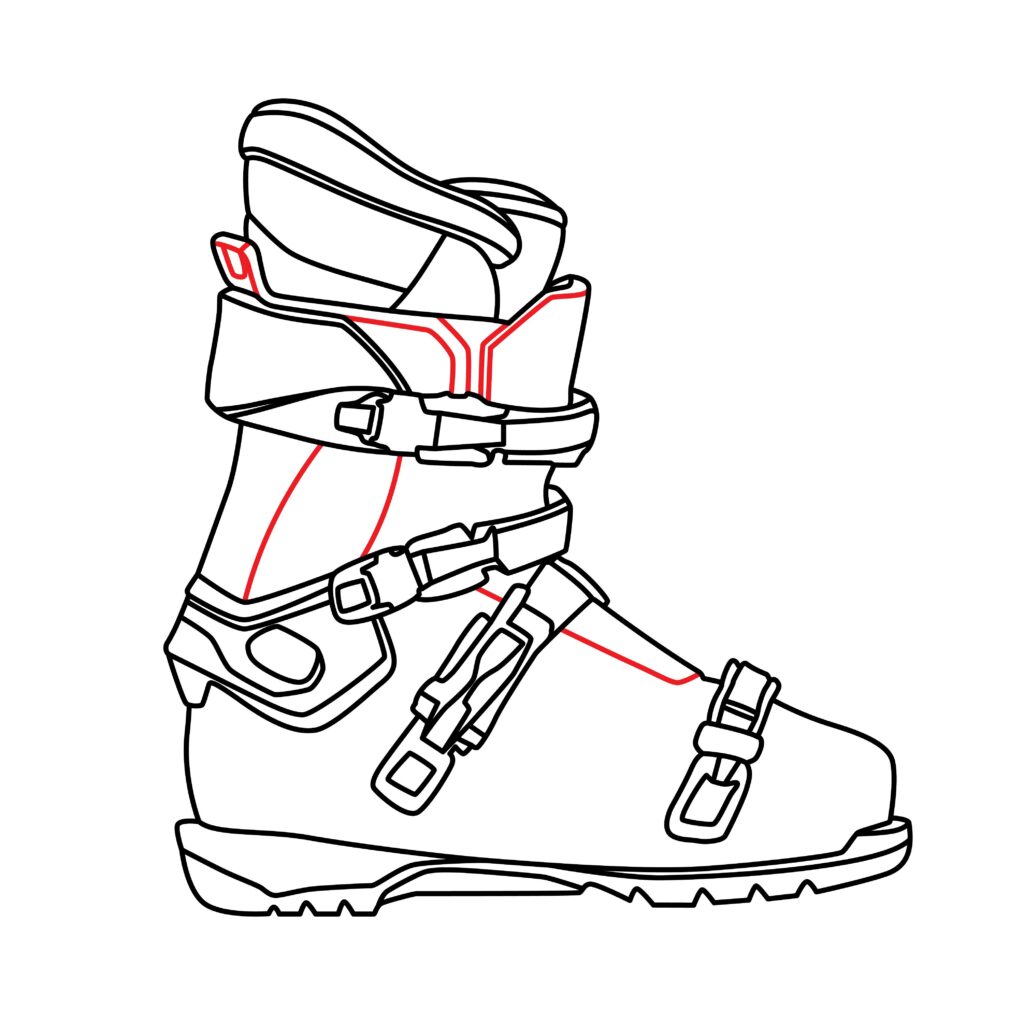
Step 7: Add Extra Details
Add a few extra lines across the front, sides and upper shell of your boot to give it an extra edge that will ultimately add depth and enhance the appeal of your drawing. You can also incorporate shading to create some shadows.
- Use curved lines to define the contours of the boot
- Add shading to create shadows for a 3D appearance
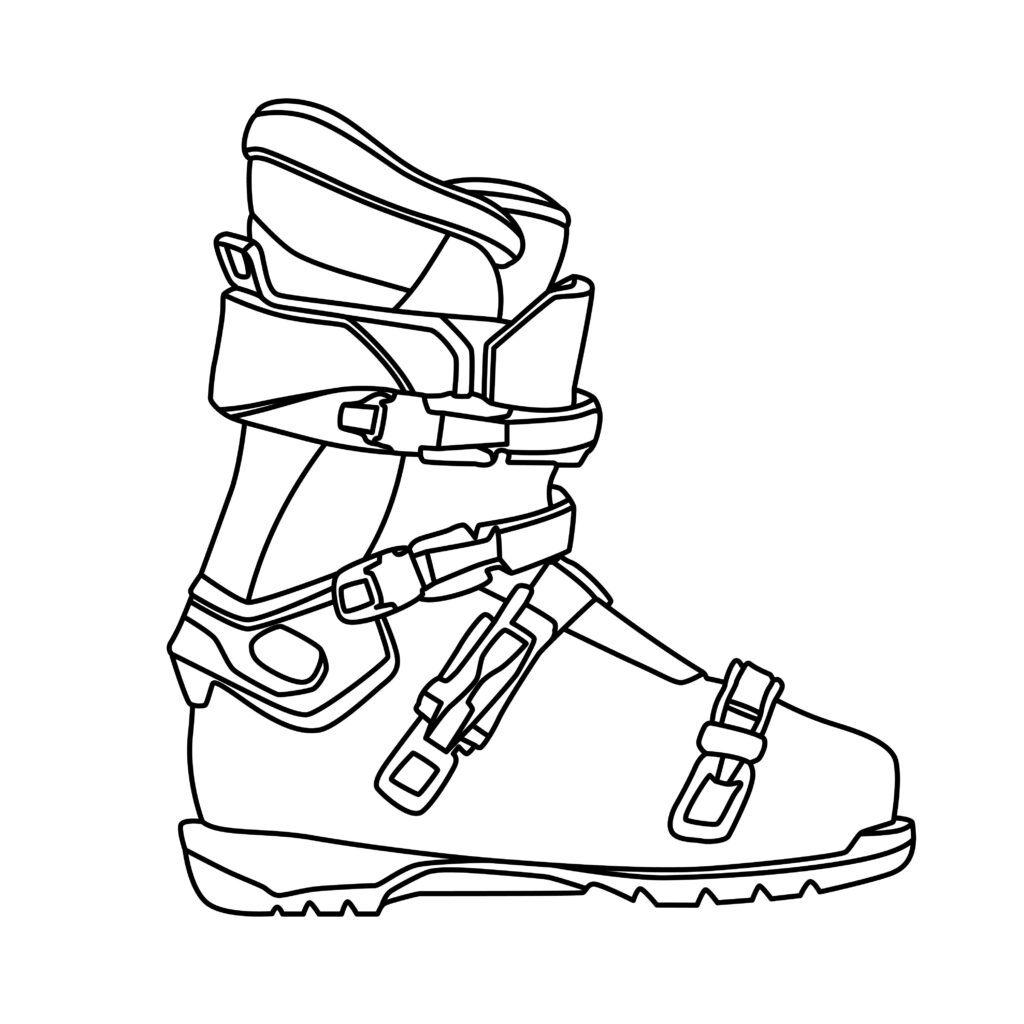
Congratulations! Your Ski Boot Drawing is Complete
What was your experience like sketching a ski boot? Was it perhaps easier than you expected or did you struggle with certain parts of the drawing?
Compare your black-and-white sketch with the one below to ensure your drawing accurately depicts a ski boot. If there are any parts you’d like to redo, feel free to do so now before you continue on with the rest of the tutorial.
Taking your Drawing to the Next Level
Here at Edits101, we always encourage our students to create authentic, dynamic and visually appealing designs. This is why we often include drawing a background and adding color in our drawing tutorials. Be sure to implement these steps to give your drawing some flavor.
Step 8: adding a background
For a single ski boot, you can draw snow-covered mountains in the distance, or pine trees lining the slopes to provide context and set the scene. A snowy trail or pathway leading up to where the ski boot is placed is not a bad idea either, suggesting someone has just taken it off after a day of skiing.
You can also draw a set of ski poles leaning against a tree or stuck in the snow nearby, indicating more skiing equipment present in the environment to tie everything together.
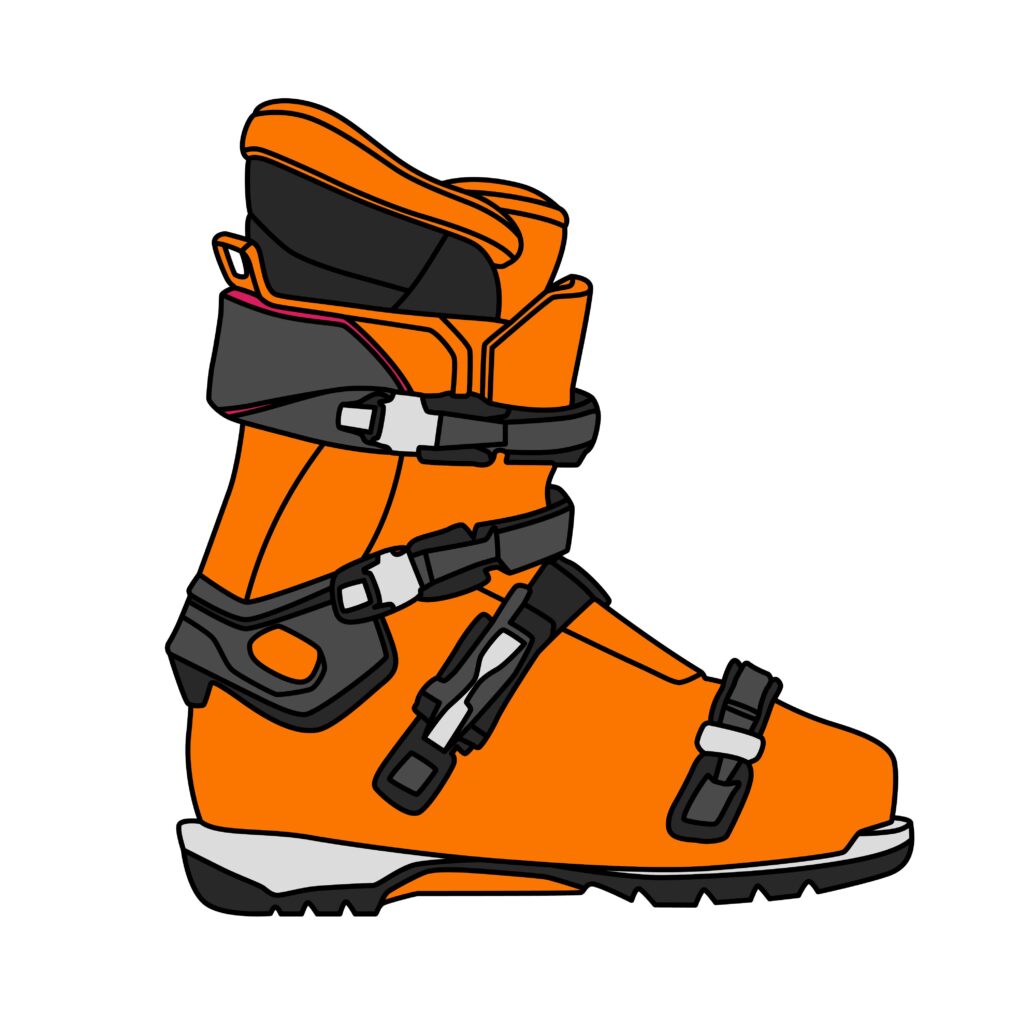
step 9: adding color
Set down your black pencils and grab your favorite coloring tools, whether it’s crayons, pencils, markers or pens. Select different colors for different parts of your ski boot before you start coloring.
In our illustration, we colored the majority of the boot orange and then added a series of darker shades to the sole, buckles, and liner. We also incorporated the use of a lighter gray on certain parts to boost constrast.
You can either color your ski boot the same way, or pick your own color for the majority of the boot while using similar colors for the rest.
Bonus Tips
Try drawing the boot from a front angle. The same rules will apply, but this time you will challenge yourself in using perspective and proper dimensions.
Additionally, draw another ski boot (left) to make your drawing more holistic. This way you can prepare yourself for drawing a skier rocking a full gear in future.
Interact with other budding artists on YouTube or visual learning platforms to share your experience and also seek some advice, if necessary.
Add your name and date to the sketch to mark it as yours and create a timestamp for when you file it away.
Conclusion
As you are now probably more aware, drawing a ski boot requires a keen eye for detail.
Each component is incredibly intricate, including the sole, shell, liner, cuff and buckles. You were required to draw a series of small shapes and lines at a difficult angle that takes time and effort.
So great job for completing today’s lesson. Feel encouraged and inspired as you set your drawing down and seek new things to add to your collection!

Thanks for reading & feel free to check out more of our articles!
Author Rating
Overall Rating
Summary
This guide explains how to draw ski boots, and you will also learn a few things about their design and features.