How To Draw A Gondola | A Complete Guide
In today’s lesson, we will learn how to draw a Gondola.
Do you know Gondolas have been used since the 11th century? Their name has been derived from the word Gonda, which is a kind of boat. Gondolas can go as fast as 45 km/h. They are quite similar to a rowboat.
It’s time to turn your paper into a magical piece of art.
What you will need
- A pencil
- An eraser
- A sheet of paper
- Coloring kit
- Ruler
- 30 minutes
How to Draw a Gondola
When you think of drawing a Gondola, it might look difficult at first. It is not as difficult as drawing a cruise ship or a battleship. In this guide, we will break it down into small and easy steps.
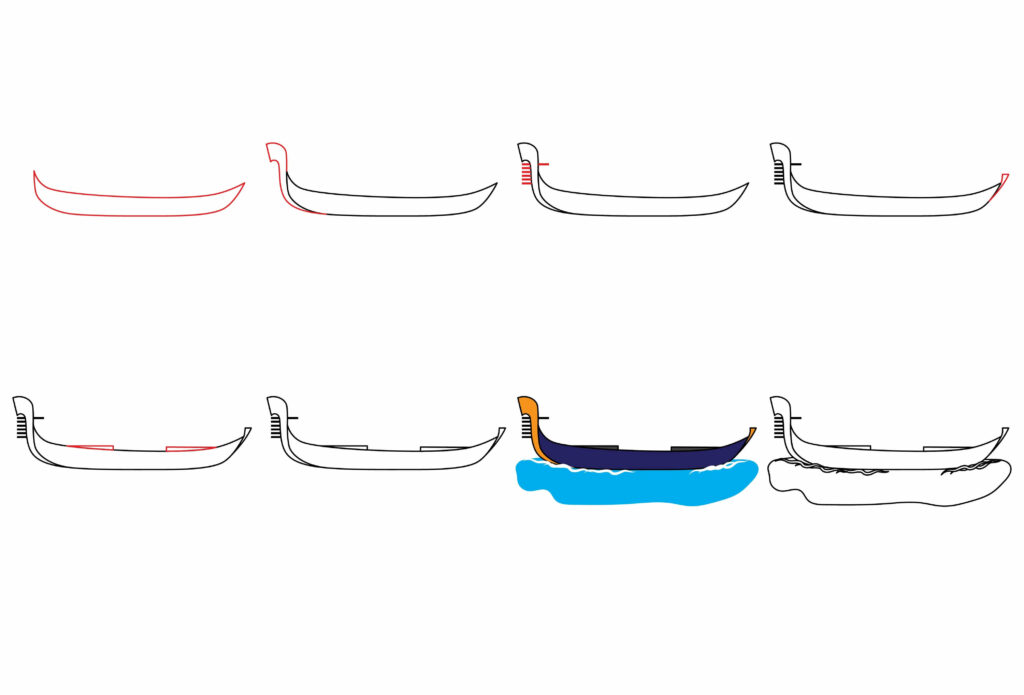
Step 1: Draw the Main Body
We will begin by drawing the main body of the Gondola. To draw the main body, start by drawing a horizontal line. Curve both ends of the lines upwards. On the left side curve, let the curve be angled in a way that it goes upwards. While on the right side, first curve it upwards and then let it go vertically straight. The right side is slightly higher than the left side. This is the base of our gondola.
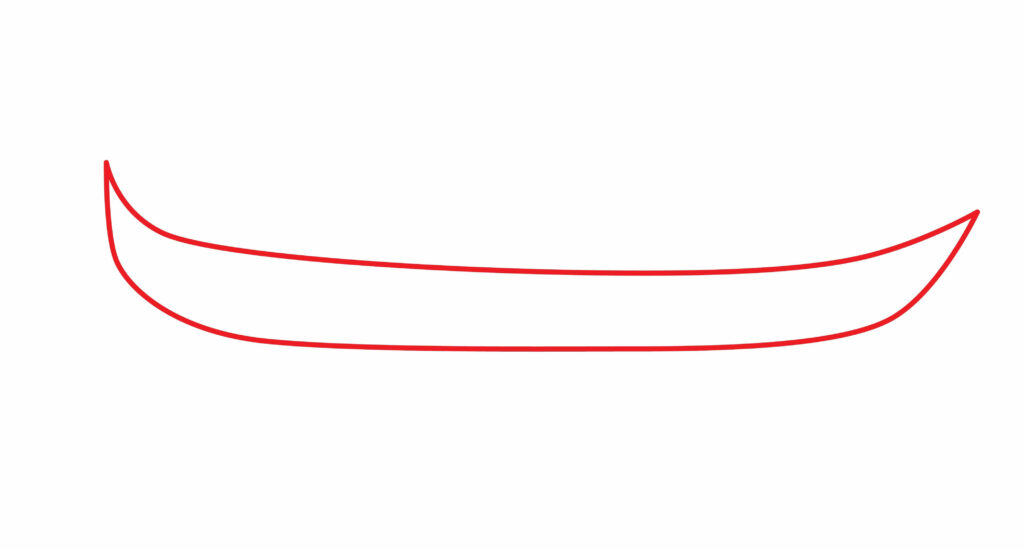
Now, we have to start from the right side with a curved line. But the curve is very small, and then the line becomes angled downward. This line is very slightly downward. Make it go straight, and just where the lower line starts to curve, curve this line and attach it to the top corner of the first line. These two lines should not meet except at both corners.
Step 2: Draw the Front Part
In this step, we will draw the front part of our gondola. Its shape is similar to a snake standing up vertically on its body. To draw this, start drawing a curved line from the base of the gondola, let it go straight, and then curve upwards. After it has gone slightly higher than the body, give it a sharp curve towards the left side.
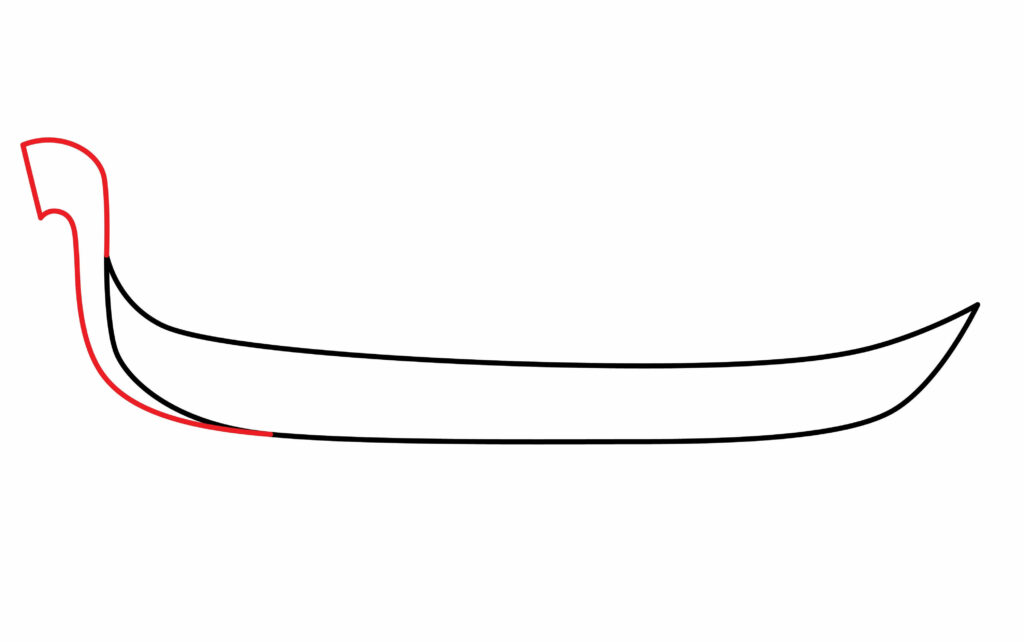
Start another line from the top of the body of the gondola and let this line go upwards. After it has gone slightly higher than the first line, curve it towards the left in the same way as you did to the first line. Join these two lines with an angled line.
This is the front part of your gondola.
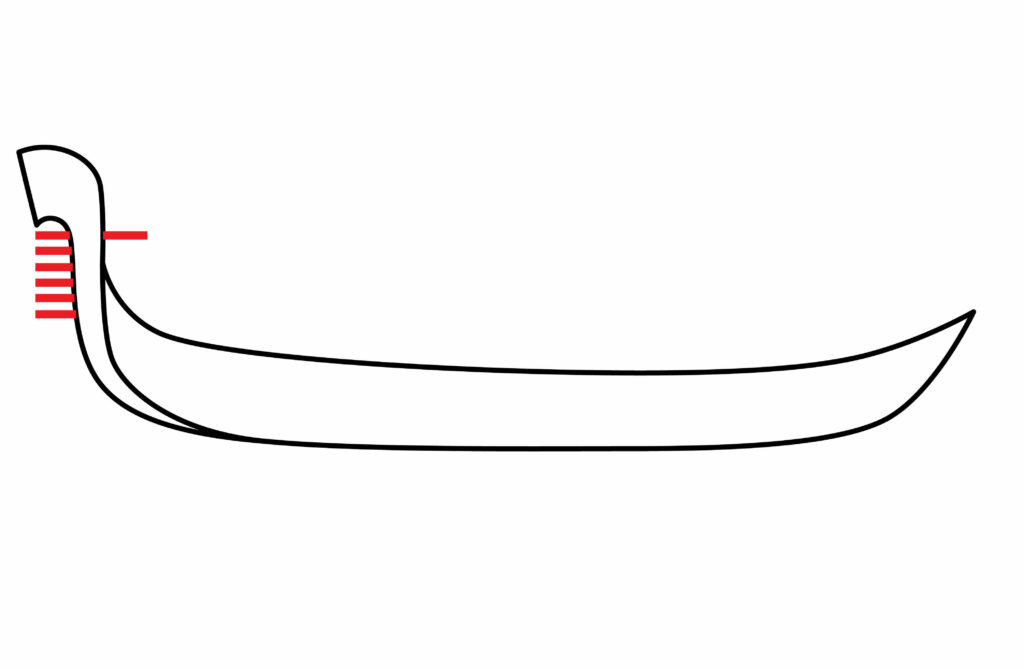
Step 3: Completing the front part
Now, draw some very small horizontal lines originating from the right side of the gondola. These lines should remain under the front part of the gondola and not exceed it. All of these lines are the same in length. The first line starts slightly higher than the body of the gondola, and on the back side, it extends over thirty of the gondola.
Step 4: Draw the back part
The front part of our gondola is complete. In this step, we will draw the back part of our gondola. Start from the left portion and draw a curved line upward. Now, draw another line upward similarly. Notice these are small lines, and these should be smaller than the front part of the gondola. Join these two lines with a horizontal line. The back of our gondola is complete.

Step 5: Draw the sitting part
People travel large distances with Gondolas, and Gondolas also travel unstably. So, we need to have seats on the gondola where people can actually sit while on their journey. In this step, we will draw the sitting part of our gondola. To draw the sitting part, draw two lines, i.e., one right and the other from the left body part. Let them go horizontally straight. Rejoin these lines or benches with the body by drawing a vertical line for each bench.
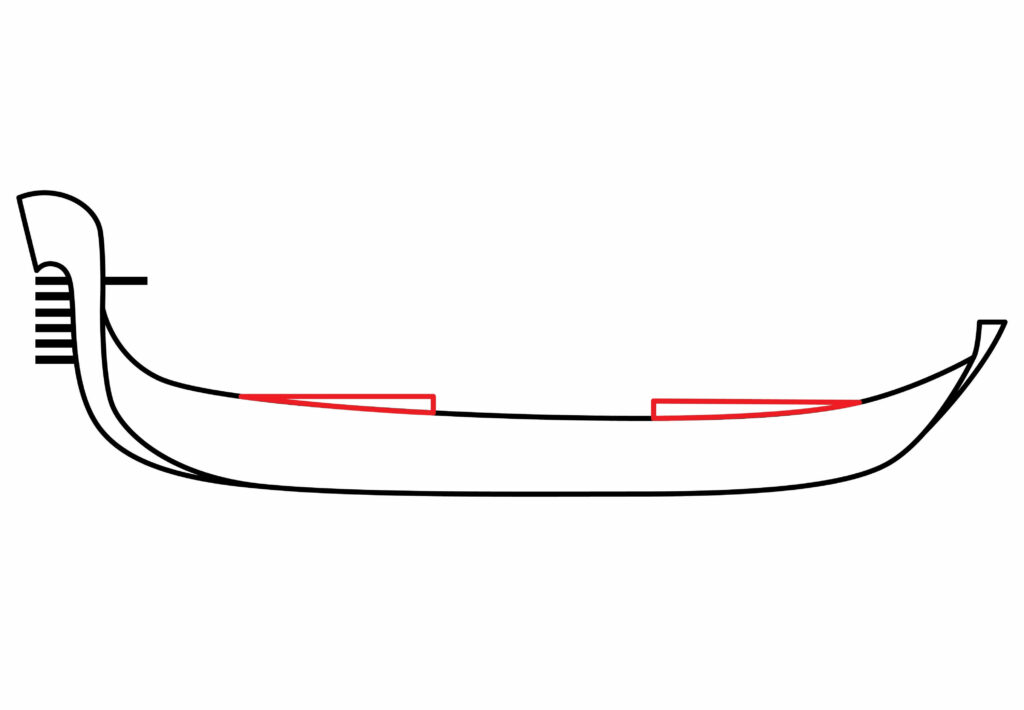
Notice that these benches are drawn on the top line of the body of the gondola and not on the second or lower line.
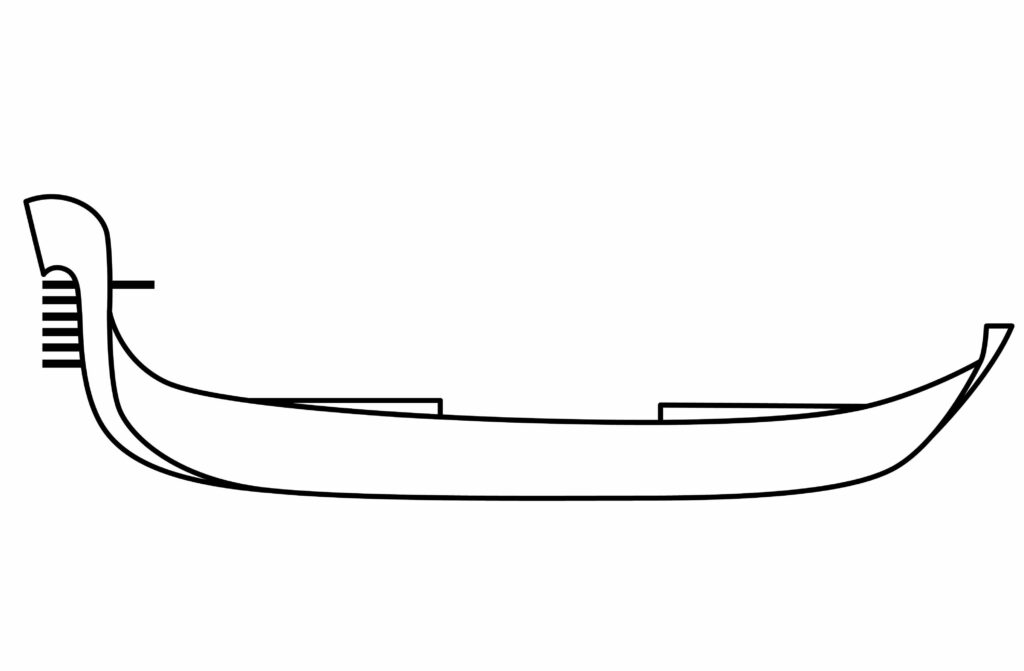
Step 6: Your Gondola is complete
Yayy! Your Gondola is complete. You did a great job drawing this. We hope you enjoyed the whole process and liked it. The real surprise is about to come! You will enjoy the next part even more as it involves using your imagination. In the next part, you will bring life to your drawing by using your imagination.
Taking your Gondola Drawing to the Next Level
Drawing has different levels. As we complete them one by one, our drawing starts to look better and more realistic. The first level is the one you just did, and it is no doubt very important. But after sketching or drawing an outline of a particular thing, we move to other levels. These are important because they bring life into your drawing. When you want to draw an object, you want to have a drawing that looks complete. Even though the gondola we just drew looks good, it still feels incomplete. This is because we have to do it’s other levels, too.
Adding a background to your drawing is very important. When you imagine something in your mind, it does not appear on a white background, does it? Everything has a background attached to it. So, when we draw something, we have to add a background to make it more realistic.
The other level is adding colors to your drawing. We never see things without color. So, when we look at a drawing without color, it feels incomplete, and it does not leave a good impression on the viewer. So, we have to color the things we make to make them look more realistic and complete.
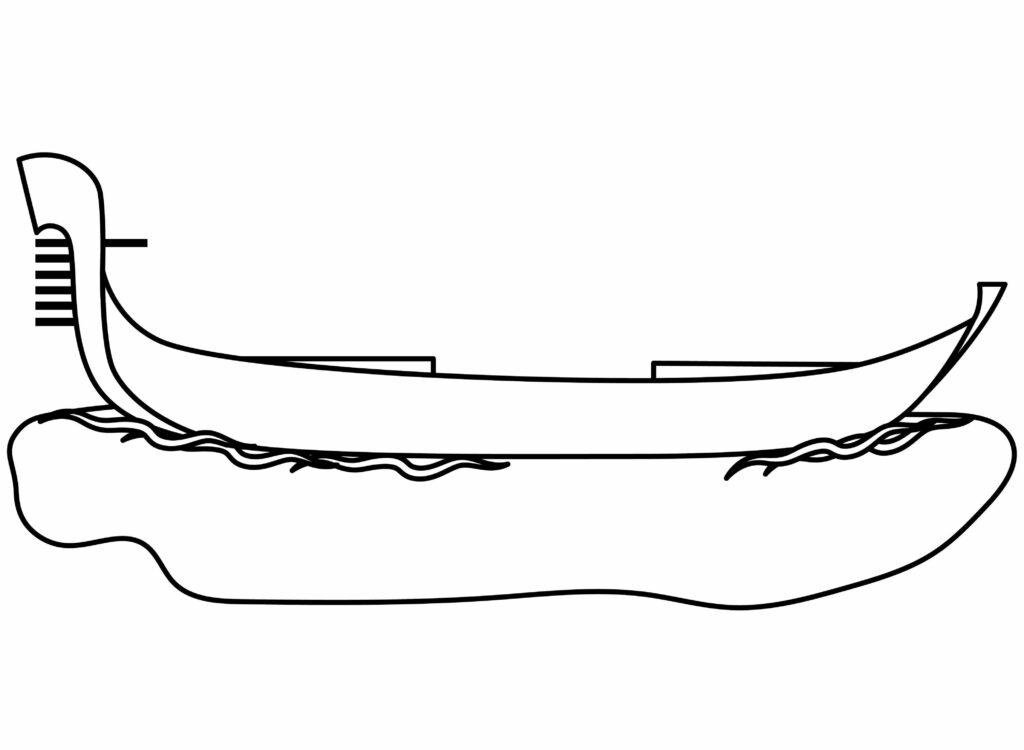
Adding background to your Drawing
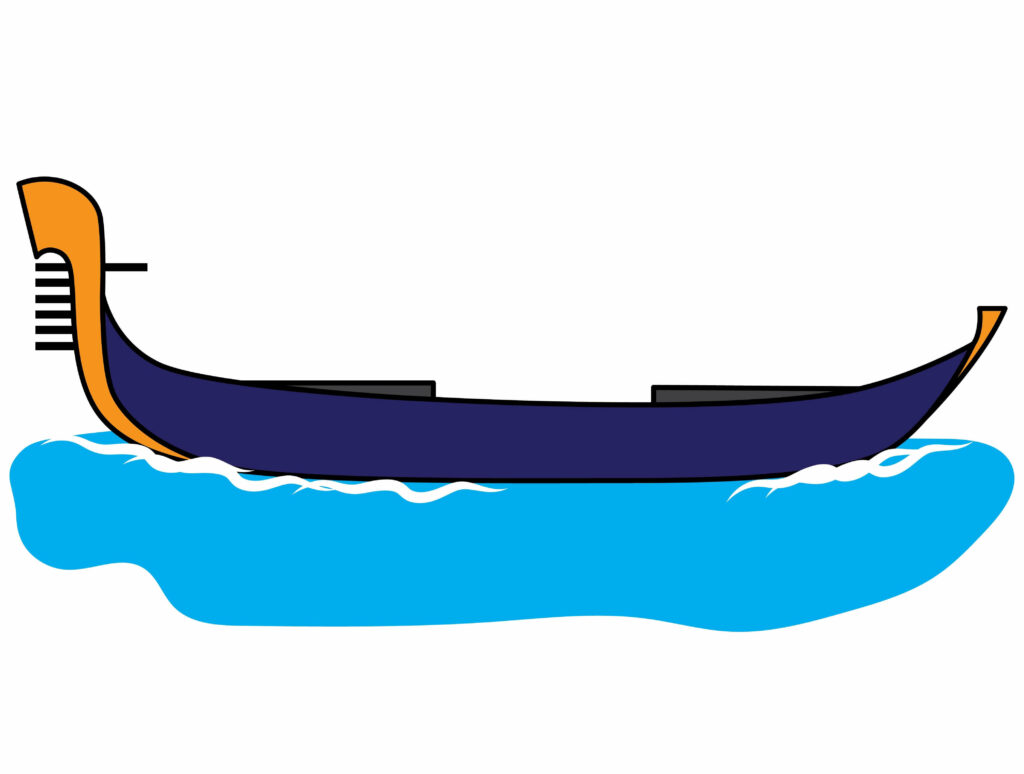
Adding background to your drawing involves your imagination. When you imagine a gondola in your head, how does it appear? On a shore? In the water? Or at a carpenter’s shop? Well, this is why it is mentioned as a part that involves imagination. We think that a gondola looks more realistic on a journey where it is going on water. So you can draw some waves underneath the gondola and make it look like it is on the water. But there are no limitations. You can’t really lock ideas about art. So, take a swing at what you think is the best background for this picture.
There is just one important point to note. As we discussed before, the background makes our drawing look more realistic. So, when you’re adding a background, remember it should be real. If you draw a gondola in space, it will confuse people instead of bringing clarity to their minds. We know you’re going to do a great job using your imagination.
Adding colors to your drawing
It’s time to get your colors and show your art. Whatever type of colors you have got, whether they are crayons or markers or paint or pencil colors, just bring them and take a swing. Fill each part of your gondola with a different color and try to make it look more contrasty because different contrasting colors look more catchy and lock the attention of the observer.
You can try different combinations of colors until you are satisfied with the results. You can color the front and back brown as they are wood parts without any paint. The seats and the sides are dark colors normally. So, remember that while coloring. Water will obviously be blue, but don’t forget to make some white foam or waves just under the gondola.
As we discussed with the background, we colored our drawing to make it look more real. So, while coloring, try to choose colors that look realistic and more subtle. Try to color inside the lines. It makes your drawing look more real and brings it to another level of charisma.
P.S Bonus Tips
Adding designs or specific details to your drawing will increase its charisma and will make it stand out. You can have different designs on the side of the gondola. You can have white foam underneath on the water. Well, it is actually up to your imagination to do what you want to do.
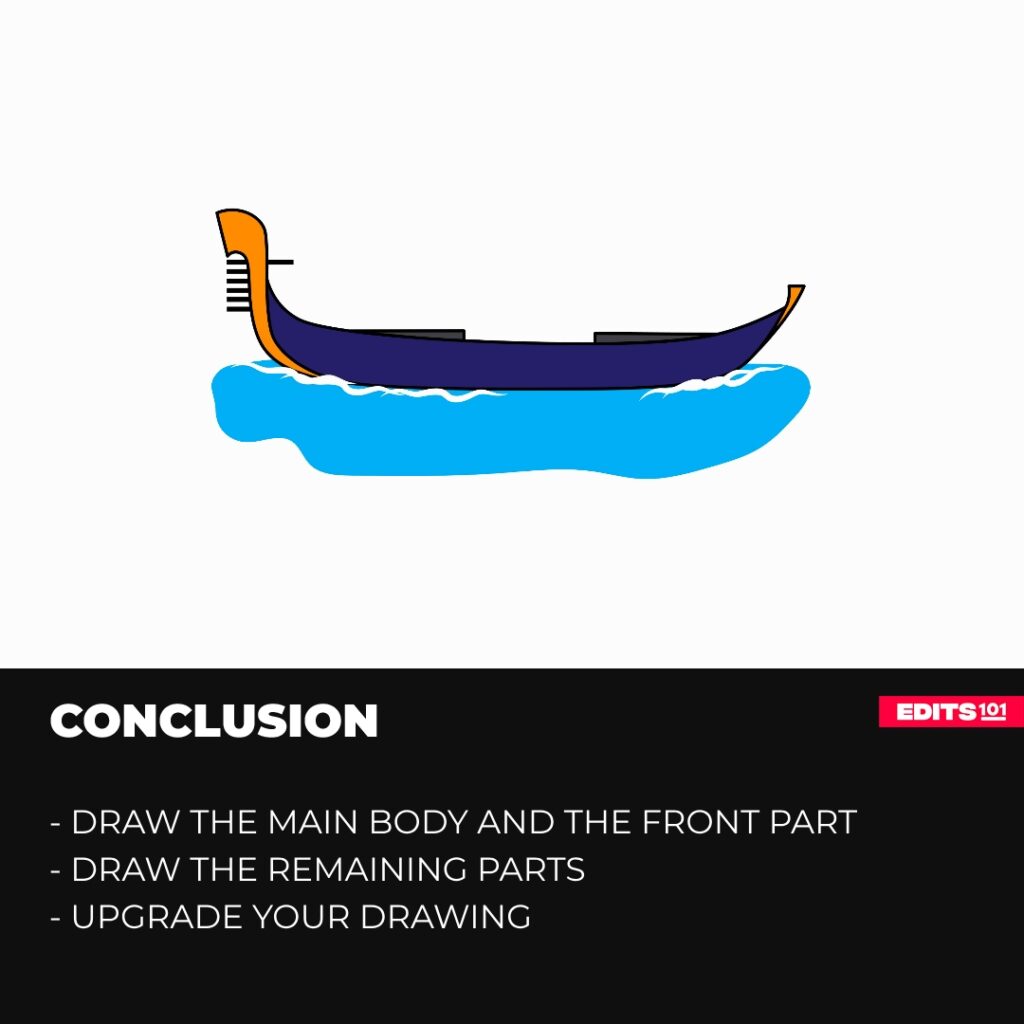
Conclusion
This was a step-by-step guide about how to draw a gondola. In each step, we drew a single part of our gondola, and slowly, we completed it. Then, we reflected on some other levels of drawing and completed our drawing by adding a background and coloring it. These two levels brought our drawing to life.
If we look at a gondola at first, it might look very difficult to draw. But if we break it down into steps and focus on one step at a time, it will appear more easy, and we will do it without feeling that difficulty. Even if you get stuck at a particular step, try and repeat it. If you repeat a particular step a few times, you will realize that you are better at it than any other step. So, don’t let any difficulty break your spirit, and work hard until you complete your drawing. You surely did a great job drawing this gondola, and we hope you enjoyed the process. We also hope that you will continue drawing different objects.
Thanks for reading & feel free to check out more of our articles!
Author Rating
Overall Rating
Summary
Learn how to draw a gondola in simple steps. You will also learn about the names of the different parts as well as a few interesting facts.